What did you do to your TJ today?

And you didn’t damage the paint with the extra heat you were applying in that one concentrated spot?
No not really at all, the small torch did a good job concentrating the heat into the center back of the bolt. Was very careful and tried to be patient.

One was really stuck on there, I had reheated, then used the bolt extractor that locked up my drill in all the settings up until 'hammer drill'. When I switched to that torque setting the extractor broke and the bolt didn't budge.

I did buy the cheapest Amazon food torch for this job and it's a piece of junk, the main valve locked itself open but the control valve did a good job regulating the fuel

15639294058973973746806644014316.jpg
 
No not really at all, the small torch did a good job concentrating the heat into the center back of the bolt. Was very careful and tried to be patient.

One was really stuck on there, I had reheated, then used the bolt extractor that locked up my drill in all the settings up until 'hammer drill'. When I switched to that torque setting the extractor broke and the bolt didn't budge.

I did buy the cheapest Amazon food torch for this job and it's a piece of junk, the main valve locked itself open but the control valve did a good job regulating the fuel
View attachment 106014
Sometimes after applying the heat I hit it with a cold wet rag to quickly shock to shrink.. the heat expands and the cold quickly contracts and I cross my fingers that it breaks the hold.
 
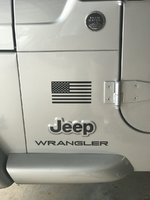
Trying something different with the Trail Rated badge. I've got a box of challenge coins, and figured this would be a unique way to 'display' them vs the wooden display racks that are available.

View attachment 106031

View attachment 106032
I like it.. But keep mine in my pocket in case the need arises... Let us know how they hold up to weather. One I got the commander of the army reserves gave me years ago
 
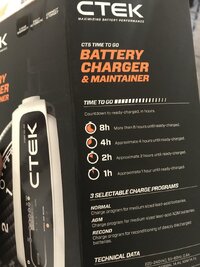
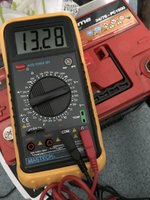
You didn't do it any favors, but it is a good agm, and a nice slow trickle charge may bring it back. I had one of those in my camping trailer and I would kill it dead and recharge it and kill it dead over and over and I always seemed to bring it back to life. I think in the end you will get less life, but I have brought mine back to life from less voltage before.

A trick if you are having trouble is if you have a older non-auto battery charger you may need to use that to kick the voltage high enough for the auto chargers to see it then change the charger to the new auto charger so it won't over charge it.

The older chargers will charge high amps forever and never stop, where the new ones will autoscale amperage till the point where it doesn't over charge then turns into a trickle charger. The con of the autocharger is that it needs a certain amount of voltage to start working.

I keep my old battery charger just for such occasions.

Btw I have that same battery in my 3/4 ton truck it is a good battery and when my yellow top aux battery fails it will get another one of these.
My charger Seems to have brought it back


k 06C0F461-981F-4690-AF98-B50636801D58.jpeg3E1193E7-E62B-4003-9A8F-5F53D5F0188B.jpeg
 
Trying something different with the Trail Rated badge. I've got a box of challenge coins, and figured this would be a unique way to 'display' them vs the wooden display racks that are available.

View attachment 106031

View attachment 106032
Like it. My RME did not have the decal on the drivers side and I have seen others with that one missing also so I assumed they did not have one on that side from the factory.

4HnaWoOVQnivOtNPMneV3g.jpg
 
Changed out rusted out fuel tank skid and diff fluid in rear. Found evap line a lil rusty where it goes over axle in rear while I was up under there, got a piece of 3/16" brake line replaced section and poof engine light all gone now. 😁

IMG_9980.JPG


Looking it's age...

IMG_9986.JPG


Slightly different design, maybe newer year? Model? But everything fit as should and looks to offer more protection on front corners, and a little more stout than the old one. Even taking into account for rust weight reduction.
IMG_9993.JPG


All cleaned up ready to go back in.

IMG_0029.JPG
IMG_0008.JPG


Ass looks a little healthier now without all the cellulite. 😂
IMG_0032.JPG


And figures I did it on the days where it was in the 90's feeling like low 100's and now it's mid 70's here now. Hell I'm just happy as a pig in shit the engine light is gone. ✌
 
Cleaned my Jeep got rid of the last of the Moab mud. Been super busy since the trip in May. Finally got to really washing it. I am getting ready to tear the interior apart, and I absolutely hate working on a dirty rig. So here it is ready to get a new interior. Hopefully this week:

View attachment 105658
Wow! That really cleaned up good!
 
  • Like
Reactions: ac_
Last night finally installed new springs and fixed the front bumpstops. Took 5 hours me and a buddy with his lift. Rear took most of the time up. Fighting the rear track bar and upper control arm taking apart and reinstalling. Of course I snapped the one rear upper control arm bolt because I torqued it to “lower control arm” specs which is 100 ft lbs more😖. Fronts weren’t too bad. Managed to only disconnect links and lower shocks and used a pry bar to remove old springs and 2” spacers and install new 2” bds springs with a 0.75 spacer. Added 2” pucks to spring perch and trimmed the upper bumpstops. Driving home last night hit a bump on the highway and got major DW til I slowed down. Drove home at 45 mph no issues. Torqued the track bar to 55lbs this am while Jeep was on the ground. No noticeable vibes. Happy with how it sits. Front not as saggy anymore. Hopefully DW was just track bar not torqued to spec. Last picture is my old bumpstops being crushed when flexing last time out in the trail.

6463E16A-5DFC-4122-BC93-0F1825DC870D.jpeg


61E8C16C-FCC9-44EA-9541-4CA034FB5BA8.jpeg


A12D6DF9-F396-4BD9-8F0D-D5CC8A871DCC.jpeg


42977790-E6A9-4760-BDD8-936E6B394DE9.jpeg


CC4C2BFC-76FA-47E0-BE5C-C8DCF82721A4.jpeg


3FF36FD6-76E6-4246-B392-DF07CBE4F9F6.jpeg


4B230462-5D11-4D36-BB8A-4CA678935E24.jpeg


B8CA527F-14D7-49FF-9433-4693B43036E4.jpeg


5500B116-490A-4821-98FF-3C53708526B4.jpeg


3BE7983F-7200-4C4D-A13B-30517B936120.jpeg


6EFCA7A7-2842-4510-86AB-0CEB62320C4A.jpeg
 
Coolness finally!! Got rid of my cane, my knee is still tight but improving. Reinstalled my fog lights today. I found another Fury horn in my barn so I installed it on the shelf under the master cylinder. Ripley has an even LOUDER voice now, like a couple of ‘66-‘69 Furys. Wrestled with my Cj draw bar and finally got it on. But it’s not for towing and will be used to carry a bike rack and an aluminum hitch carrier. Want to try out my new half doors too. I need to wash it tomorrow so it’s clean for my Outer Banks trip on Saturday.
 
Not really something I did "to" my TJ so much as "with" my TJ - one of my schools is hosting several international visitor groups this summer and I've gotten to tag along to several events on the itineraries that we planned for them.

I volunteered to drive and gave many of our visitors their first experience riding in a Wrangler, doors/top off as weather allowed. The high schoolers were arguing with each other over a whose turn it was to ride in it :LOL: . Pretty fun stuff.
 
Changed out rusted out fuel tank skid and diff fluid in rear. Found evap line a lil rusty where it goes over axle in rear while I was up under there, got a piece of 3/16" brake line replaced section and poof engine light all gone now. 😁

View attachment 106089

Looking it's age...

View attachment 106091

Slightly different design, maybe newer year? Model? But everything fit as should and looks to offer more protection on front corners, and a little more stout than the old one. Even taking into account for rust weight reduction.
View attachment 106092

All cleaned up ready to go back in.

View attachment 106093View attachment 106094


Ass looks a little healthier now without all the cellulite. 😂
View attachment 106095


And figures I did it on the days where it was in the 90's feeling like low 100's and now it's mid 70's here now. Hell I'm just happy as a pig in shit the engine light is gone. ✌
Replaced the tank skid plate? Hell your old one looked
IMG_20190409_163726079.jpg
new!
 
Changed out rusted out fuel tank skid and diff fluid in rear. Found evap line a lil rusty where it goes over axle in rear while I was up under there, got a piece of 3/16" brake line replaced section and poof engine light all gone now. 😁

View attachment 106089

Looking it's age...

View attachment 106091

Slightly different design, maybe newer year? Model? But everything fit as should and looks to offer more protection on front corners, and a little more stout than the old one. Even taking into account for rust weight reduction.
View attachment 106092

All cleaned up ready to go back in.

View attachment 106093View attachment 106094


Ass looks a little healthier now without all the cellulite. 😂
View attachment 106095


And figures I did it on the days where it was in the 90's feeling like low 100's and now it's mid 70's here now. Hell I'm just happy as a pig in shit the engine light is gone. ✌
Replaced the tank skid plate? Hell your old one looed new!
Wow. Might want to increase your lift kit a hair. Looks like there’s some drag. Miracle it didn’t wear through the tank.
Ha..! If only y'all not in the rust belt could feel our pain :)
 
Got some gumption from somewhere this morning and figured might as well put the rear bumper on that has been sitting in garage for past few months. Removed stock one couple weeks ago cause those big ole jugs were eating my lunch. Anyways got everything ready, put it on jack raised it up into place and realized this needed something done with it first.
IMG_0036.JPG


So proceeded to do a little prodding and low and behold, nice big hole.

IMG_0037.JPG


So after quite a bit of grinding(hole ended up about twice the size as above to get most of rust out. rust was actually between those 2 layers and not as you would expect inside coming out. Cause inside that hole which I assume would be internal structure for tub looks like new. Did what I could without replacing whole outer corner probably. Tacked a strip of metal inside hole. Narrow enough to fit thru hole and hold out tight with magnet while welding into place. Sorry didn't get pic of that. Mixed up some All-Metal filler(not bondo) and slopped some on with putty knife so to speak. At least that's what it looks like in pic. :whistle:

IMG_0040.JPG


And after some quick blocking, hit it with some sealer primer, and shot it with some canyon satin black. Has flattened some since pics as it was still fairly wet. I hate waiting, wanna get it done and rush too much sometimes.

IMG_0044.JPG
IMG_0045.JPG
IMG_0049.JPG


NOW I was ready to slap the bumper on. 2 hrs later and 20 degrees warmer. But on she is now which took all of 10 minutes. Now I just have to decide whether I like it or not. :unsure: Didn't put the shackles on though as ride some pretty rough roads to work and don't wanna be jingle jangling the whole way.

IMG_0054.JPG
IMG_0056.JPG
IMG_0058.JPG


Now just to spray dust off it and see what's next....I'm thinking something too eat, little tv and a nap about now would work just right. :cool:
 
Replaced the tank skid plate? Hell your old one looed new!

Ha..! If only y'all not in the rust belt could feel our pain :)


I know right. I think the po used mine to take his boat to the bay(saltwater of course) at beginning of spring with a float off trailer, then left it sitting there trailer submerged in water and jeep up to it's driveshafts and left it till fall when he took boat back to dry dock it. At least it makes it sound reasonable.
 
  • Haha
Reactions: Five