06' Red Rubi Build

Rory O'Brien

Member
Joined
Jan 27, 2018
Messages
25
Location
Halifax, NS, Canada
So, I decided I wanted to make a dedicated post to the development of my Jeep. This is my first "build thread" but not my first build. (more on that later). I like this forum and I think the community is positive so I'd like to hear feedback and recommendations as I go!

This first post will be mainly an overview of what was done, what the plans are, and what I have done, hopefully as organized as possible.

So once upon a time I was 16 and bought my first jeep from my father who owned a 2000 TJ Sport from the factory so it had spent its entire life in my family. I really couldn't imagine parting with it 8 months ago, but here we are. I built it up essentially from stock on a high school budget, I'll post a few pictures of the last few times it was in action. I miss the ol' girl.

20161229_225257000_iOS.jpg
RockLine.png


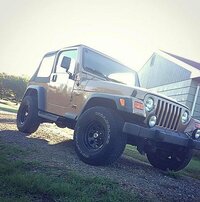
While surfing on kijiji I found a 2006 Rubicon about 7 hours from where I live and it was in perfect condition for being a Nova Scotian vehicle (LOTS of salt around here). I had to have it and the next week it was mine.

Now that we're all caught up here is a picture of generally what it looked like when I picked it up in July 2017.

20170529_232426000_iOS.jpg

20170529_154348000_iOS.jpg

Here is a picture from January 2018

20180109_130857000_iOS.png


Lots has changed already. At the time I'm making this build thread I'm already a fair ways into the build. Here's a quick rundown.


At time of purchase:
2.5" coil spacers
Smittybuilt xcr? front bumper
10000 lb super winch
"delta" headlights
50" RC light bar
5" generic princess auto pillar lights
Uniden CB Radio
30.5/10.?? Bald Goodyear MT/R on 16" procomps
Banks CAI
Banks Power catback
Banks? throttle body spacer
JVC headunit and speakers upgraded
Black hardtop from '97 TJ


Currently:
3.5" Metalcloak Suspension
4" Metalcloak arched tube fenders and 4" rear fenders
New CB antenna
33/12.5 Duratracs on 15"
Upgraded brakes
Tom Woods DC Rear driveshaft
Custom "RNTGB" front winch bumper
8500 lb warn winch
Custom "RNTGB" Built rear bumper with tire carrier and hi-lift mount (this rig is pretty cool wish I made a write up)
Kaki hardtop from '00 TJ.
Custom "RNTGB" roof rack
Selectable locker bypass switch
New Truk Lite Headlights
CO2 OBA System

Future plans:
3/4-1" bl
Tummy tuck
Tom woods front driveshaft
Custom truss for both axles
New front bumper
Side steps and sliders
New headlights
35" STT Pro's or Open Countrys
upgrade sound system
DIESEL SWAP


I plan to keep this segment of the thread up to date with what major things have been done and how my plans will change as i go.

I hope you guys enjoy this thread and follow along with me as I attempt to take more pictures and be more organized with my upgrades!

20171015_231745000_iOS.jpg
 
Last edited:
Here's a little bit about me. I'm, currently, a 20 year old engineering student in Halifax NS Canada and I'm slowly picking away at finishing my dream jeep. Jeeping and wrenching is what initially got me set on taking engineering so I can have the knowledge base and freedom to design and dream up different ways to do things. As a result I'm pursuing a career in the automotive design industry (at least I hope to). I've been around jeeps my entire life, my father and his family owned several while I was growing up and from what I remember my mother had a 1991 YJ and my dad had a 2000 TJ Sport that he used for plowing out his business lot.
Plow.jpg


That TJ sport later became mine when I turned 16 and I build that from a fairly stock daily to a capable rig. Here's a few pictures of how she turned out.
Stock.jpg Snow.jpg
Summer16.jpg


I recently sold my 2000 along with the emotional and sentimental attachments seeing as it was a part of the family for the 18 years it was in existence and purchased a "new" 2006 Rubicon. Not much in the way of differences aside from some more respectable Dana 44s with lockers, a cb radio, A/C (blessing and a curse) and a 6 speed transmission. Oh and cruise control but who uses that anyways?
 
Last edited:
  • Like
Reactions: derekmac and Chris
When I bought the jeep it had a 2.5" coil spacer lift, a Smitybuilt front bumper and was rolling on worn out and unbalanced MT/R's resulting in a 7 hour drive home full of death wobble. Throwing me codes P0421 and P0431 and the heater fan wasn't working. The only other mods I'm aware of are some upgraded speakers/head unit, some LED lights and the CB.

20170529_232422000_iOS.jpg


Fast forward 2 months and I've been working 11 hours a day at a boat yard and the new jeep has been sitting in my yard mostly unused. This is where the fun begins. I ordered a 3.5" Metalcloak short arm suspension kit and 4" arched tube fenders to start the mod process. Unfortunately I don't have many pictures to speak of besides a lovely one of me after I knocked half my tooth out tightening a control arm bolt..... Yeah..

20170803_180832655_iOS.jpg
Mid Fenders.jpg


This jeep is originally from Alberta and was purchased as a retirement gift to themselves I guess. As a result it was in pretty immaculate shape for its year and all the install went pretty smoothly all things considered. I decided to opt for Bilstein shocks as I had already used them in my old jeep and I enjoyed the quality. Once the lift kit was in it was time to start the fenders. I had the same fenders on my old jeep so the install was fairly straightforward aside from relocating some stuff under the hood. Again I don't have many pictures of this, my main concern was getting it done and drinking beer (oops) but here's a picture of them on for reference.

PreO.jpg


I was leaving for Ottawa for a 4 month work term related to my studies. The picture above is from the day I left, and I wanted to have this jeep all done and ready to go by that time. Fortunately I had it all done with 2 weeks to spare. This allowed me some time to work out some other kinks. I was driving from Yarmouth Nova Scotia to Ottawa Ontario straight shot and wanted to make sure she would make it. I made home made roof rack from some rectangular tubing, 2 cheap hitch mounted carriers from princess auto welded together and the existing lightbar mounts and it worked like a dream.


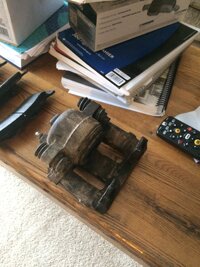
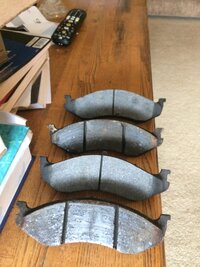
My brakes started acting up before I left so those were a necessity, pretty easy job and with disc brakes all around it was truly a blessing. Alls well that ends well.

20161010_165844142_iOS.jpg 20161010_165830702_iOS.jpg

During my time in Ontario I didn't have the space or time to work much on it so it stayed as is for the most part.
 
  • Like
Reactions: derekmac and Chris
I arrived home a month ago now and about 3 hours from home I started hearing some clicking coming from the Jeep. 13 hours into my drive my brain wasn't working too well and attributed it to wind noise from my lightbar (darned thing that is). When I got home the sound worsened and after investigating I was convinced it was a worn universal joint in my axle. After a few hours of frigging around and pulling the axle shaft out I was proven wrong, but decided to go ahead and change the universal to an upgraded unit and seal it back up and bring it for a drive to see if anything changed (spoiler: it didn't). I was then convinced it was the wheel bearing. Changed out the wheel bearing and what do you know, not that either.

Axle Shaft.jpg

By this time I needed to get back to Halifax for school and the issue would have to be worked out then. After researching and worsening of the conditions I determined the issue was the well documented "Angry Sparrows" and I pulled my front driveshaft to investigate and surely enough my socket yoke was reduced to dust. I'm currently waiting on a new one from quadratec to come in.

ball.jpg
As i suspected, my socket yoke in the CV was reduced to nothing. No needle bearings in sight and not a lick of grease, you shouldve heard the thing when I tried to manipulate it.

Pin DS.jpg
I figured while the driveshaft was pulled it would be a good idea to have a look at the universals to look for wear. The universals in the CV look fine, lots of grease and no visible wear on the needle bearings so I won't replace these just yet. I have spares on hand and I thought I might as well change them while it's out but they're in better shape than I anticipated.

DS.jpg
The universal at the pinion was also in pretty good shape, however I will opt to replace this one. I have a needle zirc greasable universal I will put in so I can prolong the life. I know sealed are generally accepted as more durable but I would rather grease it every few months than buy a new unit. This isn't in an overly difficult place to reach and I don't abuse my rigs too bad so I'm not worried.

While I've been waiting I went ahead and tried to trouble shoot my code issues, it seems I either have an issue with my upstream O2 sensors impacting the air/gas draw or my pre cats arent functioning. Right now I'm waiting on the ambition and time to disconnect the cats and investigate the conditions of them to determine the issue, money is tight and I can't be throwing it away on an if and a maybe. In the mean time I've replaced my spark plugs which turned out to be MUCH needed.
Plugs.jpg
The plugs are supposed to be gapped at .03-.035 (left) according to what I've read. Well, the plugs I pulled were now gapped to almost .075 (right)!!! wowsers glad thats done with. For anyone who hasn't done their plugs on a coil pack TJ its pretty easy, get yourself a torque wrench accurate to 22 (coil rail) and 27 (spark plugs) ftlbs respectively, some dielectric grease and some anti seize, a 5/8 spark plug socket, a 13mm socket, and a couple 3"-12" ratchet extensions and you'll be all set to go. By the looks of it mine were probably factory plugs, done at 140k km. I went with champion 7034, they're a double platinum and I've seen them highly recommended on various forums. I believe the stock ones are just copper NTK's which are also fine, these later TJ's are fairly picky with what they let in to them, so far I've had no issues.

I have also reinstalled the CB unit that came with the jeep when I bought it. A buddy of mine in Ontario got all liquored up and snapped my antenna so I took all the electrical out and decided to save it for a rainy day and save space for the drive home (the unit was attached to the rear of the console impeding the rear seat from folding properly). I managed to snag a better antenna at a yard sale for free after an extended conversation about wheeling SCORE. The unit was originally wired into the fuse panel in the dash which seemed like issues waiting to happen to me so I rerouted it properly. I actually got the chance to put it to use today and it worked perfectly. I don't have any pictures off hand but I think it's pretty self explanatory.
 
Last edited:
  • Like
Reactions: derekmac and Chris
I recognize that 2000...Did you do a youtube video when you installed the fenders at 16? I think I just watched it yesterday! Anyway, welcome. Nice introduction, and a couple of nice jeeps there.
 
  • Like
Reactions: Chris
I recognize that 2000...Did you do a youtube video when you installed the fenders at 16? I think I just watched it yesterday! Anyway, welcome. Nice introduction, and a couple of nice jeeps there.

Thanks for the comment! I didn't do that video but I know exactly what video you're referring to! I watched it when I bought the fenders at 16 and the video gave me the confidence to try putting them on myself. Same color rig.
 
  • Like
Reactions: Chris and Mike_H
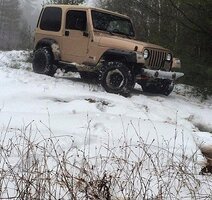
During the week I don't have too much time to work on the rig. School is pretty heavy and most of my time is spent at the library. However I live for the weekend. A friend of mine and I decided to go on a little tour about a half hour outside of Halifax to look for camping spots for the upcoming summer. We were a hard crew between the two of us, his clutch was slipping and I was without 4wd as my driveshaft is still removed from the vehicle at the moment. We were just planning on running logging roads so 4wd wasn't going to be must of an issue aside from icy conditions.

We decided to take a little more daunting trail to one of the marked camping locations we wanted to check out, on the gps the trail didn't look super difficult with only a few iffy spots. Well, we were wrong, I had to be winched up a few hills because of the ice and there were some really tight spots. It appeared to be more of a 4 wheeler path than anything. We had to trim up a few trees and had to have a few well thought out lines to get through but we made it. At the end I slipped off the trail and got hung up on a stump, that took a while to get out of but we made er'. Overall a good little day trip. I'll add some pictures once I get them off my camera.

When I got home I decided to clear the codes to see if changing the spark plugs helped anything. I've read fouled spark plugs can actually results in a P0421/31 code being thrown so why not give it a try. I left the battery unhooked overnight to clear the codes and so far I've put about 30 km on it and the CEL hasn't come on but I suspect it will take a few hundred clicks before I'll see it.

This week my plans are to reinstall my driveshaft once my socket yoke comes in, do some voltage testing on my O2 sensors and try to get a concrete idea of whats going on with the 2 pre cats and finalize my decision on some new headlights.
 
  • Like
Reactions: derekmac and Chris
I'm pretty sure you've got more invested in your build than most of us, having knocked out half your tooth and all! Damn!

I like where you're going with it so far.
 
  • Like
Reactions: JMT
I'm pretty sure you've got more invested in your build than most of us, having knocked out half your tooth and all! Damn!

I like where you're going with it so far.
When I go I go all in I guess!. From the funds I got from my old jeep and banking 8 months of work I was able to invest quite a bit into it quite early. I'm happy with the performance of it to date but there's always more to be done. My focus now is to get it running soundly for the next 4 months. Parts and mods will come with time.

Welcome aboard neighbor! I live in Elmsdale, so not too far from you. If you're looking for good folks to wheel with, check out Backcountry 4x4 Club and also Pirate Off-road Nation.

I've actually been a member of Pirate Off-Road for a while now. Haven't gotten around to getting a new Krew sticker yet I suppose. I used to wheel with the Clean n Greasy down in Yarmouth but I've switched chapters to the Harbour Hounds as most of my time is now spent in Halifax. I will definitely checkout Backcountry though thanks for the recommendation. Hopefully I will see you out on the trails before long. Couldn't make it out for Carma because of the driveshaft.
 
  • Like
Reactions: Chris and derekmac
I've actually been a member of Pirate Off-Road for a while now. Haven't gotten around to getting a new Krew sticker yet I suppose. I used to wheel with the Clean n Greasy down in Yarmouth but I've switched chapters to the Harbour Hounds as most of my time is now spent in Halifax. I will definitely checkout Backcountry though thanks for the recommendation. Hopefully I will see you out on the trails before long. Couldn't make it out for Carma because of the driveshaft.
Right on. Halifax is a good chapter with a good Krew. I'm the Captain for the East Hants River Rats chapter now, and some of the Hounds are in my chapter too. I dare say we'll see each other on the trails sometime. :)

I wasn't able to run CARMA in my rig this year as I need to replace u-joints in my front driveshaft, and change the front pinion bearings. I was lucky enough to be able to ride shotgun with a buddy though.
 
Why do you guys keep spelling "crew" wrong? Kardashian fans? :risas3:

Tell whoever is in charge to learn to spell! :p
 
So a little update.

My new socket yoke came in finally. Wish I would've found Rockauto first though. Could've been a 20$ fix opposed to a 110$ fix. Oh well:nusenuse:
NewVOld.jpg


The new one looks to be a lot better already lol. My plan is to get all that in and back together this weekend. We just got a bit of a storm here in NS, 4-6" of snow and now freezing rain so not the ideal weather for playing with a driveshaft. Driving around would be a lot more fun with 4wd too.

I also ordered some truck-lite headlights that I'm looking forward to getting on and a viair 12V compressor for airing back up after trail riding. Tired of my crappy princess auto one and will do for now until I can figure out a OBA setup when I go to bigger tires. I also ordered both upstream O2 sensors to hopefully cure my emission codes. I plan to weld spaced bungs for the downstream sensors if they're the issue and if its worst case and I have to replace the pre cats that will have to wait until spring time.

Looking at the future I think I want this build to be a low COG. 3.5" of suspension is plenty for a DD, I'll look into getting a tummy tuck if possible but I'd rather not put an inch+ of BL in to do it so we'll see what happens. I'm going to do some more research and hopefully outboard my rear shocks and extend the front shock towers to run 12" shocks. Some day I'll grow a set (or save some money) and splurge on coilovers but that's a ways off. For now I would like the benefits of extended shocks.

As usual money is tight so it'll be a slow few months mod-wise. Probably will focus on the creature comforts and getting it running up to snuff before I do anything crazy.
 
  • Like
Reactions: derekmac
I must not be looking in the right spot cause I can't seem to find it on RockAuto. Do you have a link or part number?

All I needed was the ball assembly. The socket itself is fine. Can't see the PN on rockauto but this is the link http://www.rockauto.com/en/moreinfo.php?pk=387932&cc=1432231&jsn=541

The socket was on sale on quadratec for 55$ so the price for the full unit is not bad but shipping is where quadratec sucks and I couldn't find the assembly locally. Lesson learned I guess.
 
  • Like
Reactions: derekmac
So today I tackled the driveshaft repairs. Step one of course was to get er all laid out. Gettin' you a BFH is the fast track to success.
Essentials.jpg


Unfortunately my "workbench" is my desk for school so I just laid some garbage bags out and went to work. I got the new universal placed into the socket yoke before I put it into the CV. Once i had that ready to go I put the new spring into what I guess you could call the male end of the socket assembly. Just refer to the pictures lol. It was a little bit awkward to get the capless ends through the joint openings because the ball socket was a bit stiff but the install for this was actually pretty smooth. I used some WD40 lube and spread it around the caps to make it easier for them to seat into the CV. Using my ball joint press I was able to set them in without too much effort honestly. Once they were set in a put the retainer clips in. The second u-joint was in good shape with no slop so I left it for now. I have a spare if it decides to crap out on me.

Joint in Socket.jpg

Spring.jpg

Capless in CV.jpg

HF Cap.jpg

Cap In.jpg

Endprod2.jpg


Next was time for the pinion end. This was a little more difficult. I didn't have the old universal removed prior to the rebuild process because to be honest I wasn't sure if I was going to replace it until today. I'm opting for a greasable joint to prolong the lifespan of it. Taking out the old universal definitely look some doing. She was in there and didn't wanna come out. The retaining clips were a PITA to get out too for some reason. However I did manage to get it out and without a breaking bar or bench vise so that's not too bad. As you can see from the second to last picture, the universal really isn't in bad shape. I thought I could feel resistance in the side to side motion but I guess I was being too picky.

HOWEVER

The replacement joint I picked up from Parts for Trucks was missing a needle bearing from the start. AWESOME!!!! I was pretty pissed about this so taking pictures took a back seat from that point on. I managed to dig into my bag of parts and find an old universal that luckily had the same size needle bearings that was still in half decent shape that I could use and it saved the rebuild.

Old Pinion.jpg

Shitty clip.jpg

Beer.jpg

EndProd1.jpg


So this was my little driveshaft rebuild post I guess. I haven't yet put it on the jeep. I just finished it a few hours ago and then went for some beers. We had a flash freeze today so I think I'll wait for some more negotiable weather to get underneath and stick it all back together.

I also plan to do the upstream O2 sensors either tomorrow or later this week if I have time, seems that's a rarity these days. Hope someone finds this helpful!
 
51AF889C-C13F-4A59-9EC3-ADE1C35FB5D2.jpeg
So it's been a while since I've had anything updated on this. Life among other things has gotten in the way of the build and money is always an issue.

I've since replaced both upstream O2 sensors. They definitely needed changing but I've deduced that the issue is in the pre cats and when funds allow it I will be replacing them or hollowing them out. Emissions aren't the greatest concern where I live so I don't many concerns as far as inspections go.

I've also added metalcloak tube rear fenders which I am actually very pleased with both the look and functionality of. It has granted me some extra clearance in the rear and I got away from the traditional plastic fenders. I'll post up a picture when I get the chance.

As far as my OBA system is concerned, I had been using a viair 88P portable compressor, it has gotten the job done, albeit slowly, and up until recently I have stuck solely with that as an means to airing up. However with my 33's nearing the end of their lifespan and the plans to go to bigger tires in the future I invested in a better OBA system. After researching I decided to go with CO2 as my OBA. I purchased a 20lb tank locally for cheap and because it was originally purchased at a local brewery store it is eligible for exchange for 20$ each time. This made economical sense to me at the time because I do not have nor do I plan on running air lockers and this provides me with exceptionally fast air up times and the ability to run air tools (which I have no plans of doing but +1 cool points). I'm currently waiting for my fixed co2 regulator in the mail and I'll be in business. The price is comparable to a fairly low end compressor system sitting at just under 160$ all in and a 20lb tank will fill 35" tires in less than a minute and will do so numerous times before I require a refill. I do believe I will be happy with this decision in the end, my only task now is to find a way to mount it. hmmm.

My A/C is currently out of commission, and by a great stroke of luck we are in the middle of an unprecedented heatwave in NS with 35+ degree weather every day lately. My guess is a wasted ac compressor clutch or a refrigerant leak but time will tell.

I'm going on a 2 week vacation to finish the summer so my plans are to tie up loose ends; get my oba situation finalized, fix my cat issue, fix the a/c and find some new tires for the winter season.

Hope everyones enjoying the summer months.
 
Last edited: