Hey just checking in on you to see how things are going. It's been a few months since your last post. Hope everything is OK and that the Jeep is coming along.
Happy New Year
Happy New Year
I appreciate you asking, I've been meaning to get back into the saddle lately. I've still been lurking a little but just haven't had the time/motivation to get going on the projects last few months. Nothing exciting to report, just the usual life stuff was getting in the way.Hey just checking in on you to see how things are going. It's been a few months since your last post. Hope everything is OK and that the Jeep is coming along.
Happy New Year
I appreciate you asking, I've been meaning to get back into the saddle lately. I've still been lurking a little but just haven't had the time/motivation to get going on the projects last few months. Nothing exciting to report, just the usual life stuff was getting in the way.
And actually, the wheels and tires I ordered in August have finally arrived YESTERDAY haha. What a long ass wait, but boy was it worth it! Might've been the kick in the pants that I needed.
View attachment 219261
View attachment 219262
I will need to get more pictures today. It was dark out by the time I rounded up the tires and installed them.
With that thing parked in the driveway, property values in the area are gonna go up!Dang the walkers look freaking good. WHen i get this Atlas installed lets get your wheels good and scratched up at walker
FIFYWith that thing parked in the driveway,property valuesthefts in the area are gonna go up!Looks amazing, buddy! Congrats!
Looks killer and really works with your paint color!I appreciate you asking, I've been meaning to get back into the saddle lately. I've still been lurking a little but just haven't had the time/motivation to get going on the projects last few months. Nothing exciting to report, just the usual life stuff was getting in the way.
And actually, the wheels and tires I ordered in August have finally arrived YESTERDAY haha. What a long ass wait, but boy was it worth it! Might've been the kick in the pants that I needed.
View attachment 219261
View attachment 219262
I will need to get more pictures today. It was dark out by the time I rounded up the tires and installed them.
With the blue protectant still on the RWLs, people are gonna think it's a garage queen!
Fortunetly that was just before the rain we had last couple days. So It's back too fooling everyone into thinking its hardcoreWith the blue protectant still on the RWLs, people are gonna think it's a garage queen!
It's funny how even a small change (or a big one, as is the case here) can make such a difference in how we perceive things. Hell, once I got all the dash lights working again in my ol' truck, I thought I was driving a new vehicle!
It's a whole new world over here (as you know). The difference is astounding, my old tires must've really been crap. Now I just need a good snow so I can see how they handle then.It's funny how even a small change (or a big one, as is the case here) can make such a difference in how we perceive things. Hell, once I got all the dash lights working again in my ol' truck, I thought I was driving a new vehicle!
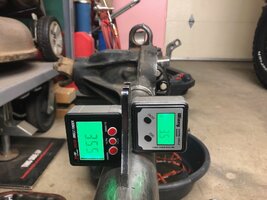
They seem to be showing you the angle it should be, set a digital angle finder with zero set to the cover face and dial in the bracket per drawing. Tack & cycle. Check for clearance on your uca joint. You could probably get it in the right position by setting axle at ride height and aligning the bracket to make the UCA straight.Chanting the mantra slow progress is better than no progress, I've got the HP30 dragged out and I'm trying to align my new bracket.
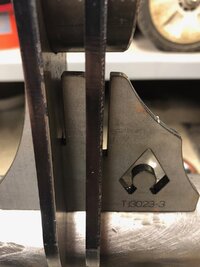
Using the picture provided by Artec, it looks like i need to be 3.5* back from the diff cover mounting surface. I'm assuming the bracket is suppose to be perpendicular to the axle tube? Wondering if anyone has a good method to check that other then just eyeballin' it?
View attachment 222127
So the axle should be under the jeep for this? this axle is the new housing out of the jeep, LP30 is still installed.They seem to be showing you the angle it should be, set a digital angle finder with zero set to the cover face and dial in the bracket per drawing. Tack & cycle. Check for clearance on your uca joint. You could probably get it in the right position by setting axle at ride height and aligning the bracket to make the UCA straight.
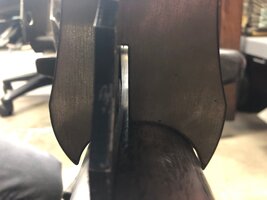
I would definitely need to brush up on my trig for this. I've got two digital angle finders, my hiccup is that the part of the bracket that needs to be clocked 3.5* back doesn't exactly sit perpendicular on it's own, so i didn't know if there was an easy way to measure that relative to the tube.Oh, and if you don't need to measure from the mounting hole use what ever spot you need to measure from to make your calculation. You could also trig out that measurement, but most of use don't use trigonometry enough to make doing that easy.


