From Conservative Build To Rock Crawler

Kevin Bright

TJ Enthusiast
Supporting Member
Joined
Dec 6, 2017
Messages
112
Location
pa
What’s up guys and gals, First I would like to say BE WARNED OF SOME BAD PHOTOS! Okay now with that out of the way I would like to thank all of you for loving your Tj’s the way you do and sharing your experiences and thoughts about them on this forum, all of the information that is on this forum is in invaluable to helping me work on this thing. So thank you @Chris !! Happy to Support the forum anyway I can.

Background on me,
Back in 2015 my family went out to Sedona, Arizona and rented a JKU sport to travel around in. Eventually my brother and I took the jeep out to some trails and did some light wheeling... that's what started this obsession.
Fast forward to 2017, I just graduated college in May and had been toying with the idea to get a wrangler. My Subaru had a heart attack so I replaced the engine but decided it was finally time to pull the trigger. I took all the money I had and waited for my parents to Fly to Oregon to visit my sister. Got a uhaul car hauler and went out and bought my SE off craigslist.. Now knowing what I know now, I wish I would have waited to find a 4.0 but after starting at page 110 of this forum and reading so many different threads my co-workers believe me when I say i'm obsessed haha. I am however perfectly content on what the 4 squirrels can do. I am super temped to bring back @StG58 ‘s fun idea of nitrous but I figure it would be better to not blow myself up haha.
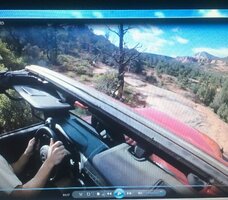
IMG_2656.jpeg IMG_2655.jpg Sedona AZ & the JKU started the obsession back in 2015

Background on the Jeep
So starting from the beginning and before I found this forum. I bought this Tj in Delaware from a brother and sister who originally bought it back in 1999 from the dealer (they had the original title) which had me feeling good about the buy. I drove it and everything ran fine, I looked for rust, didn’t find any (didn’t know where to look so strike one), the oil in the jeep was good (I’ve been taught to never start anything until you check the oil), there wasn’t a full spare (strike 2) and they said they used it only for going to the beach (strike 3 because the frame was full of sand). I bought it for a decent price and brought her home. As soon as I got it home, I knew the stickers and tail-light guards had to go. Popped off the rear fender liners and boom, there was a good amount of rust. Thought to myself, no big deal and popped off the tail light covers. I went out and bought a portable sandblaster to got rid of the rust.
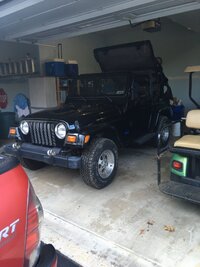
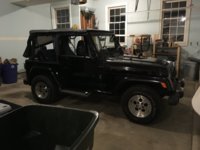
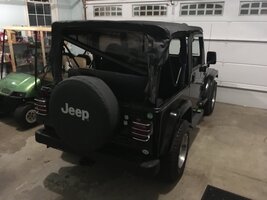
IMG_2074.JPG IMG_2069.jpeg IMG_2070.jpeg The day I bought her


IMG_2075_2.jpeg IMG_2077_2.jpeg The rust I found behind the tail lights and the fuel door. Before and after sandblasting and painting.
 
Last edited:
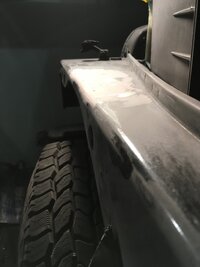
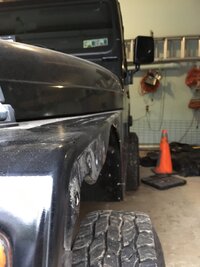
After learning the rust, I went and looked at the whole jeep. I found the one fender had rusted through so I cut it up and went to work with sheet metal and bondo (these pictures are rust cut out, tack welds, after first layers of bondo and what it looked like before i put the new flares on).IMG_2096.jpeg IMG_2098.JPG IMG_2106 (1).JPG IMG_2328.jpeg
 
Hey Kevin, good job fixing it. I have some nightmares in those spots :(
Please don't get offended if I say bondo will shrink and peel as it age and then you're back to square one.
 
  • Like
Reactions: Kevin Bright
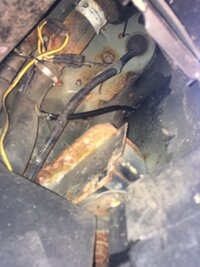
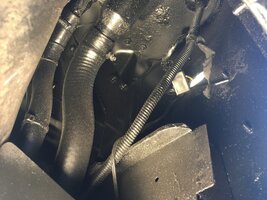
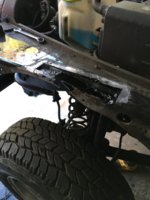
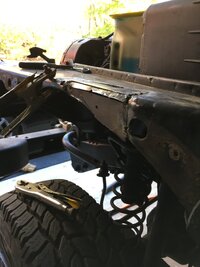
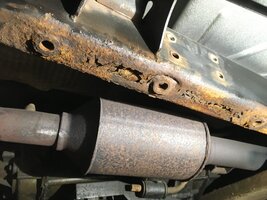
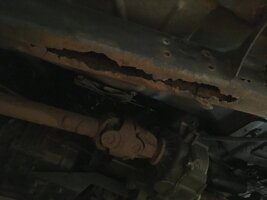
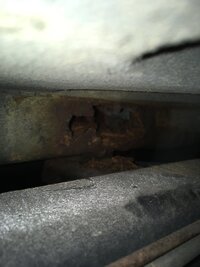
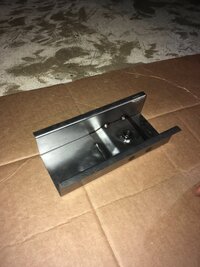
After I took care of the fenders and the rust there back in late October/early November. I focused my attention onto the getting the skid plate off to evaluate the whole undercarriage. When the nutserts started spinning, that is when I realized how bad the rust really was. For the life of me I could not figure out how to get the skid plate bolts out so I turned to the internet and it lead me here. Doing my research on this thread I learned how the frame usually rust between the diff skid and the frame. Of course 4 out of the 6 nutserts broke which lead to me buying a pry bar to get some force on the nutserts. That worked for all but 1 so I did go out and buy an angle grinder/cutoff wheel. After removal of the skid plate and seeing how bad the rust was, that was the first time I thought about selling her. After some more research and deciding I wanted to tackle the project at home in the garage, I learned about the Safe-T-caps. While investigating the rest of the jeep since I was really scared the frame was shot, I found I had a completely shot body mount. Again I turned to the internet to see how to move forward and found Rust-repair-patch. I am not trying to promote a product but I have had the Safe T-caps and Rust-repair-patch on the jeep since November and so far they have held up pretty well (its only been 3 months and 600 miles so I will update in a year or so)
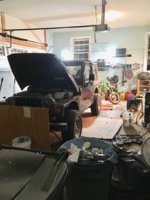
Before we got to welding and my brother helping me, I took the portable sander and a wire brush wheel on our cordless drills and went to town. The 5th picture shows how I had to set up cardboard and plywood to keep the sand from spraying all over the garage. I also had to open the hood to keep sand from accumulating on the wire connections and had to cover the intake with plastic wrap.
I couldn't have done some of the work without my brother who owns our tig and mig welders. We have both been welding since we have been 15 and I had our neighbor (who is a professional welder) come over check all of our welds before we buttoned everything up to make sure they are safe for the road.
IMG_2200.JPG IMG_2209_2.jpegIMG_2111_2.jpeg IMG_2207_2.jpegIMG_2205 (1)_2.jpeg IMG_2233.jpeg IMG_2236.JPG Order of pictures, the first 2 are each side of the frame where the nutserts went. 3rd is the shot body mount and 4th is the Rust-repair-patch replacement piece.5th is when I went through and sandblasted and wire brushed the entire under body. 6th is the Safe T-caps after we cut the required portion off the frame and 7th is my brother welding.. Definitely not OSHA approved working conditions

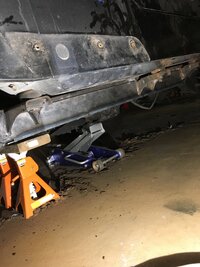
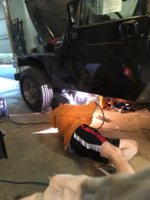
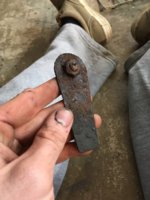
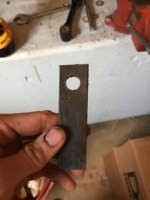
After we got the frame welded up and coated in primer and undercoating, I sat down for about a week and read as much as I could about all of the various types of lifts and tire combinations. I realized I did not want a huge massive lift and did not want to get new axles. With deciding that, I learned I wanted 33's and dpg's OME lift was the way I wanted to go. I know it was expensive but after having bought a good expensive kit for my Subaru, I knew suspension was worth the money. I called Dirk from dpg offroad back in late November and ordered the OME 2.5 Ultimate Tj lift. Dirk said that it would take a day to install, since it was my first time installing a lift (I installed a lowering coil over kit on the Subaru) . It took my brother and I about a full weekend to get everything installed and replace every bolt we broke (which we broke more bolts than bolts that came out in one piece) and also creating parts that we broke and figured we could make. And example is the retainer bolt for the front control arm. That bolt was so seized it broke, so we took some 1 inch flat stock and drilled the appropriate hole, welded a new nut onto the back. Then took the grinding wheel to it and shaped it similar to the ome part. (1st and 2nd pic). We also had to take the dremel and re-shape stripped hex bolts and used smaller sockets to get them off (pic 3) IMG_2317.jpeg IMG_2315.jpegIMG_2324_2.jpeg
 
Last edited:
@TJ2 haha not much anyone says can offend me. I take everything as a compliment or constructive information. The reason for the bondo was to avoid having to pay to get a replacement fender that I just didn't have the money to spend.
 
  • Like
Reactions: Squatch
Wow, you got some work to do Kevin. Time to learn a bit of fab shop tricks. You need a portable bench press.
I wish you are close by me, as if I would like to help on weekends at you garage.
Hats off to you my friend, don't quit on us :)

When you put back your skid plates, put a 3/4" lock-washer in between the frame and the skid plate before you bolt them back up. That gap will not hold the salty dirt muds when you power wash your under chassis.
 
@TJ2 I apologize but I'm actually quite a bit along with this project and I am now just finding time to get my pictures uploaded and starting this thread. I actually have the skid plates already bolted up but I will surely go back and add that 3/4" lock washer next weekend because after my mini off-roading adventure last weekend, I had a lot of mud stuck up in the skid
 
Thanks @bobthetj03 ... I honestly wasn't expecting to get into a jeep that needed some of this major work and thought about selling her a couple of times but I just couldn't do it. I'll have more to post about other parts that I saved and worked on. I just have to find where these pictures went and figure out what to write so I stop posting these last 5 months of the build in mini stories
 
  • Like
Reactions: bobthetj03
Were you able to drill a drain hole at the back-bottom of your frame? Hate to see you back in this rusts after 5 years.
Actually with the safe t-caps I drilled a hole in the front and the rear of the cap before I welded them onto the jeep. Luckily I found this forum and did some extensive reading on what other members have done to solve their similar problem.

It helps having some fab skillz and a few crucial tools to fix that rust. I'll be following along.
The welders have definitely gotten a lot of use from this project build. I recently went through 2 bottles of Argon/Co2 mix welding up the modifications I made to the stock bumper and tire carrier 2 weeks ago.
 
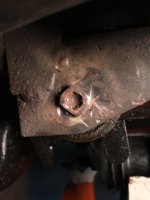
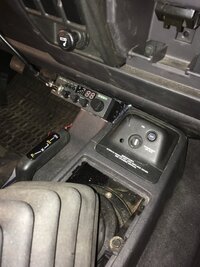
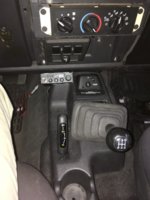
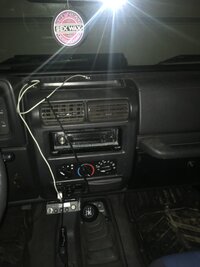
The Tj pretty much sat after I put the lift kit on her as I decided where I wanted to go next with the build. During that time I turned to the forum and tried to figure out the essentials or the best upgrades I could get. I hate not being self-sufficient and relying on people in times where I would't need to be if I was prepared appropriately. With that thinking I decided to buy the Super Winch for recovery along with a barricade recovery package that included the essentials. I put my cb radio, fire stick antenna,switches, raxiom 21.5 inch light bar, hood mounts on my Christmas list which Santa blessed me with. I knew I did not want a windshield light bar as I did not see the need but still can't decide if I like the light bar on the hood. I feel like it looks misplaced but it works very well there. The Cb radio was a breeze to install and I mounted it behind the driver tail light. I knew I wanted to install the Cb in a location that worked and functioned well. I also wanted it to be out of the way. I decided the location it's in because you have to remove the center consul to remove the 2nd knob before the cb radio will slide out. So I took the dremel and cut to get the CB to fit snug and out of the way of the transfer case shifter. The wires were easy to run under the consul,driver seat, through the factory grommet and under the tail light opening. IMG_2352.jpeg IMG_2345.jpeg IMG_2636.jpeg IMG_2342.jpeg


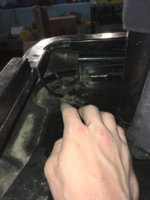
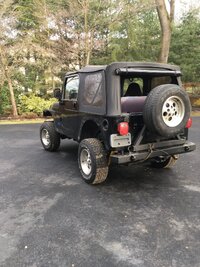
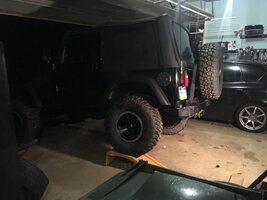
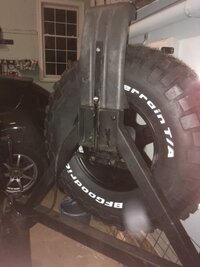
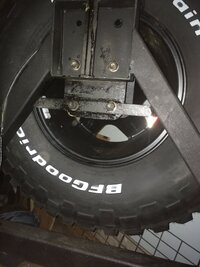
After Christmas in January, I met up with my buddy who had bought a 2017 JK and got the barricade rear bumper and tire carrier for Christmas. He decided he didn't want it and wanted to go a different route. He said he would give me a deal on it even though I originally wasn't going to get a carrier. But after thinking for a week I decided to help him out and I bought it from him. Also with planning on going 33's, I did not want to risk the hinges of the tail gate after seeing the amount of rust on the Tj. (I still have to take the hinges off and see how the undersides look.) After having the bumper and carrier on for a week. I knew that the spare had to get lowered. It looked dumb that high in my opinion with 30's on. I contemplated how to get the factory 3rd brake light to work and how to lower the tire for a couple of days. Instead of cutting the carrier and sectioning out inches to lower the tire, I simply welded in a piece of flat stock to lower the mounts for the tire while I also welded in a piece to hold the 3rd brake light. To get the 3rd tail light lowered, again I took the dremel and trimmed away about half an inch at a time. My brother lead the high school robotics team for his 4 years there so I had him cut and solder in a foot of wire to extend the factory. brake light wiring. IMHO the 30's in the first pic sat up way to high. The 33's in the second pic is with the pieces welded in to lower the tire. 3rd and 4th pics show what I did and you can see the unused factory holes at the top of the 4th pic.
IMG_2334.jpeg IMG_2633.jpg IMG_2637.jpeg IMG_2638.jpeg
 
  • Like
Reactions: Chris
It's coming a long, I dig it! I too wish I could weld. So many things I could do!
 
I knew I saw a post somewhere where the Saf-T-Caps were done! I'm figuring I may need to do them at my skid mounts too. Just waiting for the weather to get a bit better. Do you mind if I PM you questions on the work?? And you're not too far from me, I'm in Baltimore.
 
  • Like
Reactions: Kevin Bright
Wow..nice work. I feel your pain on the rust. Thankfully, my frame is pretty good, but the tub has some issues. My whole life right now is work, come home, work on the jeep...cleaning and painting.
@Ranger_b0b that was my life up until the previous month until I have been traveling to Rhode Island on the weekends to visit my girl friend but I should be getting back to that life style shortly of gym,work,jeep sleep. rinse and repeat :neng2kb:

I knew I saw a post somewhere where the Saf-T-Caps were done! I'm figuring I may need to do them at my skid mounts too. Just waiting for the weather to get a bit better. Do you mind if I PM you questions on the work?? And you're not too far from me, I'm in Baltimore.

@etc1006 I definitely have some pointers about their installation that I would be happy to pass on!

And sorry guys and gals, I just got back tonight. Going to regroup and hopefully update this thread by the end of the week. Happy Jeepin!
 
  • Like
Reactions: etc1006
Hey Guys and Gals, Finally caught a break to update ( 3 months later lol )

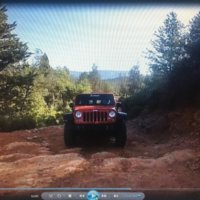
Put Twiggy (Newly Named by the girlfriend) through her paces at Rausch Creek Back at April Playing in the rocks and mud.
IMG_1692.jpg

This was in Devils Den at Rausch which this trip helped me switch gears from Overlanding to Rock Crawler Mindset.

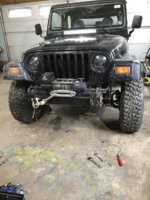
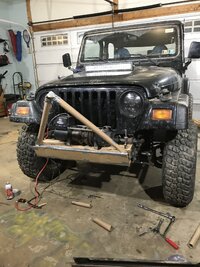
This lead to the custom bumper i created out of the stock bumper having to go IMG_1172.jpeg If you look at the picture from Rausch, you can see that the fog lights did not making it home so I ended up cutting the bumper but I don't care for the way it looks so I started to mock up another one that is currently sitting in cut pieces of 3/16 steel waiting to hopefully get welded together this weekend IMG_1174.jpeg
I also got a new job at Mainline Overland and I am waiting to get some more practice in on our hydraulic tube bender before I bend the 1.5 inch DOM tube I have.

But the most recent purchase was I picked up a set of stock Dana 44's off of a 2004 Rubicon that got hit by a bus and they are getting picked up to get re geared to 4.88 Tomorrow
IMG_1686.jpg


Next Modifications are to get an S-pod to handle the Air Compressor and Locker Switches and to handle the 21.5 inch light bar that is going to get mounted above the winch. Also Contemplating Cutting the hood and remounting the stock front fenders up 3 inches and cutting the rear.. Anyone have first hand experiences on what to account for? I've been reading and I know various things in the engine bay will have to get moved around and the stock air box will have to get modified but any issues with cutting the rear and will I have to rotate the rear track bar?
 
  • Like
Reactions: ac_