TJ Build

Kerry

Member
Joined
Jun 27, 2019
Messages
75
Location
New Zealand
The Purchase

So I finally settled on a stock TJ, had some nasty (cough) oil drips so of course there was a discount...
I have had it around 6 months now, heres whats happened to date...
icon_smile.gif


So far have ordered:
- Rough Country 3.25" lift kit
- Rough Country Steering Stabiliser
- Rough Country Front Stubby & D-Ring kit
- Rough Country front adjustable track bar
- LED head/tail lights
- 12k Winch
- Snorkel
- Fuel Revolver Rims
- Kumho 33x12.5 R15
- Fenders/grille
- Sway bar disconnects
- Bikini Top!
- Fixed UHF Radio
- still no light bars.....?

More to come...

Much discussion around Tyres (and Rims), I could write a book on tyres at the moment! I wanted 33" Duratracs for their light weight (for performance; re-gearing might be a while) and snow rating, but Goodyear do not stock that size in NZ...
EDIT: went with Kumho MT51's, only 2 kg heavier than the Duratracs so total weight added only 35kg for the set of 5. I will not be re-gearing as it simply is not necessary, the day I swapped over I felt the power loss was about 5%.

1040525136.jpg
 
Last edited:
Lift, Wheels, Stubby bumper and Winch

After getting a rear track bar bracket folded locally (included one was LHD) and getting an adjustable front track bar from Auzzie , I finally have the TJ back. Compliments to the Peter Munro commercial guys, good people to work with.
Drives amazingly well at this stage, super smooth on the highway, yet to do any off roading.
Pic shows 3.25" lift, 33" tyres, Stubby bumber and winch all installed.
Snorkel is next, will have a go this weekend, then onto fenders and all the sundry stuff...

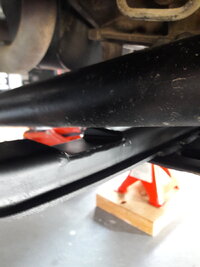
EDIT: Note there is an issue with the Rough Country 3.25" lift kit if you have an 03-06 TJ. 03 onward has an additional crossmember up front, and a smaller bash plate holding the tranny up. The 97-02 just has a larger bash plate. Even with the supplied drop pucks to lower the bash plate and crossmember, the driveshaft still (just) hits the crossmember. In my case its around 10mm extra clearance needed, I have modified the crossmember by cutting the top open and welding a support plate in20200122_175735.jpg, see photo..

Winch fitted.jpg
 
Last edited:
Snorkel

Finally got around to installing the snorkel (or 'snukel' according to the poorly written instructions)

It was a cheapie off Ebay, around $200 landed, they had sold hundreds and the reviews were ok.

The install took about 5 hours, it required removal of a structural bracket between the firewall and the fender, then opening this up a bit with an angle grinder so the hose could pass through, and modifying the air box ofc. Not to mention drilling a 75mm hole in the side of the Jeep, which then had to be opened up into an oval shape due to the angle of the outlet on the snorkel body.

It seems solid and I'm pretty happy with it, it does not have the 'ram air' type head (helps remove incoming rain/water) though so I might modify this over the next few weeks as its simple enough to do.

file.jpg
 
Last edited:
Sway Bar Quick Disconnects

I got some Rubicon Express sway bar quick disconnects for $300 landed, and its one of the easiest installs I have done to date. Mainly because the links had already been replaced as part of the lift kit, so I was undoing nice shiny new bolts and replacing them with even shiner ones.

They even provided some plugs you can swing the links up onto and refit with the split pins when your off road.

Took about an hour all up and didn't even get my hands dirty...

Sway bar discos.jpg
 
Last edited:
  • Like
Reactions: Kiwi TJ
Fenders

This time I installed some pocket type flares. I really wanted flats but the best deal I could find was about $700, then they would likly be hit with duty so prolly near $900 all up.

These were $208 landed, so cheap enough, but probably less clearance than the stock flares, so I have already trimmed the rears, will see how I go with the fronts, they might be ok. I needed them for the extra width as the tires stick out wider now on the new rims.
The rear mudflap will need some thought as its too narrow now.

Ofc the holes did not line up perfectly so a bit of adjustment needed, but not a difficult install at all, took about 4 hrs all up.

Threw on bonnet and rear corner armor while I was at it...

EDIT: On the McCauley trip I found that with the sway bar disconnected there was contact with the front tire/fender. With sway bar connected it was fine. I have taken the jigsaw to the fender lip, hopefully that will sort it.

Fenders.jpg


EDIT: Never really liked the look of these fenders but they were dirt cheap on Ebay. Turns out they are quite brittle, and they don't offer the same protection under the wheel arch as the stock flares. Also, less clearance meant I had to cut the lip off, and they don't really cover the tires properly. Hence I splashed out the aforementioned $700 and got the Rough Country flares. These are same as stock just wider!
20200103_161136.jpg
 
Last edited:
  • Like
Reactions: UKTJ and Kiwi TJ
Soft Top replacement

I brought this TJ knowing it needed a new soft top, the Smittybuilt ones are about $450 landed so not too bad. I got away without any duty which was a bonus.
A -4 morning in Tekapo forced the issue with the back screen cracking severely in the cold when opened.
I waited for a warm day as per the instructions, and it was a very easy switchover, allow about 90 minutes all up, but probably a lot quicker if your used to using these.
I kept the old side windows for use on any scratchy trails

Softtop 1.jpg


Softtop2.jpg
 
Last edited:
  • Like
Reactions: Kiwi TJ
4 Low Selector problem

Another unintended consequence of the 3.25 lift I noticed on the MaCauley trip. A couple of times the TJ popped out of 4 low, I had to hold the selector lever hard up into place to make it stay there sometimes. Seems that when you lift, there's an arm that moves slightly forward toward 4 high. Its a simple adjustment using a 13mm spanner, I found a guide on youtube and 5 minutes later all was good again.
 
  • Like
Reactions: Chris
Spare Tyre Carrier

A consequence of going from stock 28" to 33"x12.5 tyre is that they no longer fit very well on the spare tire carrier. I ended up getting a Rough County spare tire carrier spacer for $150. This is a great cost effective solution for the time being, but of course still also means the center stop light is no longer visible as the spacer shifts to tire about an inch out and an inch up as well as the larger diameter.

I managed to make half of it visible again by using some spacers I found floating around in the garage, but the stock bolts will only allow about 1" height increase so I might just make a little bracket when I get some time.

EDIT: I found some 100x50 aluminium box section at work which worked perfectly, a bit of shagging around cutting it to shape and painting it black but it does the job for no cost. There are brackets around on ebay etc for around $60.

Rear Tyre.jpg


EDIT 2: As the new bracket pushes the tire out and up, it is no longer in contact with the bump stops on the tailgate. No problem around town but a friend following on a bumpy trail mentioned it seem to be shaking about a bit. I remedied this by extending the stops with some hardwood I had laying about. I cut it to length and shaped it to suit the existing rubber bumpers. A coat of primer and 3 top coats should see them lasting a while!

20201224_091122.jpg


20201224_091134.jpg
 
Last edited:
  • Like
Reactions: Chris and xxdabroxx
Bump Stops

Next on the list of consequences of a 3.25" lift, is bump stops. I was finding that the tires were hitting the fender when under full compression, so the stock ones were now well short. The best time to do this is during the spring removal/replacement, so keep that in mind if you are lifting your jeep.

On to Ebay and I found some extensions for $55 landed. I also picked up some spring compressors for $30, I used these on the front springs to help removal, but was not that happy with them so got my money back. (still have then tho)

The front extensions were the biggest job, there's loads of info on the net how to do these, but I went for attaching them to the bottom perch rather than extending the top. It involves drilling and tapping, so we will see what the certifiers make of that soon...Allow about 4 hours for this job if your a noob like me, nothing really difficult about it if you follow the guides. This one helped me a lot:
https://wranglertjforum.com/threads/how ... stops.194/

I should say here the biggest problem I had was getting the body of the TJ high enough to allow full droop, I only have a std trolley jack and axle stands, I had to block these up with timber to get her high enough, as you will see in one of the photos.

The rears were a piece of cake, did not even have to remove the springs as you can reach in and extend the top plug easily, it takes a bit of lube and wriggling to get the plug out, but the rears only took me around 2 hrs.

Bumpstop1.jpg


Bumpstop2.jpg
 
  • Like
Reactions: Kiwi TJ and Chris
Nice Job!!!! Are your wheels 8" or 10" wide??? They look awesome!! I'm guessing they are 10" wide.

EDIT: NEVERMIND...I FOUND THE INFO I WAS LOOKING FOR...

MHT Fuel Offroad D525 Revolver, 15x10 Wheel with 5 on 4.5 and 5 on 4.75 Bolt Pattern - Black with Machining - D52515000437


Last edited:
Where in Oz did you end up getting the front track bar from ?
I initially got one from Rough Country but they did not state it was LHD only so I got my money back. I found the RHD one in Australia at ebay.com.au: http://rover.ebay.com/rover/1/705-5...0001&campid=5337789113&icep_item=281349242151. Direct Spares in NSW had no problem sending to NZ

I still have the LHD one, half price if anyone wants it! (NOW SOLD)

There is an issue though with it rubbing on the diff cover. There was a bit of play in the mount on the lower fixing, and I used a heavy set of gooseneck pliers to open it up a little more and managed to squeeze a 2.0mm washer in there to space it further away from the diff cover which seems to have sorted it.
An aftermarket diff cover would also work but $$!
 
Last edited:
  • Like
Reactions: Kiwi TJ
This site contains affiliate links for which Jeep Wrangler TJ Forum may be compensated.
I initially got one from Rough Country but they did not state it was LHD only so I got my money back. I found the RHD one in Australia at ebay.com.au.
I still have the LHD one, half price if anyone wants it!

There is an issue though with it rubbing on the diff cover. There was a bit of play in the mount on the lower fixing so I managed to squeeze a 1.6mm washer in there which seems to have sorted it.
An aftermarket diff cover would also work but $$!
Ok fair enough...I have a couple of my clients in OZ who import Jeep stuff if needed....not sure if its cheaper than ebay or as convenient.
Did you manage to get your speakers sorted?
 
This site contains affiliate links for which Jeep Wrangler TJ Forum may be compensated.
Ok fair enough...I have a couple of my clients in OZ who import Jeep stuff if needed....not sure if its cheaper than ebay or as convenient.
Did you manage to get your speakers sorted?
I have not even started on the stereo yet, so no issues with speakers at this stage!
Going for Certification on thurs, wish me luck....
 
  • Like
Reactions: Kiwi TJ
Good luck with that yes...that way you can get out an enjoy this sunny weather we've had the last couple of days...I went for a cruise at midnight 2 nights ago, warm enough for the top down and the doors off
 
Rear Bumper

I have been looking at rear bumper options, and they all seem to add up to a lot of $$, so I took a better look at the stock bumper, and removed the number plate holder. This left a lot of holes and looked untidy. On the whole it looks very strong though.
I couldn't see the value in a new bumper, as they were up to $1000NZD landed, so for around $200 added some D rings and some aluminium tread-plate to cover the holes.
Spot the difference in the 2 photos...

20191001_173645.jpg


20200205_185648.jpg
 
Last edited:
  • Like
Reactions: Kiwi TJ
Stereo Head Unit Upgrade

I had been looking at quite a few double DIN units on Ebay and got down to a requirement shortlist of:
  • Must be an Android unit (For google maps, Nexflix, Apps etc)
  • 4x60w minimum (useful until I can get an amp)
  • Must have at least 2 x USB ports
  • Subwoofer out
  • Reversing camera input
  • Bluetooth
  • Must have a volume knob (not push buttons)
  • Able to connect to Bluetooth steering wheel controls
  • GPS of course..

I wound up with this unit : http://rover.ebay.com/rover/1/711-5...0001&campid=5337789113&icep_item=401864838719

But there are loads of others like it on Ebay. For under $100 NZD I was not expecting much, however I was pleasantly surprised. Bang for your buck these things are hard to beat if you get a good one.

I got the TJ 2 Din dash kit (more expensive than the radio!) being careful to get the 2003-2006 one (the 98-02 one is different) and with included harness. This replaces the existing center dash fascia.

Install was very straightforward, instructions were good, just a bit of time spent wiring the 2 harnesses together.

In the settings, I was even able to choose a Jeep logo on boot up.

I took my time, and spent around 3 hours installing all up.

It has Wi-Fi, so for google maps or other software I usually just pre-download onto a 64gig USB stick I have in the rear dongle stuffed up behind the glove box, but it will happily bluetooth tether to your phone and use your phone data if you want that. I have all the local area saved already.

Speakers and sub-woofer incoming !

86187549_3178450568841464_8721816454791430144_o.jpg


86480437_3178450438841477_5227625856712572928_o.jpg
 
This site contains affiliate links for which Jeep Wrangler TJ Forum may be compensated.