Sunrider top without door surrounds

DeltaNu1142

TJ Enthusiast
Original poster
Supporting Member
Joined
May 27, 2019
Messages
688
Location
Maine
I'm attempting to get rid of my door surrounds, while still keeping my Bestop NX with the Sunrider capability.

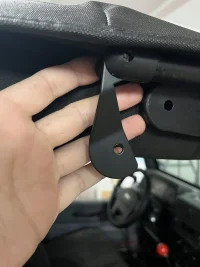
I've modeled a piece that can attach to the roll bars (around the padding) with a 1" piece of Velcro. So far, I think the best way to do this is to incorporate the metal attachment point from the OE door surrounds into the design:
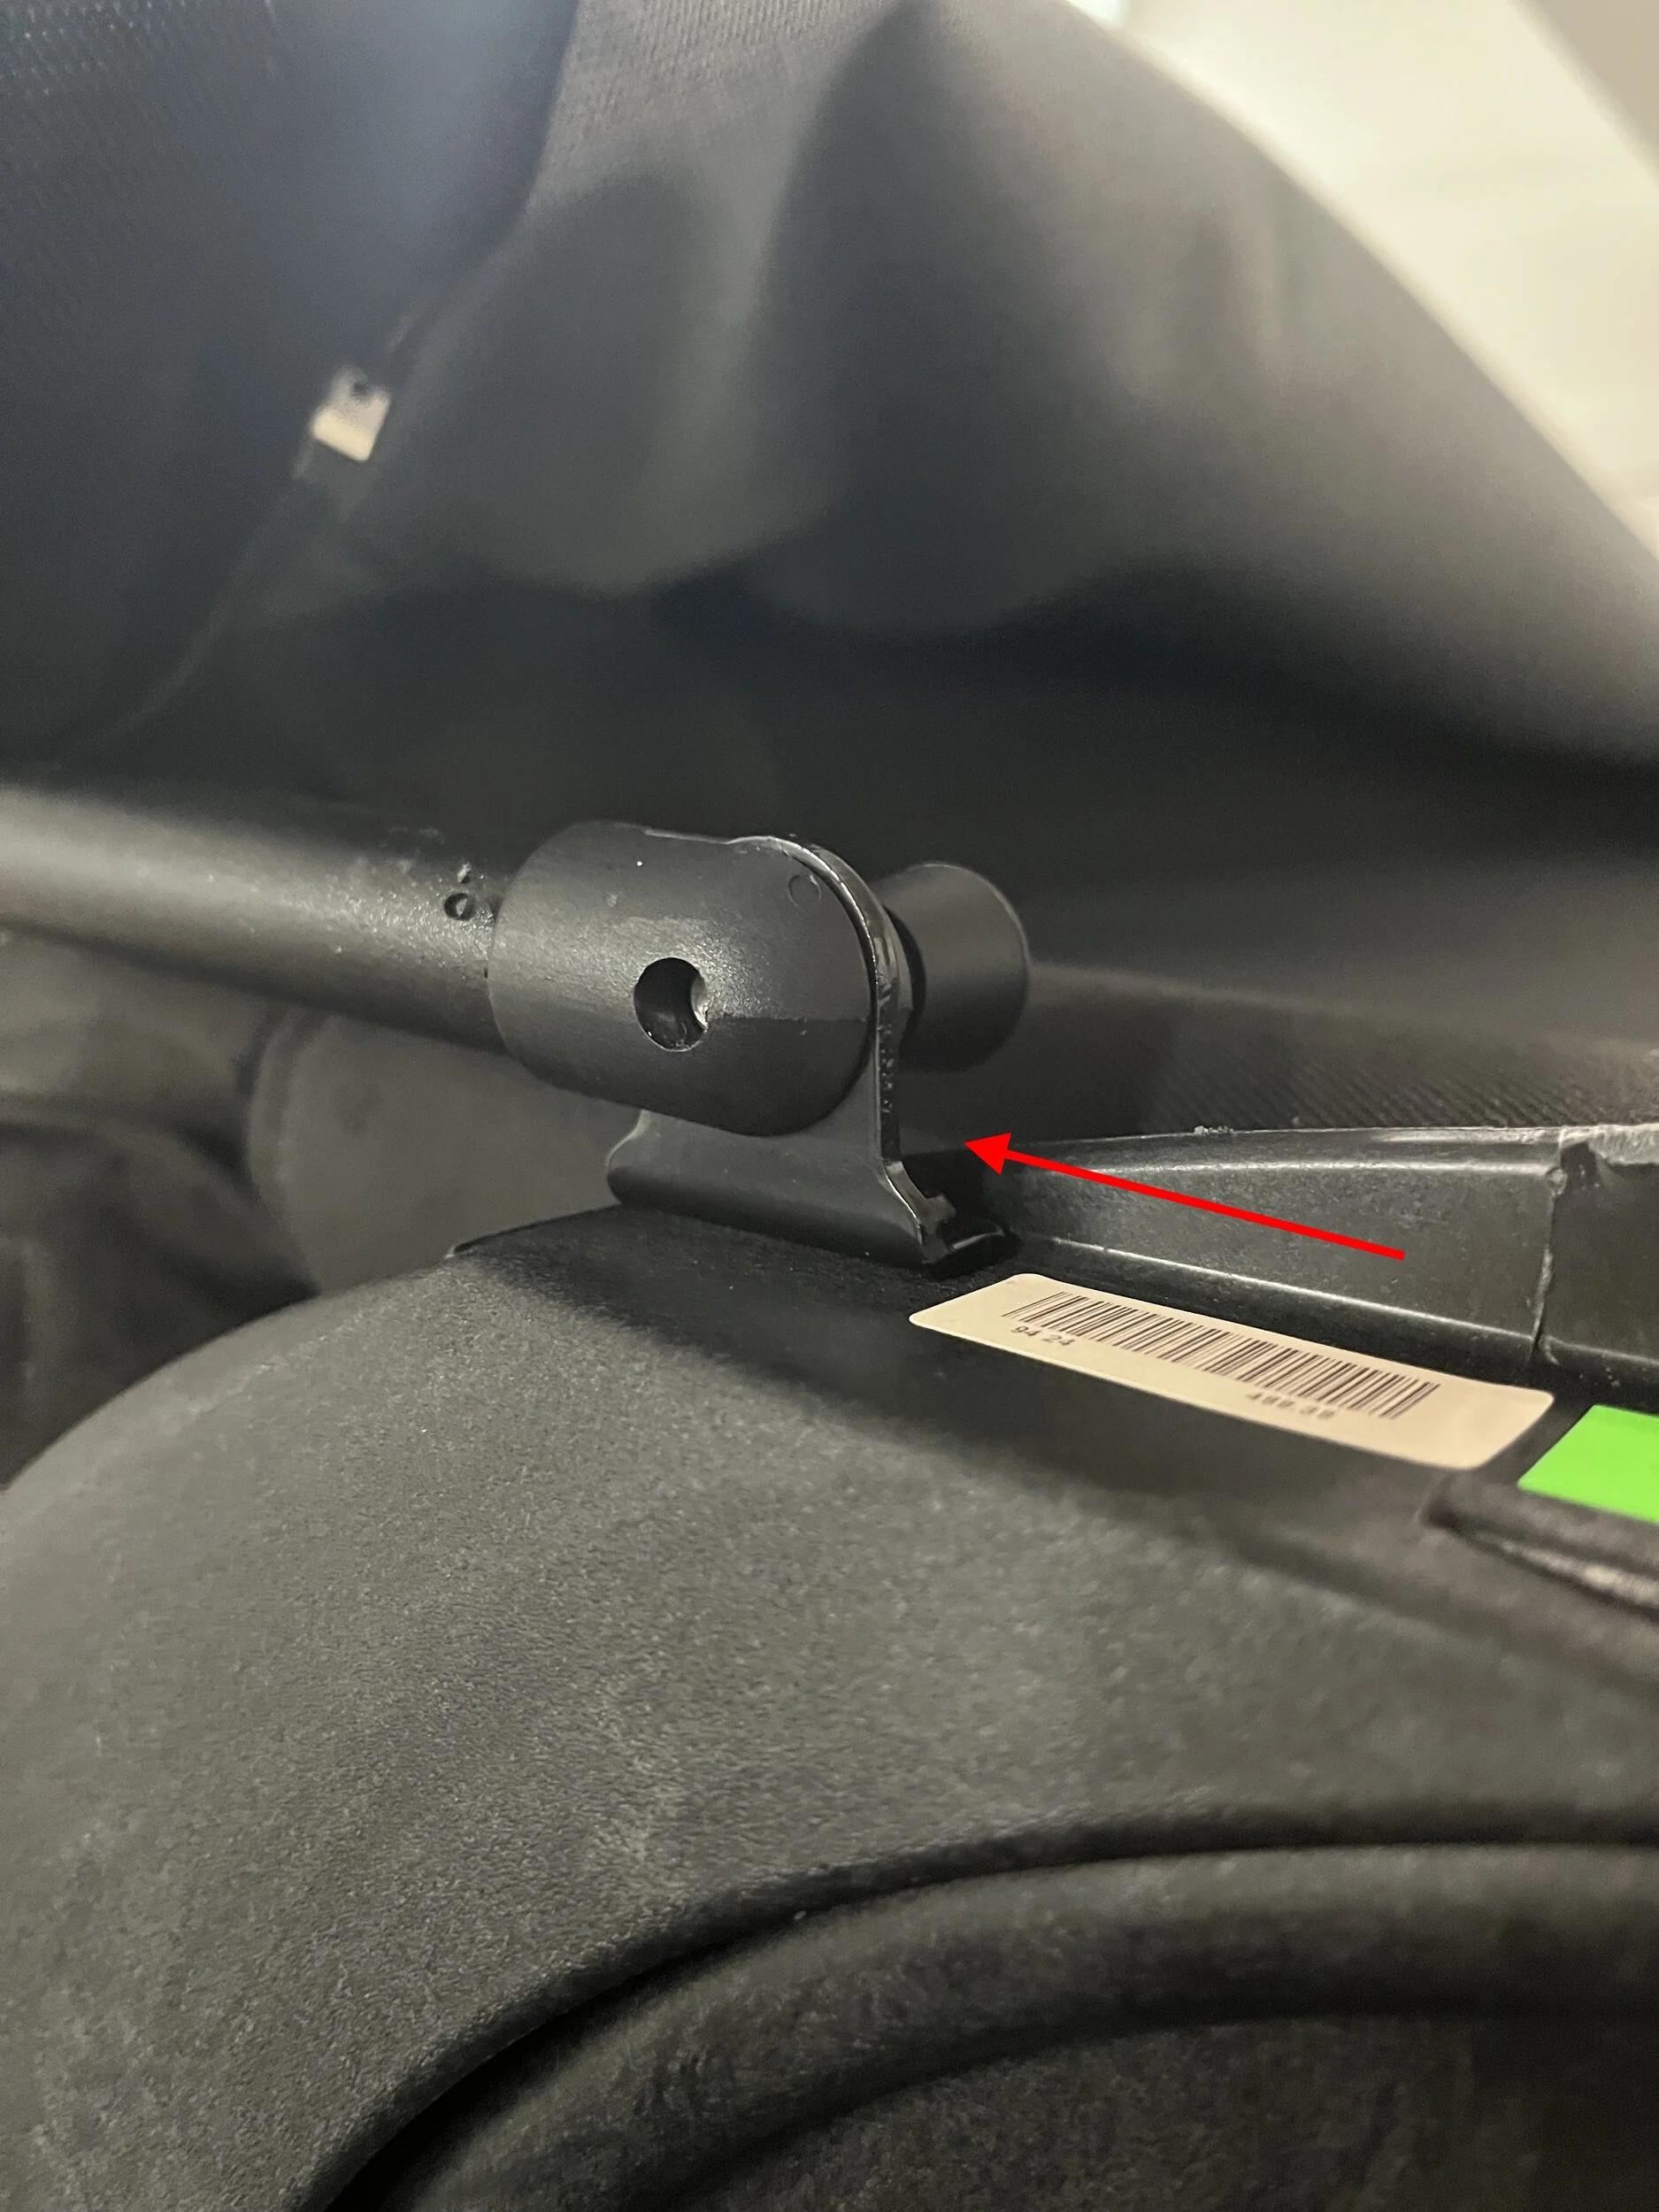
IMG_2093.webp


Anyone know if this piece is available separately from the door surround? From what I understand, it comes in multiple thicknesses; mine is 3.5mm/1/8". I might have to go scavenging.

 
Are your door surrounds hinged like factory? If so, you can remove the vertical from the horizontal section so the soft top still has a structure to attach to.
image.webp
 
Are your door surrounds hinged like factory?
They are, and that's interesting... that would go a long way towards what I want. I hate driving with the window surrounds in.

I'm going to go check to see if I can pull the B-pillar piece.
 
  • Like
Reactions: MikeE024 and jjvw
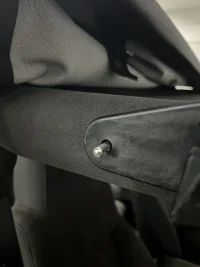
Alright, well, that didn't take long. The little circlips are painful to remove, but once off, yeah. the surrounds come right apart.

The bad news is, that doesn't help me... the attachment points for the NX are on the vertical piece. The piece I want to see gone:

IMG_2097.webp


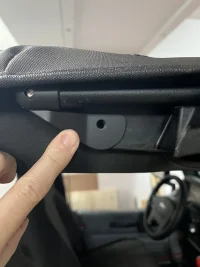
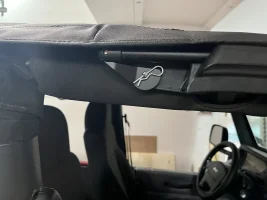
Here's the top with the upper piece mounted. The Sunrider bar doesn't have anything to attach to:

IMG_2096.webp


No way is it designed to attach to the holes on the upper piece. Now... I could just design a strap that attaches to that hole at the back end with a pin. That would be pretty easy.
 
Just buy this and just cut it up and bend as needed.

View attachment 602690

$16 on Quadatrac
Got a link, or a part number?

Looks like it could work. Metal is nice. But I can save $15.70 by printing a couple of these:

1742582569097.png


EDIT: Make that $35. And I don't know what would prevent it from fitting my '05, but this says it's for a '97-'02. I don't see one for a late TJ.

EDIT 2: Answer on the Quadratec site says:
Technically the sportbar diameter changed in 2003 which would affect the arc of the bracket, and proper fitment with interior trim
 
Last edited:
  • Like
Reactions: rasband
I know the guy in Pittsfield. I might reach out to see if he's got anything. I didn't even know this part existed... thought I invented something.

Nothing new under the sun, I guess, especially on a 20-year old Jeep.
 
  • Like
Reactions: wigsajumper
Yeap, 3D printed.

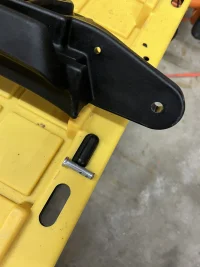
I got some clevis pins today. I need to cut them down, but they're in as-is right now. I did break one of the brackets while trying to get the pin in, so that doesn't bode well for the strength of the PETG. I might have to cut some out of aluminum, or maybe get a service to print some in glass-filled nylon or something.

IMG_2101.webp
IMG_2102.webp
 
I had heard of Send Cut Send a little while ago, but I never used them.

This morning I decided to give it a try. I had to learn a bit about modeling sheet metal in Fusion, but I got it uploaded and ordered. Two powder-coated SS brackets for $35 shipped. Most of that cost is wrapped up in the two bends in each bracket. I can see using that site for a bunch of stuff.

1742736378884.webp
 
Last edited:
I had heard of Send Cut Send a little while ago, but I never used them.

This morning I decided to give it a try. I had to learn a bit about modeling sheet metal in Fusion, but I got it uploaded and ordered. Two powder-coated SS brackets for $35 shipped. Most of that cost is wrapped up in the two bends in each bracket. I can see using that site for a bunch of stuff.

View attachment 603256

Whether 3D plastic printed or cut and pressed metal, I think your design might benefit from a little extra meat here. It would need to be on the "bottom" edge so as not to interfere with the Sunrider's arm, but this feels like a weak point.

IMG_2101a.webp
 
It absolutely is. I did what I could with the print by adding a filet on the backside... I don't know if you can tell by looking at the sheet metal model above your post, but I made that part thicker before sending it to fabrication. It's limited by the gap on the bow, like you mentioned. I beefed it up as best I could.

The good news is... almost all of the forces on that piece are going to be along its length (tension/compression) and not on its face (shear).
 
Received the parts from sendcutsend yesterday... they fit like a glove.

IMG_2128.JPGIMG_2129.JPGIMG_2130.JPGIMG_2131.JPGIMG_2132.JPG

I cut the clevis pins down to around 1-1/4". I took off the upper door surrounds and inserted the pins from inside out. The roll bar retains them... they won't come out without the surrounds coming off first.

I'll probably try to smooth out the pins a bit and paint the hardware black.

Sendcutsend is awesome. I can definitely see using them some more.

I think my next step is to modify the door surround b-pillar piece so it attaches with the clevis pin for tool-less installation. Ideally, I could install them without removing the upper surround, but I don't see how that could work.
 
Last edited:
Received the parts from sendcutsend yesterday... they fit like a glove.

View attachment 604816View attachment 604817View attachment 604818View attachment 604819View attachment 604820

I cut the clevis pins down to around 1-1/4". I took off the upper door surrounds and inserted the pins from inside out. The roll bar retains them... they won't come out without the surrounds coming off first.

I'll probably try to smooth out the pins a bit and paint the hardware black.

Sendcutsend is awesome. I can definitely see using them some more.

I think my next step is to modify the door surround b-pillar piece so it attaches with the clevis pin for tool-less installation. Ideally, I could install them without removing the upper surround, but I don't see how that could work.

Nice work around to get what you needed. 👍🏼
 
  • Like
Reactions: wigsajumper