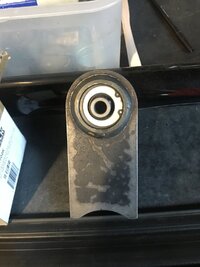
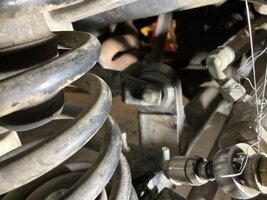
Iron Rock Off Road Upper Control Arm Flex Joint

Irun

A vicious cycle of doing, undoing, and re-doing!
Supporting Member
Joined
Oct 31, 2019
Messages
8,061
Location
Virginia
My upper control arm bushings are shot and need to be replaced. Rather than install a factory like bushing, I'd rather go with a high misalignment end. The Johnny joint is the standard, but Iron Rock offers a simple and interesting variation, using a 10mm bolt. In looking at the video, one thing that concerns me is that they show the procedure for holding the joint in place in the axle housing is to simply peen the edge. Anyone else here have experience installing these, and are there other things that make this a less than desirable replacement? I'm guessing where this conversation will go, but let's hear it anyway!

https://www.ironrockoffroad.com/product/upper-control-arm-flex-joint-8-bolt-10mm-cartridge.html
 
I watched the video...I didn't like em. The races seem small, and I can image those little cap head screws would be really bothersome two or three years down the road, living where I do. I didn't like the peening of the lip either. Give it a proper press fit. They would probably work okayish on the driver's side, but that little sheet metal bracket on the pass side concerns me too. Where are you going to peen the joint? That sheet metal won't support the joint without a properly designed press fit, on BOTH halves of the tower.

Why don't you want to do the Johnny joints kit?

I'm not a fan of the bracket that comes in the CE-9102K kit. If I went with JJs, I'd want to do something similar to what Blaine did in the thread below. That said, I found the correct JJ that goes in the driver side, but need the correct one for the passenger side mount.

Driver side : https://savvyoffroad.com/product/ce-9112m/


https://wranglertjforum.com/threads...y-joint-bushing—will-it-fit.31051/post-500756
 
I'm not a fan of the bracket that comes in the CE-9102K kit. If I went with JJs, I'd want to do something similar to what Blaine did in the thread below. That said, I found the correct JJ that goes in the driver side, but need the correct one for the passenger side mount.

Driver side : https://savvyoffroad.com/product/ce-9112m/


[URL]https://wranglertjforum.com/th...y-joint-bushing—will-it-fit.31051/post-500756[/URL]

I bought two of those CE-9112M Johnny joints thinking they would both just press in. What I didn't know is that the passenger side has to be welded in (like what Blaine did), as it is too small for the hole in the tower. Thus why I just pressed in the clevite Moog joint that I thankfully had on hand.

I still have both of those CE-9112M JJs, new in the opened boxes. PM me if you're interested. The price has gone up since I bought them.
 
  • Like
Reactions: Irun
I bought two of those CE-9112M Johnny joints thinking they would both just press in. What I didn't know is that the passenger side has to be welded in (like what Blaine did), as it is too small for the hole in the tower. Thus why I just pressed in the clevite Moog joint that I thankfully had on hand.

I still have both of those CE-9112M JJs, new in the opened boxes. PM me if you're interested. The price has gone up since I bought them.

Message sent!
 
he does great work but 1 might argue if that much weld is needed or maybe he just likes it 100%. it's not wrong, just a tad more than i might bother with.

i'm with Mike_H on most of what he said, not a fan of those joints.
 
  • Like
Reactions: Mike_H and Irun
he does great work but 1 might argue if that much weld is needed or maybe he just likes it 100%. it's not wrong, just a tad more than i might bother with.

i'm with Mike_H on most of what he said, not a fan of those joints.

And if it was only welded in enough places to hold it, everyone would ask why it wasn't finished including you.

Lest we forget, I'm the guy who ran 4 heavy tack welds at the outboard corners of the frame top and bottom on a rear outboard job and then sent the rolling chassis home to finish getting built. Then install the shocks, drive it and bring it back to get burned in or adjusted. They didn't fail so I know how much weld is needed. ;)
 
I have the Johnny joint ones. I don’t have a lot to say yet but the work. You don’t be disappointed if you go that route. What don’t you like about the pass side control arm mount?
 
I have the Johnny joint ones. I don’t have a lot to say yet but the work. You don’t be disappointed if you go that route. What don’t you like about the pass side control arm mount?

The stock mount works and just needs a little reinforcement. Much like the front lower control arm mounts!
 
  • Like
Reactions: TRE3TOP
The stock mount works and just needs a little reinforcement. Much like the front lower control arm mounts!

My mount was in rough shape so I used their supplied one. I didn’t do the install so I can’t provide any info there.
 
I went with the savvy kit and it was a good addition. I used the tombstone on the passenger side but wasn’t really concerned about looks. The way Blaine does it is much cleaner.

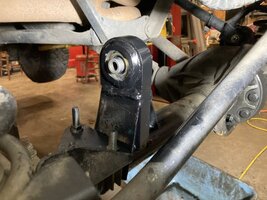
The driver side just pressed in, the passenger side bushing gets cut off and the tombstone gets welded to the remaining pieces of the original mount. You do need to trim and test fit it a few times to get it in the right position. The second photo is the bracket tacked in and weight on the wheels to make sure it’s positioned correctly.
6C0B364A-F7EC-49A5-B8C7-24F857914D69.jpeg

C30CC861-B479-4261-ABA9-F8E04167AD9F.jpeg

B3017077-04E6-4062-9634-C60C051BC47A.jpeg
 
I went with the savvy kit and it was a good addition. I used the tombstone on the passenger side but wasn’t really concerned about looks. The way Blaine does it is much cleaner.

It looks like you welded the mount to the old bracket and the axle. The installation directions say you don't have to to avoid warping the tube.
Or are those just tacks?
 
Last edited:
I went with the savvy kit and it was a good addition. I used the tombstone on the passenger side but wasn’t really concerned about looks. The way Blaine does it is much cleaner.

The driver side just pressed in, the passenger side bushing gets cut off and the tombstone gets welded to the remaining pieces of the original mount. You do need to trim and test fit it a few times to get it in the right position. The second photo is the bracket tacked in and weight on the wheels to make sure it’s positioned correctly.
View attachment 342685

View attachment 342682

View attachment 342689

Thanks! I'm going to use JJs and reinforce the stock bracket.
 
  • Like
Reactions: TRE3TOP
It looks like you welded the mount to the old bracket and the axle. The installation directions say you don't have to to avoid warping the tube.
Or are those just tacks?

It’s one bead along the bottom of the bracket on the front. In the rear I drilled some holes and added plug welds, then welded the stock bracket to the new savvy bracket. I wasn’t worried about welding that part of the savvy bracket to the axle tube, it isn’t wide enough to warp the axle when welding it. However, if you install one yourself, do whatever you’re comfortable with.
 
Last edited:
  • Like
Reactions: Irun
I just watched that vid and it’s a cool idea, makes it simple for the DIY’er without a lot of expensive tools. I just did the Johnny joints on mine and the reason for going with them was the fact that they are proven and easy to rebuild and get parts for. That and every time I replace a joint I’ve always gone with Johnny joints. Makes it easy for me remember what I have and where to go to order stuff from.
 
  • Like
Reactions: Irun