
If it is like my Moog parts the zerk is self tapping and will cut its own threads . Little pressure and easy peasy.
That's what I recall when I did mine.


If it is like my Moog parts the zerk is self tapping and will cut its own threads . Little pressure and easy peasy.
Doesn't seem like a very good idea to cut threads into a metal-on-metal greased joint post-assembly... but I'm sure Moog is smarter than I am. Or, maybe they're just cheaper.If it is like my Moog parts the zerk is self tapping and will cut its own threads . Little pressure and easy peasy.

What "gets me" is their inconsistent painting. When I did F/R trackbars and steering, nothing was painted except ONE of the trackbars (forget which) which had paint on it. *SHRUG* Nobody paints knuckles either - thank Goddess for RustOleum!Doesn't seem like a very good idea to cut threads into a metal-on-metal greased joint post-assembly... but I'm sure Moog is smarter than I am. Or, maybe they're just cheaper.
If it is like my Moog parts the zerk is self tapping and will cut its own threads . Little pressure and easy peasy.
If it is like my Moog parts the zerk is self tapping and will cut its own threads . Little pressure and easy peasy.
Forget all that when you get to the tie rod ends.Righty-tighty, lefty-loosy.
Forget all that when you get to the tie rod ends.
I need to remember that in October when I do mine.The rubber bushing has different hole sizes on either side.
So, I did this today. Notes for future noobs that have never done this before:
1. Take all your Moog parts and thread them all together first before you start (unless you can leave your Jeep down for days). They should all thread by hand without issue. I ended up getting a Moog ES2079S with bad threads in one end. I stopped trying to hand thread it when I couldn't do it anymore but it ultimately galled some of the threads on my new drag link (I replaced everything b/c my mechanic said all my tie rod ends were worn and the damper was leaking). Being that it was a Sunday, my only option was Autozone for a Duralast equivalent part. Thankfully, I didn't mess up the threads so much that the new sleeve wouldn't thread. I bought a Duralast DS1430 just in case, and it looked like crap compared to the Moog.
2. The threads on the Monroe dampener are also kind of ass. The castle nut side threaded OK. But the other end of that assembly just would not thread. I had to run a tap on the nut and a die on the bolt to get it to run together smoothly.
3. Similarly, you might want to get a new bolt/nut where the dampener bolts to the frame. I was able to reuse mine, but I had to run it through a tap/die as well to clean up the threads.
4. No matter how much I bashed on the dampener with a pickle fork, I was unable to get it out of the old track bar. Thankfully that didn't really matter for me, but that was unexpected. The pickle fork made short work of the rest of the joints.
Did you paint the Moog parts?
I did not. I'm hoping that being in Los Angeles, I don't have to worry about rust. At least, short term. I might get back under it and just paint in place.
Edit - is this BS ? They didn't look bare metal to me. They were a gray color, didn't look like bare metal to me. Though it didn't look like paint either.
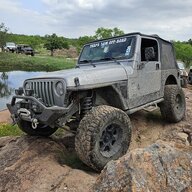
@Zorba I took pictures of my Moog parts today. Is this what yours looked like? There's definitely this grey coating on mine. Not paint (like the clamps).
I am like 10mi inland from the coast. I don't think the salt air makes it this far.
View attachment 700528
View attachment 700529
View attachment 700530
That's an electrophoresis coating. I scuffed mind with sand paper then primed and painted.





