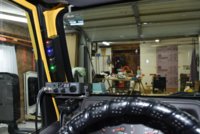
Building A-pillar switch panel...

Vulture

TJ Enthusiast
Supporting Member
Joined
Aug 17, 2016
Messages
263
Location
Indiana
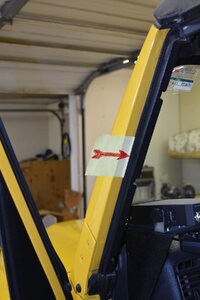
So, I've been mocking up a 4-switch panel for the A-pillar on my 2001 TJ. I'd like to use the 3 screws that hold the "Weather strip, front door" (part# 55176 618AB) to the door frame opening to mount the panel. Try as I might, I've not been able to get this little plastic piece to come off. I've reached the "Fear" (Fearing breakage...) point trying to get it off and can't budge it. Has anyone out there removed this part and if so, what did you find was sticking it on?
I've got pictures of the part I'm talking about and also of my switch panel mock-up but for the life of me, I can't figure out how to insert pictures into this post. Thanks everyone!
 
Next to the "Post Reply" click "Upload a File." Then go to your photos on your device and select all the pics you want to upload. It would be nice to see your switch panel mock-up and A-pillar. Hope this helps
 
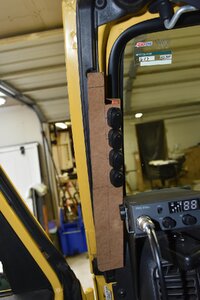
Sorry for the slow reply! Here's a pic of the part in question and also of the partial switch panel mock-up. when finished, the tab on the side of the mock-up will be behind the black "weather strip". The bottom of the panel will narrow and extend down to hide the wiring until it goes in behind the dash.
DSC_1999B.JPG DSC_2000B.JPG
 
  • Like
Reactions: Chris
Sorry for the slow reply! Here's a pic of the part in question and also of the partial switch panel mock-up. when finished, the tab on the side of the mock-up will be behind the black "weather strip". The bottom of the panel will narrow and extend down to hide the wiring until it goes in behind the dash.
View attachment 21689 View attachment 21688

There's a strip of adhesive sealant under that piece, as well as the phillips head screws and a push-in Christmas-tree type pin at the top where it meets the windshield header. The adhesive strip seemed to pop free pretty easily for me, I just started at the bottom end I think and slowly pulled it straight away from the windshield frame.
 
Thanks you guys for the pic posting instructions and also for the info on the weather strip. This was exactly what I wanted to know! I'll post up some pics when I get the panel built. Thanks again!
 
Howdy, I got side-tracked off of the panel project due to the discovery of a pretty serious (lack of) foundation drainage around my house. Anyway, after the rental of a trencher and the massive, awesome assistance of my buddy Greg and all his survey equipment and knowledge, the tile is installed and the sink hole is fixed!! I hope to get back on the switch panel project later this week. I'll post up some pictures when I get a little progress made. Thanks for the interest!!
 
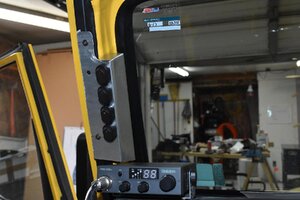
So, here's an update on this interrupted project. After several cardboard prototypes, I got the first metal panel made. Here's a pic of the panel temporarily mounted. I've got to paint it yet and permanently mount the switches. I'll post again when I get the thing finalized. DSC_4092RS.JPG
 
  • Like
Reactions: skrelnik and Chris
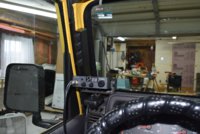
Finally finished up the switch panel. I think it turned out OK, It doesn't obstruct my view out the windshield or side window and it is easily accessible without having to fumble around for it. When the switches are off and the pilot lights aren't lit you can hardly notice the panel. And,...I didn't have to drill any holes in my TJ!!

DSC_4145RS.JPG DSC_4148RS.JPG
 
Nice fab there, and always good when we can avoid extra holes in the Jeep. I like where you have your mic holder for the CB too. I have the same mount and might have to try that.
 
Thanks guys! I had to lengthen the Rugged Ridge CB mount in order to raise the radio enough to mount the Mic underneath it. So far I really like the position.

The switches are operating front auxiliary lighting and I plan to mount some LED back-up lights that go inside the rear bumper The switches are rated for 30 amps so I didn't mount any relay's. If I have any trouble with them heating up, I'll add the necessary relay's as needed.
 
  • Like
Reactions: Serbonze