


Need help with fittings at the combo block

hear

Can't type
Original poster
Lifetime Supporting Member
Joined
Oct 18, 2020
Messages
6,045
Location
Prosper, TX
I’m replacing the master cylinder on daughter’s jeep, and the lines are rounded & effectively seized at the m/c. So I’m replacing the shorty lines as well. And since I can’t find them for sale anywhere, I figured I’d learn how to do my own flares.

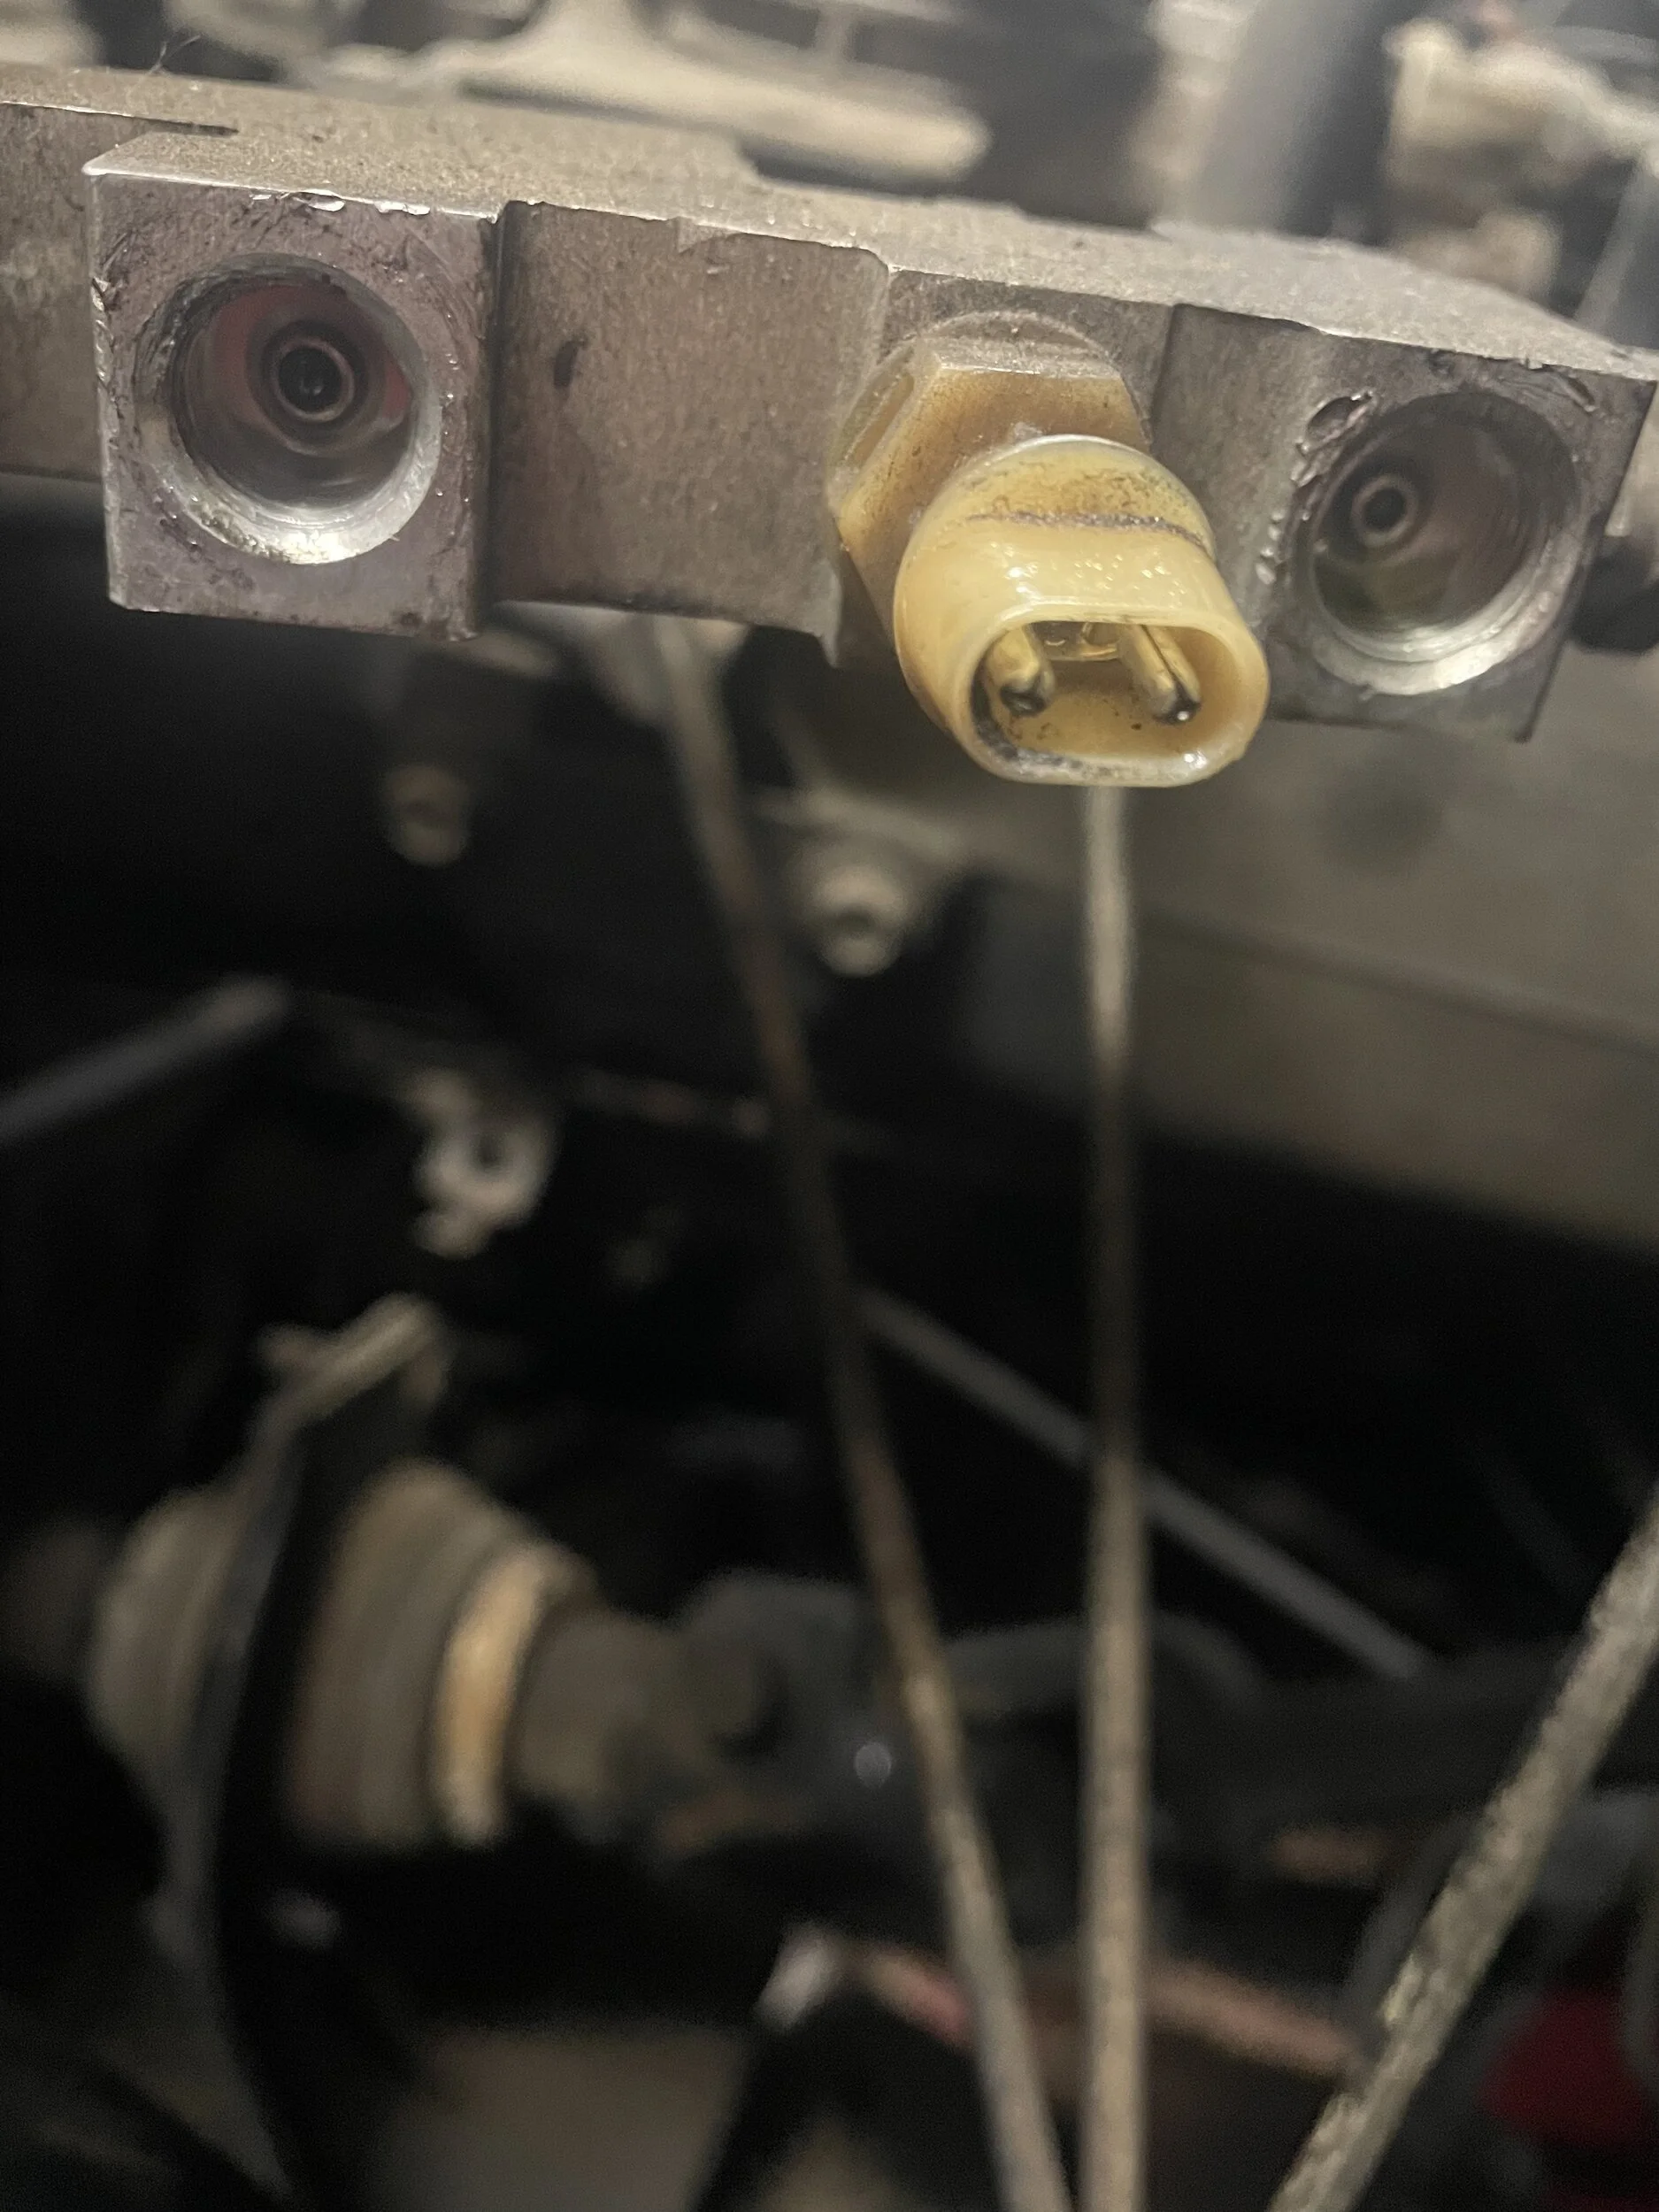
I’ve probably read every thread out there on the fittings in this area but now that I’ve got it all apart, I have new confusion about the flares at the combo block. They look like this, which isn’t anything I’ve seen anywhere. Note the “nipple” down in the bore.
526CD170-1D72-4A64-9D94-B70738B6D49E.webp


Everything I’ve read says that the flares here are double flares. The info on fedhillusa.com describe a double flare opening as a volcano sort of thing, but that’s not what this looks like, at least not to my eye.

CF10CF65-9819-4500-AE32-732A1C0CA9EA.webp


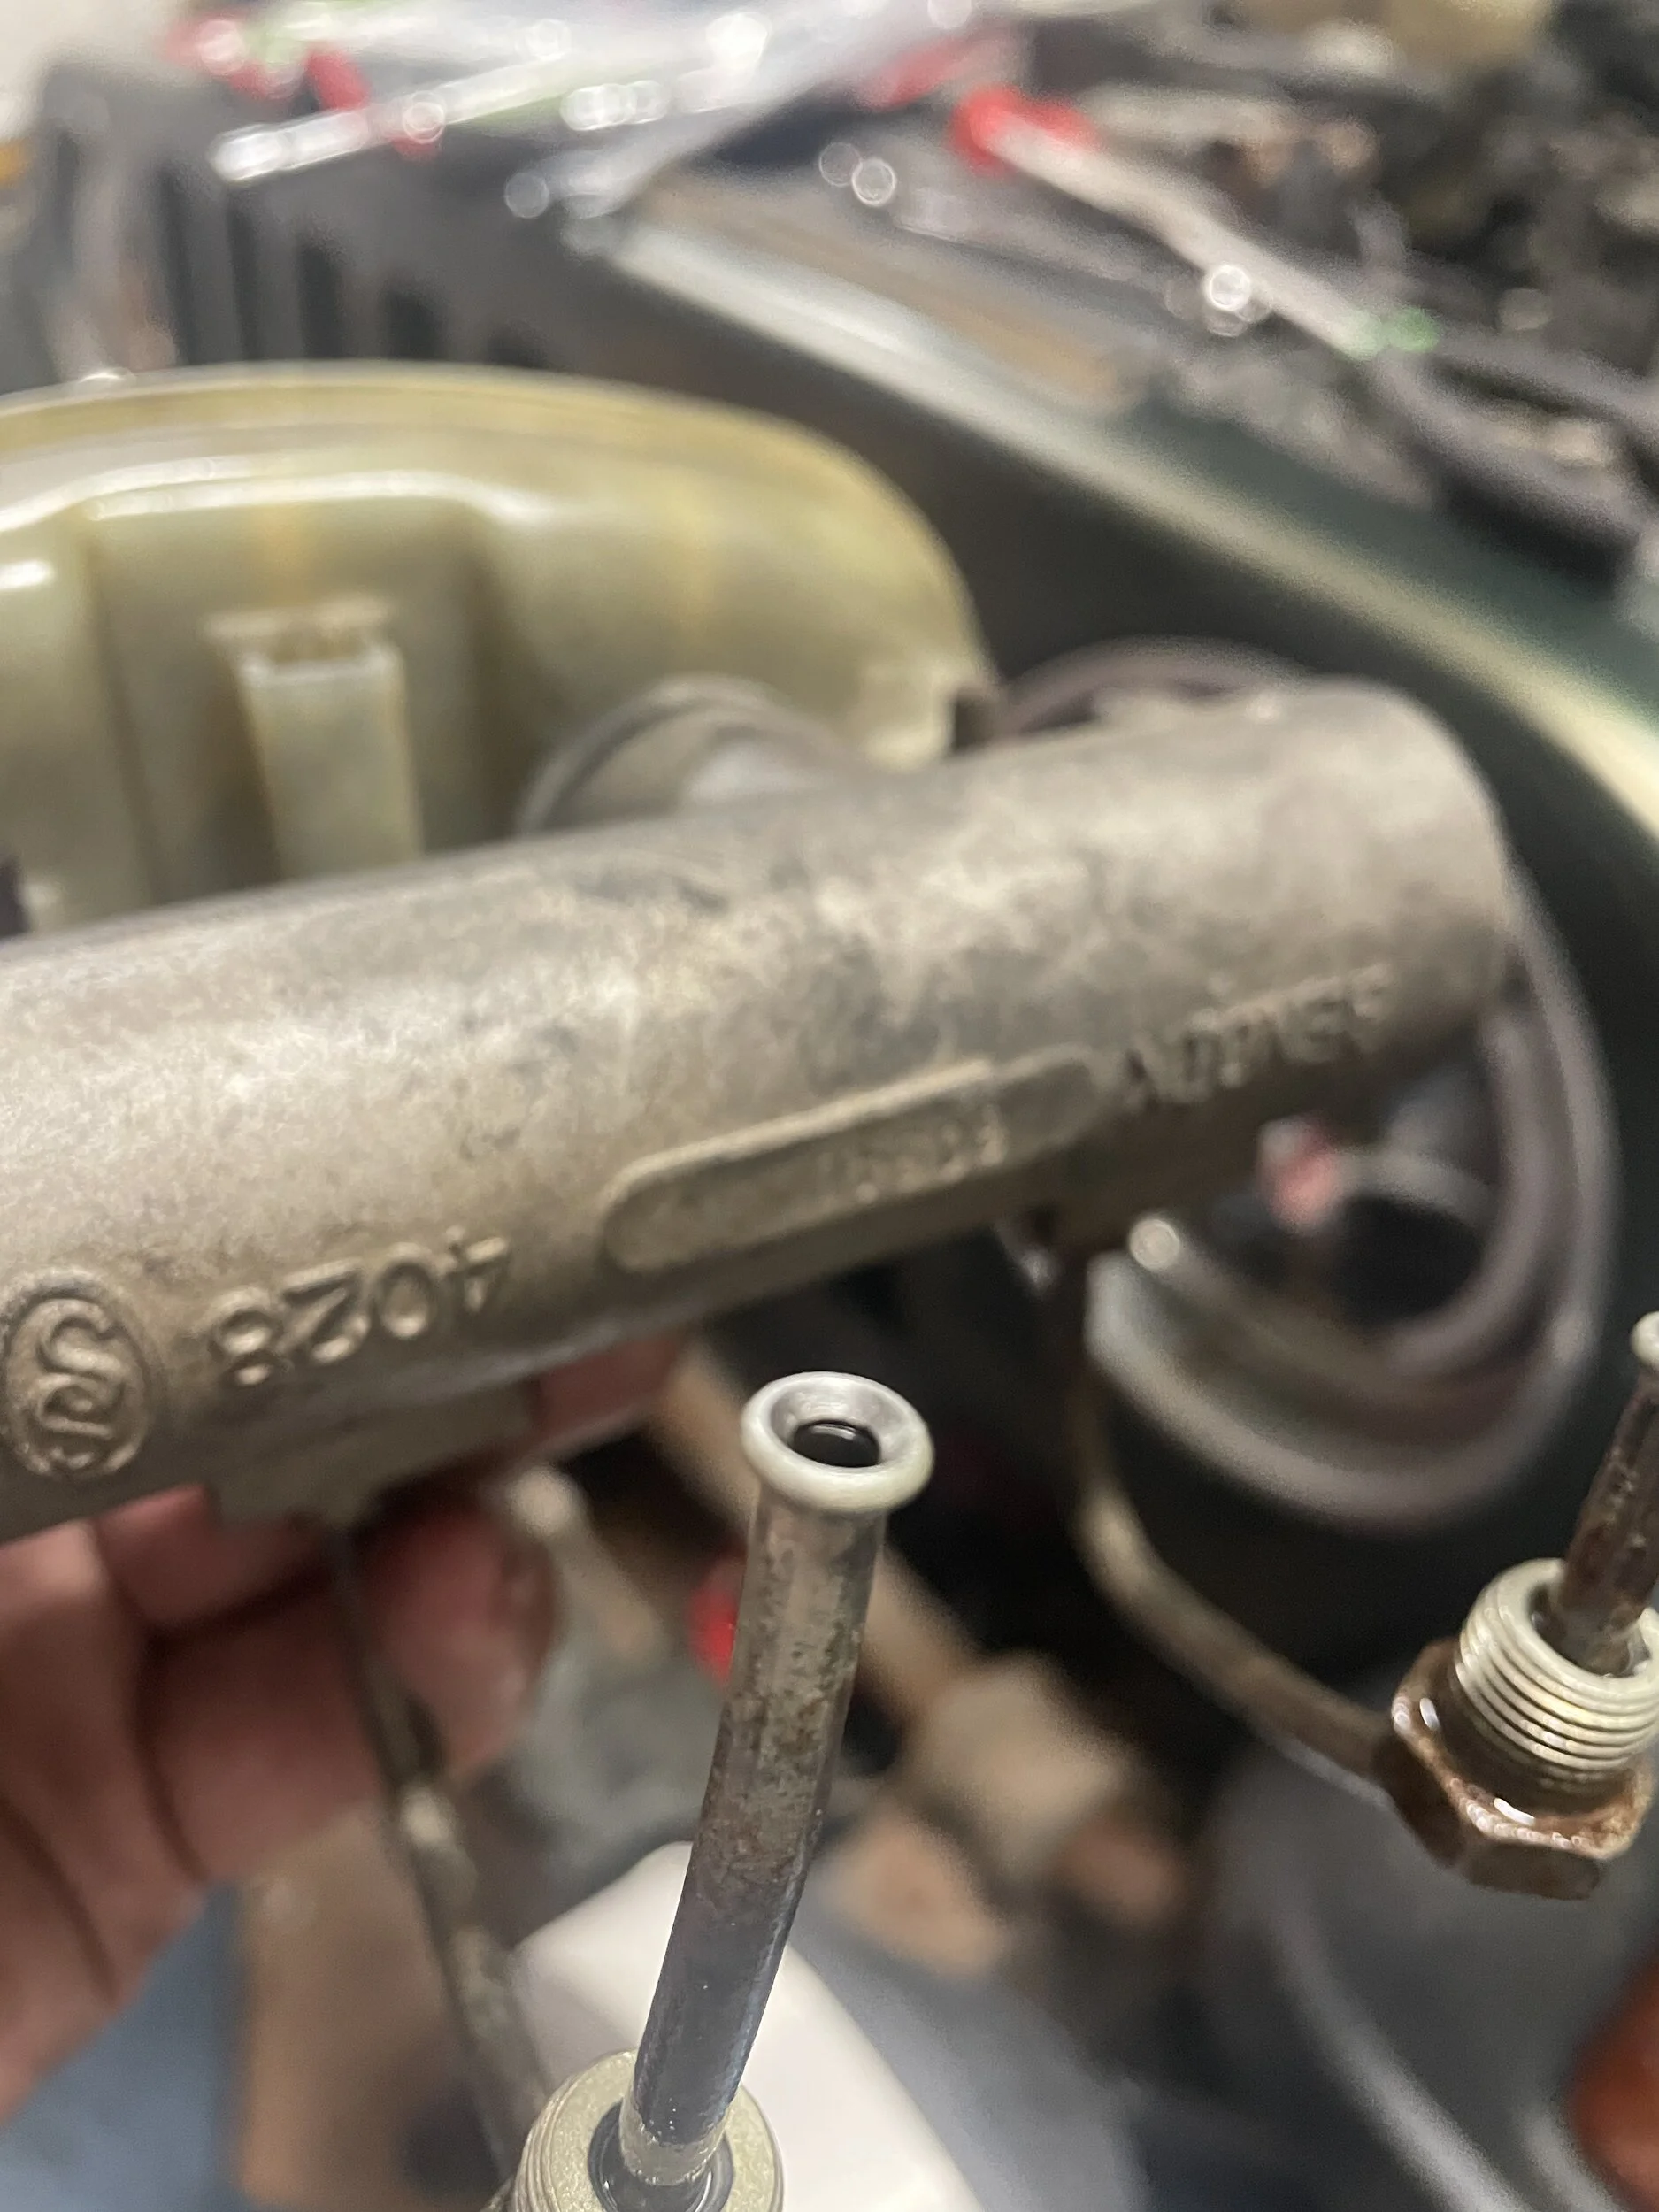
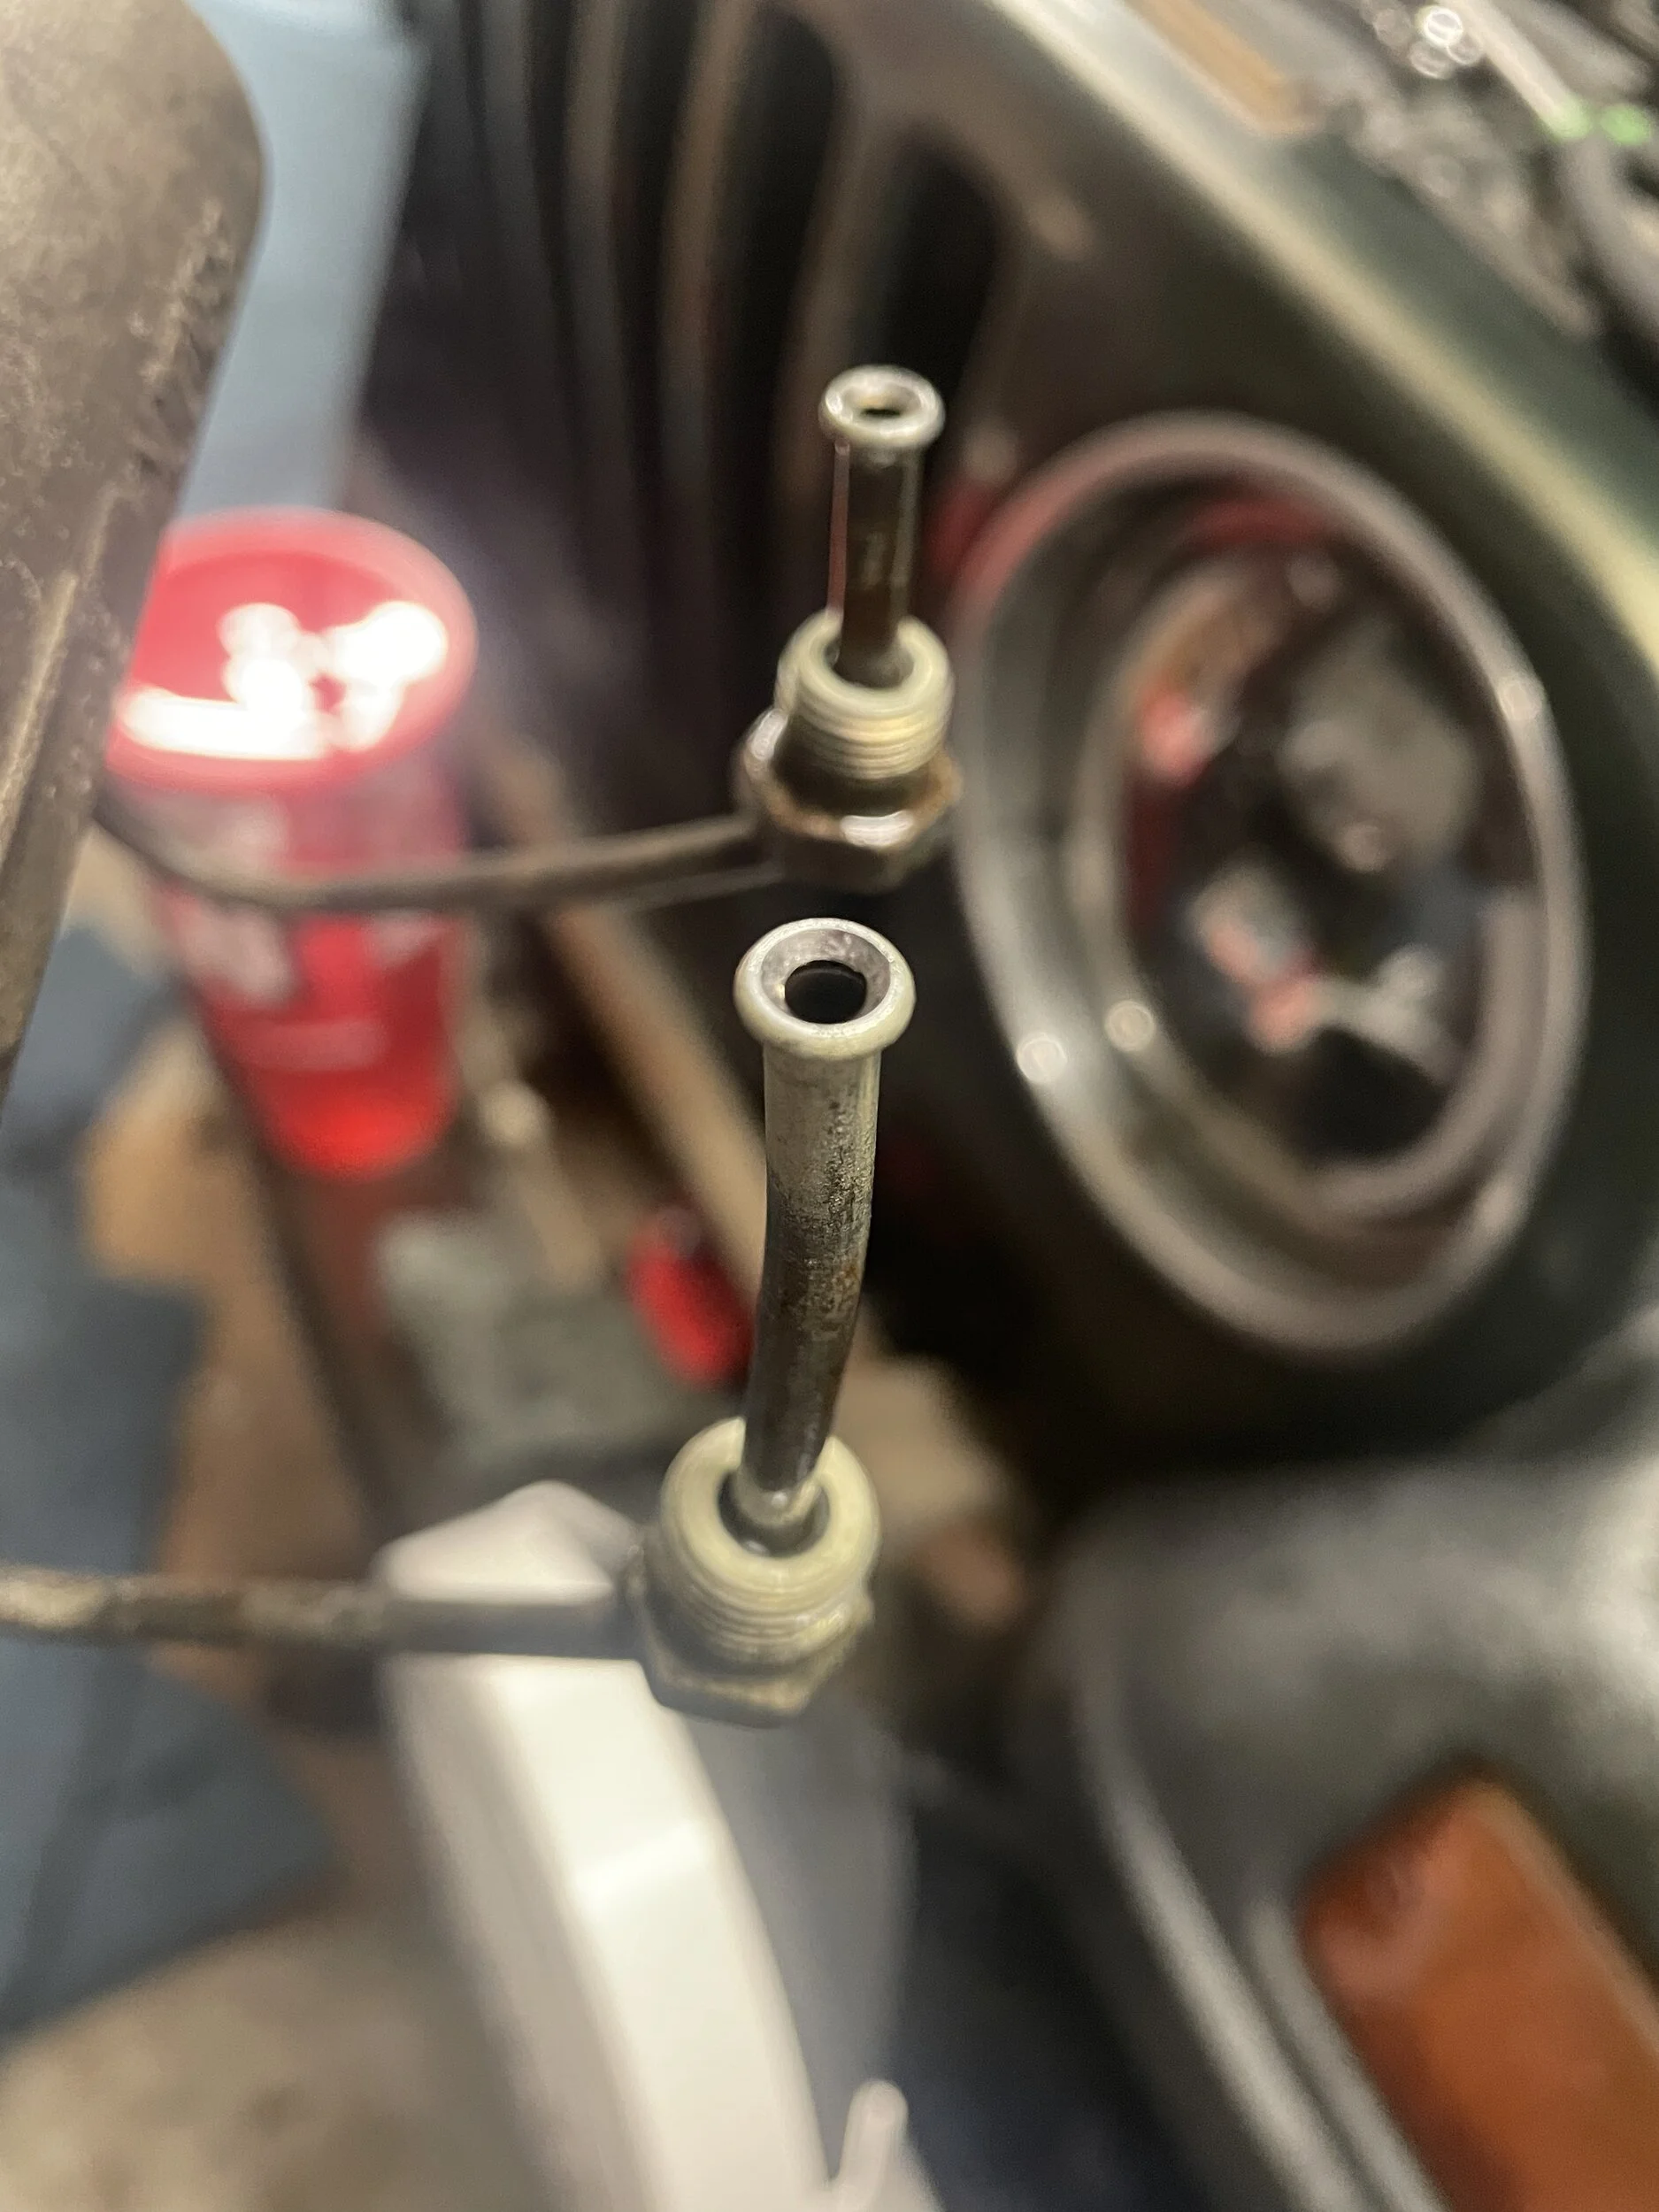
The flares themselves also don’t really look like double flares I’ve seen posted, or that I’ve been able to create. I might just suck at flaring…I bet we determine that before this thread is over. These are off the old lines where they go into the combo block. They have what looks to be a 45* angle on the inside of the opening.
55E1D232-61CA-4E27-A1F4-DC368385008B.webp


71EE57E7-9A30-44AF-83DA-BFBD185FAC30.webp


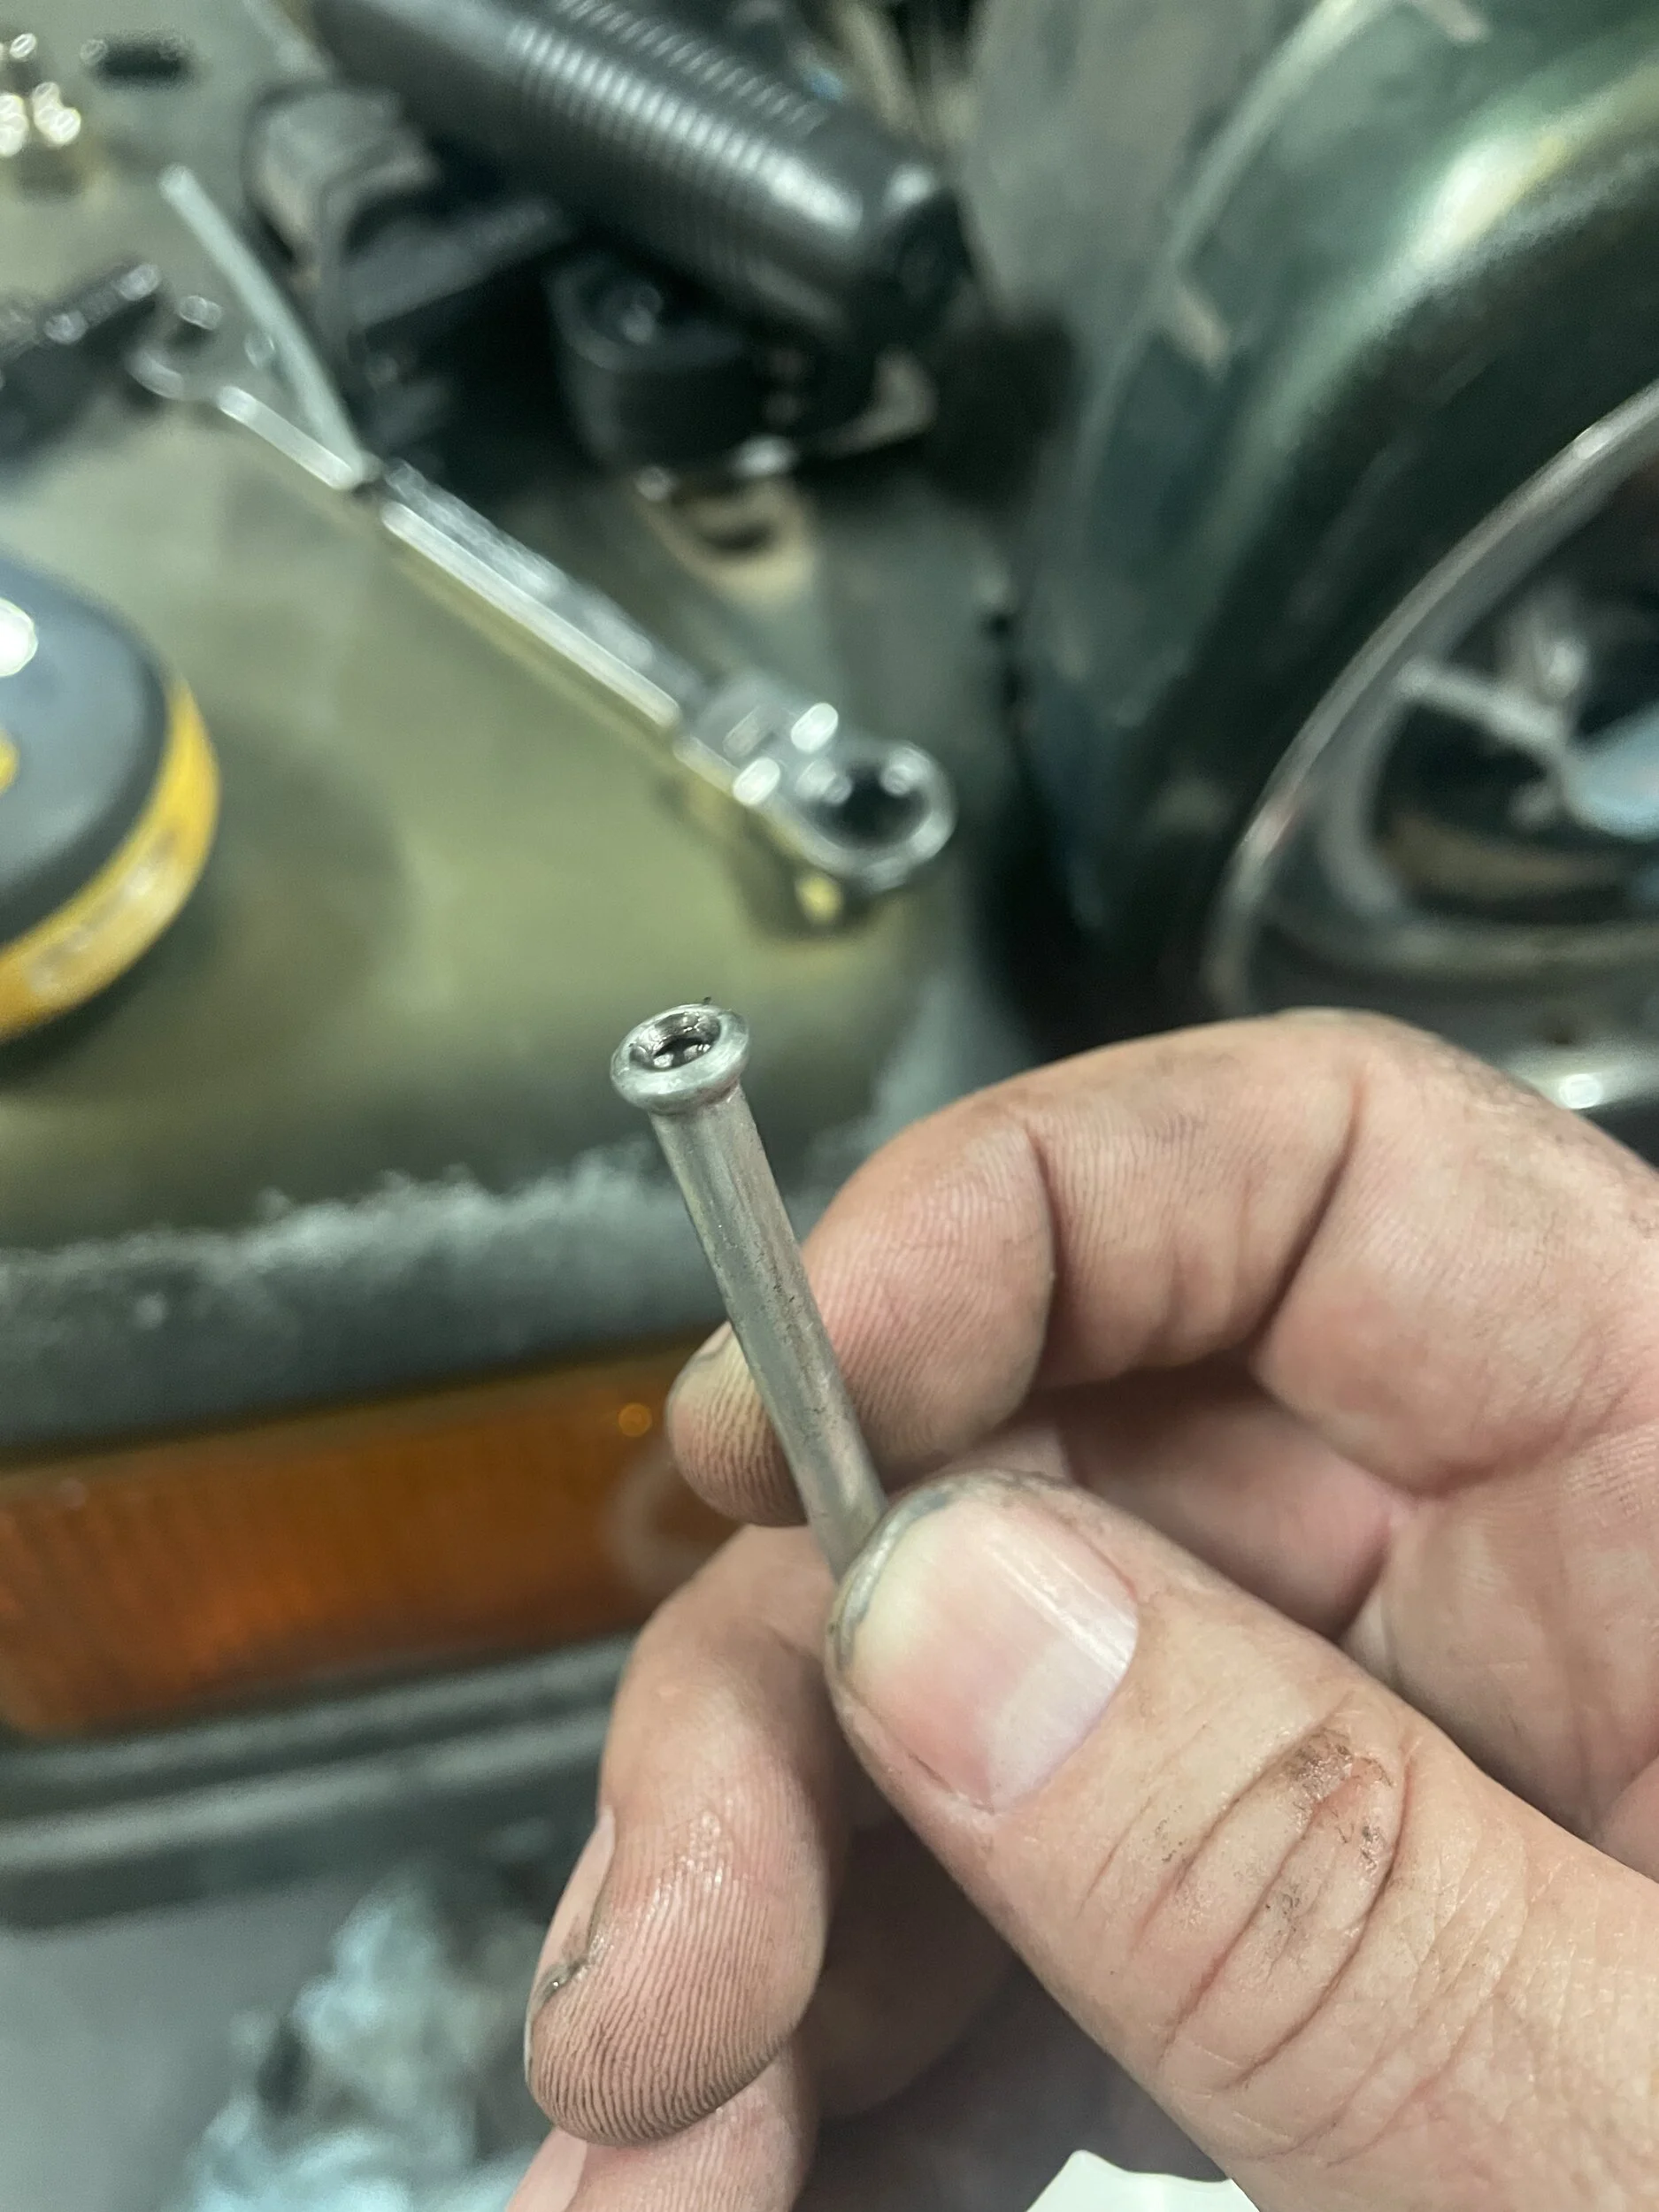
My flares don’t quite have that same inverted “45” on the inside.

801CE9BB-60F5-4CFA-934C-9B663EEA3A55.webp


Happy re receive feedback on my flares, but I’m really trying to understand what I’m seeing down in those bores on the combo block. Does that nipple go *into* the opening on the flare? Am I overthinking this?

Halp.
 
I’m replacing the master cylinder on daughter’s jeep, and the lines are rounded & effectively seized at the m/c. So I’m replacing the shorty lines as well. And since I can’t find them for sale anywhere, I figured I’d learn how to do my own flares.

I’ve probably read every thread out there on the fittings in this area but now that I’ve got it all apart, I have new confusion about the flares at the combo block. They look like this, which isn’t anything I’ve seen anywhere. Note the “nipple” down in the bore.
View attachment 507578

Everything I’ve read says that the flares here are double flares. The info on fedhillusa.com describe a double flare opening as a volcano sort of thing, but that’s not what this looks like, at least not to my eye.

View attachment 507581

The flares themselves also don’t really look like double flares I’ve seen posted, or that I’ve been able to create. I might just suck at flaring…I bet we determine that before this thread is over. These are off the old lines where they go into the combo block. They have what looks to be a 45* angle on the inside of the opening.
View attachment 507582

View attachment 507584

My flares don’t quite have that same inverted “45” on the inside.
View attachment 507583


Happy re receive feedback on my flares, but I’m really trying to understand what I’m seeing down in those bores on the combo block. Does that nipple go *into* the opening on the flare? Am I overthinking this?

Halp.
You need to crank the flaring tool down a bit more but even then, what you've done should seal fine. The bottom of the hole in the combo block ports are inverted flare exactly like the brass fitting you showed. Check your flaring tool for the degree of angle, it may be the JIC 37 degree for AN stuff.
 
Here's a post by @mrblaine that should answer your question. If not, you might ask him since he's an expert on brakes.

https://wranglertjforum.com/threads/2004-tj-rear-brake-line-questions.61071/#post-1097141

When I said I read every thread on this topic, I wasn't kidding. That one didn't really answer my specific questions.

The bottom of the hole in the combo block ports are inverted flare exactly like the brass fitting you showed. Check your flaring tool for the degree of angle, it may be the JIC 37 degree for AN stuff.

I have this flaring tool, which states its for 3/16" tube and will make double & bubble flares. The reviews on it are very solid, with pretty much all the bad reviews having to do with a wrinkle in the flare which isn't a problem I've had.

You need to crank the flaring tool down a bit more but even then, what you've done should seal fine.

I don't know that I can tighten the die any more, but I'll give it a shot. I'll also mark the tube on the backside, maybe it's sliding out of the tool? Good to know that what I have will work, but I'd like to try make them closer to factory if I can (without spending even more money on this side quest).
 
When I said I read every thread on this topic, I wasn't kidding. That one didn't really answer my specific questions.


I have this flaring tool, which states its for 3/16" tube and will make double & bubble flares. The reviews on it are very solid, with pretty much all the bad reviews having to do with a wrinkle in the flare which isn't a problem I've had.


I don't know that I can tighten the die any more, but I'll give it a shot. I'll also mark the tube on the backside, maybe it's sliding out of the tool? Good to know that what I have will work, but I'd like to try make them closer to factory if I can (without spending even more money on this side quest).

The tube sliding out is the problem with stainless tube. Should not be a problem with that one. I'll get a pic of what ours do as a comparison if I can get to it today. The description does state it is 45 degree so if that is accurate, that is what you need.

FYI, the wrinkle in the flare is likely due to crap tube. It would be pretty difficult to make a flaring tool do that otherwise. The mechanics of what it is doing just don't have anything inherent to the method that would wrinkle a flare.

The other thing that is critical is the amount of material past the clamp. Too short and you won't turn enough of the tube inward for the doubled up part. Too long and the diameter of the flare will generally be too large to fit into a typical 3/8-24 bore. Not applicable with the larger diameter threads, but we run into that from time to time.
 
The other thing that is critical is the amount of material past the clamp. Too short and you won't turn enough of the tube inward for the doubled up part. Too long and the diameter of the flare will generally be too large to fit into a typical 3/8-24 bore. Not applicable with the larger diameter threads, but we run into that from time to time.
Yeah, that's what's great about this tool; it's got a bolt that sets the "stickout" and there's a hole where you can actually see it. No guesswork involved. But it may still require some skill. ;).

I'm using this copper nickel tube, in the interest of full transparency.
 
I tried again tonight, no change despite taking even greater care at each step. But it may not even matter. Bending these short lines might actually be beyond the scope of my skillset. Even if I can get the flares perfect, getting these compound bends right is going to be a challenge. It might be easier if I make them much longer than what is necessary....the difficulty is that the bends on the OEM lines are too close to the flares so you end up in a catch-22 on the sequencing. If you have the nuts in place, you can't use the tube bender, if you slide the nuts down and then bend, the nuts can't get around the bend.

I could use a socket or something to do the bend, but then I realize that getting these bends in the right place is going to be hard. Where you put one bend determines (a) where the other bend will go AND (b) how long the other end needs to be. Now I know why my old CJ had a big curly Q on the end of some of the lines. Much easier to maneuver that sort of thing. Of all the lines on the jeep, these 2 are most likely the hardest ones to DIY.

I found a set of the shorty lines on ebay, I think I'm going to buy them and cut my losses. I knew at some point I would find a project that I couldn't complete on my own, but I sure didn't expect it to be this one!
 
I ordered the shorty lines off eBay for $20, that’s WAY less than I’m into this diy project for after fitting, tube, tools…

But then with a fresh head I gave it another shot. I probably could’ve made the bends cleaner if I gave it 2 or 3 more attempts, but this is probably going to be good enough for now. There’s probably a formula for where to set the bends for a given tube thicknes, but the stuff is flexible enough that “close” works.

No idea if the flares are good enough, but I guess I’m going to find out. Next up: bench bleeding the new m/c.

6095F2D6-08E2-47CC-A069-9F207D87414C.webp
