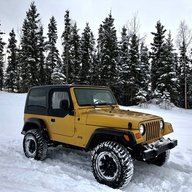
Building an E-Ticket ride - 06 LJ

I spent a couple of weeks away from the LJ, working on my new JL (bumpers/winch/rockers) and starting the preparations for our upcoming move to AZ. Moving really sucks and I hope this is it for a while. We will be putting out stuff into storage initially as we continue looking for a suitable place and my need for a shop is ruling out 90% of the stuff we see. Not going to rush this one so planning to stay in some temporary digs initially while we look.

I will have access to my LJ and plan to wheel it as much as I can. Hopefully the future repairs and mods will be basic wrenching until I can get back into a shop with a lift and the ability to weld.

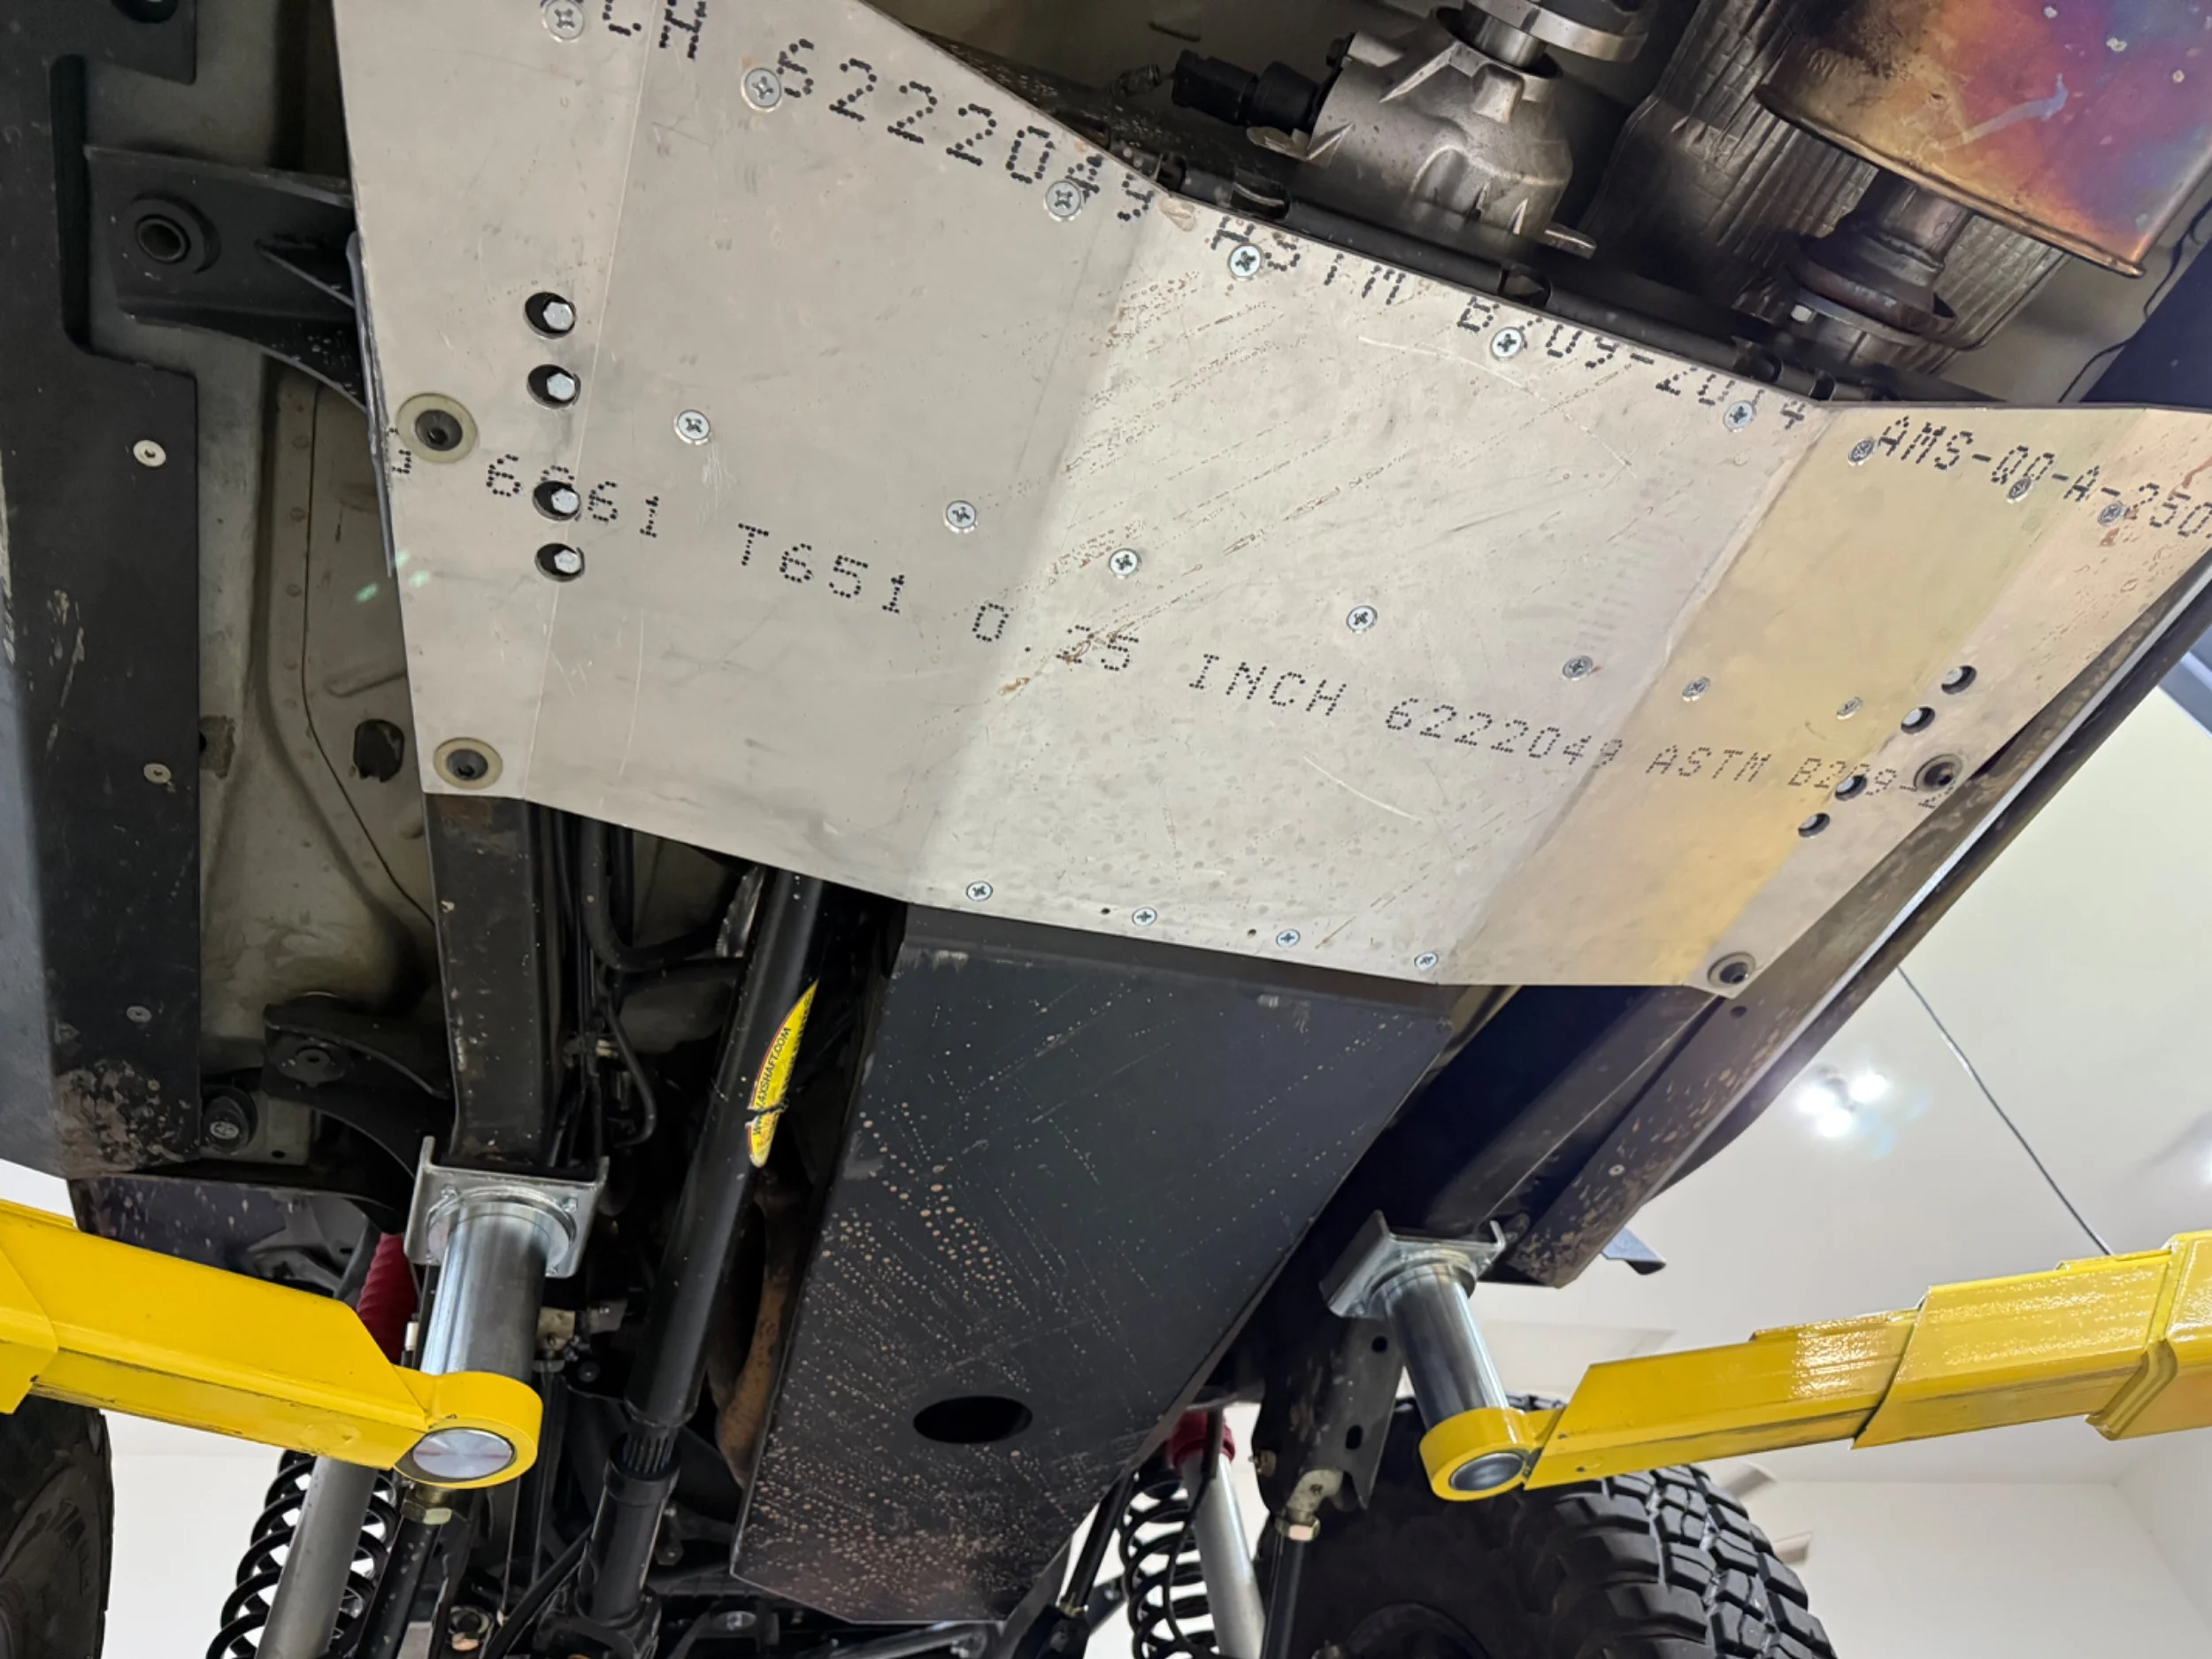
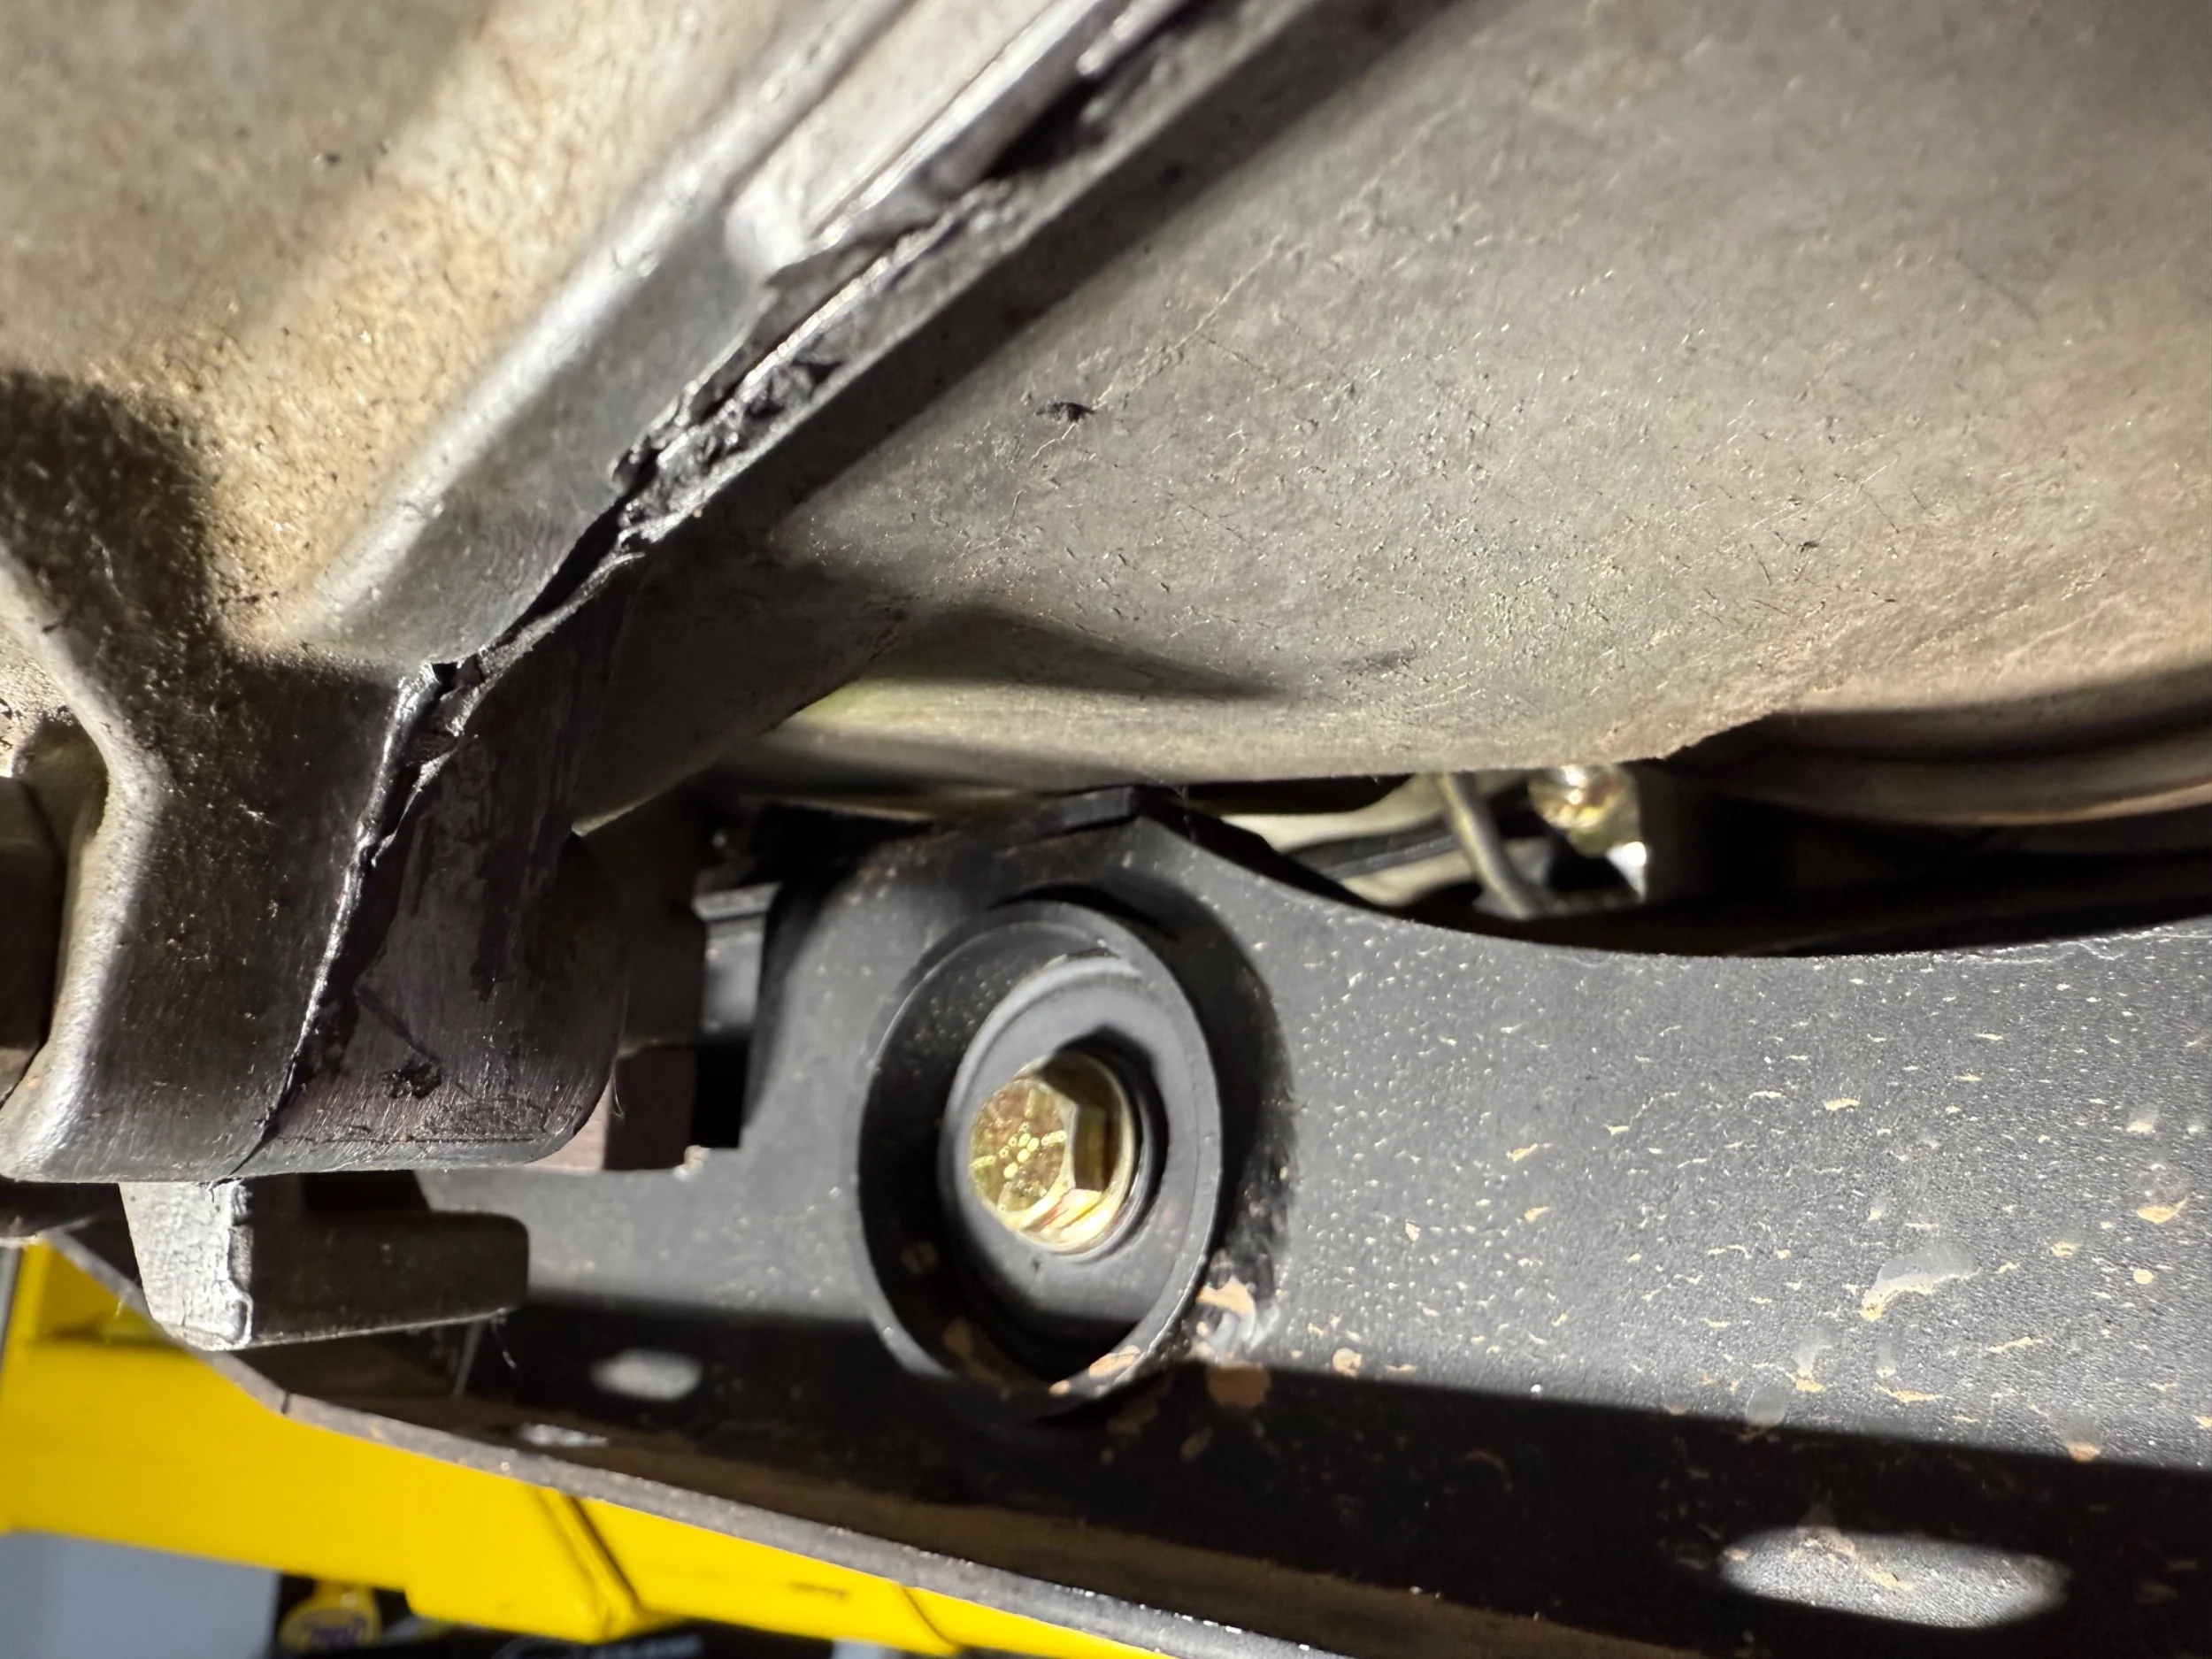
Back to the post Moab fixes, today I addressed the clearance issues with the Savvy UA. I notice less clearance for the front driveshaft, SYE and exhaust after the trip vs the post mod condition. In keeping with the them of my rig in Moab, the damn transmission mount bolts had backed off!

This caused the crossmember to rotate and cause my clearance issues.

The front driveshaft was rubbing on crossmember:
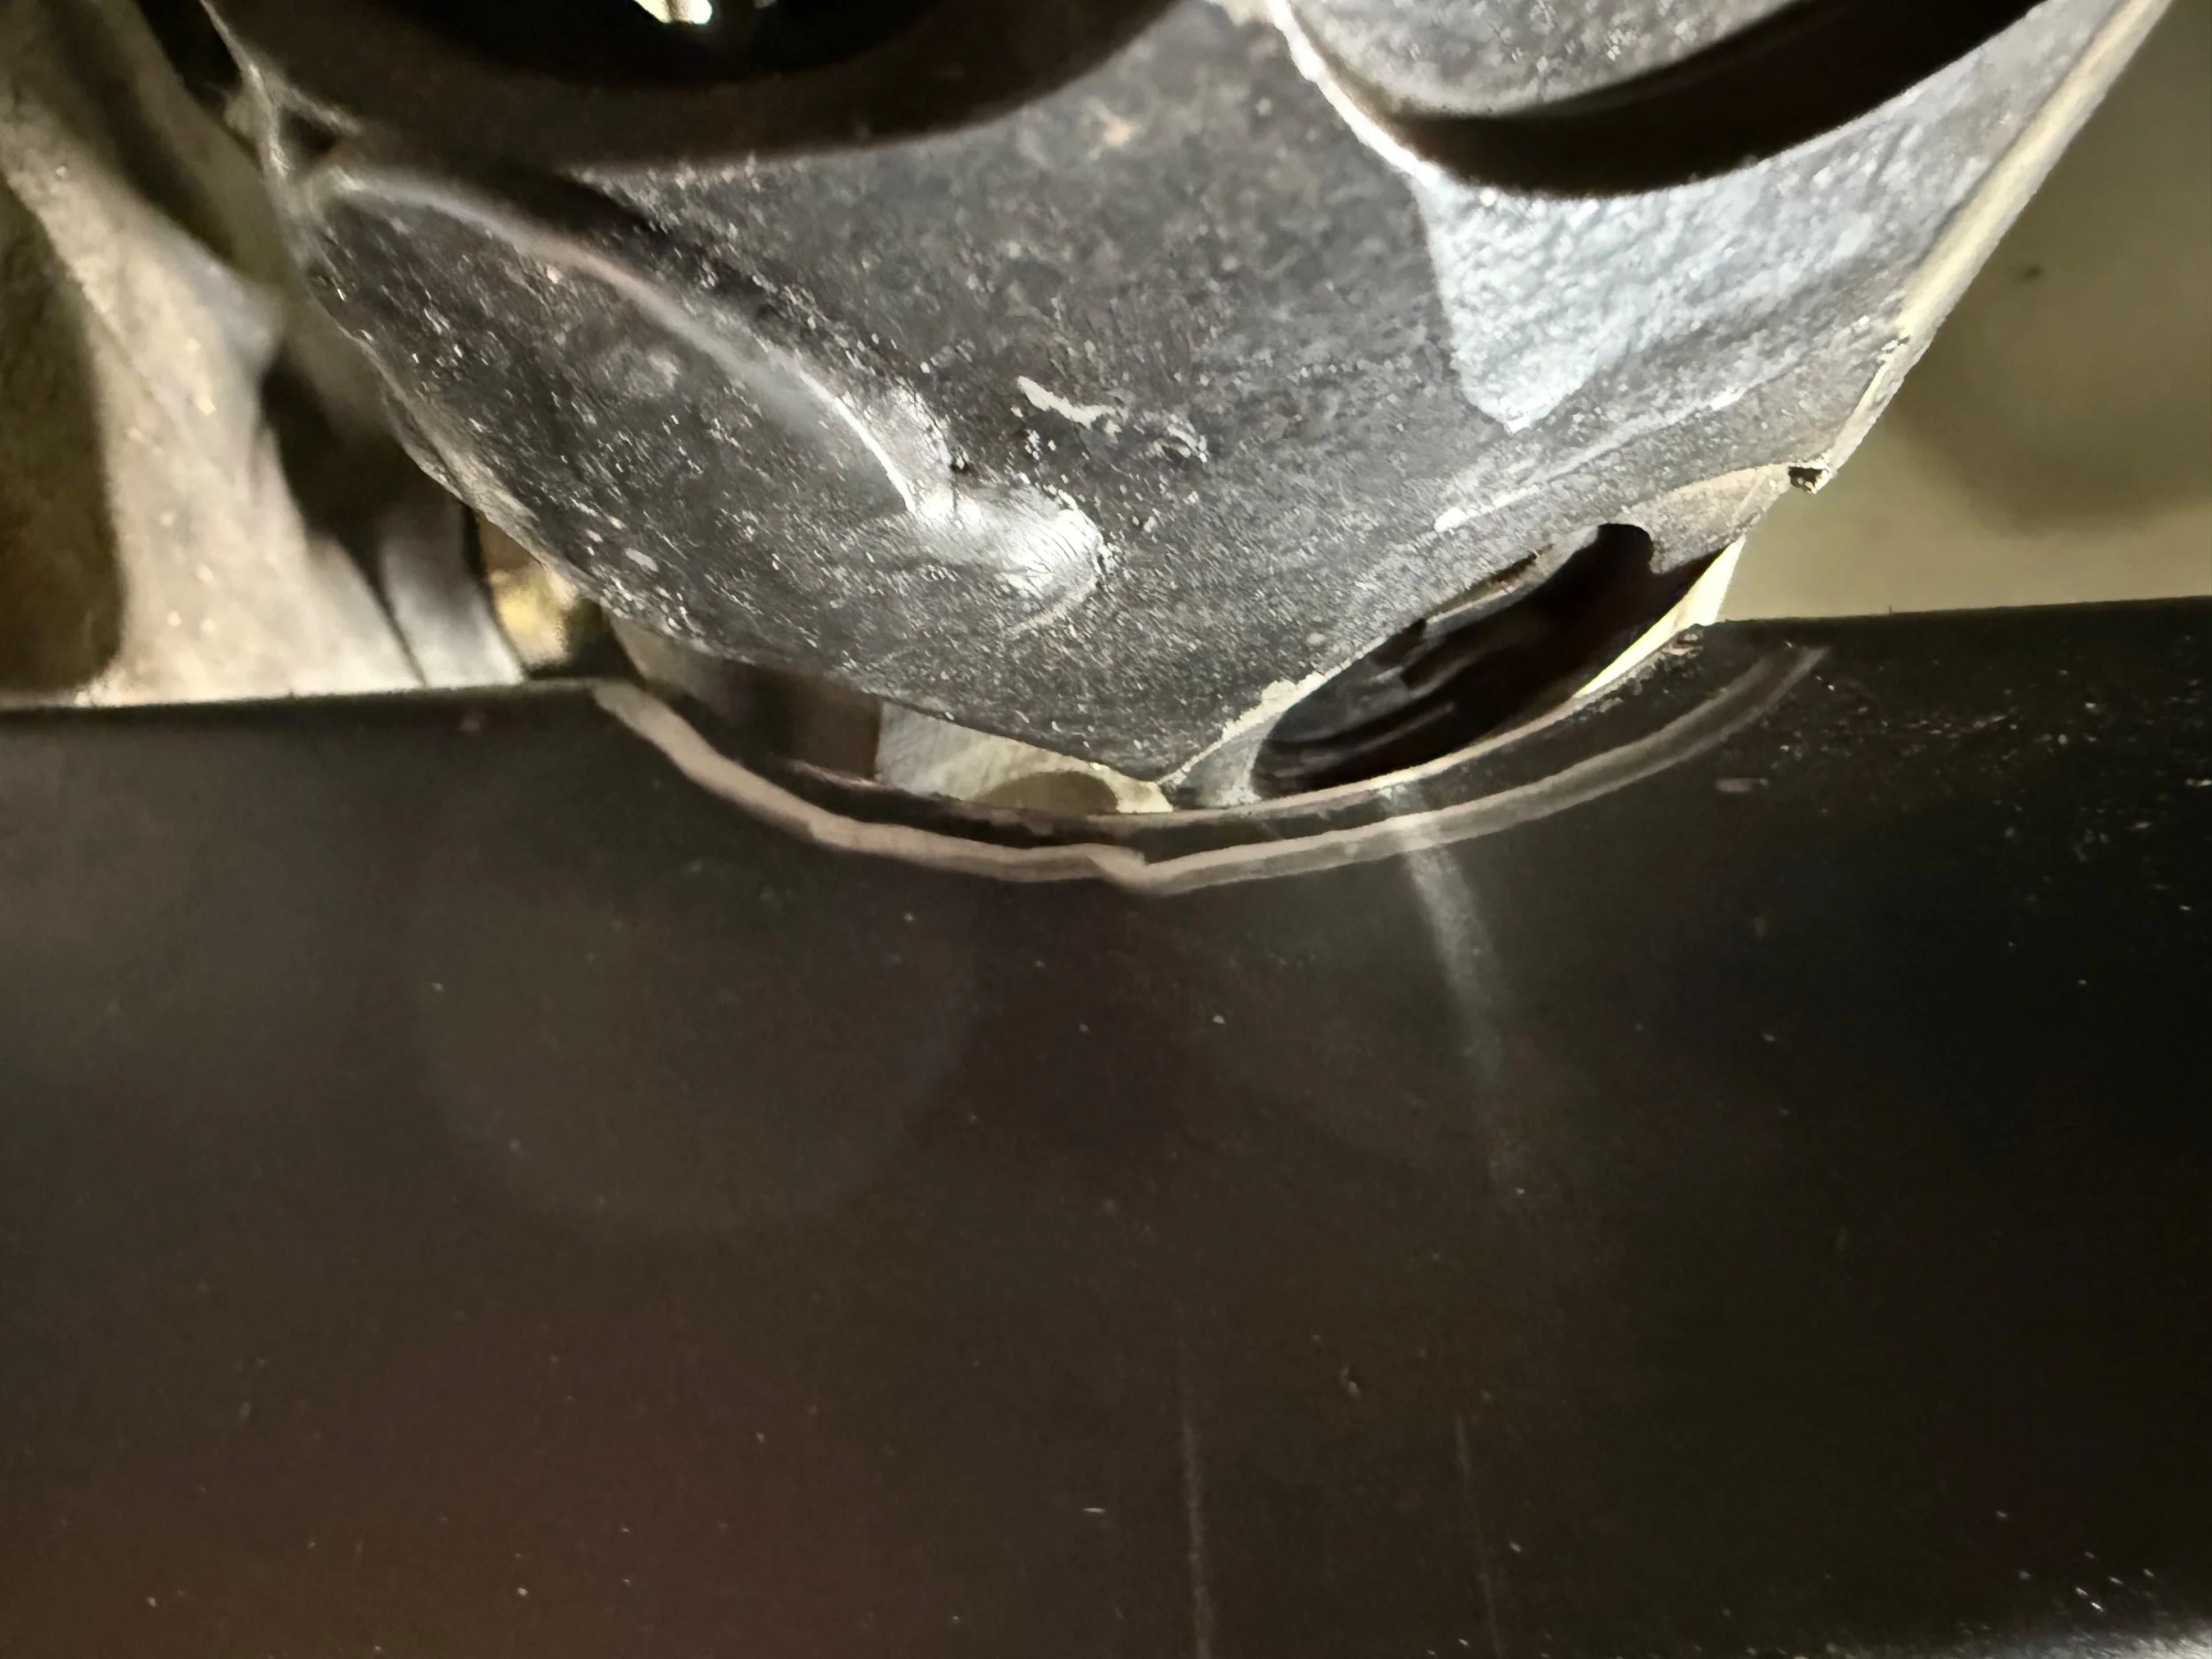
IMG_9105.jpeg


Contact between TC body and crossmember:
IMG_9107.jpeg


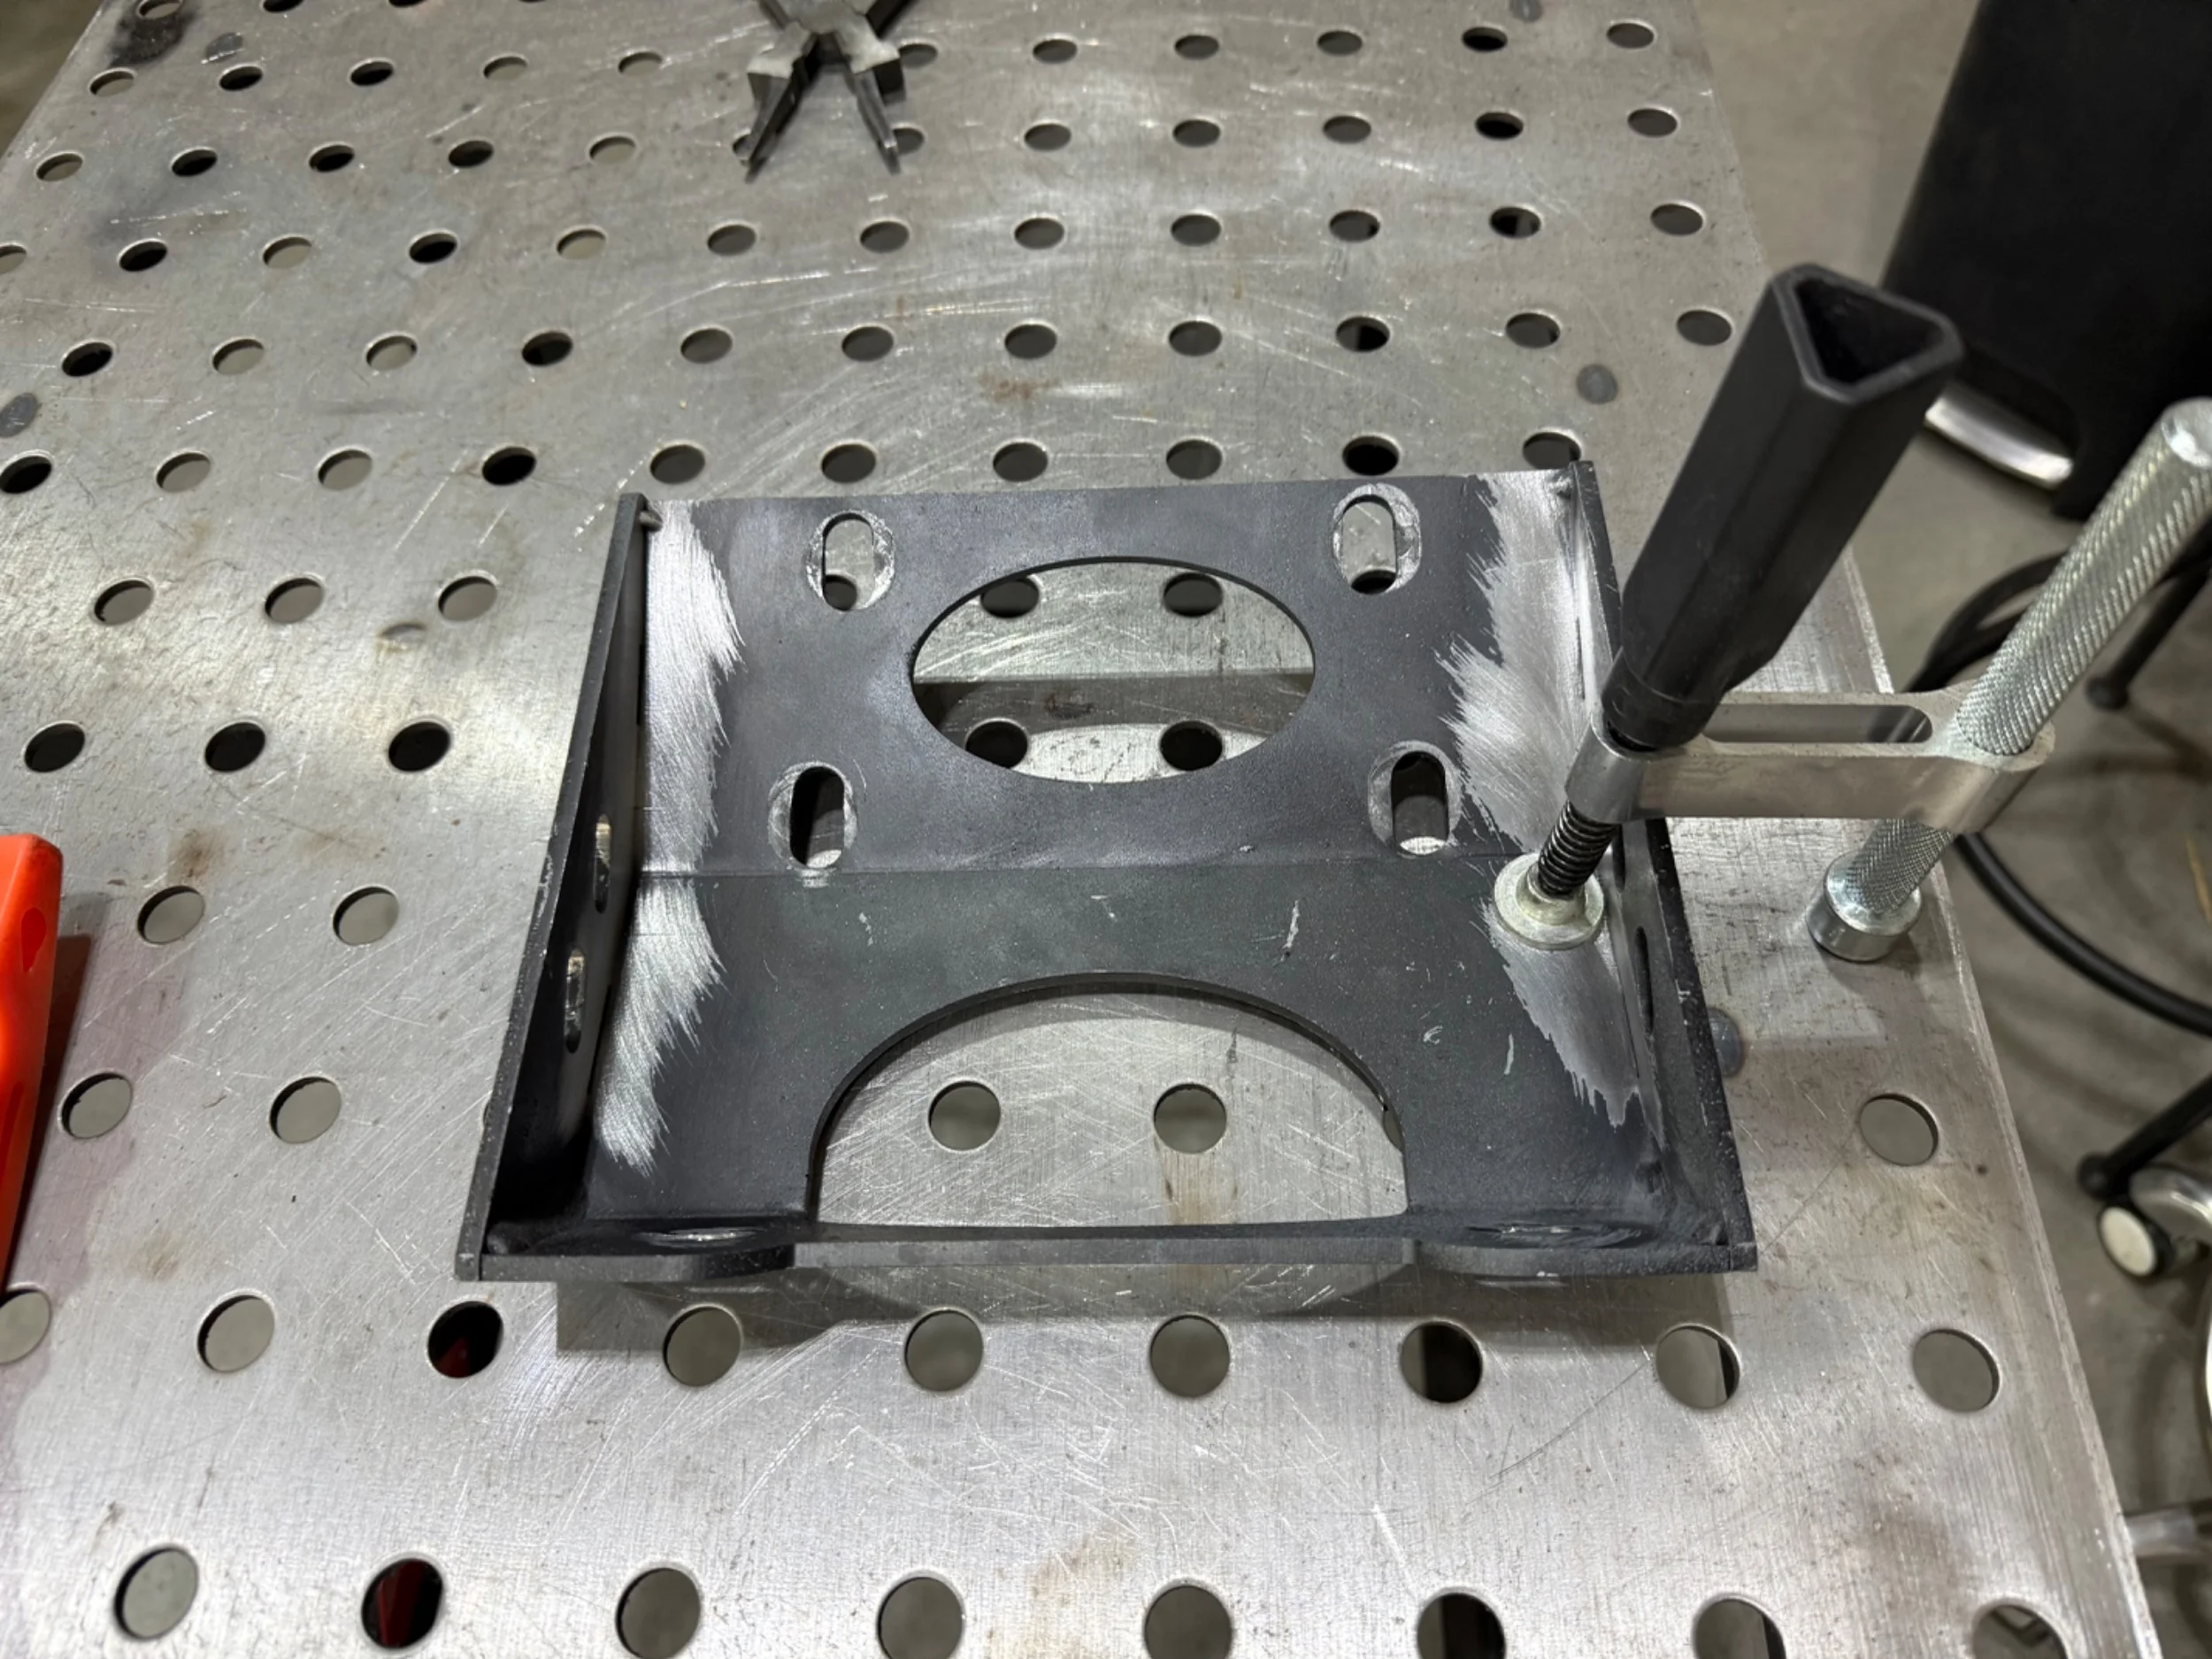
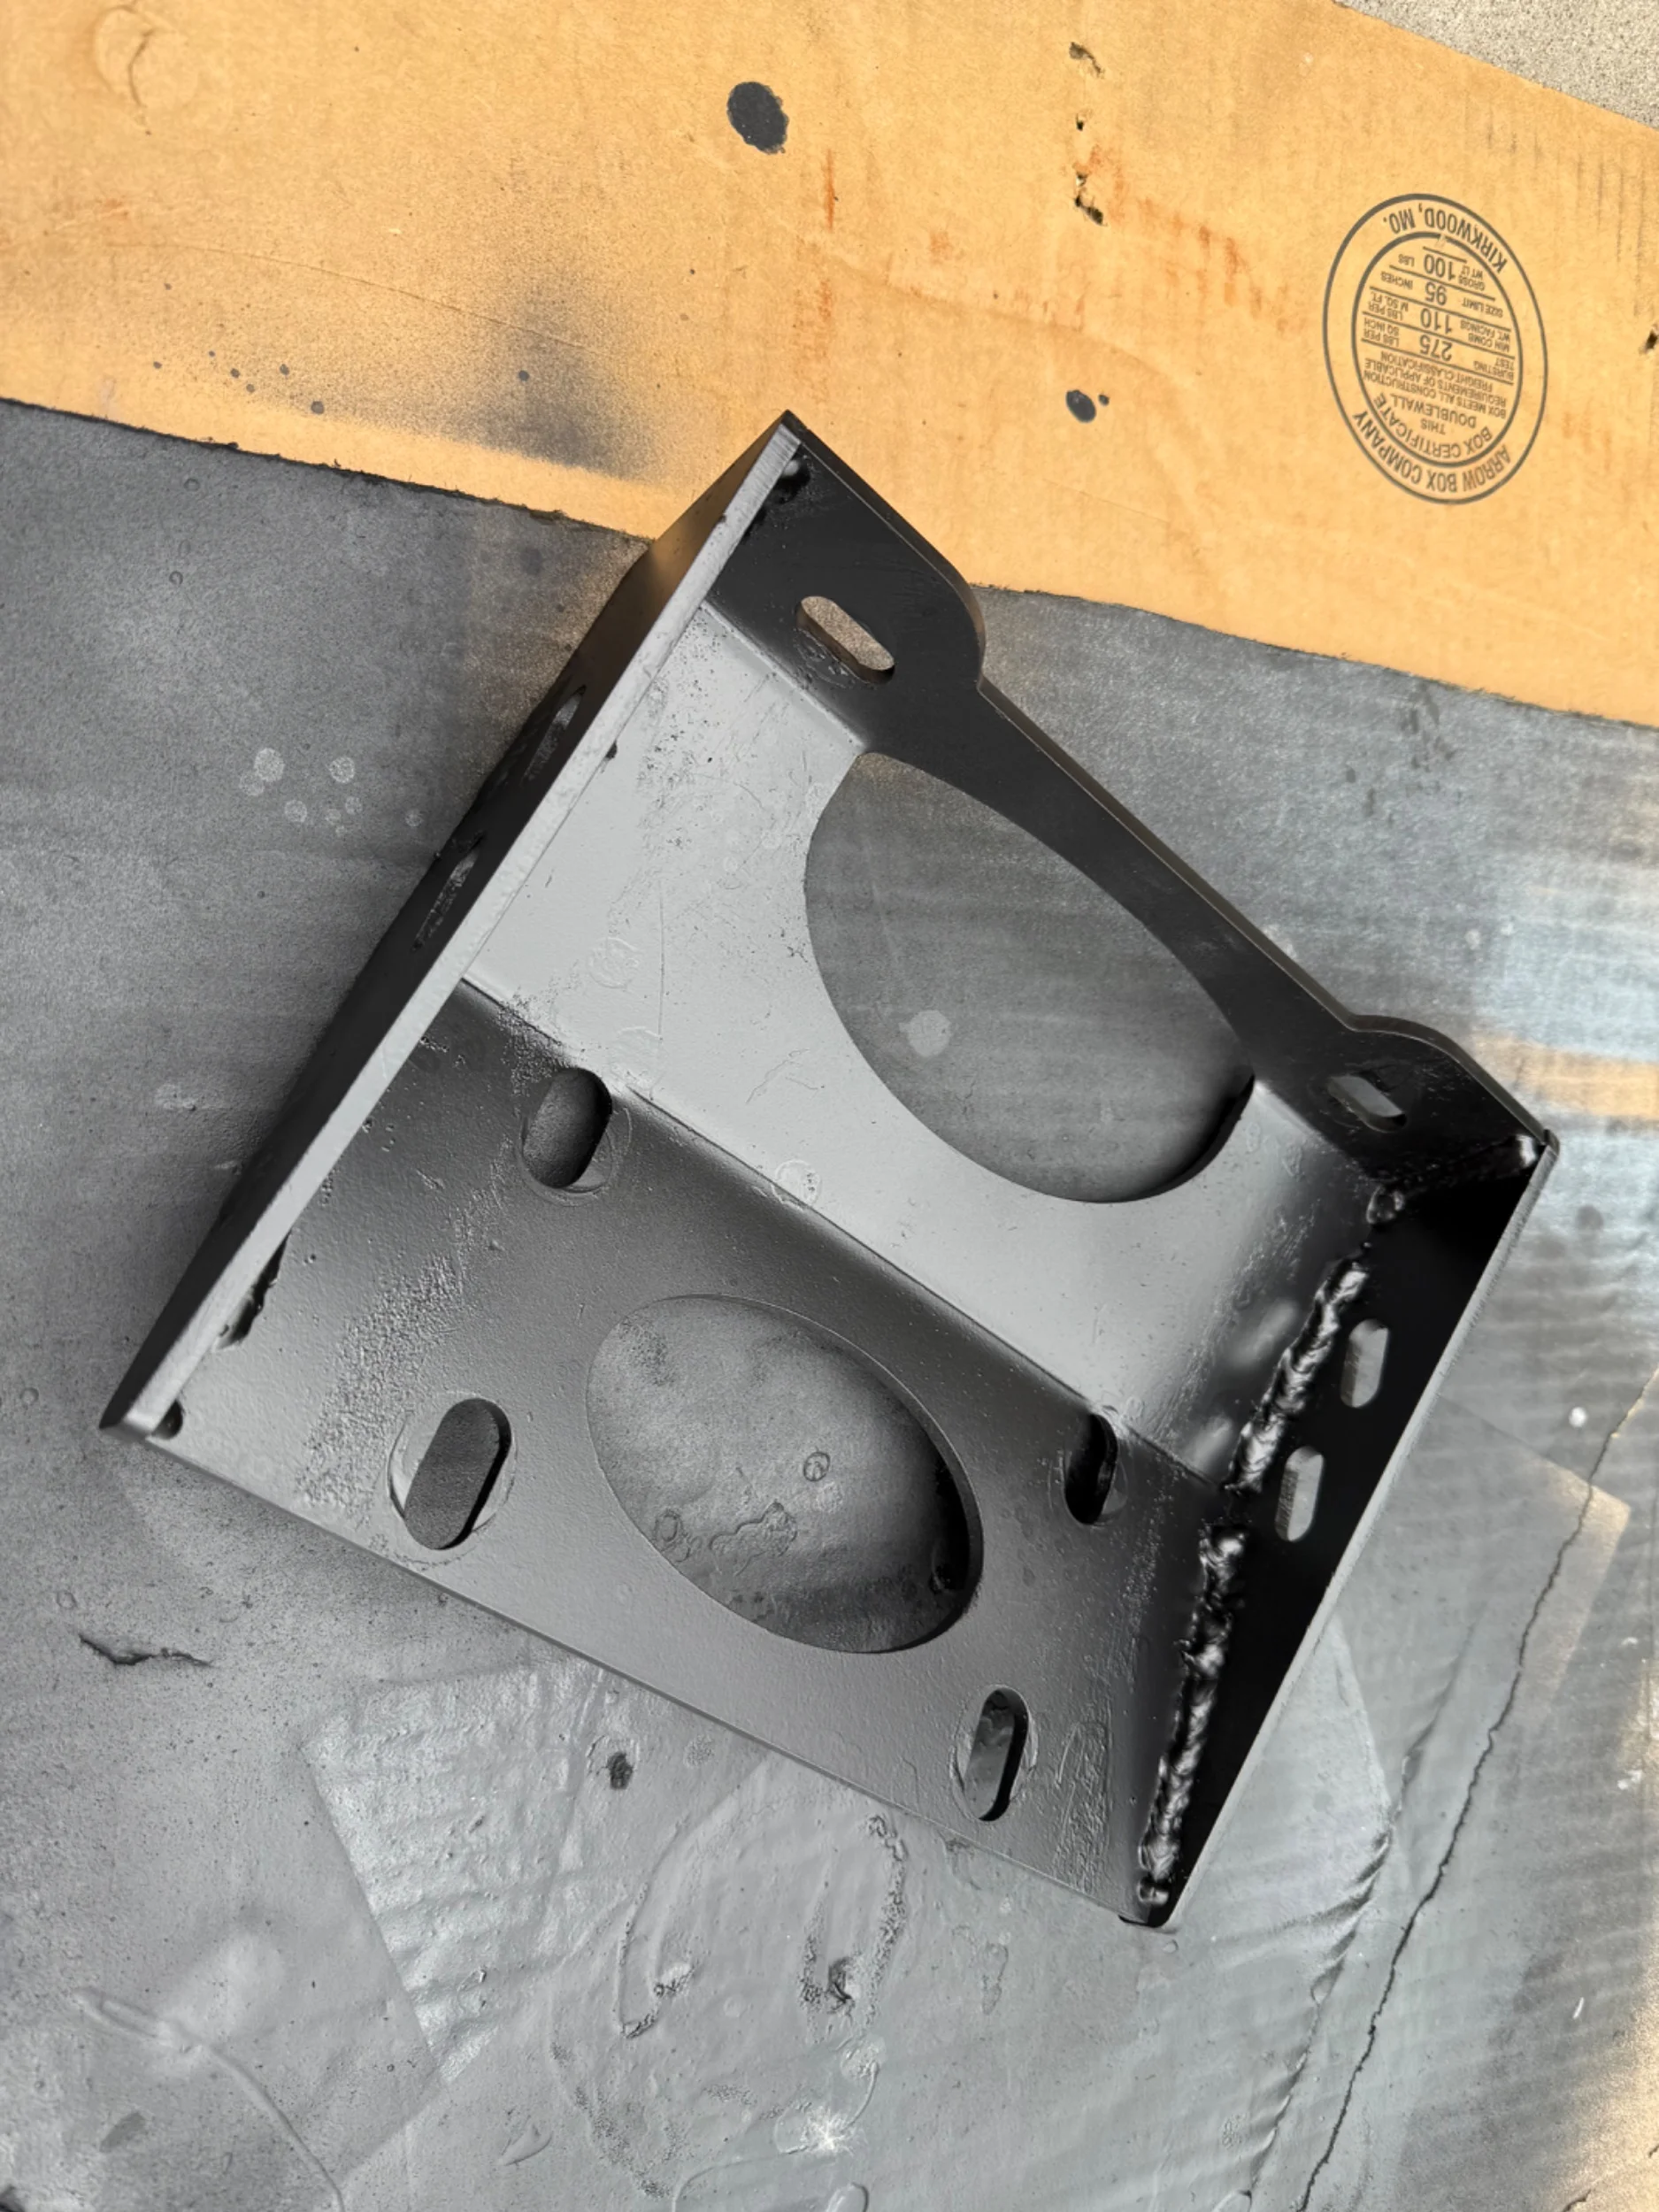
While in there, I added some weld to the Savvy mount bracket. Sorry missed the pics of the unpainted booger welds:
IMG_9108.jpeg


IMG_9110.jpeg


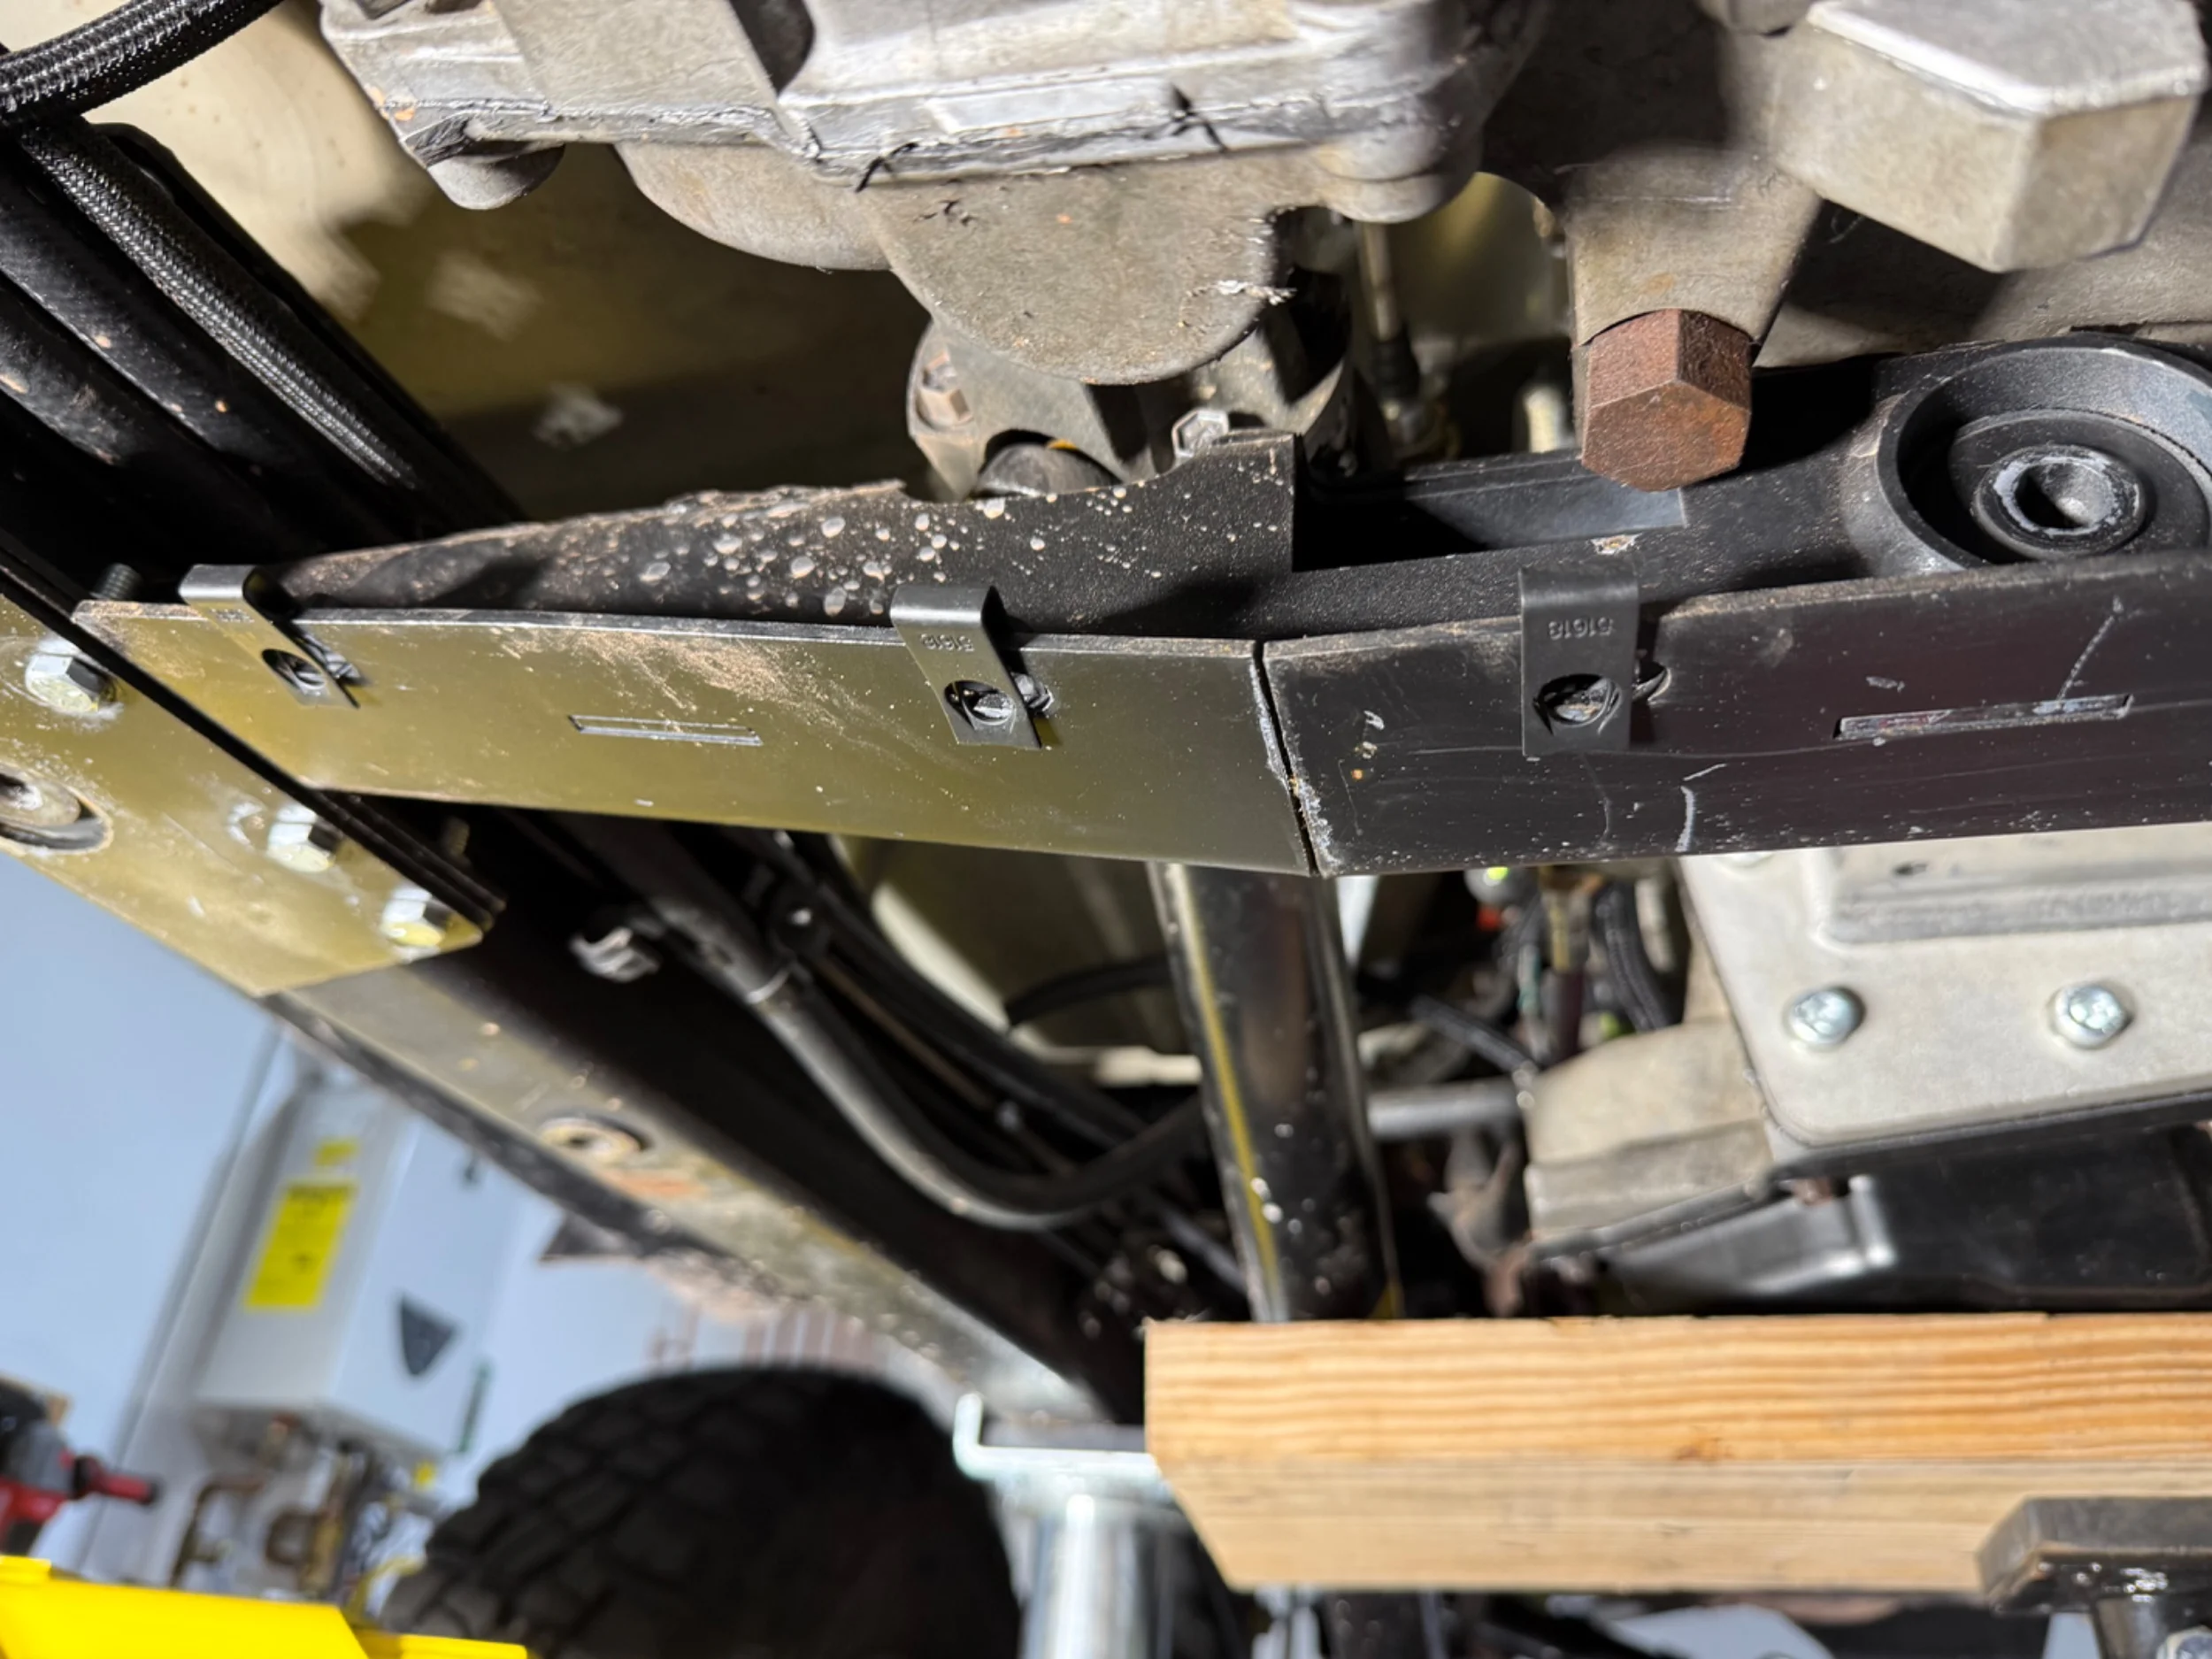
Also while in there installed clip nuts on the crossmember:
IMG_9109.jpeg


After reinstalling bracket tight using plenty of thread locker, clearance is fine on the driveshaft and the TC:
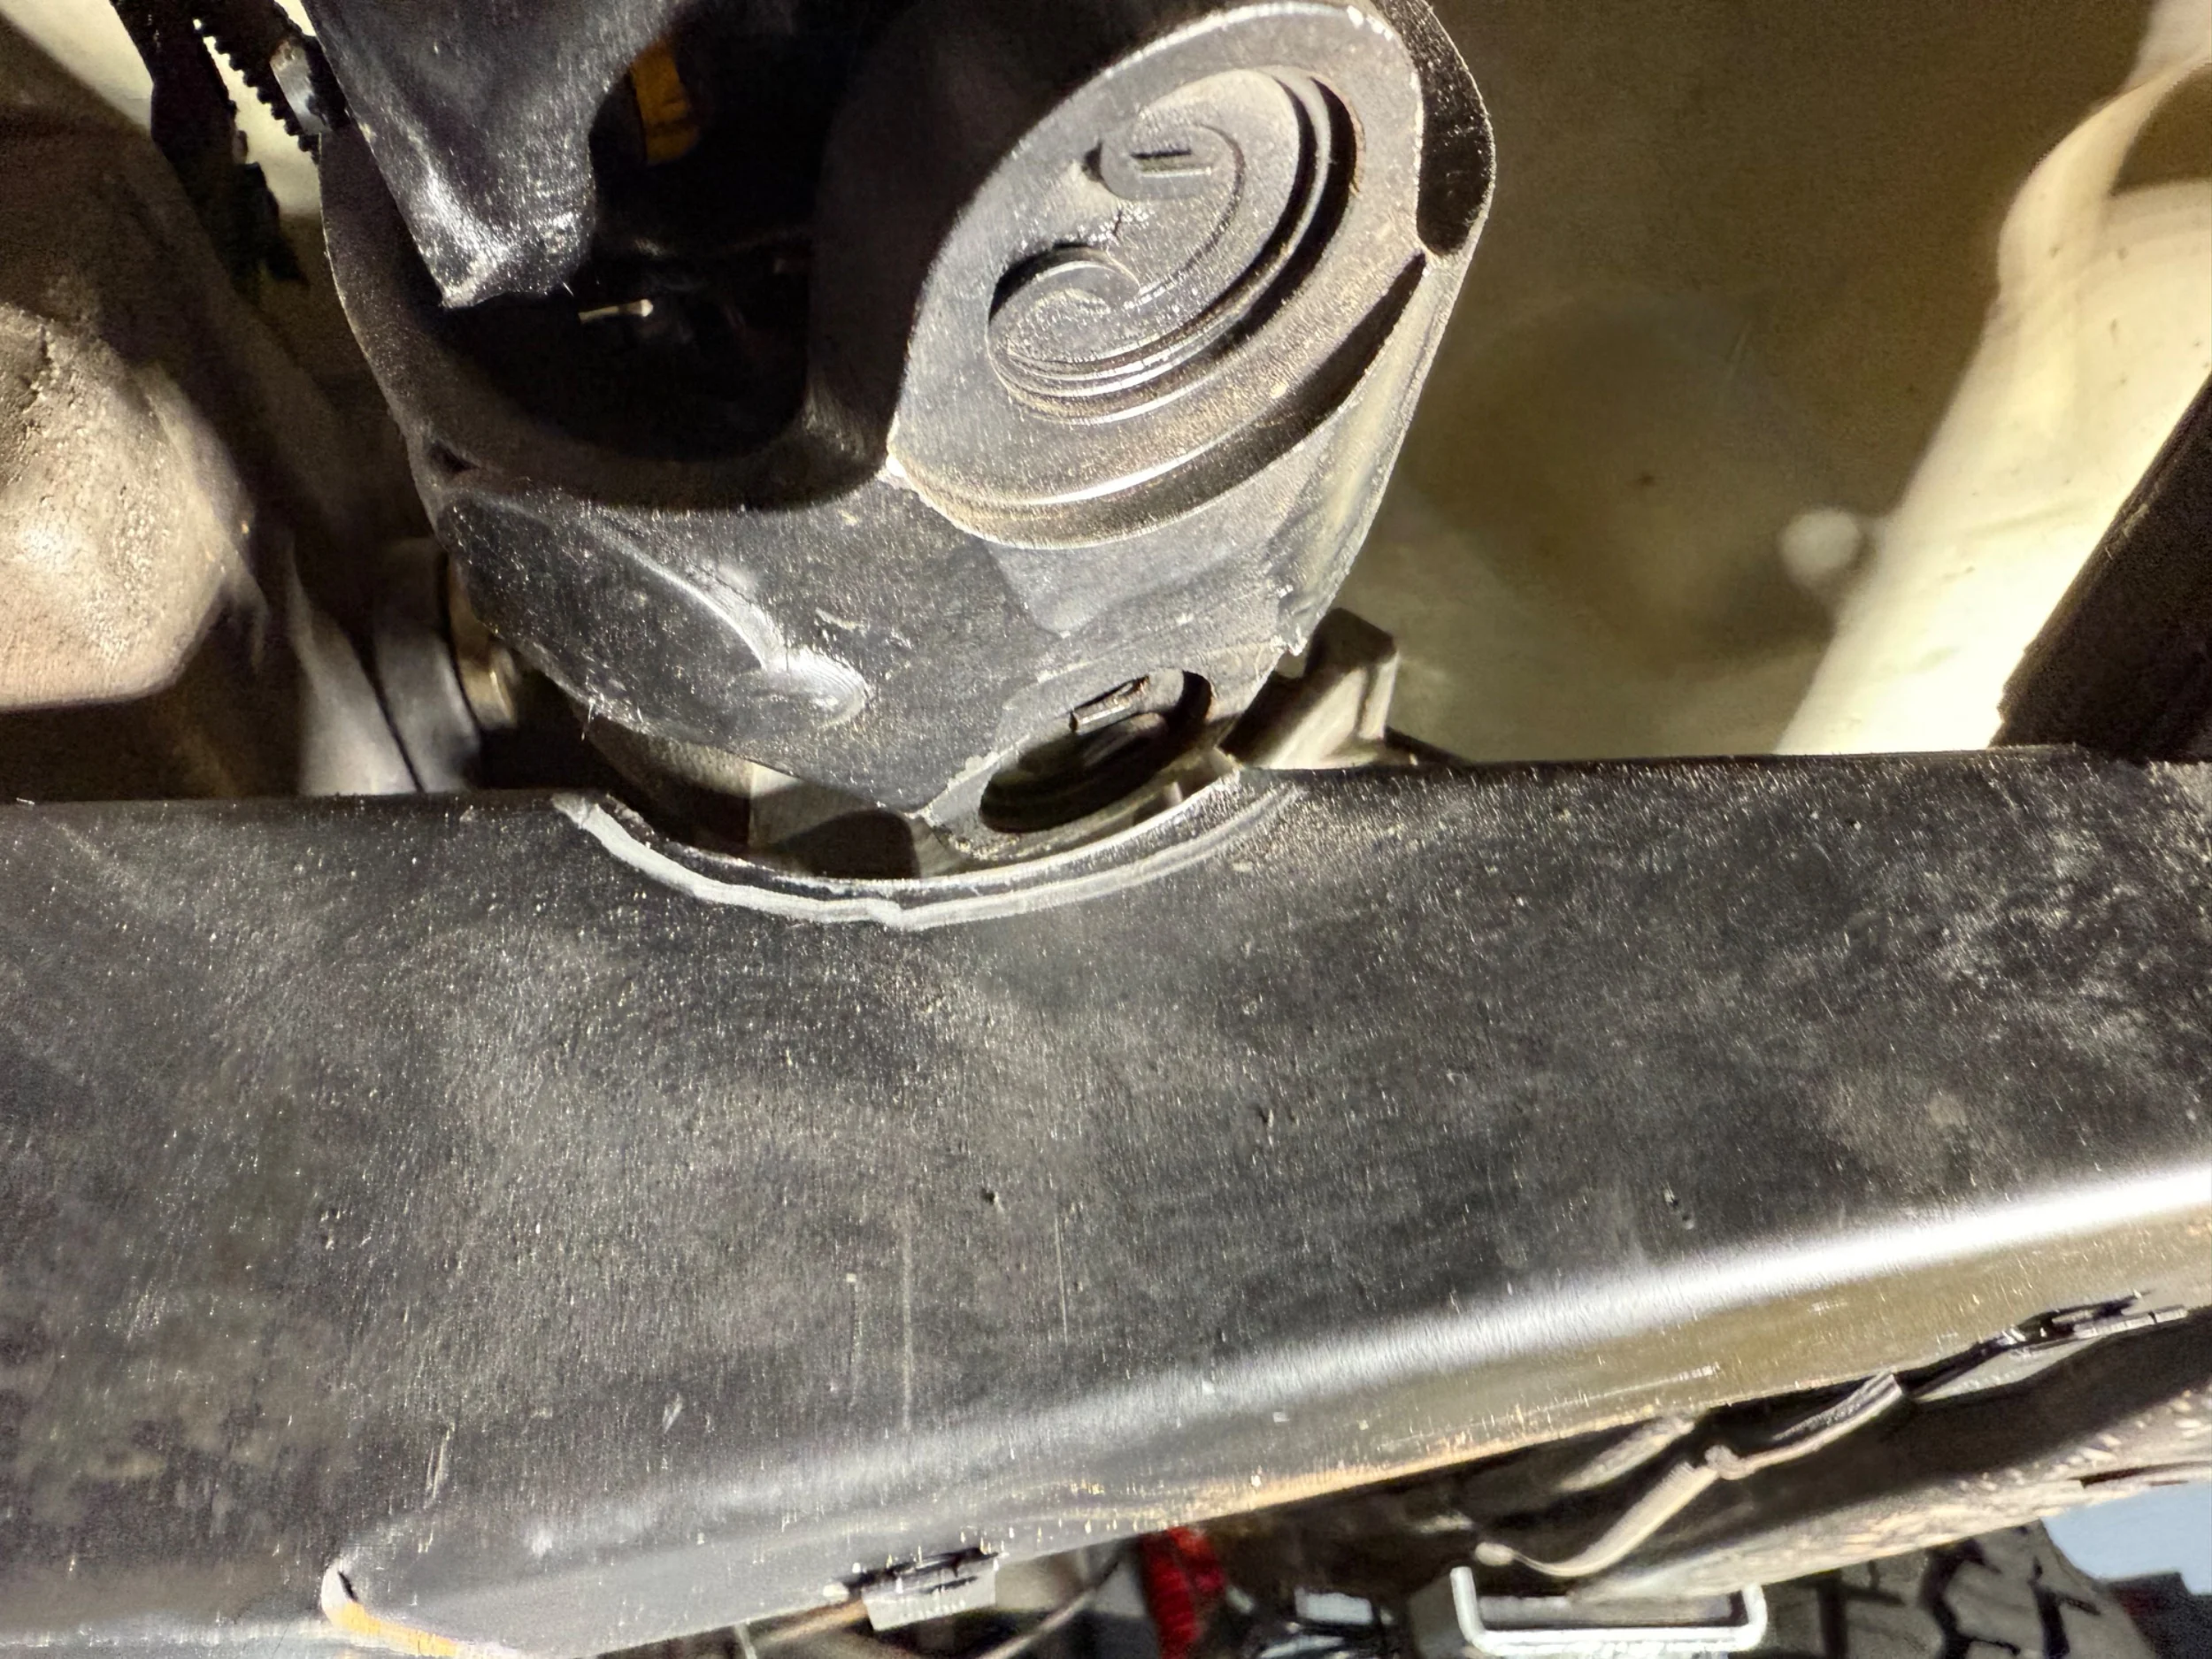
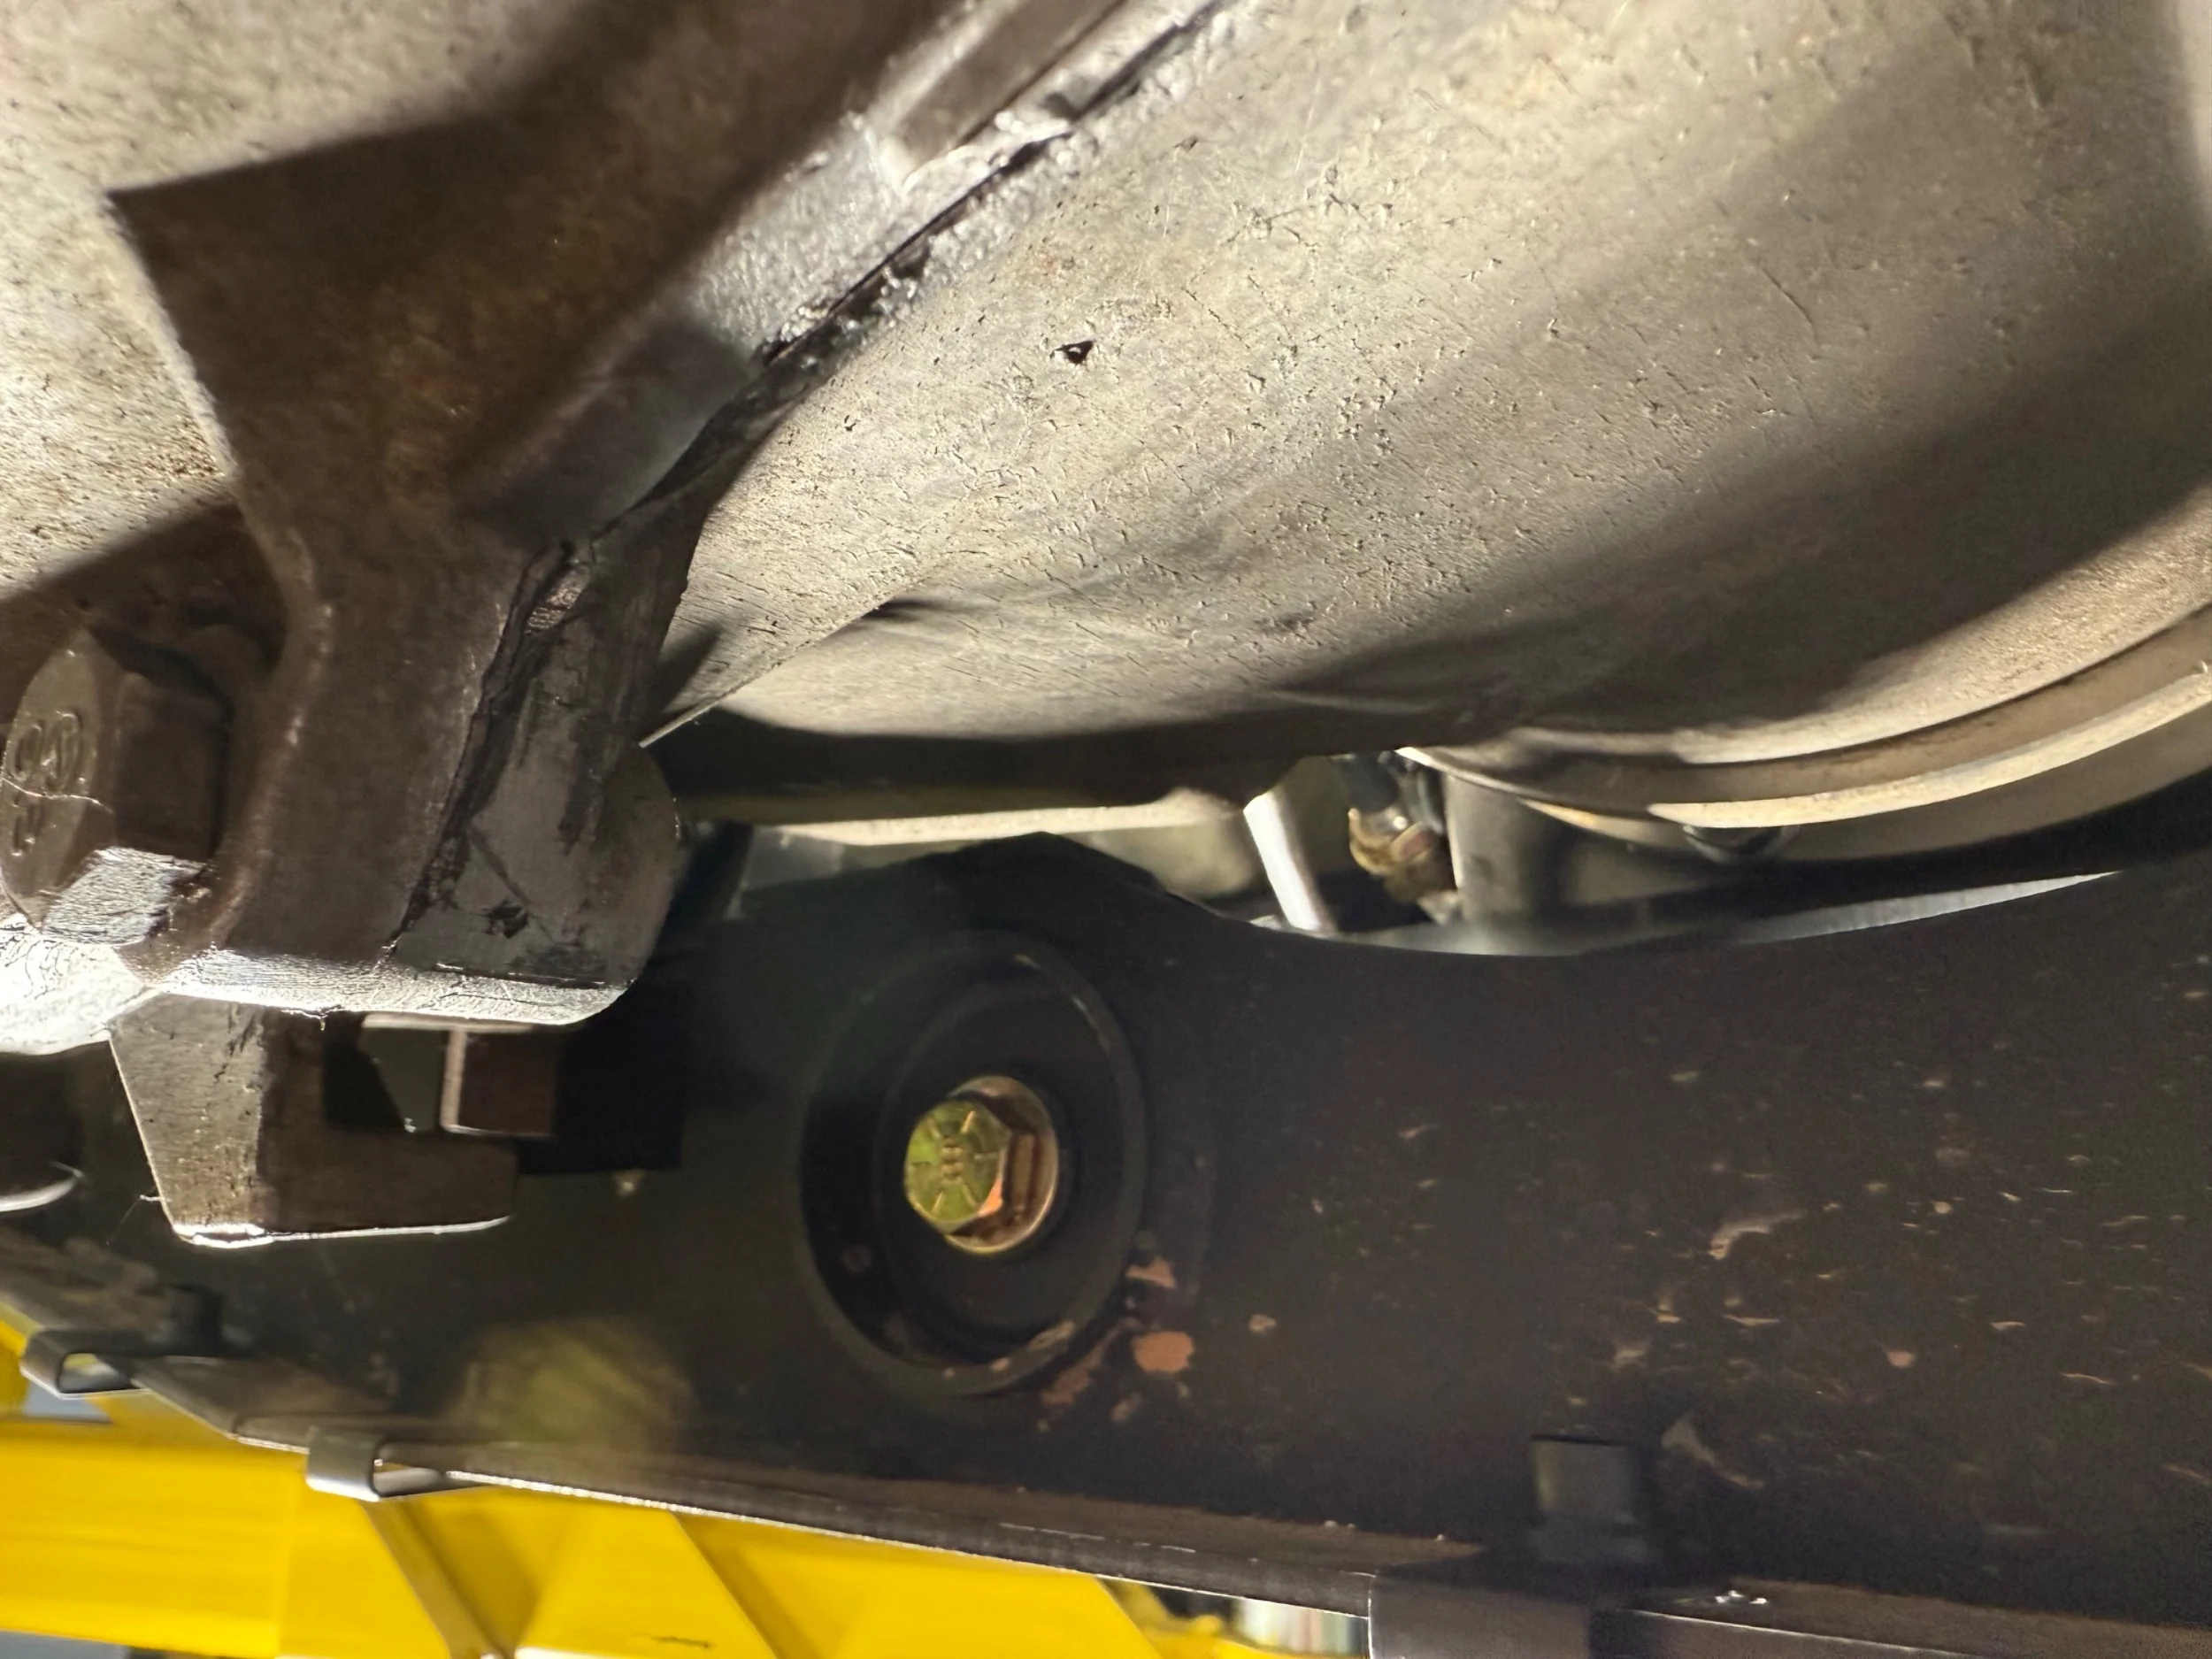
IMG_9112.jpeg

IMG_9113.jpeg


I clearanced the aft stiffener where it had been in contact with the SYE, and gave it a bit more room around the exhaust:
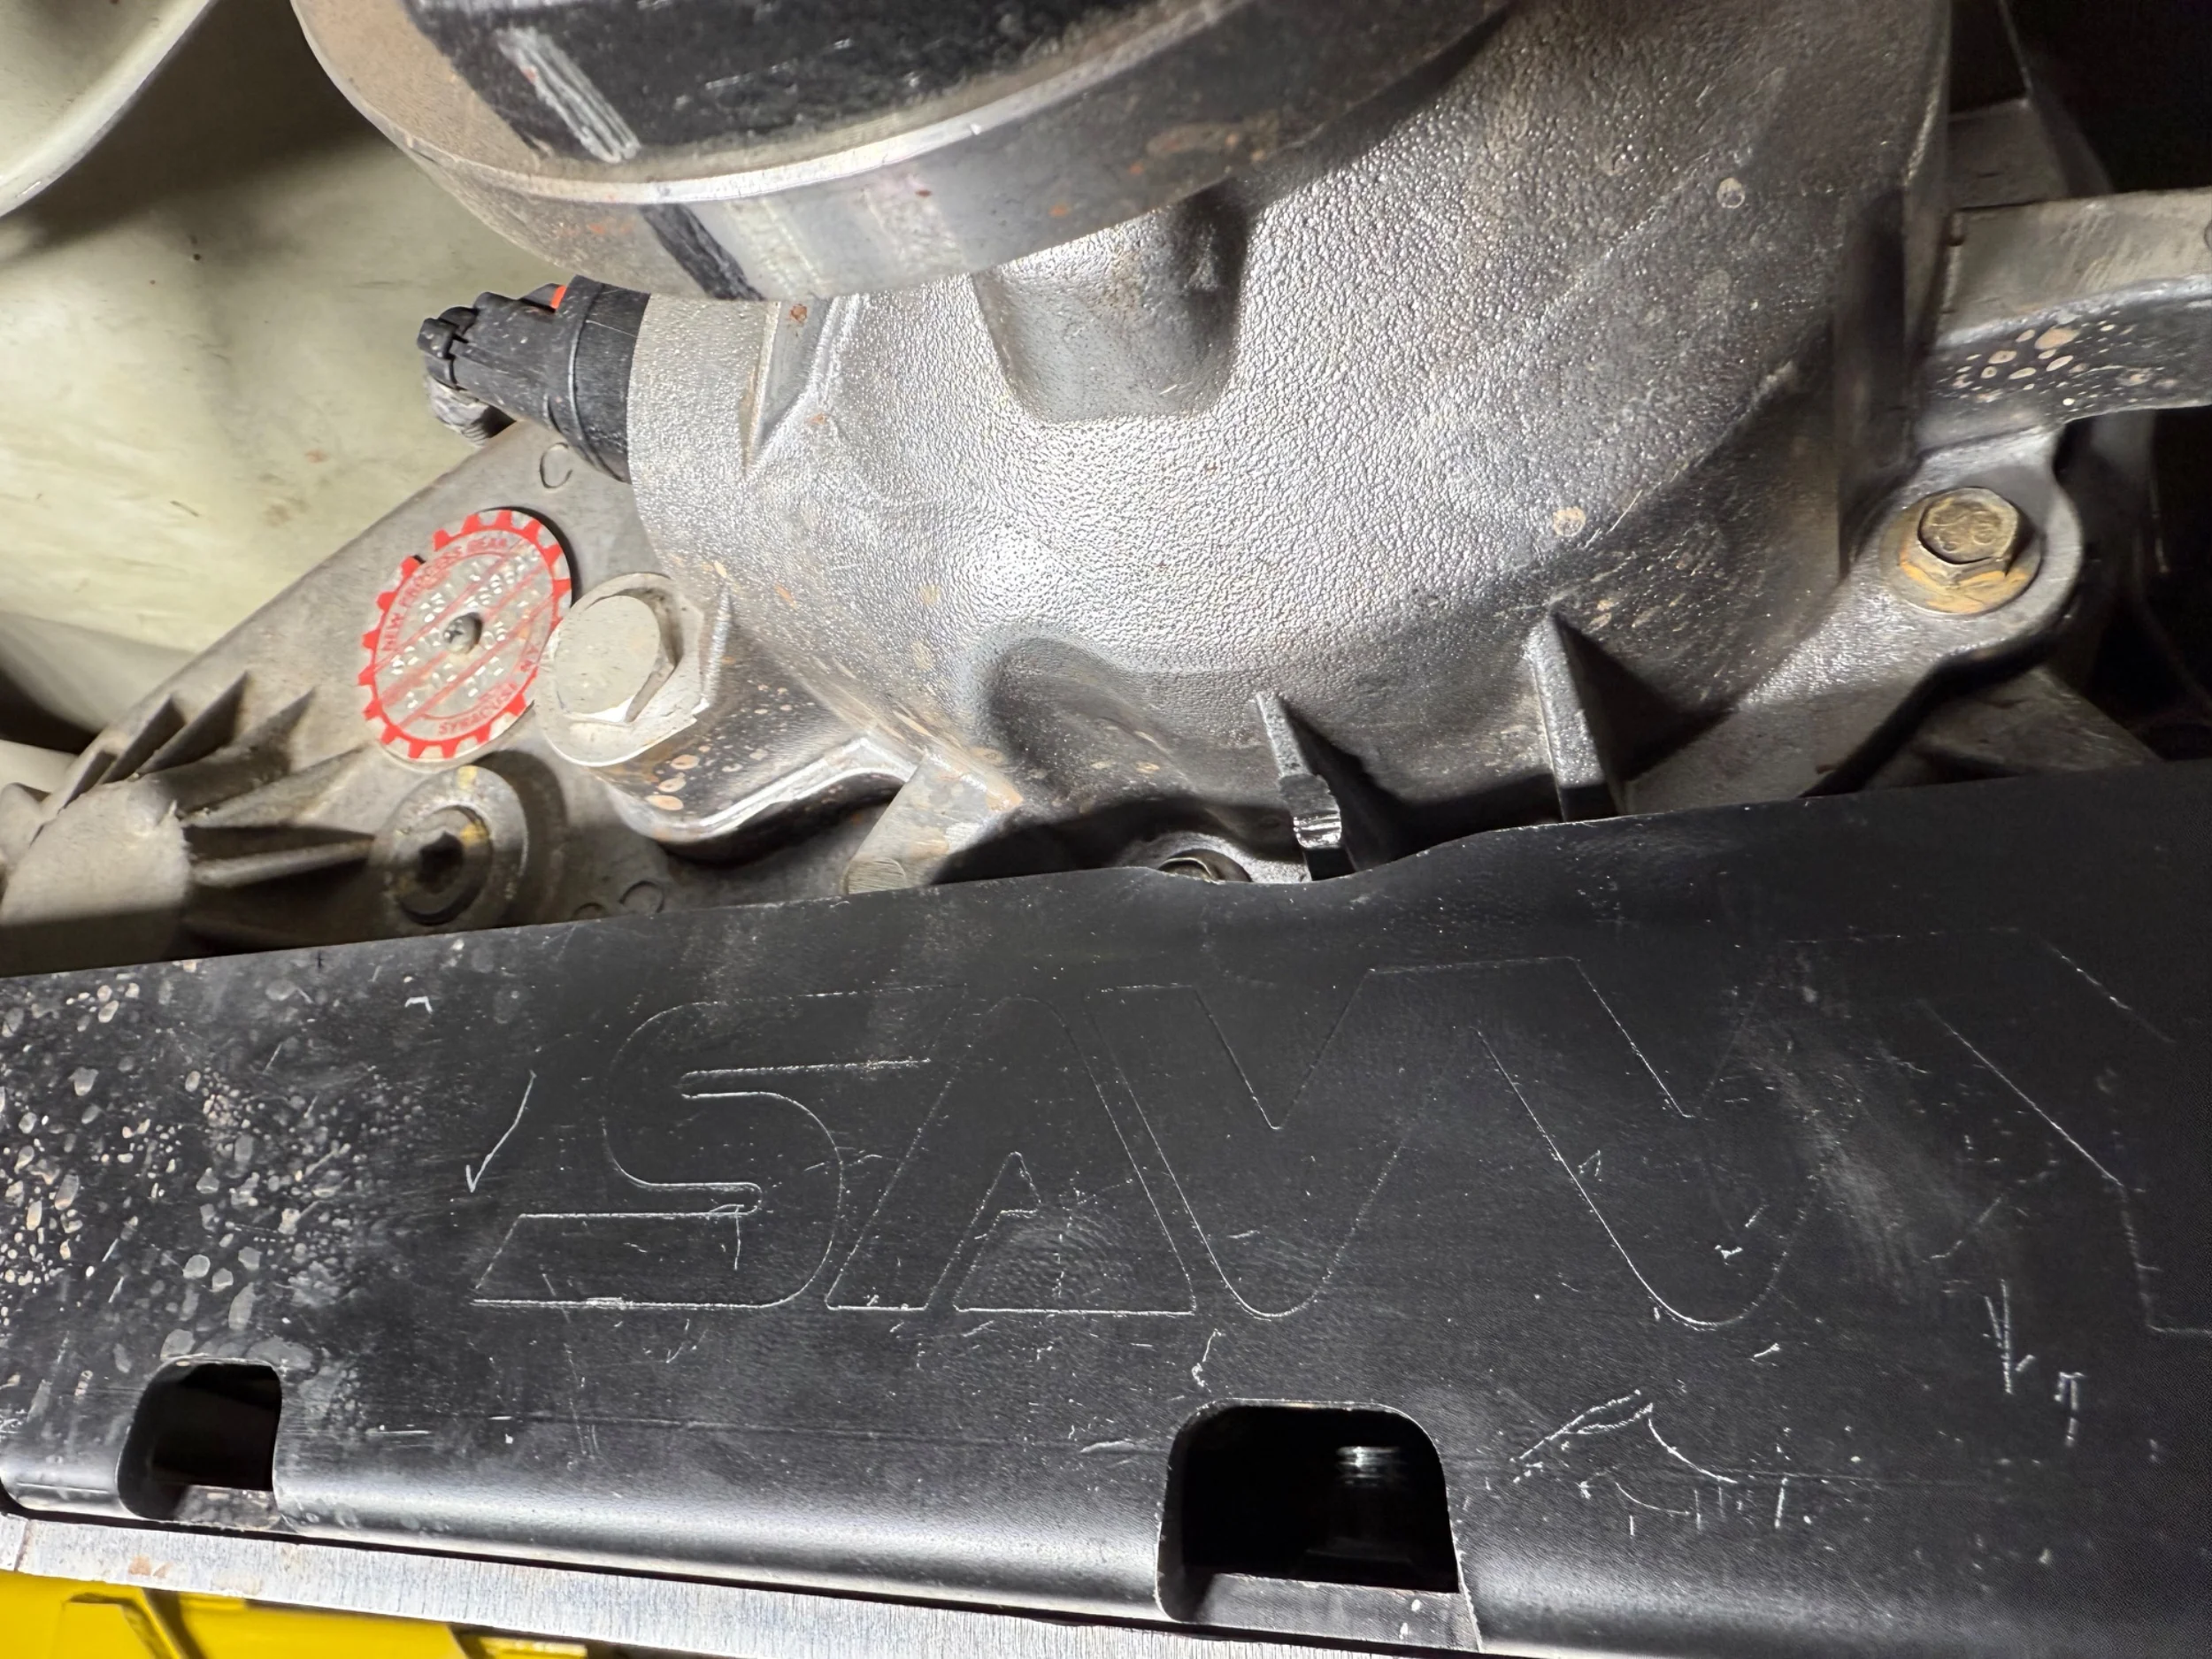
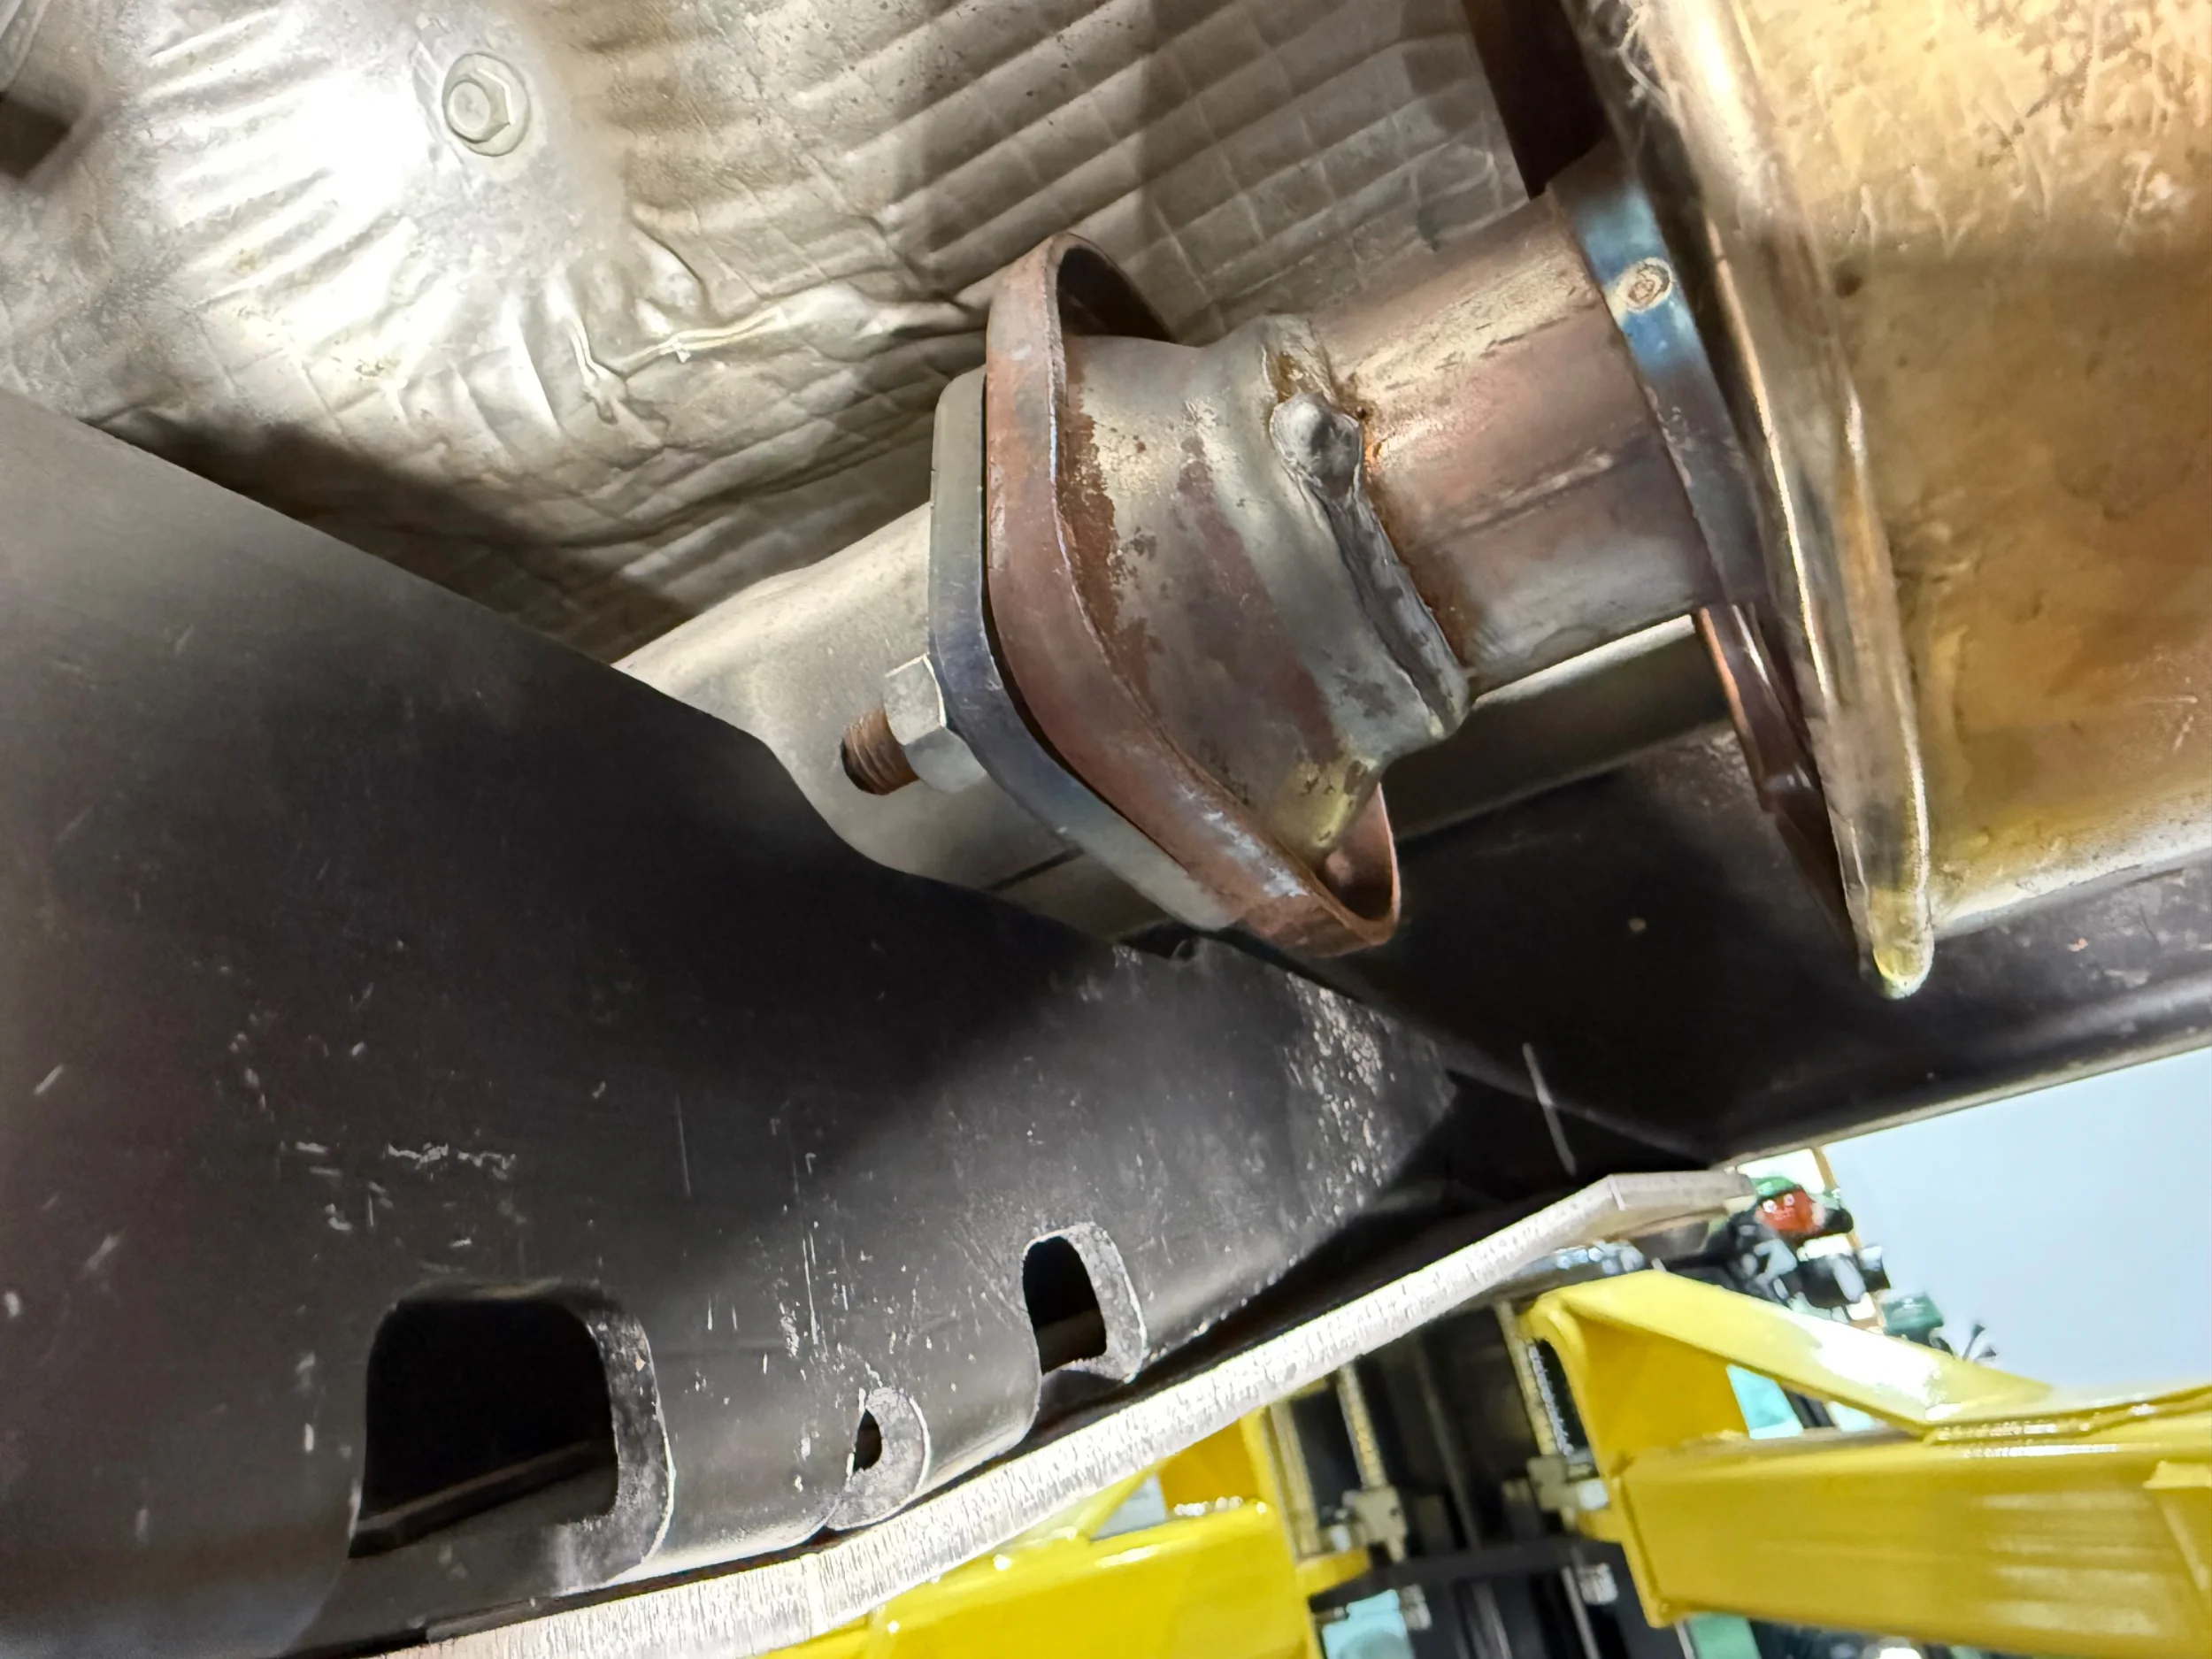
IMG_9114.jpeg


IMG_9115.jpeg


Clip nuts at the joint between the TC and engine skids makes instead the engine skid much easier:
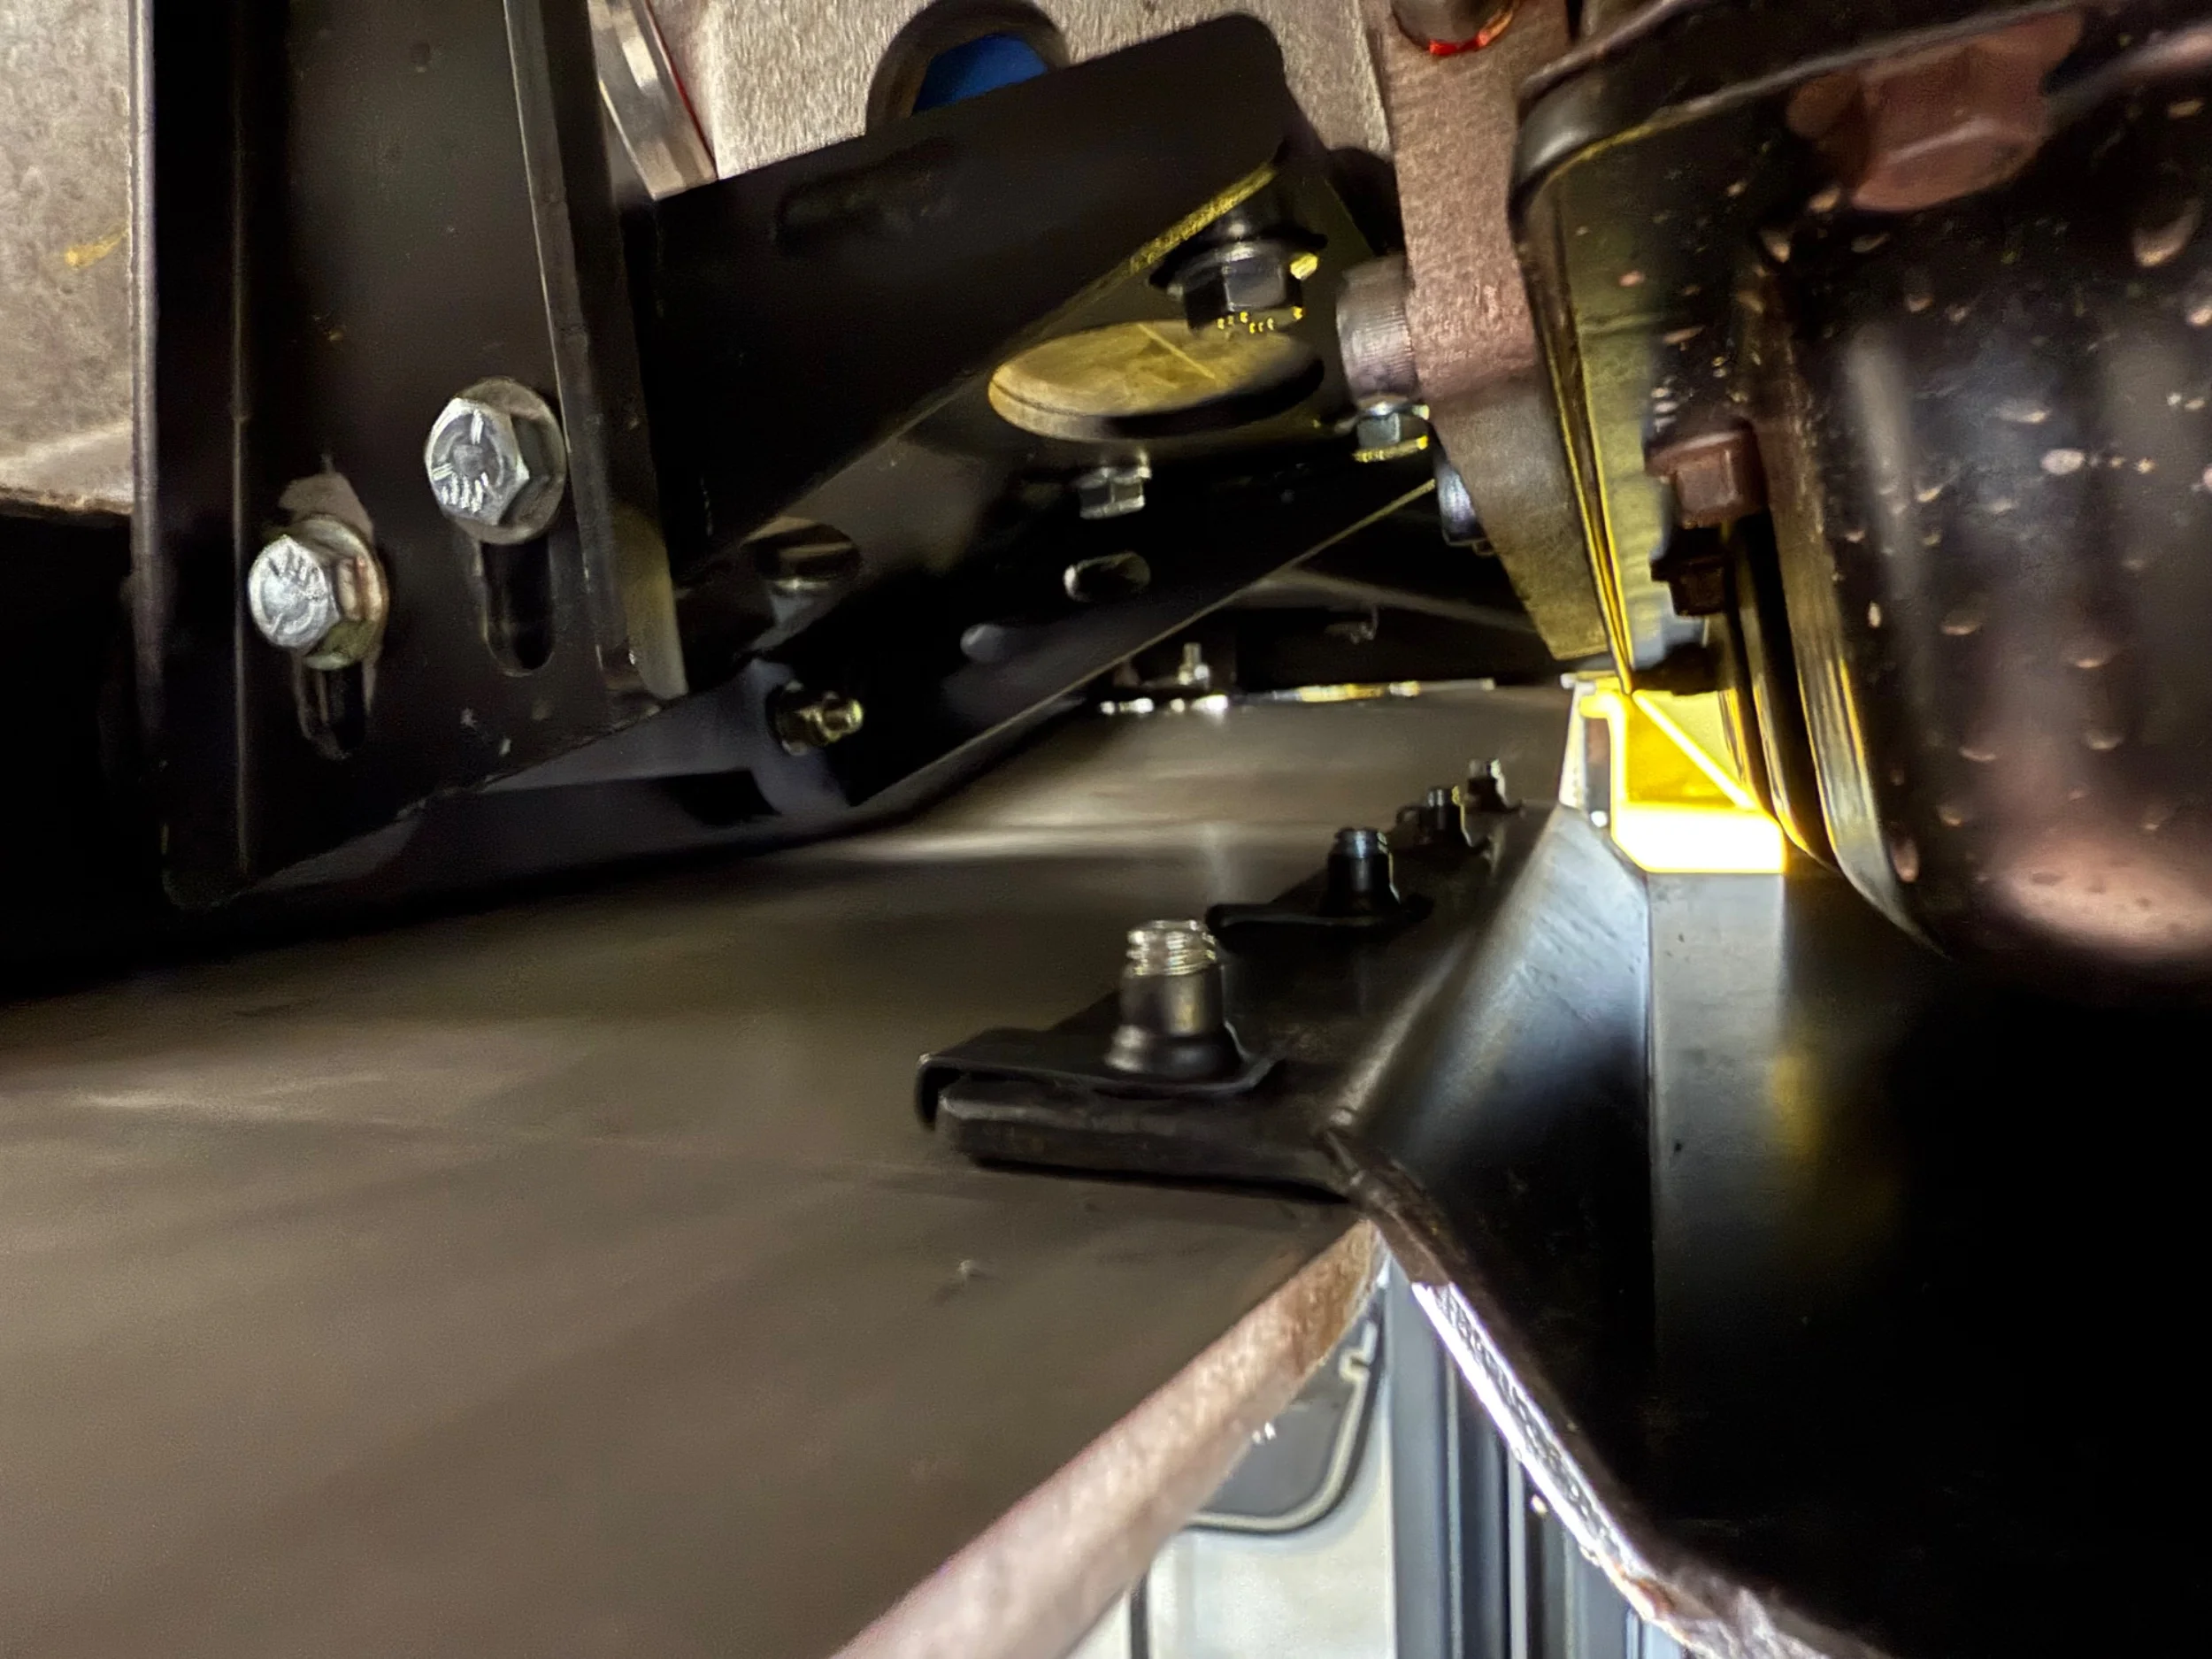
IMG_9116.jpeg


I removed some material on the engine skid at the exhaust where it had been very close:
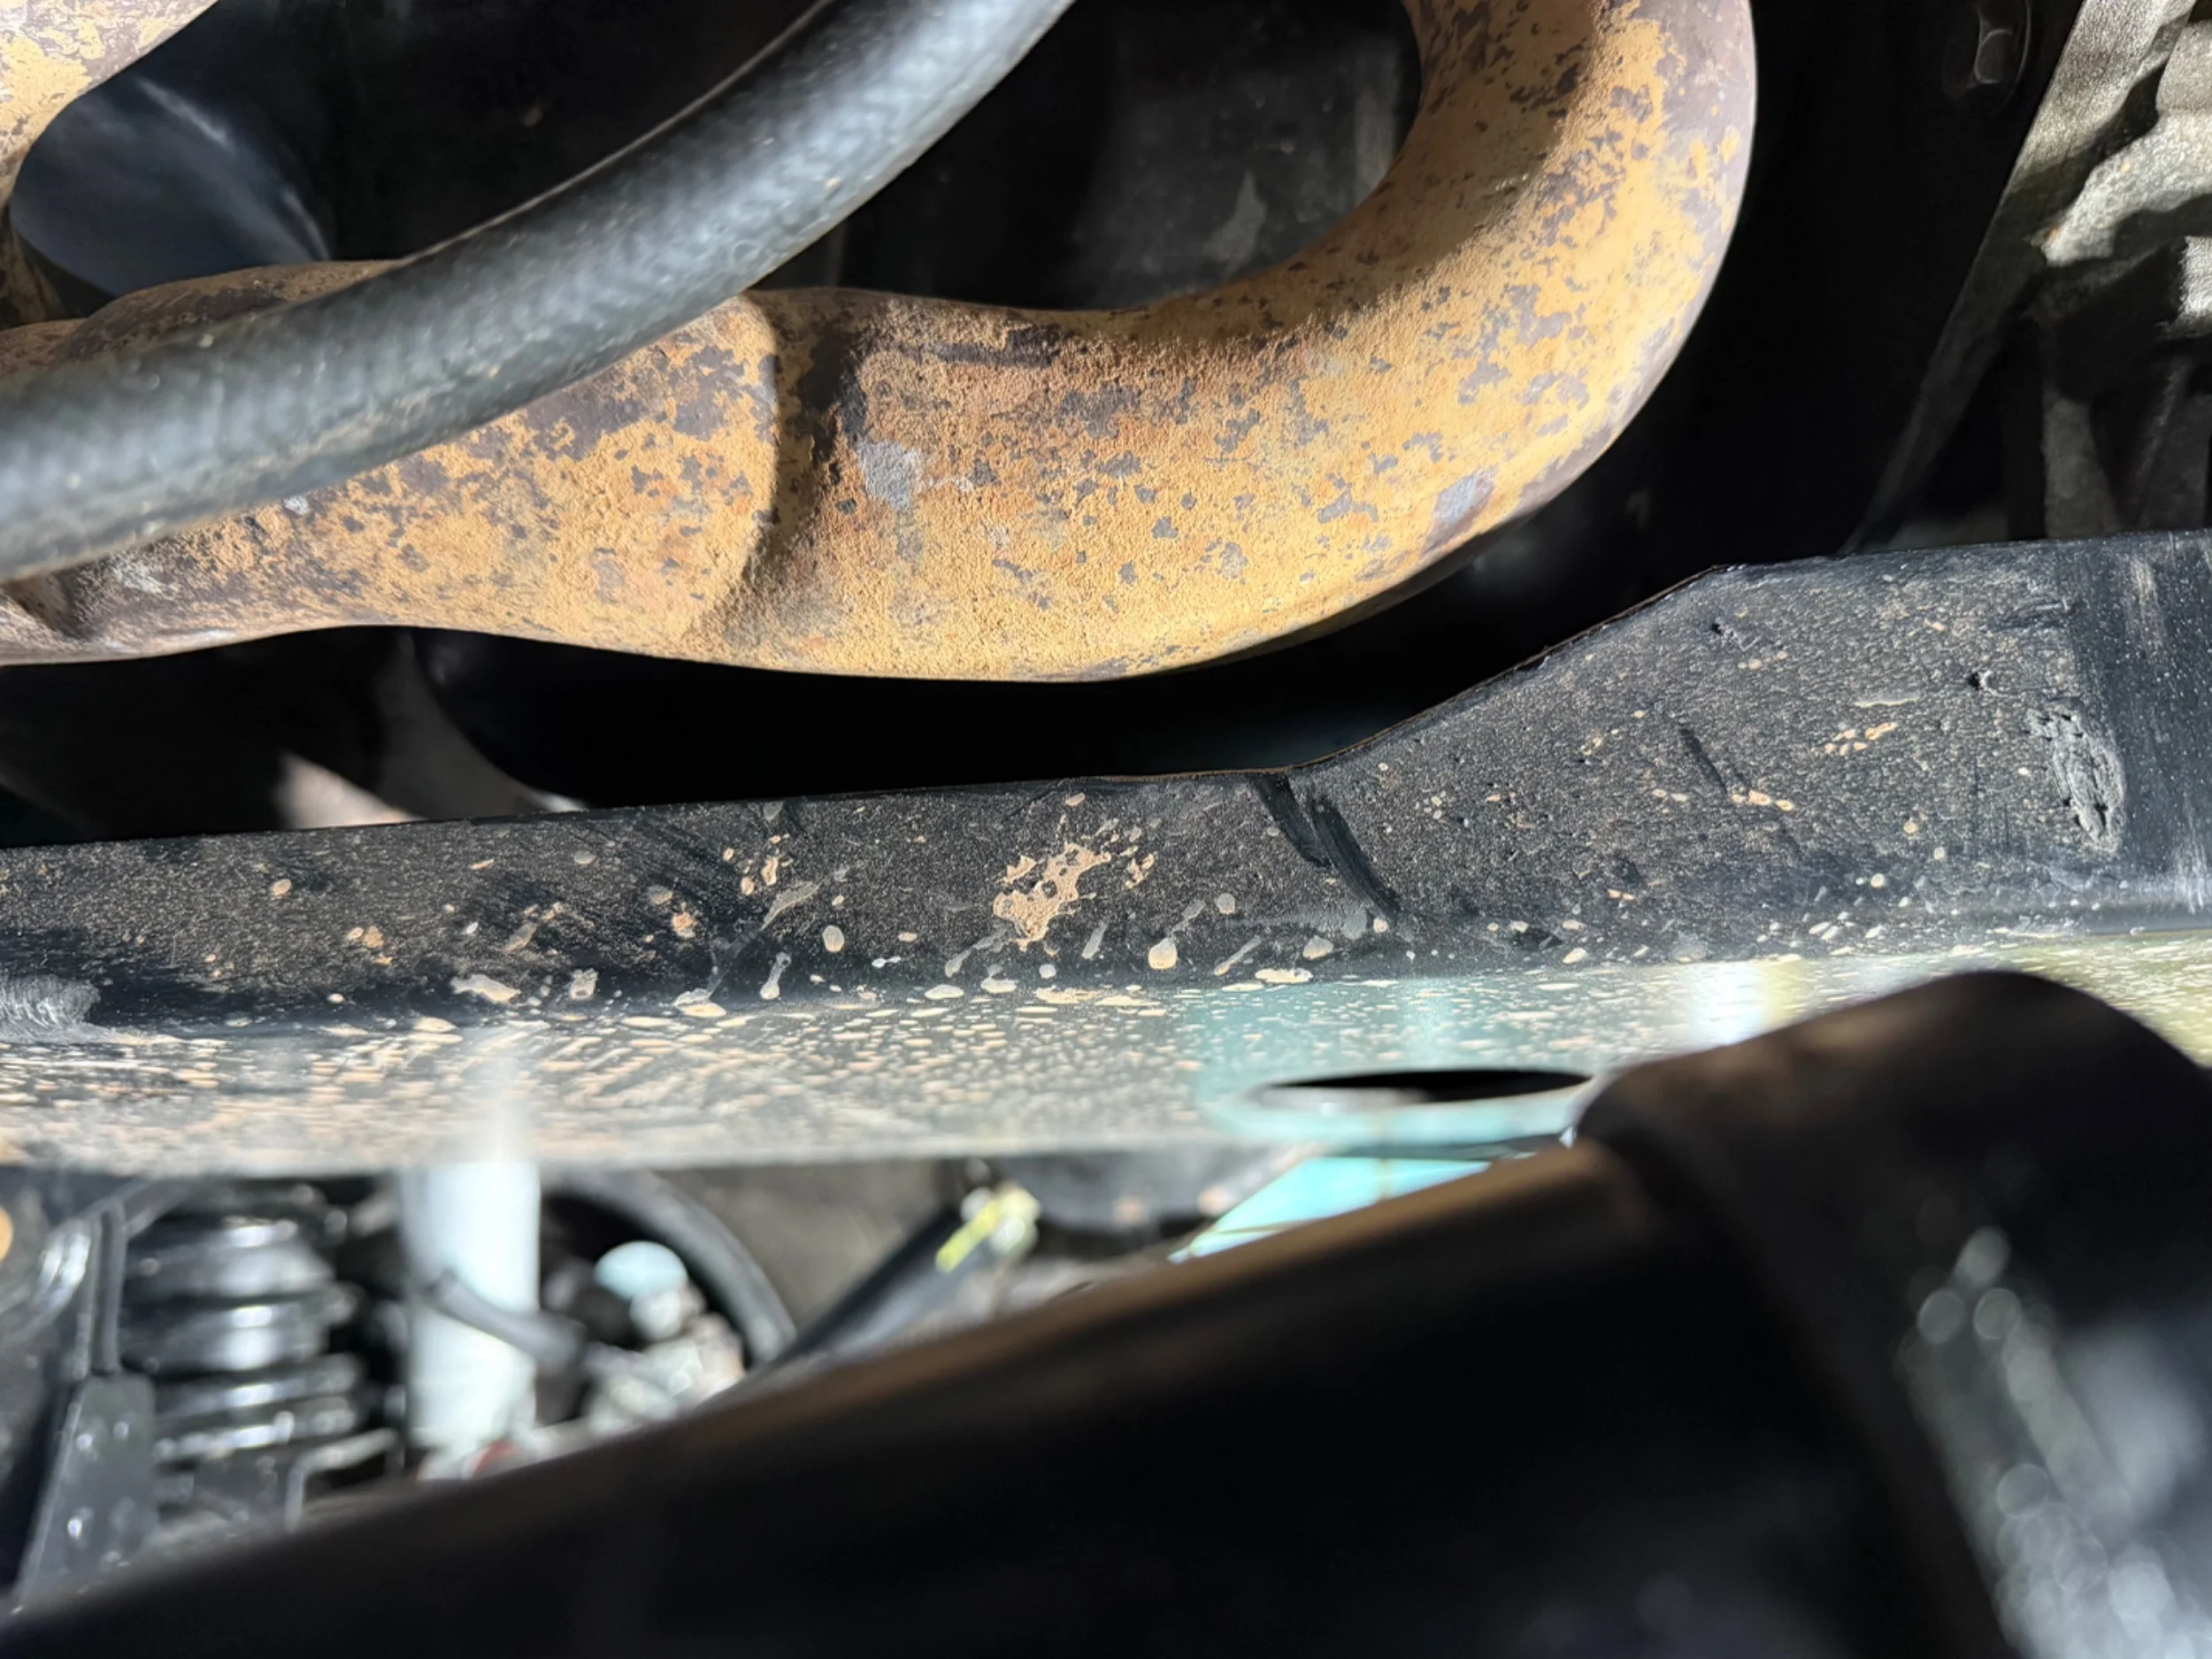
IMG_9117.jpeg


All done:

IMG_9118.jpeg


Next up some electrical gremlins, inoperative transmission fluid temperature gauge and no power to my GMRS radio.
 
Last edited:
Wow - amazingly, I read through this entire build topic today (off and on, depending on activities). I highly enjoyed your learning processes and attention to details! Having previously owned a from-new 2000 TJ subsequently built mostly with Currie johnny joint stuff plus gears, ARB lockers, BMB Big Brake Kit and more, but sold end of 2020 thinking I was done with that. I do have a 2017 JK Rubicon and 2020 Can-Am Maverick Sport Xrc but I bought a previously built 2005 TJ Rubicon 5 wks ago. Right now, doing all the deferred maintenance work while forming plans on what aspects I'll change for my intended usage in this forested area. Already ditched the nearly new budget 35" tires in favor of 33" BFG KM3 to work better with 42RLE and 5.13 gearing, as well as getting an inch lower to the ground. Since mine has combo of RE 5.5" long arms and 1" BL, few options for exhaust fit and routing, so ordered a Magnaflow 17122 with welded cat flange pipe, 5"x14" muffler can and turndown tip. Similar to the old muffler installed years ago but hopefully somewhat dBA quieter inside the cab - TBD after that arrives.

As to your planned move to AZ, welcome from "The Other Arizona" in easternmost AZ. My house at 7.4k' has adjacent forest road access just 2 miles away going up to more than 10k' elev. If you're planning on location within urban Maricopa County, you might have to build what you want or buy a place a bit further out with sufficient land to build a shop outbuilding. Rural areas where I now live often have no garage or had one converted into living space. An old guy now without need for a large home, my attached garage is highly atypical, being nearly as large as the residence at nearly 1500 sq' (3 bays across front plus 2-story RV bay at 90*), currently comfortably housing 6 vehicles inside right now. Sadly, no hydraulic lift as your current shop has. I'll continue to monitor your progress and decisions with interest...
 
Wow - amazingly, I read through this entire build topic today (off and on, depending on activities). I highly enjoyed your learning processes and attention to details! Having previously owned a from-new 2000 TJ subsequently built mostly with Currie johnny joint stuff plus gears, ARB lockers, BMB Big Brake Kit and more, but sold end of 2020 thinking I was done with that. I do have a 2017 JK Rubicon and 2020 Can-Am Maverick Sport Xrc but I bought a previously built 2005 TJ Rubicon 5 wks ago. Right now, doing all the deferred maintenance work while forming plans on what aspects I'll change for my intended usage in this forested area. Already ditched the nearly new budget 35" tires in favor of 33" BFG KM3 to work better with 42RLE and 5.13 gearing, as well as getting an inch lower to the ground. Since mine has combo of RE 5.5" long arms and 1" BL, few options for exhaust fit and routing, so ordered a Magnaflow 17122 with welded cat flange pipe, 5"x14" muffler can and turndown tip. Similar to the old muffler installed years ago but hopefully somewhat dBA quieter inside the cab - TBD after that arrives.

As to your planned move to AZ, welcome from "The Other Arizona" in easternmost AZ. My house at 7.4k' has adjacent forest road access just 2 miles away going up to more than 10k' elev. If you're planning on location within urban Maricopa County, you might have to build what you want or buy a place a bit further out with sufficient land to build a shop outbuilding. Rural areas where I now live often have no garage or had one converted into living space. An old guy now without need for a large home, my attached garage is highly atypical, being nearly as large as the residence at nearly 1500 sq' (3 bays across front plus 2-story RV bay at 90*), currently comfortably housing 6 vehicles inside right now. Sadly, no hydraulic lift as your current shop has. I'll continue to monitor your progress and decisions with interest...

Thanks for the kind words @DirtDawg ! I look forward to following your new TJ build as well and hope to wheel with you when I get out west in 2026. I lived in the Prescott area for 2 years previously and did a fair amount of exploring the state then in a JK, but did not get out the the far east side and would like to see that area. One thing I love about AZ is access to the mountains, great wheeling and views combined. Your set up with smaller home / large shop is a dream for an active retirement.
 
  • Like
Reactions: Wildman
Wow, long time since I updated this thread. Reason is, I haven't done anything to the LJ since last summer after the Moab trip.

Reason for that is we moved in September and that meant the LJ was not a priority and instead we were packing boxes, prepping to sell a house, moving across country, putting our stuff in storage, living in temporary accommodations, buying a house, remodeling said house, then moving into the house in January. Oh, and I retired in December and helped find and then train my replacement. Now I am a full time handyman with an endless list of "honey do's" and other stuff at the new place (not that I'm am complaining). All the while the LJ sat in storage.

Thankfully, @Beestinger organized some local wheeling in February and I finally took the LJ out for some wheeling after 6 months of hibernation. The LJ ran well but I still had some interference between my front driveshaft and my engine skid in passenger front full stuff scenarios. Trimming the skid would negatively impact its ability to take an impact since I'd have to cut out the return lip that give the edge rigidity. Despite I thought I had my axle centered from installation, it appeared shifted a bit to passenger and I took that as justification to shorten up my track bar a bit to see if that would alleviate the interference. I moved the axle 3/8" towards driver and then went for a ride to see if I could stuff the passenger wheel.

I found a local spot not far from my new place, in fact just 22 minutes away. The trails are in the Prescott National Forest and form a short loop that I ran in 35 minutes. For any locals looking for some fun, I recommend this loop formed by FS 661 to 9915 to Trail 21. This starts and ends on Camp Wood Road a few miles off Williamson Valley Road. The trails were tight with pinstriping just about certain. There were a couple of turns I had to make 3-point, so best suited for a short wheelbase rig.

A couple of pics:

IMG_0905.webp


IMG_0904.webp


IMG_0902.webp


It was hard to find a good spot to stuff the axle, but at one point I as sure I heard the driveshaft chatter in contact with the skid, damn!

With another local wheeling trip just days away, I had to get this sorted. So, I sucked it up and committed to pulling the coil springs to swing the axle. I have to admit, when I installed the lift and axles (all new), I did not yet have a full rig built to even perform an effective axle swing. Now with all the equipment installed it was long overdue that I check for interferences and today was the day.

What a pain it was getting the springs off! I had to remove all of the potentially optional bits such as the steering, track bar and lower CA's to get the axle low enough but after much effort and likely a bit too much risk with a prybar - I got them removed. I am also back to working on the floor and a roll around since my new place doesn't have a shop with a lift (yet)...I know - my first world problem.

Thankfully, my bump stops lined up well fore/aft. Subsequent to the first installation I've changed the lenght of the CA as I dialed in my pinion angle and recovered from my infamous loose CA debacle in Moab last year.

IMG_0920.webp


IMG_0914.webp


Side to side there was contact, but certainly not well centered:

IMG_0915.webp


IMG_0919.webp


Both sides are off center to the outside, so no side to side adjustment will center both of them.

Looking at the most pressing issue I am aware of, I was not able to recreate any interference between the front driveshaft and the engine skid plate:

IMG_0921.webp


Note the skidplate is pushed up on the driver side versus flat as I last installed it. I believe the driveshaft pushed it up when on the trail and I did not "fix" it afterwards. Sitting here now I should have loosened the bolts and squared it up and check again, but I did not...an oversight.

Another area that I was concerned about was my Currie Dana 44 differential hitting my Rock Jock track bar. When in Moab last year, there was contact at the TB gusset. I later ground the gusset down to relieve the interference. With full stuff on the driver side there was no contact:

IMG_0916.webp


Another interference that left some evidence was the track bar rubbing on the front differential cover plate. That did not occur during this axle swing:

IMG_0917.webp


I also had some bent sway bar brackets after Moab. I did find the drag link barely contacting the passenger side bracket at full stuff. Seems I'd have to move the axle aft to solve it, but then I am off the bump stop centers and who knows what else...I will leave this for now and see how it goes.

IMG_0924.webp


With these results I decided to leave the TB and CA's as they were. I've got some serious wheeling coming up this week at Table Mesa and that should reveal if I've missed something with my axle swing. One flaw in this process I can see is that the bump stops are not hard stops, rather they are urethane and they compress. So how far do you compress them? With the side to side mismatch on mine, I'd deform/slide the top side stop outboard and off the bottom stop, something that likely can't happen with the coil springs installed and creating a retainer for the stops.

One completely unrelated finding to this process is that I've got a damaged driver side front brake line. I've ordered a replacement and that alone was worth the effort. More to come after this weekend of wheeling.

IMG_0903.webp
 
Got in a great day of wheeling at Table Mesa today. I certainly cycled the suspension every way possible and pleased to report I didn’t hear or feel any interference on the front driveshaft or anywhere else.

I got a good look at my front driver at full stuff and the bump stop engagement was just as I suspected, the coil spring kept them aligned.

IMG_0958.webp


I did have problems with my rear locker not working most of the time (but not all of the time) that I engaged it. @PurpleTJAZ had a good idea for me to check the pins in the connector for contact/engagement. When I got home I found on of the pins on the differential side came out of the connector easily so perhaps it was not fully seated. Tomorrow I hope to have use of the locker on demand.
 
Quick update - after pulling the pins from my rear locker connector and re-seating them...it worked! I still don't trust that connector and will replace it, but it confirmed the problem and took a big load off my mind thinking it was something inside the axle. Thanks @PurpleTJAZ for your advice on that and again for the great lead and spotting this weekend.
 
I’ve noticed on some recent trail runs that my GMRS radio has poor reception / transmission compared to others. I had a ghost antenna mounted up on my roll cage and that’s not a good location with all that steel close by.


I also needed to mount a CB to participate in runs with a local club that requires one. That, and I need a place to put my flag for Sand Hollow. So, time to make a mount for both on the tailgate. I took a piece of 2x2 aluminum extrusion and cut it to length to fit across the upper hoes where the spare tire mount would go. My spare is in the tub so I have good access to the bolt holes, even though they are shared already by a license plate mount and a small rear facing light bar.

Just four holes are needed, two for the mounting bolts and then two for the antennas. Well, five holes as we will see later.

IMG_1140.jpeg


add the antennas and it should be good.

IMG_1143.jpeg


No so fast. I had poor SWR readings on the CB, 2 and over. Despite that I could hear trucker traffic across many channels and I am nowhere near a highway. After some googling, it looked like I needed to add a ground to the mount.

I grabbed some 10g wire and ran a ground line from the mount to the tailgate and the from the same screw on the tailgate, another line to the tub.

IMG_1147.jpeg


IMG_1148.jpeg


This did not improve my SWR readings, no matter how I tuned the fire stick antenna up or down.

I read further that a good ground for a CB mount is best done with braided bonding strap, not wire. I had one and added it between the tub and the tailgate. This is a temporary configuration as I need to find my nutsert kit in my storage unit and put one in the tailgate for a better connection.

IMG_1151.jpeg


I also had a bunch of excess coax length and perhaps had that wound too tight as I’ve read it is better to make a long figure 8 with excess coax to avoid problems with SWR.

Not necessary shown but for the record, I’ve got a Cobra 75 All Road CB, a 4’ firestick and an 18’ fire ring coax cable.

Hopefully this works well enough for my upcoming run on Saturday.

As for the GMRS, I don’t know yet if I’ve improved that with the new mount until I can use it with someone else. I also got myself a 6db gain whip antenna in case the ghost antenna still doesn’t work well.

IMG_1146.webp
 
I’ve noticed on some recent trail runs that my GMRS radio has poor reception / transmission compared to others. I had a ghost antenna mounted up on my roll cage and that’s not a good location with all that steel close by.


I also needed to mount a CB to participate in runs with a local club that requires one. That, and I need a place to put my flag for Sand Hollow. So, time to make a mount for both on the tailgate. I took a piece of 2x2 aluminum extrusion and cut it to length to fit across the upper hoes where the spare tire mount would go. My spare is in the tub so I have good access to the bolt holes, even though they are shared already by a license plate mount and a small rear facing light bar.

Just four holes are needed, two for the mounting bolts and then two for the antennas. Well, five holes as we will see later.

View attachment 677886

add the antennas and it should be good.

View attachment 677887

No so fast. I had poor SWR readings on the CB, 2 and over. Despite that I could hear trucker traffic across many channels and I am nowhere near a highway. After some googling, it looked like I needed to add a ground to the mount.

I grabbed some 10g wire and ran a ground line from the mount to the tailgate and the from the same screw on the tailgate, another line to the tub.

View attachment 677890

View attachment 677889

This did not improve my SWR readings, no matter how I tuned the fire stick antenna up or down.

I read further that a good ground for a CB mount is best done with braided bonding strap, not wire. I had one and added it between the tub and the tailgate. This is a temporary configuration as I need to find my nutsert kit in my storage unit and put one in the tailgate for a better connection.

View attachment 677900

I also had a bunch of excess coax length and perhaps had that wound too tight as I’ve read it is better to make a long figure 8 with excess coax to avoid problems with SWR.

Not necessary shown but for the record, I’ve got a Cobra 75 All Road CB, a 4’ firestick and an 18’ fire ring coax cable.

Hopefully this works well enough for my upcoming run on Saturday.

As for the GMRS, I don’t know yet if I’ve improved that with the new mount until I can use it with someone else. I also got myself a 6db gain whip antenna in case the ghost antenna still doesn’t work well.

View attachment 677888

Wiring looks great and well planned.

One thought I'd share - when I added my CB to the tailgate, I ran it out through the existing brake light hole under that plastic cover. Even then, I left a relief amount but I always had to check it every time I closed the tailgate because there was enough to get caught in the gate.

I am now going a very different route, but here was a thought I did have:

Add a very light spring-rate spring to about halfway on the cable to pull it back into the tub as the tailgate closed but didn't pull/tension when it was open. I came up with this idea from my old garage screen door that closed but didn't 'bang' closed — just the right tension.

Just a thought to share.
 
  • Like
Reactions: Wildman
Wiring looks great and well planned.

One thought I'd share - when I added my CB to the tailgate, I ran it out through the existing brake light hole under that plastic cover. Even then, I left a relief amount but I always had to check it every time I closed the tailgate because there was enough to get caught in the gate.

I am now going a very different route, but here was a thought I did have:

Add a very light spring-rate spring to about halfway on the cable to pull it back into the tub as the tailgate closed but didn't pull/tension when it was open. I came up with this idea from my old garage screen door that closed but didn't 'bang' closed — just the right tension.

Just a thought to share.

Good shout. I will keep a close eye on how those wire/cables bunch up when the tailgate is closed. I just added that same type of spring on my garage entry door and it works great.
 
I got out yesterday with a local group and ran a trail just a few miles from my new place. Good variety of rigs with 2 XJs, a ZJ, 2 JKs, 1 JL., 1 Tacoma and me representing the TJ/LJ. The trail was mostly washes with just a couple of hard sections that were tight turns between nasty boulders. All the Jeeps made it through/over without any damage and the Tacoma took some body damage (door pillar, ouch). The trail didn't look like it is run much and was overgrown with brush in many spots. Lots of Arizona pinstripes were dispensed to all and we even had to remove a fallen tree at one spot. Thankfully the ZJ guy had chainsaw and it wasn't too hard for several of us to move off the trail.

I didn't get any pictures of myself or even any of the hard obstacles, but here are a couple typical shots of the trail:

IMG_1176.webp


IMG_1171.webp


My CB worked great, but I will need a tennis ball to keep my whip antenna from slapping my hardtop after going under low branches.

It was pretty hot out and I am glad I had my hardtop on and my AC blasting. Keeping an eye on my fluid temps, the coolant was just under or over the 210 mark all day, very steady. The ATF temp varies a lot and the highest I saw was 200 after a prolonged, slow climb, with most of the day around 180. The ATF temp comes down quickly with some speed or some downhill sections, or some time while shut down. Hopefully I am going to be in good shape for some head in Sand Hollow in May.
 
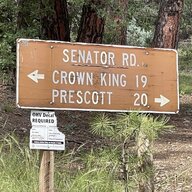
After a few Arizona trail runs it is clear that I am going to be driving through a lot of dust. A few weeks ago we were coming back from Crown King on the dirt road and the group was kicking up a plenty of dust/dirt. It was a bit dangerous on a switchback road with occasional oncoming traffic. I noticed that @Beestinger has a bunch of amber lights on his rig and that made him more visible in the dust.

I had a couple of round, white ditch lights on my bumper. I decided to swap them for ambers and add two forward facing on a mount that sits behind my fairlead. They are cheap lights so I am not going to be too bothered if they are hit by rocks or get some trail damage (though the centers sit behind the bullbar).

IMG_1181.webp
 
Given that I have my spare mounted in the tub there is is not much room left for gear, unless I create a pile.

I want a cargo rack/tray to give me a second level in the tub the secure gear to, especially for an overnight trip. I’ve got a trip to the Rubicon Trail lined up for July, so need to get moving on storage.

I have a Genright cage with parallel tubes running the length of the tub. These are perfect for mounting a tray. Rather than using some sheet metal brackets to attach the tray, I am going to use some bar clamps like these:

IMG_1190.webp


Four clamps at the corners should do it.

As for the tray, I am going to use angle aluminum extrusion, 2 1/2 x 2 1/2. I probably could use smaller angle but that’s what I have and it will give me plenty of room to drill holes to attach straps or a net.

IMG_1188.webp


Now for the size, I am going 53 1/2 wide and 24 deep. This will be larger than any of the trays I’ve seen available and for right on the cage tube clamps.

I have to be able to remove the tray to access the space tire, so it has to be able to come out with the hard top on. To be sure it will work, I mocked up the tray in wood first to check fit. It is very tight maneuvering it in, but it just squeezes in. If I go with less width then I can’t get the fasteners to be vertical as I want them to be. They need to engage with the bottom surface of the angle and leave room for the fasteners to avoid the vertical leg of the angle. I figure that is going to be much easier to install and remove than if I went with horizontal fasteners or a cantilevered bar bracket designed for lights.

I can just set the tray on the threaded studs and the spin down some wing nuts.

Here is the wood mock up for fit and install check, without a floor of course. The aluminum tray will have a plywood base.

IMG_1187.webp


If you are wondering, no the spare is not held in with those straps, just my gear bags. The spare is bolted to the tub floor, details are earlier in this thread.

I’ve got a local welder lined up to weld the aluminum angles with 45 deg corners for me. Though I purchased the gear to weld aluminum, it is boxed in storage and I’d like this cargo set up for Sand Hollow.

I will update once I’ve got the tray back from welding.
 
I’ve been disappointed with my double DIN view of On X, too small and hard to see in certain lighting.

Seeing some guys with tablets for mapping, decided to get a RAM mount for my GPS enabled tablet and give it a try. This is going to be far more useful.

IMG_1243.jpeg


IMG_1244.jpeg


The “C” size 1.5” ball is super solid, don’t think it will get shaken loose but that has to be tested.
 
Last edited:
99% done. Drilling 36 large holes with a step bit was way more work than I’d expected. Then I realized that the frame is not square but my mounting holes are, so they didn’t fit until oversized them.

The plywood base needs just a bit more work to sit down flush around the wingnuts, but that’s tomorrow’s business since I need to go get a drum sanding bit.

IMG_1253.webp


IMG_1252.webp


IMG_1249.webp


That’s a lot of aluminum shavings generated with a hand drill!

IMG_1250.webp