Hey all, sorry for the overkill but thought I'd write up what I did after I successfully sealed my RMS. I have totalled three attempts over the year and thought I'd talk about the differences and what has and hasn't worked.
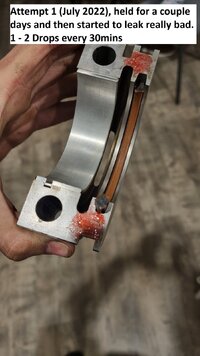
Attempt 1: July 2022, Felpro RMS, 3mm offset, RTV on RMS ends, Anaerobic Sealant used, small amount. This attempt held initially for a couple days. I then went on a camping trip, returned home after a week and it was consistently tripping.
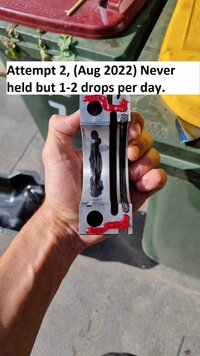
Attempt 2: August 2022, Victor Reinz RMS, no offset, RTV on RMS ends, Anaerobic used, large amount. This attempt leaked once complete but it was a very slow and manageable leak.
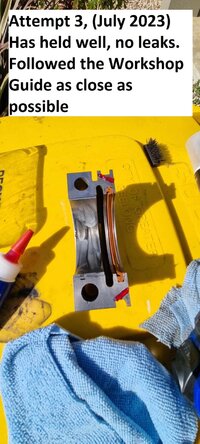
Attempt 3 (Success): July 2023, Mopar RMS, no offset, no RTV on RMS ends, Anaerobic used, moderate amount (very close to workshop guide). There hasn't been a leak and the RMS is holding well. I did a few extra things (documented below) to ensure the it would seal and believe it has all helped.
This time around (Attempt 3) I did a few different things (not in order) that may help you if you've done it a couple times with no success. I know Chris did a great guide which covers everything really well, but there's a few extra points which could make the difference for you if you just can't get it to seal.
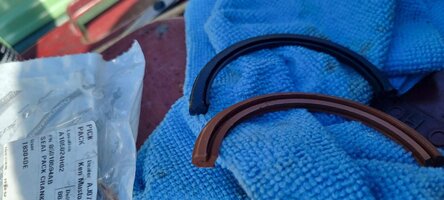
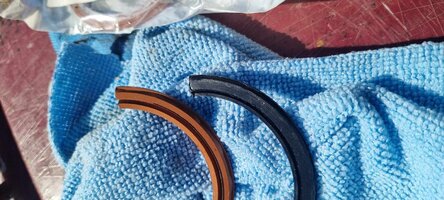
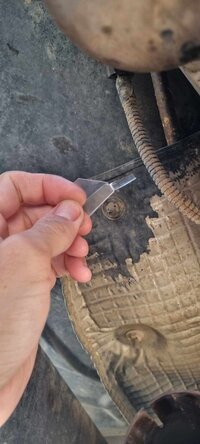
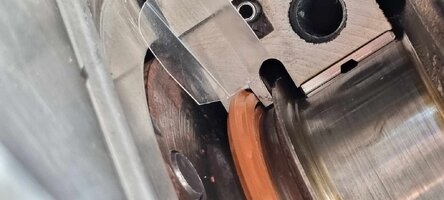
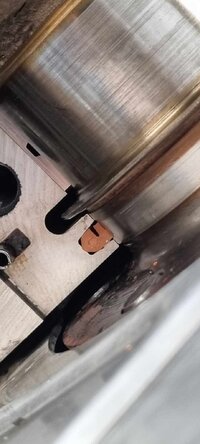
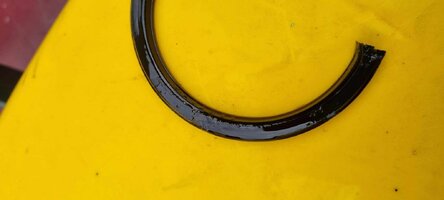
Number 1: Use the Mopar RMS. I've attached a pic of the difference between the lips and IMO, it's substantial. The Mopar RMS kisses the crank easily, whereas the Victor Reinz and Felpro seemingly just touch it. I've used the felpro in the past and it looks identical to the Victor Reinz except in colour. I know people have had success with both of these seals in the past but I doubt they'll last as long as the Mopar, as the lip sticks out at least 30% more. If you order the Mopar seal, you'll need to make your own shoehorn which is pretty easy. Just find some plastic packaging and cut a square out, then cut it to size. The one I made worked perfectly. I also did not put Rtv on the ends of the RMS. The reason I didn't (I did last time) was when I was cleaning the bearing cap, I noticed Rtv had caked on around edge where the seal goes in. It has somehow not set and worked its way in other areas. I also didn't do an offset with the seal, as it's just too risky you'll cut the seal when putting the bearing cap in.
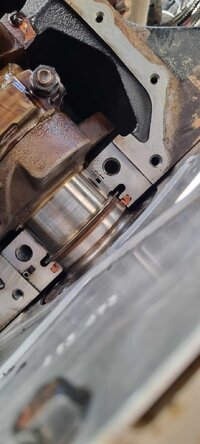
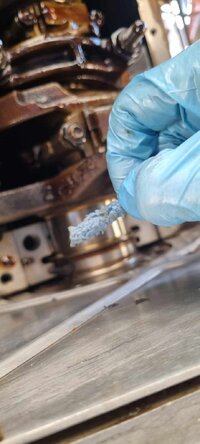
Number 2: Clean the upper half of the end housing by cutting little squares (1" x 1") of lint free rag, spraying it with brake cleaner and pushing it through with the old seal. Do this 5 to 10 times and you'll see there's a fair bit of muck in there. Some people have suggested spraying brake cleaner in there and then blowing it out with compressed air. Be mindful, if it has grime that's stuck in there, that technique may not get it out. If you do the rag method, the little square should go in easy and shouldn't be forced. If it doesn't want to go in, you've probably cut too big a piece or the material is too thick. Then just use your old seal (cleaned with brake cleaner) and push it through. Between the first and last square (about 10), there was a big reduction in the amount of grime on the last rag. It was only after this step did I spray the entire area with brake cleaner and used compressed air to flush/dry it.
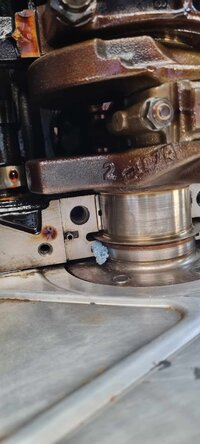
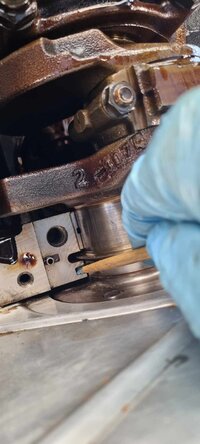
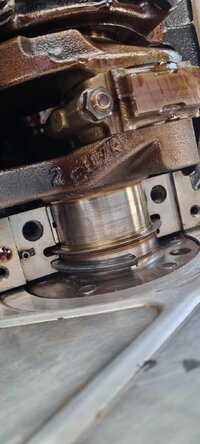
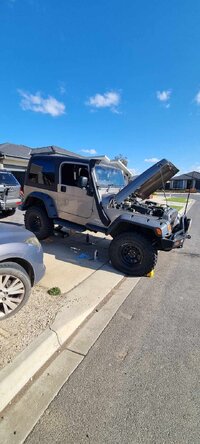
Number 3: When you start this job, have the back of the Jeep raised so the motor is level or tilting down towards the nose. As your 4.0 tilts down towards the back and when you're doing this job, oil will slowly work its way down into the bearing cap area. My theory is, if the oil is running towards the back of the crank, you might find it'll contaminate the Anaerobic Sealant or rtv around the oil pan before it can set. If the anaerobic seal doesn't set, it'll be washed out by oil. My TJ has a 1" motor mount lift, so this has likely exacerbated the oil running down.
Number 4: When putting the main bearing cap back on, make sure the threads for the bearing cap bolts are clean (use cotton tips, brake cleaner etc) and the bolts themselves. This will ensure that when you torque the bolts, it will be as accurate as it can be. If there is debris or muck on the threads, it may give over time and you will no longer be torqued to spec. Make sure you thread it up evenly by hand, until the cap starts to mate with the flange. To seat it correctly and as per workshop guide, give a few very gentle taps with with a rubber mallet and a block of wood. You'll see it seat in correctly, meaning you can now torque it. The socket size is 13/16. To ensure it's seating on both side correctly, torque it starting at 20nm, then increasing it 20nm on each side until you get to 108nm.
Number 5: Give the sealants ample time to set before you put oil in and run the motor. The Anaerobic is meant to set within minutes but I don't believe it sets that quickly. The YouTube channel Project Farm tested all the different types of gasket maker/sealer. Anaerobic performed quite poorly and it seems to need perfect conditions to work, with additional dry time (https://youtu.be/ACIzlSanS60). It's no way near as forgiving as rtv. I gave everything 24hrs before I put a drop of oil in.
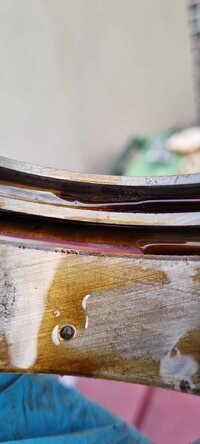
Number 6: The second time I performed this job, I followed some other YouTube guides with how they applied the Anaerobic Sealant to the main bearing cap. I believe they could be putting too much on, because when I took off my main bearing cap, I found half set anaerobic sealant under the seal. This indicates that if too much is used, it'll just squish into every orifice it can find, and may affect the way the seal seats into the cap. In the below photo, you can see the dried up anaerobic sealant, which had a similar consistency to sand/grit. On the third attempt, I used significantly less anaerobic. I really believe you can use too much sealant where you won't know where it has gone or what it may effect.
Number 7: To avoid using a metal punch to get the top half of the seal out, go to your local Chinese restaurant and ask for some chop sticks. I've received wooden and plastic in the past. These are so much safer to use and are more forgiving. The wooden chopsticks are great for scraping off baked on anaerobic sealant, which in hard to get to spots.
I know it is very likely the RMS is holding because of the Mopar RMS alone. I think whilst you're in there, you might as well go the extra mile, make sure everything is spotless, take your time and be as thorough as possible. I'm aware people have successfully done the job without any of extra things I did, I'm just putting this out there in the event someone is doing it again and wouldn't mind a few additional pointers.


Attempt 1: July 2022, Felpro RMS, 3mm offset, RTV on RMS ends, Anaerobic Sealant used, small amount. This attempt held initially for a couple days. I then went on a camping trip, returned home after a week and it was consistently tripping.

Attempt 2: August 2022, Victor Reinz RMS, no offset, RTV on RMS ends, Anaerobic used, large amount. This attempt leaked once complete but it was a very slow and manageable leak.

Attempt 3 (Success): July 2023, Mopar RMS, no offset, no RTV on RMS ends, Anaerobic used, moderate amount (very close to workshop guide). There hasn't been a leak and the RMS is holding well. I did a few extra things (documented below) to ensure the it would seal and believe it has all helped.

This time around (Attempt 3) I did a few different things (not in order) that may help you if you've done it a couple times with no success. I know Chris did a great guide which covers everything really well, but there's a few extra points which could make the difference for you if you just can't get it to seal.
Number 1: Use the Mopar RMS. I've attached a pic of the difference between the lips and IMO, it's substantial. The Mopar RMS kisses the crank easily, whereas the Victor Reinz and Felpro seemingly just touch it. I've used the felpro in the past and it looks identical to the Victor Reinz except in colour. I know people have had success with both of these seals in the past but I doubt they'll last as long as the Mopar, as the lip sticks out at least 30% more. If you order the Mopar seal, you'll need to make your own shoehorn which is pretty easy. Just find some plastic packaging and cut a square out, then cut it to size. The one I made worked perfectly. I also did not put Rtv on the ends of the RMS. The reason I didn't (I did last time) was when I was cleaning the bearing cap, I noticed Rtv had caked on around edge where the seal goes in. It has somehow not set and worked its way in other areas. I also didn't do an offset with the seal, as it's just too risky you'll cut the seal when putting the bearing cap in.


Number 2: Clean the upper half of the end housing by cutting little squares (1" x 1") of lint free rag, spraying it with brake cleaner and pushing it through with the old seal. Do this 5 to 10 times and you'll see there's a fair bit of muck in there. Some people have suggested spraying brake cleaner in there and then blowing it out with compressed air. Be mindful, if it has grime that's stuck in there, that technique may not get it out. If you do the rag method, the little square should go in easy and shouldn't be forced. If it doesn't want to go in, you've probably cut too big a piece or the material is too thick. Then just use your old seal (cleaned with brake cleaner) and push it through. Between the first and last square (about 10), there was a big reduction in the amount of grime on the last rag. It was only after this step did I spray the entire area with brake cleaner and used compressed air to flush/dry it.


Number 3: When you start this job, have the back of the Jeep raised so the motor is level or tilting down towards the nose. As your 4.0 tilts down towards the back and when you're doing this job, oil will slowly work its way down into the bearing cap area. My theory is, if the oil is running towards the back of the crank, you might find it'll contaminate the Anaerobic Sealant or rtv around the oil pan before it can set. If the anaerobic seal doesn't set, it'll be washed out by oil. My TJ has a 1" motor mount lift, so this has likely exacerbated the oil running down.

Number 4: When putting the main bearing cap back on, make sure the threads for the bearing cap bolts are clean (use cotton tips, brake cleaner etc) and the bolts themselves. This will ensure that when you torque the bolts, it will be as accurate as it can be. If there is debris or muck on the threads, it may give over time and you will no longer be torqued to spec. Make sure you thread it up evenly by hand, until the cap starts to mate with the flange. To seat it correctly and as per workshop guide, give a few very gentle taps with with a rubber mallet and a block of wood. You'll see it seat in correctly, meaning you can now torque it. The socket size is 13/16. To ensure it's seating on both side correctly, torque it starting at 20nm, then increasing it 20nm on each side until you get to 108nm.
Number 5: Give the sealants ample time to set before you put oil in and run the motor. The Anaerobic is meant to set within minutes but I don't believe it sets that quickly. The YouTube channel Project Farm tested all the different types of gasket maker/sealer. Anaerobic performed quite poorly and it seems to need perfect conditions to work, with additional dry time (https://youtu.be/ACIzlSanS60). It's no way near as forgiving as rtv. I gave everything 24hrs before I put a drop of oil in.
Number 6: The second time I performed this job, I followed some other YouTube guides with how they applied the Anaerobic Sealant to the main bearing cap. I believe they could be putting too much on, because when I took off my main bearing cap, I found half set anaerobic sealant under the seal. This indicates that if too much is used, it'll just squish into every orifice it can find, and may affect the way the seal seats into the cap. In the below photo, you can see the dried up anaerobic sealant, which had a similar consistency to sand/grit. On the third attempt, I used significantly less anaerobic. I really believe you can use too much sealant where you won't know where it has gone or what it may effect.


Number 7: To avoid using a metal punch to get the top half of the seal out, go to your local Chinese restaurant and ask for some chop sticks. I've received wooden and plastic in the past. These are so much safer to use and are more forgiving. The wooden chopsticks are great for scraping off baked on anaerobic sealant, which in hard to get to spots.
I know it is very likely the RMS is holding because of the Mopar RMS alone. I think whilst you're in there, you might as well go the extra mile, make sure everything is spotless, take your time and be as thorough as possible. I'm aware people have successfully done the job without any of extra things I did, I'm just putting this out there in the event someone is doing it again and wouldn't mind a few additional pointers.

