Yup.
I was thinking of doing this as well, one more thing I'd like to learn to weld for.
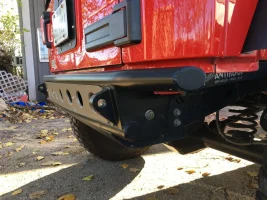
I'd particularly like to get rid of the gap in the rear (between the tub and the bumper) at the same time... it's very unsightly.


Yup.

Did you add material to the top edge to reach the frame or is there a small enough gap to fill in with weld? I haven't studied the mounts enough to see what is going on.Depends on how good you are.Before I convinced Tony to make the raised versions, I used to do it this way.
View attachment 66747
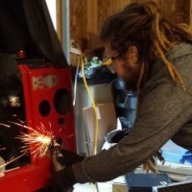
Did you add material to the top edge to reach the frame or is there a small enough gap to fill in with weld? I haven't studied the mounts enough to see what is going on.
I know I can do it with the factory mounts. This is a ways off, so I'm not thinking too hard about the cost vs convenience yet.
I've been dragging the bumper for several years and catching the side mounts more and more recently. It certainly looks good, too!I was thinking of doing this as well, one more thing I'd like to learn to weld for.
I'd particularly like to get rid of the gap in the rear (between the tub and the bumper) at the same time... it's very unsightly.
I've been dragging the bumper for several years and catching the side mounts more and more recently. It certainly looks good, too!
That's what I was thinking.There would be a decent size gap. Genright solves this by adding strength back in with "legs" that wrap onto the top of the frame rail.
The sides are relatively easy, any way you do it. Chopping off the back of the frame will require a bit more courage and commitment. For me at least.Yes, it serves a dual purpose. Clearance, and aesthetics. We all know that that gap can be particularly ugly.
...
Not all polyurethane is the same. I have Daystar's 1" kit, which yielded more than an 1" BL. All bolts torqued to spec and thanks to Loctite 243 have stayed that way.
Increase departure angle and cover the gap?
Only as compared to some of the enormous bumpers out there. Don't look too closely at mine...How is this increasing departure angle?

It does eliminate the isolator. I have their kit on mine and have for about a year. So far, no issues.Doesn't the Daystar BL entirely eliminate the factory isolator? That's a worthy topic to explore.
Does the Daystar kit use an inner sleeve to truly isolate the body from the frame? That inner sleeve is also what allows the ability to set the bolt torque and evenly load the mounts. The inability to bottom out on a sleeve and torque the body bolts is one of the significant failings of the JKS kit.It does eliminate the isolator. I have their kit on mine and have for about a year. So far, no issues.
I can’t say for sure that there is any advantage to it. In my case, I picked it because it was well reviewed and until reading this thread, had never heard anyone give a good reason for the aluminum pucks. Time will tell I suppose.
Yes, there is a sleeve in the daystar set. I can’t recall what it was, but there was a torque spec in the installation manual.Does the Daystar kit use an inner sleeve to truly isolate the body from the frame? That inner sleeve is also what allows the ability to set the bolt torque and evenly load the mounts. The inability to bottom out on a sleeve and torque the body bolts is one of the significant failings of the JKS kit.
This is a 5 year old memory, but I recall a torque spec on JKS as well. I knew enough back then that I needed to slowly work up to that number in smaller increments. But I did notice that as I jumped around tightening, the torque would lessen on the previous bolts. Looking back I see why that sleeve matters as it creates a hard bottom for the bolt to clamp against.Yes, there is a sleeve in the daystar set. I can’t recall what it was, but there was a torque spec in the installation manual.

It does and you shouldn't.Doesn't the Daystar BL entirely eliminate the factory isolator? That's a worthy topic to explore.
It does and you shouldn't.
Yes, it's custom, so any way you want it.That looks like a good option with a lot less work. Is there a TJ version?