Initial Alignment

Thomas-2005-LJ

Member
Supporting Member
Joined
Jan 31, 2022
Messages
42
Location
16117
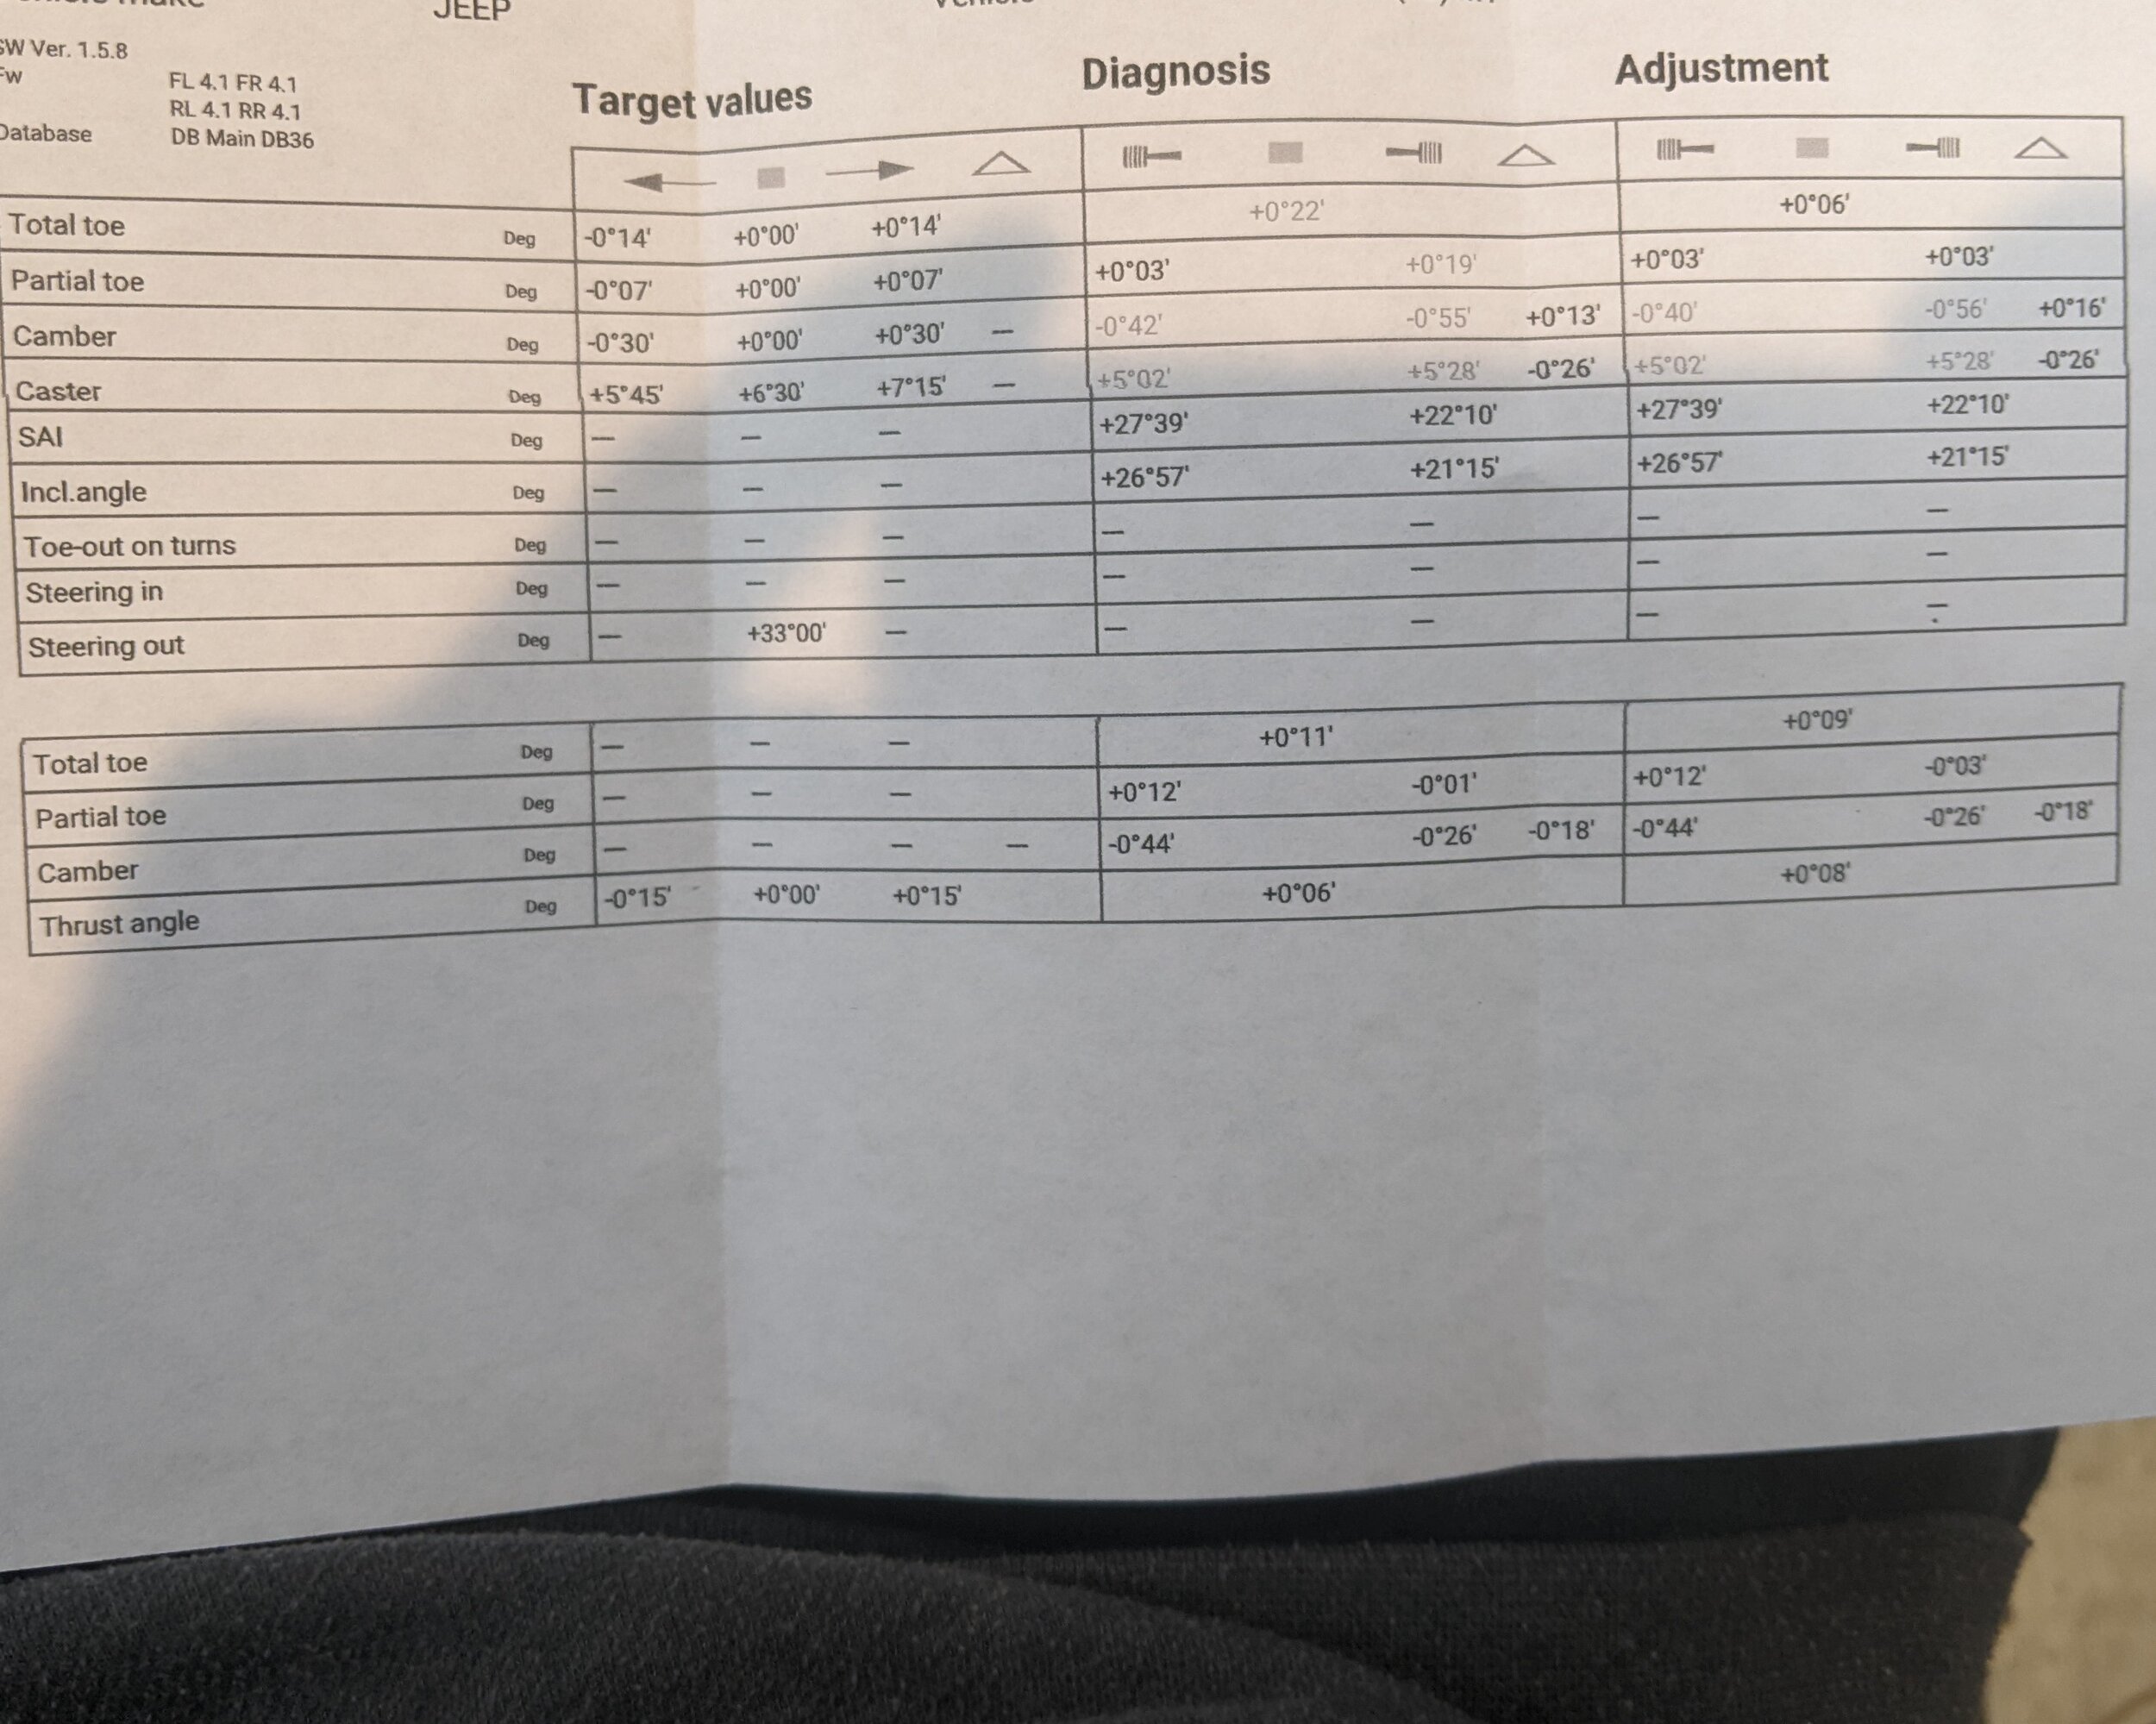
I replaced control arms, springs, shocks, track bars, hub assemblies, axle shafts, Currectlync HD Steering, SYE, and installed an antirock sway bar. I have a ton of unearned confidence, and did all the work myself with the help of YouTube and info from people on this forum. I took my LJ in today for a tire and wheel balance and an alignment, and they gave me a printout of my alignment. I have no clue what it all means on paper. Just for added confidence, or to get ridiculed, can anyone tell me if I was at least originally in the ballpark. Thanks!
PXL_20240213_232354743.jpg
 
Last edited:
I've never done an actual alignment but I am fairly familar with what is supposed to be what.

It looks like you weren't too far off and they brought it into spec.

What's kinda weird about that printout is that the Target value of Total toe and the Partial toe each show a range from a negative degree to a postitive degree and I'm pretty sure negative toe (pointing outward) is what we want to avoid.
 
  • Like
Reactions: Thomas-2005-LJ
I've never done an actual alignment but I am fairly familar with what is supposed to be what.

It looks like you weren't too far off and they brought it into spec.

What's kinda weird about that printout is that the Target value of Total toe and the Partial toe each show a range from a negative degree to a postitive degree and I'm pretty sure negative toe (pointing outward) is what we want to avoid.

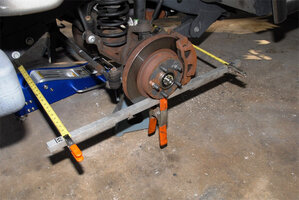
I thought I had the toe 1/8" in. I bought the TMR brackets and did that part as described in a few threads.

PXL_20240127_152155334.jpg
 
  • Like
Reactions: LONGJP2
I thought I had the toe 1/8" in. I bought the TMR brackets and did that part as described in a few threads.

View attachment 500785
Your toe-in should be measured at the same points the tire's outer diameter would be at. 1/8" at your measuring points would produce significantly more than 1/8" (etc.) when measured where the tread would be.

Like how this toe-in is being measured, its measuring points are roughly 35" apart. When we give 1/16, 1/8", or 3/16" measurement suggestions it's always when measured as in this photo. Unless it's the perspective in your photo making your measuring points look too close together.

Toe-in-Measurement.jpg
 
  • Like
Reactions: Thomas-2005-LJ
Your toe-in should be measured at the same points the tire's outer diameter would be at. 1/8" at your measuring points would produce significantly more than 1/8" (etc.) when measured where the tread would be.

Like how this toe-in is being measured, its measuring points are roughly 35" apart. When we give 1/16, 1/8", or 3/16" measurement suggestions it's always when measured as in this photo. Unless it's the perspective in your photo making your measuring points look too close together.

View attachment 500988

The TMR brackets are only 24" long. I see what you're saying regarding the length of the bracket. Moving forward, I could definitely figure out a formula to see what measurement at 24" would correlate to the measurement regarding the tread.
 
The TMR brackets are only 24" long. I see what you're saying regarding the length of the bracket. Moving forward, I could definitely figure out a formula to see what measurement at 24" would correlate to the measurement regarding the tread.
A 40" long piece of square aluminum tubing marked at the center and at its 35" diameter marks is cheap and pretty darned easy so you can measure it directly. There's far more chance of error at 24" where a small error gets magnified at 35" than there is when measuring at the 35" marks.
 
  • Like
Reactions: Thomas-2005-LJ
I've never done an actual alignment but I am fairly familar with what is supposed to be what.

It looks like you weren't too far off and they brought it into spec.

What's kinda weird about that printout is that the Target value of Total toe and the Partial toe each show a range from a negative degree to a postitive degree and I'm pretty sure negative toe (pointing outward) is what we want to avoid.

Thank you for the input. I'm glad I was at least in the ballpark.
 
A 40" long piece of square aluminum tubing marked at the center and at its 35" diameter marks is cheap and pretty darned easy so you can measure it directly. There's far more chance of error at 24" where a small error gets magnified at 35" than there is when measuring at the 35" marks.

As always, thank you for the guidance.
 
  • Like
Reactions: Jerry Bransford