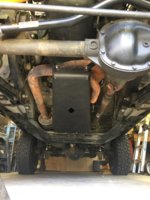
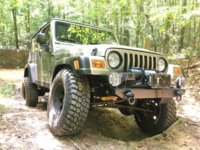
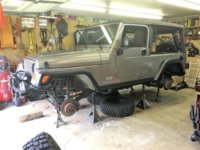
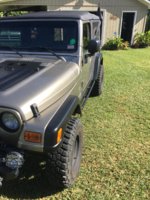
I never really documented my lift installation here. This was installed in May of 2018. In May of 2019, I replaced the OME nitro shocks for Rancho RS5000x's posted above.
I purchased the kit with the Brown Dog motor mount lift and JKS body lift just in case I wanted to install them down the road. After having it the way it is over 1-1/2 years, I don't see my self installing them, so I'll probably end up selling them.
——-
Although I don't live in the rust belt and don't have all the problems involved with rusted hardware like so many do, I've been soaking the applicable nuts and bolts with some Kroil. The upper shock mount bolts are easily sprayed from between the frame and fender liner once the wheels are removed.
Little by little, as time permits. Got the rear done except for adjusting/installing track bar and tightening up the control arms once it set back on the ground.
When removing the jounce bumper cup to install the spacer, I found the recessed area where the bolt goes though packed full of sand. After cleaning it all out I used some rubber plugs I laying around and found a couple that fit in the hole above it. Hopefully it will keep it from filling up again.
Only got the front springs and sway bar links removed today before having to stop and get ready for work.
Had to stop for the day. Thought I had a 9/16 drill bit for front track bar installation, but turns out I didn’t.


I only got one day before work, to work on it this past week. Got the front springs, shocks and steering stabilizer in. The cavity right above where the jounce bumper cup is bolted to was completely full of sand. I cleaned it out really well and used a couple 1-1/2 inch rubber table let tips to jam in the hole from the top to keep that from happening again. I wasn't man enough to force them in, so I picked up some spring compressors from Harbor Freight. They worked very well. Wheels/tires on, sat it on the ground and the front wasn't quite as high as I wanted it. When I was ordering, Dirk told me it probably wouldn't be with the aftermarket bumper, winch plate and winch I had, so he suggested I get some factory spring isolators and stack with the original, so he added them to the kit. The spring isolator was about 3/4 on and inch thick. Got springs and shocks reinstalled but still haven't got to get it back on the ground. I need a job with less hours. LOL
I also installed some spring retainers from Clayton Off Road.
Finally finished installing this lift, and very happy with it.
Setting the toe-in went pretty easy. I followed the directions I seen posted by Jerry Bransford, using the method of 2 aluminum square tubes clamped to the rotors, marking them for your tire size and then measuring the difference front an back until you get 1/16" - 1/8" closer in the front. Not pictured, but put a couple lug nuts on snug so they hold the rotors tight. Aligning the steering wheel was even easier, but took a few tries to get it just right. As mentioned in an earlier post, Dirk at DPG suggested I get another set of the factory spring isolators to use as spacers in case the front didn't get the full lift. He said with my bumper, winch plate and winch, I'd probably need it. He was right, it initially was only 1-3/4 inches higher than before the lift, so in went the isolator. They are 3/4 inches thick. It's just barely higher in the rear than in the front. I'm going to give it a little time to settle in then I may add the 10mm OME trim spacers to the rear. (It never sagged and I never did add the spacers)
One of the best parts of doing the lift, no trouble with removing any of the hardware. : )
Along with the lift, I did the following:
- Replaced rear sway bar bushing on the axle with Moog K3160.
- Replaced front sway bar bushings in front of grille with Moog K7352. (These things squeak like hell when cold, even though I put some lube on the bar. Concidering going back to regular rubber bushings)
- Added front spring retainers from Clayton Off Road.
- New jounce bumpers all the way around.
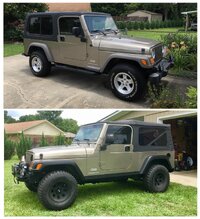
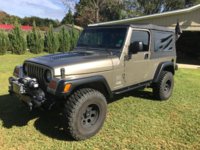
Before and after.
