2005 Texas Jeep TJ Never Sell Build

Air Assault school is a blast. I got my wings in Alaska in 1982. They say it's the hardest best 10 days you'll ever have in the Army.
Congratulations to your son on getting his rope.

Well, delayed because my son shipped immediately to Europe and spent a 9 month tour 5 miles from the Russian border, but got back and got his Air Assault, and momma got to make it there, I had a client meeting.

Funny that he can study when he likes the subject, stubborn kid, ha!
EC82416A-21FA-437E-B585-6C073837161B.webp
 
FYI, if you put on the JB Conversions SS SYE, it uses a tone ring. If your speedometer goes out completely, and you’ve made sure the nut is torqued to spec, the sensor may be bad. Mine was, and easy replacment. Check it, because I pulled the SpeedoHealer and all, and then realized the sensor may be bad. If speedometer won’t work at all plugged to healer or to straight harness, then check the sensor.
 
Well, delayed because my son shipped immediately to Europe and spent a 9 month tour 5 miles from the Russian border, but got back and got his Air Assault, and momma got to make it there, I had a client meeting.

Funny that he can study when he likes the subject, stubborn kid, ha!
View attachment 510672

Bring the wrangler next time, we’ll hook you guys up in GA.
 
  • Like
Reactions: Wildman and cpwolf
So I got my MORryde put on today. Haven’t put a 35 on back yet, will later this month, still a mostly useless now 33.

Of course, it was a 2 hour ish or less Job that went far too long, ha.

It was going super easy….until I see or remember the owner before me put these rear light covers on. So, they don’t freaking fit, and I need to get something that is a 1/4”, for rubber fender washers and got it back on, but needed the longer 12-24 bolts, that took forever to find at ACE.

Also used 2 1:8” thick rubber / Vinyl fender washers cut on the bottom nubber to make it same to the tire as before.

I also extended the 3rd light up using my old 1” Transfer case, ha.

I need to get some better protection tubing, I’m out, but all the exposed is covered for now.

Word to the wise on the 2005, at least mine. For some reason the 2 metal butt terminals that touch for the 3rd brake light….some reason these things caught the lip of the body, and ripped one out. Unplugged it, I plugged it back in and bend the body lip there and no more problem.


The factory 3rd light tower didn’t match up when lifted, so I ran a 1/4” cut across and it go right in.

I took pics, but the tire is juts a hair off center? I looked and looked, and it’s possible I’m an idiot, but the dad gum tire is a touch off to passenger, and I think the light is centere. That’s where the mounting holes are? Bery odd.

I’m putting on the Savvy BL
MML
And the Under Armor in the next month, so I’ll fit the 35” spare when that is done

BE6EC623-33DA-41AA-91D4-A0374783AB7A.webp


1D3983A5-0547-49CD-8B38-777A9D18A745.webp


60BAC58F-B519-4A54-839A-C6B5B2CBEB64.webp


5718AECB-16BF-49AC-BAFE-A8AB4790709D.webp


5B0B9765-F6DC-4B75-99E2-A15AFD7CB2DD.webp


426C519A-F58C-447B-9653-1F5F2D26180A.webp


871910EF-0BA9-4433-B953-CC4BE371AB3B.webp


002C5D30-F7AA-4F38-9885-B8FDA29DD9F6.webp


3338F811-B6E0-4479-9BD3-1234D0BCDF2E.webp


AD8E7B4A-2B2F-4D3E-BB61-DCA4584E7D85.webp


7AA7A24E-B5EE-4088-9F5F-64EB70150A87.webp


763C1BC3-0196-43E4-B262-7C464A02B37C.webp


512D811B-D0B0-4A9E-81D6-4C374C9548C1.webp


DF75083F-F0DB-46F0-BC1B-781282E682F8.webp


D4B3FF85-7F1A-41D2-A6B5-D2C1356A3503.webp


FB46A41C-6B9F-4B14-A4AD-1DD60BAD287D.webp
 
So I saw a person talk about the Front to Back bow strap for the softop frame. Ours was off when we got it, and I’m an old CJ5 guy and didn’t even think about these straps.

So, I decided to get it done. I bought this 3” wode strap on Amazon for like $7.
https://www.amazon.com/dp/B0BJ7VQJMH?tag=wranglerorg-20

I drilled out the rivets and on the frame back and front.

I used the one that was torn up and kinda made a template. The angled cut is basically 45 degree so just cut and that was the start of the next length.

I then marked the holes with a silver sharpee.

Then I heated a nail in my vise, and just ran the nail through where the silver sharpee marks were, and they were set up for 1/8” rivets.

I drilled out the rivets witb a 1/8” but, and there are 3 holes front and back.

I got a Rivet gun and rivets for Father’s Day, and bam.

Drive it and it was much quieter, a lot less random “flapping and popping, almost none actually.

I also bought some pipe insulation, and the Velcro on this cheaper top across just in front of the sound bar, it tightened that up big time. I had to cut it and bastixally just put a slice in.

Much quieter. I also took some of the thicker kitchen cling wrap over the vents in the tailgate and put the air on recycle. Makes for the last part, and the cabin with the top up is crazy quiet compared to before I did this.

All of $35 or so with the Rivet Tool, rivets, webbing and pipe wrap.

866AA978-E351-4B9B-8888-6FBC0387FA20.webp


D9D874D0-9B98-4834-BB2B-DA5285077DFF.webp


DA11681A-1678-49AC-A690-07D0E1ABDB8A.webp


4F2A94AE-63B7-4FDA-8AEA-85B24D52B353.webp


FEAE7516-DAD9-4259-BC88-0944A5F53BA6.webp
 
So my goal is to get the Savvy UA Skid on, and then the Savvy Engine skid.

So I needed to get the Savvy 1.25” body lift and Savvy 1” motor Mount lift on the TJ.

I started a few weeks back, and on my rust free Texas TJ, front passenger body mount bolt broke. F!

So plan was to get it done this weekend, and over the past week I started spraying with Liquid wrench, all the bolts.

Well, that’s more fun that ever. I got an endonscope on Amazon, and a super long straw to go on the liquid wrench nozzle. Fed it in from the back wheel well to the middle and rear of the large 3 center. The front I had to pull the plug in floorboard and it was a son of a gun.

Here’s an example of doing it, would see the straw a little longer get it there and hit it. Worked pretty well with patience.

The black tape go all black gewy, I’d use a different tape, maybe clear packing or Velcro straps ha.

896B7763-8EFA-4A19-B255-51E0EC03D581.webp


D9DF2808-2DDF-4F7E-B8D0-8C5E031E76CF.webp
 
I then drilled a hole under the back seat to get those. Driver I was on top of the bolt. And wanted an angle to spray threads, lesson learned passenger side was cleaner.

CD6BF022-B816-4C6F-9E4B-70AF6683AC3C.webp
 
So this weekend I had the time to do the BL and MML hoping the bolts would cooperate.

I hit the heads with a single flame cigar torch. Worked really well, I went until I could slightly smell hot rubber.

7BE0AEB4-F90D-4AA7-BD2B-6F292B3AD1F3.webp


They all came out prett easy now.

Then went back to the one that broke, and had a ton of thread. I got a 3/4 nut and threaded it on, then welded it to the bolt.

D0FC7C68-E5B3-4D4D-86A0-D89A25DA2EA3.webp
0B83F624-4CDE-44BA-B3A7-C7E60B4EB028.webp
4F77E57B-409A-43D5-A0D4-C4DA4911A196.webp


Pic of bolt in the location, bolt with amazingly terrible weld, ha, and then the free to put on BL bolt hole , ha.
 
The new Crown Body mounts and the Savvy pucks and hardware with Blue Loctite on the threads, all went in pretty easy.


With one side high other not, the back smaller and the front grill, I needed to level
Out the body, then they all lined up, was simple and I did the whole project solo.

8FE1CFA6-C845-412A-8C86-6DFE5E07B252.webp


The front grill snubbers, or Radiator Suopports, of course, they broke off their tabs.

So I left them off for now and have OEM replacements coming and I’ll get them in.

B542AED8-8A7D-4F51-A0EE-43F3CE0A8A85.webp
 
Then on to the Savvy Motor Mount lift.

I got Mopar OEM rubber. Mine don’t look bad, but I figured get new while doing this (I’m glad I did, mine look squashed over 19 years, so the new probably much better).

I did this solo, and out a block on Jack and put it on the bell housing.

I got the front passenger off, and the only snag was this one bolt.

I could not get it to start, and I didn’t want to cross thread it.

My brother was an Air Force mechanic and then lead guy at Off Road Unlimited in Houston for a long time, and I know his advice. Walk away, I went 7/11 and got a slurpee in my CJ5 great weather.

Got back and Blaine ans Ricky and few others had tips.

I raised the engine more to get the engine brackets out of the way some and not fighting me, made sure other side was loose. And used some leverage and it got started.

The drive side, easier. I loosened the 3 block bracket bolts. Made it easy to take out the but, bolt and thru bolt.

With the bracket loose, thru bolt came out easy, AC didn’t matter.

It all went back in easy. The thru bolt is pointed some, got it in some, and put a battery ratchet on it and it spun itself in easy on both sides.

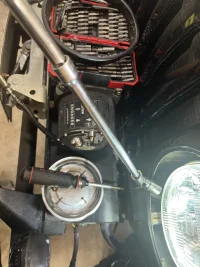
Getting a torque wrench in there … was harder than most anything.

3844330D-A06F-4EC7-8CF9-490DA747D432.jpeg
23EB21B7-C4D7-4C06-80E0-E441BF6AB42B.jpeg
5F987B0C-2094-4CC0-8179-69A031A6B3A7.jpeg
9C0C719D-5FC0-412D-8D95-10E8CFF4428B.jpeg
0D41BC91-641B-4F44-8E69-D132FB9DF078.jpeg


The TJ finally looks like the 35’s have the room to really articulate. I have flat tube, and I know they may restrict some, I’ll live with that. I don’t like the Highline Fenders.

Free workd, I get it, I just personally like the look of keeping the fender, looks more like my CJ5, ha, and I like that.

Super fired up.

10190C1C-B446-4C2A-A03F-70C2645935DE.jpeg


076A40D3-00CC-4D27-9644-5F60C8BE3C59.jpeg
 
I suspected I could have an issue with the stick shift hitting.

Sure enough it’s so tight, I probably won’t drive until I get the Savvy UA skid on the TJ.

That should bring the trans up, as well as bend it back into that opening better. If not, and I’m wrong, then I’ve got some Lower Boot and console work. Console I’m good, if it’s the lower boot I spent way too much to replace, I’ll be pissed at myself.

Also, I did the GM Fuel Filler back in 2015 when we got the TJ originally for my son. That neck is too short, so I ordered and OEM style replacment knowing I’ll be dropping the tank to fix it properly.

I zip tied to see about test driving, but the stick is hitting too much, so I’ll have the neck on and not drive with zip ties ha.


Down the Rabbit hole, 1 project necessitates another and on and on. Although I’m nearing the last lap, maybe ha.

294036E8-5400-4707-8051-4713896EBB89.webp
 
On to the Savvy Under Armor Skid install in a couple different work times after flying back home.

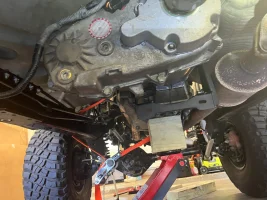
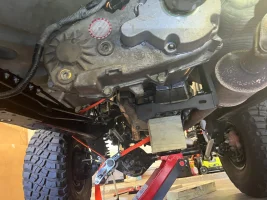
Got the Transmission on a Jack stand and dropped the skid. One of the nuts underneath was gouged, literally just enough to make me get a file, never easy.

Took off the trans minute, and dang, it is super separated. I have felt some steady vibes, and had a feeling this might be an issue, so this is a bonus to this install.

Had to stop for a workout and job, but back at it this evening.

I’m concerned about exhaust work, we’ll see, it seems everyone has to make changes.

I will say, after the bodily lift the space above the Trans and TC is huge.

Also, making a very, very specific review of wiring , I do not want to cause a major headache by smashing wires.

71BCBD59-69BE-42F8-807F-65C34602CFA4.webp


05462C3D-0C56-4A97-9651-3B2211943650.webp


DB80169E-B43B-4FEF-95B4-ECC7552F9B45.webp


A2E218E7-F5A2-49F0-862D-2412E5945ADE.webp


BD68BD1F-049E-4A0C-9314-E45C00E27DBA.webp


239C45F3-126D-4BA9-9F10-2FCF9B10C65D.webp
 
Wanted to update my build thread on the efforts running up to July 4th 2024, ha.
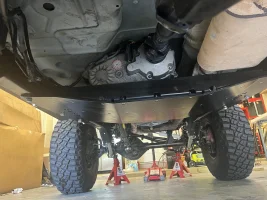
So I got the Savvy Under Armor skid on. I did the entire job solo. I try to do that, strangely enough so that I can take my time. I feel like if I rush, I’m gonna screw something up.

It makes me crazy, but most of the time I’m looking to see if anything else needs to be done, ha.

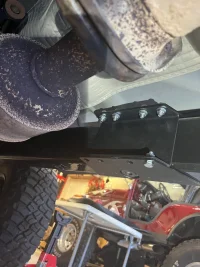
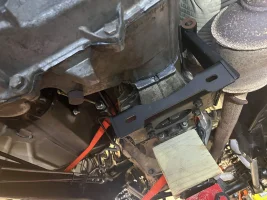
I had to disconnect the muffler from Cat section, so I got that soaked with Liquid Wrench, and luckily no issue. This is the Flowmaster 40 that was on it when we got the TJ May 2016. I pulled that out of the way for now, and got to work on the skid. It went about as simply as a mod of this degree can, not sure if that's because I've got the Savvy 1.25" BL and it doesn't squash like I hear others, plus I put Crown body mount replacements, so it's not settled or anything.
C11AE2BF-0EE4-4B4F-A14A-80DF61F2B05A.webp
231AAD75-9058-48D4-82E7-4FABBA0B01E8.webp
CE808DC5-6605-4E71-BC5F-C62C2B7BCFA8.webpC865BE9E-32ED-4D76-B59C-728912A94506.webp
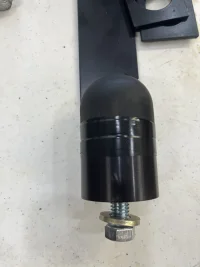
The outer channel C's went on pretty easy, I loosened all 6 main under door body mounts, and took out the bolt on the middle so I could install. I also loosened the front grill one, because I still had to go back and get the Radiator Core braces (snubbers whatever) extension etc on the front. The new ones I ordered didn't come in, so I took electric tape and taped the stock to the extension, because the nub broke off when taking them out.
238358CA-A27C-4D6B-8B49-D911CD992598.webp4D5D2C9B-0505-4A1C-9532-87845BA9FF83.webp3AB7F85A-A0D6-4BE8-AEE1-1F308C25FF1A.webpDBBC3757-1B0A-48FE-B74F-89F90AF1546B.webp

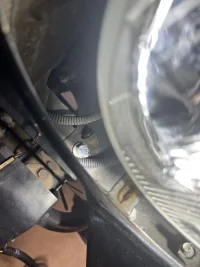
I read to take out the whole headlight bucket, but I used extensions, socket, wobbler and a couple small pieces of masking tape to keep the bolt in the socket, and I was able to get them on....just pulling the bevel, only took out 3 phillips screws each, was pretty dang simple actually. So that was taken care of for now, I'll keep an eye on if I need to install the newer when they come in, but it wouldn't be hard to replace.


I then went back and tightened down the body mounts and torqued them again.
The inner c was pretty easy as well. I then put the 4 top bolts on each side as well as 1 on bottom to hold in place, the bottom will need to come out. As an aside, the setup comes with bolts for this with a flange nut. In reading about this, repeatedly, I saw that @mrblaine commented on a thread that the top should use a washer, and the bottom not so it doesn't hit the skid. I commented on an old thread, and mentioned instead of getting washers....a flange head bolt would work. Back to Ace, got 5 (all they had) and ordered the others so I had 8. Makes it that much simpler not fumbling with washers, plus being a flange holds tight easy.


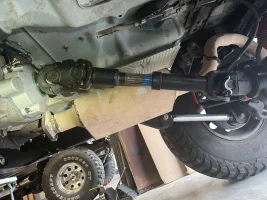
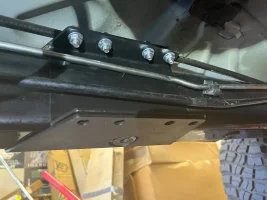
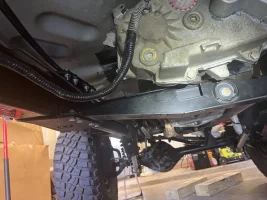
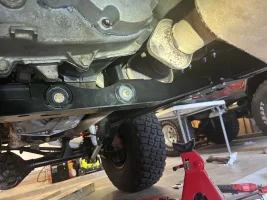
Then I had to lift the driveline, my biggest worry watching wires so I don't smash them and end up with a massive project while getting the crossmember into place. I got high enough that it hadn't hit the tub, and tried...and sure enough the crossmember went into place. I secured it with the bottom 4 bolts each. I got the exhaust hanger on the Cat and the bolts through the trans mount and in through the bushings on the crossmember. I snugged them, Still not really tight, I did a quick run through.

I took a long piece of cardboard and ran it all over the trans and transfer case to see if it caught and was touching the tub. I couldn't find a single area. I bought the 1" lock nut etc to use to bend the tub, and it wasn't necessary. That concerns me that all the videos and walk throughs needed it, but mine did not.


I then went back and pulled any bolt and put blue threadlocker and snugged them up. All aligned I got them tight. I could not find torque values, so I used the German method of good n tight. I'll give it a few weeks and check. The only ones I used a torque wrench were the trans thru bolts to the crossmember bushings. I used the same torque value as the upper control arms use, because that's where those are from in reading on this kit.

I was able to get the exhaust hooked back up and all is good. No hits there, except it's just barely rubbing the gas tank skid. I little adjustment and that stopped. I got a quieter muffler, so for now this is good, and I'll get back to that, the flowmaster 40 drone on the highway is just getting old.
DBBC3757-1B0A-48FE-B74F-89F90AF1546B.webp3681BFCB-D0BC-4390-A25F-90CE0101E2C9.webp3997AB5B-1A0E-4D6C-A1D0-FC91892B682B.webpBDDAE286-7F33-4AD7-946F-AA00FBE469C9.webp5A4F0184-7140-491F-B88D-4F6D3799406B.webpFA6BA303-8B3C-462E-8C99-4F2F140C49DB.webp56B24385-B6FD-4B83-8D5D-00FA7FD444FD.webp8865D6D3-E5F4-4B93-995B-9BFE10537504.webp

I then adjusted the rear pinion and DS angles. I was more closely aligned prior, but the lower Savvy control arms are almost all the way in, and the uppers are pretty extended. I didn't want to go farther, I got to 2 degrees difference pinion and drive shaft and went to test. I wanted to test with the front DS out, I had taken it out while this was done so that I could grease the Tom Wood's front CV centering ball.


I ran 75-80 on the Texas Tollway and it was stock smooth. I hit 83 rolling with car flow a little and still good.


I came back, hooked up the front DS, and went for a run, and same results, no vibes all good. I'm a little shocked, I think I have a touch too much Caster, it's a little heavy steering, but I'm not messing with this at the same time. I want to make sure this is all good, which it seems to be, and I'll come back and look at just that.


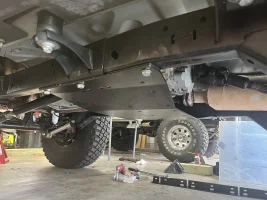
I got the skid up, it's so light I just held it with one palm and started a bolt on one side, switched hands and started one on the other. I had to pull the front and backs to get the spacers in for the skid after, then I snugged those 6 bolts up.

I got blue threadlocker on each beveled bolt and flange nut, and got them into the crossmember. I used a pointed bar (forget the name of that) to align some of the holes, and then get them in and the flange started. With all of those connected, I tightened them down fully. Then I tightened and torqued the big skid bolts. Then the back brace I put up on the skid (I'm wondering if that would have been easy to do before I put it on) but I got them all on and tightened down.

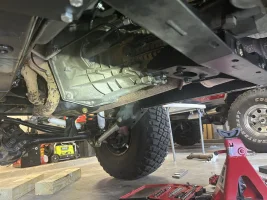
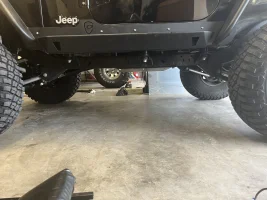
For my 2005 TJ this was work, not the massive problem one after the other that some projects lead to, I just went step by step and it all just went into place. Gained a couple of inches, and now I'll be able to get the oil pan skid up to this as well. Love it, great product and workmanship, went into place very well.

 
The TJ drives great with the Savvy Under Armor skid. Looks good and my clearance is significantly improved, and when I get the oil pan skid on it'll be much better.

View attachment 540600

View attachment 540601

The comment about pulling the head light bucket via the 3 nuts on the studs at the back side of the grill shell doesn't mean you shouldn't do it another way. It just means that if you are one who appreciates the easier path to a very simple method to do something, then it accomplishes that very nicely. It is the same as the folks who install a cable shifter without dropping the belly skid or who remove a front driveshaft without dropping the belly skid. Sure, you can do it, but the 3 minutes it takes to drop the skid makes the job easy, simple to do, and much faster to accomplish.

A gynecologist had become fed up with malpractice insurance and HMO paperwork, and was burned out. Hoping to try another career where skillful hands would be beneficial, he decided to become a mechanic. He went to the local technical college, signed up for evening classes, attended diligently, and learned all he could.
When the time of the practical exam approached, the gynecologist prepared carefully for weeks, and completed the exam with tremendous skill. When the results came back, he was surprised to find that he had obtained a score of 150%. Fearing an error, he called the Instructor, saying, “I don’t want to appear ungrateful for such an outstanding result, but I wonder if there is an error in the grade?”
“The instructor said, “During the exam, you took the engine apart perfectly, which was worth 50% of the total mark. You put the engine back together again perfectly, which is also worth 50% of the mark.”
After a pause, the instructor added, “I gave you an extra 50% because you did it all through the tailpipe, which I’ve never seen done in my entire career.”
 
So, in true Jeep TJ fashion....I immediately start getting hiccups with the starter. Click, click then go. Sometimes 2 or 3, but a restart it would go. I took a deep breath, and look at all the wiring, did I damage something. No, I didn't, I'm convinced.

So, I check grounds, and all good. The battery had been unhooked for about 2 weeks while I was working on the MML, BL and Under Armor, but I had a charger on it....so that absolutely shouldn't be the issue.

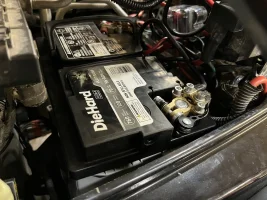
It's a DieHard Platinum AGM. I go to Advance Auto...and they test it failing. Ok, under warranty ( and I won't keep arguing, Consumer Reports and AutoTrend both talked about Texas being the hardest on batteries) but the Adv Auto is not prorated, it's a free AGM Diehard Platinum. Only problem, they don't have the one for the TJ anywhere, the AGM Platinum has the posts opposite, better CCA and all else, but opposite. I'll take it.

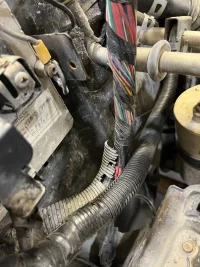
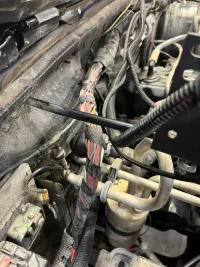
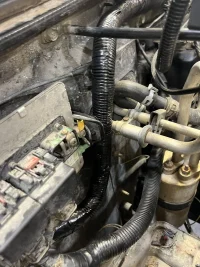
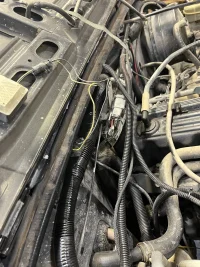
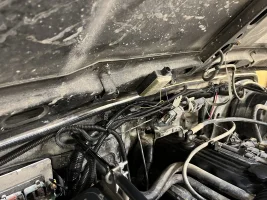
Down the rabbit hole, and probably for good reason. I pull the battery, and move a cable loom, and it crumbles. I touch some more, and the entire loom crumbles. Last summer I went through some of this, and I got a bunch and needed to get more on there.

9C095C6B-FD2C-4026-B340-B3015F0EBB54.webp9BDDA5FC-970E-4330-8290-1CFE223009F5.webpD1465AD1-DDE9-41F3-97EC-CE9FA150E3F4.webpF1FA33C3-5AE0-4420-A005-A6E4BEF88B46.webp
93DE1BA9-0A50-4B97-A569-CF0942E97899.webp

I saw this and got after fixing it. Cutting the old and tape off, and the zip ties, and getting new wire loom on the bundle.


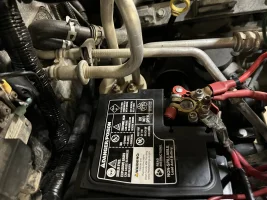
I knew this was the case, but the battery cables won't reach opposite poles. I then cut all the wrap and tape holding the positive and negative cables to the alternator, starter and block. Once that was cut, they all reached. So with the battery still not in and room to work, I got them all in the right place, and reworked new wire loom and taped it up. I had put the Aux box onto the support rod above the battery, but I can hand twist it up and out of the way temporarily as well, so I pulled the wires and re ran them out of the way and better for the positive being opposite side.

Battery went in and all hooked up well. I know some don't like the posts that I use, but I put shrink on the positive handle so it won't bump arc anywhere when removing, and not better or worse that a small wrench being used.
4968AAC8-0B37-4F3E-9559-9EA7890FC4F2.webp53A8A9F7-32DF-4334-BC16-773AF075C601.webp


Then I tested, and dad gummit, still the same click, click again, then start. Weak start frankly even when it did turn.


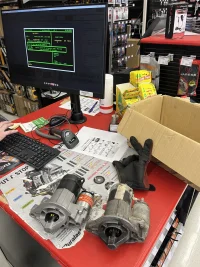
So looked in my book (I keep a log of all the things I do to the vehicles) and remembered the first few months in 2016 got a new starter. At Autozone, was in a hurry and grabbed it. So I took it up there, and it tested bad on throwout, and they pulled a new one, so zero cost (and I get it, still a AZ part, ha).
CAC72253-3447-49E4-8D1B-C25E9C9546AB.webp
Spent the 5 minutes putting it one, and noticed the ignition wire loom single wire crappy, so I re did that with new wire loom. TJ Fired up faster and stronger than maybe ever.

So I got a new battery under warranty, and a new starter after 8 years. So crisis averted, ha, and in the process a 30 minute job of battery and starter switch, turned into a half day of wire loom coverage in the process.
 
So, in true Jeep TJ fashion....I immediately start getting hiccups with the starter. Click, click then go. Sometimes 2 or 3, but a restart it would go. I took a deep breath, and look at all the wiring, did I damage something. No, I didn't, I'm convinced.

So, I check grounds, and all good. The battery had been unhooked for about 2 weeks while I was working on the MML, BL and Under Armor, but I had a charger on it....so that absolutely shouldn't be the issue.

It's a DieHard Platinum AGM. I go to Advance Auto...and they test it failing. Ok, under warranty ( and I won't keep arguing, Consumer Reports and AutoTrend both talked about Texas being the hardest on batteries) but the Adv Auto is not prorated, it's a free AGM Diehard Platinum. Only problem, they don't have the one for the TJ anywhere, the AGM Platinum has the posts opposite, better CCA and all else, but opposite. I'll take it.

Down the rabbit hole, and probably for good reason. I pull the battery, and move a cable loom, and it crumbles. I touch some more, and the entire loom crumbles. Last summer I went through some of this, and I got a bunch and needed to get more on there.

View attachment 540607View attachment 540608View attachment 540609View attachment 540610
View attachment 540612

I saw this and got after fixing it. Cutting the old and tape off, and the zip ties, and getting new wire loom on the bundle.


I knew this was the case, but the battery cables won't reach opposite poles. I then cut all the wrap and tape holding the positive and negative cables to the alternator, starter and block. Once that was cut, they all reached. So with the battery still not in and room to work, I got them all in the right place, and reworked new wire loom and taped it up. I had put the Aux box onto the support rod above the battery, but I can hand twist it up and out of the way temporarily as well, so I pulled the wires and re ran them out of the way and better for the positive being opposite side.

Battery went in and all hooked up well. I know some don't like the posts that I use, but I put shrink on the positive handle so it won't bump arc anywhere when removing, and not better or worse that a small wrench being used.
View attachment 540611View attachment 540613


Then I tested, and dad gummit, still the same click, click again, then start. Weak start frankly even when it did turn.


So looked in my book (I keep a log of all the things I do to the vehicles) and remembered the first few months in 2016 got a new starter. At Autozone, was in a hurry and grabbed it. So I took it up there, and it tested bad on throwout, and they pulled a new one, so zero cost (and I get it, still a AZ part, ha).
View attachment 540614
Spent the 5 minutes putting it one, and noticed the ignition wire loom single wire crappy, so I re did that with new wire loom. TJ Fired up faster and stronger than maybe ever.

So I got a new battery under warranty, and a new starter after 8 years. So crisis averted, ha, and in the process a 30 minute job of battery and starter switch, turned into a half day of wire loom coverage in the process.

I don't see any stripes on the new loom. (doesn't mean it isn't there, I just don't see it.) It will last longer if you get the stuff with the gray stripe on it which has a higher heat rating than the generic off the shelf stuff.