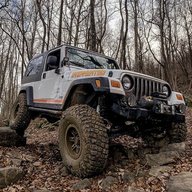
Such a good looking simplistic bumper. Makes me want to get exogate hinges and snag the dirtworx now.


That's my plan down the road - Exogate replacement hinges..Such a good looking simplistic bumper. Makes me want to get exogate hinges and snag the dirtworx now.

One down, one to go...
2 coats Rustoleum self-etching primer:View attachment 15312
2+ coats Rustoleum textured black:
View attachment 15313
Thanks, it did turn out good. Thanks for the paint recommendation. I will attempt to get better photos up closer to show the textured finish. It really looks nice. I got a little carried away, and used most of one can of paint on the rear bumper. I wanted to make sure it had good coverage. Of course, moving it into the shed to allow it to dry for a few days, I managed to hit the other bumper. Already had to touch it up...looks great!
Sent from my iPhone using Tapatalk Pro
![IMG_0866[1].webp](https://wranglertjforum.com/data/attachments/15/15536-f864bac2d1196654b354d87c50678906.jpg?hash=Uwv0aUnVg9 "IMG_0866[1].webp")
![IMG_0867[1].webp](https://wranglertjforum.com/data/attachments/15/15537-d608c6f6b569203d9e8ed1b0ba8ff6a9.jpg?hash=MSO56q44yN "IMG_0867[1].webp")
![IMG_0868[1].webp](https://wranglertjforum.com/data/attachments/15/15538-9e4809ed063d91429ff63f3b8737a6fe.jpg?hash=QBjjwAz2E6 "IMG_0868[1].webp")
![IMG_0869[2].webp](https://wranglertjforum.com/data/attachments/15/15539-b221a9141f746da532e1bf8172cd3b28.jpg?hash=pGnnfpLM4Q "IMG_0869[2].webp")
![IMG_0870[1].webp](https://wranglertjforum.com/data/attachments/15/15540-b8bb143b8f0d29d25b8f22083b6b6642.jpg?hash=QM-kx72En5 "IMG_0870[1].webp")
![IMG_0871[1].webp](https://wranglertjforum.com/data/attachments/15/15541-3268378c679c922c782c0897eafc44d0.jpg?hash=PqJg7hz4OQ "IMG_0871[1].webp")
![IMG_0872[1].webp](https://wranglertjforum.com/data/attachments/15/15542-edce749674fb02d64857543c64e64208.jpg?hash=kNx-ZjIZiU "IMG_0872[1].webp")
![IMG_0873[1].webp](https://wranglertjforum.com/data/attachments/15/15543-7638fe8abd16504e493e2f21652b8f3c.jpg?hash=bqc59t0A43 "IMG_0873[1].webp")
![IMG_0874[1].webp](https://wranglertjforum.com/data/attachments/15/15544-a9c4ae592e0249f85bdccfc32d85e189.jpg?hash=jjfKsT2Cfu "IMG_0874[1].webp")
![IMG_0875[1].webp](https://wranglertjforum.com/data/attachments/15/15545-0f8683855f36173835f0b8e65dab6d50.jpg?hash=KRHFUHP06r "IMG_0875[1].webp")
![IMG_0876[1].webp](https://wranglertjforum.com/data/attachments/15/15546-20481b6bb28eaf58fc4ba7195a4746cc.jpg?hash=7_EEYYyMZN "IMG_0876[1].webp")
![IMG_0877[1].webp](https://wranglertjforum.com/data/attachments/15/15547-fd0252d280810bd9c3827cfad33c1e97.jpg?hash=09MBgBgE7D "IMG_0877[1].webp")
![IMG_0878[1].webp](https://wranglertjforum.com/data/attachments/15/15548-a1a4ab3230aa2408276dd1d275806ed9.jpg?hash=L0uUciIJkB "IMG_0878[1].webp")
![IMG_0879[1].webp](https://wranglertjforum.com/data/attachments/15/15549-cac18012b8266308a7b239e848c09ec7.jpg?hash=y9asdXCByH "IMG_0879[1].webp")
![IMG_0882[1].webp](https://wranglertjforum.com/data/attachments/15/15550-343a3a8d04d05504be4dd777f3c6145e.jpg?hash=L7d158Ec0Q "IMG_0882[1].webp")
![IMG_0880[1].webp](https://wranglertjforum.com/data/attachments/15/15551-3e8301752926742c52a66ad9c41d6637.jpg?hash=qVBdfF--jR "IMG_0880[1].webp")
![IMG_0881[1].webp](https://wranglertjforum.com/data/attachments/15/15552-0491638195ad7f7ee7f3ad543a4cc0e3.jpg?hash=LeOGgbENBz "IMG_0881[1].webp")
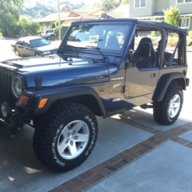
I appreciate all the input. Project complete. Bumpers primed, painted (Rustoleum black textured), installed. Rear was a pain in the rear, but would have taken half as long if I would have taken the gas tank skid nuts loose and just let it droop a bit. Most of the time spent was trying to fish the inner four bolts into their respective holes. Front was a breeze, 6 bolts on and off. I did have to drill a couple of holes in the front bumper, as the fog lights have a little tab that goes into a small hole next to the fog light, to keep it from pivoting. Some after photos:View attachment 15536 View attachment 15537 View attachment 15538 View attachment 15539 View attachment 15540 View attachment 15541 View attachment 15542 View attachment 15543 View attachment 15544 View attachment 15545 View attachment 15546 View attachment 15547 View attachment 15548 View attachment 15549 View attachment 15550
And the frame tie-in brackets...sort of hard to see
View attachment 15551 View attachment 15552
Another plus - although these weigh more than the stock bumpers (go figure!), it did not affect the suspension. All the measurements taken up front and in the rear were the same before and after.
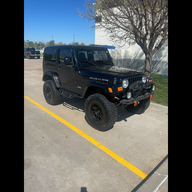
Thanks.Looks great. The textured black really dresses up the bumpers nicely. How much do you have into the primer, paint and prep?
Bumpers look great. Love the texture and the simplicity of them. They look very strong.
Not a fan of the hoop/stinger deal but, that one looks good.These seem massively strong. Everything bolted up exactly right. The frame tie-in brackets add a lot of strength to the rear.
I was leery of the front hoop, I thought it might be too much, but after putting on the bumper, it doesn't look out of place. Will look better with a winch.
I know, right? I really debated first just ordering without it, and even after receiving it, possibly removing the hoop b/4 painting...then I thought, just run it as is, see how you like it. I really don't mind the hoop now.Not a fan of the hoop/stinger deal but, that one looks good.
Thanks. SW Jeeps are a blessing to work on. I didn't need any PB Blaster type anything on any of the bolts involved. This is one project that pretty much went just as I hoped. Now I definitely have a strong tow setup if needed. Oem recovery hook on the back now on the shelf.The Jeep turned out great!!! I can't get my a head around how nice it must be to work on a Jeep without 10 yrs of Michigan salt on it though.
Will look better with a winch.
I am waiting for my dirtworx bumper from Robert as we speak. Mare the frame tie in brackets necessary? I looked at some but was not planning on buying them. Would like opinions if the are really needed or not. THANKSThese seem massively strong. Everything bolted up exactly right. The frame tie-in brackets add a lot of strength to the rear.
I was leery of the front hoop, I thought it might be too much, but after putting on the bumper, it doesn't look out of place. Will look better with a winch.
I am waiting for my dirtworx bumper from Robert as we speak. Mare the frame tie in brackets necessary? I looked at some but was not planning on buying them. Would like opinions if the are really needed or not. THANKS

I have Poison Spyder Frame Tie-In’s for safety when towing a trailer. They were about $50. For me, well worth the peace of mind. All you have holding that rear bumper on is the crossmember. If you’re towing for sure, or if you get stuck and need someone to pull you from the rear, you’d want the tie-in’sI am waiting for my dirtworx bumper from Robert as we speak. Mare the frame tie in brackets necessary? I looked at some but was not planning on buying them. Would like opinions if the are really needed or not. THANKS
I have Poison Spyder Frame Tie-In’s for safety when towing a trailer. They were about $50. For me, well worth the peace of mind. All you have holding that rear bumper on is the crossmember. If you’re towing for sure, or if you get stuck and need someone to pull you from the rear, you’d want the tie-in’s


