
You are using an out of date browser. It may not display this or other websites correctly.
You should upgrade or use an alternative browser.
You should upgrade or use an alternative browser.

Replacing stock control arms with Savvy control arms, not adding a lift
- Thread starter GregBelleville
- Start date
One side down, one to go. 
Rented a seal driver set from AutoZone. Popped right out without too much effort.
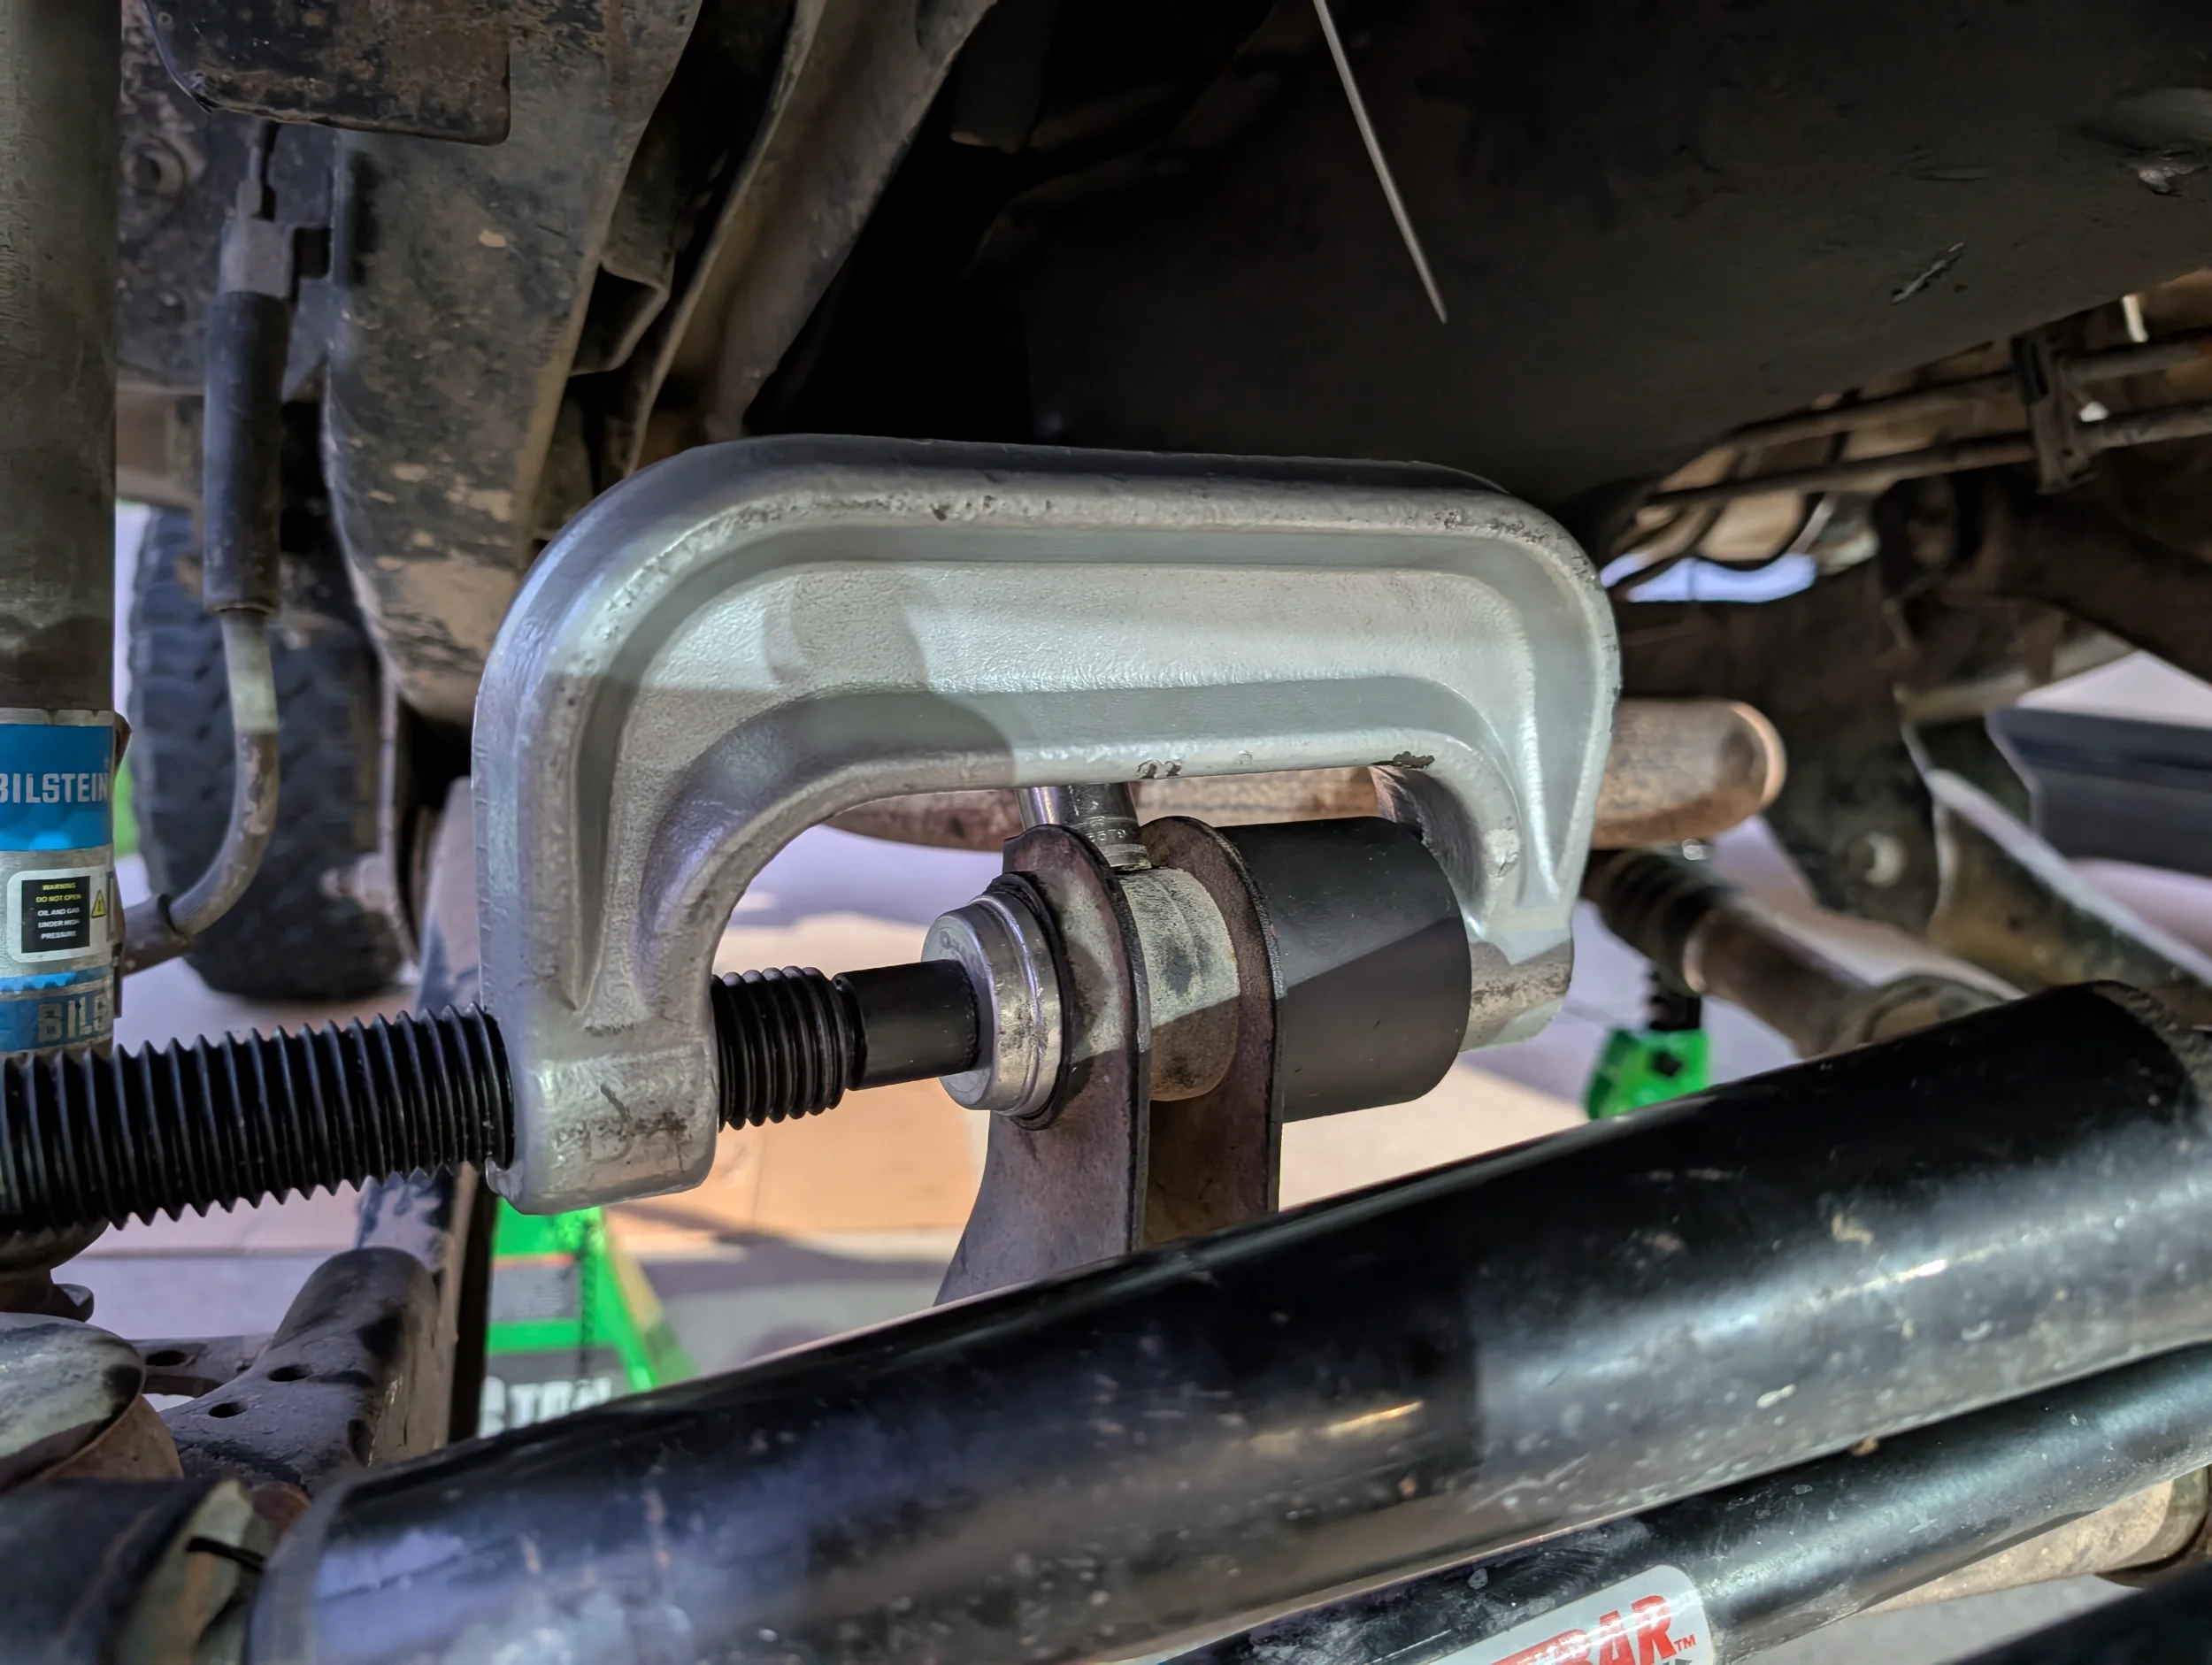
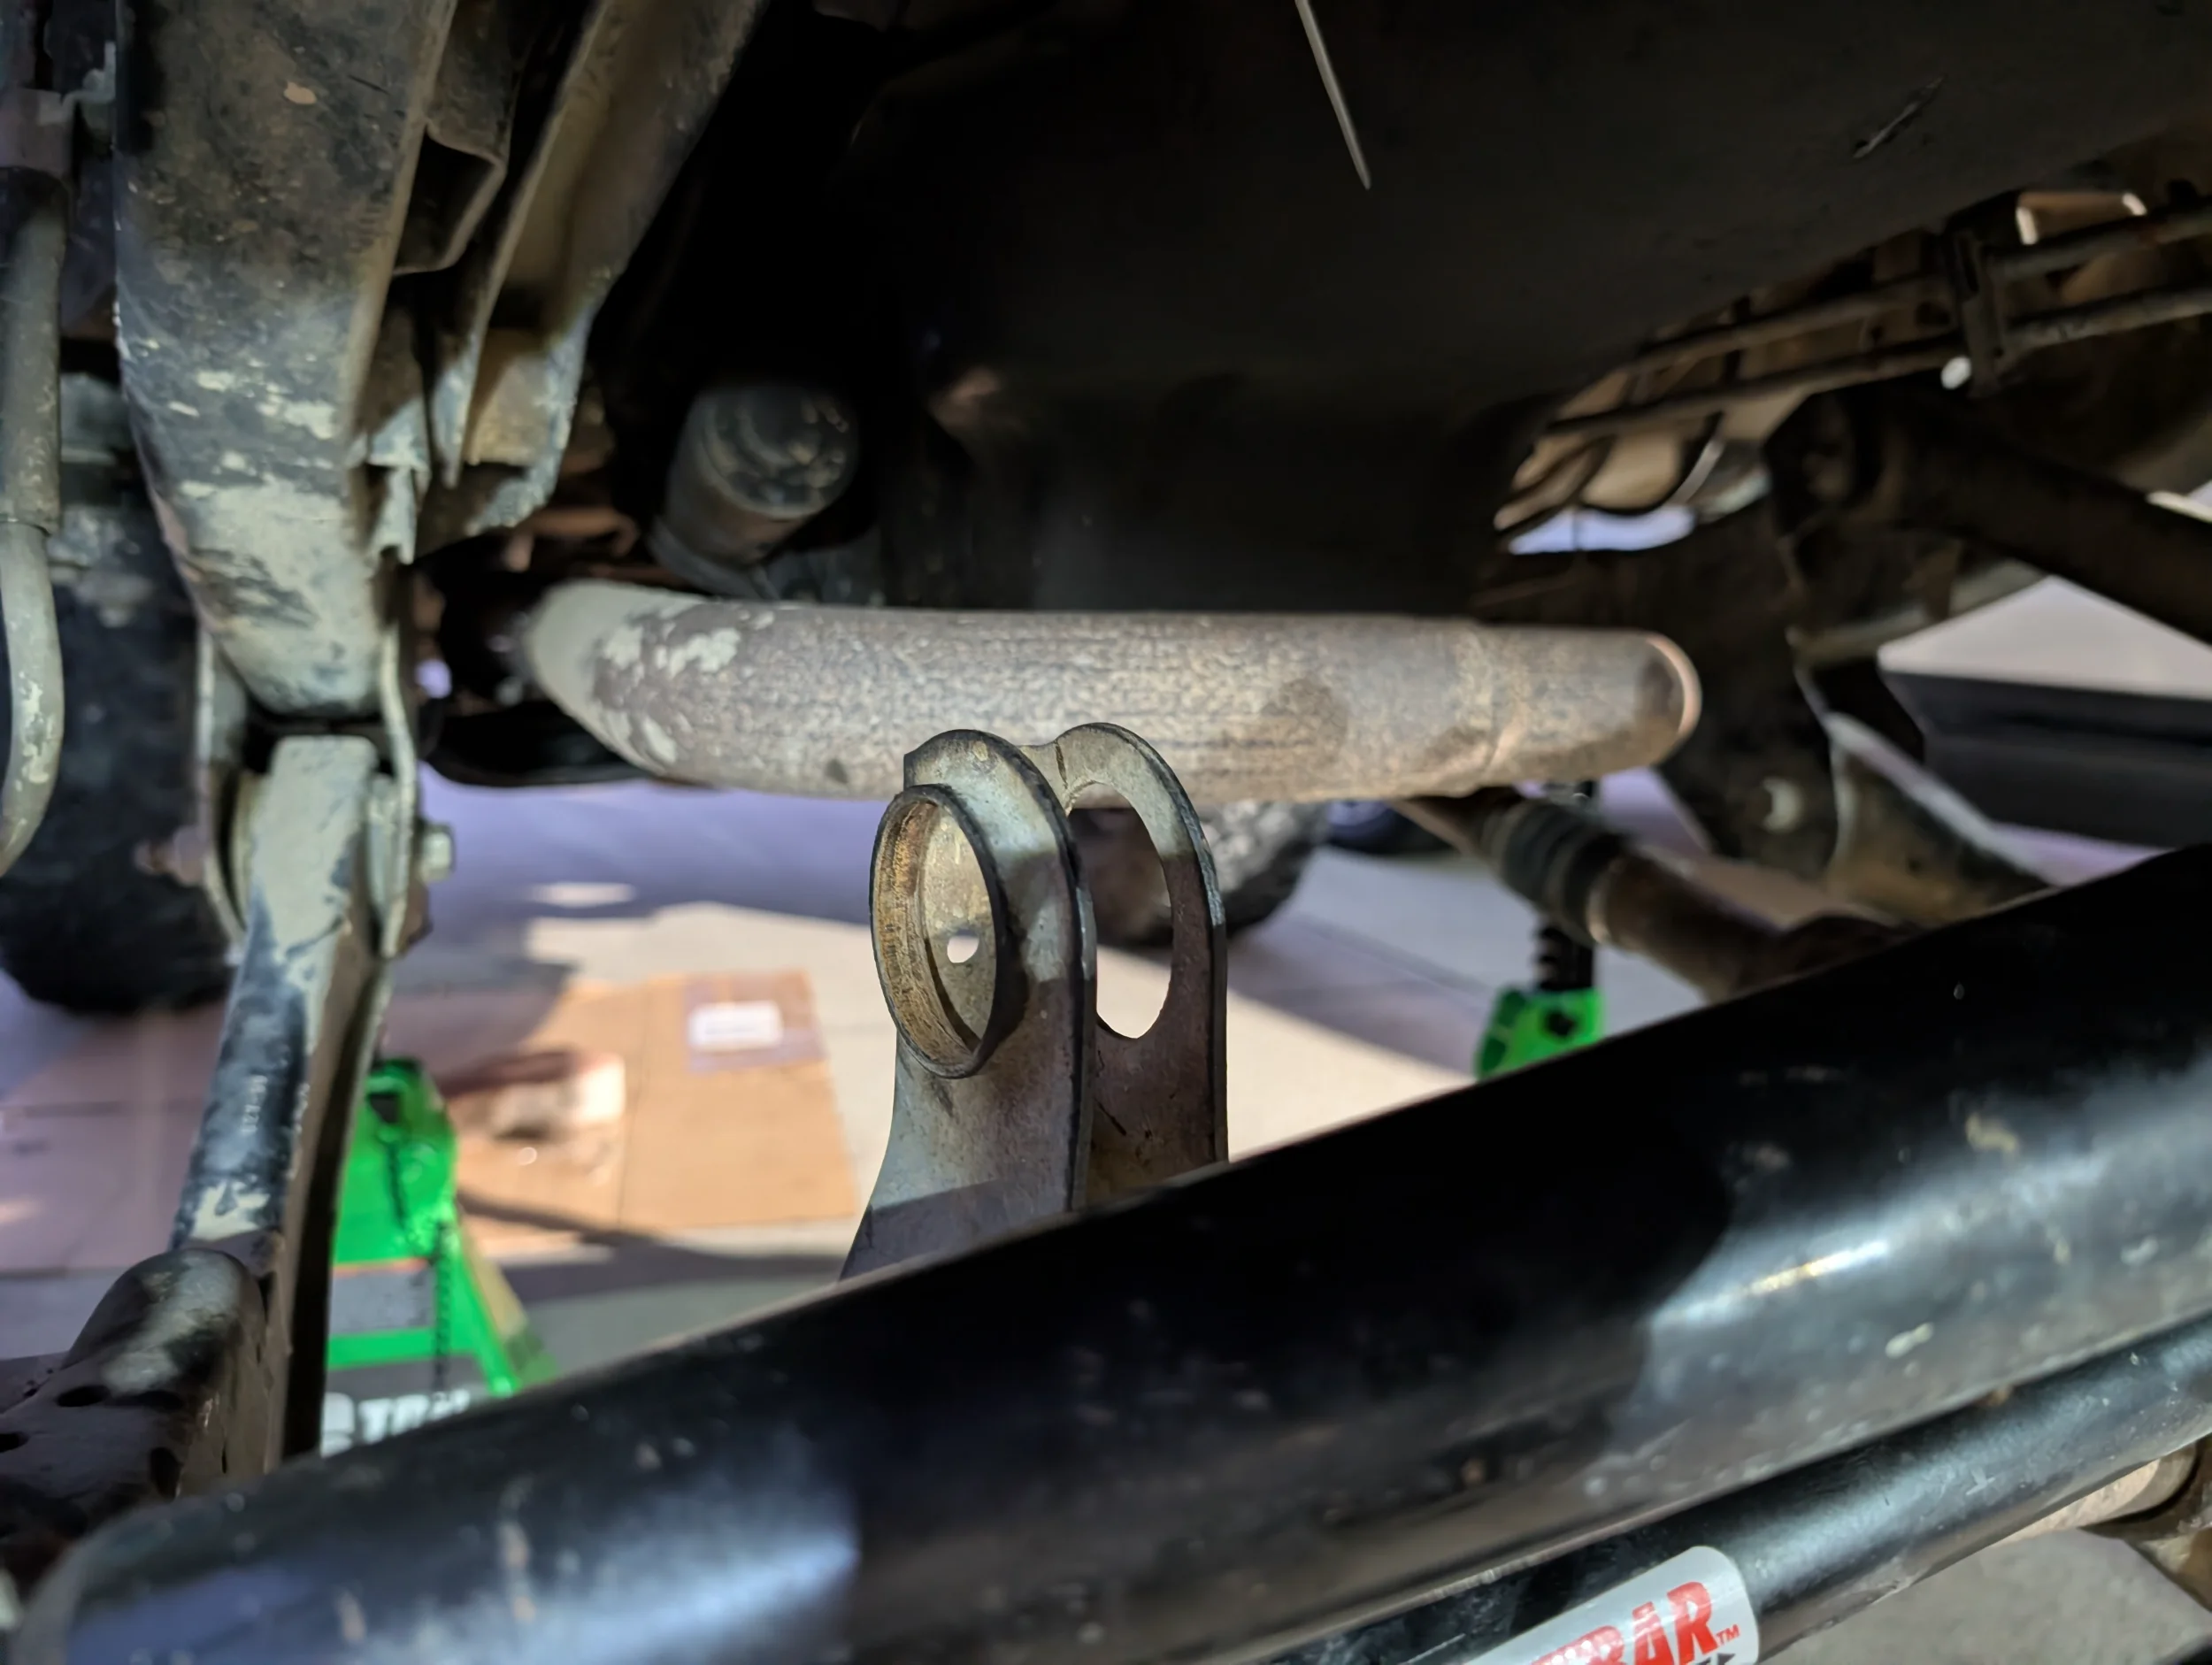
Rented a seal driver set from AutoZone. Popped right out without too much effort.
Ok here's an update on this project.
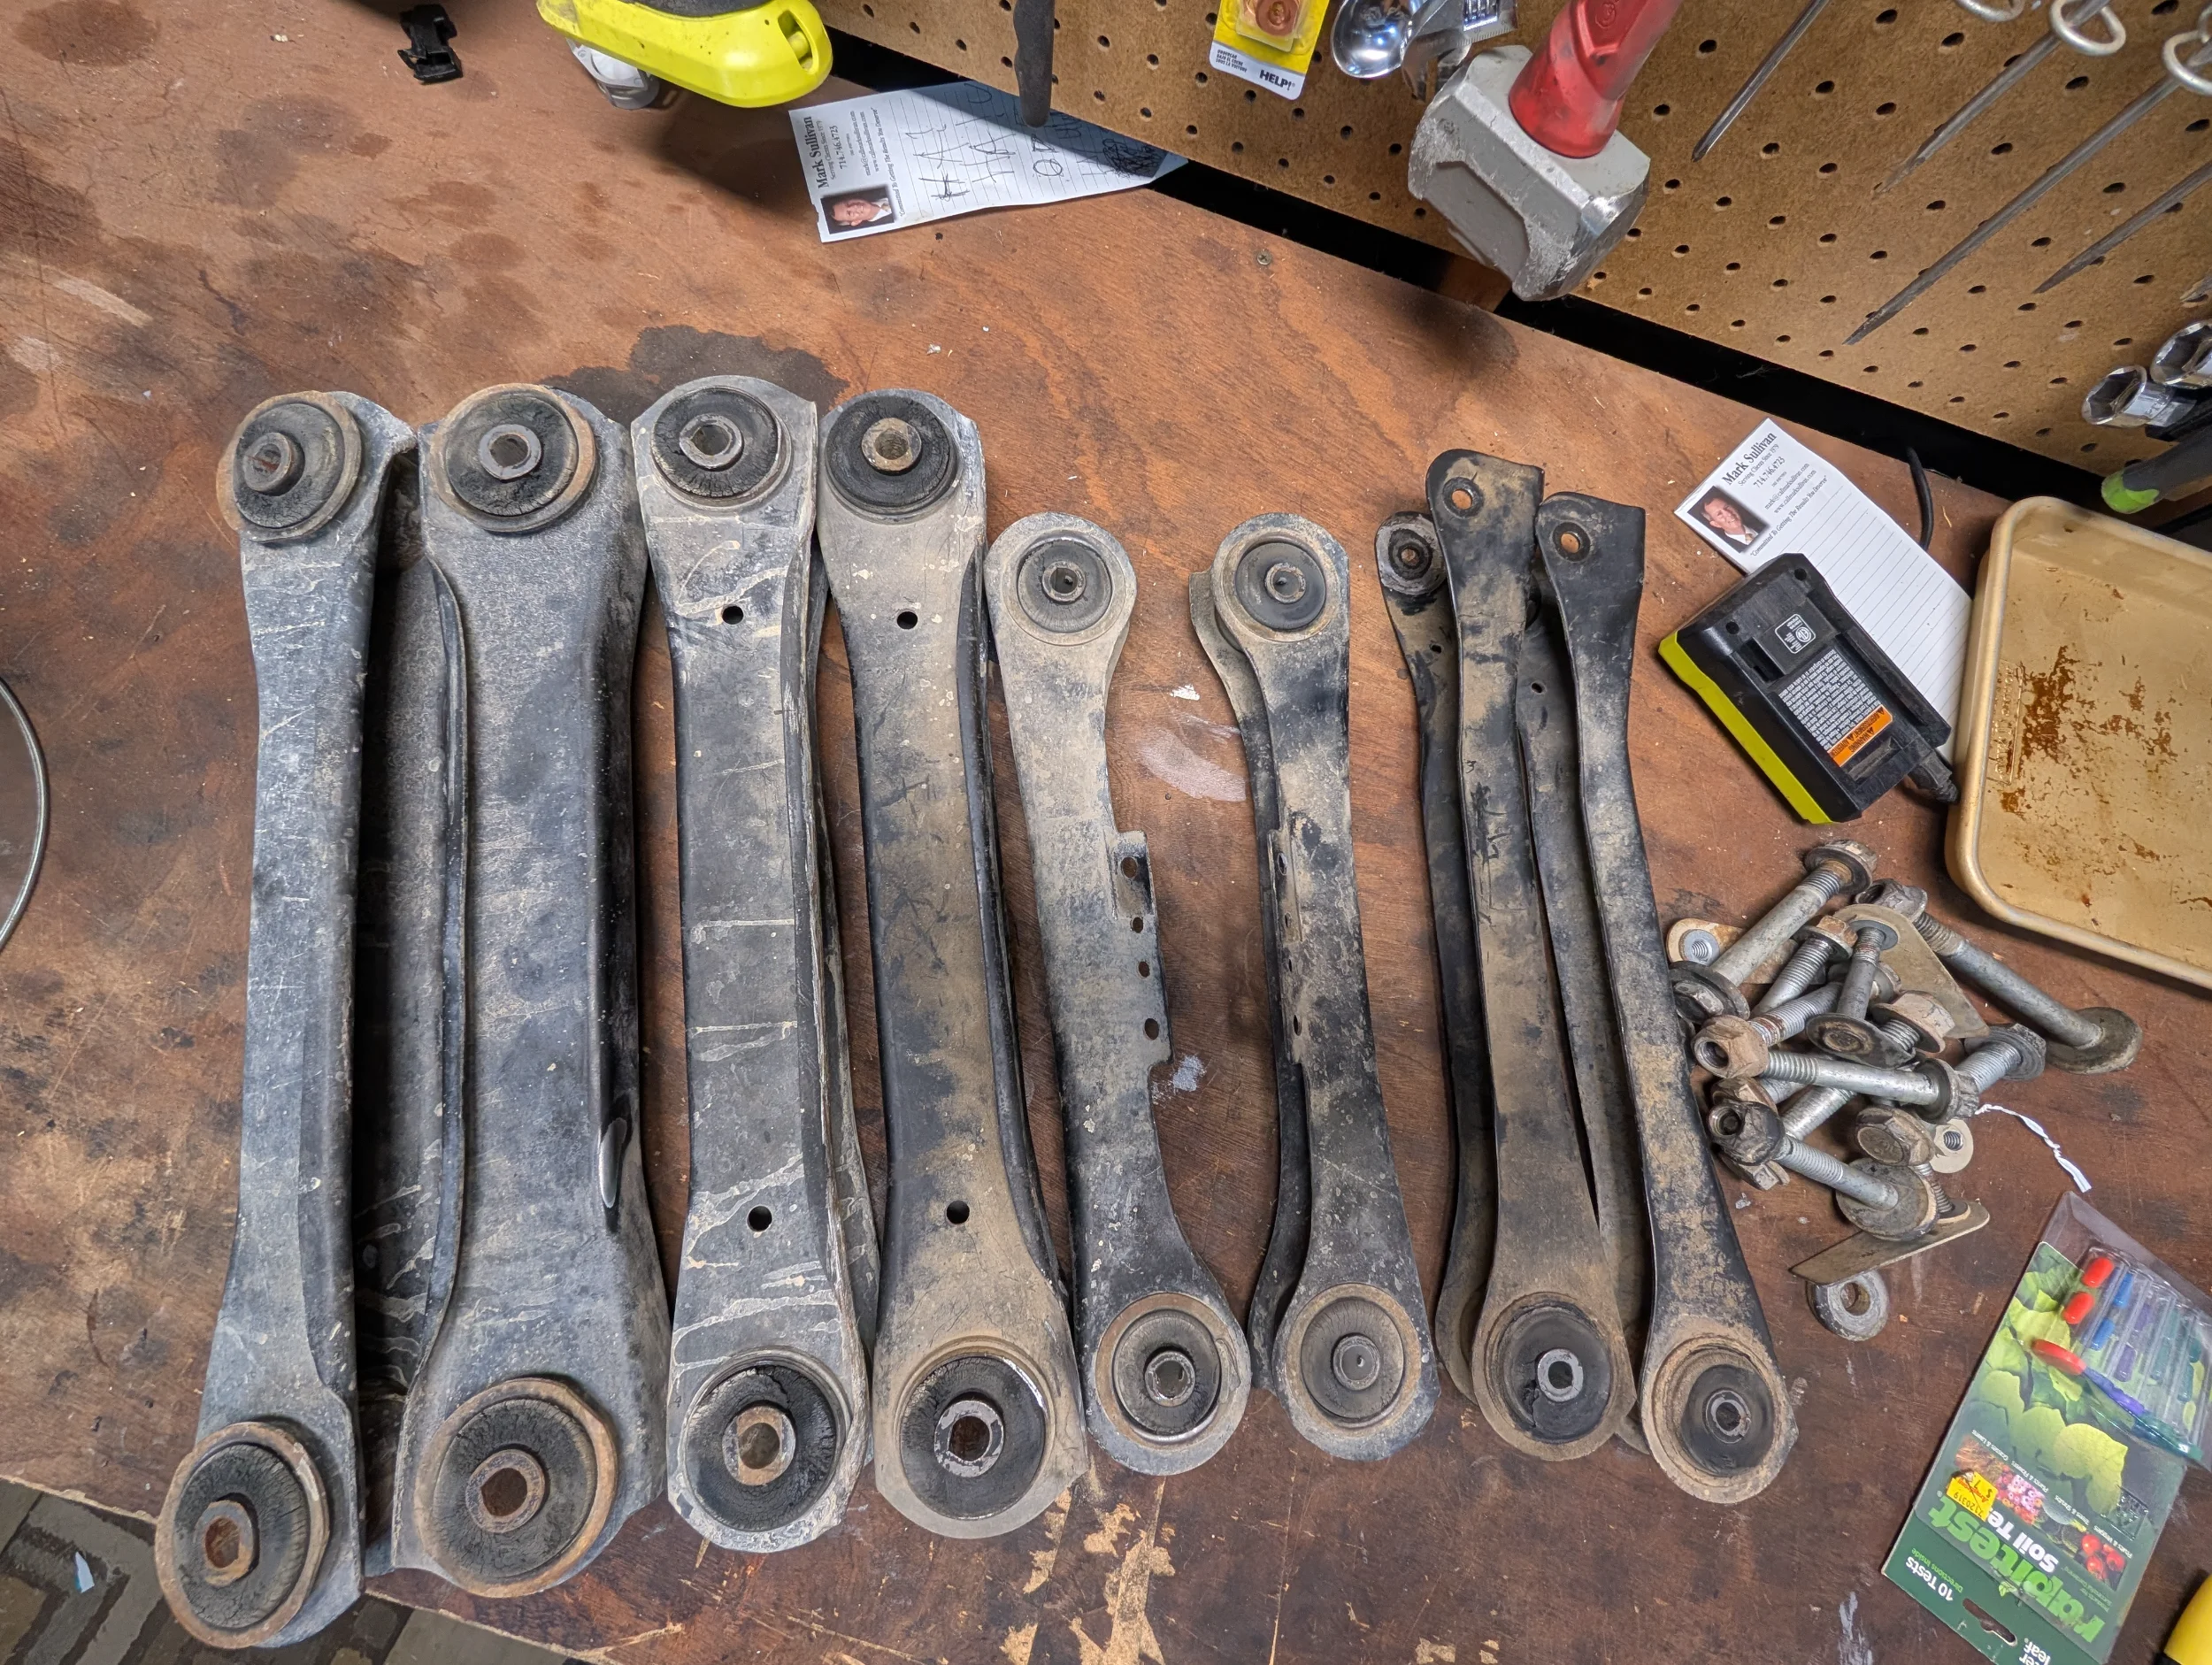
Got all of the OG arms removed and replaced with the Savvy arms, the OEM arms were roached.

Yesterday I got a bit ahead of myself while working on the rear end, I got all 4 arms in but I think I got out of sequence and torqued all of the control arm bolts before making any adjustments to square the axle.
When I went to measure for squareness and adjust the lower arms, all of the arms were in a bind and would hardly turn at all by hand. I remembered a @mrblaine quote that if I can't turn the arms by hand then I've done something wrong.
So I got back at it today and decided to start by loosening all of the control arm bolts, then I removed the springs and lower shock bolts and raised the axle to full bump to check my bump stop position.
Driver side starting position:

Passenger side starting position:
View attachment 696929
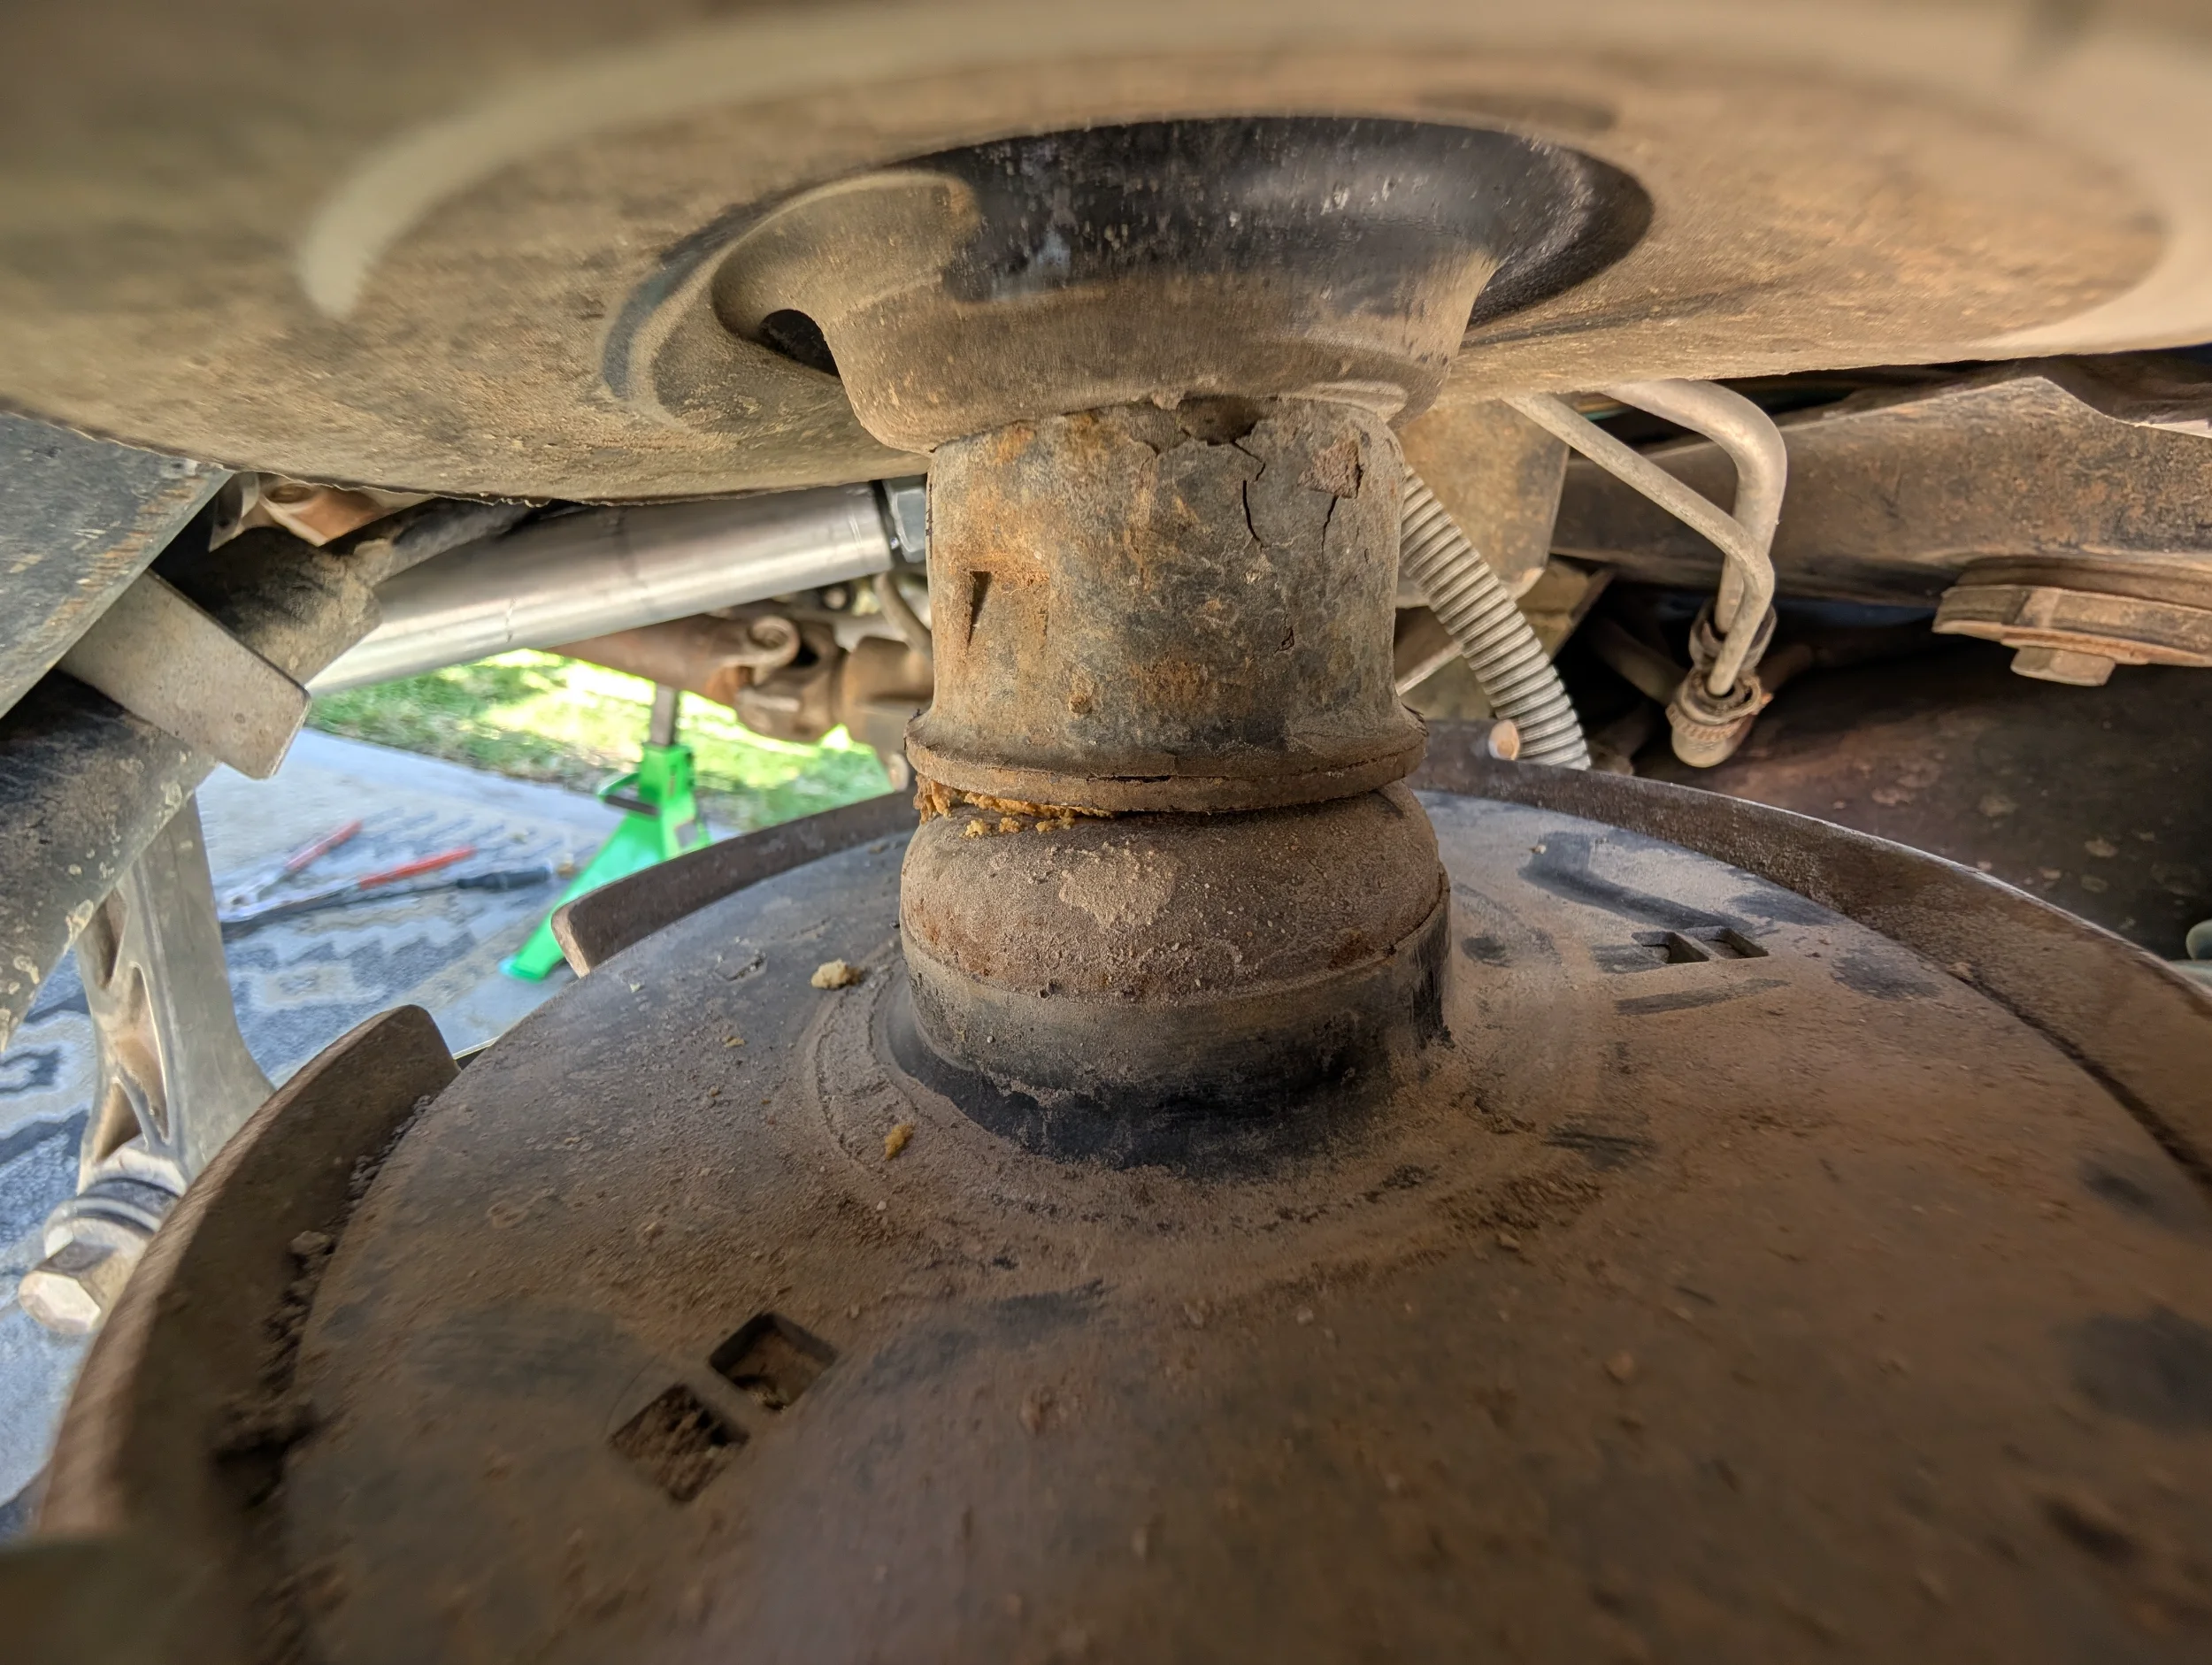
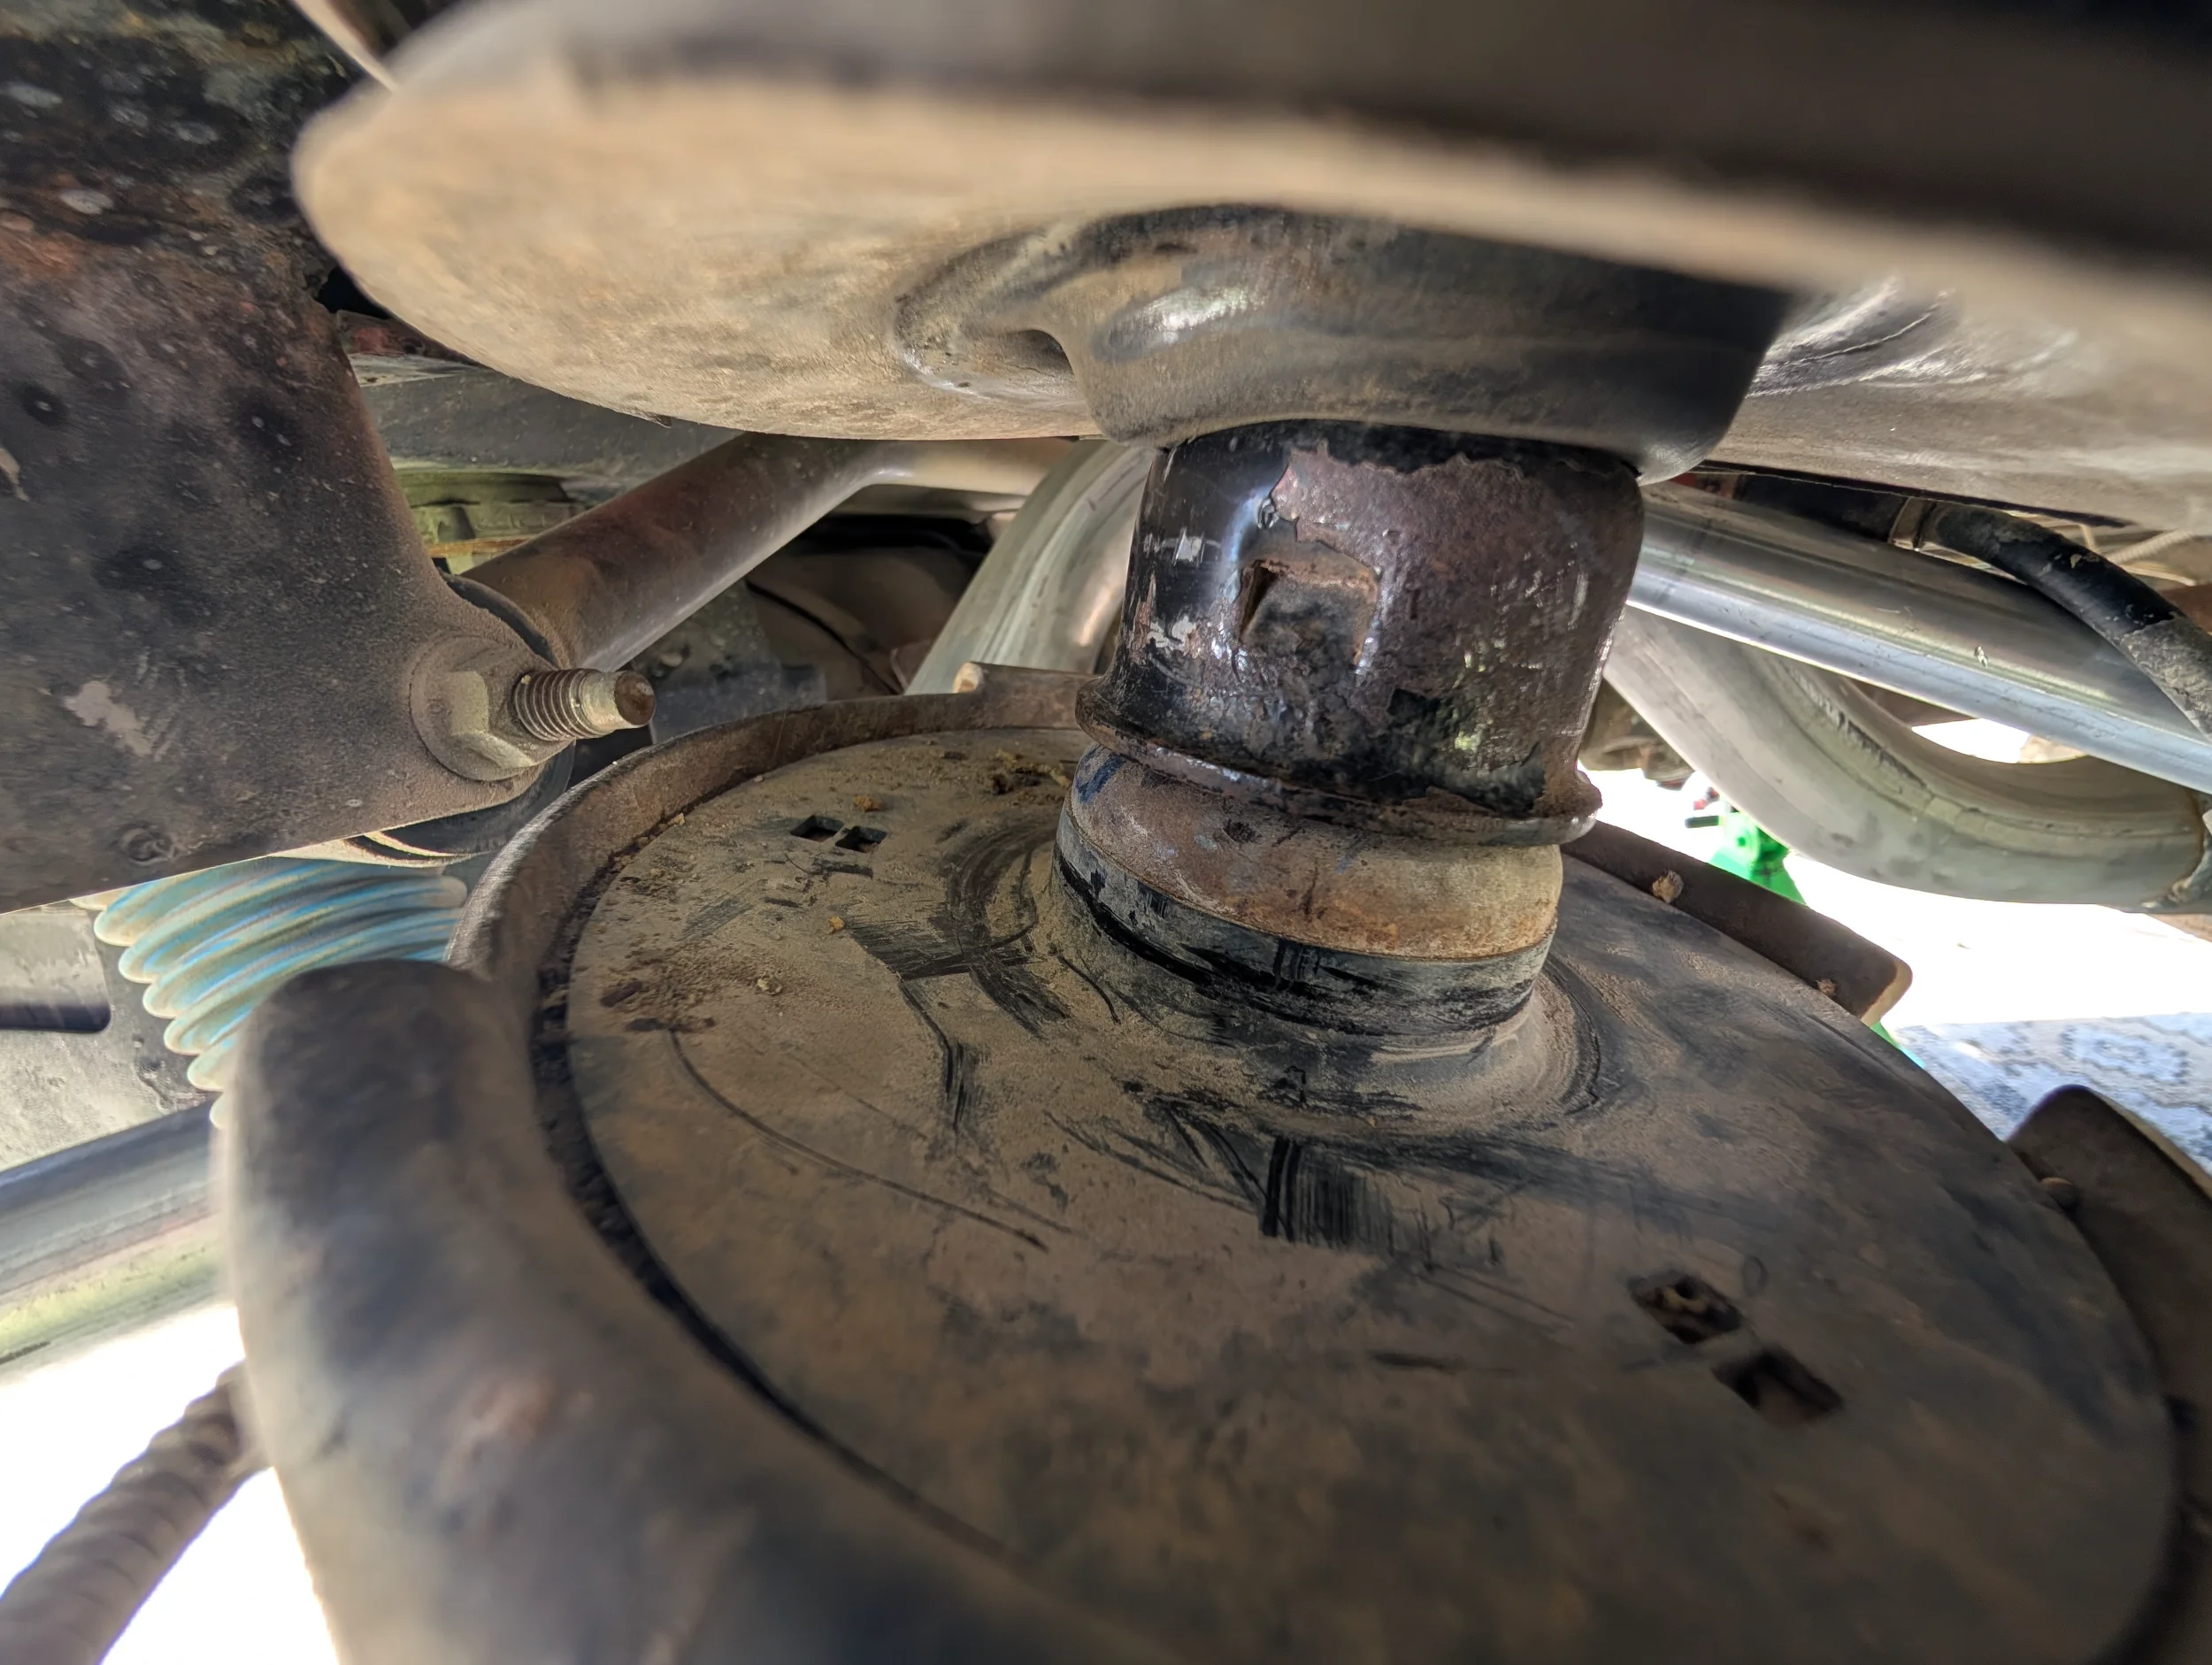
I had to move the driver side forward about ½" and the passenger side back about the same to get everything close to centered f/r.
Driver side after:
Passenger side after:
I stopped there for the day, hopefully I'll find time this week to adjust the pinion angle and get the uppers dialed in.
Got all of the OG arms removed and replaced with the Savvy arms, the OEM arms were roached.
Yesterday I got a bit ahead of myself while working on the rear end, I got all 4 arms in but I think I got out of sequence and torqued all of the control arm bolts before making any adjustments to square the axle.
When I went to measure for squareness and adjust the lower arms, all of the arms were in a bind and would hardly turn at all by hand. I remembered a @mrblaine quote that if I can't turn the arms by hand then I've done something wrong.
So I got back at it today and decided to start by loosening all of the control arm bolts, then I removed the springs and lower shock bolts and raised the axle to full bump to check my bump stop position.
Driver side starting position:
Passenger side starting position:
View attachment 696929
I had to move the driver side forward about ½" and the passenger side back about the same to get everything close to centered f/r.
Driver side after:
Passenger side after:
I stopped there for the day, hopefully I'll find time this week to adjust the pinion angle and get the uppers dialed in.
Last edited:
Also, can anyone give advice on routing the parking brake cables? I forgot to look at the routing before removing my stock arms, but should they be zip tied to the under side of the upper arm I'm assuming?
Any tips for removing the bracket that attached the brake line to the control arm?

Any tips for removing the bracket that attached the brake line to the control arm?

Looks like underneath. https://wranglertjforum.com/threads/is-this-a-stock-rear-anti-sway-bar.55426/
I'd be tempted to try using plumbing tape,a couple washers and bolt/nut to hold the lines just like stock. Basically the way these clamps could be used if i couldn't find some.

I'd be tempted to try using plumbing tape,a couple washers and bolt/nut to hold the lines just like stock. Basically the way these clamps could be used if i couldn't find some.
Last edited:
Looks like underneath. https://wranglertjforum.com/threads/is-this-a-stock-rear-anti-sway-bar.55426/
I'd be tempted to try using plumbing tape,a couple washers and bolt/nut to hold the lines just like stock. Basically the way these clamps could be used if i couldn't find some.
View attachment 696974
Thanks Rick. Just to make sure I'm following, you're saying to get a pipe clamp and then attach the factory bracket to that?

No, pipe clamps are for fucking pipe. A couple of heavy duty zip ties are more than adequate. The bracket are easily peeled open with a couple of vise grips, we've never left them, no reason for you to.Thanks Rick. Just to make sure I'm following, you're saying to get a pipe clamp and then attach the factory bracket to that?
Bump stop contact is not how you determine arm length. Set the lowers the same length as a starting point. Rough in the pinion angle with a single upper.Ok here's an update on this project.
Got all of the OG arms removed and replaced with the Savvy arms, the OEM arms were roached.
View attachment 696933
View attachment 696932
Yesterday I got a bit ahead of myself while working on the rear end, I got all 4 arms in but I think I got out of sequence and torqued all of the control arm bolts before making any adjustments to square the axle.
When I went to measure for squareness and adjust the lower arms, all of the arms were in a bind and would hardly turn at all by hand. I remembered a @mrblaine quote that if I can't turn the arms by hand then I've done something wrong.
So I got back at it today and decided to start by loosening all of the control arm bolts, then I removed the springs and lower shock bolts and raised the axle to full bump to check my bump stop position.
Driver side starting position:
View attachment 696931
Passenger side starting position:
View attachment 696929
I had to move the driver side forward about ½" and the passenger side back about the same to get everything close to centered f/r.
Driver side after:
View attachment 696927
Passenger side after:
View attachment 696928
I stopped there for the day, hopefully I'll find time this week to adjust the pinion angle and get the uppers dialed in.
Then you cycle and see what your tire clearance at sheetmetal is and how your bump stops interact.
If they are good, then put the springs in, even out the load on both uppers, tighten it all up. If not, then ponder what needs to change and factor in how that affects the other things and adjust accordingly.
Bump stop contact is not how you determine arm length. Set the lowers the same length as a starting point. Rough in the pinion angle with a single upper.
Then you cycle and see what your tire clearance at sheetmetal is and how your bump stops interact.
If they are good, then put the springs in, even out the load on both uppers, tighten it all up. If not, then ponder what needs to change and factor in how that affects the other things and adjust accordingly.
Thanks Blaine. Just to clarify where I went wrong, it sounds like I need to cycle the axle with the tires on, not just looking for bump stop alignment at full stuff, but also tire clearance into the fenders, as well as track bar to gas tank skid? If I'm having clearance issues with tires or track bar, I should adjust the arms accordingly and the bump stop alignment will be what it will be?
You can check most of it with the tires off and then double check with the tires to make sure you don't have to start over. You do need to keep an eye on the pinion angle. It does no good to get it all adjusted and then have to dial out 10 degrees of rise at the pinion because you focused on the bumpstop centering.Thanks Blaine. Just to clarify where I went wrong, it sounds like I need to cycle the axle with the tires on, not just looking for bump stop alignment at full stuff, but also tire clearance into the fenders, as well as track bar to gas tank skid? If I'm having clearance issues with tires or track bar, I should adjust the arms accordingly and the bump stop alignment will be what it will be?
Generally, the lowers will be the same length, they don't get bumped around enough to matter. If you adjust one lower, just bring the other one to the same length. But yes for the rest of it.
You may already be doing this: Tilt the axle, in addition to taking it straight up and down. Lift one tire to full stuff, then lower it and lift the other, checking for interference points.
You may already be doing this: Tilt the axle, in addition to taking it straight up and down. Lift one tire to full stuff, then lower it and lift the other, checking for interference points.
Thanks, yesterday all I did was raise the entire axle (both sides same time) to full stuff.
My new plan will be to fully cycle the axle as you and Blaine mention, raising each side to full stuff individually. With the front axle that will include turning the tires lock to lock at full stuff as well.
Thanks Rick. Just to make sure I'm following, you're saying to get a pipe clamp and then attach the factory bracket to that?
Yep!
Yesterday I was able to cycle the rear axle and get everything adjusted.
This is where the pinion angle was in relation to the TC. It was difficult to get a consistent reading off the TC with the driveshaft in place.
I tightened everything down today and test drove it. It has a vibe at about 60, feels like from the rear. I'm assuming I need to bring the pinion up a bit?
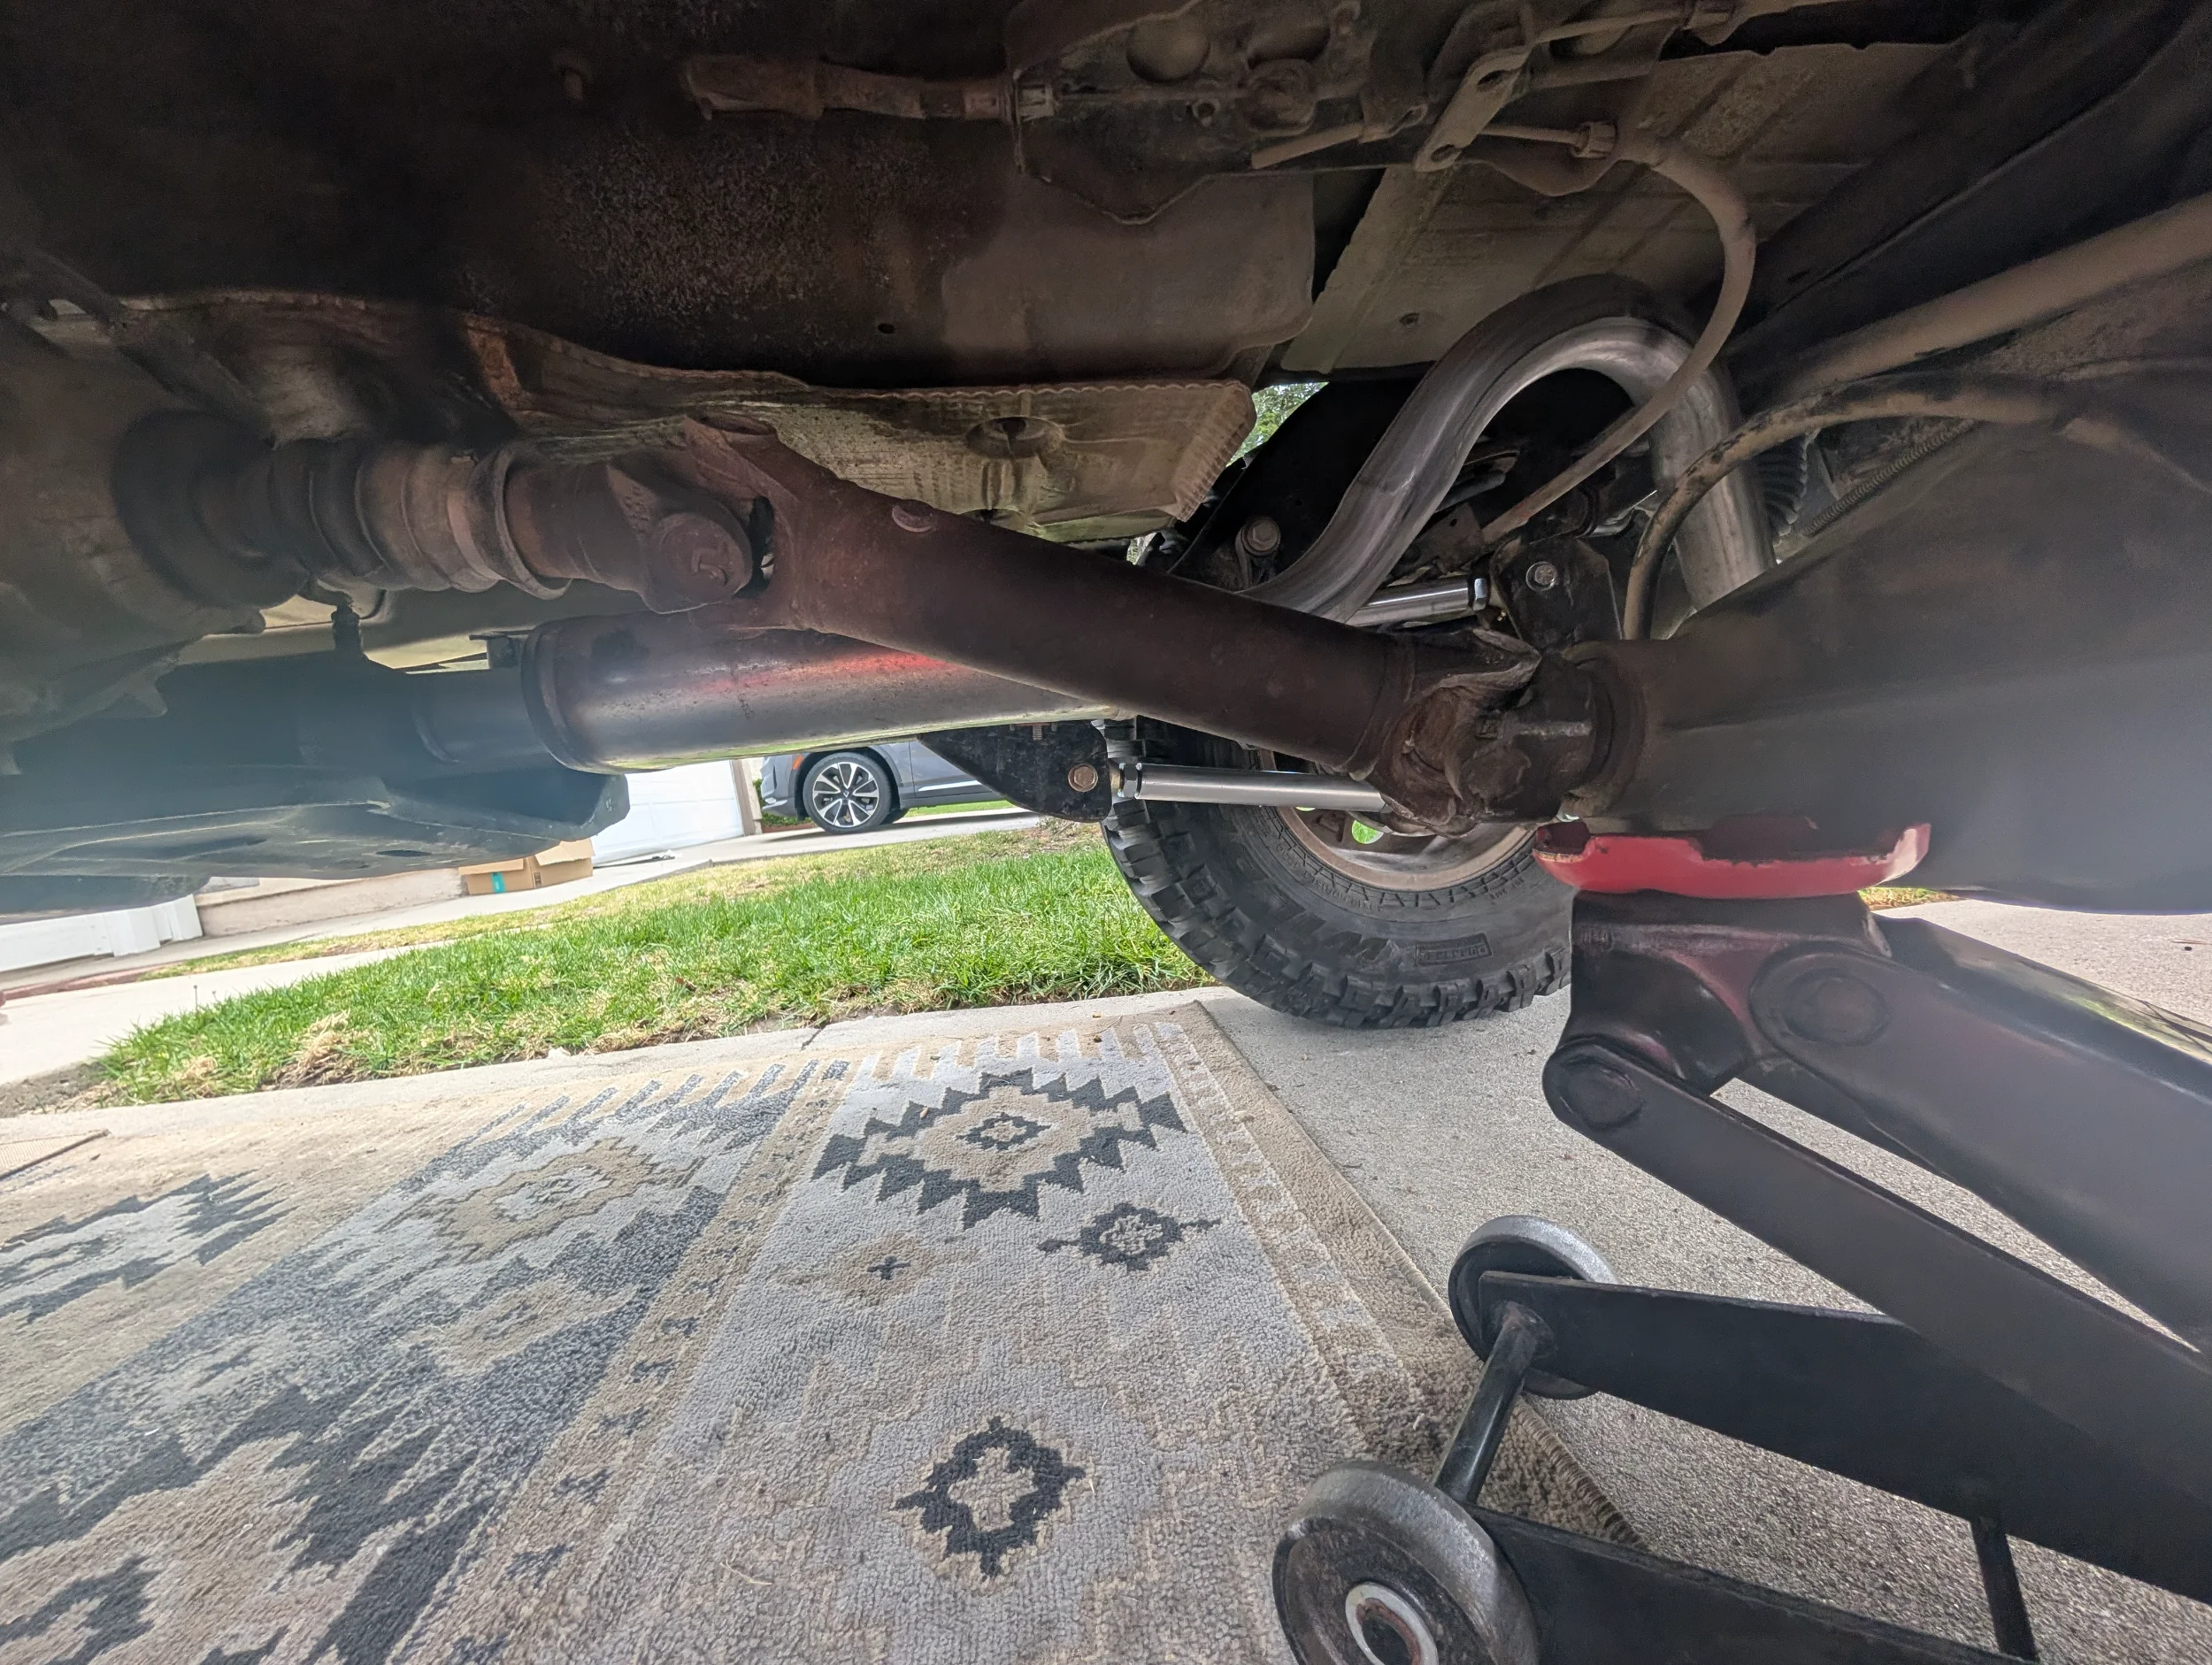
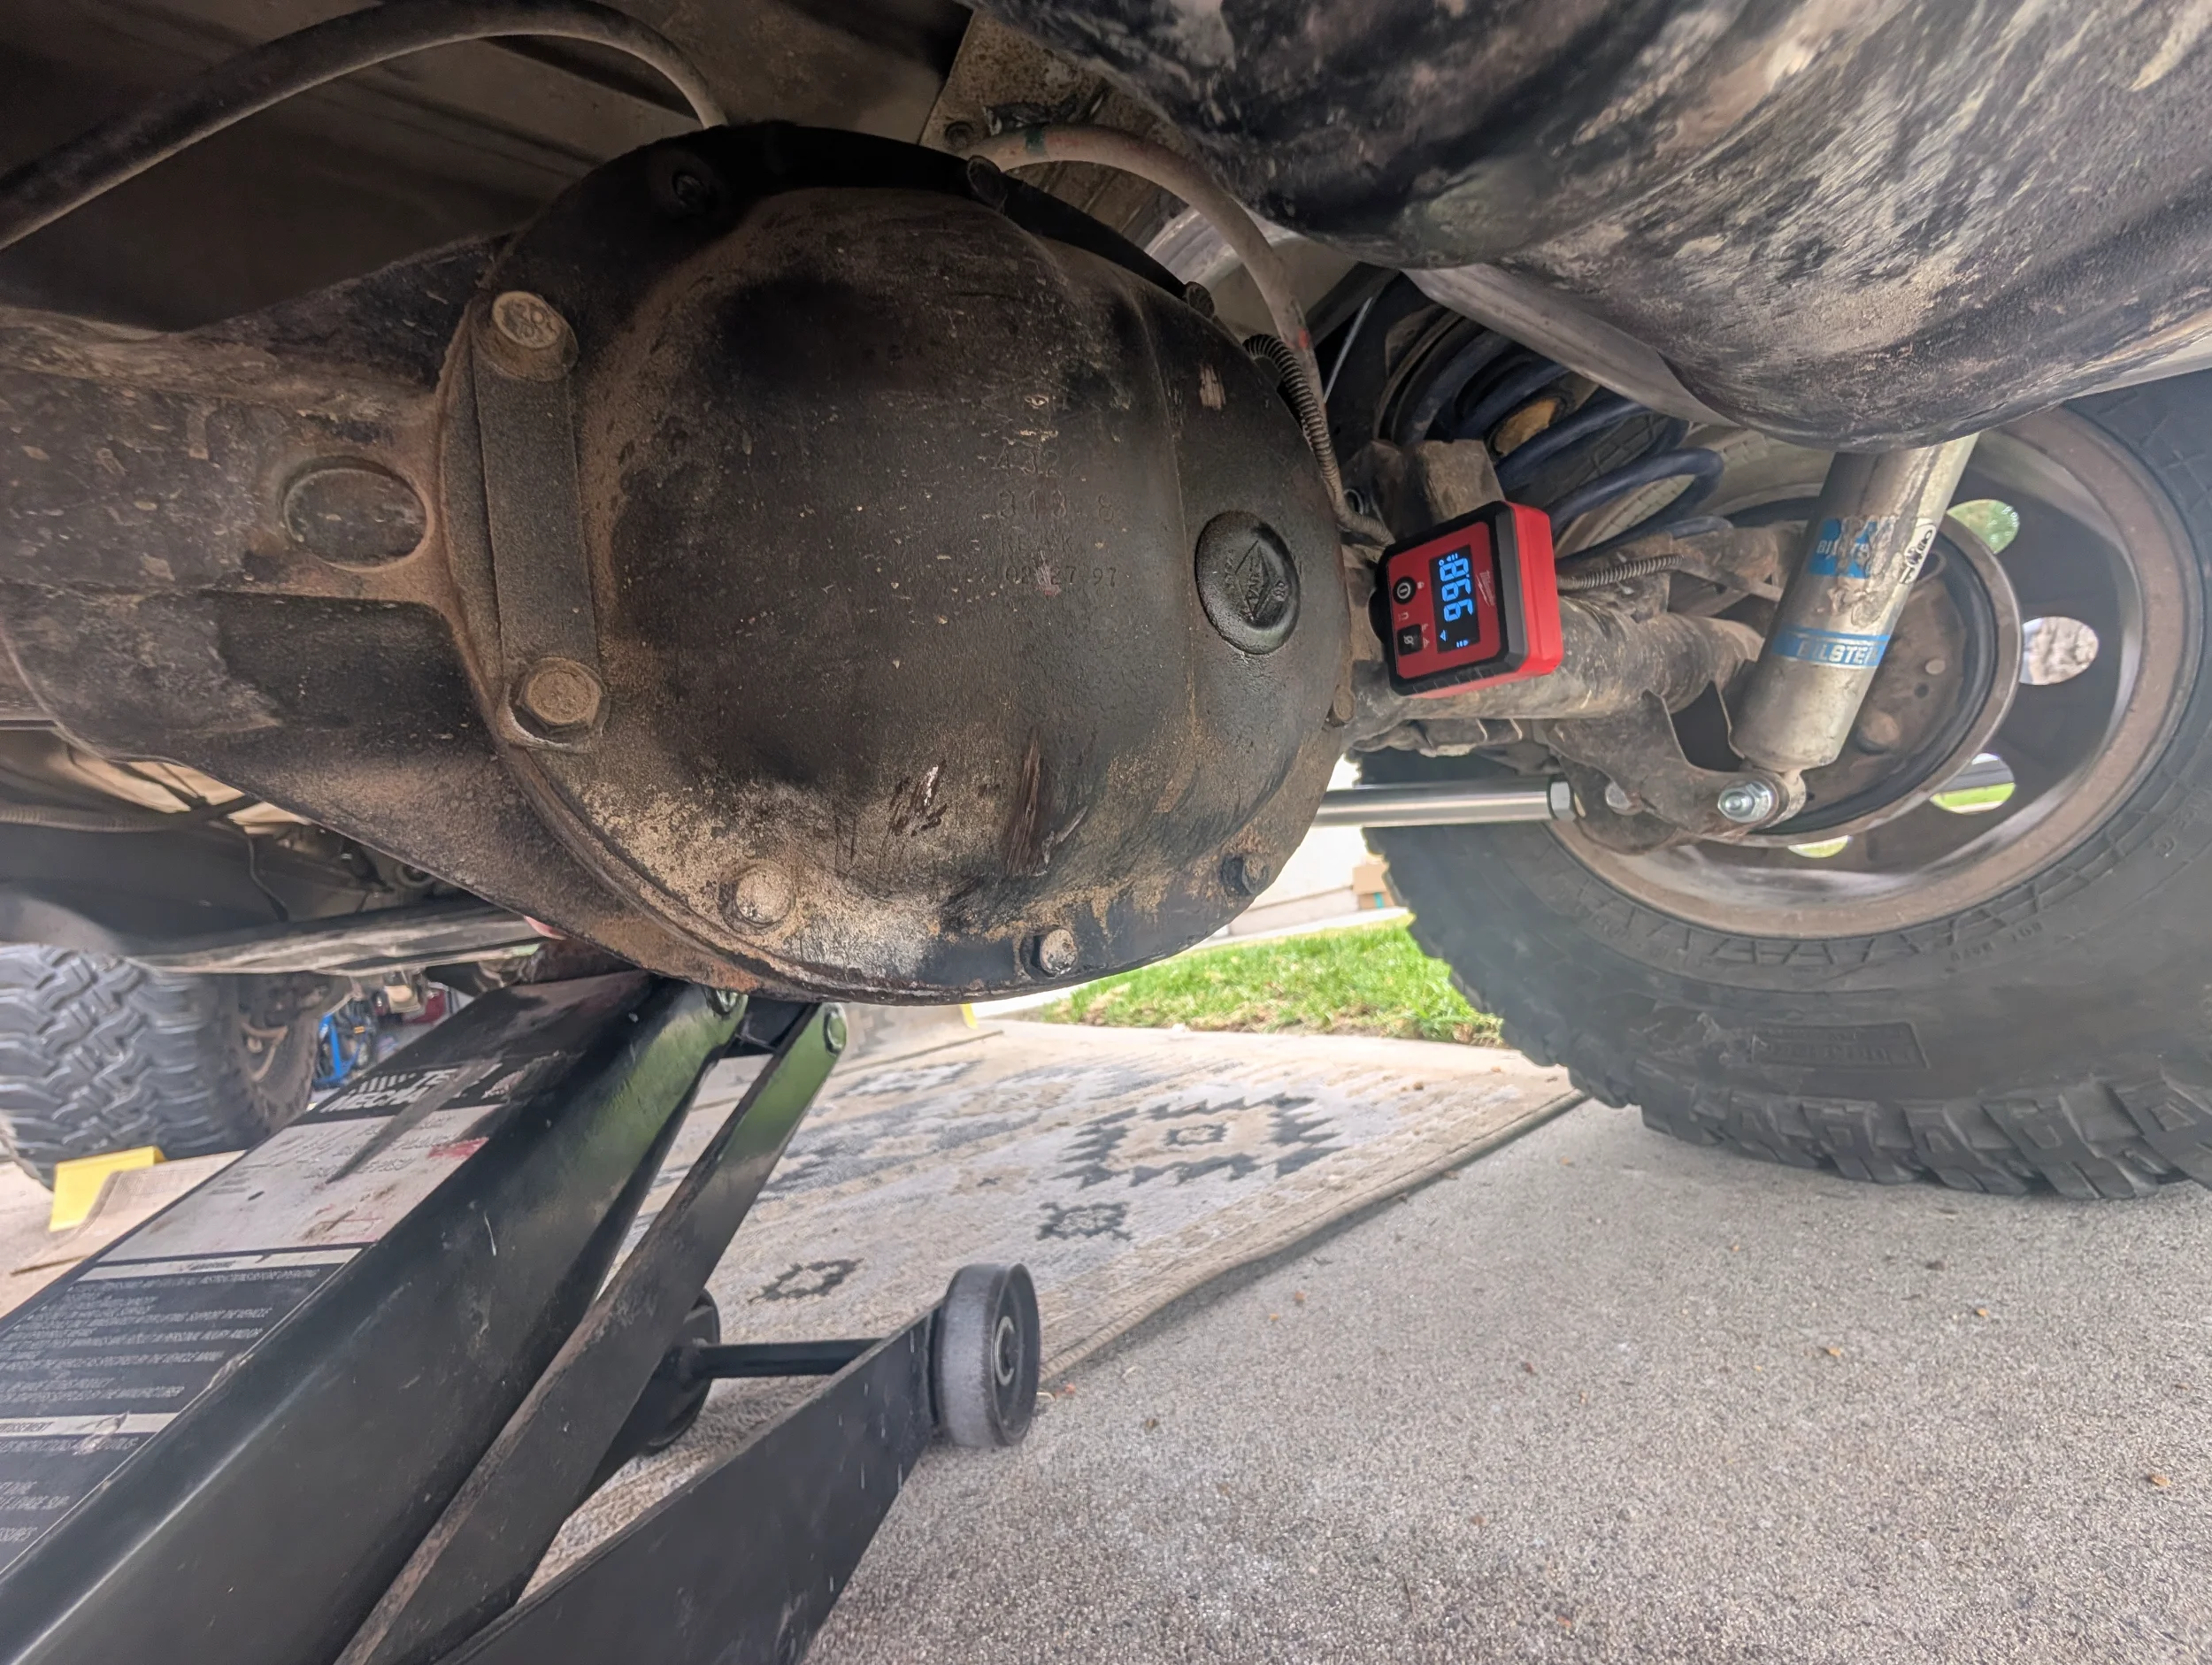
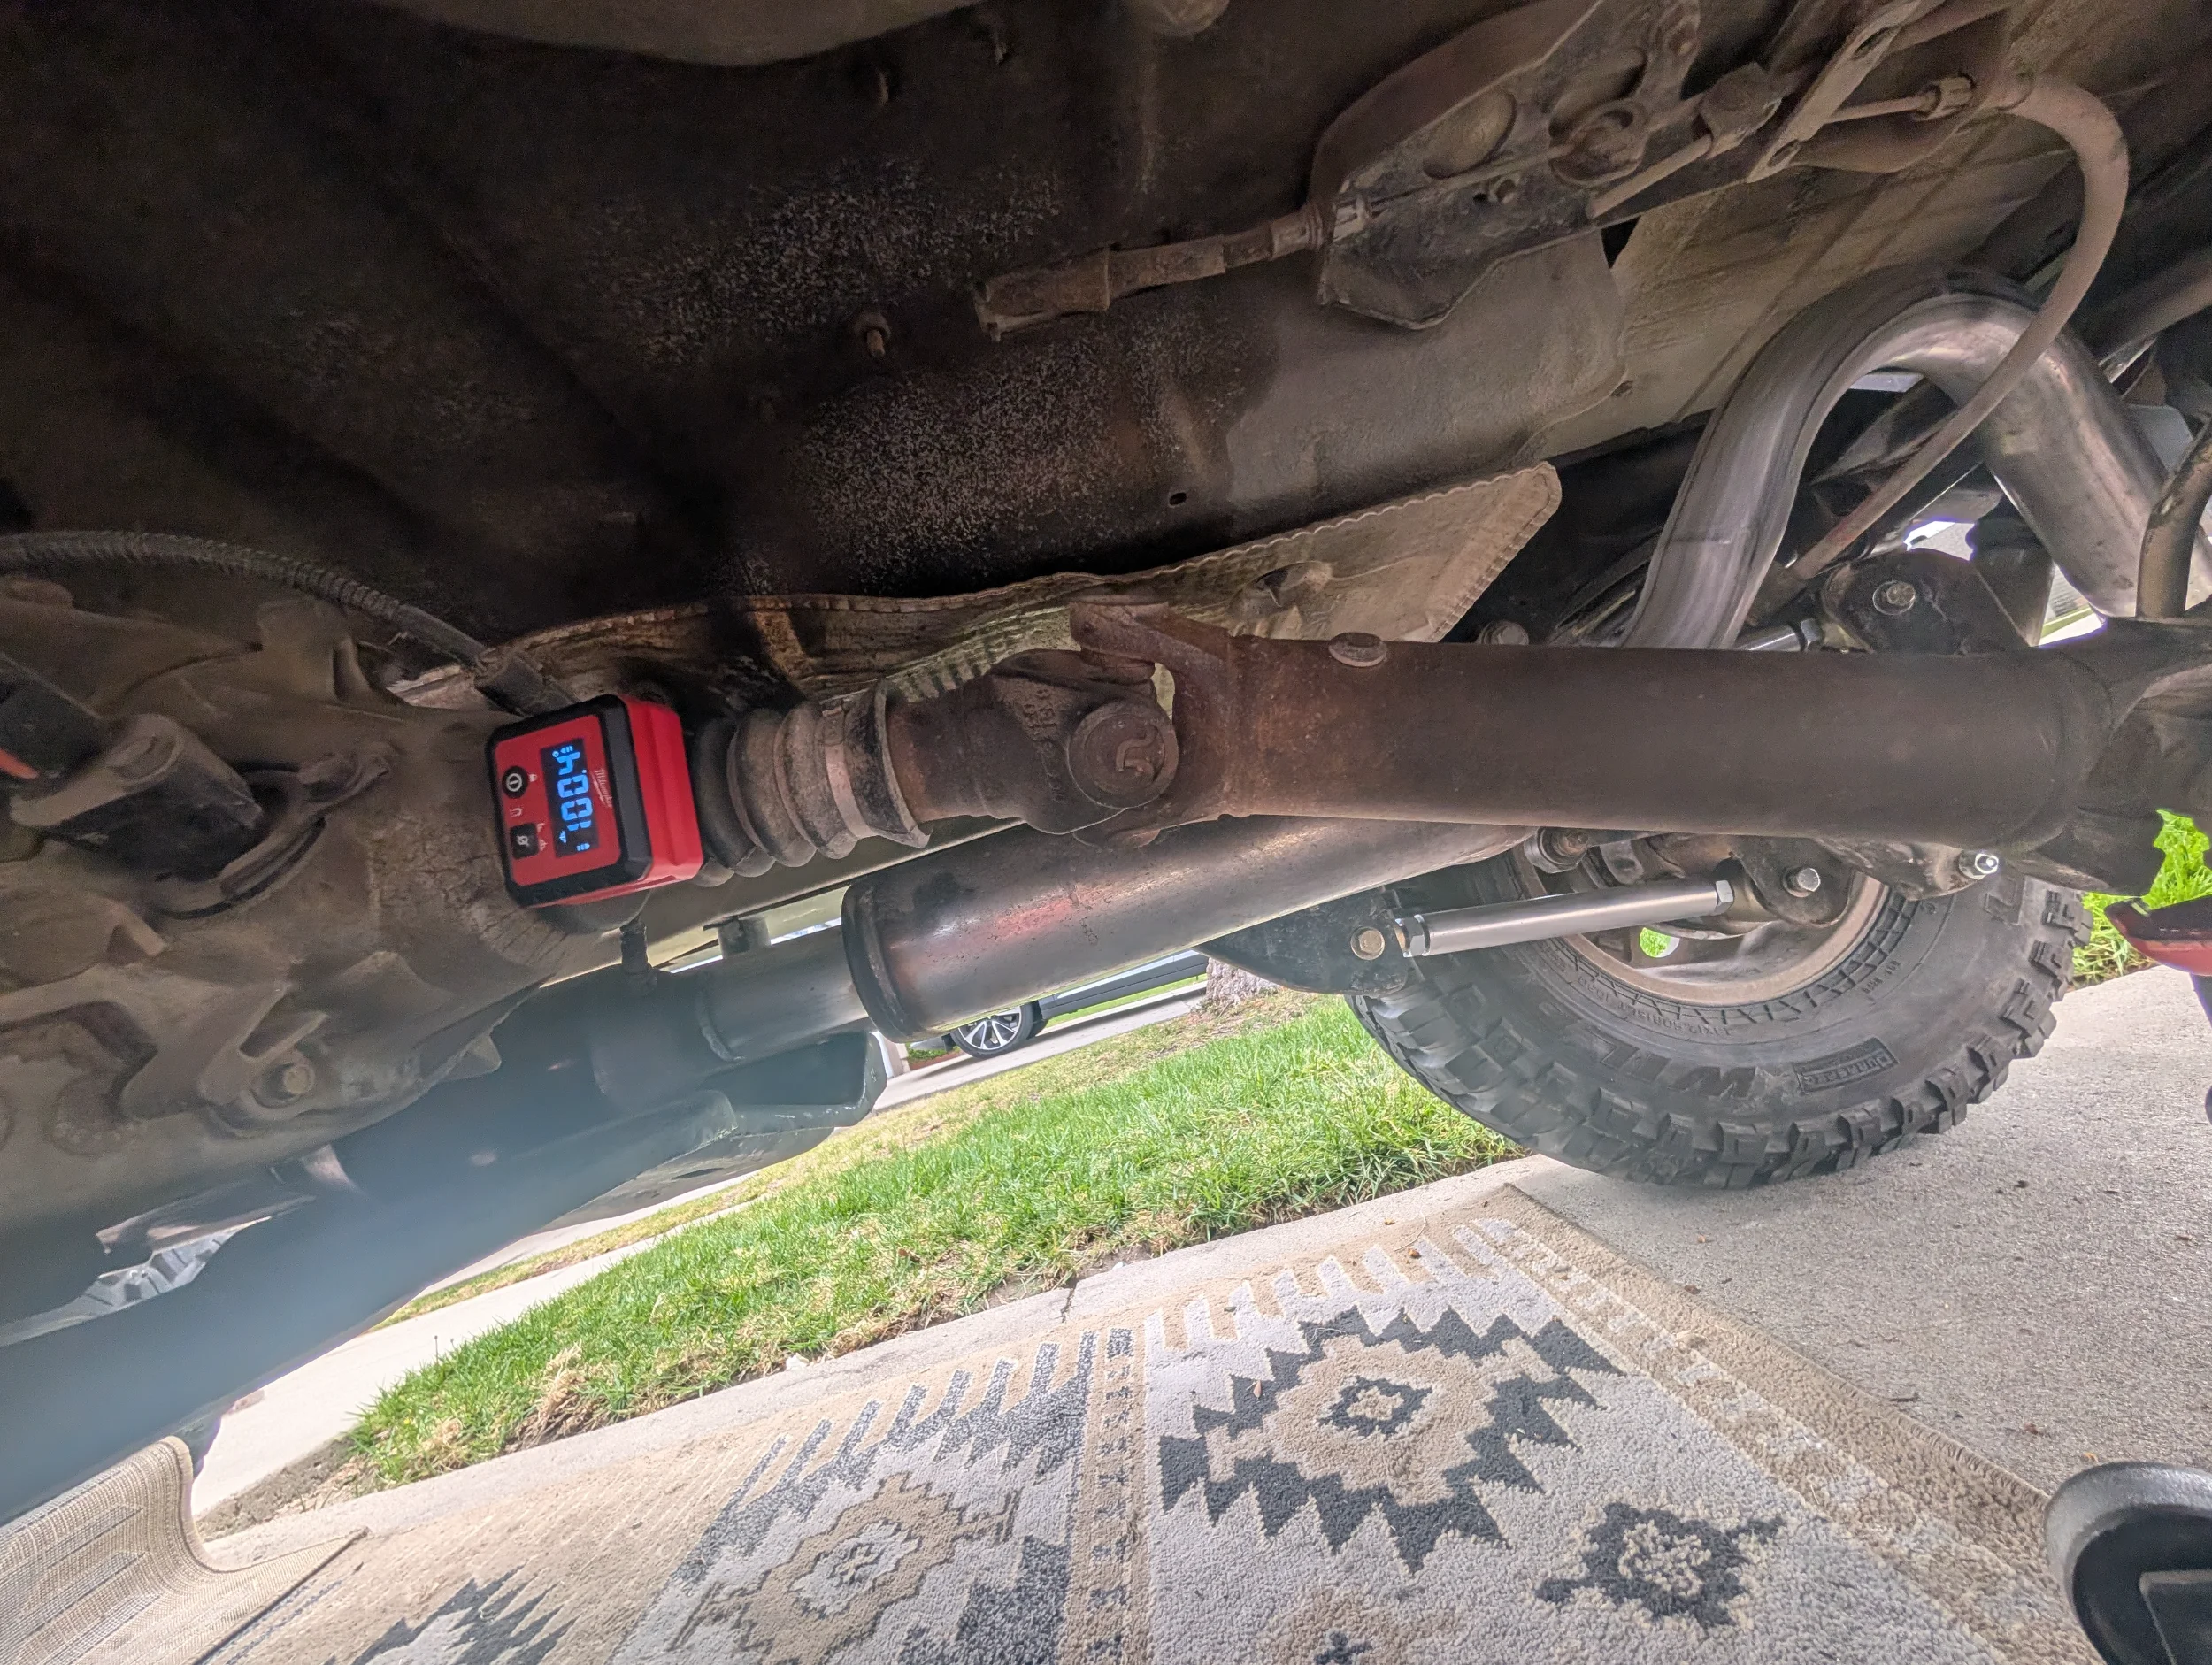
This is where the pinion angle was in relation to the TC. It was difficult to get a consistent reading off the TC with the driveshaft in place.
I tightened everything down today and test drove it. It has a vibe at about 60, feels like from the rear. I'm assuming I need to bring the pinion up a bit?
Single cardan you want equal angles on the joints. You probably need a tcase drop/mml or just get an sye
I don't really have a lift installed at this point. I'm just trying to get it dialed back into an acceptable angle with this set up.
SYE and driveshaft are on the list.

Yesterday I was able to cycle the rear axle and get everything adjusted.
This is where the pinion angle was in relation to the TC. It was difficult to get a consistent reading off the TC with the driveshaft in place.
I tightened everything down today and test drove it. It has a vibe at about 60, feels like from the rear. I'm assuming I need to bring the pinion up a bit?
View attachment 698172
View attachment 698173
View attachment 698174
Are you driving it like that?
The jam nuts should be snugged down for test drives. If they are loose, the steel threads on the joints hammer them and that can cause bad things to happen over time.I drove it a few miles today.
The jam nuts should be snugged down for test drives. If they are loose, the steel threads on the joints hammer them and that can cause bad things to happen over time.
That photo was taken when I was taking measurements. I test drove it after tightening everything.
Similar threads

- Replies
- 1
- Views
- 789


- Replies
- 10
- Views
- 2,068

- Replies
- 19
- Views
- 1,189


- Replies
- 2
- Views
- 618

- Replies
- 2
- Views
- 883

