
You are using an out of date browser. It may not display this or other websites correctly.
You should upgrade or use an alternative browser.
You should upgrade or use an alternative browser.

Any A/C gurus here? I’m stumped
- Thread starter any4xx
- Start date

If there is any good news to report, the 2017 receipt that listed replacing the evaporator mentioned that the fresh air door actuating arm was broken and no longer available so they wired it in the closed position. In looking at the plastic arm I’m about 99% sure that I can fix it by pinning a shaft through it from behind. So maybe a win-win?

I was dreading the "dash-out adventure" as well, but there are a couple of decent You Tube vids that provide good info on how to do it without removing the steering column, and the process wasn't as difficult as feared. Change out your heater core while you're in there!
It turned out that removing the steering column wasn’t really that big of a deal. Four mounting bolts then an additional bolt holding the upper shaft to the lower shaft and it was free. Lots of electrical connections to unplug and the cable going to the shifter then out it comes.

KennethS
TJ Expert
Got any links? I'll need to do this over the winter.there are a couple of decent You Tube vids that provide good info on how to do it without removing the steering column, and the process wasn't as difficult as feared.


Got any links? I'll need to do this over the winter.
These are both pretty thorough:
View: %5BURL%5Dhttps://youtu.be/vgAc_TQNSGM?is=hWgm0wDzX_hLuQnn[/URL]
View: %5BURL%5Dhttps://youtu.be/9eVpBF4F5G8?is=tKE06yNMKWMRXWym[/URL]
KennethS
TJ Expert
Thanks, I’ll study those and prepare myself for the ordeal this winter.
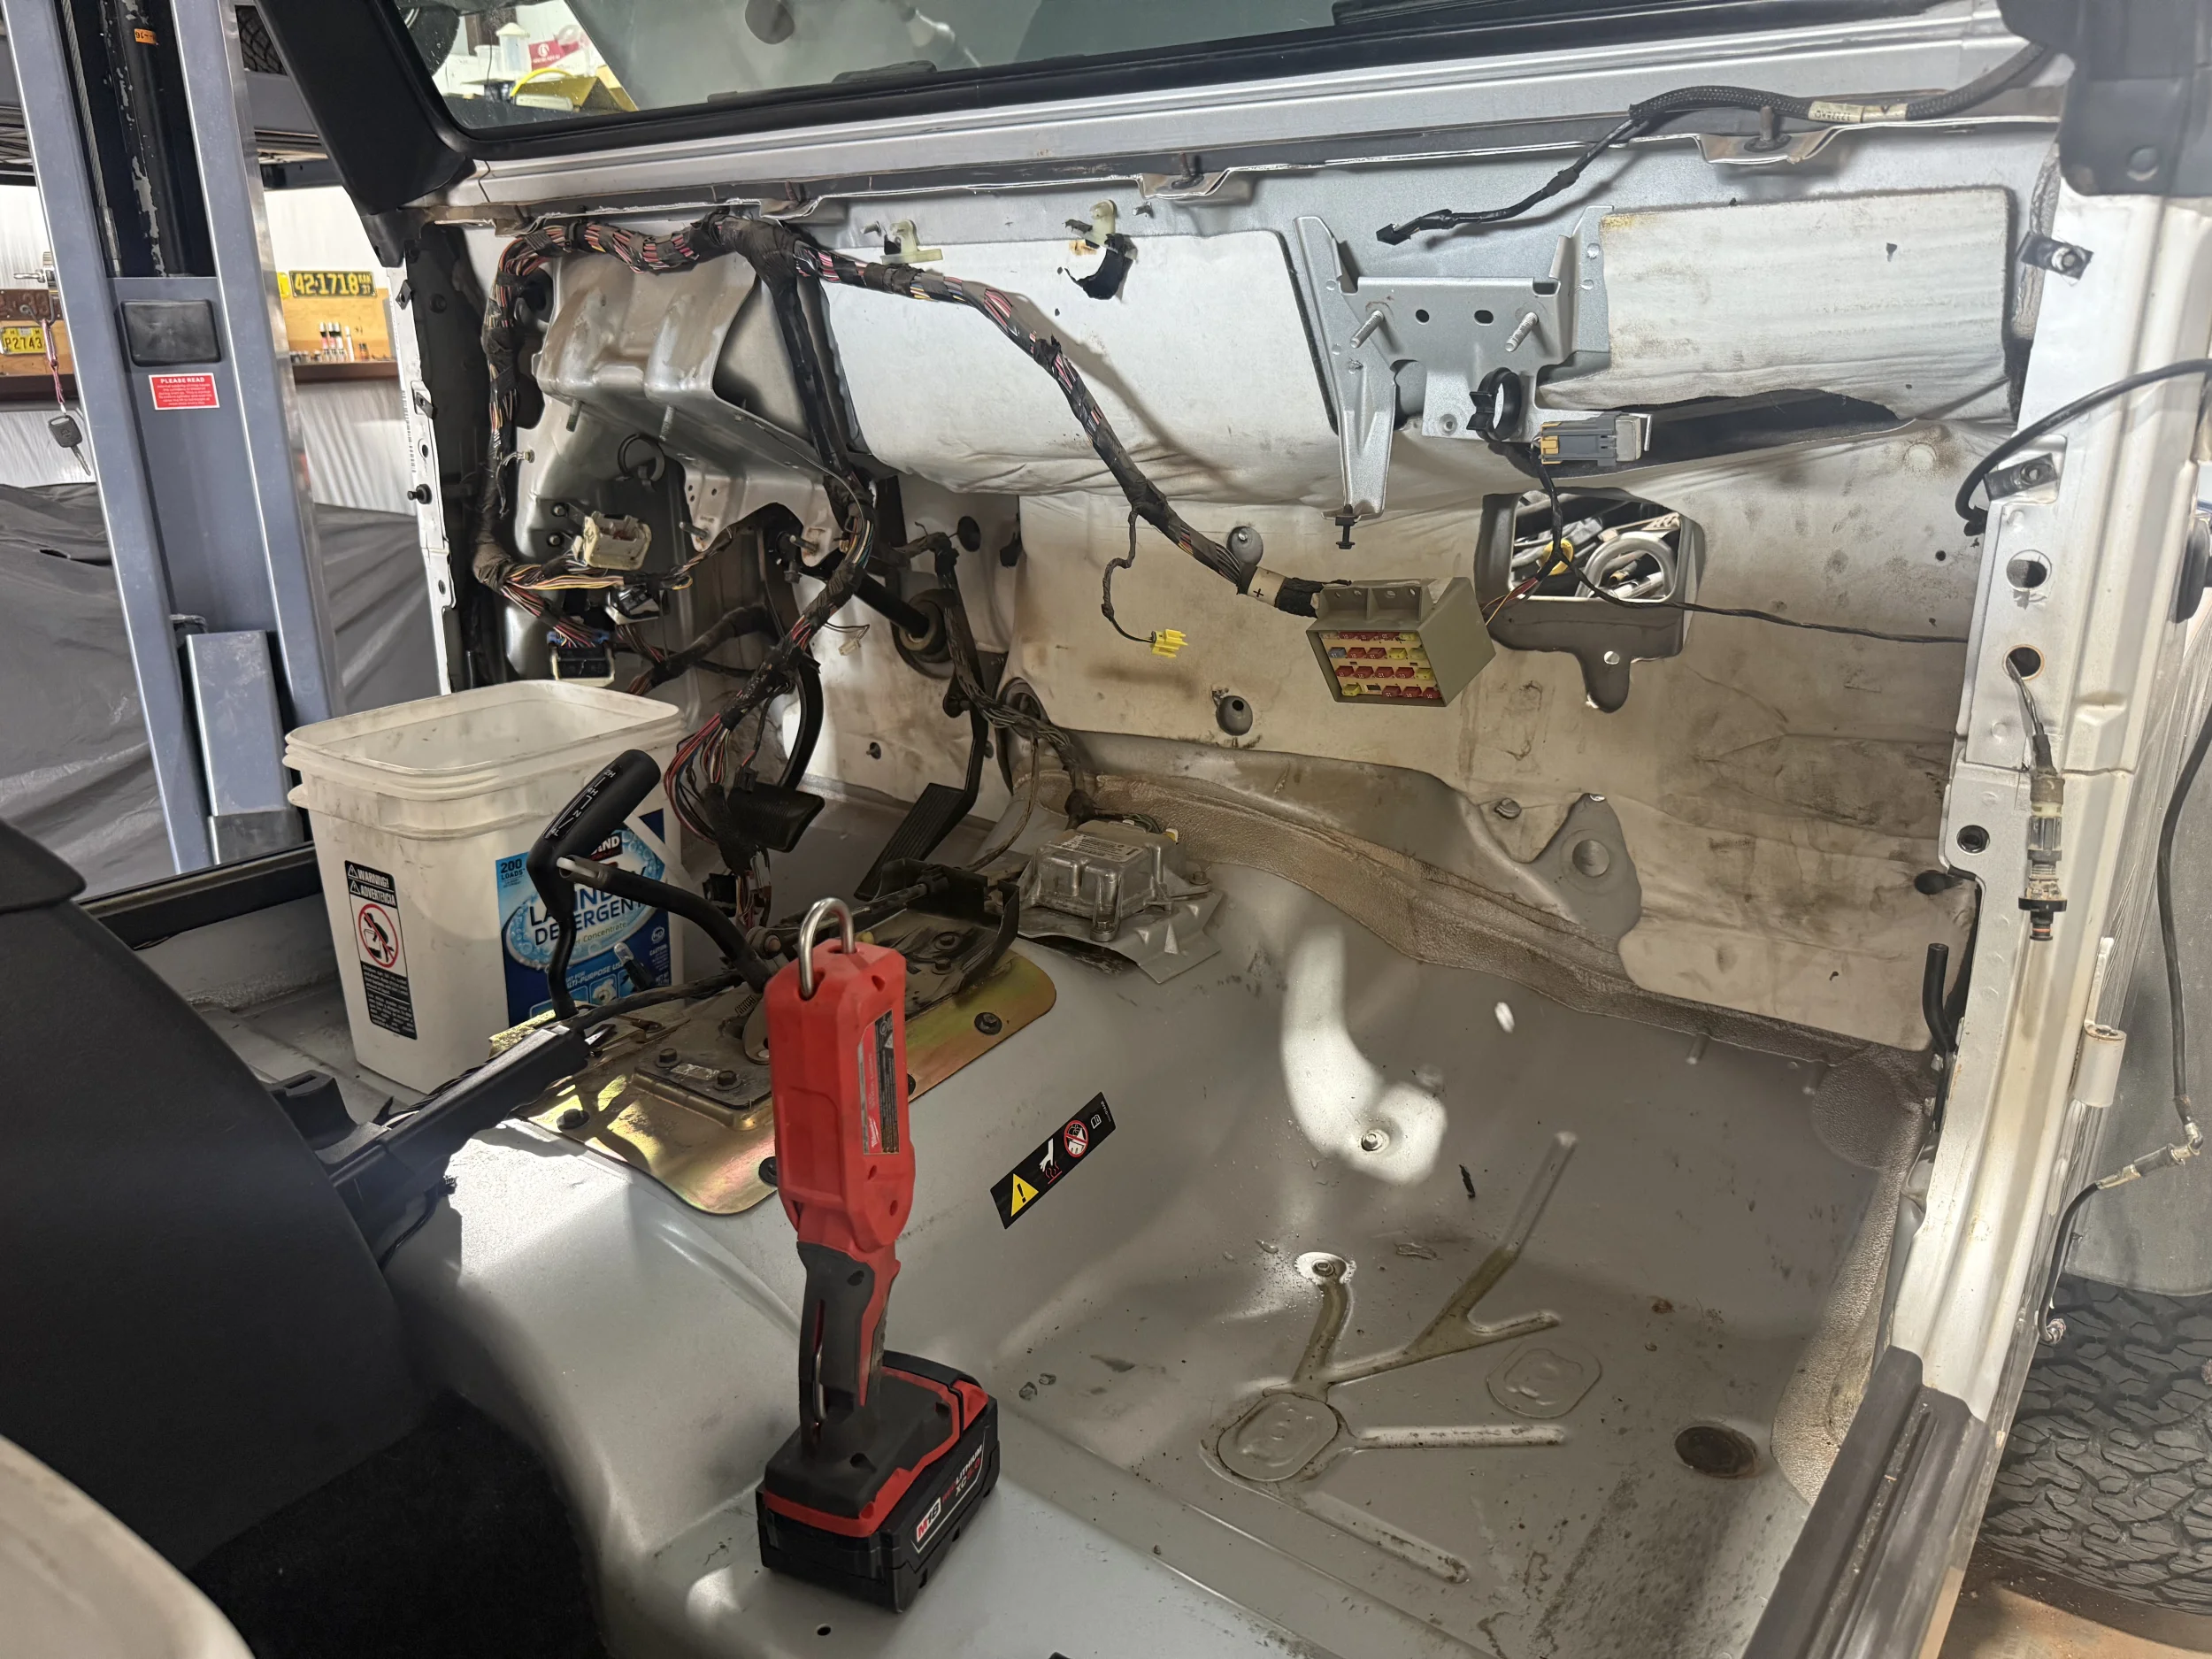
Learn from my mistake(s). This morning I went out to start cleaning things up before removing the actual HVAC system. With everything sitting on the ground it was quite obvious that I took apart way more than I needed to. NONE of the screws holding any of the plastic dash face to the metal frame behind it need to come out. The footlights and ALDL connector can stay in place along with the grounds on each end. The main dash harness comes out with the dash and only has two white plugs on the drivers side and a green plug on the passenger side. Unplug those three large plugs along with the passenger airbag plug and the powered mirror plug on top and you’re free.
The only thing holding the entire dash assembly in place are the three torx head bolts on each end and four 6mm (10mm hex head) nuts along the top below the windshield.
In my case I had planned on disassembling everything anyway because my Jeep was absolutely filthy and I wanted to take this opportunity to deep clean. But for just doing the required work to the HVAC system there’s no need to unscrew things furiously.
Here’s how it should look if you do it the easy way.
OOPS: EDIT: Don’t forget the two large nuts holding the back of the passenger airbag mount to the firewall.
Last edited:
Had a similar issue on my TJ a while back, even though dye was added there was zero evidence of a leak anywhere. Finally picked up a sniffer and found the LP switch on the accumulator was leaking internally. (never leaked under vacuum) Replaced that and have been good for over 12 years now.. Good luck....
Last edited:

I was dreading the "dash-out adventure" as well, but there are a couple of decent You Tube vids that provide good info on how to do it without removing the steering column, and the process wasn't as difficult as feared. Change out your heater core while you're in there!
With what?sound like all of the tj heater cores suck.
Everything is apart and the leak is epic! Apparently my theory has some merit. The leak is at the very top of the evaporator right where the core and inlet tube connects. And there’s ZERO UV dye tracking there. I pressurized it and the leak was obvious.
Very sadly, the evaporator looks to have been damaged before it was ever installed. Obvious “crunch” at both ends of the top of the core. I have to hope the installing shop vacuum tested the system before the first charge was applied, but the damage is so obvious that even if it did initially hold vacuum you would have to figure that the solder joints were compromised and a few heat & pressure cycles would push it to failure.
Anyway…. For your entertainment:
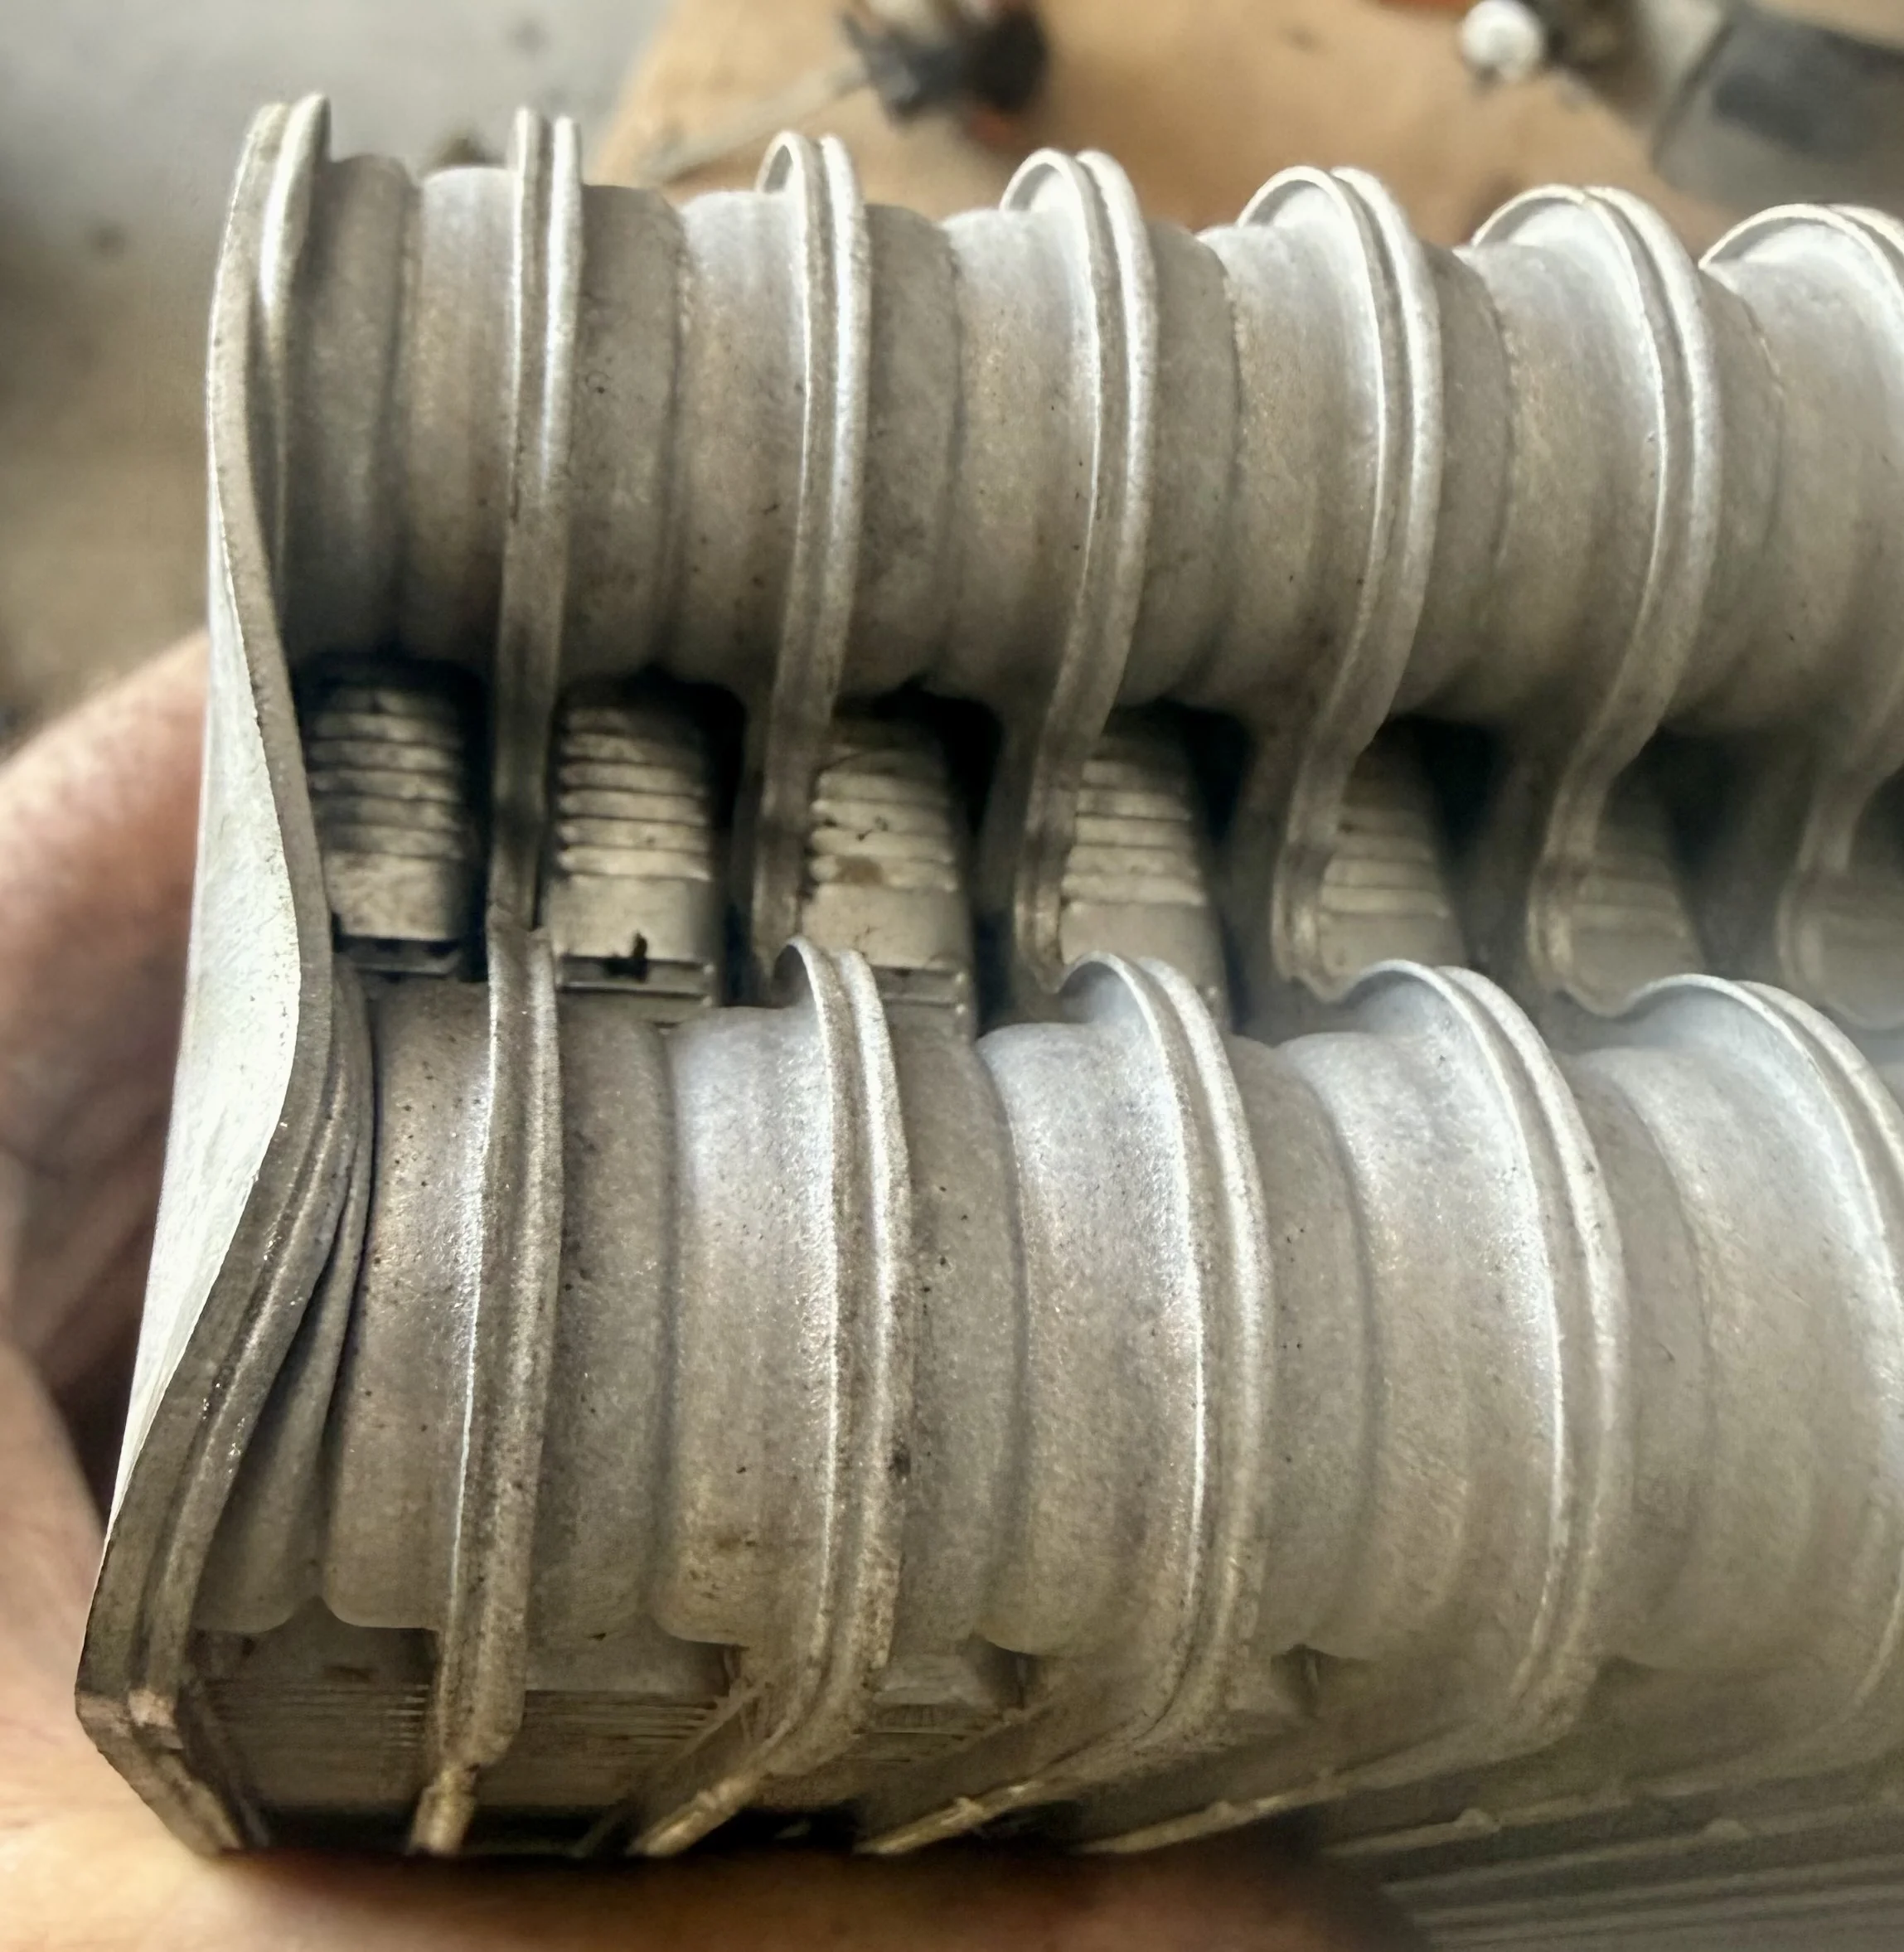
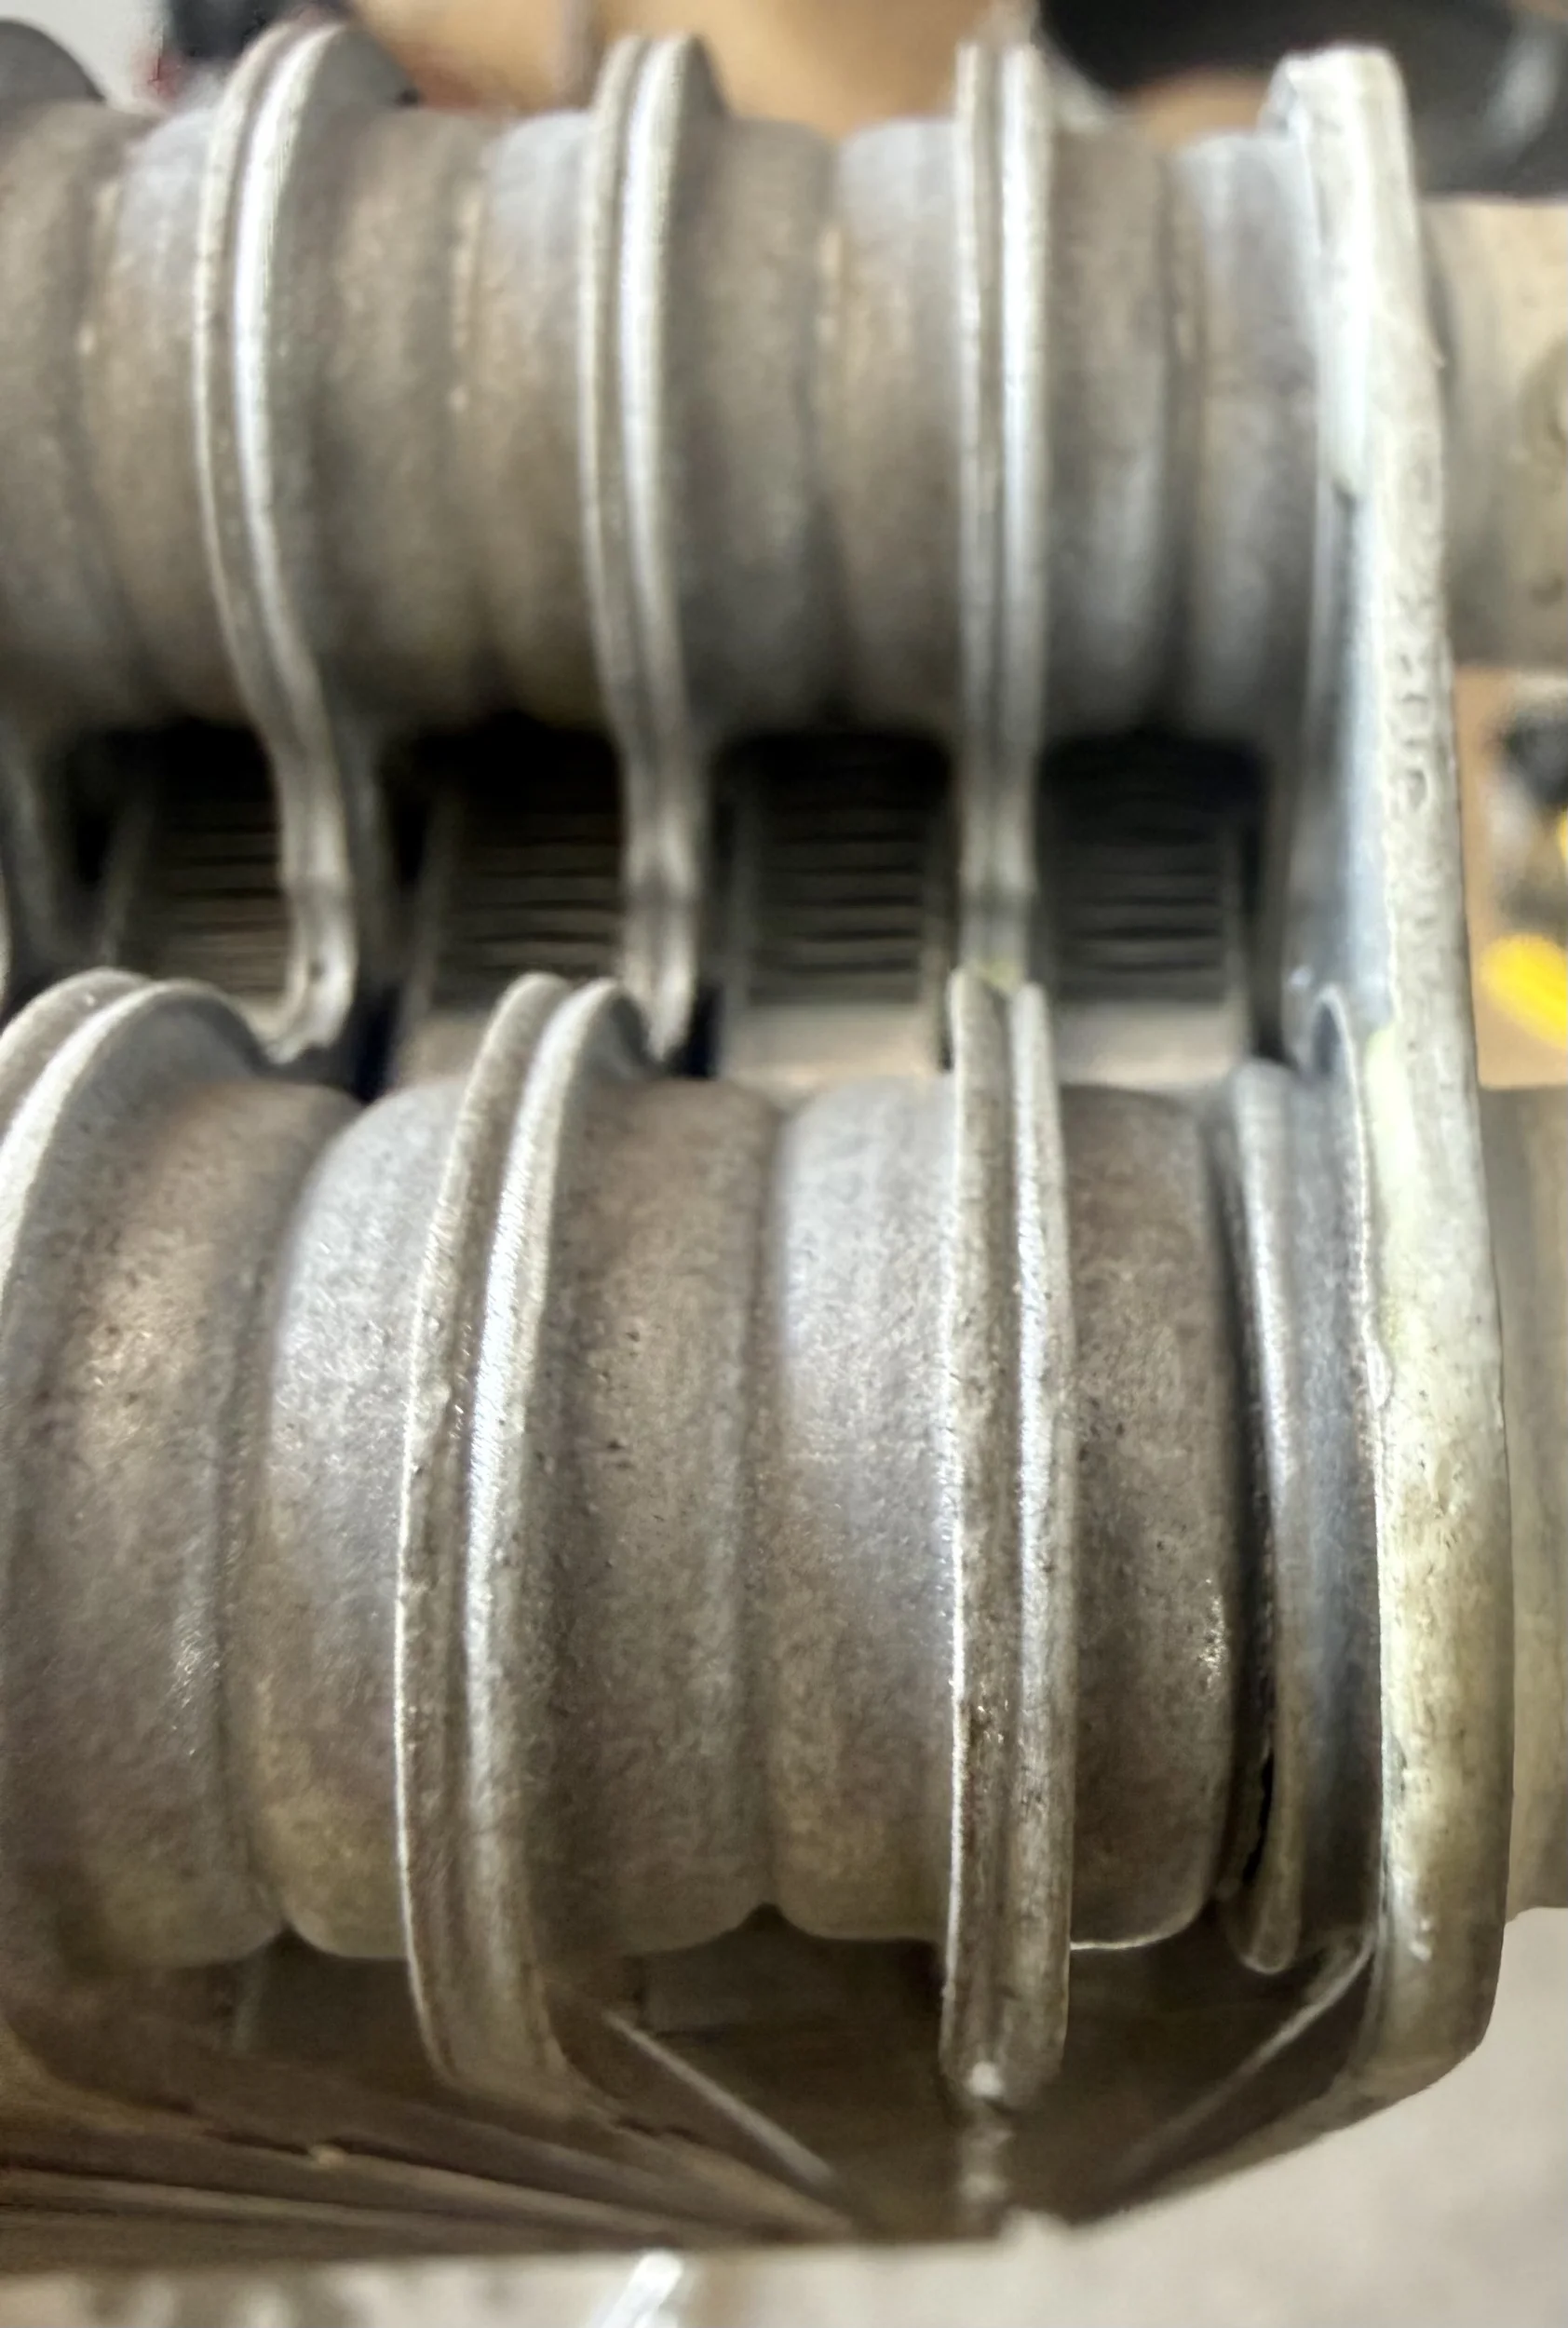
Very sadly, the evaporator looks to have been damaged before it was ever installed. Obvious “crunch” at both ends of the top of the core. I have to hope the installing shop vacuum tested the system before the first charge was applied, but the damage is so obvious that even if it did initially hold vacuum you would have to figure that the solder joints were compromised and a few heat & pressure cycles would push it to failure.
Anyway…. For your entertainment:
And now I just wait for my new evaporator and heater core. As you may remember the only other “fix” I had to do was to the fresh air/recirc. door actuator. The door had been wired closed and it was noted on the repair bill from 2017 that the actuator arm was broken and no longer available. I looked it over and the fix seemed fairly simple. And it was. I removed the arm and took a Dremel to the back side so I could sink a 1/4” bolt with the head sitting flush. A bit of Loctite on a slightly-loose nut through the original hole in the vacuum actuator arm and it appears to work just fine.
I’ll test the Loctite hold tomorrow and if it looks like it might ever loosen I’ll put in a slightly longer bolt with a Nylock nut. Now I’m bored while waiting on parts….
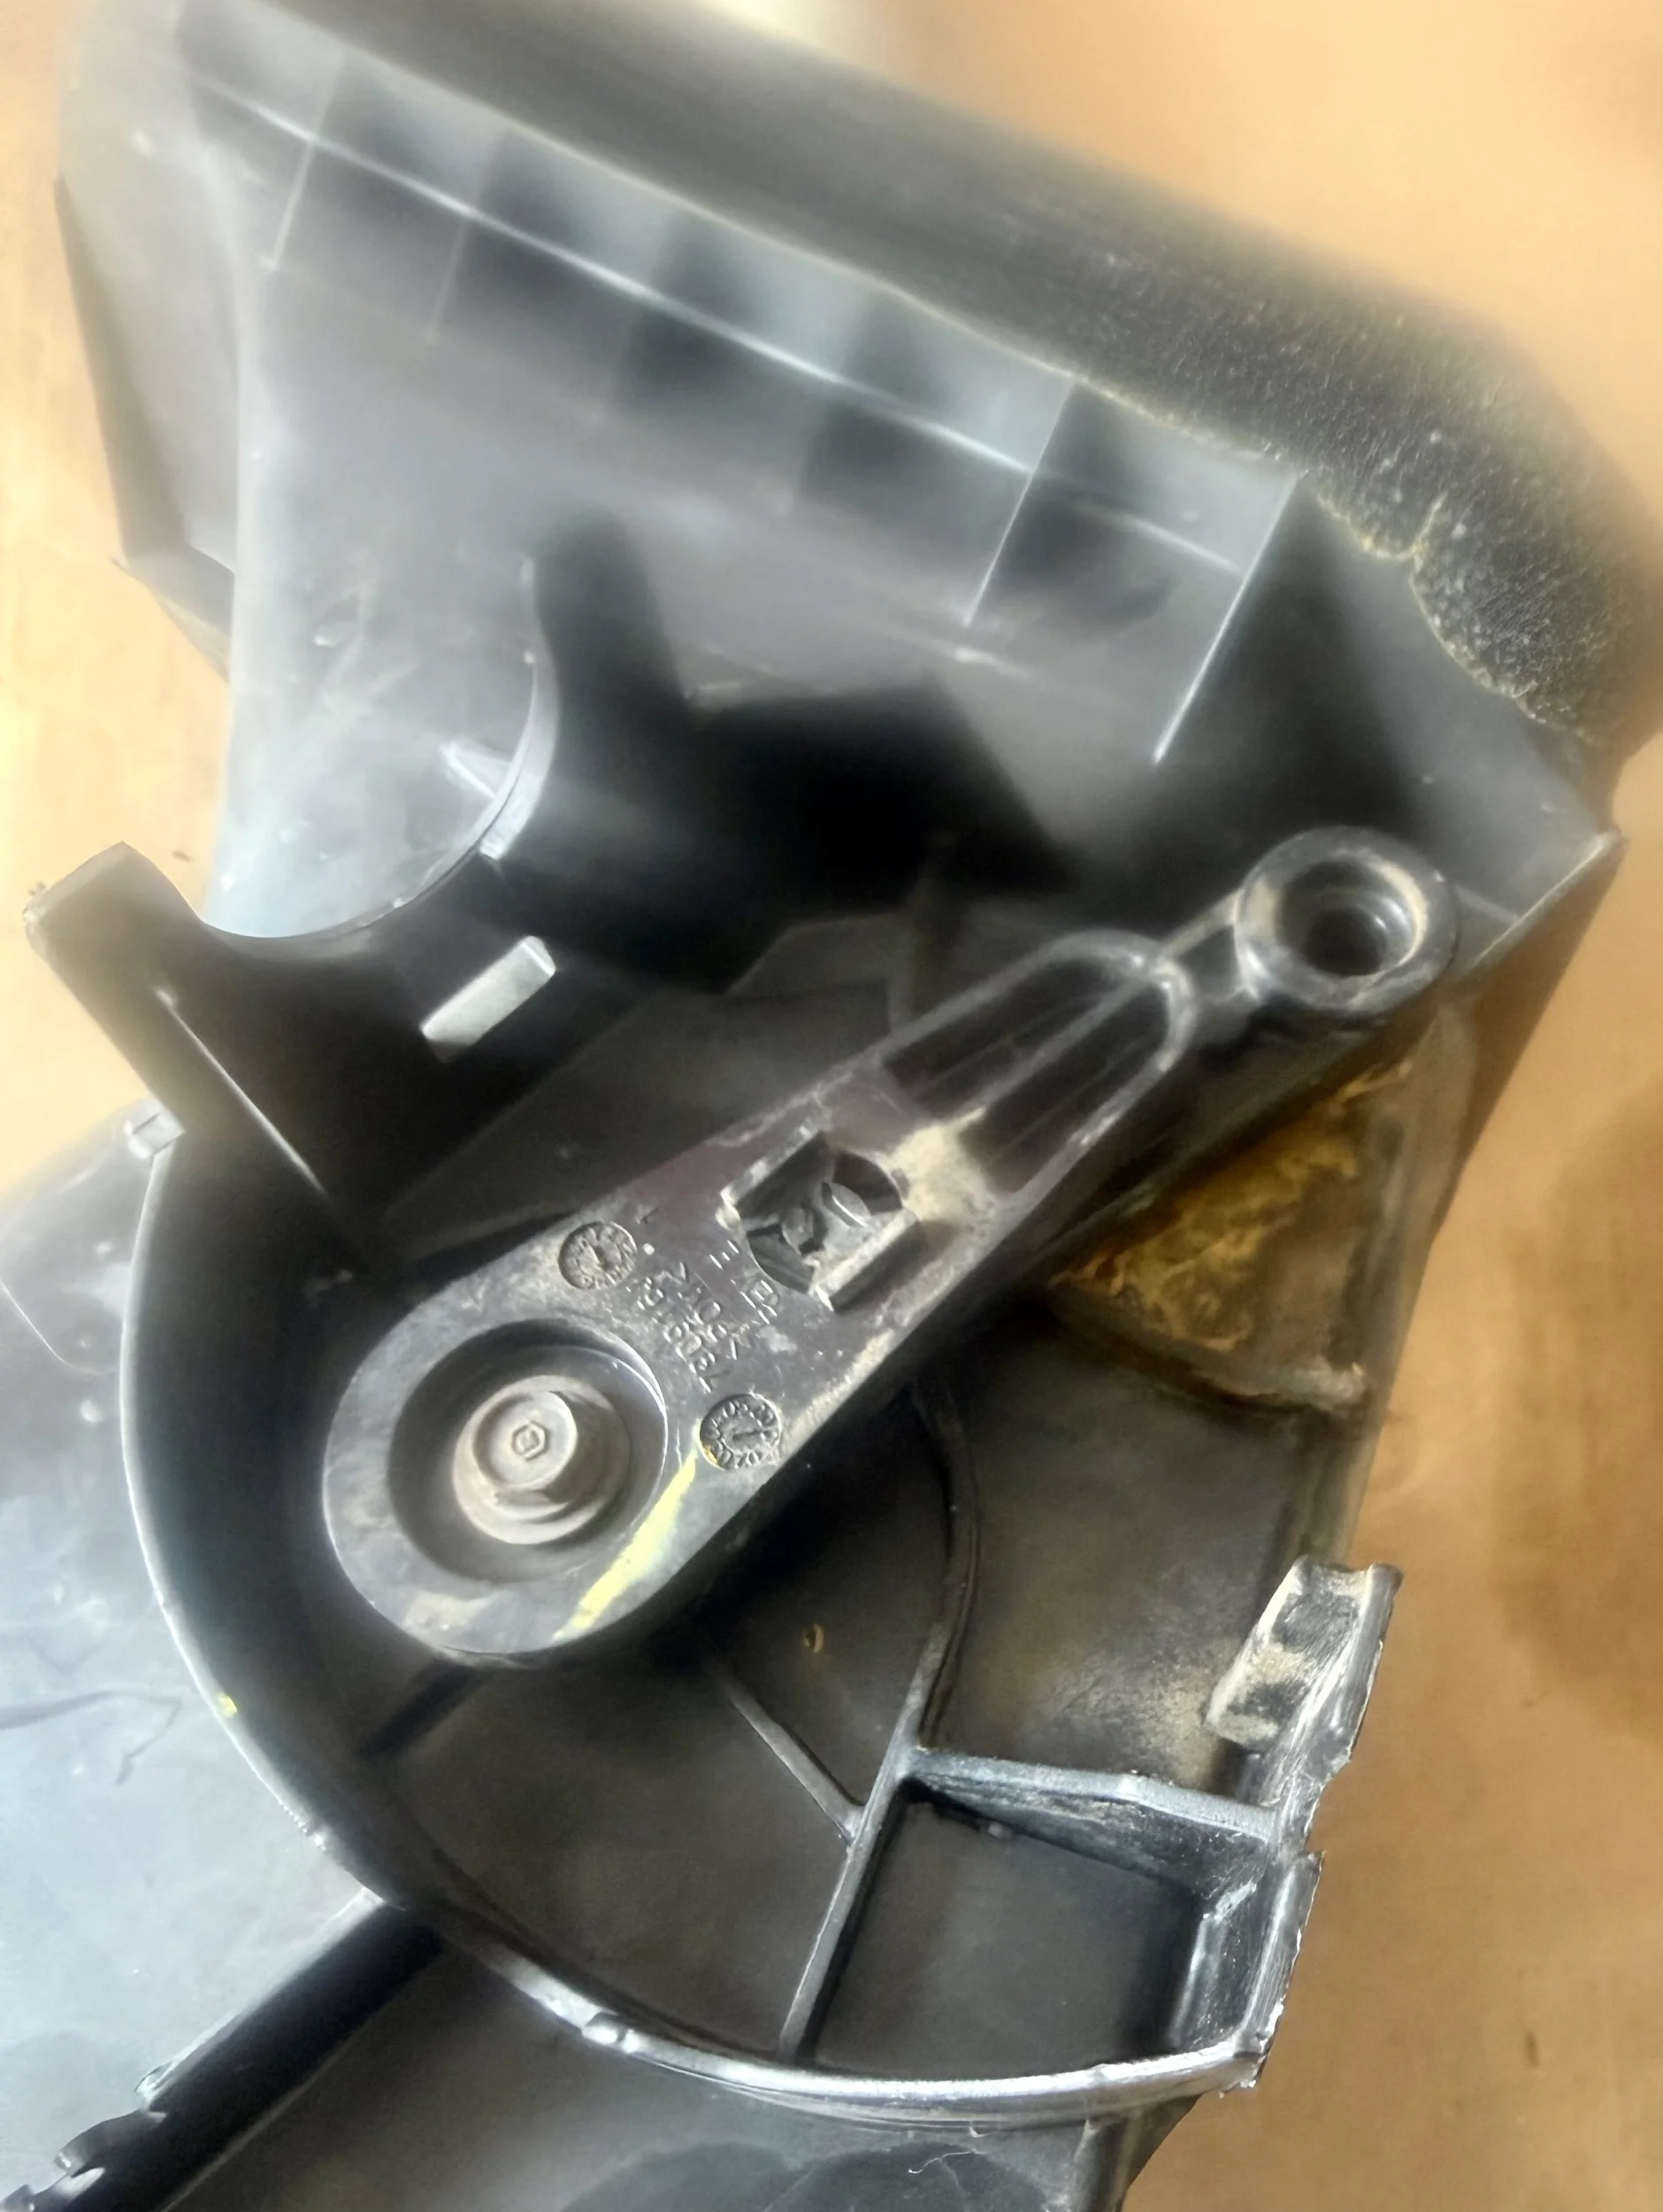
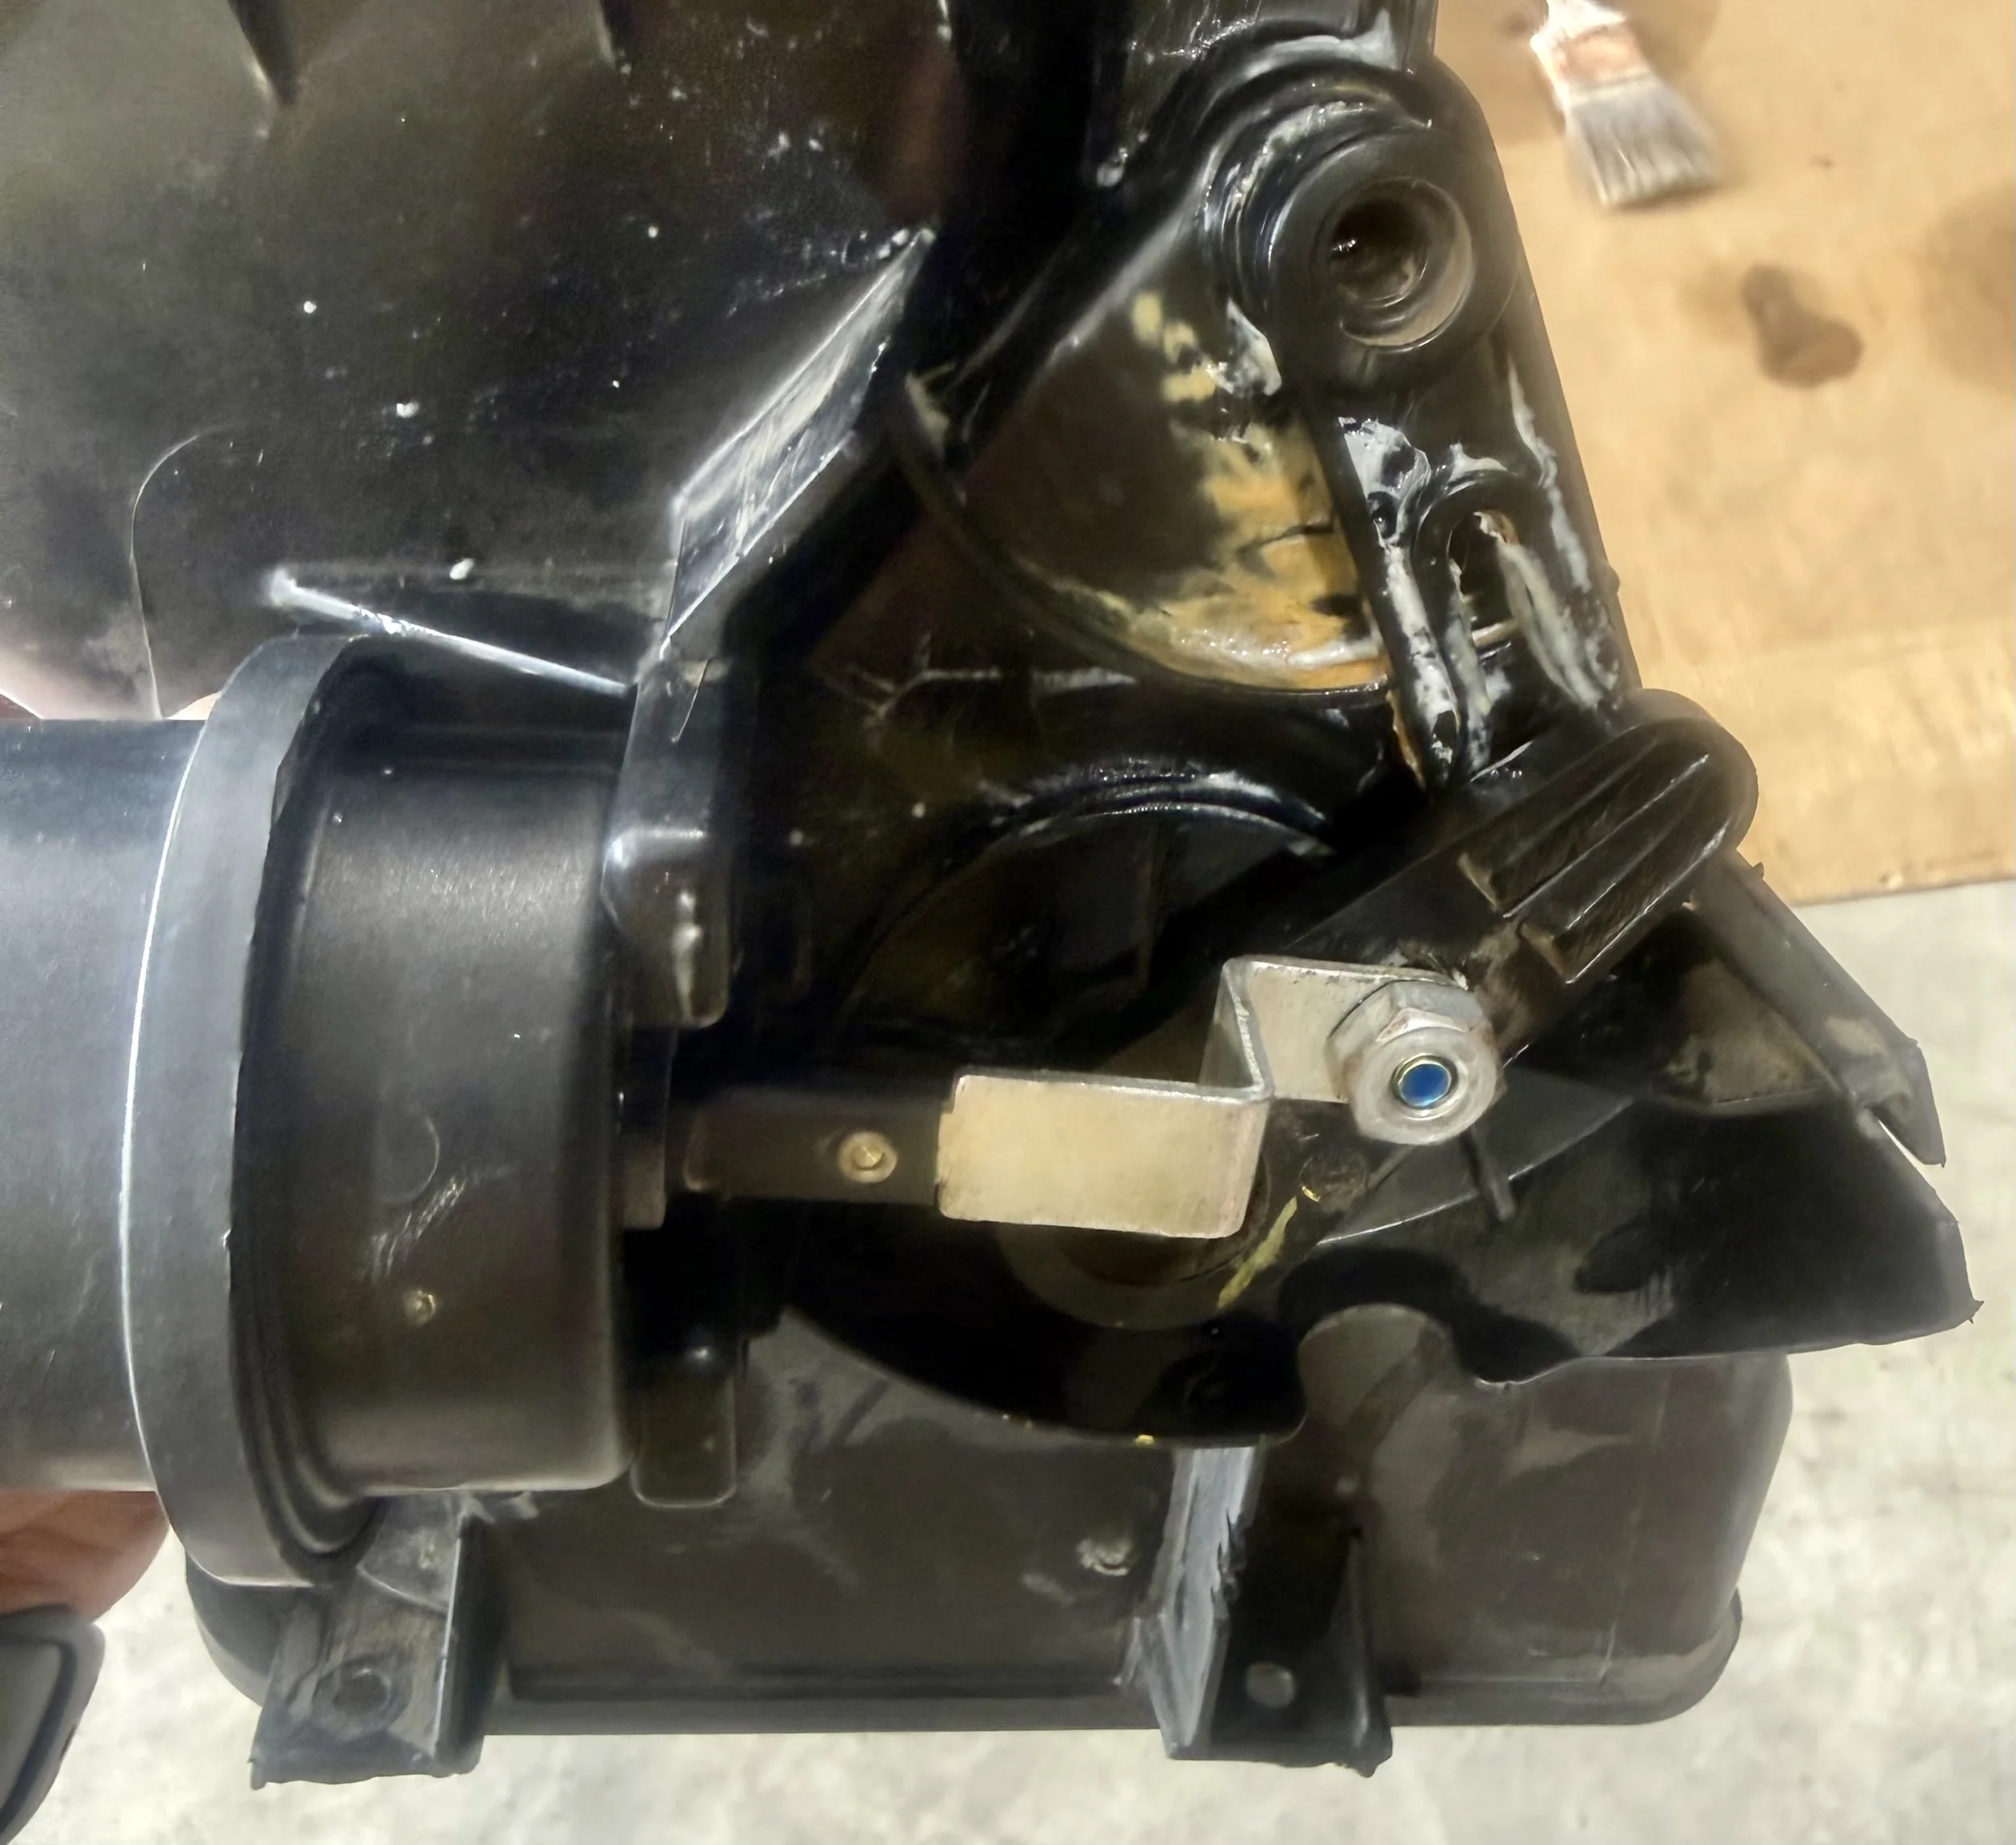
I’ll test the Loctite hold tomorrow and if it looks like it might ever loosen I’ll put in a slightly longer bolt with a Nylock nut. Now I’m bored while waiting on parts….
With what?sound like all of the tj heater cores suck.
This is the one I installed. It's only been in use since March, so I can't vouch for its durability.
https://www.amazon.com/dp/B0B6PNLVNX?tag=wranglerorg-20
Ready to reinstall everything. Both the mountain peak and jungle sites shipped quickly so I had both the evaporator and heater core this afternoon. But because I also ordered a new stereo to replace the 12 year old $79.95 Pioneer that was in there I won’t be back on the road until probably Tuesday. So tomorrow will be some stereo pre-wiring, some final cleaning, and hopefully getting the HVAC guts and dashboard back in.
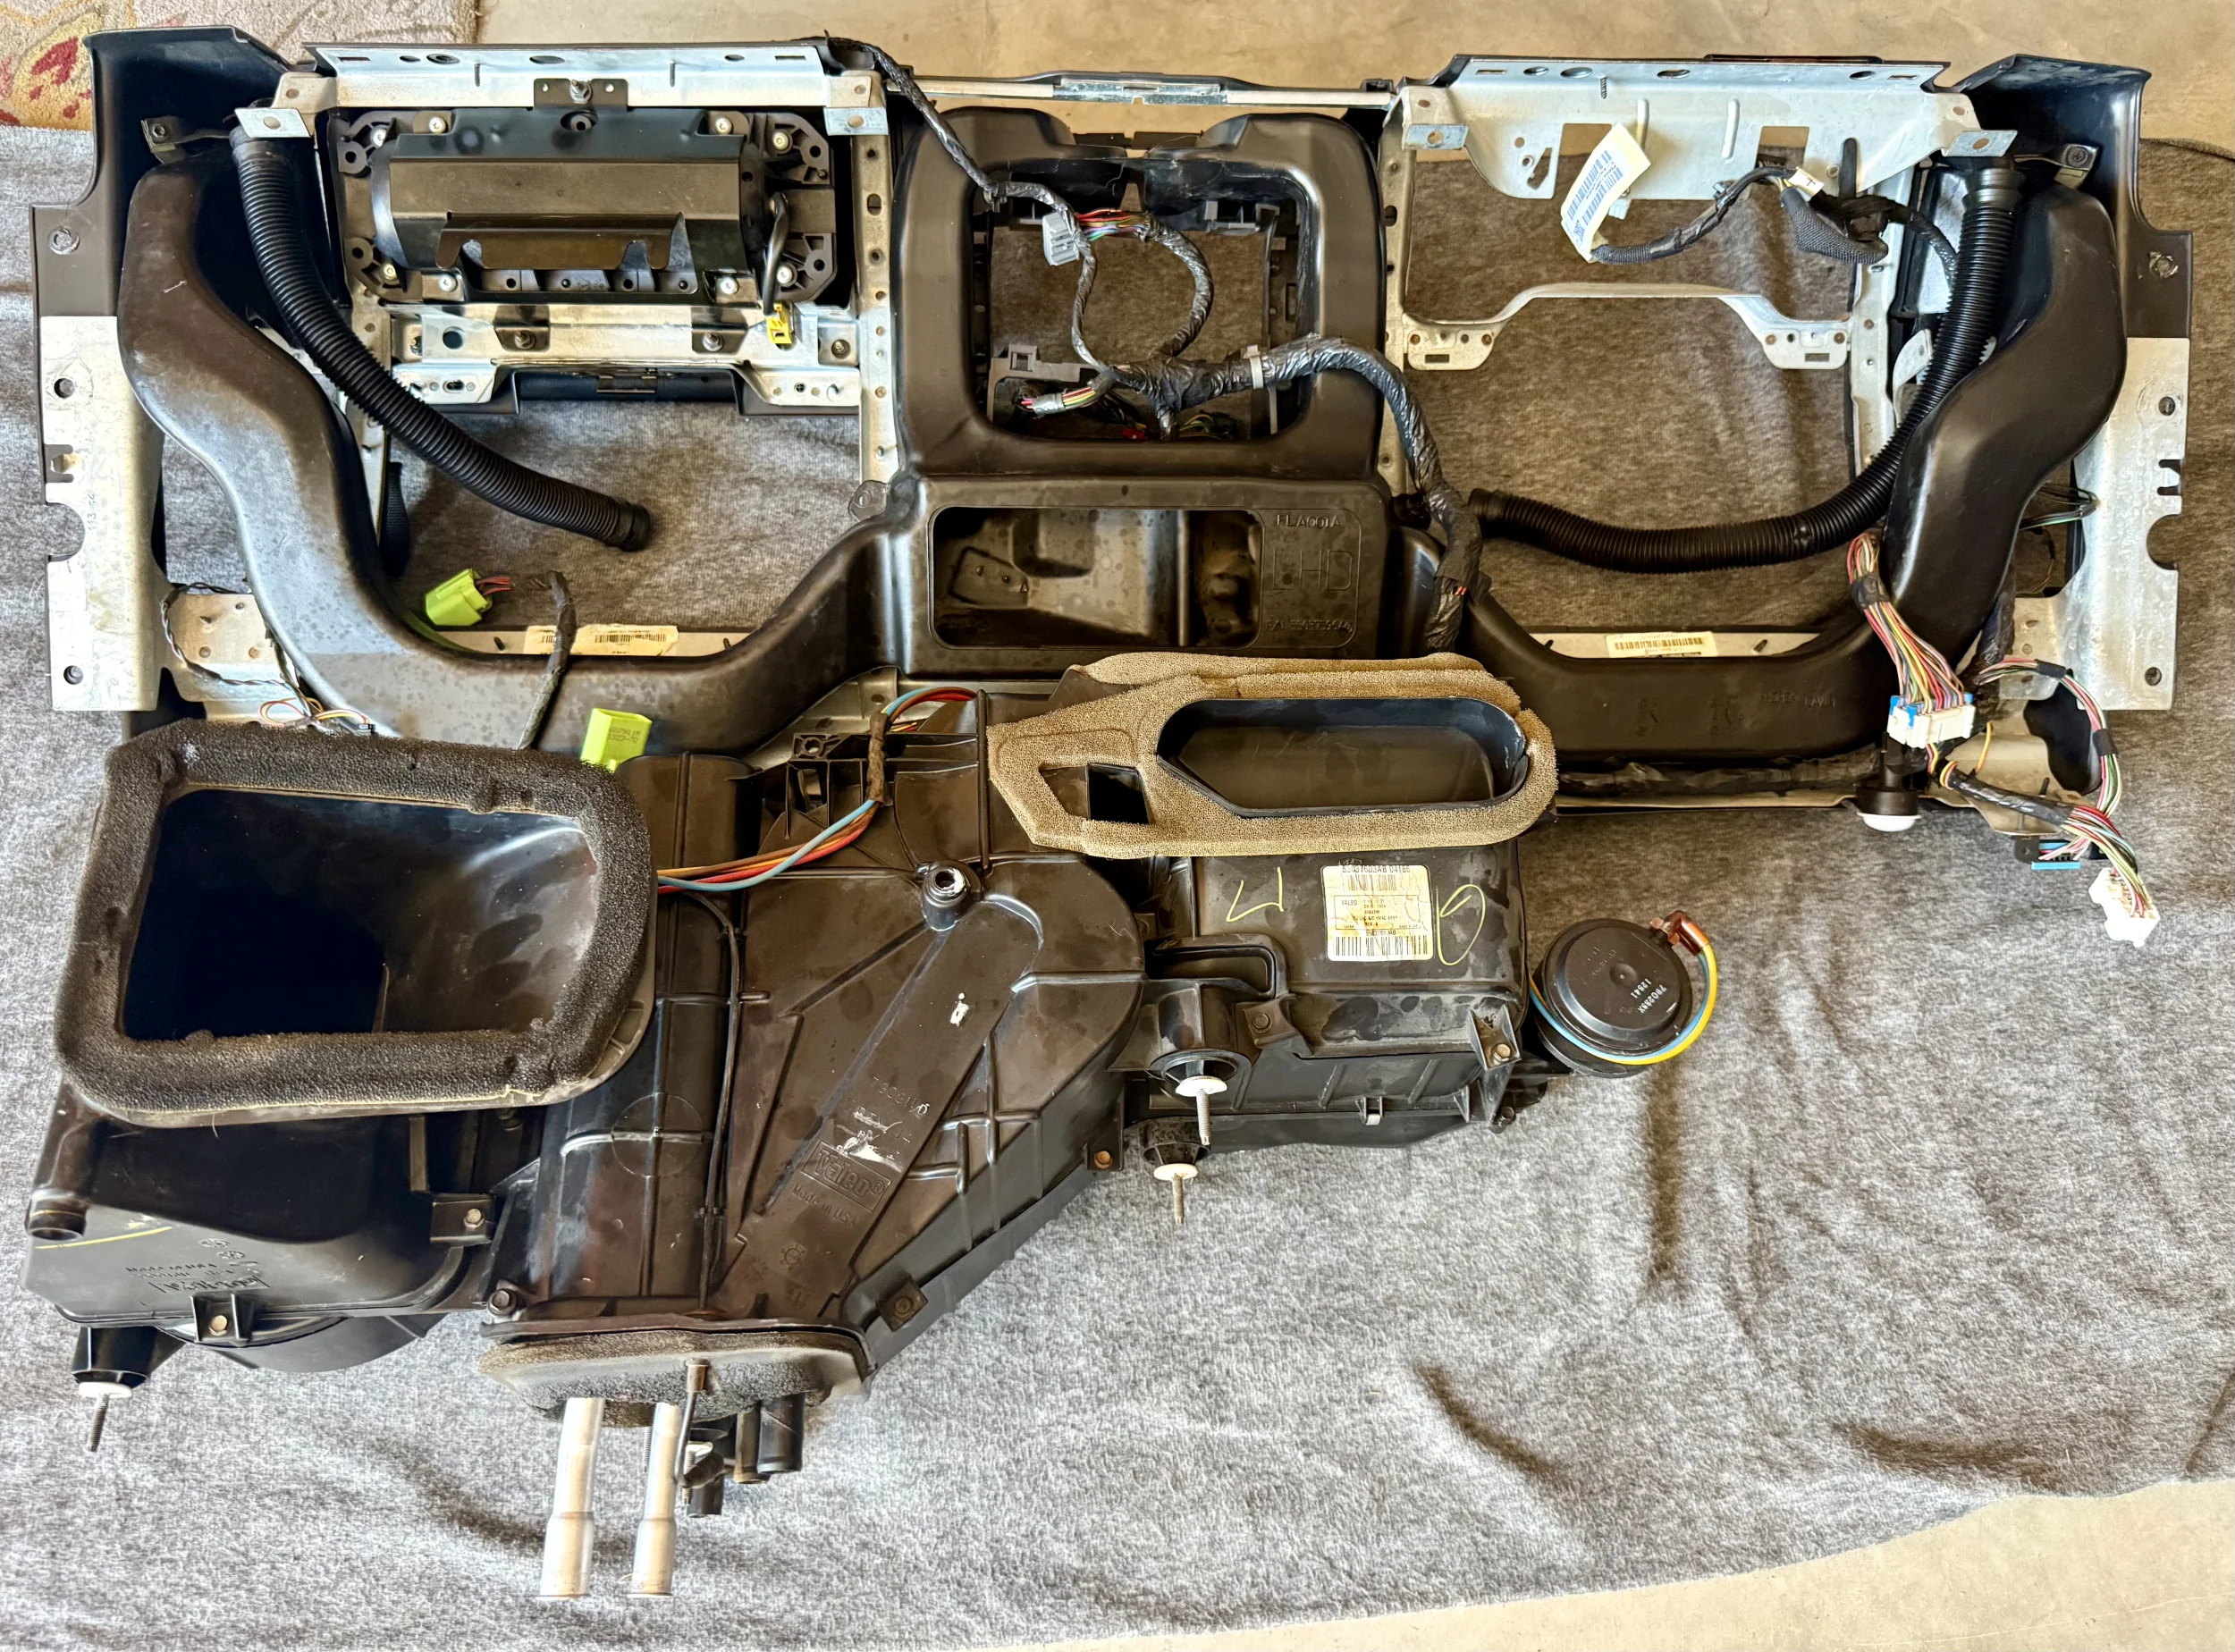
Time to contemplate some life choices. I got the HVAC box mounted back into the Jeep and hooked up the new evaporator and new heater core. I put my vacuum pump to the A/C system and it holds vacuum!
Success!!!
Then I notice a pool of coolant on the passenger floor. Whaaaaatttt??? I’m praying that when I was hooking the coolant hoses to the core one leaked out its contents before I could get the clamp tightened, thus letting coolant run down the inside of the firewall/footwell. But no way am I going to go any further before pressure testing the cooling system. Yet another new tool on the way. But I need to find out now if everything is coming back apart to replace a brand new leaky heater core.
Success!!!
Then I notice a pool of coolant on the passenger floor. Whaaaaatttt??? I’m praying that when I was hooking the coolant hoses to the core one leaked out its contents before I could get the clamp tightened, thus letting coolant run down the inside of the firewall/footwell. But no way am I going to go any further before pressure testing the cooling system. Yet another new tool on the way. But I need to find out now if everything is coming back apart to replace a brand new leaky heater core.

The good news is that the cooling system held pressure just fine. So my passenger floor coolant was simply the coolant running down the footwell from when I put the lines back onto the heater core. I’m surprised that the seal there isn’t better. It will be sooner than later with a bit of caulking.
I’m reassembling and hoping to be back on the road tomorrow. The parallel stereo install certainly slowed things down but it seemed to be the best time to do it.
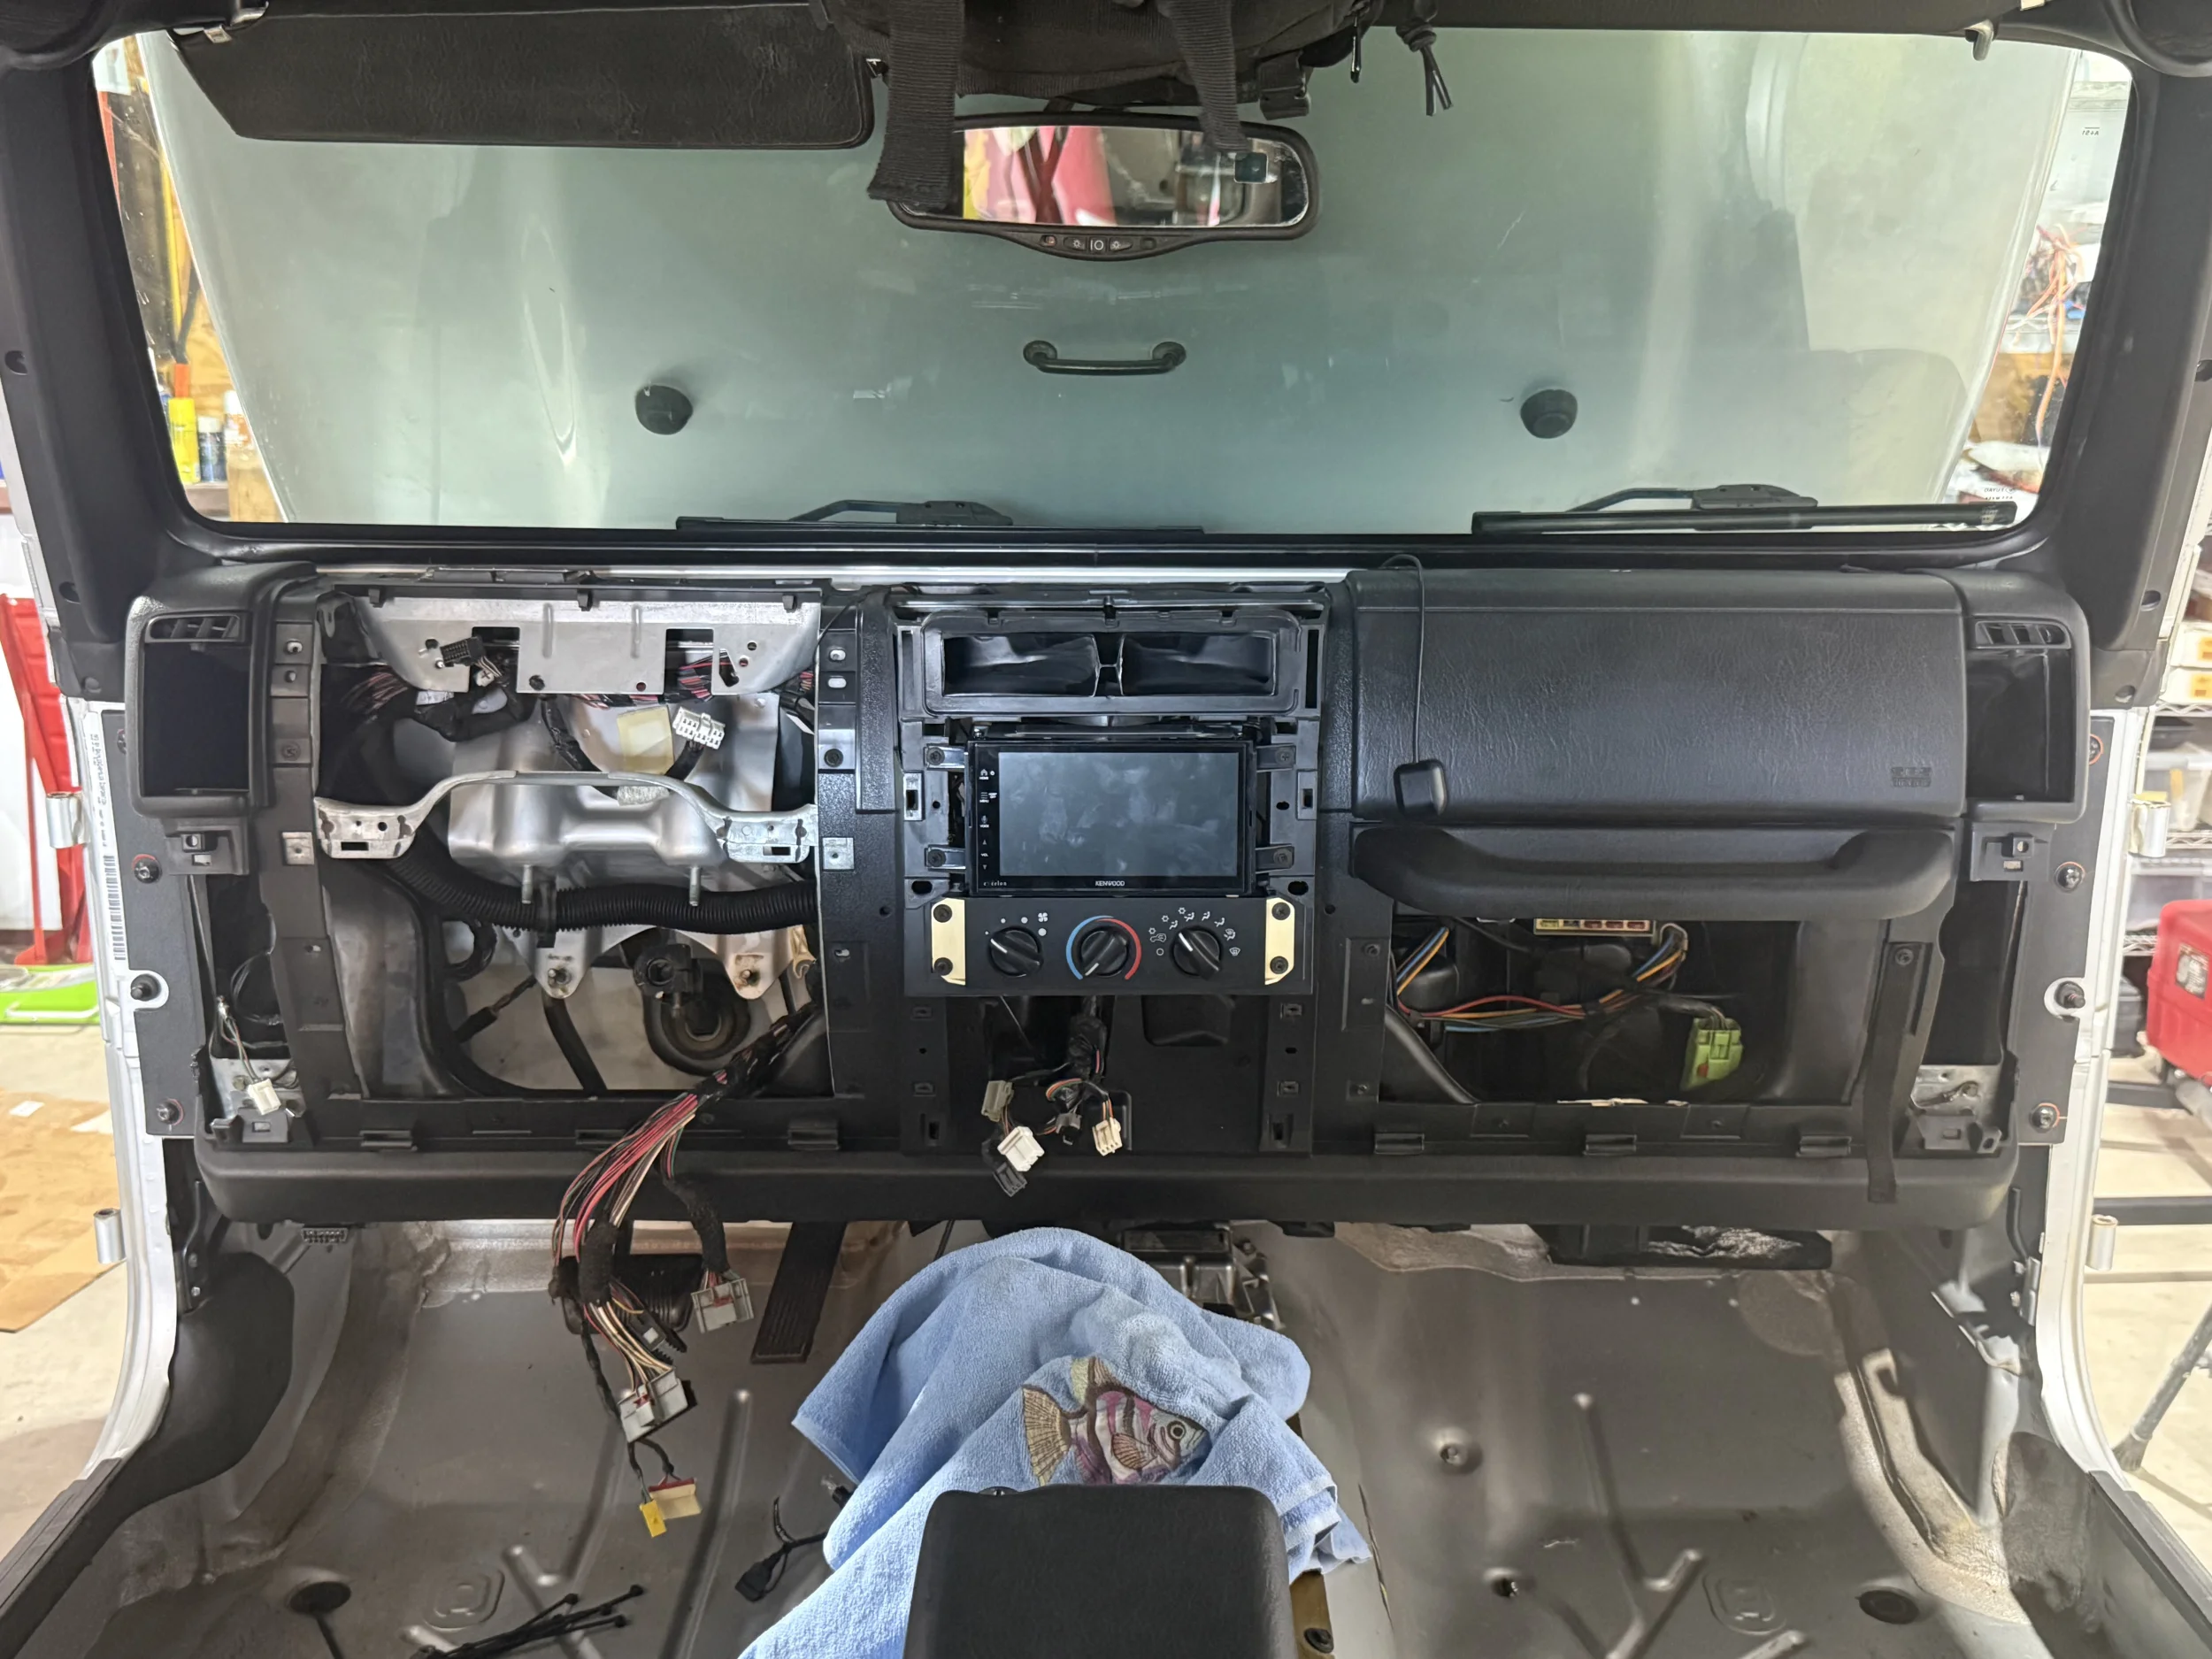
I’m reassembling and hoping to be back on the road tomorrow. The parallel stereo install certainly slowed things down but it seemed to be the best time to do it.
And after all of that I’ve got cold A/C. Finally! Thank you again to those who took the time to chime in.

Thanks for posting and for everyone’s comments. This was a great thread - I learned a lot and I’m sure it will all be needed at some point.
Similar threads

- Replies
- 41
- Views
- 10,562


- Replies
- 18
- Views
- 2,802


- Replies
- 7
- Views
- 979
- Replies
- 5
- Views
- 423

- Replies
- 45
- Views
- 5,947
