Cooling System
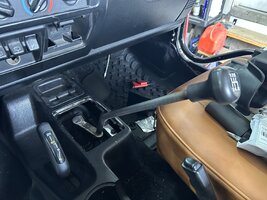
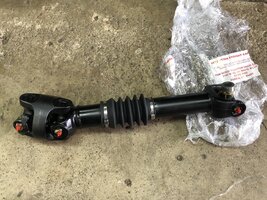
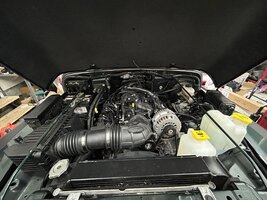
I found the cooling system to be very simple. But with the many different engine options and the many different vehicle options and the numerous radiators you can use, your hose configuration could be different than mine. I used a early truck water pump with my Gen 3 engine and a Superior Radiator LS to TJ radiator where both ports are on the passenger side and I got it with the shroud and fan (fan is crap so do not buy that, but the shroud is good). The upper hose was a Gates 22345 and the lower was a 21615, both have to be cut at certain points but both of these hoses are available at your local auto parts stores. The heater core hoses are 28471 and 28480 cut to length on both sides. Just route those how you see fit. Next swap ill be using a factory style radiator (an upgraded aluminum one) so that if it ever blows while I am out of town, I can get a replacement to get me home from a local autoparts store.
https://www.wwwsuperiorradiator.com/jeeps_and_wranglers
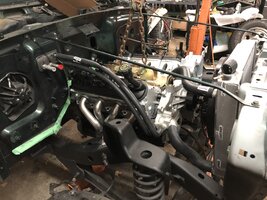
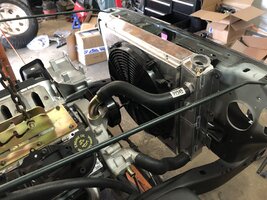
For the cooling fans, the Superior Radiator supplied fan failed in a few months, I bought a Flex-A-Lite 16in fan that Orielys had displayed behind the counter and mounted it to the shroud that came with the radiator, just had to drill some holes and I used riv-nuts to mount it. I got fancy with my wiring and got some of the terminals that the early TJs PDCs use and routed a new power wire from the PDC to the fan relay. But the big thing in the end is to use a thick wire (I used 12ga I think), a 30amp fuse (I think) and a high amperage relay that was triggered by the GM PCM.
For the expansion tank, I used the factory bottle and one of the Flex-A-Lite mounting plates to mount it to an aftermarket radiator since the factory mount is integrated to the factory shroud which is probably being removed for this swap. I think going forward I want to use a better sealed bottle since when the trail gets bumpy or out at the dunes, coolant spills out the bottle.
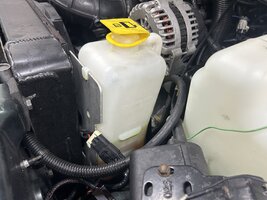
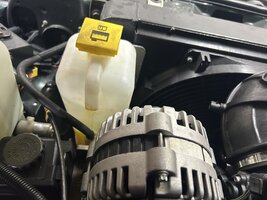
Other may have different experiences, but I have an insulated hood with no vents and grills inserts that block a lot of airflow and I have not had any overheating issues, infact it runs too cool in the winter even with 4 of the 7 grill inserts completely blocked and a 195* thermostat. The most stress I have put on this was towing a SxS at the dunes with a locked wheel. I had to use 4L going up a long sand hill in 3rd towing this thing out. It got hot, but not dangerously hot and it got back down to operating temp quick when I stopped. So I have had no serious cooling issues when going to a V8 but how you use it and where you use it could make the difference.
Intake
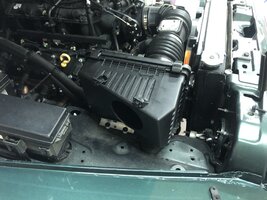
You can be real basic with this and source all of your stuff from the plumbing section at your local home improvement store or real complicated and make it look factory which is what I did. I used an elbow from a early F-body (not LS) 5.7 Camaro, a universal card style (LS3) MAF housing, and straight flex tube from a 3.5 Nissan Murano, and an airbox from a 05ish Chevy Impala. Or just stick a filter on the throttle and do a speed density tune and call it done. I personally want to work on a intake that runs to the firewall and opens up in the cowl to reduce IATs and possibly less dust since after any dune trip or water crossing, I get debris all over the engine bay.
Remember to go into this knowing what you want, so do your research in advanced if you want to do speed denisity only where you can omit the MAF, or if you want to include an MAF to your setup.
 Exhaust
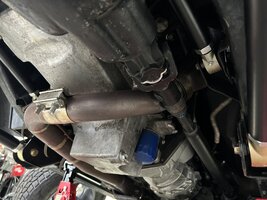
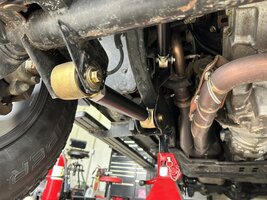
This was definitely the biggest PITA for me since I was very specific that I wanted it somewhat quiet which I know it’s a Jeep, but I want what I want. Holley used to make a full bolt on kit from headers to exhaust tip, but has been discontinued. So your only option is custom made at this point in time. To save your self some time, just purchase a 3in tail pipe (basically from back end of skid plate to exhaust tip) and custom make the rest from there.
What I did and majority of people do is the passenger side goes straight back to the tail pipe, the driver side gets routed down towards the front and goes around the oil pan sump the goes back and merges with the passenger side down pipe. Add your mufflers and catalytic converters as needed. I have seen LS3 manifolds used a lot, which I kind of want to go to. I was fortunate to get the full Holley exhaust before it was discontinued, but I modified it a bit for my personal use (and someone ran into my garage destroying parts of it when they were lying on the ground being installed and I couldn’t get replacements). I also had an earlier setup where I used Novaks headers which are nice, but absolutely not needed and you can get similar ebay knockoffs.
 Fuel System
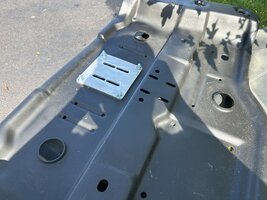
This is probably the easiest part of the swap, even easier if you have an 05-06. LS engines require 58psi, but the stock 97-04 fuel sendining unit is regulated to about 42psi. But luckily the stock fuel pump can output enough for most stock to mild LS builds. What you need to do is bypass the stock fuel pressure regulator which is metal can thing on the sending unit. Novak and G-force Performane are the only 2 regulator bypasses I know of. The Novak bypass kit requires you drill a hole on the sending unit and add a fitting for the return, the G-force unit already has 2 ports in the bypass so no drilling required. I used the Novak with success for years, I bought but have not used yet the G-force. In addition to the bypass you now need to regulate the fuel pressure to 58psi. You can use a C5 filter/regulator if you have a returnless fuel rail on your engine, or just use the stock truck regulator if it’s a referenced return style. For awhile I used the Novak with a Summit branded C5 regulator (which leaked after 2-1/2 years and was annoyed I mounted it in a spot where I had to drop the tank). The picture below with a stock tank shows the Novak setup with thier bypass and a drilled hole in the top of the sending unit and a fitting installed for the drain from the C5 regulator.
A note about Gen 5 engines. In a factory configuration, they use a PWM pump and special controller that varies the pressure going to the fuel rail. From all that I have read, it is not required and many have had no issues supplying a fixed 58psi to a Gen 5 engine.
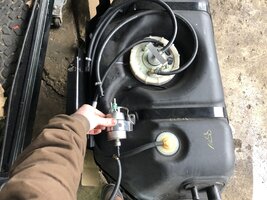
Here is an important note on fuel pressures and the tune. GM had 2 different style regulators for trucks. The earlier engines had a vacuum referenced regulator which was mounted to the fuel rail, where at high vacuum conditions like at idle the fuel pressure was actually reduced to 42psi. When vacuum reduced the fuel pressure would increase to 58psi. Later trucks did not have this, the fuel pressure was a flat 58psi the entire time. There is a difference in tunes between these 2 style the injector scaling was adjusted for it. So when talking to your tuner, make sure you mention what style regulator you have since it does make a difference in drivability. I ran a fixed PSI regulator on a PCM that had the reference regulator tune without making these adjustments for a long time not realizing this was a thing. As soon as I adjusted the scaling, it made a huge difference in acceleration and power delivery.
If you have an 05-06, good for you…you don’t have to do anything fancy at the fuel tank. 05-06 are regulated to 58psi. Right now I am using an 05-06 fuel sending unit since I got a used Genright tank that was from and 06. I recommend this route now just for simplicity sake. It eliminates one component from the system that can (and did for me) fail. I do not know if an 05-06 fuel sending unit will work in earlier tanks. Picture below is of a 05-06 Genright tank but is functionally the same as a stock 05-06 tank. The canister is a filter I added inline. I think it was for a 11-14 Mustang with the 5.0. It used 3/8 quick disconnect fittings like all the Jeep and GM parts use. There is no return since the housing is the regulator. But in reality you could leave everything alone at the tank end of the fuel hard line with an 05-06.
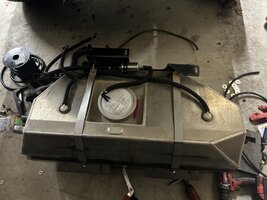
After you get the tank side figured out, just connect the supply line and return line if applicable to the fuel rail. The stock hard lines work fine. I bought a new set from a company called Fine Lines and they are a very nice set. Make sure you get the 4.0 set with a 3/8 supply and 5/16 vent. For all the lines from pump to rail, I made sure use 3/8 Fuel Injection hose that is rated for 225psi and the vent line is just 5/16 hose. I am returnless now, but when I had a short return hose from a C5 regulator, it was 5/16 fuel injection rated hose.
https://www.sstubes.com/products/wg...-5-16-return-complete-fuel-line-kit-stainless
Power Steering
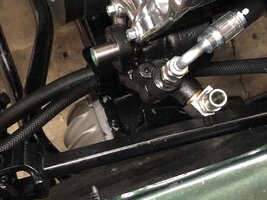
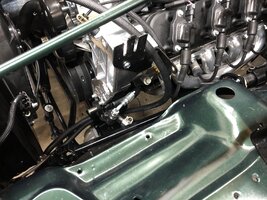
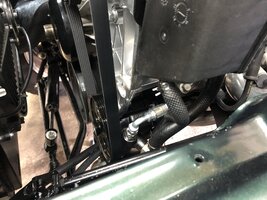
This can be done in multiple ways, and I can’t just tell you what to do, but can say what I did. What I did that worked was use a Trailblazer SS PS pump (type 2) and got a fitting that presses into the reservoir port that has a nipple on it so you can run a remote reservoir. For me I just mounted a C5 reservoir on the bracket. The pressure hose is a stock hose where I had a hydraulic hose shop crimp a JIC 90* fitting (pretty much an AN fitting) and had an AN adapter on the PS pump. Used a factory return line and hooked it to the reservoir. I know this can be done better and I would have rather just done AN lines entirely, but there is not a lot of clearance from the Jeep steering box to the grille and at the time (early 2021) a lot of special fittings that could have been low clearance enough were not in stock of course from supply chain issues. I am currently working on a custom bracket that will allow the use of un-modified Jeep PS lines and use the same type of PS pump as a Jeep (Type 2) which is used on a lot of GM vehicles like the Camaros, Corvettes, Trailblazers, Cavaliers, etc. This bracket will move the PS pump higher than the stock truck location and will be close to where its mounted on a Jeep 4.0 which I have found that the PS pump was acting as my bumpstop after my first trip to the dunes so keep that in mind. The alternator will remain in a stock truck location.
 AC
AC
Idk, still working on that. Just take your doors off or roll down the windows.


