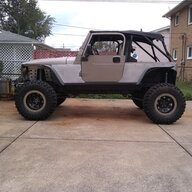
Someguys 04

nothin produced for the market is gonna fit what i have now. i plan on steel and did have the notion of a UHMW rub rail at the top edge. not against 1 along the bottom but would wanna see my fit 1st.
i have mentioned the idea of UHMW sliders or slider covers or even just strips on any skid to some and the idea seems less than popular. most stating that they couldn't hold up.

if 3/16" gets beat up i can go 1/4", i'd rather not jump to that weight out of the gate, until it's proven needed.
 
  • Like
Reactions: mattcogdell
so i was able to get the corners fit. i need to add 3 nutserts on each side, down the door line.
not much room to get back and get good pics. and my chopped off rear torque box ends right at the lowest gate edge holes, that'll have to be worked around.
having these in place will get me good measurements for forming the boat side panel upper edge. no cuts yet, i'm in no hurry there. plenty to do b4 that.

i wanted to start to put the body back together today, and get a few tacks on the cage posts, but the dam welder is out of gas. so i'm stalled until i get it filled.

145014511_871263180083811_1035429697361751877_n.webp


145129093_2866225303595966_6687576408490327126_n.webp


145303856_1784233058406564_7761284645082229679_n.webp
 
so i was able to get the corners fit. i need to add 3 nutserts on each side, down the door line.
not much room to get back and get good pics. and my chopped off rear torque box ends right at the lowest gate edge holes, that'll have to be worked around.
having these in place will get me good measurements for forming the boat side panel upper edge. no cuts yet, i'm in no hurry there. plenty to do b4 that.

i wanted to start to put the body back together today, and get a few tacks on the cage posts, but the dam welder is out of gas. so i'm stalled until i get it filled.

View attachment 222426

View attachment 222427

View attachment 222428
I will be using these blank corners as well. Are you going to run a rear flare or just cut the wheel well opening around the tire?
 
I will be using these blank corners as well. Are you going to run a rear flare or just cut the wheel well opening around the tire?
flat sides for now, in the rear. i have enough on my plate to finish. but maybe if i can find a clean way to fit a flare i might. the front high line fender looks bare without the flare and it'll need something to compliment it on the back end so it doesn't look hokey.
 
well i tried to get some welding gas fri after work and they are out until tomrw afternoon, so i try again tomorrow.

i did mess with how i'm not gonna use those stanchions (tried 1), that came with the roll cage. bolted into pot metal clips meant to hold molding, that's laughable.
those need replaced with 1.75" DOM with a bend just above the dash to lean back with the windscreen and tie into the windshield brace.
i got everything ready to weld in the fuel cell support, made a couple brackets to jump the upper CA's and support the front end. it'll be 100% supported from the frame. after trimming the hole placement is goofy but nobody's gonna see it beyond this.
and got the body prepped and ready for the new skins, stripped off all that dam bed liner so i can get a good flat bond between panels.
and drilled several holes to rosette weld the panels in several places.
then i made up a cross section of the boat side panel. fits real nice right up tight to the rear armor. this runs a nice level 3/8 gap under the door threshold.

the bottom end of the rocker is not trimmed, and will be 3.5" when i bend the real parts. $ for some size reference.
the small pate is just holding me up off the E brake.

147917837_239164147795327_3931581604201267901_n.webp


147936581_488138072578874_7915309034225806196_n.webp
 
alright it only took 4 trips to Airgas to get my bottle exchanged...........1st trip, they are out of it, and say come back tues. 2nd trip, tues they still haven't received the restock. 3rd trip wed, computers are down they can't sell anything. 4th trip thurs. i got the last F'n bottle, finally i can weld again.

so today we get to work on puttin my skins on the body, and gettin that into primer if all goes right. then to the fuel cell mount.

works rippin out the old laser they should have never bought. over $1mill invested for cost and repairs to an obsolete machine in the last few yrs. so it's goin in the scrap bin.
anyways the shop super loves to throw shit away, so i got my plate for the boat side panels, 3/16" 1045, 36"x73". now i just need some time on the press.

i ordered up some 4" round LED's for the rear end, those arrived thurs.

also i measured my for rear driveshaft length the other day, i think it stared with the stock shaft, around what 16-17"? then the TW shaft was 19 1/2"ish, IIRC. the new 1 needs to be (ready for this shit?) 30 7/8".

this things gonna have the room to run bigger wheels, i kinda need to start looking at axles that will.
but not this yr. i'll suffer through any ill effects of this wheelbase and 35's for now.
 
17* here this morn , gonna take 2hrs to get the garage to above 45*.

i been kickin around the idea of some UHMW on the rockers. it seems kinda silly to add anything to a flat bottom rocker as clearance is $. but the angle of my rocker allows for some room to play, in a way that does not change the bottom line.

i'm considering a piece of 3/8" black UHMW mitered to fit like this.

uhmw.webp
 
so the body is pretty much back together, the 16ga. panels are permanent and welded in.
the driver side needs some minor detail work and it's good enough for primer and paint. the passenger side needs a bit more patchwork and welding to remedy that over cut. but it's close.

as i drug the welder around the jeep, i got the fuel cell mount all welded in also, nice and rigid. i'll work on assembling it's cover this wk.
so not to primer just yet, but some progress.
the garage is a cluttered mess with almost no room to work when i can move shit and get pics, i'll post um.
 
only 9* this morn, waitin for some heat in the garage, again. yest was to cold to even bother.

i did break down and go fetch a 110V mig welder. the HF 220V mig welder i have does me fine for most stuff i've had to do. i don't have issues with it because i know a little about welding, and can compensate for it's shortcoming's. but it doesn't have the adjustment to do thin body panels well. set up as it is. also having the door cracked to run power from the house when it's freezing is not good, so i had the excuse to buy a 110V.

lincoln an miller are out of my range, hobarts not much less. even used they still fetch a premium around here, and you risk receiving someone else's headaches if it don't work right.

eastwood is right up the road from me and they had a 135 i snagged for 329$. it's imported but they warranty it for 3yrs.
 
so it took a wk but the weather is starting to turn for the better. i got the body all put back together, and today i was able to get the garage up to 70 today. that was good enough to spread the panel sealer and get some primer shot. now i can work on the guard panel.
it's not fancy but once the bed liner is redone over the new metal work it'll blend well enough.

153213989_489411369098419_8529648053628334508_n.webp


154328702_154983009795528_8060743176576709372_n.webp


155195969_793985971475372_1039906134272370899_n.webp


154180299_2801574630115598_6661840586957658086_n.webp
 
so it took a wk but the weather is starting to turn for the better. i got the body all put back together, and today i was able to get the garage up to 70 today. that was good enough to spread the panel sealer and get some primer shot. now i can work on the guard panel.
it's not fancy but once the bed liner is redone over the new metal work it'll blend well enough.

View attachment 229862

View attachment 229863

View attachment 229864

View attachment 229865
Surprisingly not a lot of footroom lost! That’s awesome man.
 
Surprisingly not a lot of footroom lost! That’s awesome man.
no change from the front edge of the door forward. until the roll bar legs drop down through the dash into that area.
i do have to find a new spot for the lug wrench and jack stick.
 
Last edited:
  • Like
  • Wow
Reactions: Wildman and JMT
Sunday i messed with the cage some. if you notice the chunk of tube in the tub ( ^above), that's about the 3rd time the bastards fallen down so it needed some tacks b4 i needed some stitches.

anyways, pretty smooth sailing through the front portion and the mid section was ok, no issues. the back end has a bit of an issue.
the instructions provided say "to have a buddy hold up the back bar and tack it in, continue to hold it while the rear supports are placed and tacked. there are etched marks on the bars for alignment".

well there are etched marks on the rear support bars (blue). there is no marking on the back bar (red). there are etchings for the bottom of the support and the end of the back bar on the angled tube (yellow) that show me where it should all hit.

here it gets all tricky, the back bar (red) leans down, that's how it's cut to fit best. the support bars (blue) reach the back bar from the etches like this.
now the header bars (green) will not reach the back bar (red) unless it's up level and the cut on the end of the back bar (red) is not coped right for that position nor does it hit the etching. and it's above the supports (blue) reach now.
with the back bar (red) placed in the etches and leaned and hitting the support bars (blue) placed in the etches, the header bars (green) are a 1/4" short of reaching that back bar (red).

now i'm dizzy..........the short of it is i'm gonna alter the headers (green) rather than 4 other pieces that seem to be where they belong, and leave a little lean on the back bar (red).
so i took the headers in today and cut them in the middle and made up some 5" inserts from 1.5" DOM. now i can stretch them to reach. both the support bars (blue) seem to favor just off center in the bend with their natural fit , so i'll use that spot i reckon.


ps cage color1.PNG


ps cage color2.PNG
 
Last edited:
now i didn't use any of that crap up front. the stanchions the risers or the dash bar.

the dash bar may be alterable to work with a full tube riser up front, but we'll have to wait and see.

ps cage unused.webp
 
  • Like
Reactions: JMT and NashvilleTJ
Nice. Much better (and easier) to do the front right and loose those stanchions, then to retrofit it later like I did.
 
  • Like
Reactions: B00mb00m
now i didn't use any of that crap up front. the stanchions the risers or the dash bar.

the dash bar may be alterable to work with a full tube riser up front, but we'll have to wait and see.

View attachment 230447
Those top two header bars should really be triangulated in some manner to provide any actual support don't you think?
 
Those top two header bars should really be triangulated in some manner to provide any actual support don't you think?
Triangles are king. But it would be a very complicated compound cut to get into that front joint junction. I got a plan to holster it.
 
  • Like
Reactions: B00mb00m
Those top two header bars should really be triangulated in some manner to provide any actual support don't you think?
that front header bar is angled forward and comes in at a reverse downward angle into the side header.

those twin bars spit the big rectangle and grid it into smaller stronger cells.
without trying to add a lot of weight up high. i'm considering a plate over the top to tie and anchor all those top center legs, and a couple 1.75" DOM x .095 ribs to make those cells even smaller. that would catch the top door center from coming in, and the plate will aid the center from bending inward. could even go top and underside plate in the center and have a radio and storage cubby, we'll see.

ps cage big.webp
 
  • Like
Reactions: Alex01
that front header bar is angled forward and comes in at a reverse downward angle into the side header.

those twin bars spit the big rectangle and grid it into smaller stronger cells.
without trying to add a lot of weight up high. i'm considering a plate over the top to tie and anchor all those top center legs, and a couple 1.75" DOM x .095 ribs to make those cells even smaller. that would catch the top door center from coming in, and the plate will aid the center from bending inward. could even go top and underside plate in the center and have a radio and storage cubby, we'll see.

View attachment 230711
I'm not experienced in cage design but I think that's called a dead tube. You want to go from corner to corner for strength. So an X would be best but if you wanted to leave the center then do this:

I think those middle bars are usually triangulated via windshield bars which no one wants on a road vehicle.

ps-cage-big-png.230711~2.webp