
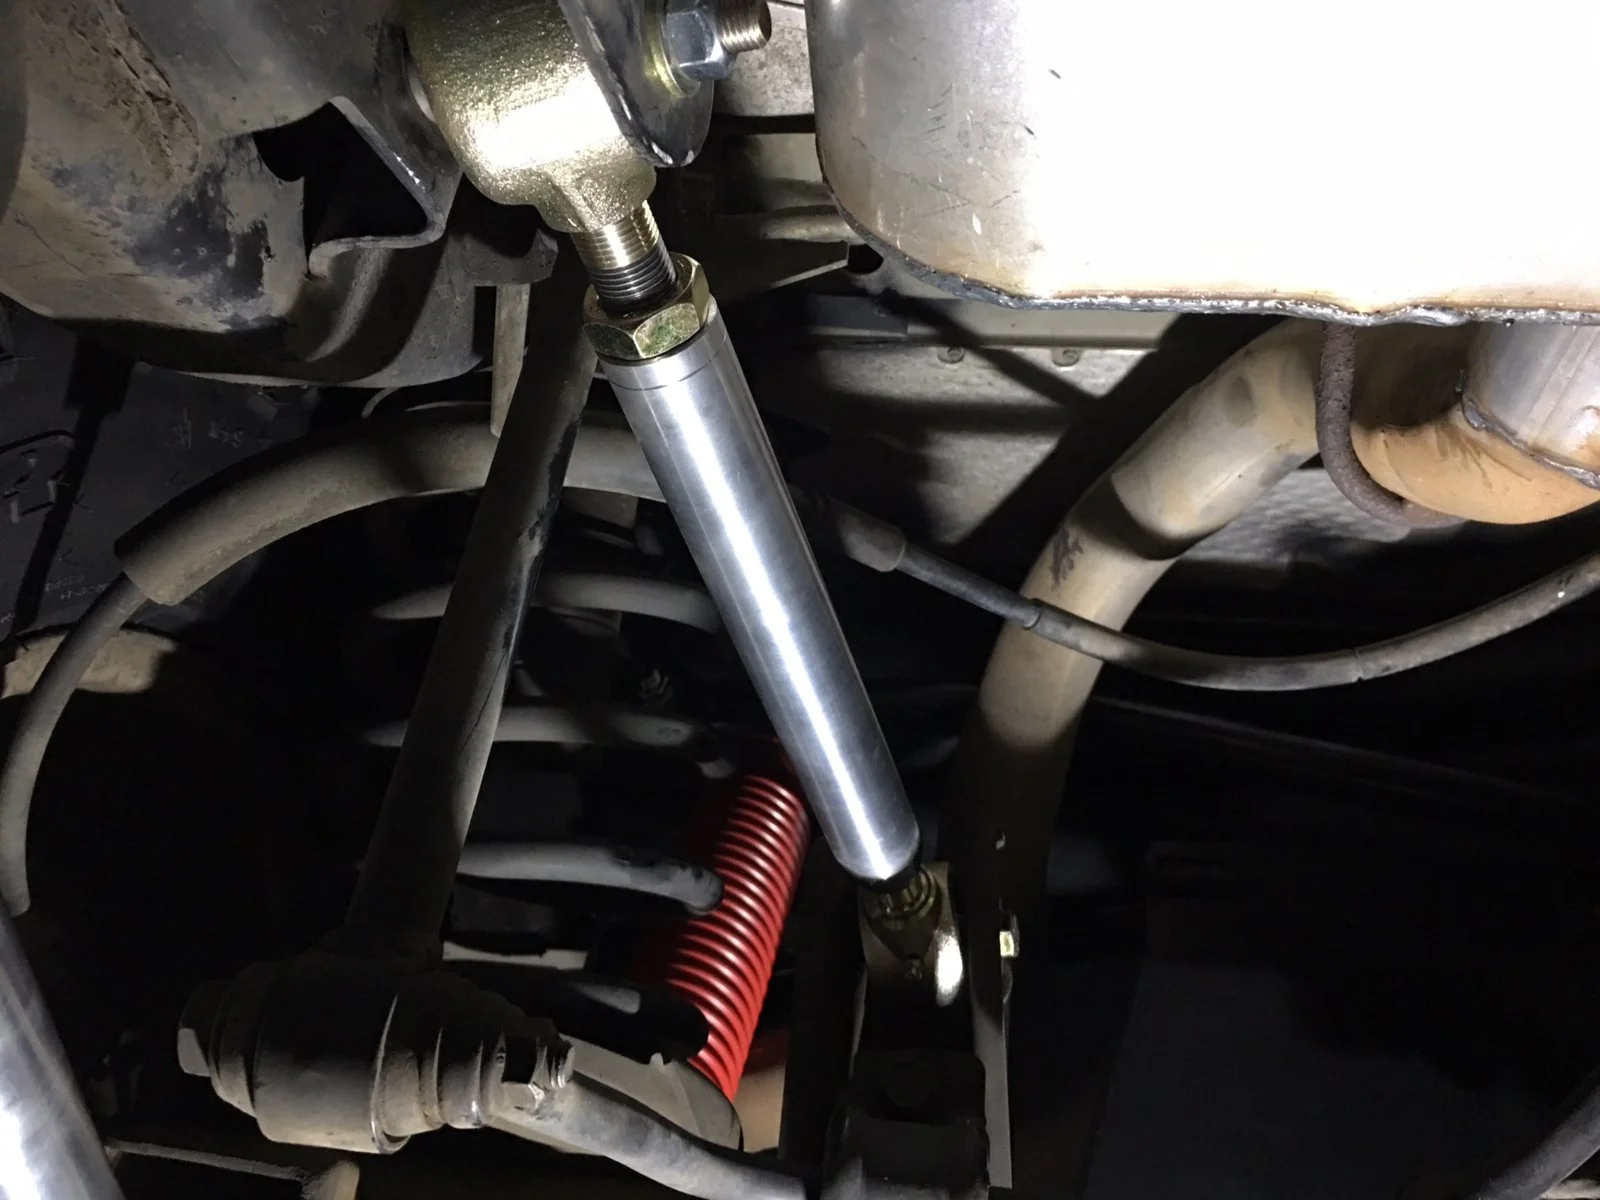
Okay, so I just got done with the rear control arms. The uppers ended up with 7/8 thread showing after the jam nut:
The lowers have barely any showing:
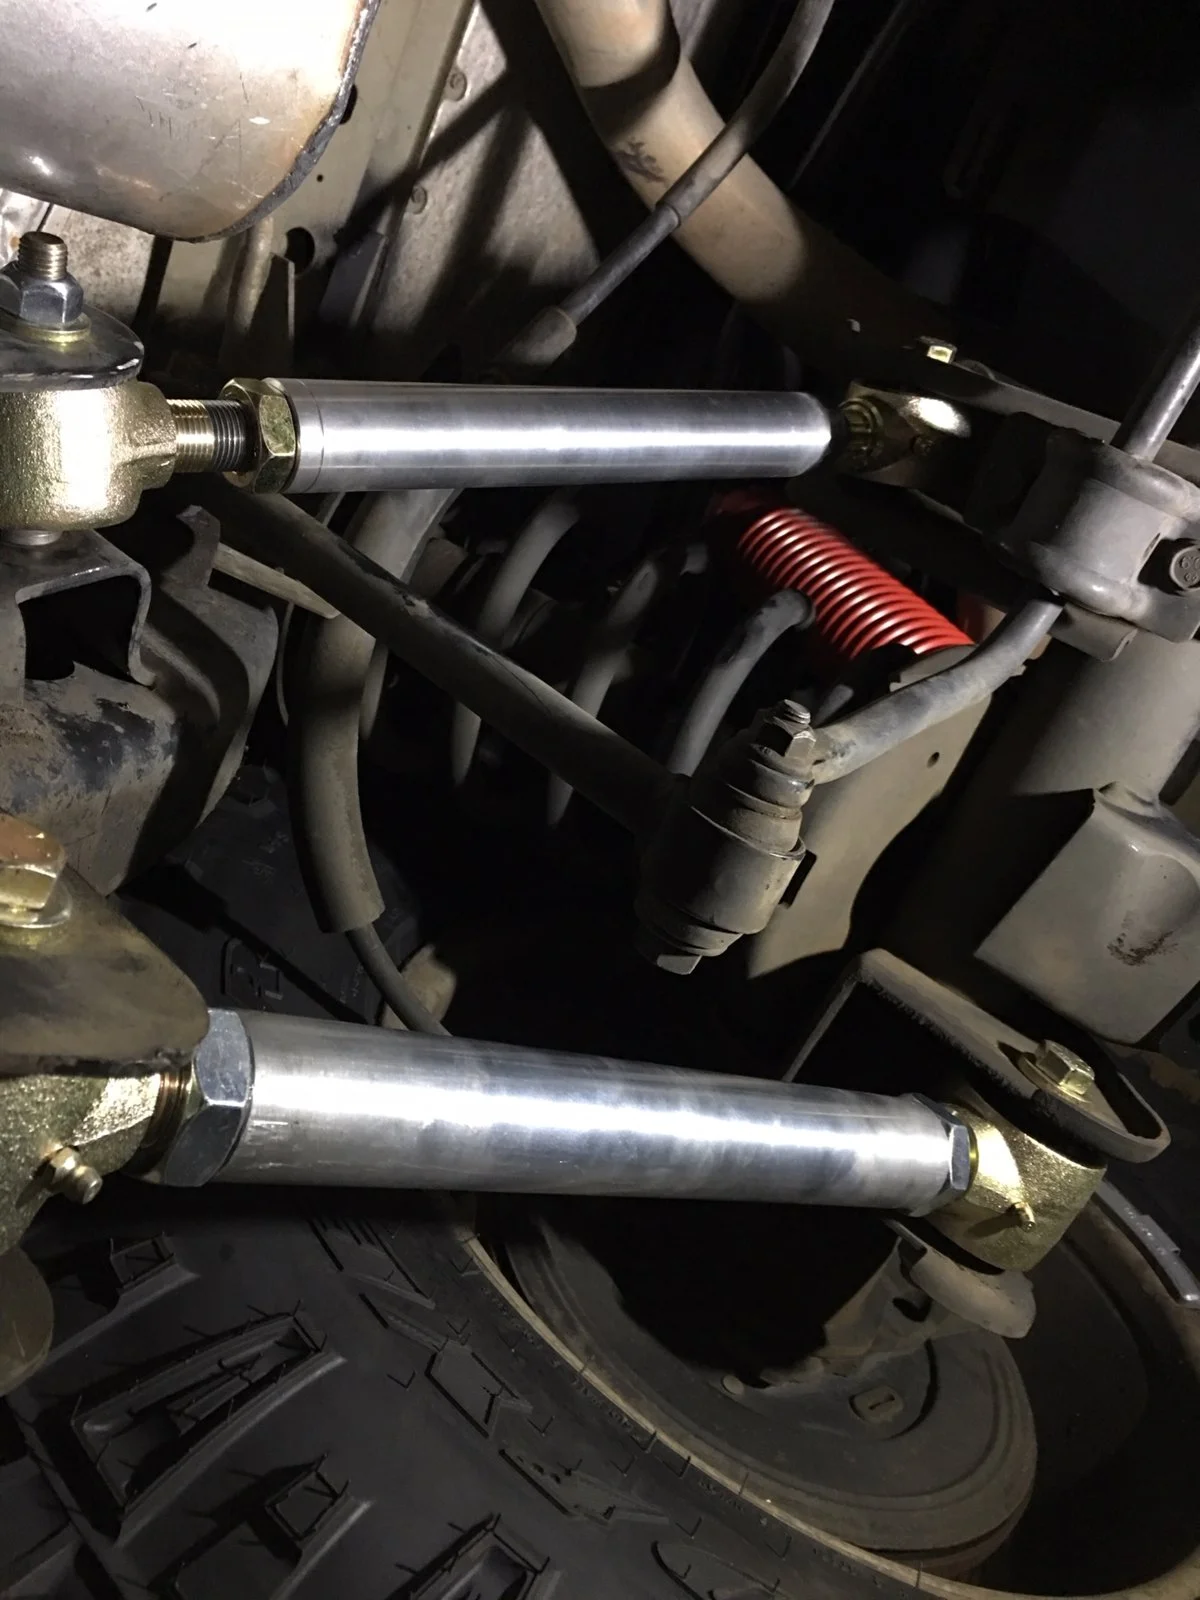
The lowers have barely any showing:


Are the tube is threaded all the way down or just a section?
looks good to me, if you're happy I am happy!
I'll be happy if I take it for a drive tomorrow and there's no vibes!

How long is the threaded? My rule of thumb is 2x engagement per diameter... So, if it's a 1/2" bolt, 1" of engagement. That is a very cautious rule of thumb. A jamb nut will also help stabilize the joint.
Threaded Joint pedantic should know that thin pattern nuts used to lock two threaded components together to prevent loosening is a jam nut, not a jamb nut.To be perfectly clear though... I'm not a suspension designer, just a guy who knows a fair amount about threaded joints, in general.

The only way a vendor could even begin to talk about it intelligently is for the customer to start by sending in unsprung corner weights. Then they would need every single modification planning to be installed and a CAD drawing of the rig in question and full specifications on the drive train.This is the part that vendors no talk about it, Trial and error x 10 until you feel comfortable with your set up. I will like to said that 1/3 of the rod inside the nut will be Ok, but again is about how comfortable you feel with it. No worry too much, you will soon found your sweet spot.
Here are your baseline stats-Chris, I found this old ************* article that might be helpful on Savvy arm lengths: http://*****************/forum/f9/savvy-control-arms-length-1522252/.
Have you tried calling Savvy just to see if they have some baseline stats for where you should be based on your lift height, and the max recommended lengths?
And if by the 1 in 10,000 miracle you have the oddball Jeep that will allow the arms to be adjusted past their safe point, are you going to get new longer arms or are you just going to shorten them up a small amount, pull the wheelbase in slightly and go have fun?I believe these Johnny Joints have a 2.5” threaded shank. When I measure the amount of thread showing after the jam nut, it’s around 1.25”.
Here are your baseline stats-
Set pinion angle at ride height. Cycle suspension until all clearances are checked and found to be acceptable with no interference issues. Once that is done, adjust wheel base until bump stops are within spec and acceptable. After wheel base is adjusted, cycle suspension again to check for clearance issues. After both are done and the rest of the suspension is installed correctly, test drive to ensure pinion angle is within spec and free of vibrations.
We spent most of yesterday going over a rig that had an extremely large amount of money spent on it. Steering, brakes, HP 60's front and rear and custom suspension under it. Supercharger, blah blah blah.Wish the shop that installed my lift recently would have actually used a bit of this advice. It's been fun laying in the driveway getting back to where it should have been installed. Would have gladly taken it back to them, but they did such a bad job, I lost faith in them completely.
They are not tubes. They are solid round bar stock that has been bored and threaded only on each end.I'm not 100% sure, only because I never took the Johnny Joint itself out of the tube before installing them. They came pre-installed in the tube.
Not tubes.Are the tube is threaded all the way down or just a section?
The only way a vendor could even begin to talk about it intelligently is for the customer to start by sending in unsprung corner weights. Then they would need every single modification planning to be installed and a CAD drawing of the rig in question and full specifications on the drive train.
Then and ONLY then would they have a reasonably accurate idea of where to start and at that point they can give you specific lengths of the arms and after that, guess what? That would still only be a starting point so you could install them and go for a test drive to see if your rig actually responds to the modifications the same way or differently as the last 28 did or will it behave differently?
If all rigs were the same, arms would not be adjustable. We would know the lengths and just build them to that since it really isn't that hard to do. Ya'll newcomers don't even remember when DA control arms didn't exist. They adjust twice as far as a single adjustable and that is a thing of beauty.
If it was actually important, one would unthread a joint from the arm so we know how much we have to work with.Let's not forget his question, What is the maximum safe length of the jj thread shank can be outside the thread on rod.

I'll never forget the time many years ago after installing my previous TJ's long-arm suspension and I was (temporarily) proud of it. I asked you what I should do next. "Start over"...I don't know how to fix it without ripping out a lot of things and starting over..
 was your simple reply.
Is it me or is it really frustrating that these companies are soooo bad at providing some sort of documentation?! I'm still clueless on what I'd need to do to adjust my RK RRD emulsion shocksEither way, my Savvy arms didn't come with directions

Is it me or is it really frustrating that these companies are soooo bad at providing some sort of documentation?! I'm still clueless on what I'd need to do to adjust my RK RRD emulsion shocks




