My LJR journey

nevada72

Member
Original poster
Joined
Dec 26, 2023
Messages
34
Location
PNW
It's been a long while in the making but I have settled on what may be my third and last Jeep Wrangler - a 2005 Jeep Rubicon Unlimited. I've done "build" threads on cars and bikes, but this will be my first Jeep thread of the process. It's not a "build" per se, but just ownership and the inevitable changes that many of us do. And some repairs that are inevitable as well.

My first Jeep was a 1980 CJ5 with the 4 banger. Man, that thing was slow! But it did really well off road. That was back in the 80s, so it's long gone and probably been turned into sardine cans or wherever recycled metal goes. The second Jeep was far more recent. We relocated from Wisconsin to Washington and the region is perfect for wheeling. So we ended up dipping our toes in the Jeep waters with a a nice 2003 TJ sport -
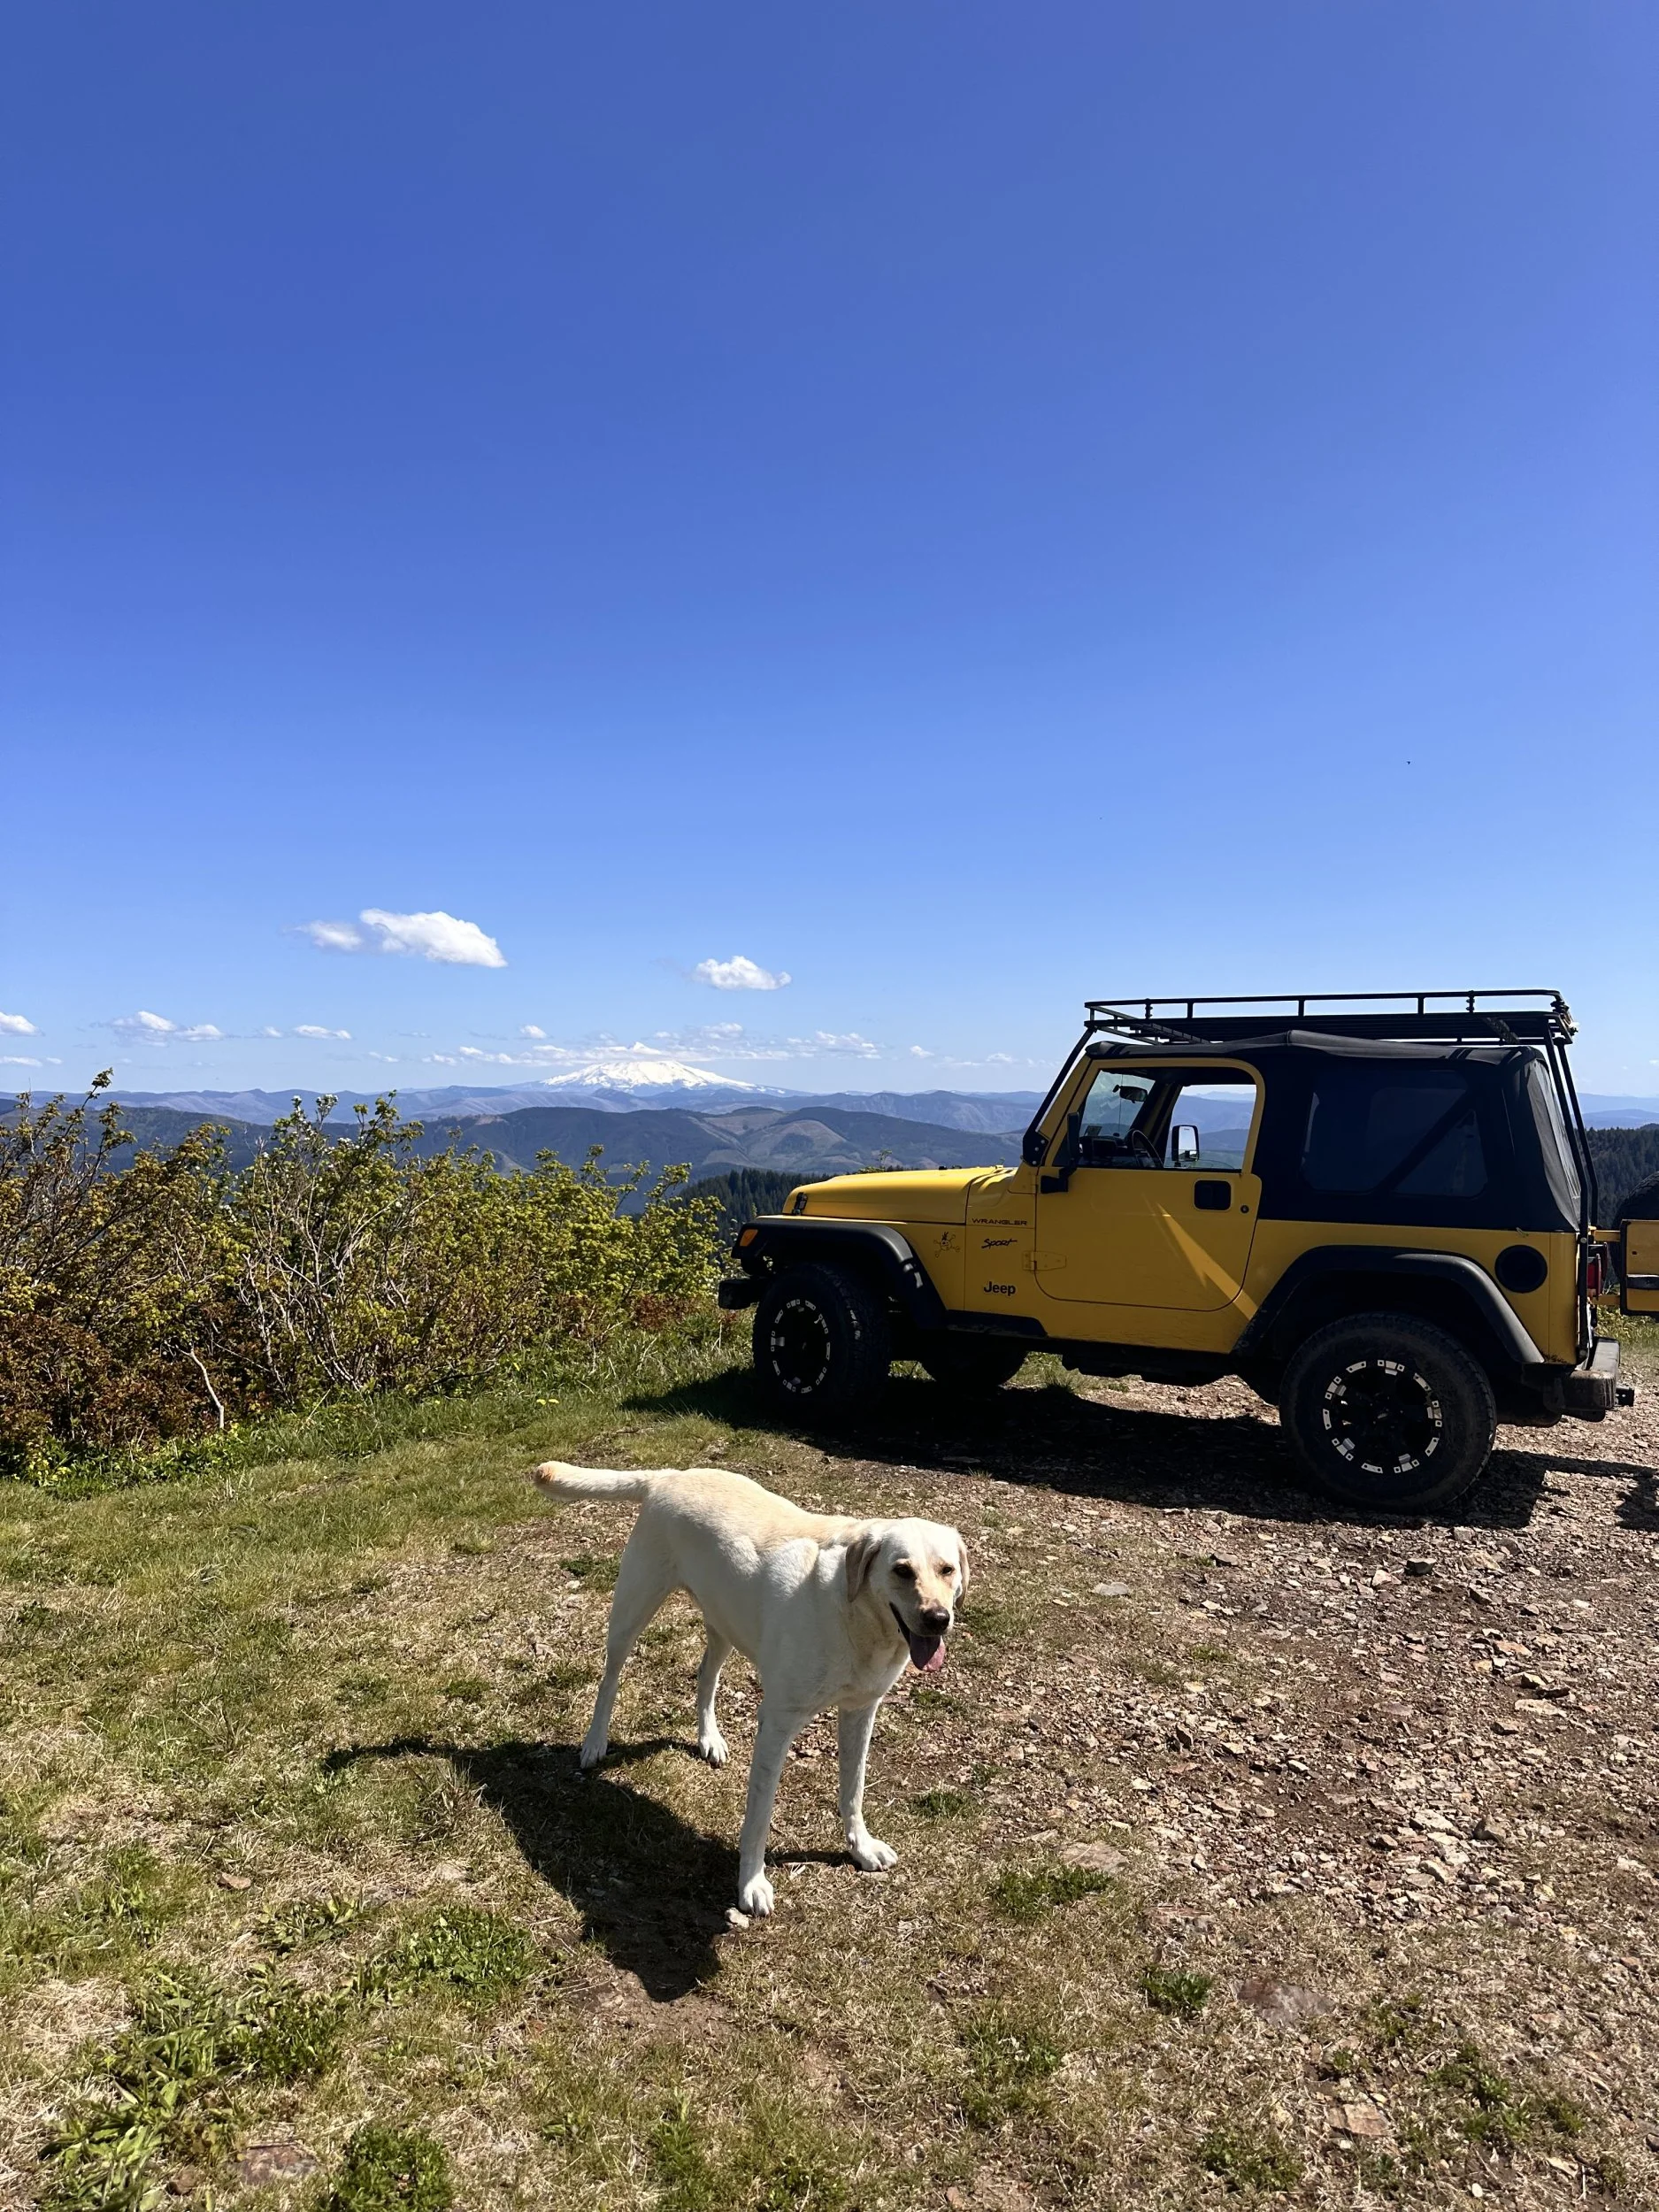
IMG_3705.webp


It was really nice but I soon learned that if I wanted to do any serious trails, or even semi-serious ones, I needed to make some changes. I added up the cost to do what I wanted to do and decided it would be best to just start over with a Rubicon to get the D44s and the Rubicon transfer case, among other things.

Wanting is one thing, but buying is another. Prices vary greatly on LJs and even more so with LJRs. I saw them as high as $40K and the average seemed to be around $18K - $22k. I searched for about 3 months and found this one in Sedona AZ -
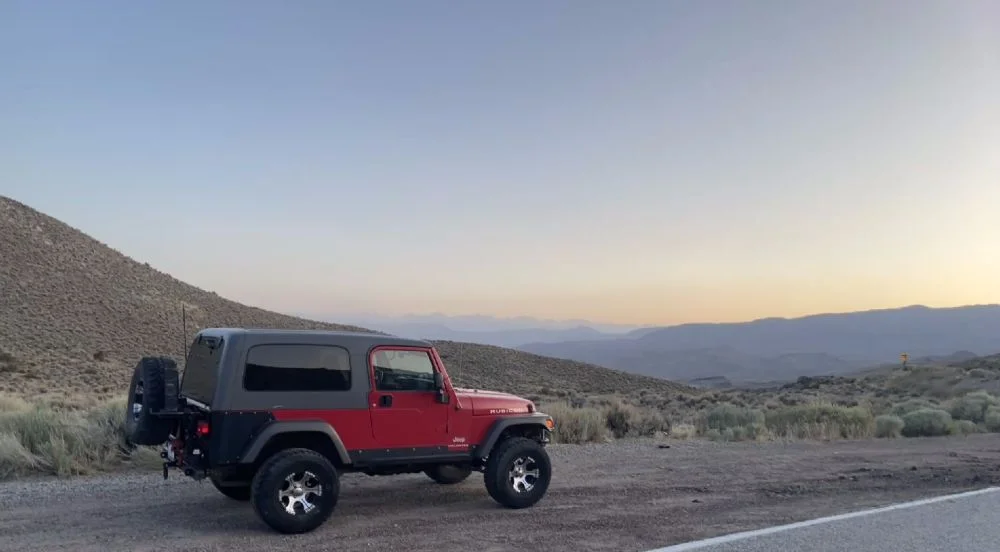
Jeep Nevada.webp


The price was right, the miles were right (87K) and the prior owner had done a lot of nicely executed mods. The gentleman that owned it passed away and his widow sold it to the Jeep dealer in town. I just happened upon the ad doing a national search the day they got it. I bought it over the phone when the salesman did a Facetime chat with me. I flew down and drove it back home in the 110 degree heat! As it turns out, the gentleman that owned it was part of a Jeep group associated with the dealer and did a lot of search and rescue using this Jeep. As such, he needed it to work and work well. The salesmen where all gathered around it when I arrived and they told me that they were well aware what a special Jeep this was and if I didn't buy it, there was a line forming behind me. I did not need any convincing, rest assured.

The 1200 mile drive back was eventful due to the weather. it went from intense heat to intense wind. I basically drove into a Haboob once past Las Vegas. The Jeep struggled to maintain highway speed the wind was so intense. And the dust and sand made it seem like it was foggy out. I was really hoping the Jeep had been well maintained and would take this punishment. And it did. Beautifully. Ultimately, it got me home safe and sound.

Next up - Be careful when you tell your wife "This Jeep needs nothing". :D
 
Whenever I buy a used vehicle that's more than 10 years old I pretty much take it apart to a certain extent. By "to a certain extent" I mean whatever the project merits. In one case I started cleaning up a 1971 BMW R75/5 and by the end of that cleaning session the bike was in pieces and down to the bare frame. In the case of the LJR I hoped it wouldn't be that extreme, but I did know I had about 2 decades of AZ dust to scrub out of every nook and cranny. Patting the seats or carpet firmly created a sand storm in the Jeep. So that was step 1 - remove and clean the interior.

Man, what a pain. It comes apart fairly well, but it was a lot. It also gave me line of sight on some questionable wiring that I removed and replaced with something more appropriate.

IMG_6209.JPG


I'm sure to some this seems excessive. But look at all that dust! I figured I would be inhaling that for the rest of my life if I left it so I went to work.

IMG_6212.JPG


I have a lot more pics but I think you get the idea. I spent about a week cleaning everything.

And once it was done it looked pretty good! The carpet just hung on to that "old carpet" smell, so Bed Rug it is!

IMG_6242.JPG


And while the dash was apart I added a double din CarPlay unit and backup camera, as well as Garmin GPS.

IMG_6258.JPG


And I left the side carpet out in back as I like the look. I did reuse the factory carpet on the back floor. I may replace that with Bed Rug as well.

IMG_6358.JPG


Next up - inventory...
 
Hopefully your heater core is good….
Would suck to pull the dash apart again.

Nice work btw! I really want another LJ and red would be the color. However, the cost of divorce would probably not leave me enough money to mod it the way I want. Lol
 
  • Haha
Reactions: DavidBT
Hopefully your heater core is good….
Would suck to pull the dash apart again.

Nice work btw! I really want another LJ and red would be the color. However, the cost of divorce would probably not leave me enough money to mod it the way I want. Lol

Yeah, I thought about the heater core but honestly, the work to get it out even with the dash removed is still a lot. That coupled with the uncertainty of the quality of the aftermarket replacement led me to decide to leave it be. So far, so good. I also did a radiator/heater core flush (I'll post about that in a bit) and it all came out looking clean, so fingers crossed.

I appreciate the compliment btw. I would have taken a LJR in pretty much any color, but the red was ideal. Now my neighbors think we have a "red" fetish. :D

Jeep and Mustang.webp
 
Now that the Jeep was cleaned up I started to look in earnest at the mods that had been done. As mentioned, I had a pretty good feeling about the gent that owned the Jeep prior to me He was the second owner btw. He owned it for 16 years. Bought it when it was just a few years old from the original owner. I made sure to run the Carfax and it had two owners, which is a very good sign. Anyway, I had faith that things were done right. And after digging a bit deeper, and reading up on the brands, I feel that faith was justified.

The wheels were (more on that in a bit) Dick Cepek. Pretty common. The tire size was what I wanted - 33x12.50x15.

Right away you can see the aftermarket bumper. Someone told me the brand, but I forget now what it is. And of course the winch - Warn XD90001.
IMG_6196.webp


Then the Teraflex swaybar.
Teraflex sway bar.webp


You can also see the springs. Turns out to be Rubicon Express 4 inch lift with matching adjustable lower control arms and track bar. Shocks are Bilstein 5100 (I think).
IMG_6129.webp


Moving back are the sliders. They appear to be early Poison Spiders (but I could be mistaken). I had tried my hand at refinishing them, but decided to powder coat.
IMG_6195.webp


Poison Spider corner armor (again, I think) with AZ pinstripes and Rock Hard bumper and spare tire carrier. I was surprised at how expensive that was.
IMG_6131.webp


Under the Jeep I found this -
IMG_6149.webp


Other than that pretty much stock. There's a cold air intake and a Jasper sticker on the fuse cover - Turns out the transmission was replaced 40K miles ago, so that's nice.

Next up, some repairs, some upgrades...
 
So on to repairs. I knew the transmission had a leak because of the bright red fluid on my pristine garage floor. It was enough to leave about a quarter size puddle. I put down cardboard but decided to address it because I just don't want it to leak. I remember how pissed my Dad would get when someone parked a leaking vehicle on his driveway, so I always took it to heart that dripping on a friend's driveway is bad form. Plus the fluid hitting the hot exhaust smelled up the garage, so it had to be addressed.

Here's how it looked -

IMG_7342.webp


I wasn't sure it was the pan as there was a lot of ATF fluid all over the place. So I cleaned it up, which took a lot of work. I hit it with kerosene first. I have a pressurized sprayer so I doused it a few times with good results. Then I hit it with Gunk degreaser and followed up with a pressure wash.

Once cleaned it became clear it was the pan gasket. Which as it turns out, wasn't a gasket, but just black RTV. Which I discovered once I removed the pan. After that I used brake cleaner to get the mating surfaces clean. I swapped in a new Wix filter and used a Wicks gasket. I also opted for a new Dorman pan with a drain plug.

Naturally, when doing something, one thing leads to another and I decided to clean up the wiring to the transmission while I was in there. The main harness had dried and broken corrugated conduit so that all had to go. Once I cleaned up the wires I found one had broken insulation and bare copper. So I ended up depinning the 10 pin connector and shrink tubing the broken spot. Then I used 3/4 shrink tube and bundled all the wires together. And of course I cleaned up the connector itself.

IMG_7374.webp


And the broken wire -

IMG_7376.webp


You can see how grimy the wire gets under there. It was an effort to get everything cleaned up and back together properly, but the peace of mind is worth it. It's why I do most of my work myself - a mechanic isn't going to spend that kind of time fixing stuff like that and even if they did, it would cost a fortune as it adds a lot of labor hours to a job.

The end result -

wire repair.webp


You can also see my fix for the broken shift linkage. I ended up with no ability to shift the Jeep out on a trail a while back. I crawled under and saw that the plastic pressure fit tab broke. It would have been an easy fix to just buy the new plastic piece, but it seems failure prone so I modified it to what you see. It works great and will never leave me stranded.

I got everything back together and filled it up with ATF+4 and went for a drive. It drove out great with no engine lights, so my connector work went well apparently. But unfortunately something went wrong with my "sealing process" and it ended up barfing a lot of ATF on my garage floor. Very disappointing. I had checked the fluid level when I returned and it was still showing on the dip stick, so no harm done, but what a PITA! So this morning I spent an hour wiping up ATF and then took the pan off. I'm not sure where I screwed up, but basically the Threebond I use for gaskets just didn't set up right and the leak was significant. I ordered in a LubeLocker gasket so hopefully I can just reassemble and be done. I've never used them before but I've heard good things.


#transmission pan gasket
 
I like the LubeLocker gaskets, use them on the transmission pan and differential covers without any issues. You should verify that the Dorman pan is flat along the sealing surface.
 
I like the LubeLocker gaskets, use them on the transmission pan and differential covers without any issues. You should verify that the Dorman pan is flat along the sealing surface.

Good to know!

The pan is brand new but I did test it for flatness on my granite countertops. That said, I will check it again after I clean it up. I still have the stock pan and it seems a little heavier gauge than the Dorman.
 
Got it all wrapped up. And no leaks!

It was a PITA getting here though. The oil leak was, as it turns out, due to the aluminum having been stripped. Apparently that's a common thing. I went into more detail on a transmission thread here, but the long and short of it was I cleaned all the holes with a 8x1.25 tap. Then I used stainless studs with red Loctite. I've worked on vintage cars and bikes and aluminum doesn't like fasteners being removed and replaced a bunch of times. But studs remove that hazard. I tapped the one stripped hole out to 10 x 1.50 and bought a chainsaw stud that was 10x1.5 to 8x1.25. So I was able to maintain uniformity. BUT, the stud has a non-threaded aspect between the two sizes so I added an aluminum bushing to stand the nut off of that a bit. You can see it on the right.

oil pan installed.webp
 
  • Like
Reactions: Rickyd and roboto65
We’ve seen some people get on here with your mindset and start with a nice base vehicle and just get absolutely stunning results.

You may want to look at seat risers if you’re pretty tall, those things are sometimes a real game changer for some owners.

And a dead pedal is nice to have.

Keep posting, we would enjoy seeing what you do with this beautiful and sought after LJR.
 
  • Like
Reactions: John Cooper
We’ve seen some people get on here with your mindset and start with a nice base vehicle and just get absolutely stunning results.

You may want to look at seat risers if you’re pretty tall, those things are sometimes a real game changer for some owners.

And a dead pedal is nice to have.

Keep posting, we would enjoy seeing what you do with this beautiful and sought after LJR.

Hey thanks for the good words and advice. I'll have to look at the seat riser recommendation. Sounds like a winner!
 
I put 1.5” risers on my 05 LJR and it made the world of a difference for me. They are just blocks of Al and are simple to install and cheap. I’m 6’ and the seating position is perfect for me. I have a 6sp and have no problem with pedal work even with my size 13 boots.
 
Hey thanks for the good words and advice. I'll have to look at the seat riser recommendation. Sounds like a winner!

It does not take a lot of lift to make the seats work better for you even 3/4 of an inch can make a world a difference and if you’re real tall, if you aren’t careful, you’ll start getting your head into the stratosphere


This is 2005 with 71,000 miles


IMG_8564.webp
 
It really is!!!! Could be because it never leaves the garage.....

:D Hard for me to critique a garage queen. I spent 3 days polishing the AZ pinstripes out of my Jeep. Took it on some narrow trails and each branch dragging across my paint felt like it was digging into my skin. I would have preferred that actually as now it looks the way it looked before polishing. Ah well...
 
  • Love
Reactions: John Cooper
:D Hard for me to critique a garage queen. I spent 3 days polishing the AZ pinstripes out of my Jeep. Took it on some narrow trails and each branch dragging across my paint felt like it was digging into my skin. I would have preferred that actually as now it looks the way it looked before polishing. Ah well...

At least yours see's the trails....... 🤣 🤣