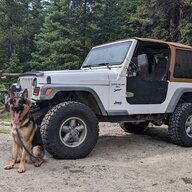
Sab-a-dab-a-doo! The back-country LJ build has officially started

That is the plan, yes. I have the front SwayLOC now (in a box). The rear will obviously have to be custom-fit, since ORO doesn't make a rear one for the TJ. That's a bit down the list, though. At least it'll be wired up so that I only have to run the air line later.

When I set up my rear last winter, I talked to the guy at ORO (his named escapes me at the moment but he was very helpful). I wanted to know the specs on the Swayloc inner solid bar to see how close it would be to my planned rear antirock. I previously ran a stock rear bar with the front swayloc and found it be very balanced feeling off road. On road manners were good too with a tendency to push at the limits of adhesion. It turns out the antirock provides both of these as well.

He said a rear swayloc could be done in a TJ but I didn’t pursue it for 2 or maybe 3 reasons:
1. Real estate. Stock width axles with 12” travel shocks don’t leave a lot of room. I barely had room for the Antirock arm between the frame and tire. The adjustment side of the Swayloc would never fit in my build.
2. Road handling. I was concerned a rear swayloc would be too stiff and possibly bias toward bringing the rear around too easily (already an issue for short wheelbases)
3. Complexity

I’m not saying that a rear swayloc can’t work for you Scott but since I worked through all that for my situation, I thought I’d share my thought process.
 
  • Like
Reactions: Rickyd and sab
When I set up my rear last winter, I talked to the guy at ORO (his named escapes me at the moment but he was very helpful). I wanted to know the specs on the Swayloc inner solid bar to see how close it would be to my planned rear antirock. I previously ran a stock rear bar with the front swayloc and found it be very balanced feeling off road. On road manners were good too with a tendency to push at the limits of adhesion. It turns out the antirock provides both of these as well.

He said a rear swayloc could be done in a TJ but I didn’t pursue it for 2 or maybe 3 reasons:
1. Real estate. Stock width axles with 12” travel shocks don’t leave a lot of room. I barely had room for the Antirock arm between the frame and tire. The adjustment side of the Swayloc would never fit in my build.
2. Road handling. I was concerned a rear swayloc would be too stiff and possibly bias toward bringing the rear around too easily (already an issue for short wheelbases)
3. Complexity

I’m not saying that a rear swayloc can’t work for you Scott but since I worked through all that for my situation, I thought I’d share my thought process.


I haven't given too much thought to the rear SwayLOC, yet, but when I get to it, I'll be working through the calculations to compare the stock design to the AntiRock and then design the SwayLOC accordingly. In the end, it may not work out, though...
 
Great progress of the Jeep, and wiring! I've got a fair amount of wiring cleanup that needs to be done and I'm dragging my feet! :(
Wiring is not very glamorous, but it's got to be done - right?
 
  • Like
Reactions: Irun
When I set up my rear last winter, I talked to the guy at ORO (his named escapes me at the moment but he was very helpful). I wanted to know the specs on the Swayloc inner solid bar to see how close it would be to my planned rear antirock. I previously ran a stock rear bar with the front swayloc and found it be very balanced feeling off road. On road manners were good too with a tendency to push at the limits of adhesion. It turns out the antirock provides both of these as well.

He said a rear swayloc could be done in a TJ but I didn’t pursue it for 2 or maybe 3 reasons:
1. Real estate. Stock width axles with 12” travel shocks don’t leave a lot of room. I barely had room for the Antirock arm between the frame and tire. The adjustment side of the Swayloc would never fit in my build.
2. Road handling. I was concerned a rear swayloc would be too stiff and possibly bias toward bringing the rear around too easily (already an issue for short wheelbases)
3. Complexity

I’m not saying that a rear swayloc can’t work for you Scott but since I worked through all that for my situation, I thought I’d share my thought process.

Steve, he was building a V8 swapped TJ with a rear Swayloc when I was over there last. That was a few years ago though.
 
  • Like
Reactions: sab and Woodrow
I had a half-day to work on the wiring some more. In the "a picture is worth a thousand words" category:
1782860129792.webp


Only the rock lights and reverse lights to go. However, for the rock lights, all I'll be able to wire is one connector for a future rock light harness to connect up to. My rig is still bare from the frame down, so I have no reference points of where to put the rock lights. I also have to wire ignition power, parking lights, reverse lights, and high beams as inputs into the Switch-Pros controller. I don't know that I'll use all those triggers, but if I wire them in, it's just a programming change to use them.

And then the only wiring left is the step sliders (until I add something else😬). Now, if this raging sore throat and cough would let up, I'd be in high cotton!

Stay tuned...
 
Today's progress report:
1783126448191.webp


I also got three of the inputs/triggers (ignition power, parking lights, and high beams) wired up. The only trigger left is the reverse lights trigger. Since there's no reverse light wiring in the engine compartment, I have that wired up to the bulkhead connector, and now I have to connect the cabin side of that to the reverse light wire inside the cabin.

Stay tuned!
 
I completed the engine side Switch-Pros wire harness this morning:
IMG_8956.webp


I weigh everything I do because it forces me to concentrate on keeping as much weight off as possible. For instance, it might be easy to just brush off the accessory wiring harness weight as insignificant. Look at the harness above, and then think about how much it would weigh, then click the Spoiler button below to see how much:
IMG_8957.webp

By comparison, the Switch-Pros 12-switch switch panel and the control box weigh less than half that, at 1.59 lb!

I still have to add the step slider motor and LED wiring to this, so it will get a bit heavier. Stay tuned!
 
Yesterday afternoon, I added the step slider motor and LED wiring to finish the engine-side accessory wire harness, putting the total weight at 4.19 lb. Today, I nearly finished the cabin-side accessory wire harness. It's a bit lighter at 1.58 lb. Again, no pictures. 😬

So, the total weight for the accessory wire harness is an astonishing 5.77 lb! I'm very glad to have this wiring nearly complete. All that's left is to remove the cabin side bulkhead connector from the firewall, install the terminals into it, and reinstall it.

Hopefully, the next bit of work will be more interesting to photograph. Stay tuned!
 
All that's left is to remove the cabin side bulkhead connector from the firewall, install the terminals into it, and reinstall it.
Got this done this afternoon, and the disable switch for the Rockslide Engineering Steps is installed. I also put everything in the dash back together except the center console. That has to wait for the last bit of wiring - cameras. I wired them several years ago, but I didn't keep good records or label anything, and I can't figure out what I did, so reconnecting will take some reverse engineering. Getting old stinks! It's like having a previous owner in your head... 😞

Before starting on the LJ, I spent the morning dealing with water issues. I had to transfer water to some temporary tanks in the garden for garden watering, and then I spent about three hours fixing several leaks in our water tank/pump house that had started to get more serious than a slight drip. Homestead living is nonstop work!

Also, I posted my computer woes in the Piss & Moan Table thread. Check that out, if you want to hear my trials and tribulations...

Finally, the LJ build has been put on pause for a few weeks - probably until the last week of the month. Stay tuned!
 
Yesterday afternoon, I added the step slider motor and LED wiring to finish the engine-side accessory wire harness, putting the total weight at 4.19 lb. Today, I nearly finished the cabin-side accessory wire harness. It's a bit lighter at 1.58 lb. Again, no pictures. 😬

So, the total weight for the accessory wire harness is an astonishing 5.77 lb! I'm very glad to have this wiring nearly complete. All that's left is to remove the cabin side bulkhead connector from the firewall, install the terminals into it, and reinstall it.
It's wild how much weight can be in the wiring. The 2 door JL Rubicon is something like 800lbs more than a TJ. How much of that is just wire?

And it goes without saying, but that's really nice work on the harness.
 
Last edited:
  • Like
Reactions: sab
It's wild how much weight can be in the wiring.
100%! I weigh most things and try to save weight wherever I can, with cost a factor, of course. For the wiring harnesses, here were some factors in my design decisions:
  1. I used max current for each conductor to pick the smallest wire size I could run for that circuit. As copper is the densest material in a wire harness, this is probably the most important factor to consider.
  2. I weighed several different types of connectors to pick the lightest for each current range (Deutsch was usually the winner). However, I didn't change from a manufacturer's connector because I didn't want to be stuck somewhere due to a failed part, overnight a replacement part in, and then realize that I had to replace the connector. I want to be able to just replace the part, plug it in, and carry on. I didn't like having to do this, though. Some manufacturers (ARB, I'm looking at you) use some really cheap connectors with no consideration for water intrusion.
  3. Before I picked my loom type (TechFlex F6 Woven Wrap), I compared it to the OEM corrugated split-loom to make sure it wasn't substantially heavier. It was essentially the same weight per foot. I think there's some weight savings to be realized here by picking something else, but I didn't take the time to find something lighter. I was just happy to stay the same weight as OEM.
  4. I tried to package as many conductors in each run of loom to avoid excessive loom weight. However, this was a compromise over making it very difficult to remove accessories in the future. I feel that putting everything in a single loom/harness isn't always wise. Forethought is your friend.
In hindsight, I should have given thought to wire weight. Of course, the copper conductor weight can't be changed. Assuming you're using copper wire, all 16g copper conductors are the same weight per foot. However, insulation weight can be a real factor. I used mostly SXL wire, which has cross-linked polyethylene insulation material. However, the insulation is pretty thick. There is a thinner-wall version called TXL made specifically to reduce weigh. How much? I don't know, but should have investigated. I used the TXL in some of the colors I needed because it was all I could find. I should have used all TXL because the cost difference was insignificant. In my racing days, we used wire with a fluoropolymer insulation (such as Teflon), per SAE AS22759. If not for it being five times more expensive, I would have used it. It's better in every category (weight, temperature resistance, flame resistance, abrasive resistance, and has a lower friction coefficient).

So, all of these factors (except the SXL/TXL factor) were considered in making that nearly six-pound harness! I don't know what it would have weighed if I'd not considered them, but it would have been significant - perhaps a five-pound difference?
 
Finally caught up! Extremely jealous of your engineering abilities, especially your understanding of material properties.
 
  • Like
Reactions: sab
Finally caught up! Extremely jealous of your engineering abilities, especially your understanding of material properties.
Thanks for the kind words, That’ll Buff! I’ve spent a lifetime in the pursuit of knowledge. You can do so, too. Just keep your mind open for every opportunity, and then make an effort to gain some knowledge!

Nah - Scott's just Googlin' stuff...

:D
There is some truth to that. Google is an incredible resource!

ChatGPT asks him for help when it comes to engineering
That’s funny, but sadly, it’s just a vicious rumor. 🤓
 
Thanks for the kind words, That’ll Buff! I’ve spent a lifetime in the pursuit of knowledge. You can do so, too. Just keep your mind open for every opportunity, and then make an effort to gain some knowledge!


There is some truth to that. Google is an incredible resource!


That’s funny, but sadly, it’s just a vicious rumor. 🤓

If I thought you were a resource for AI, maybe I’d pay more attention to it.
 
  • Haha
Reactions: Mike_H and sab
If I thought you were a resource for AI, maybe I’d pay more attention to it.

I've been "talking" with CoPilot a bunch lately. Once you learn how to prompt it, and how to make sure its only giving you "real" information, it is an incredible resource. I've used it to revamp the whole engineering process at work, revamp my "bullet Journal" to be digital and work for my AD/HD riddled brain, and debug many Power BI and PowerAutomate flows that I've been working on. Oh, I also used it to rebuild registry and boot files for a VERY old computer that runs a pretty key piece of equipment in my shop. Like, I was WAY down in the weeds and modifying config files. I'm a believer. I still get in arguments with it occasionally, where it tries to pass of opinion as fact or use contradictory information to prove a point, but on the whole, I'm in.
 
  • Haha
Reactions: Woodrow