

You are using an out of date browser. It may not display this or other websites correctly.
You should upgrade or use an alternative browser.
You should upgrade or use an alternative browser.

Building Homer (2005 TJ Build Thread)
- Thread starter FarFire70
- Start date

While I was working on the steering column I threw the cover back on.
Tried to use the heat gun on it before and it ended up getting the white powder look not long after.
So I tried Mother's Back to Black and that turned out pretty good.
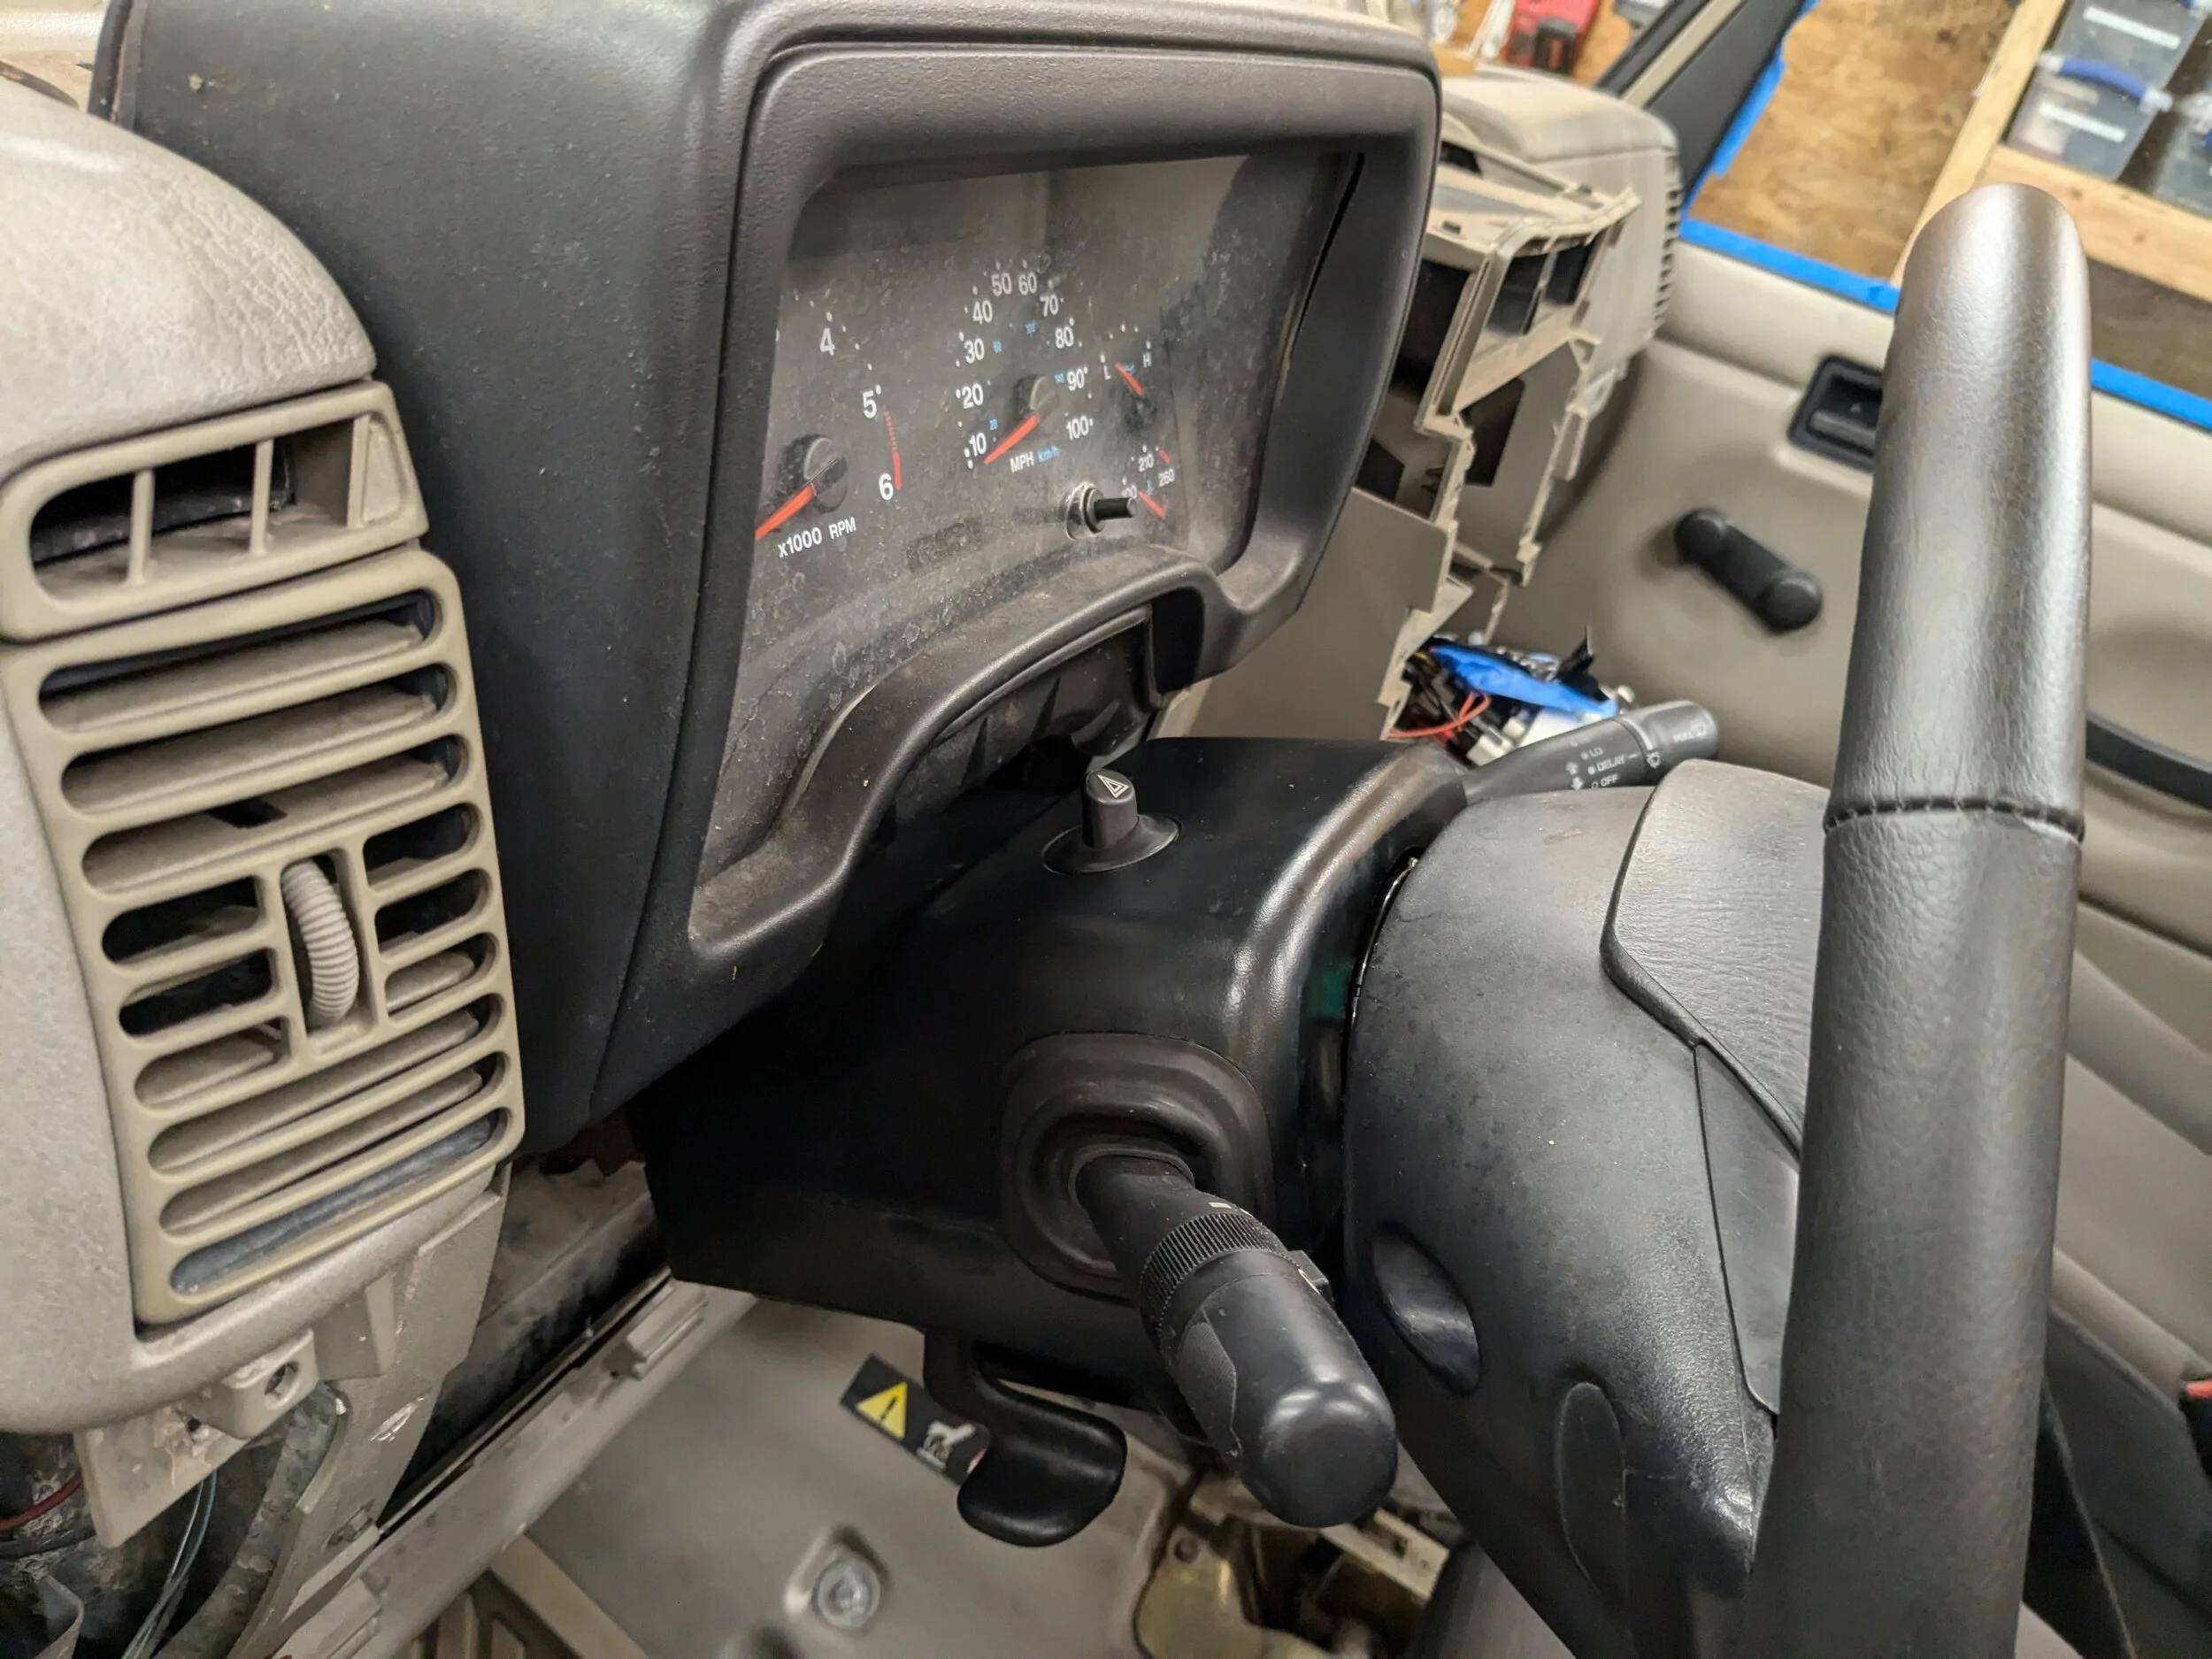
So I hit the back of the steering wheel too.

We'll see how long it looks like this out in the elements.
Tried to use the heat gun on it before and it ended up getting the white powder look not long after.
So I tried Mother's Back to Black and that turned out pretty good.
So I hit the back of the steering wheel too.
We'll see how long it looks like this out in the elements.
Ordered primer, paint, & clear.

Thanks to @JMT for his paint guide for reference. Looked over his older posts from his painting. Went with many similar products, just a different company. Hoping to get anywhere near his quality output.
I'm a little concerns on spraying the metallic paint on some of the larger panels I need to spray - like the entire cowl cover. Worst case - sand ( ) and try again...
I'll be starting with some metal blanks to work on technique, then work on the tailgate and grow into the larger panels - and the many surface rust spots in the rear wheel wells and torque boxes.
Thanks to @JMT for his paint guide for reference. Looked over his older posts from his painting. Went with many similar products, just a different company. Hoping to get anywhere near his quality output.
I'm a little concerns on spraying the metallic paint on some of the larger panels I need to spray - like the entire cowl cover. Worst case - sand (
) and try again...I'll be starting with some metal blanks to work on technique, then work on the tailgate and grow into the larger panels - and the many surface rust spots in the rear wheel wells and torque boxes.
Started prepping the sliders to finally paint them. Didn't get as far as I wanted but made some good progress.
Used some aluminum stock to back this hole for the OEM flare bolt/nutsert.
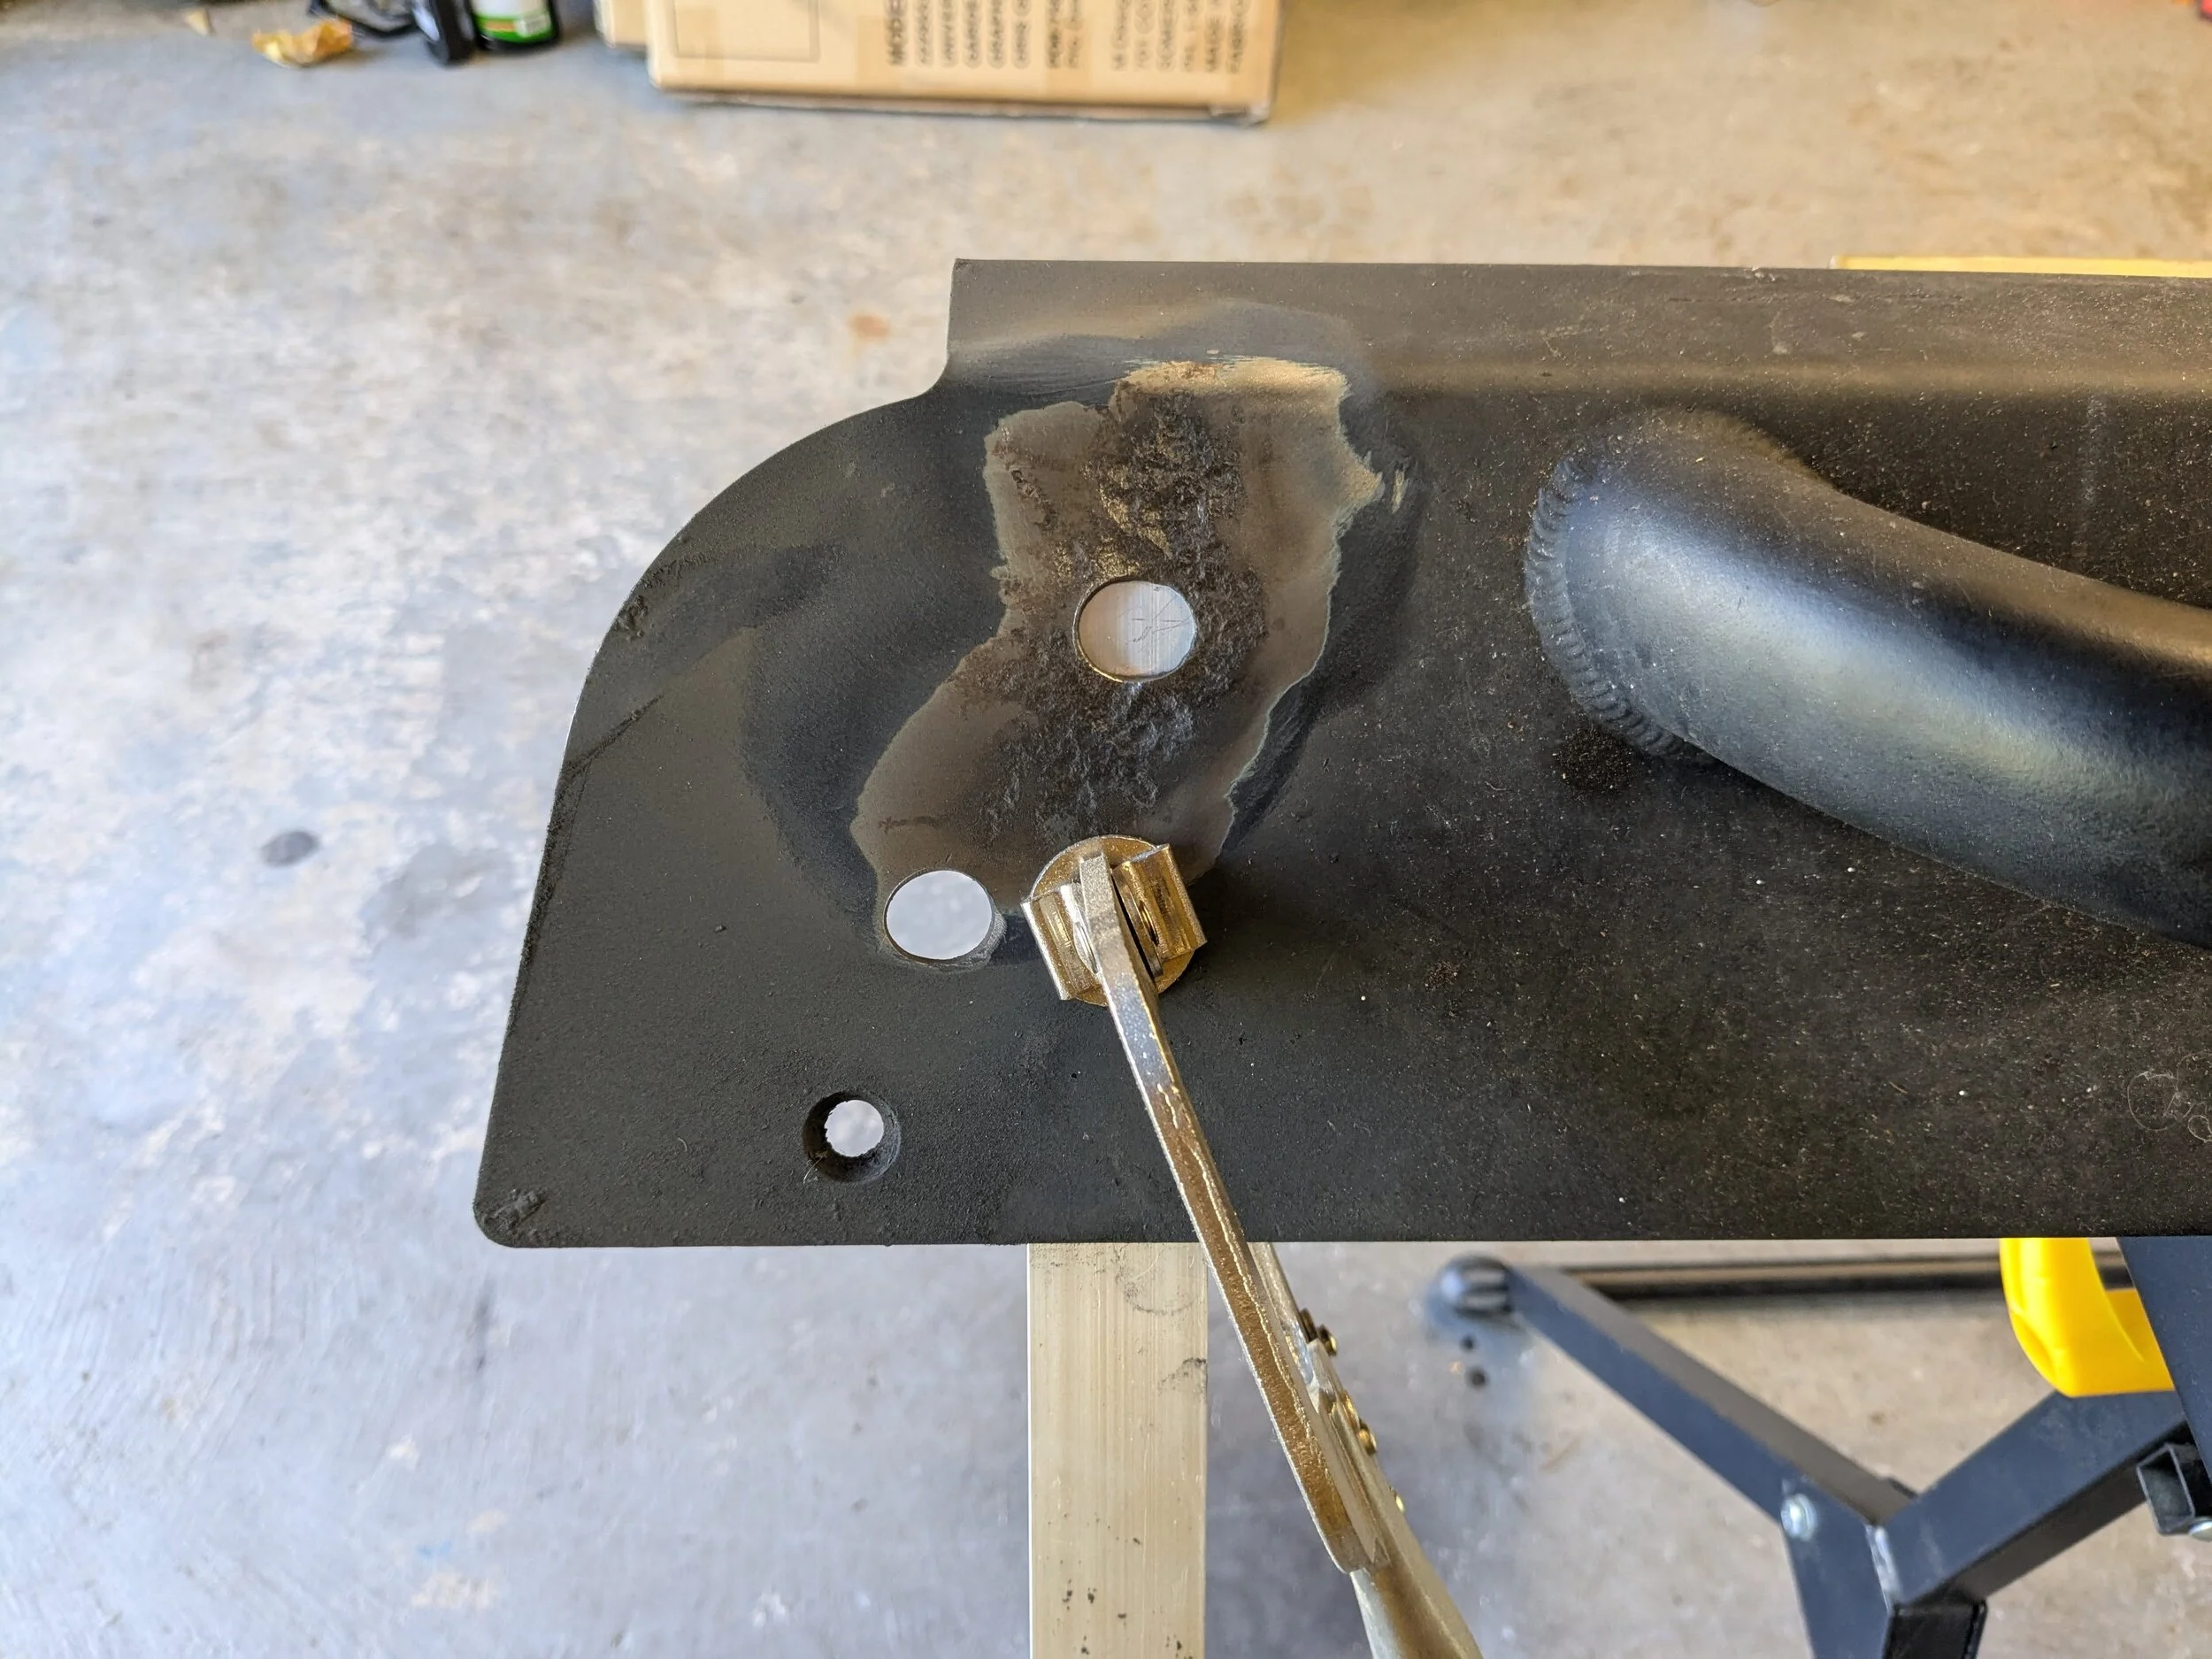
Filled in the hole and some of the surrounding rust damage.
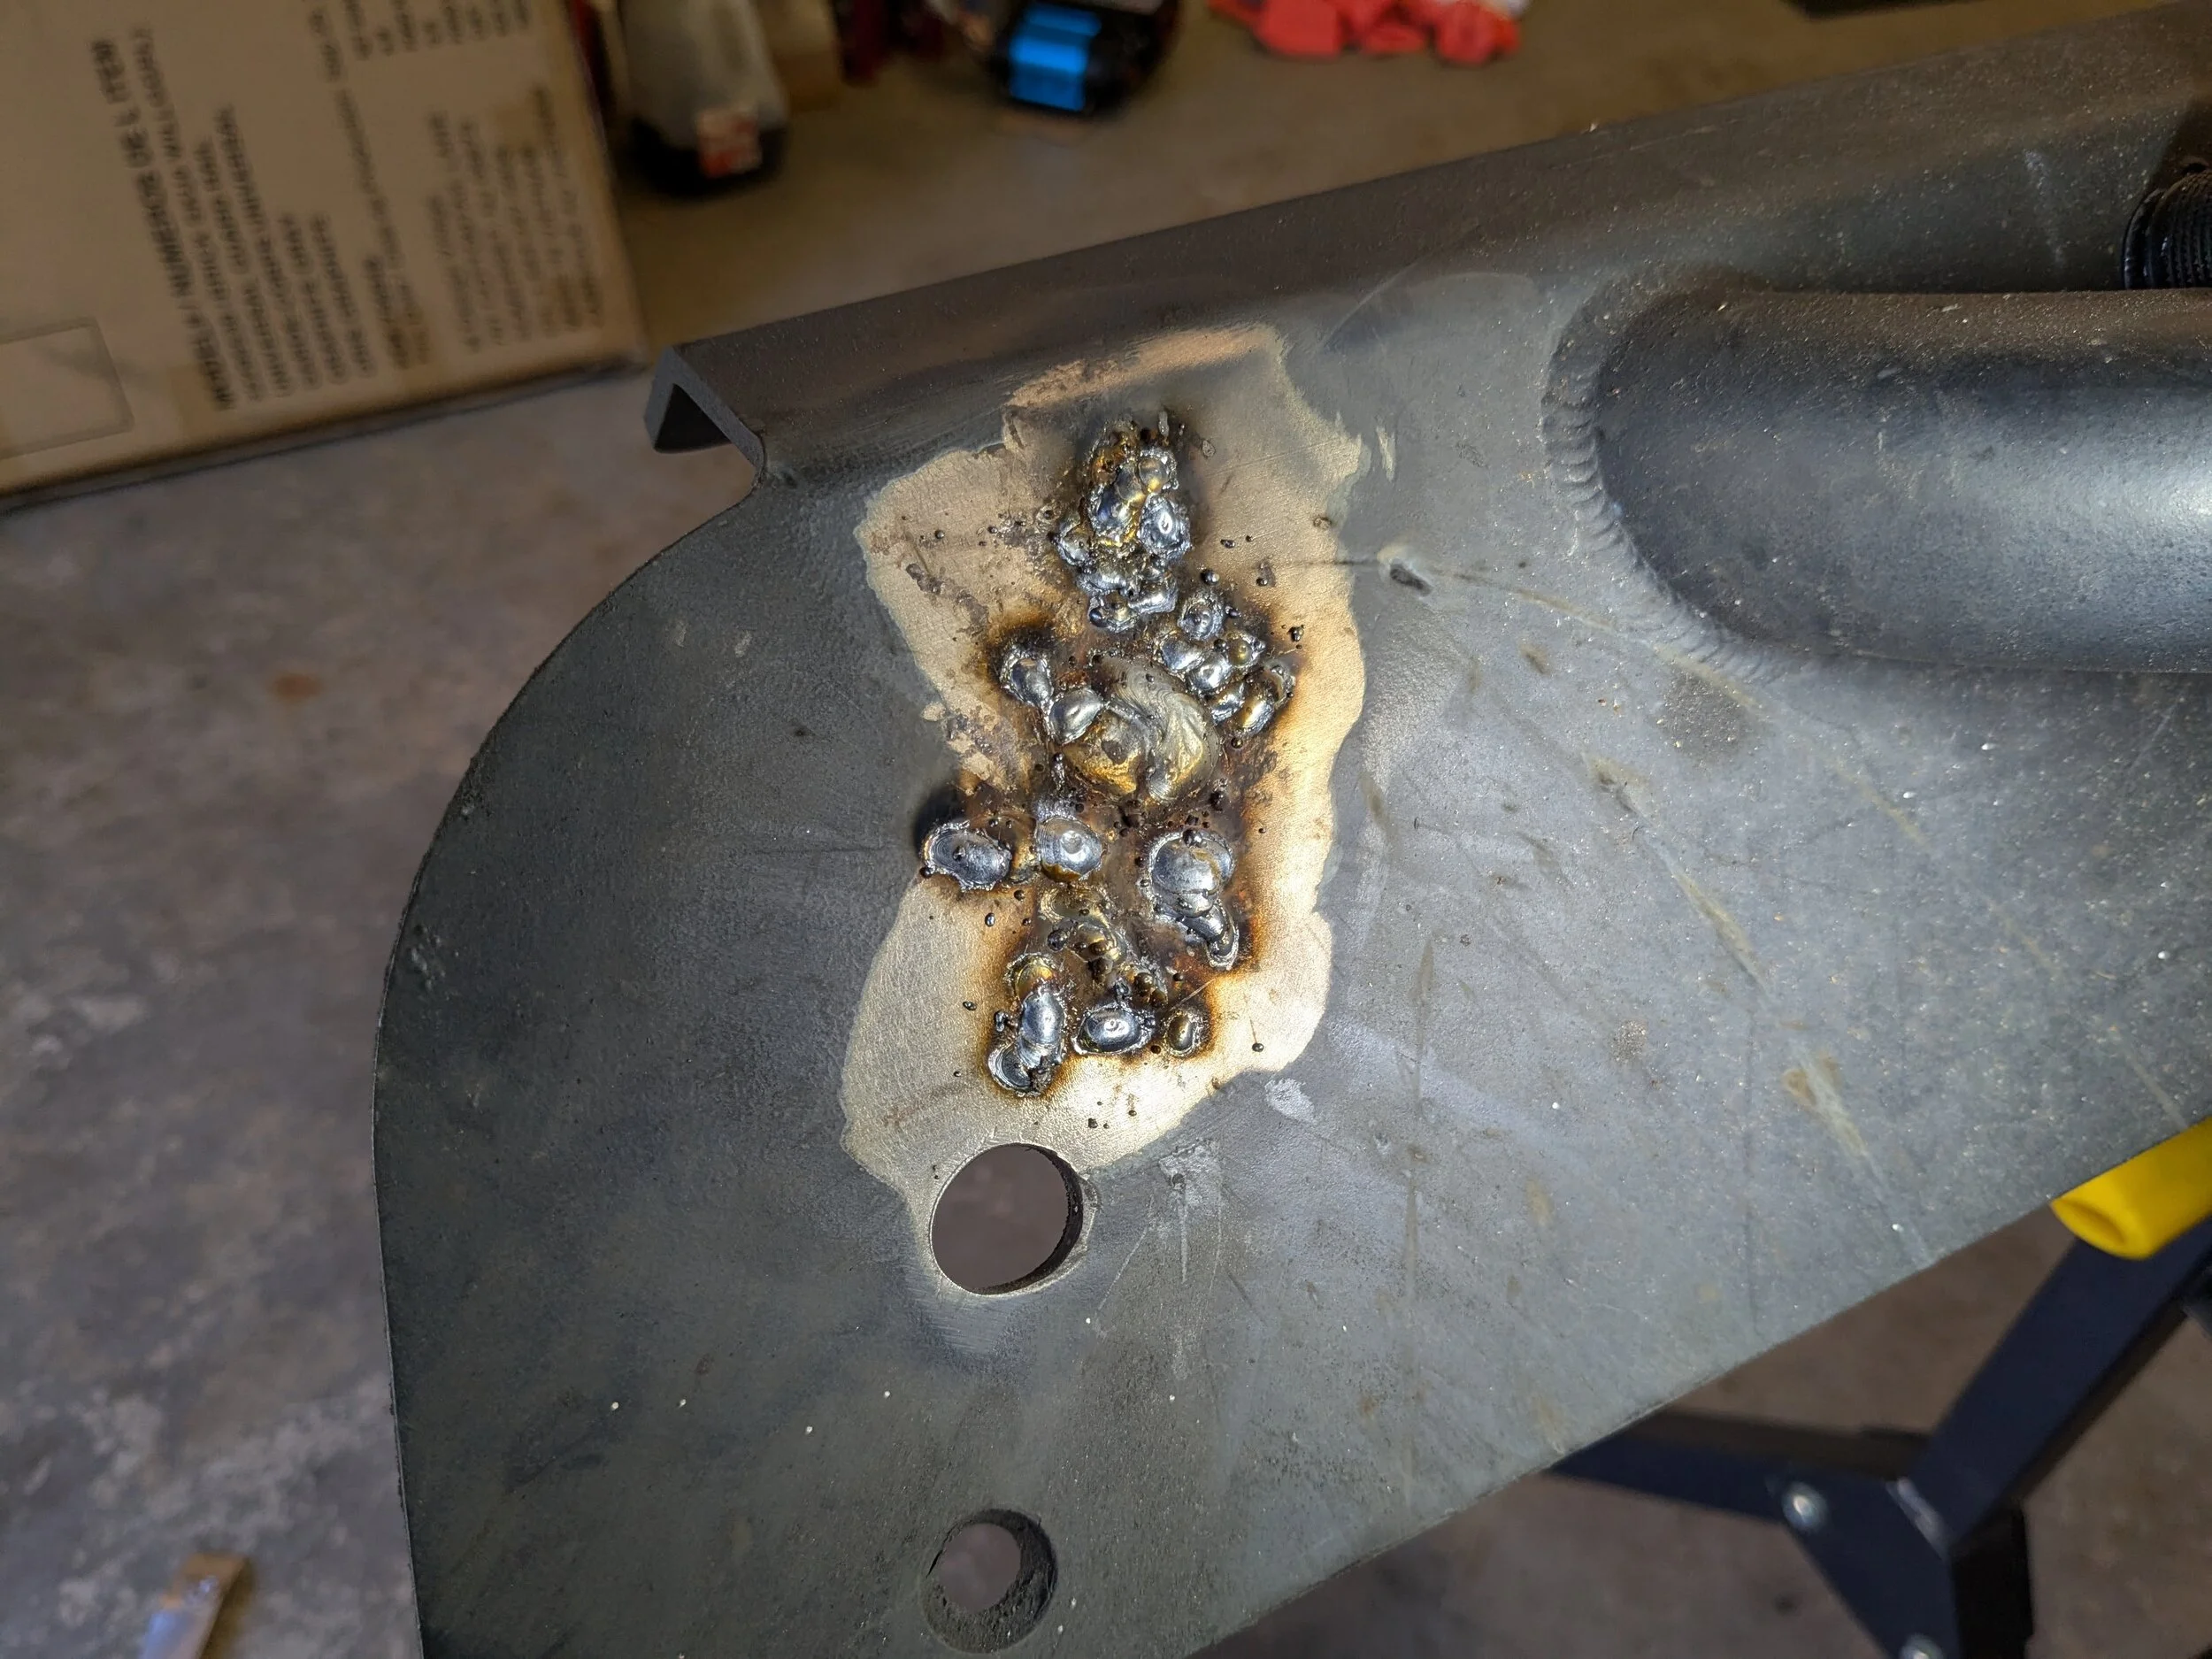
Hit it with a flap disc. Started at 40 grit but moved over to 120 grit.

After multiple weld/grind/repeat rounds, ended up here for the passenger side.
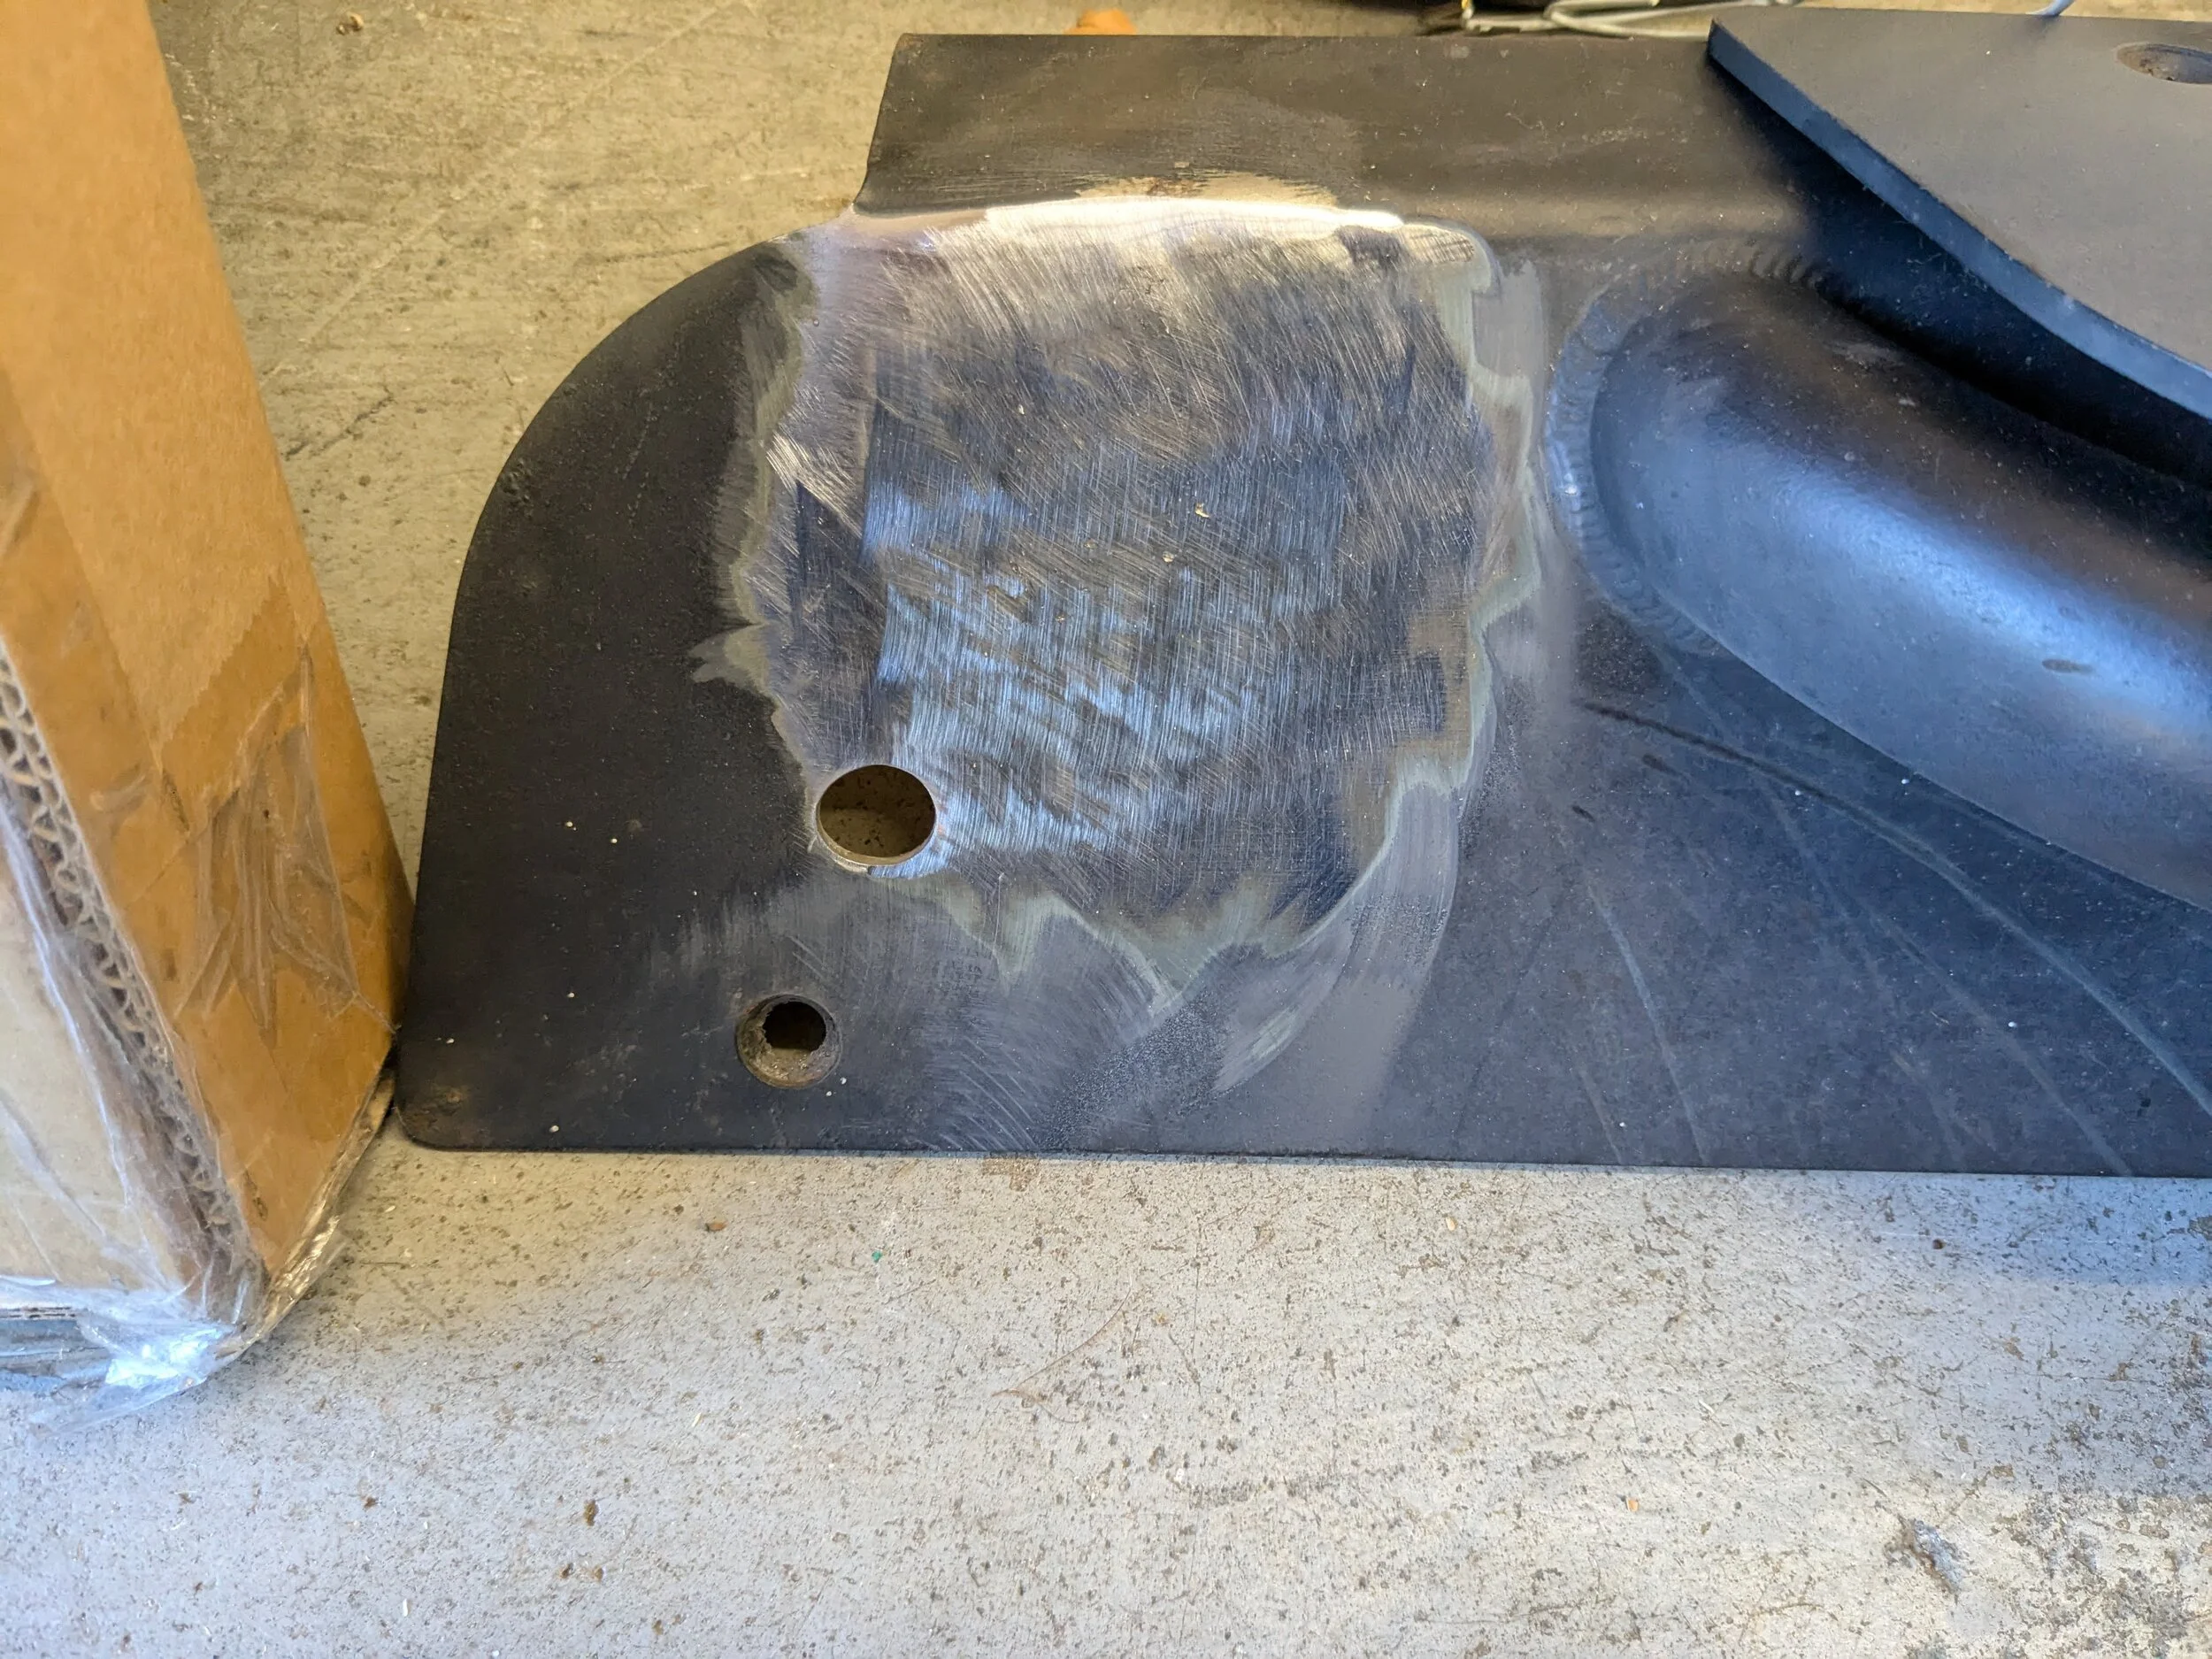
Driver side didn't have as extensive rust damage to repair.

The removed paint still has too high a lip to the existing paint so I plan to hit the tube-facing flat with an orbital to try to get it smoother before painting. I'm not worried about the bottom or inner faces being as flat nor fixing the gouges on the tubes.
Used some aluminum stock to back this hole for the OEM flare bolt/nutsert.
Filled in the hole and some of the surrounding rust damage.
Hit it with a flap disc. Started at 40 grit but moved over to 120 grit.
After multiple weld/grind/repeat rounds, ended up here for the passenger side.
Driver side didn't have as extensive rust damage to repair.
The removed paint still has too high a lip to the existing paint so I plan to hit the tube-facing flat with an orbital to try to get it smoother before painting. I'm not worried about the bottom or inner faces being as flat nor fixing the gouges on the tubes.

Started prepping the sliders to finally paint them. Didn't get as far as I wanted but made some good progress.
Used some aluminum stock to back this hole for the OEM flare bolt/nutsert.
View attachment 566745
Filled in the hole and some of the surrounding rust damage.
View attachment 566746
Hit it with a flap disc. Started at 40 grit but moved over to 120 grit.
View attachment 566747
After multiple weld/grind/repeat rounds, ended up here for the passenger side.
View attachment 566748
Driver side didn't have as extensive rust damage to repair.
View attachment 566749
The removed paint still has too high a lip to the existing paint so I plan to hit the tube-facing flat with an orbital to try to get it smoother before painting. I'm not worried about the bottom or inner faces being as flat nor fixing the gouges on the tubes.
Yeah, hit it with an orbital. Start about 80 grit, then 120, 220, 320. Then you’ll be ready to prime.
Hit the windshield corners with a roloc 120-grit bristle disc to knock some of the rust down but, since I was putting down POR-15, I wasn't worried to clear all the rust.
https://www.amazon.com/gp/product/B002P50DS2/?tag=wranglerorg-20


I had picked up small can of POR-15 and used a small brush to apply two thin coats. Didn't grab any pics yet before I made my neighbors happy and made the Jeep the pride of the neighborhood...
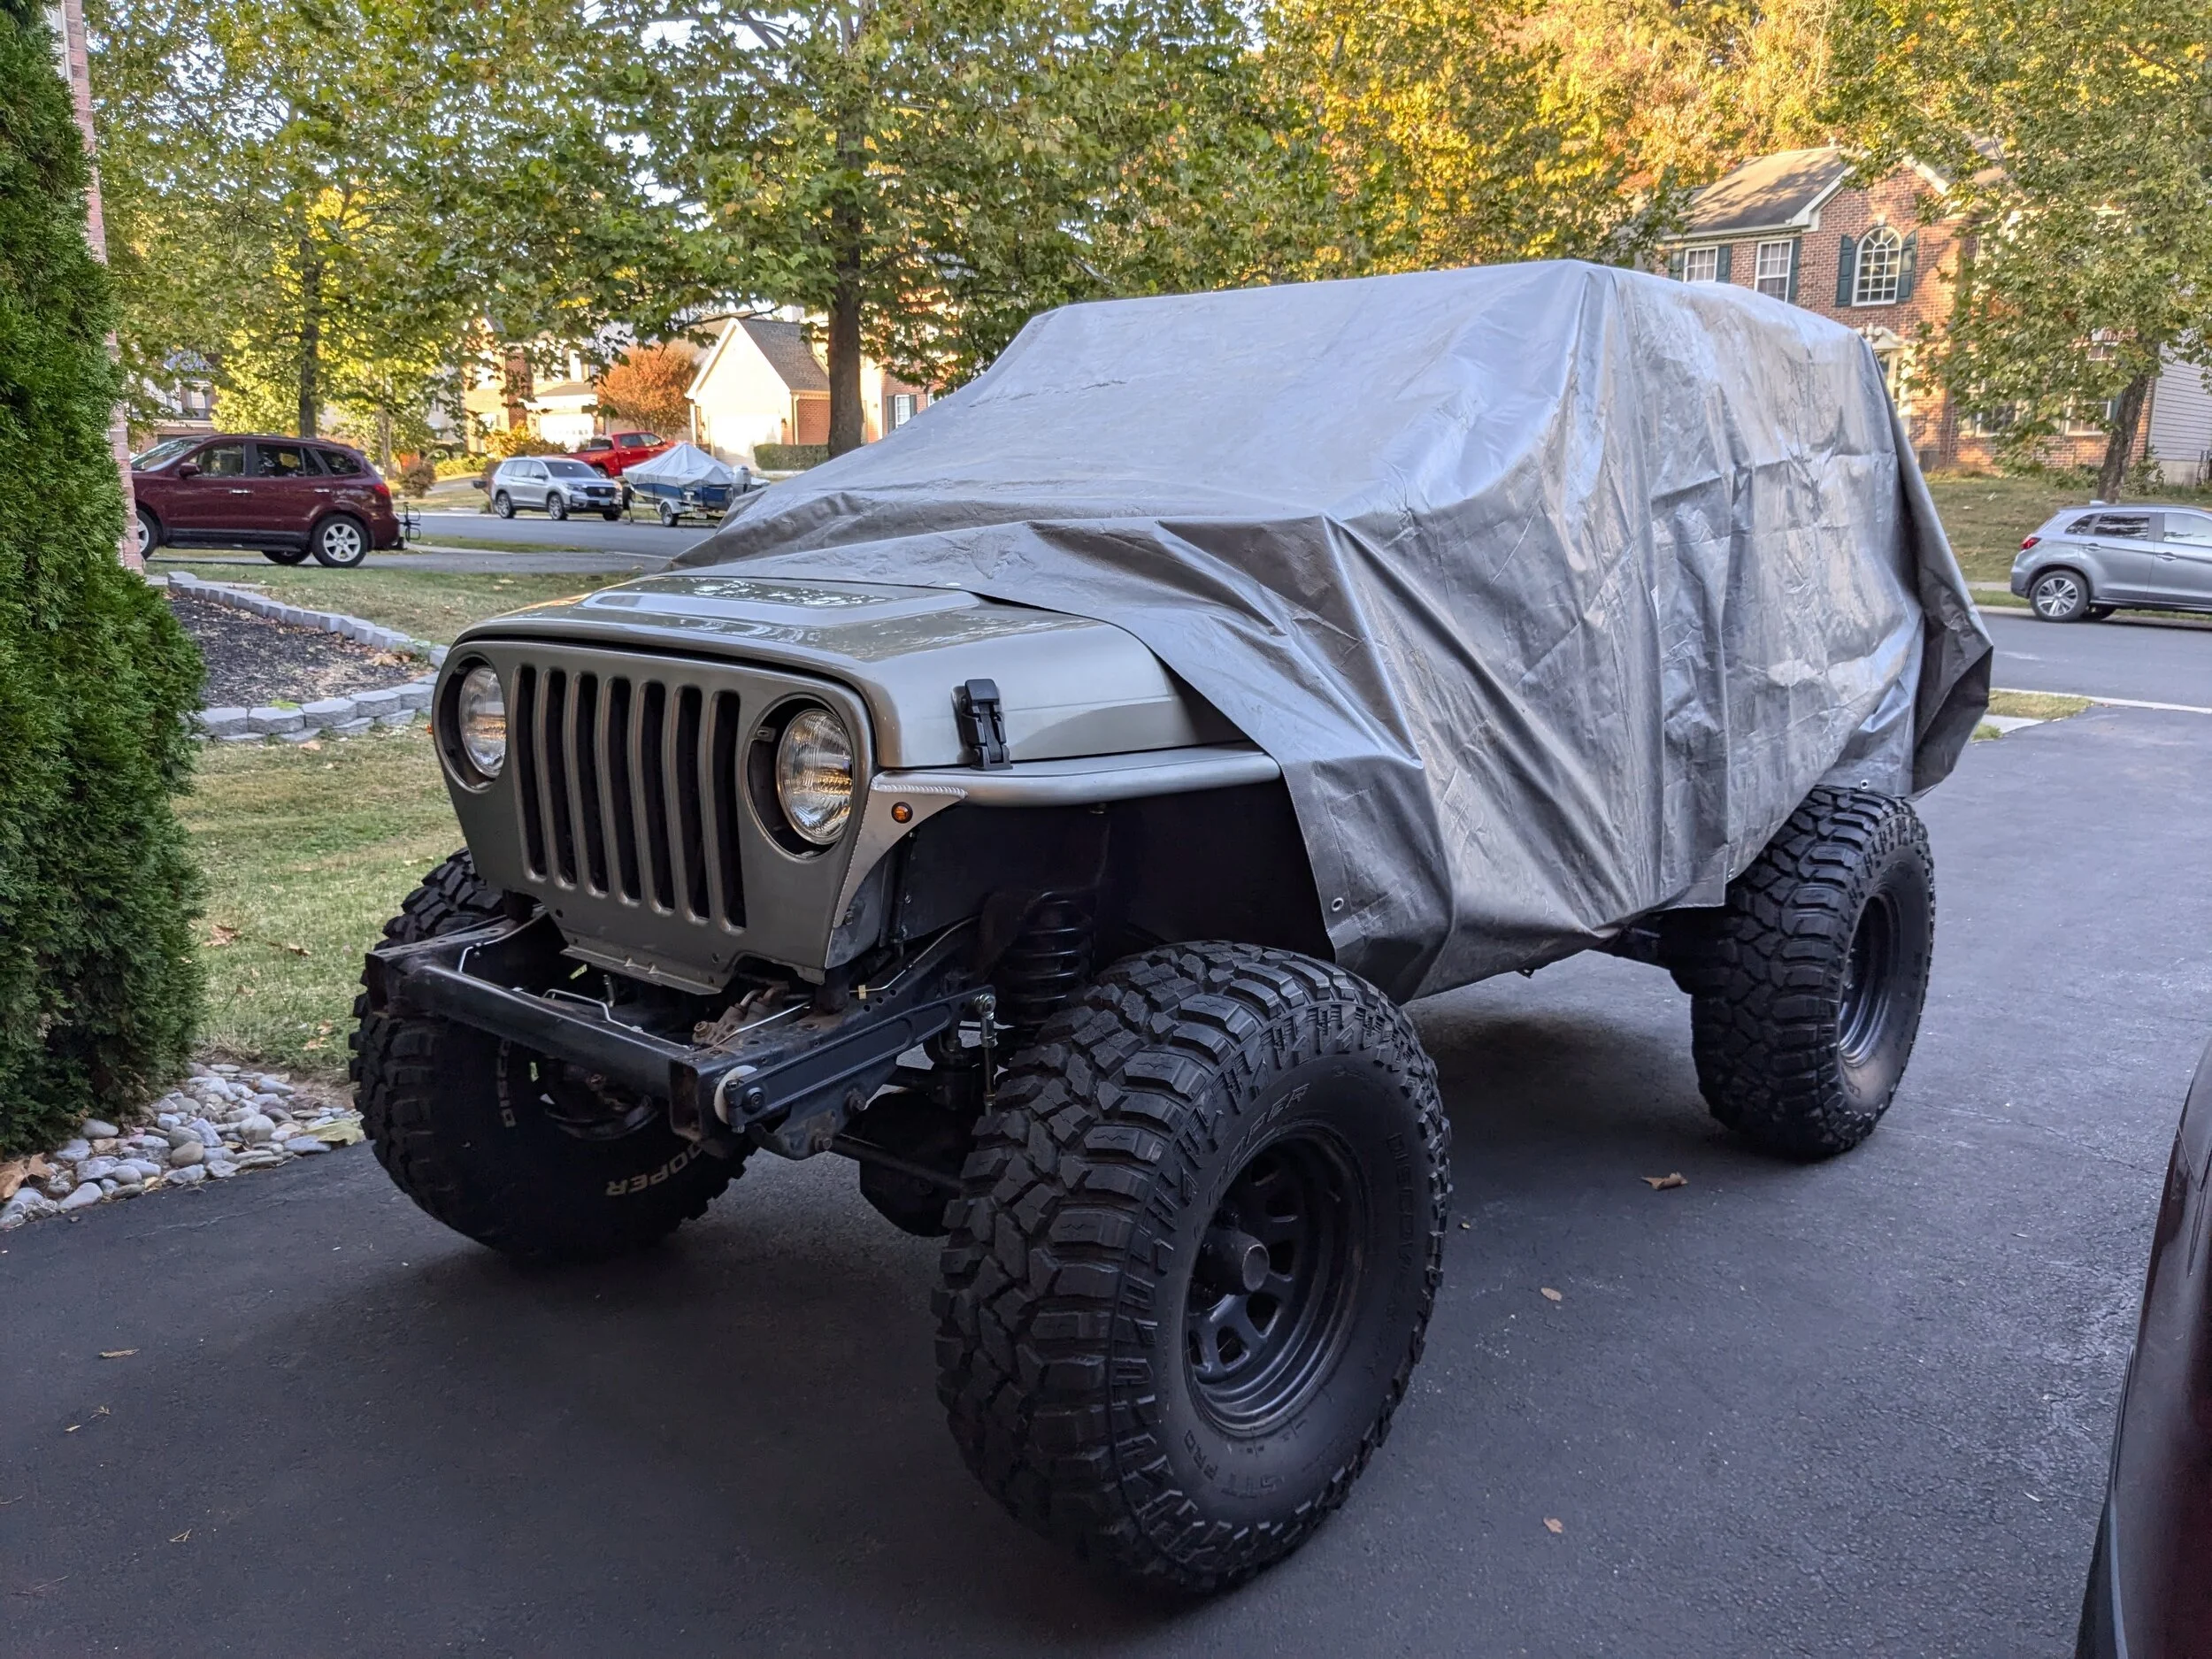
Needed room in the garage to keep working on prepping the sliders and then the painting. So Jeep will likely hang out for this week. Not expecting rain, but figured to cover it up mostly because the rollcage foam is exposed and I don't want it to get further weathered or UV damaged. Otherwise, I'd just leave the Heap out in the weather.
https://www.amazon.com/gp/product/B002P50DS2/?tag=wranglerorg-20
I had picked up small can of POR-15 and used a small brush to apply two thin coats. Didn't grab any pics yet before I made my neighbors happy and made the Jeep the pride of the neighborhood...
Needed room in the garage to keep working on prepping the sliders and then the painting. So Jeep will likely hang out for this week. Not expecting rain, but figured to cover it up mostly because the rollcage foam is exposed and I don't want it to get further weathered or UV damaged. Otherwise, I'd just leave the Heap out in the weather.
Yeah, hit it with an orbital. Start about 80 grit, then 120, 220, 320. Then you’ll be ready to prime.
Thanks! I just picked up a multi-pack for the orbital (since all I had at 100 grit for the deck railing...) which covers all those grits.
Thanks! I just picked up a multi-pack for the orbital (since all I had at 100 grit for the deck railing...) which covers all those grits.
At most hit 400, but don't buy into the idea that you can go to higher grits and get a better finish. The paint need something to bite, and anything over 400 is less bite. With today's quality paints they will lay down on 320-400 very well. I look forward to seeing how it turns out.
Ordered new hardware for the sliders. I was planning to use what I had pulled off but decided they had worn their time over the past 12 years so an upgrade was in place.
Went with 316 stainless steel. You've all convinced me to go with the Phillips head.
Which makes sense because a couple of them were stripped when I tried to remove them and I bought some replacements which will likely spend time in a container somewhere now..

Went back to my old reliable source for hardware at boltdepot.com
McMaster had me buying quantity up to 25 and it just became cost prohibitive. Bolt Depot does a great job on providing single unit purchasing and packages them excellently. Can't recommend them enough!
They only had the longest size of 3" to replace the 3.5" so I bought some low profile lock nuts in hopes that will work. Luckily the ones I have aren't too bad of shape if I need to fall back to them.
Went with 316 stainless steel. You've all convinced me to go with the Phillips head.
Which makes sense because a couple of them were stripped when I tried to remove them and I bought some replacements which will likely spend time in a container somewhere now..
Went back to my old reliable source for hardware at boltdepot.com
McMaster had me buying quantity up to 25 and it just became cost prohibitive. Bolt Depot does a great job on providing single unit purchasing and packages them excellently. Can't recommend them enough!
They only had the longest size of 3" to replace the 3.5" so I bought some low profile lock nuts in hopes that will work. Luckily the ones I have aren't too bad of shape if I need to fall back to them.
I did poor prep of the matting plates for the sliders...
I don't want to damage the existing coating because it's held up strong over the 10 plus years..
You can see the gold coating on the plates here:
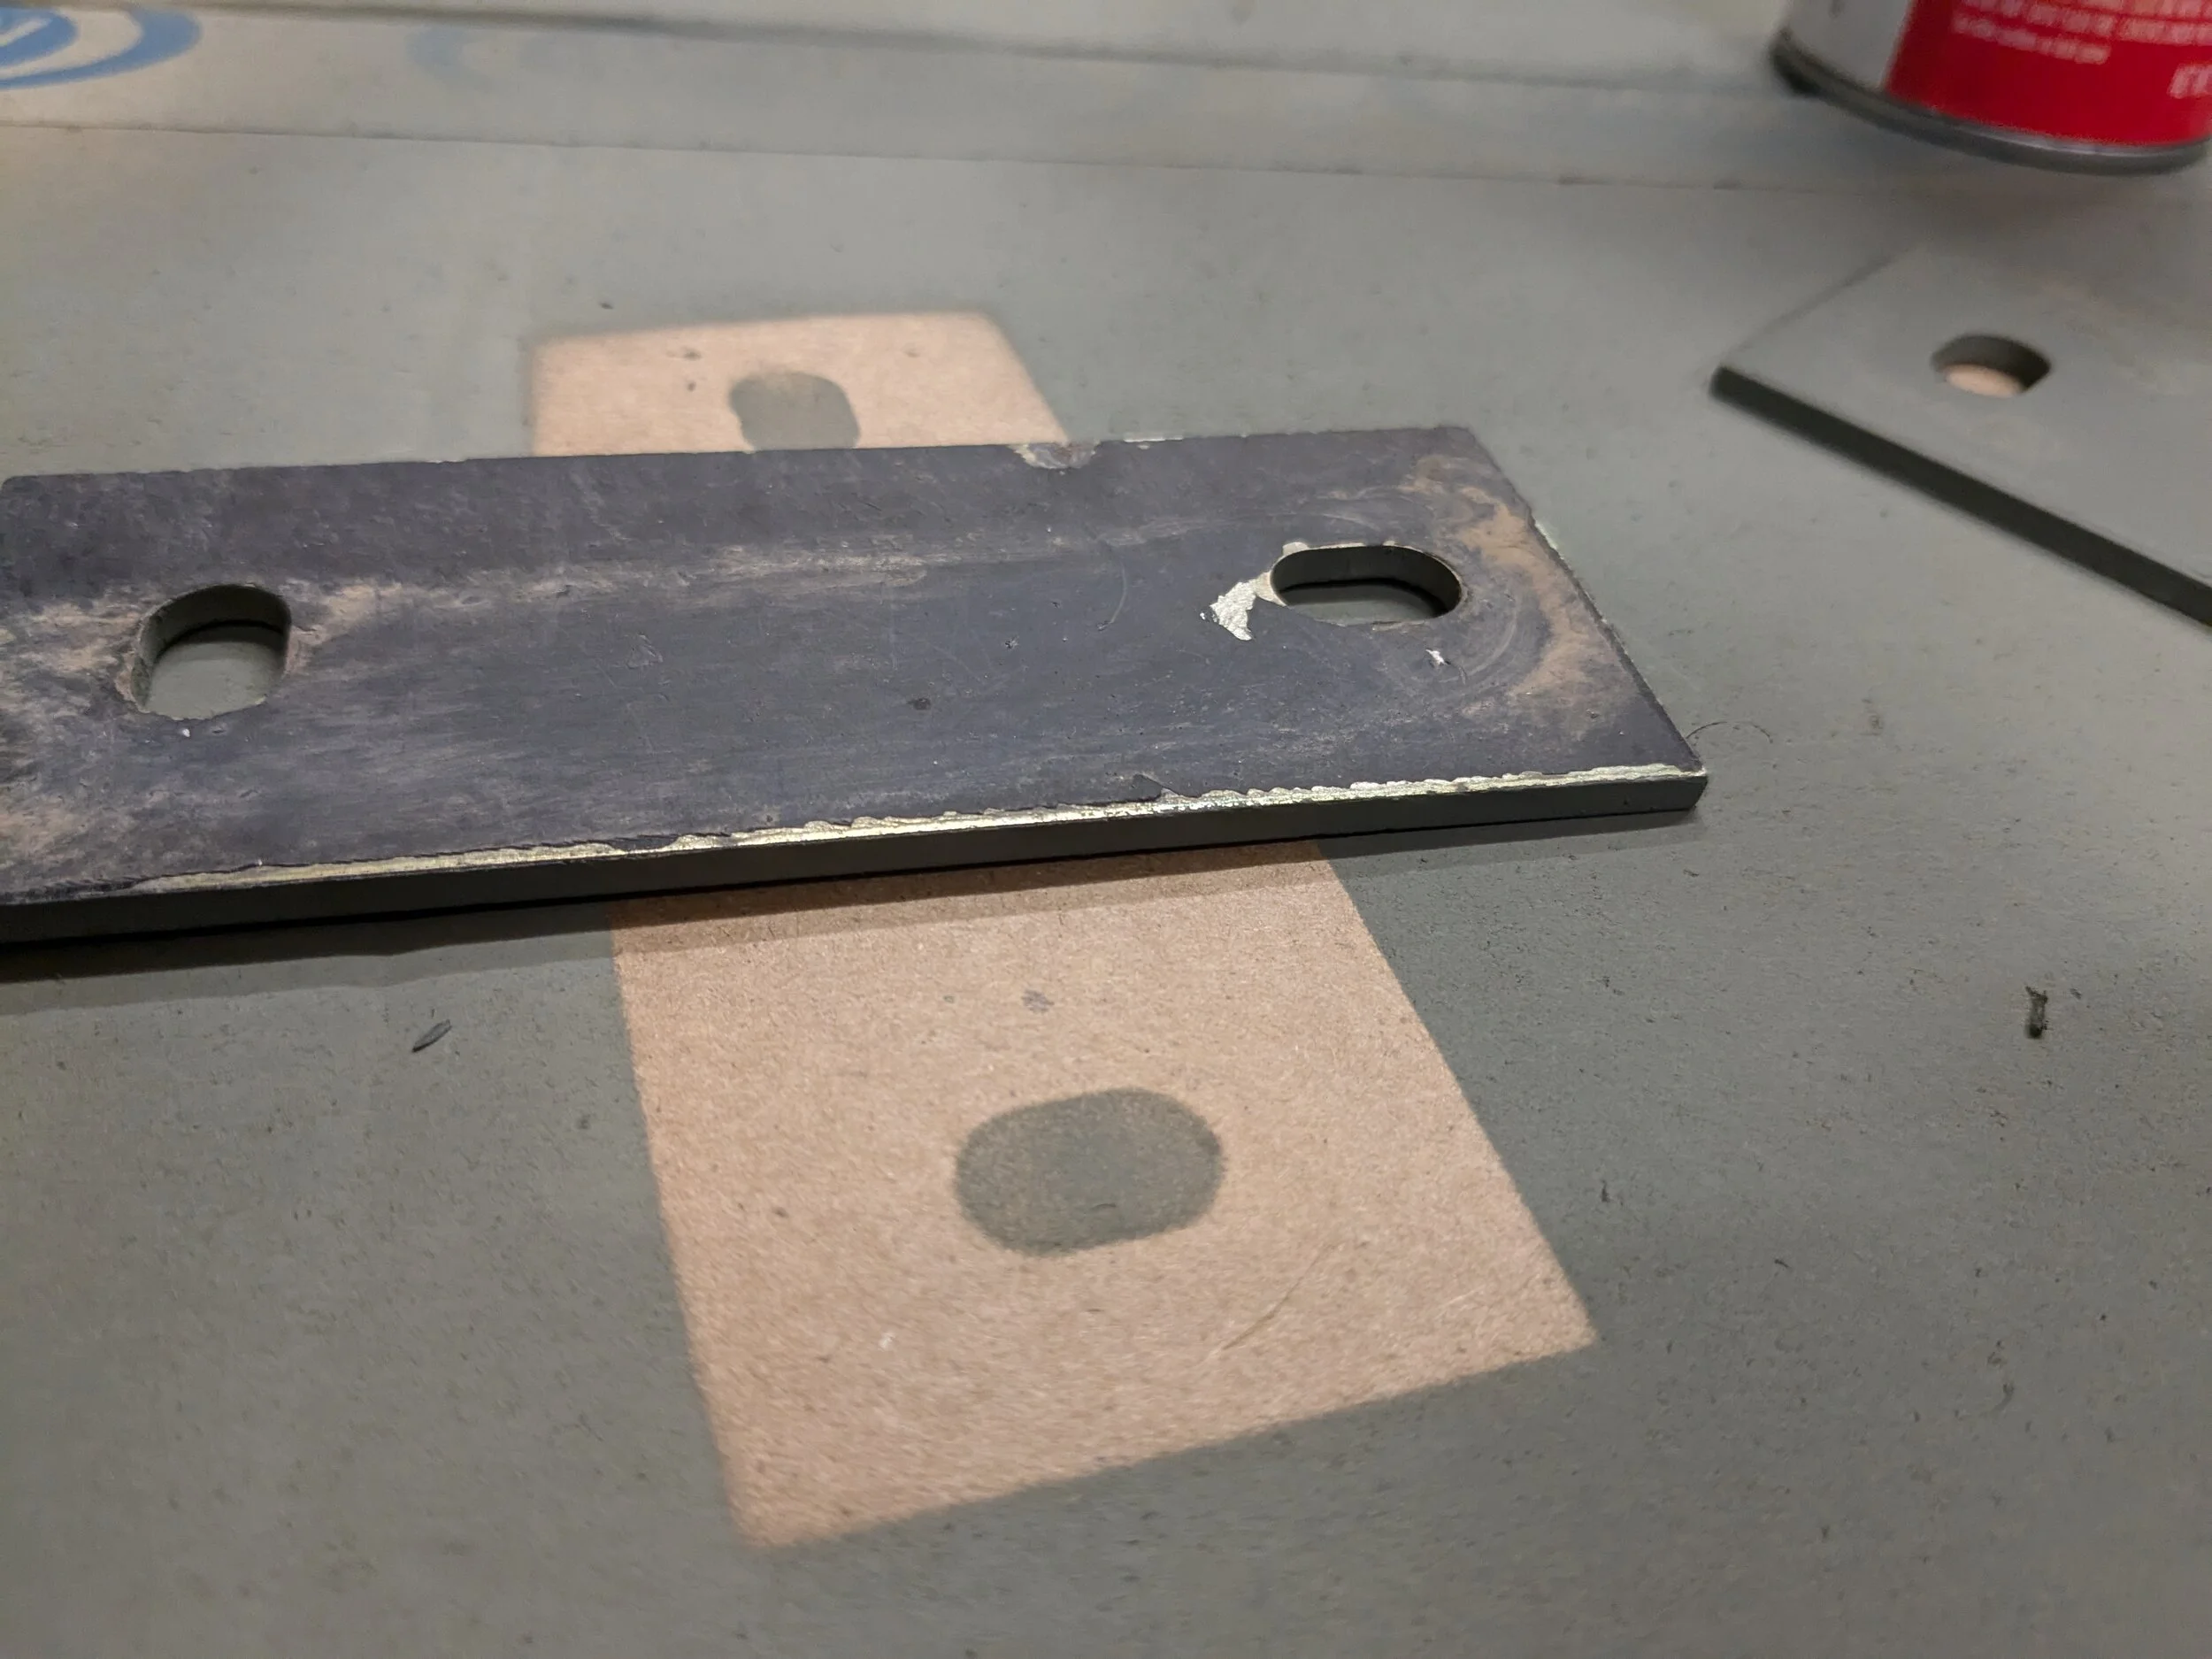
I just went over the brackets with a rag and mineral spirits to remove contaminants but that wasn't enough...
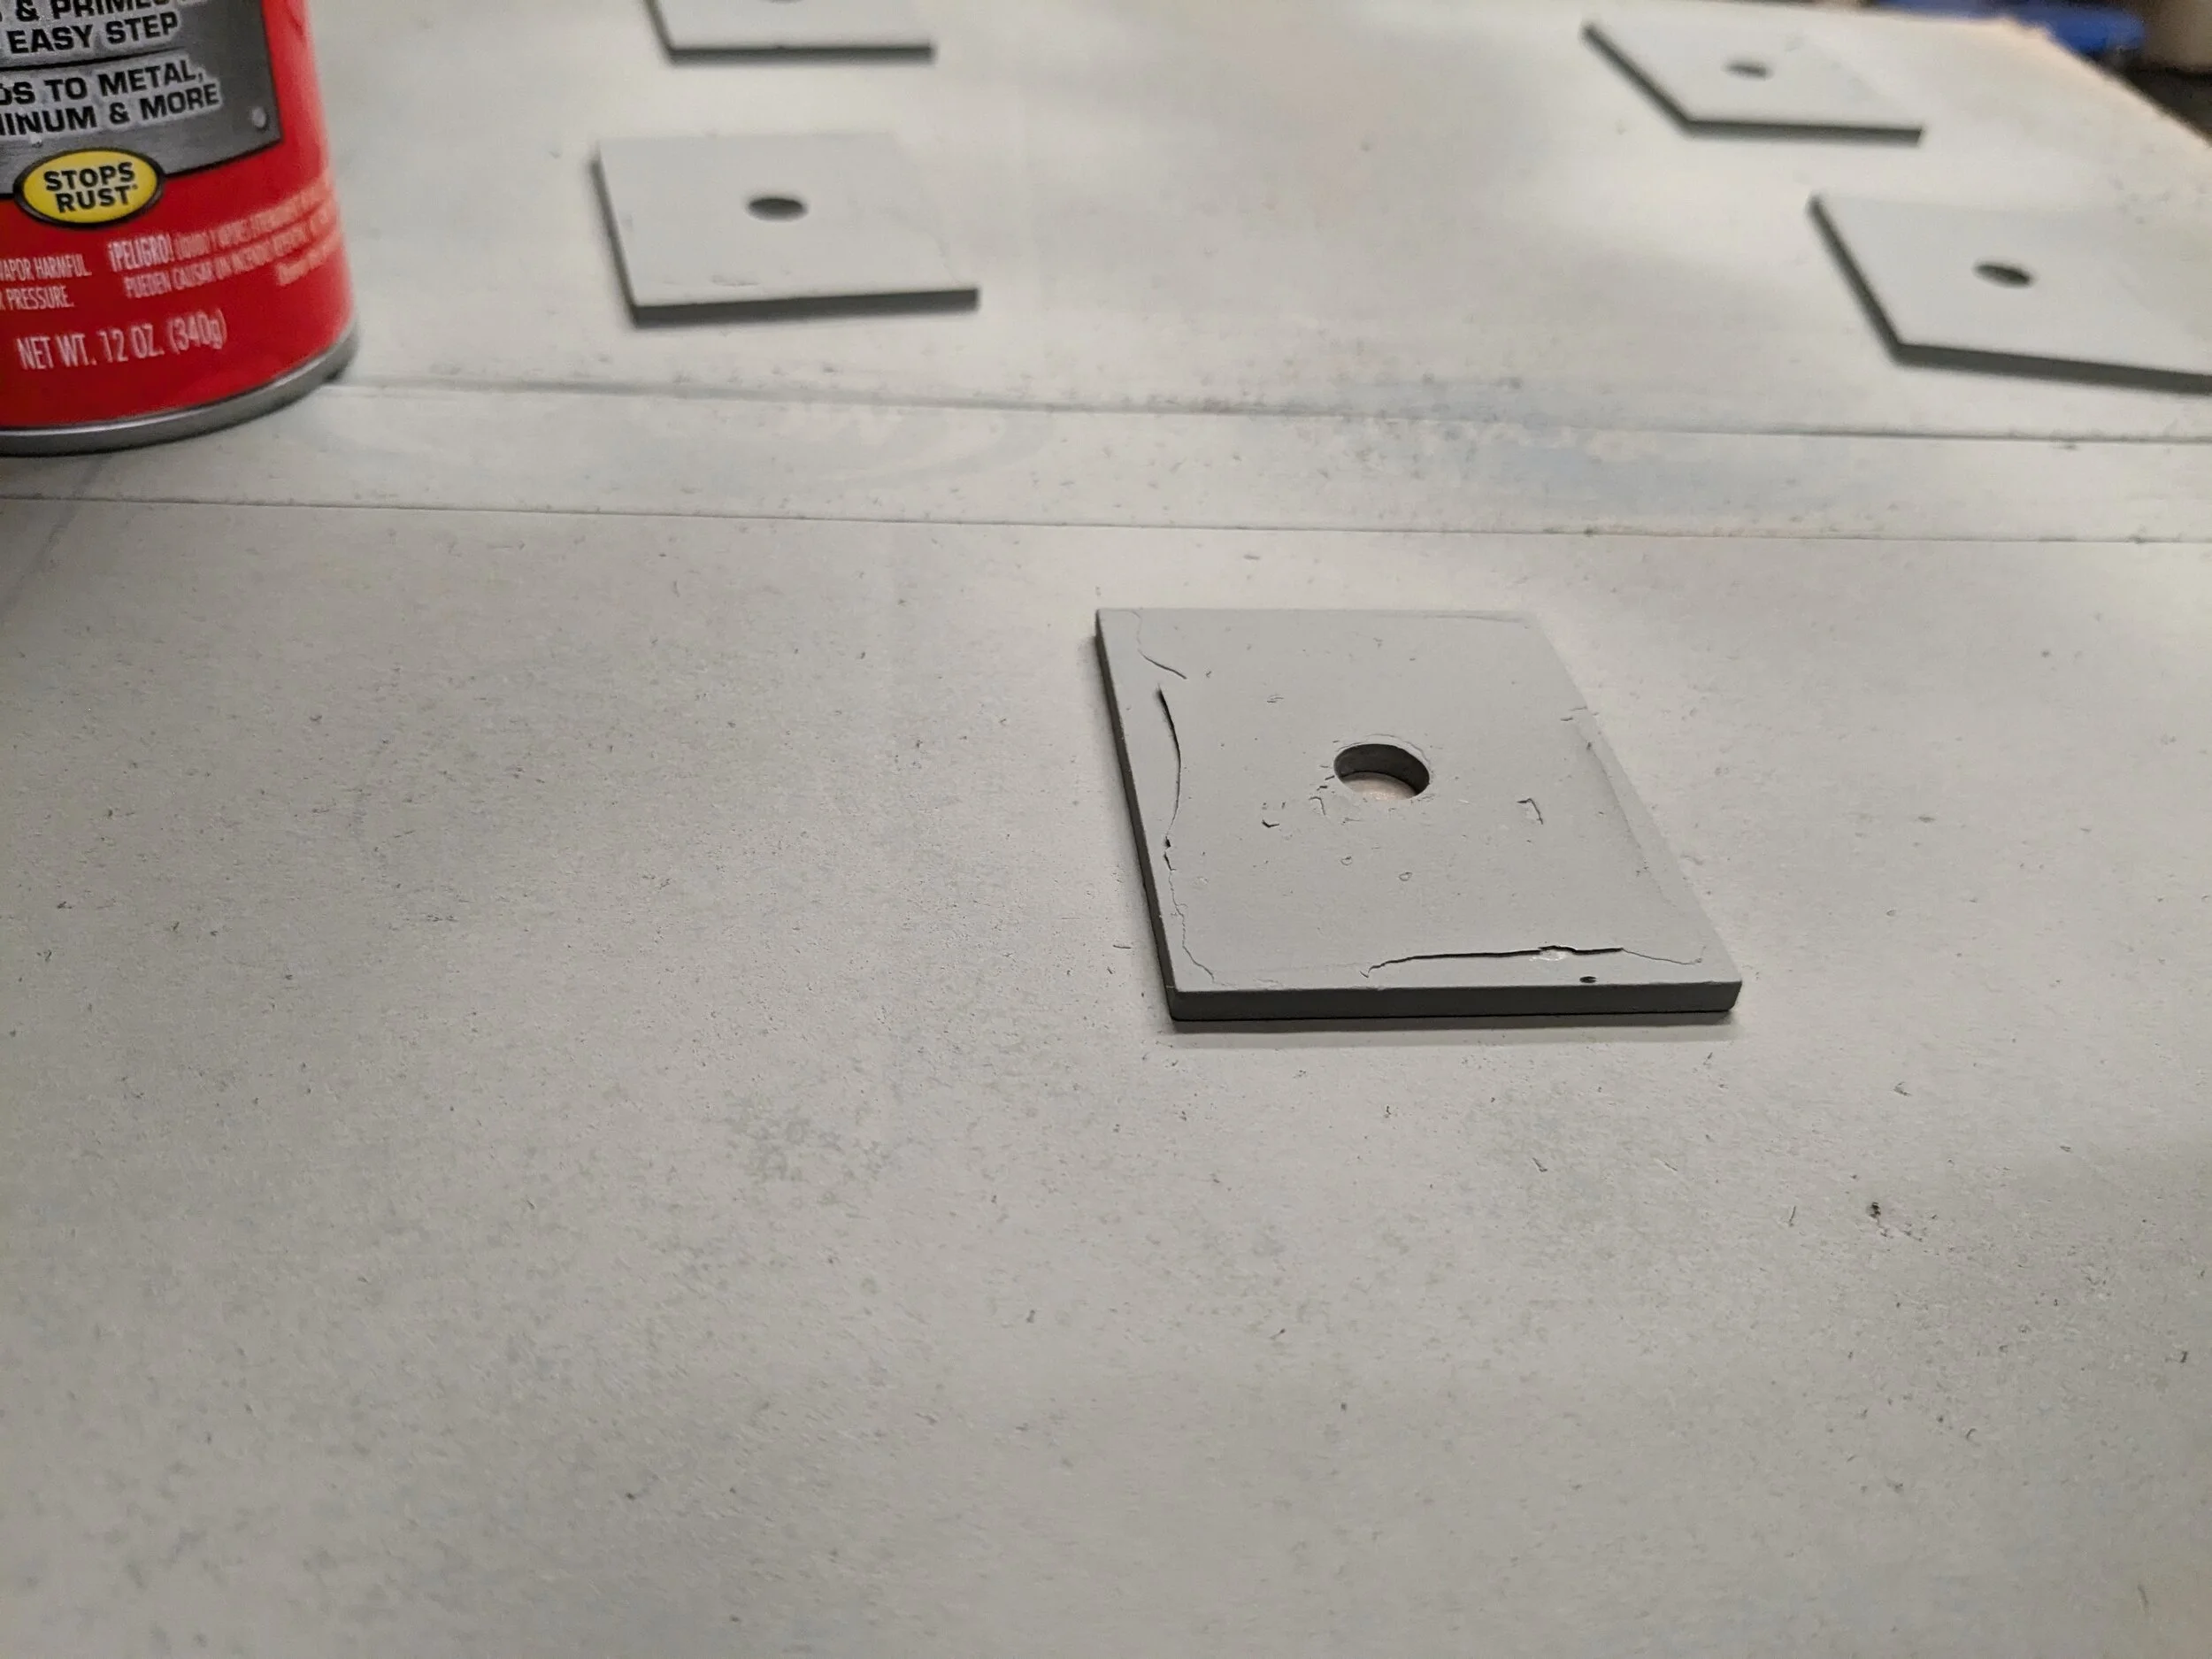
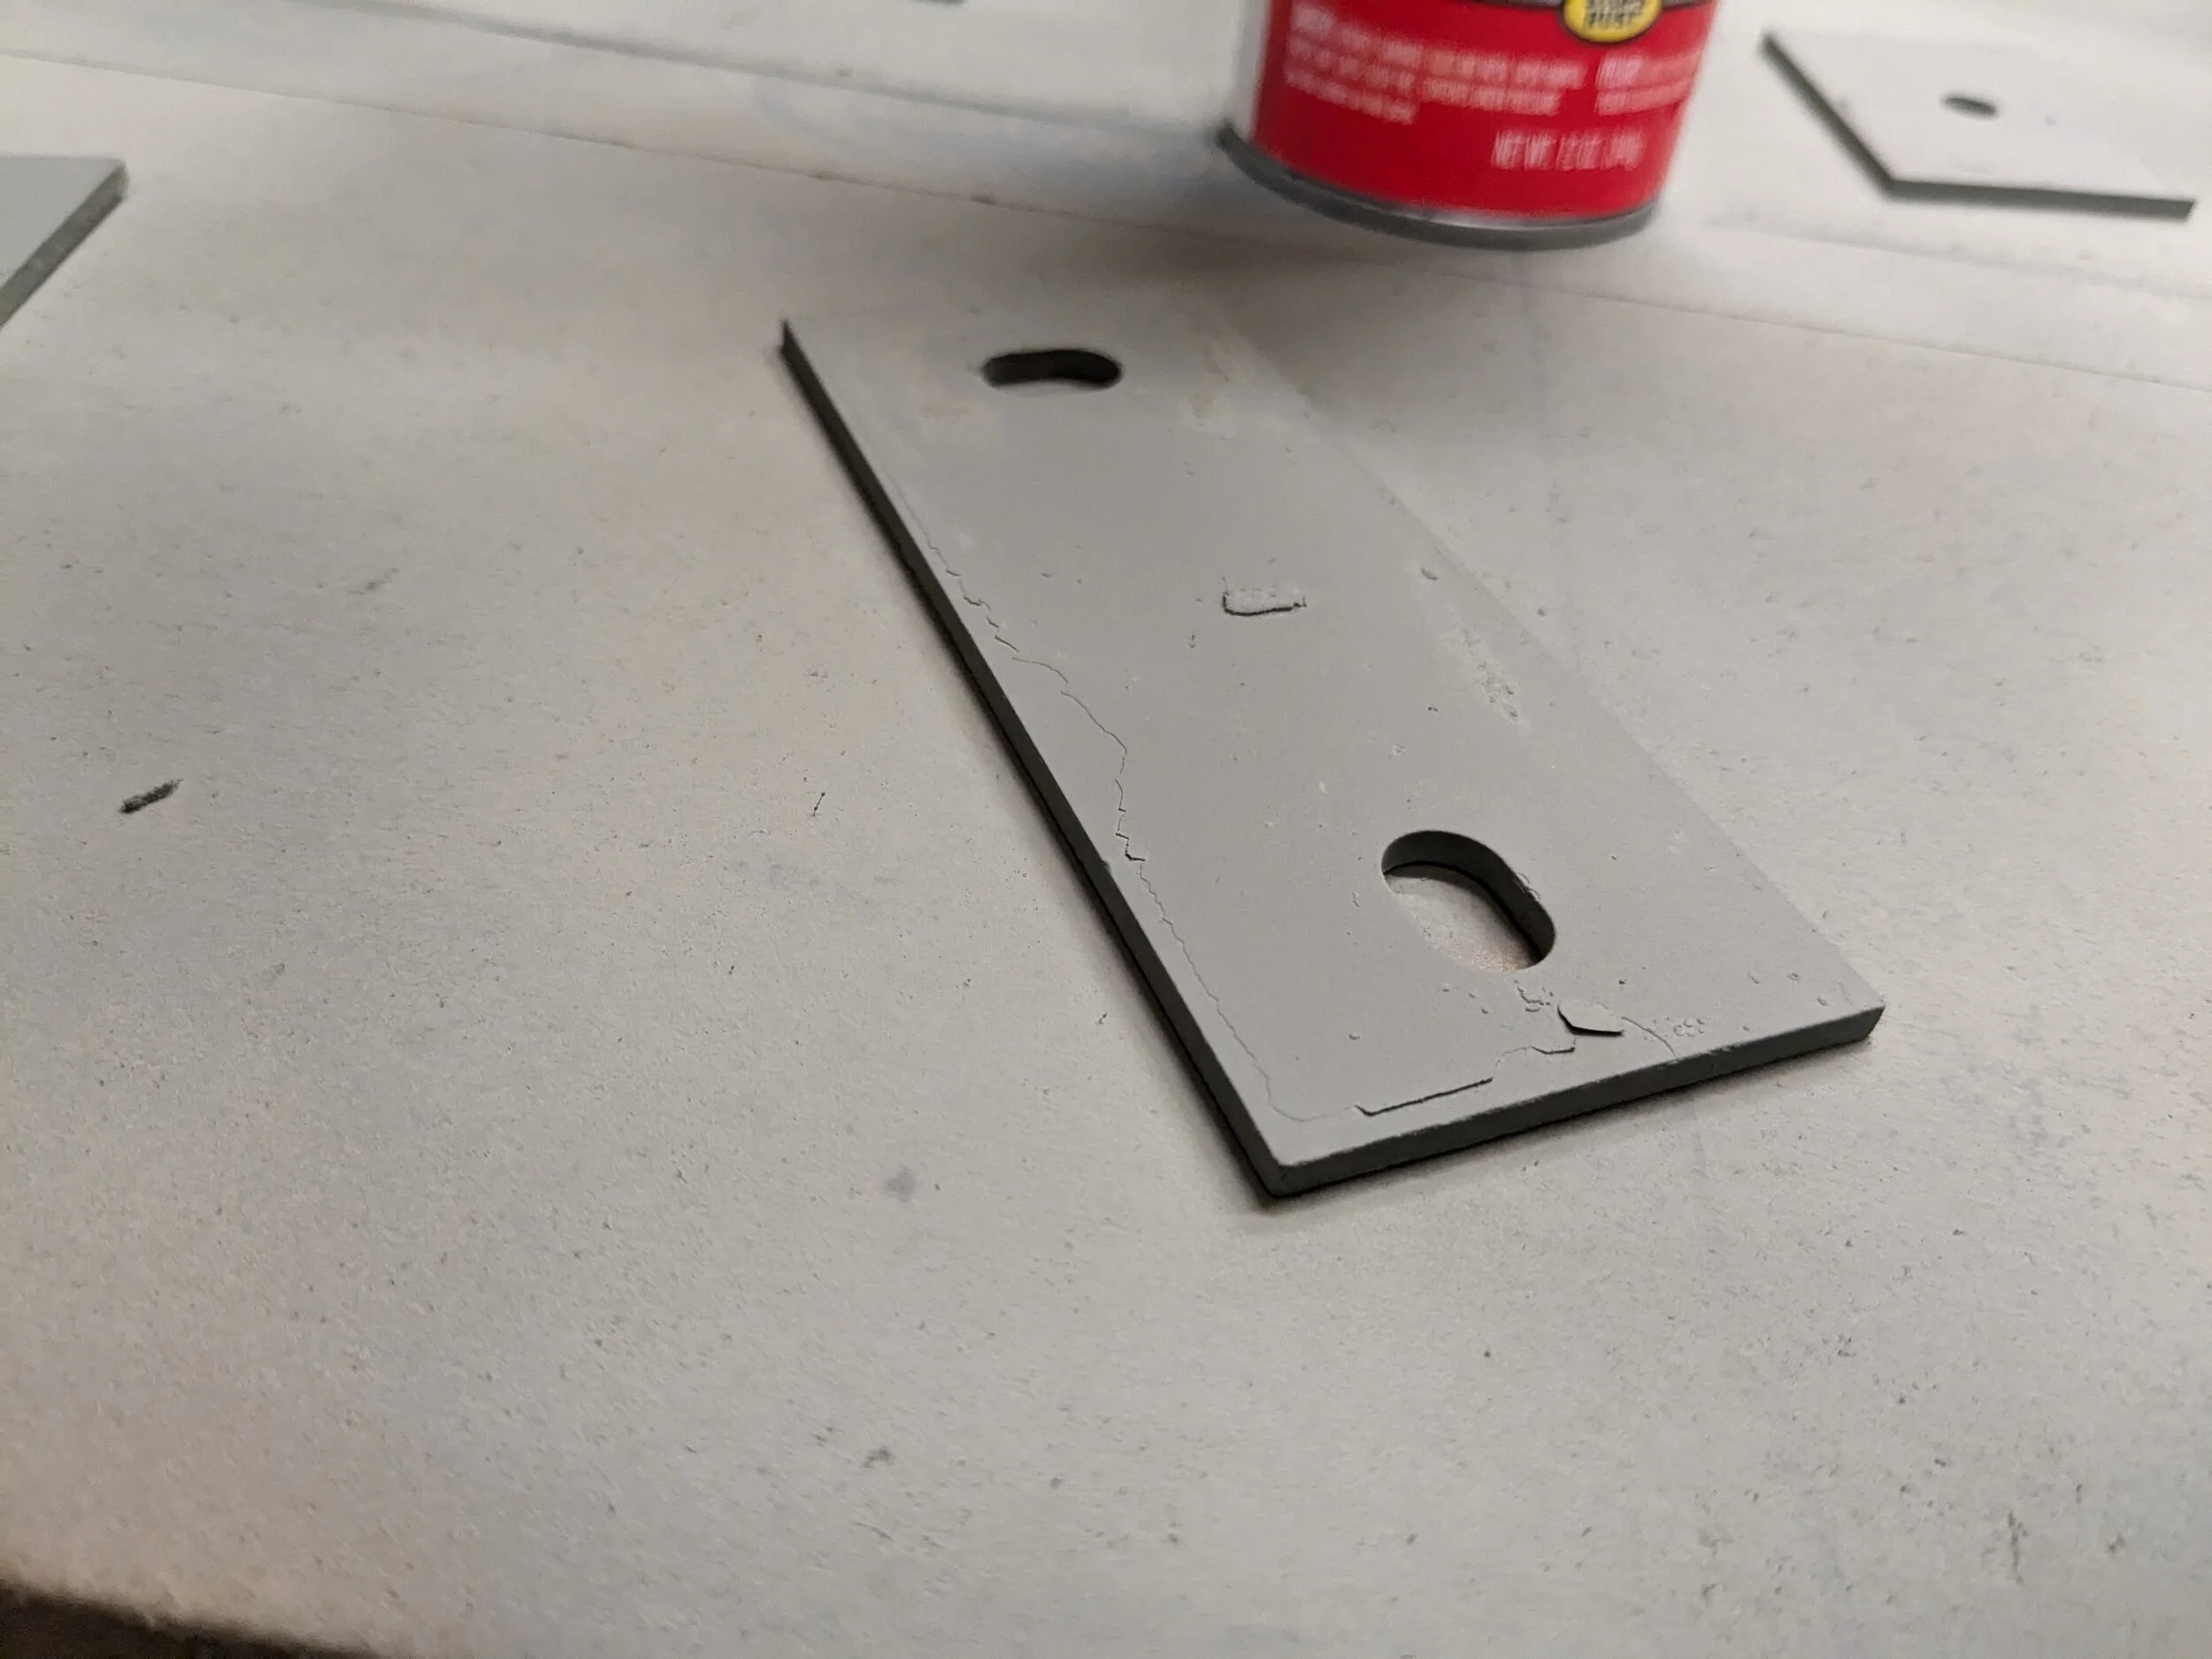
So I'll need to address these better before I finish paint them.
I don't think I used any primer when these went in and if I did it looks like the primer didn't etch into the brackets years ago.
I don't want to damage the existing coating because it's held up strong over the 10 plus years..
You can see the gold coating on the plates here:
I just went over the brackets with a rag and mineral spirits to remove contaminants but that wasn't enough...
So I'll need to address these better before I finish paint them.
I don't think I used any primer when these went in and if I did it looks like the primer didn't etch into the brackets years ago.
I trust coating that is already on the plates now so I'm hesitant to sand and them them. But I clearly need to do something to remove the old paint and minimize impacting that protective layer.
That liar on these brackets has kept them rust free for 10 plus years.
That liar on these brackets has kept them rust free for 10 plus years.
I did poor prep of the matting plates for the sliders...
I don't want to damage the existing coating because it's held up strong over the 10 plus years..
You can see the gold coating on the plates here:
View attachment 567159
I just went over the brackets with a rag and mineral spirits to remove contaminants but that wasn't enough...
View attachment 567160View attachment 567161
So I'll need to address these better before I finish paint them.
I don't think I used any primer when these went in and if I did it looks like the primer didn't etch into the brackets years ago.
Use an orbital sander to sand down where the paint edges are peeling up. Blend it all in. Any paint that stays behind is good to go. Then clean and top coat.
Use an orbital sander to sand down where the paint edges are peeling up. Blend it all in. Any paint that stays behind is good to go. Then clean and top coat.
Thought about that. My concern is these appear to be zinc coated. Worried about burning through the coating and leaving them open to future rusting.
Perhaps hitting the peeling areas with a higher grit (thinking 200 or 320 grit) quickly to just knock off the paint.
Thought about that. My concern is these appear to be zinc coated. Worried about burning through the coating and leaving them open to future rusting.
Perhaps hitting the peeling areas with a higher grit (thinking 200 or 320 grit) quickly to just knock off the paint.
Yeah, just knock it off.
Hardware arrived for the slides. Love Bolt Depot's packaging. This was for one project so it wasn't as big a deal, but when I placed an earlier order with hardware for 4+ separate projects, it was so easy to separate everything and write on the bag the project name.

Going to keep these steel, rather than the painted black I did on the original Rokmen hardware.
Ordered these earlier for some Phillips on another part of the Jeep. Fit great on this slider hardware. Just generic brand off Amazon.

@sunnysideup_lj reached out after I commented on @jjvw's build and his matte shackle mounts. These things are awesome and insanely light when compared to the OEM steel hooks they'll replace on the new aluminum @Fluxor bumper.
I wanted matte and @sunnysideup_lj had already run these through his tumbler to give a finish I was looking for to match the (future sanded) bumper's look.
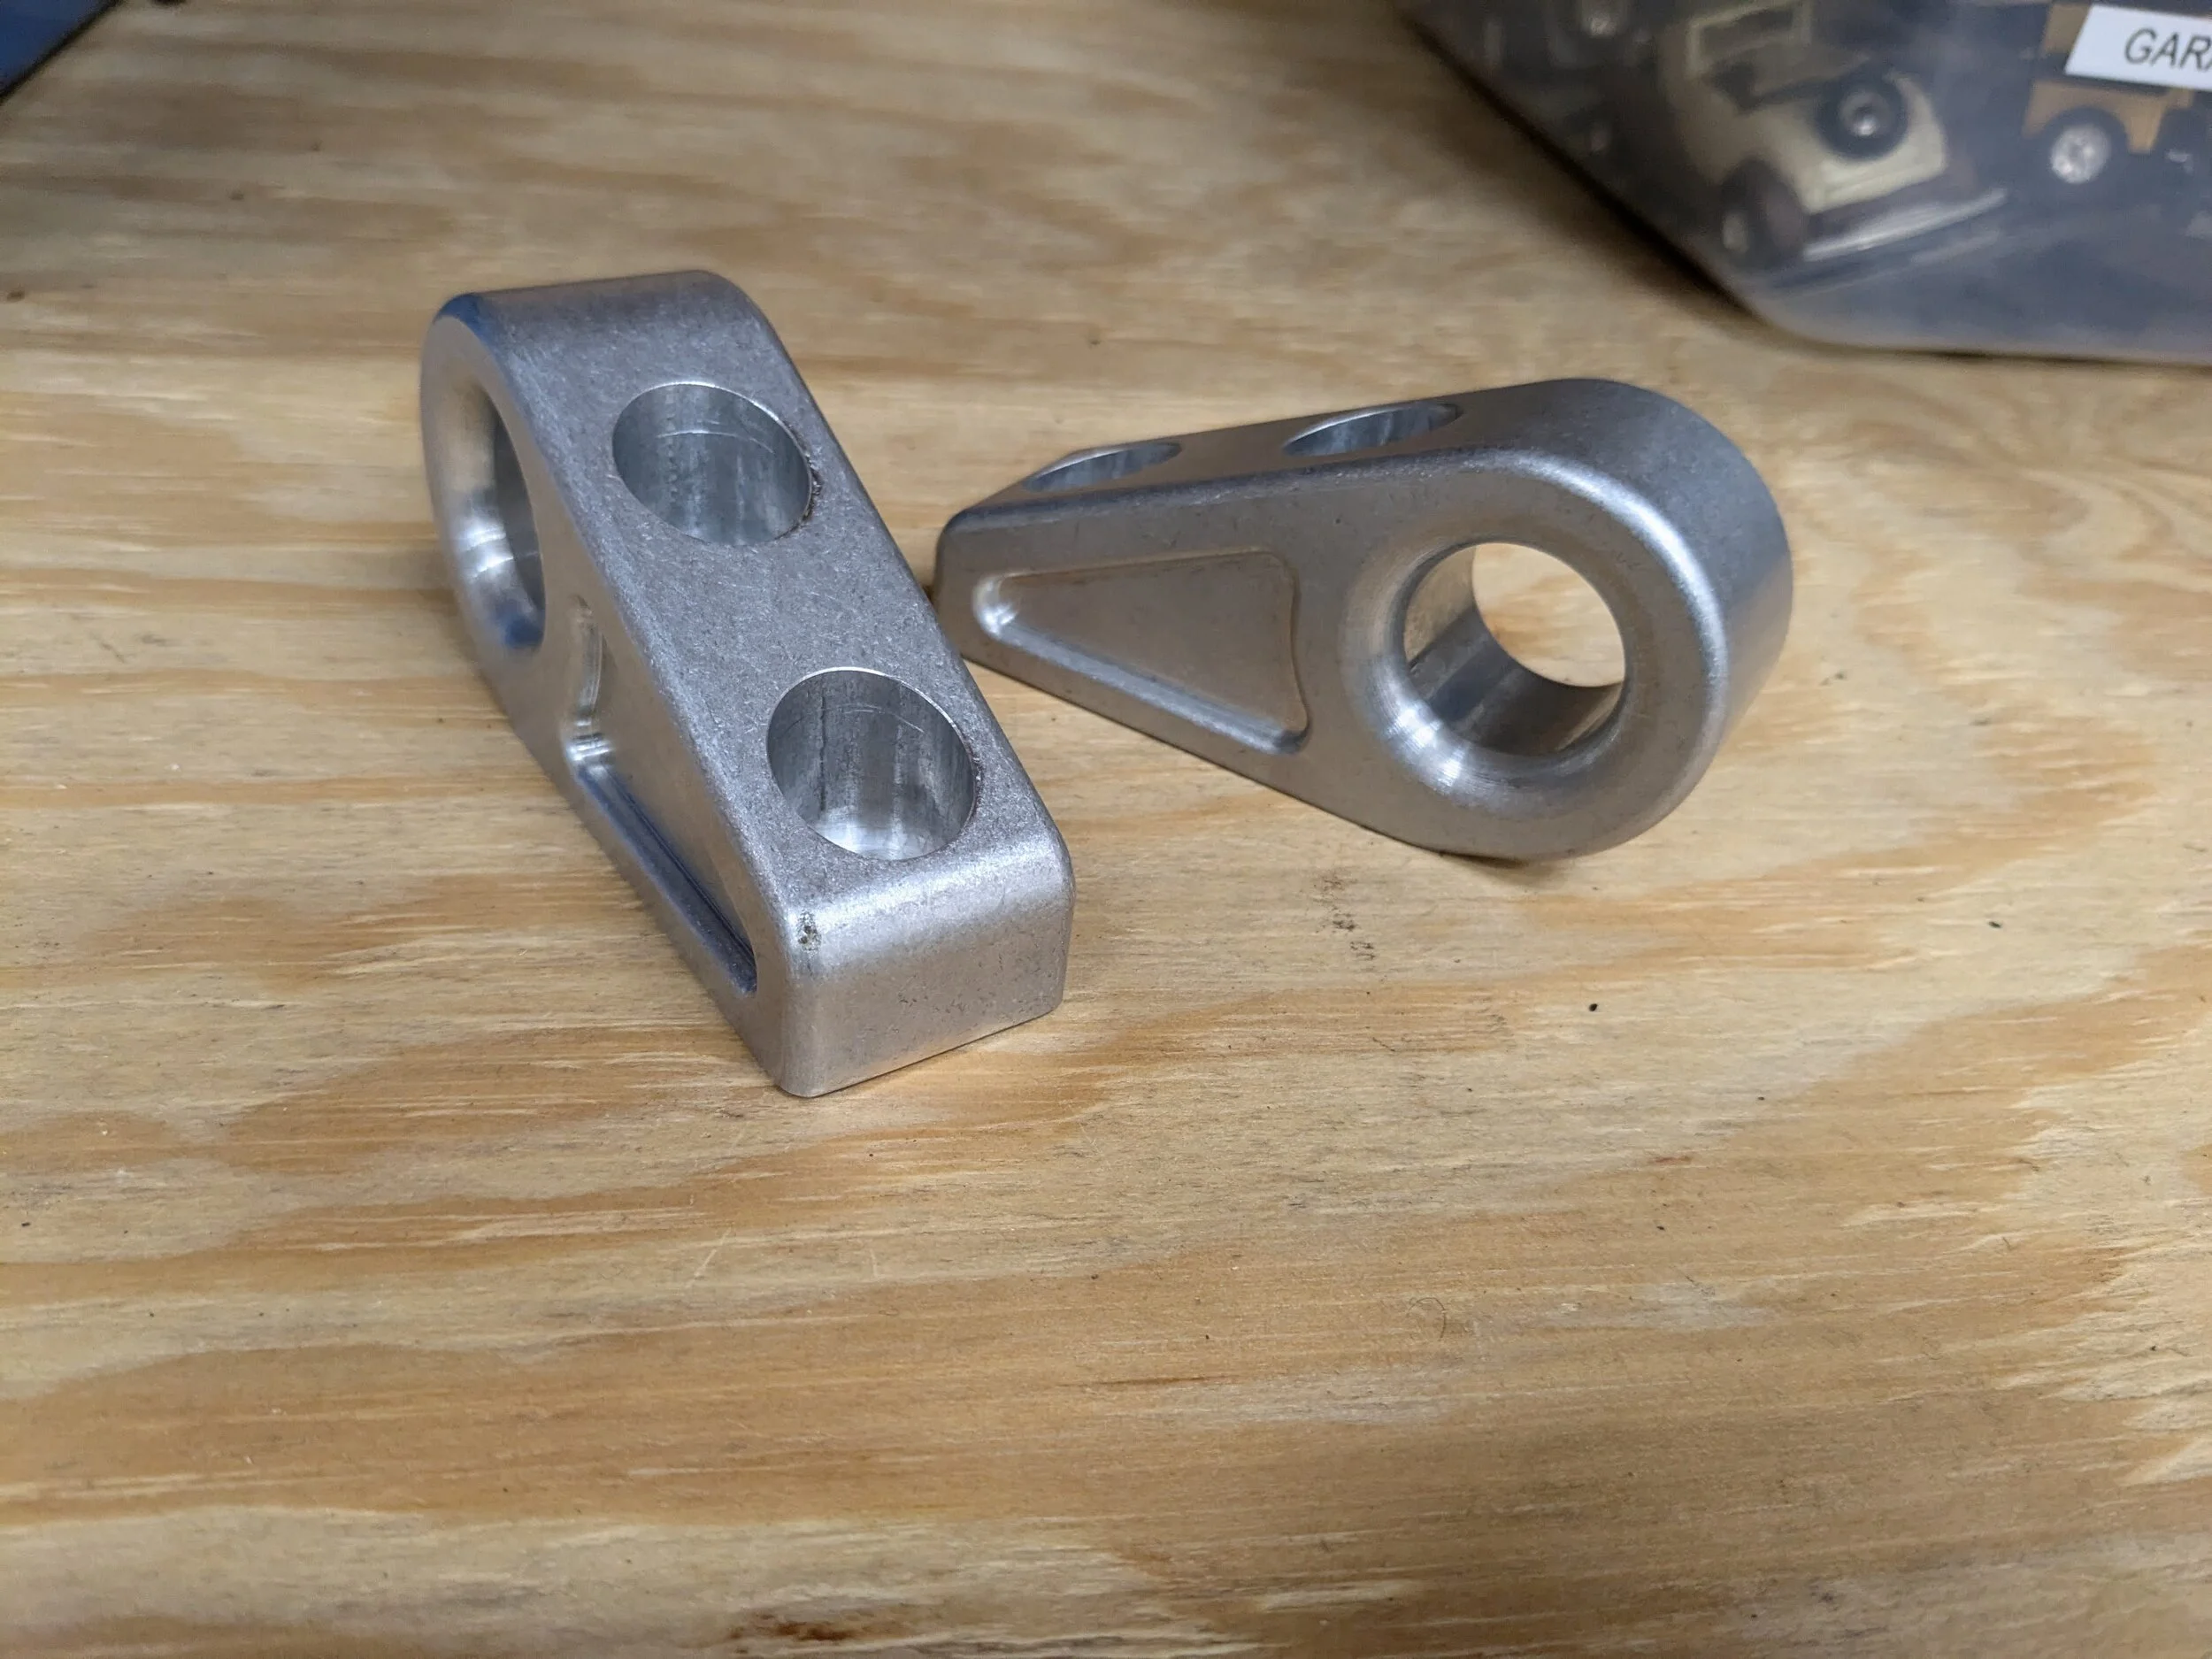
Inching closer to getting the Jeep in to start painting the frame so I can get the bumper install (after sanding it down).
Going to keep these steel, rather than the painted black I did on the original Rokmen hardware.
Ordered these earlier for some Phillips on another part of the Jeep. Fit great on this slider hardware. Just generic brand off Amazon.
@sunnysideup_lj reached out after I commented on @jjvw's build and his matte shackle mounts. These things are awesome and insanely light when compared to the OEM steel hooks they'll replace on the new aluminum @Fluxor bumper.
I wanted matte and @sunnysideup_lj had already run these through his tumbler to give a finish I was looking for to match the (future sanded) bumper's look.
Inching closer to getting the Jeep in to start painting the frame so I can get the bumper install (after sanding it down).

I think you read my post yesterday in my build thread. In it, I talked about deburring parts. One reason I deburr everything obsessively is that it helps prevent paint chipping on the edges like this:I did poor prep of the matting plates for the sliders...
I don't want to damage the existing coating because it's held up strong over the 10 plus years..
You can see the gold coating on the plates here:
Taking that sharp edge off will go a long way to preventing this type of chipping because it's tough to get paint to stick to the point of that 90° corner. It ends up very thin, and the slightest ding will lift the paint, and once a tiny spot lifts, the chipping accelerates. Personally, I wouldn't worry about taking the zinc plating off, but that's a personal call. You have to choose between form and function. I recently had to make that choice with the steel mounting brackets on the Savvy gas tank skid. I felt like the sharp corner edges would cut the gas tank, so I decided to radius the edges generously. Doing so obviously took the zinc plating off, so I had them powder-coated.
Thanks for a great recommendation! McMaster is my go-to, and has been for decades, but their minimum quantity levels are frustrating at times. How's the shipping cost for Bolt Depot? Reasonable?Went back to my old reliable source for hardware at boltdepot.com ... McMaster had me buying quantity up to 25 and it just became cost prohibitive. Bolt Depot does a great job on providing single unit purchasing and packages them excellently. Can't recommend them enough!
If you really are using a flap disk, @mrblaine convinced me to switch to a fiber disc to grind flat objects, and as usual, he was spot on. With the flap discs, because they aren't flat, you're constantly grinding grooves into the flat surface. The fiber disc is flat, so if you mind the angle you are holding it relative to the work piece, you can really do a much better job getting a flat finished surface. These discs are what Mr. Blaine recommended, and I use these backer plates for them. They really are a game-changer!
As I think I mentioned in my build thread when you asked, after those, I just run 40 grit discs on my random orbital sander, and unless is a glossy, clear-coated surface, I simply paint over that.
Similar threads

- Replies
- 13
- Views
- 779

- Replies
- 8
- Views
- 1,918

- Replies
- 30
- Views
- 5,545

- Replies
- 26
- Views
- 5,874


