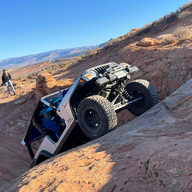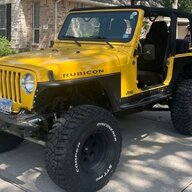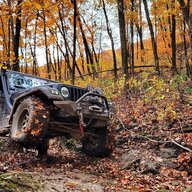
Deep East Texas LJ Build

We have SMORR scheduled for March, but nothing else. Sand Hollow was scheduled for January, but we had to cancel. We'll for sure do Barnwell and Hot Springs because they are so close. We need to try to link up.

Most of those places y'all mentioned, I have never been to. I'm new to the game and have only visited Barnwell, Sand Hollow, SMORR and Hot Springs.

I'll want to do the stretch at some point, but my front axle is too weak to worry about anything else. Once I am happy there, I have a few other "house keeping" things but would like a little longer wheelbase.
 
Last edited:
I'll have some pretty built TJ rubi axles for sale pretty soon. Chromoly with full C clips, WJ knuckle swapped, ARB diff covers, pretty new ball joints, all over the knuckle, Still 4:10s though. I'll make someone a pretty good deal on them.

2025.07.04 SMORR 06.jpg
 
We have SMORR scheduled for March, but nothing else. Sand Hollow was scheduled for January, but we had to cancel. We'll for sure do Barnwell and Hot Springs because they are so close. We need to try to link up.

Most of those places y'all mentioned, I have never been to. I'm new to the game and have only visited Barnwell, Sand Hollow, SMORR and Hot Springs.

I'll want to do the stretch at some point, but my front axle is too weak to worry about anything else. Once I am happy there, I have a few other "house keeping" things but would like a little longer wheelbase.

I'm anxious to get up to Hot spring been on bucket list since I got the jeep. We'll have steering fixed this weekend hopefully and jeep will be ready to roll. Katemcy took out tie rod at the Rock Krawler even weekend before thanksgiving.
 
  • Like
Reactions: Deep East TX LJ
I'm anxious to get up to Hot spring been on bucket list since I got the jeep. We'll have steering fixed this weekend hopefully and jeep will be ready to roll. Katemcy took out tie rod at the Rock Krawler even weekend before thanksgiving.

Hot Springs is a great park. I am told it is on a completely different level after a rain!
 
The holidays and the weather have slowed me down, but I need managed to check the box on another small project. I was gifted what I think is a Quadratec QRC Front Bumper. Maybe not the most high-end option. But certainly, an upgrade to the stock bumper I was running.

I didn't like the look with my Motobilt Highline Fenders so I took a cutting wheel to the bumper and made some slight mods. I am partial, but I think it came out great. See before and after pics.

Next on the list is replacing my stock fuel tank with Motobilt's 19 Gallon Fuel Cell. Then, I bought front and rear JK Rubicon Dana 44 axles that I will plug in.

IMG_1775.jpeg


IMG_1865.jpeg


IMG_1868.jpeg
 
The holidays and the weather have slowed me down, but I need managed to check the box on another small project. I was gifted what I think is a Quadratec QRC Front Bumper. Maybe not the most high-end option. But certainly, an upgrade to the stock bumper I was running.

I didn't like the look with my Motobilt Highline Fenders so I took a cutting wheel to the bumper and made some slight mods. I am partial, but I think it came out great. See before and after pics.

Next on the list is replacing my stock fuel tank with Motobilt's 19 Gallon Fuel Cell. Then, I bought front and rear JK Rubicon Dana 44 axles that I will plug in.

View attachment 671172

View attachment 671173

View attachment 671174

1000x better!!! Looks good!
 
The holidays and the weather have slowed me down, but I need managed to check the box on another small project. I was gifted what I think is a Quadratec QRC Front Bumper. Maybe not the most high-end option. But certainly, an upgrade to the stock bumper I was running.

I didn't like the look with my Motobilt Highline Fenders so I took a cutting wheel to the bumper and made some slight mods. I am partial, but I think it came out great. See before and after pics.

Next on the list is replacing my stock fuel tank with Motobilt's 19 Gallon Fuel Cell. Then, I bought front and rear JK Rubicon Dana 44 axles that I will plug in.

View attachment 671172

View attachment 671173

View attachment 671174

Niiice.
 
  • Like
Reactions: Deep East TX LJ
The latest modification to the LJ was the installation of the 19 Gallon Fuel Cell from Motobilt. I bought the package that includes the fuel cell mount, roll over valve, fuel filler cap and fuel pump clamping ring.

I made this modification for three primary reasons.

  • I had EVAP System problems that I could not correct. It would take 15 minutes or more to fill the tank. Hated the constant check engine light.
  • A buddy had the fuel cell package and made me a heck of a deal.
  • I think they look cool.
If you do it like I did, you will need the following items:

  • Permatex 80016 Form-A-Gasket number 2 Sealant
  • (2) Hose Fittings SUM-220765B
  • (1) Hose End SUM-220887B
  • (1) 3/8” Adaptor Fitting -6 AN RUS 640853
  • (1) 5/16” Adaptor Fitting -6 AN RUS 640863
  • Stainless Steel Braided Hose -8 AN
  • Stainless Steel Braided Hose -6 AN
  • 5/16” Fuel Hose
  • Small Hose Clamps
  • Cut the EVAP System nipple of your OEM Fuel Tank
  • A quiet fuel pump. I ended up with the Delphi FG0924
Use the instructions from Motobilt to prepare the fuel pump clamping ring.

Setting Up Your Fuel Line:

Use -6 AN Stainless Steel Braided Hose. Cut by wrapping it very tight with electrical tape and use a cutoff wheel. Add your Hose Fittings SUM-220765B with small hose clamps and some of the sealant. Using a little more sealant on threads, add your adaptor fittings. 3/8” Adaptor Fitting -6 AN RUS 640853 goes to the fuel pump and 5/16” Adaptor Fitting -6 AN RUS 640863 goes to the hard line under the jeep.

Setting Up Your Vent Lines:

Use the -8 AN Stainless Steel Braided Hose. Cut by wrapping it very tight with electrical and use a cutoff wheel. Add the SUM-220887B 90 degree hose end. Use some of your sealant on the threads and screw into the fuel cell. On the other end, use a piece of 5/8” fuel line to sleeve over the -8 AN Stainless Steel Braided Hose and the nipple you salvaged from your OEM tank. Use sealant and small hose clamps to piece it all together. This plug into your existing EVAP system under the jeep on the passenger side.

I used sealant on threads of the rollover valve and screwed into the fuel cell. I added 5/16” fuel line from the rollover valve to under the jeep.

Setting Up Your Fuel Pump Plug:

All you have to do is cut the four wires and lengthen them by splicing in new wire. I added close to 3’ which was more than enough.

Next up, JK Rubicon Dana 44s with 5.13 Yukon Gears, Yukon Chromoly Shafts, Poison Spyder Diff Covers, Front is Trussed, Sleeved and Gusseted, Rough Country HD Ball Joints, HD Tie Rod Ends and a Power Stop Big Brake Kit.
IMG_2287.webp
IMG_2286.webp

IMG_2273.webp
 
The LJ has developed too much dead space in the center of the steering wheel. Playing around on the rocks, it doesn't matter. But, it's dangerous to drive on the road.

Looking over everyone's advice on tracking down the culprit(s), I found the Lower Steering Shaft Support Bearing needed replacement. Apparently, they are notorious for poor design and eventual failure. The stock bearing was well past its lifespan.

I upgraded to the aluminum Borgeson design https://www.borgeson.com/tj-shaft-support-bearing-97-06

Also, I found conflicting opinions on the M.O.R.E. Steering Shaft Riser Bracket, but I figured it couldn't hurt. I have a 3.5" suspension lift, 1.25" body lift and 1.5" engine mount lift. It makes sense that the new bracket would help keep angles correct. https://www.quadratec.com/products/12590_042X_PG.htm

You can see big differences in the pics between the old and new parts.

After the install, the steering is mildly better. But, not good enough.

The u-joints on the steering shafts seem to be tight.

There is a lot of play inside the steering box. Moving the shaft by hand it is not tight at all. I assume adjustment would be a temporary fix at best. Looks like purchasing a new steering box is next.

1.webp


2.webp


3.webp
 
Update to the steering dilemma. The problem was the steering gear box.

Not a surprise with a 21-year-old vehicle with 132K miles.

The first pic shows to two sets of marks. The yellow marks indicate how much play I had before replacing components. The red marks indicate how much play I had after replacing the lower steering shaft support bearing.

The new box from Detroit Axle has zero play and makes a huge difference.

Removal:
1. I pumped as much of the old fluid out of the reservoir as possible.
2. Remove the pitman arm.
3. Remove the bolt from the lower steering shaft.
4. Secure your steering wheel so it doesn't rotate. I wrapped the seat belt through the steering wheel and fastened it.
5. Remove the three mounting bolts. You can let the box hang by the power steering lines, they are plenty strong.
6. Remove the power steering lines.
7. Let as much fluid drain as possible.

Install:
1. Add a small amount of grease to the splines of the gear box and insert into the lower steering shaft. There is a flat spot on the splines and inside the coupler giving only one possible way for it to fit. Start to thread the bolt back in, but don't tighten it. That allows more flexibility when getting everything else in place.
2. Replace the o-rings on the power steering lines.
2. Install the power steering lines. They are different sizes and impossible to mix up.
3. Install the three mounting bolts. These should be torqued to 70 ft/lbs.
4. Install the pitman arm. It may be easier if the tires are off of the ground at this point. You will have to do in the next couple of steps anyhow.
5. The pitman arm nut should be torqued to 185 ft/lbs.
6. Remove the seat belt from your steering wheel so you rotate the steering shaft enough to tighten the bolt.
7. Top off with ATF-4 fluid. Rotate wheels all the way to left and right. Let sit for a minute and top off again. Repeat until full.
8. Repeat step 7 with the engine running until fluid is full.
9. Test drive and inspect your work.

8.webp


4.webp
 
Last edited: