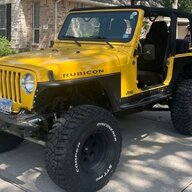
The Pickle LJ

I was looking back at your last post to refresh myself for your latest update and then something relevant hit me....

I'm about to install a Midland MXT275 and I'd seen plenty of pics of it mounted in the driver footwell. I already ran the 12V line to the driver footwell, modified the mounting bracket to accept 1/4" bolts to go into nutserts, and I have the ethernet port ready to go into the dash switches area.

I'm all ready - just need a few minutes to bite the bullet and drill in the nutserts.....

And then I see you mounted yours in the passenger footwell!!

View attachment 687534

  • I plan to run the coax up the passenger side - shorter and less complicated (not through the dash) run
  • Aux (Second OEM) Fuse block is already on the passenger side - shorter run (I can just pull back the line I ran through the dash already)
  • I haven't run ethernet yet - zero time wasted and about the same length to either footwell
Oh damn - did you just convince me to go to the passenger footwell??

Only question - how does it appear it will far in the footwell with passengers? Meaning with passenger feet, as passengers have less to pay attention to - no pedal action - verses the driver well. Seems pretty tucked up there in your install.

In my TJ I had the MXT275 mounted on the passenger side, with nutserts into the console. On the LJ, I put it on the driver side, using Velcro. Both have worked fine, with no clear winner of one mount location being better than the other. I moved to the driver side for access and keeping it out of the way of my passengers.

20260509_143423.webp
 
  • Like
Reactions: FarFire70
In my TJ I had the MXT275 mounted on the passenger side, with nutserts into the console. On the LJ, I put it on the driver side, using Velcro. Both have worked fine, with no clear winner of one mount location being better than the other. I moved to the driver side for access and keeping it out of the way of my passengers.

View attachment 687540

Thanks for the feedback. I have the dash port planned so I'm less concerned on access — you did hit on my concern on the passenger angle. Any actual issues or just a general concern to move it away from them/there?
 
  • Like
Reactions: Irun
Thanks for the feedback. I have the dash port planned so I'm less concerned on access — you did hit on my concern on the passenger angle. Any actual issues or just a general concern to move it away from them/there?

It's been my experience that any passengers I've had, primarily when wheeling, tend to bounce around more, sometimes in exaggerated movements. Since I'm holding onto the wheel, and controlling pedals, any movements I make are smaller and not exaggerated.

I need to do a dash port, because that will help keep the cable away from the shifters!
 
  • Like
Reactions: FarFire70
Thanks for the feedback. I have the dash port planned so I'm less concerned on access — you did hit on my concern on the passenger angle. Any actual issues or just a general concern to move it away from them/there?

Yeah, when sitting it’s not really noticeable, I plan to put a piece of sheet metal or plastic there just to keep the passengers from kicking it accidentally, other than that I didn’t want it in my way so I pushed it as far back and up as I could without putting the cables at a weird angle. Time will tell how it does, I 3d printed a mount for my Ethernet side and glued it to the back of a blank on my switch panel. I’m not super worried about the location of the box though.
IMG_2072.webp
 
  • Love
Reactions: FarFire70
IMG_2074.webp

Today’s project was getting the bumper trimmed to clear the power steering box after relocating, need to decide a couple more things before I send it off again and verify the winch will clear the ps box. Tomorrow I will probably work on the trackbar and finish up my box supports, clean and paint the front of the frame.
 
Yeah, when sitting it’s not really noticeable, I plan to put a piece of sheet metal or plastic there just to keep the passengers from kicking it accidentally, other than that I didn’t want it in my way so I pushed it as far back and up as I could without putting the cables at a weird angle. Time will tell how it does, I 3d printed a mount for my Ethernet side and glued it to the back of a blank on my switch panel. I’m not super worried about the location of the box though.
View attachment 687588

Appreciate the additional pic! I am really leaning this way - solves so many challenges with just adding one that can be resolved with your mentioned sheet metal (or 3D printed) cover to protect the ports.

I too 3D printed a dash ethernet adapter for the 3d printed switch panel (but I didn't print the panel) I'm putting in at the bottom 1/3 of the center dash to replace & expand the OEM panel.
 
Longer update today 🙌 going from oldest updates to newest
After getting the power steering box done, I tried to rig up the trackbar with the Genright trackbar mount I bought, but it simply wasn’t long enough to work with this setup. so I built my own and finished plating the front of the frame.
IMG_2217.webp

IMG_2220.webp

After that my PSC ram showed up, and I couldn’t punt my ram where I had originally planned, so I build my own mount that moves the tie rod side mount to a more favorable position anyways.
IMG_2262.webp

att.GMlO06GvZbEKoDoWFZi_TBTQsAjP6XLzn42zuNNZhAk.webp

After I moved my drag link and tie rod I didn’t like that I no longer had a dual shear box, so I added braces to hopefully mitigate any slop on the ends.
IMG_2317.webp

Armor came back from paint, and got it all installed, got everything all lined up, just held off on putting the sliders on until I’m get a little closer to completion so I can do wiring and etc
IMG_2341.webp

In addition to this, I built spacers for the winch to clear the power steering box, wired the light bar and pods, rerouted my fuel lines to clear the upper control arm, built some custom frame mounts for the two post lift, finished the tailgate, wired the license plate and third brake light, and put the windows back in so I could clean up the inside a bit, shocks are on order.
IMG_2562.webp


IMG_2246.webp


IMG_2246.webp
 
Big gap to cover since my last update so I will probably spread it out over a few posts.

I didn’t have enough space between my lower control arms for the fuel lines to stay in the pocket along the inside of the frame rail, so I removed the intermediate lines in the fuel system. In my case I had 2 Evap and 1 supply on the 04.

1786592488463.webp
1786592494643.webp


After consulting with a friend, I came to decision to convert the pushlok fittings over to 6 AN fittings and hose from Russell. I bought some cheap mounts off amazon, and made a couple threaded plates to bolt the mounts to. I got all this roughly mocked up before I went on vacation, and then moved on when I got back, so there is a little more to do with this down the road (yes mistakes were made). Unfortunately, these are the only pictures I have on me at the moment.
 
  • Like
Reactions: Wildman
After I got back from vacation, my shocks finally arrived. I cant remember if I’d written about what shocks I decided to go with, but a friend talked me into SDI E Clik series coilovers, 12” all around.

1786593464411.webp
1786593473160.webp


There was a mixup on specs, so although these worked for mockup, ultimately I sent them back to get a couple things adjusted and to swap the remotes for piggybacks. I was however able to get the upper coilover mounts spaced appropriately and welded up.
1786593490397.webp


Once I got the mounts welded up, I started working on frame position. Using a piece of PVC and setting the jeep at approximately ride height, I started ballparking how I wanted the coilovers to sit in the towers, and then pulled a full eye to eye measurement to set height for the tower and tacked them in place.
1786593507704.webp


After tacking up the shock towers, I pulled the springs off the shocks and test fitted them. A couple adjustments were necessary when they came back, and slight up/down, and angle changes were made, but mostly they were all pretty close.

1786593464429.webp
1786593529091.webp

1786593464447.webp
1786593534404.webp

1786593564848.webp


After all shocks were installed without springs, I flexed the jeep out on the lift to verify clearance, and after a couple tower adjustments, I maxed out the uptravel and all was well.

1786593464464.webp
1786593587373.webp

1786593604217.webp


After that, I got all of the shocks pulled back off, and shipped them back off to SDI to get switched over to piggybacks.
 
Took a little break from working on the Pickle while waiting for the shocks to return, and they had them swapped and turned around in just under a week and a half.
1786594725642.webp


Started with pulling all of the springs off and mounting again to make sure everything still cleared with the piggybacks vs remotes.
1786594736687.webp


After re-checking all angles the only spot that gave me cause for concern was where the cradle tucked up between the fuel tank crossmember. It did clear but it was close, so I marked it for clearance for later.
1786594757910.webp


After that I welded up the towers one corner at a time and tossing the shocks back on after cooling
1786594773171.webp


Since the jeep had been shifting on the lift the 1000+ times I set it down and picked it up, I took advantage of it sitting on its own weight to push it back and re-center it on the lift (had to get a glory shot of course)
1786594794263.webp


I got the jeep picked back up, and removed the shocks, and unbolted all of the steering and suspension from the axles to prep for more welding, grinding, and painting on the inside and outside of the frame. I added Gussets to all 4 corners, and did a slight cut down on the front shock towers just so they didn’t protrude as much from the frame. After that I finished the final welds and painted the shock towers.
1786594814204.webp
1786594826823.webp

1786594849638.webp
1786594861894.webp
1786594873439.webp


I did have a slight messup while welding the front shock tower. I set the torch over the frame rail and bumped it, which somehow hit the trigger and my AC condenser at the same time. So that was an easy oopsie that added an unnecessary few hours of swapping.
1786594904760.webp
1786594916452.webp


After that fiasco, I started cutting and mocking up the inner fenders around the shocks and shock towers. I also disassembled the steering, and bumper and sent them back off to powder since I had to do some decent clearancing.
1786595022397.webp

As soon as I get a chance to write up some more I will get another update uploaded!
 
Nice work.

I'm curious as to why you went away from the remote reservoir shocks. Have you flexed out the rear with the piggy backs in place? On mine the toughest place to get clearance was between the top of the coilover and the tire at full flex. On my rig, I would not have been able to do that with piggy backs.
 
Longer update today 🙌 going from oldest updates to newest
After getting the power steering box done, I tried to rig up the trackbar with the Genright trackbar mount I bought, but it simply wasn’t long enough to work with this setup. so I built my own and finished plating the front of the frame.
View attachment 692773
View attachment 692774
After that my PSC ram showed up, and I couldn’t punt my ram where I had originally planned, so I build my own mount that moves the tie rod side mount to a more favorable position anyways.
View attachment 692775
View attachment 692778
After I moved my drag link and tie rod I didn’t like that I no longer had a dual shear box, so I added braces to hopefully mitigate any slop on the ends.
View attachment 692784
Armor came back from paint, and got it all installed, got everything all lined up, just held off on putting the sliders on until I’m get a little closer to completion so I can do wiring and etc
View attachment 692772
In addition to this, I built spacers for the winch to clear the power steering box, wired the light bar and pods, rerouted my fuel lines to clear the upper control arm, built some custom frame mounts for the two post lift, finished the tailgate, wired the license plate and third brake light, and put the windows back in so I could clean up the inside a bit, shocks are on order.
View attachment 692789

View attachment 692776

View attachment 692777

Behind you quite a bit, but about to kickoff fab on front 60 as well, well noted on the track bar stuff as its one of the points we were discussing how best to do as we relocate steering box forward and up and manage the clearances.

Will be following, Great work!
 
Nice work.

I'm curious as to why you went away from the remote reservoir shocks. Have you flexed out the rear with the piggy backs in place? On mine the toughest place to get clearance was between the top of the coilover and the tire at full flex. On my rig, I would not have been able to do that with piggy backs.

I really didn’t want to have to figure out a way to mount their reservoirs is the most honest answer, the valving was a little off and it was supposed to come with piggybacks anyways, so I figured if I had to send them back, I might as well get what I requested. That and I honestly just prefer the look of piggybacks. I have flexed it out, and the reservoirs appeared to clear fine, I inset the towers in the frame as far as I could in the back . That’s all from a couple weeks ago though so I need to get another update posted.
 
Behind you quite a bit, but about to kickoff fab on front 60 as well, well noted on the track bar stuff as its one of the points we were discussing how best to do as we relocate steering box forward and up and manage the clearances.

Will be following, Great work!

Don’t weld up anything solid until you are sure you have your brackets where you want is my only advice lol, and be ready to redo everything twice. Good luck I’ll keep an eye out on your build!
 
Breaking News….
I haven’t had a chance to catch up the Pickle Build, but did want to give the ZJ an Honorable mention.

A couple months ago, my ’95 ZJ lost the heads, so I started looking for a replacement 4.0. I ended up swapping in a 4.0 out of a ’94 XJ that I was told “might” run.


The kicker was that I still had to work, didn’t have my tools, and only had from Monday evening until Friday afternoon to get everything swapped and running in time for the local mud bogs and sand drags.


Somehow, it all came together. The sand drags were tonight and the mud bogs are tomorrow, so it’ll be interesting to see how the ZJ does. I’ve still got a couple kinks to work out, but it’s officially back up and running.


Not bad for a caffeine-fueled week and an engine that was only supposedly going to run. 😅
IMG_4501.webp

IMG_4524.webp

IMG_4525.webp

IMG_4549.webp

IMG_4588.webp

IMG_4591.webp

IMG_4636.webp


Tomorrow I need to get the exhaust reconnected, but it ran great tonight, then it’s back to finishing El Pickle.
 
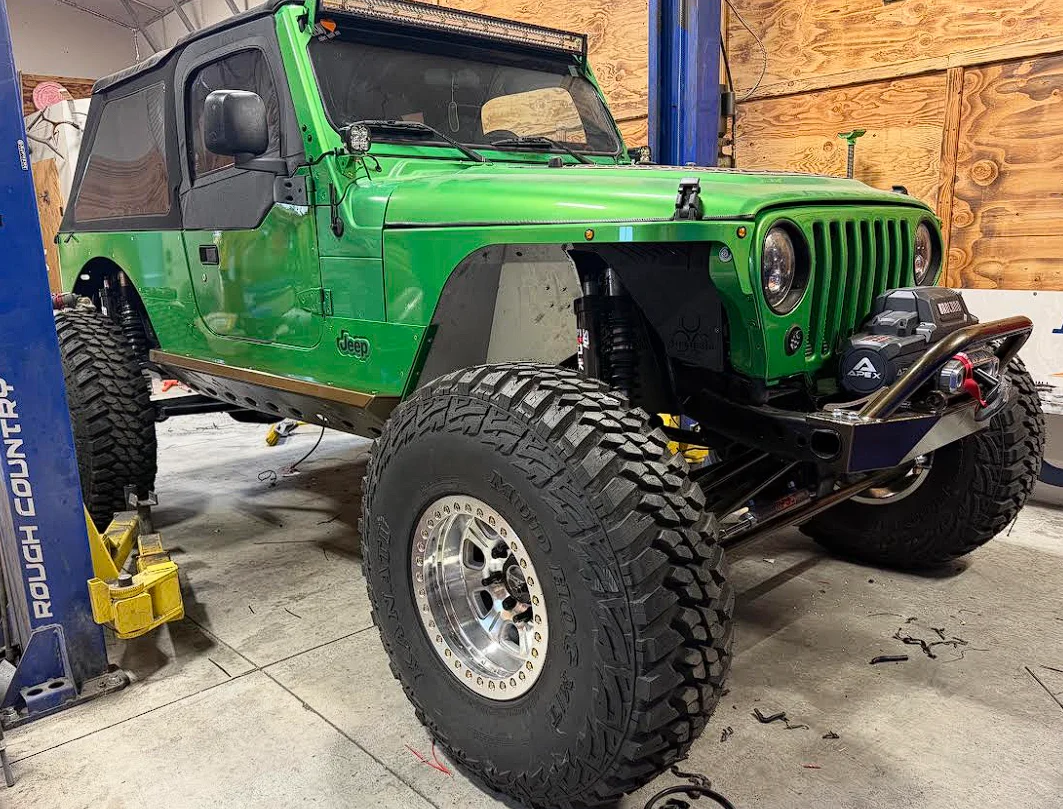
Leading off of my last post about the Pickle LJ, I had removed all of the suspension from the jeep, and trimmed the fenders. After that I cleaned up any and all gross welds I may have boogered up, and added a little bit of clearance on the crossmember that I cut out and gusseted just in case something shifts. Then I went back over all the raw metal on the frame and axles with paint and began reassembly. This picture is a little bit further along, but this is about how it sits at the moment.
1787977427705.webp


Putting my steering back together proved a little more difficult than I hoped, something got messed up in the threads on the tie rod (so I will be building a new one and use this one as a spare), But I was able to get it threaded in enough that it “shouldn’t” be a problem but better safe than sorry. A similar issue happened with the Ball Joint Eliminator brass sleeve, and the kingpin got all seized up in the sleeve. So, after many hours of curse words and sweaty work, I was able to get the pin out, and cut out the brass sleeve. As of now I have the new one in and its all torqued properly.
1787977353177.webp
1787977385082.webp
1787977686931.webp


So I don’t forget to mention it Nashville was asking about clearance in the rear on the piggybacks, so this one is for you :* I haven’t set preload on the shocks yet, so I was still able to clock the reservoirs just a bit retaining plenty of clearance, I have a pretty wide stance with this axle/wheel setup.
1787977723489.webp


After I was able to set the jeep back on its own weight with shocks, axles, and steering reattached, I started tackling wiring. I didn’t take a ton of photos, but I’m pretty sure ive ran about 2 miles of wiring in this thing, and it only took a little bit of trial and error to get all my switches dialed in. All the lights and lockers work properly. I also started wiring the SDI Eclick system through the jeep while I had all the line strewn about.
1787977220138.webp
1787977244093.webp

Testing the electronics is where I found out that I had a problem with my fuel line setup, clicking on the ignition, fuel would spray out of the system I built by the tank, after buying a couple variants of the same fitting, it would appear that I managed to knock the washer that sits in the fitting out, and didn’t think to check for it. Got a new o ring, tightened up all the fittings and all is well.

Here is some photos towards the tail end of getting all the underhood management and wiring taken care of. Still have a few loose ends I’m planning to tidy up tomorrow, but I think the wiring turned out very clean so far.
1787977294063.webp


Another task I got knocked off the list was building lines for my hydro assist. I tried a couple different routes before I took them back to be crimped to make sure I didn’t need to get different angled fittings. I also added some sleeve protectors and got them bolted in and tidied up.
1787977534158.webp
1787977589865.webp

1787977556149.webp
1787977630145.webp


I got measurements pulled for my driveshafts and swapped my rear 1310 output to a 1350 flange per suggestion of the guy building my driveshafts. He’s hopeful to get them knocked out this Saturday so there is a good chance I could be able to move this jeep around next week.
1787977660266.webp

The last big-ticket thing that this jeep needs to move was brakes. I pulled measurements and made a rough gameplan for brakes, still waiting on parts that will be showing up tomorrow. One corner’s lines showed up a day early so got to see what it would look like roughly. Still have to set up holders and etc.
1787977779652.webp

Since I’m waiting on a couple parts, I started bleeding the cooling system and power steering system tonight, and got to fire up the jeep for the first time in almost a year. It (much to my surprise) fired up no problem even with the fuel line fiasco. I will need to fill a can tomorrow, since there’s nothing left in the tank.
1787977824933.webp


And with that I believe we are all caught up. Hoping to be there for trail hero and see some of you guys!