Ok here is what I did
First off the little torx bolt comes loose when you are wheeling and I was afraid I was going to loose it so I bought a hitch clamp. It holds it tight so if I loose the bolt the plug won't go anywhere and it wont rattle:
https://www.amazon.com/gp/product/B01DOJGD2M/?tag=wranglerorg-20
Looks like mine is unavailable now, but you can probably find something like it if you want I want to say it was like 14 dollars or something like that. The bungie cord is doing nothing but being a place holder for a bungie cord, so disregard that.
As far as the jack I believe I bought 1 1/2 inch grade 8 bolts. I don't remember the size but they are just barely smaller than the holes in the plug. then I bought 4 nuts to go on them and 8 or so washers. So I took the bolts and shoved them in the holes in the angle then I put nuts on them and tightened them. Then I put flat washers on the studs to shim the jack out a little, and then the jack then two more washers then the final nuts. So in a sense they are double nutted on the angle.
I hope that makes sense.
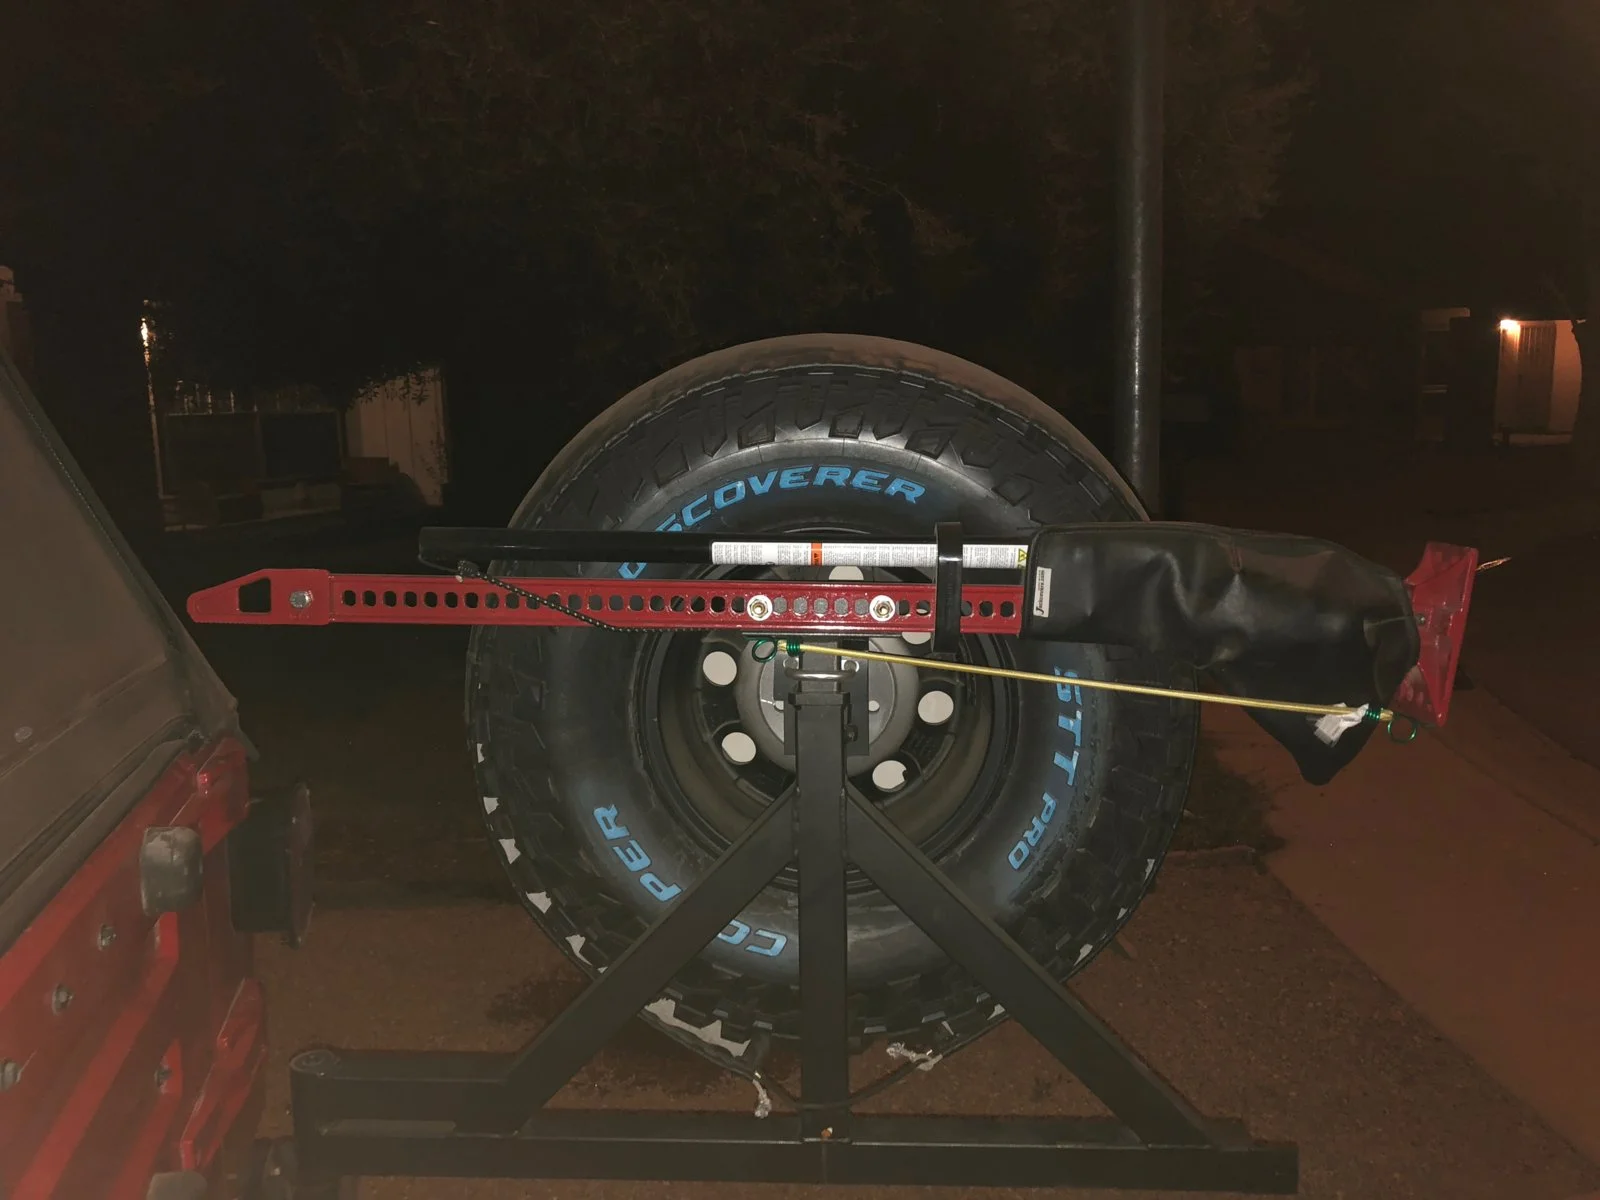
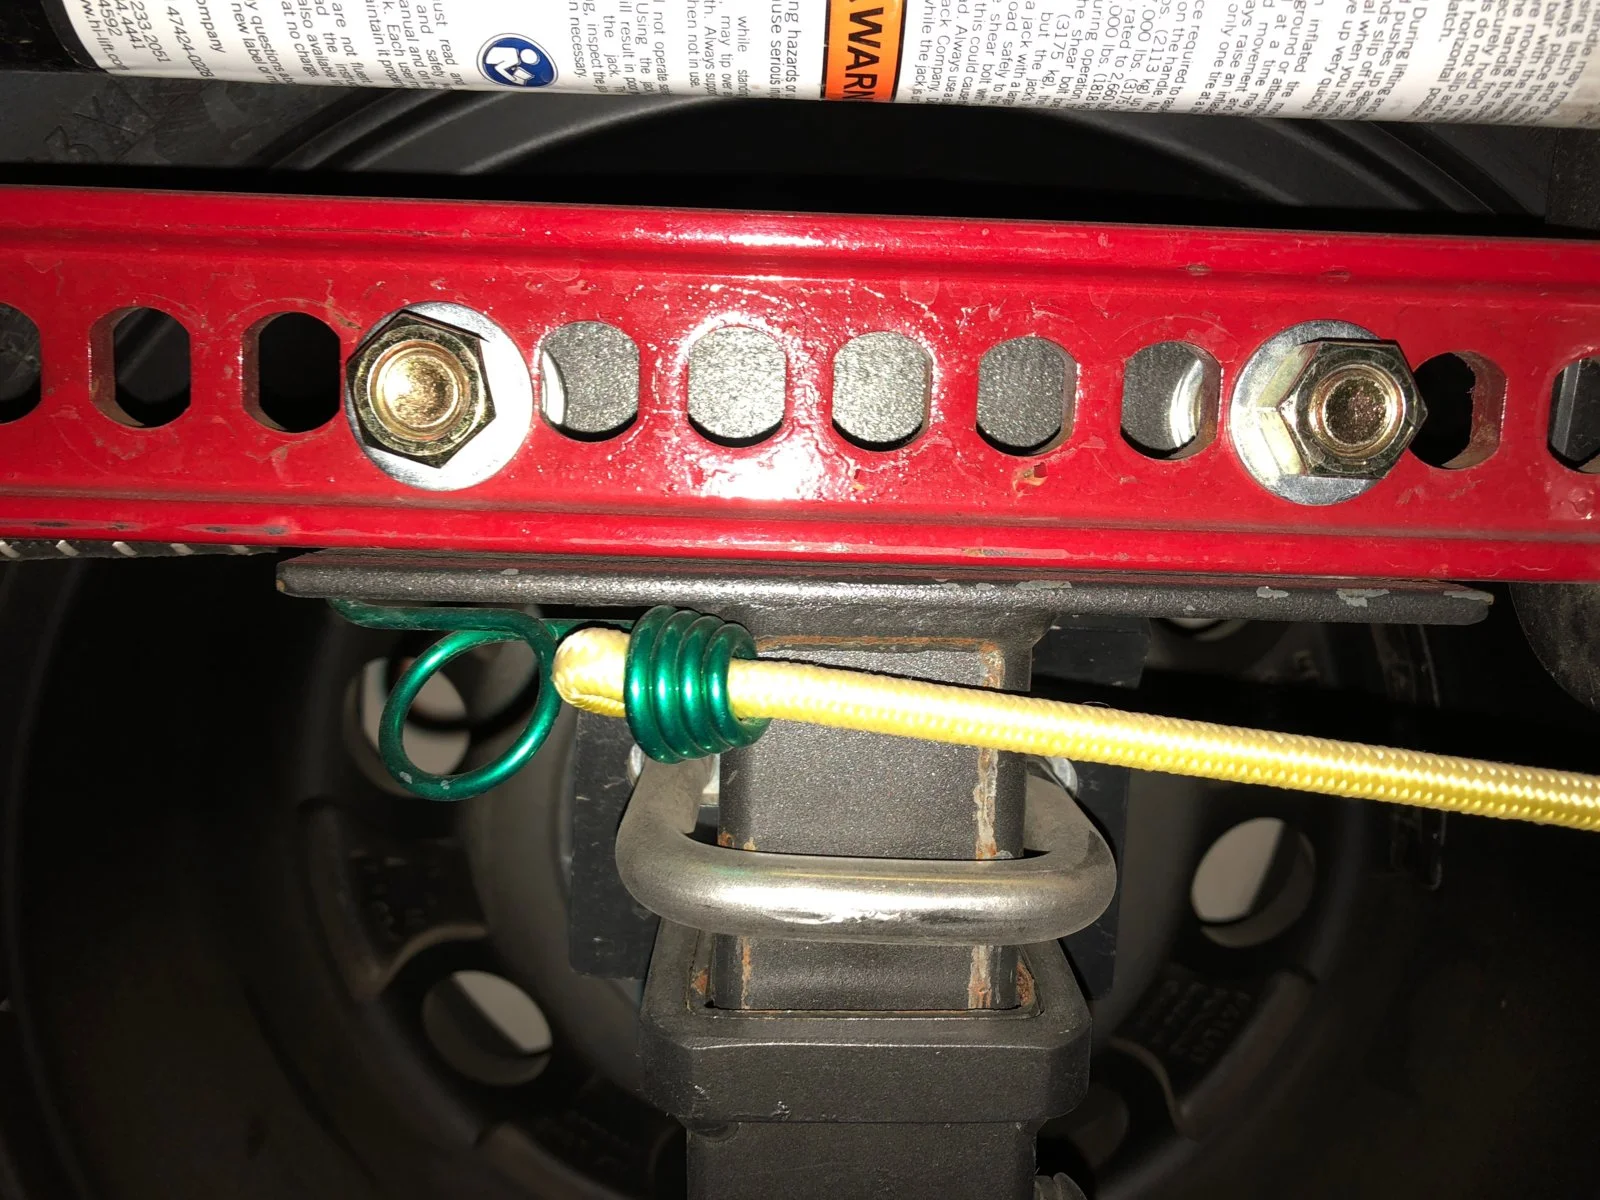
First off the little torx bolt comes loose when you are wheeling and I was afraid I was going to loose it so I bought a hitch clamp. It holds it tight so if I loose the bolt the plug won't go anywhere and it wont rattle:
https://www.amazon.com/gp/product/B01DOJGD2M/?tag=wranglerorg-20
Looks like mine is unavailable now, but you can probably find something like it if you want I want to say it was like 14 dollars or something like that. The bungie cord is doing nothing but being a place holder for a bungie cord, so disregard that.
As far as the jack I believe I bought 1 1/2 inch grade 8 bolts. I don't remember the size but they are just barely smaller than the holes in the plug. then I bought 4 nuts to go on them and 8 or so washers. So I took the bolts and shoved them in the holes in the angle then I put nuts on them and tightened them. Then I put flat washers on the studs to shim the jack out a little, and then the jack then two more washers then the final nuts. So in a sense they are double nutted on the angle.
I hope that makes sense.
Last edited: