


This post was originally written by Stu Olsen of stu-offroad.com.
Every now and then I'll do a write-up on an install that went on someone else's Jeep. I helped Les do his Super 44 axle swap a couple of months ago. He recently picked up a Currie Anti-Rock for his TJ. ScottK offered to host a wrenching party at his place so Les and I took him up on the opportunity. I did my radiator replacement and then we did Les' Anti-Rock.
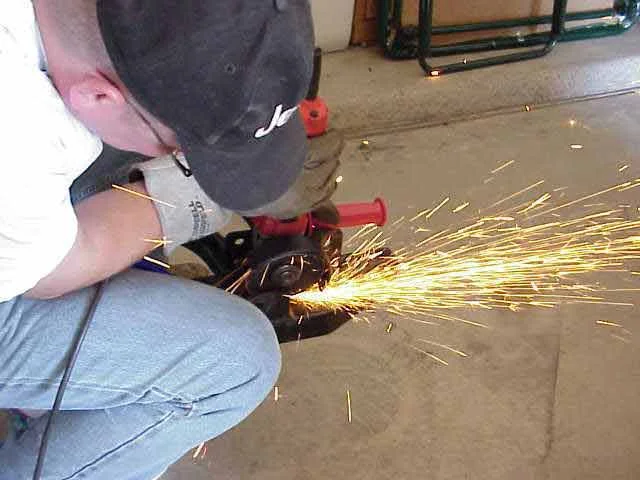
Les runs a Bullet Proof bumper on his TJ. The mounting brackets for the bumper cover part of the tubular cross member that the AntiRock mounts in. We all took a session with either the sawsall or the grinder. Here is Scott putting the finishing touches on with the angle grinder while Les and I read through the directions (yeah, OK, we admit that we did actually read them!)
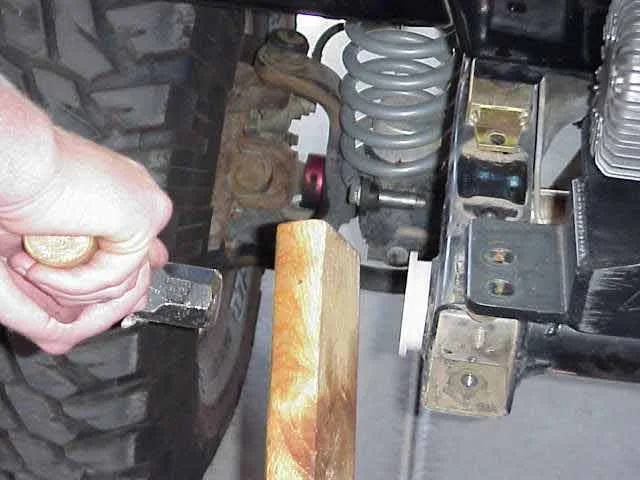
We used a piece of 2x4 and a good sized hammer to fully seat the nylon inserts into the cross member. Before you do this, be sure to check the inside of the tube to ensure there are no burrs that will interfere with the insert. On Les' TJ, one was nice and smooth and the other required a couple of passes with the die grinder before we placed the insert.
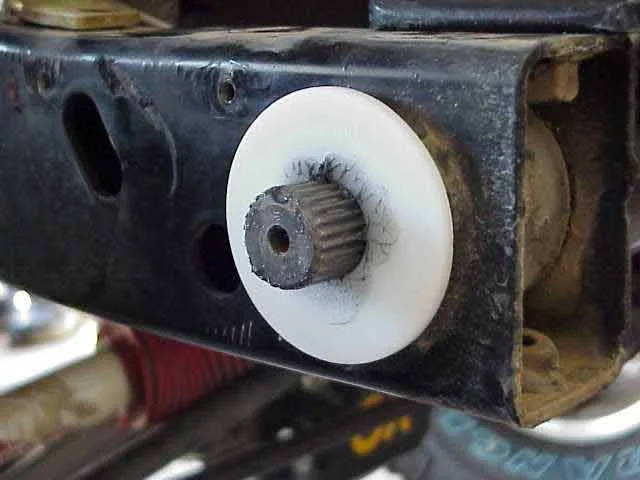
After both inserts are in place, apply a bit of grease to the end of the AntiRock bar before you tap it into place. The above photo shows the bar emerging from the opposite insert. Ensure that you have equal amounts of the shaft protruding from both inserts. We used the 2x4 on the end of the bar while tapping it into place with the hammer.
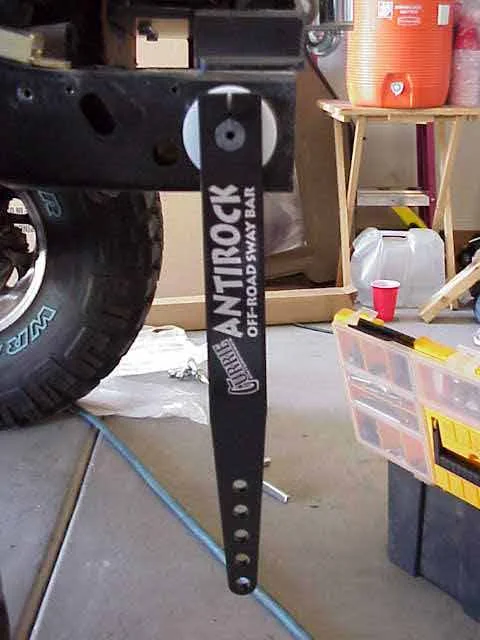
With the bar in place, slip the arms onto the end of the shaft. To make it easy to align both arms, install them vertically, rather than trying to hold them horizontal and hoping to get them parallel.
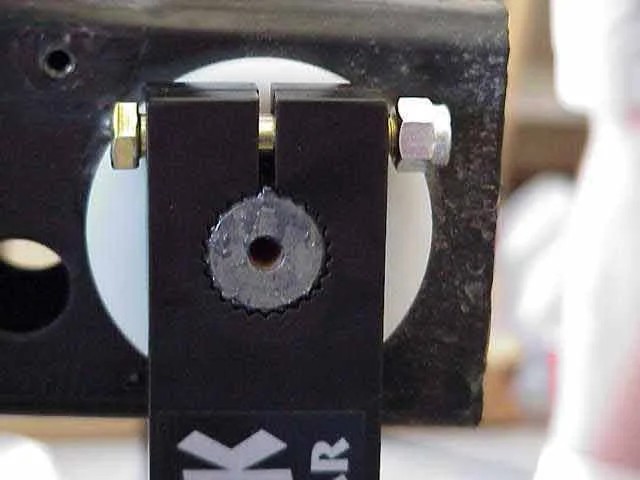
With the arms in place, very lightly tighten the bolt that holds it to the bar. You should be just able to barely move the arm back and forth on the bar. At this point, slide the the arm out to the end of the bar and just a bit further. When looking at the end of the bar, it should be recessed just a bit in the arm.
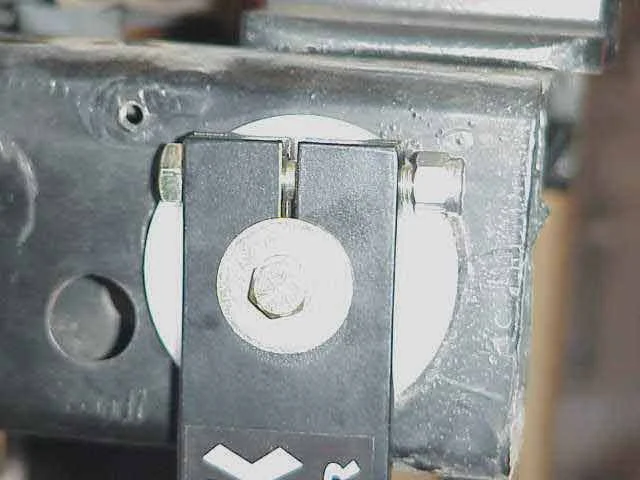
With the large washer and lock washer in place on the bolt, tighten the bolt in the end of the bar. This will push the arm back onto the bar and put it exactly flush with the end of the bar. Now tighten the bolt that clamps the arm onto the bar and you'll be good to go. Repeat this same process on the other end of the bar.
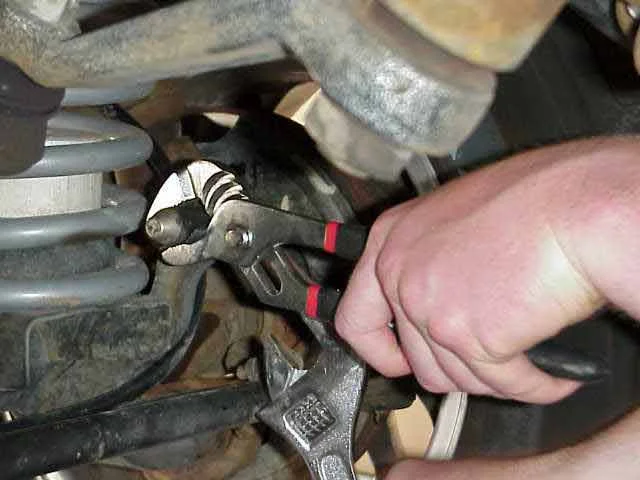
Oops....Les remembers he needs to remove his old sway bar disconnect pins. They sure did the job for him while he was using them. I am still thinking about putting an AntiRock on Lady one of these days. There are still a couple of other things I need to do first. (yeah, the never ending list of mods!)
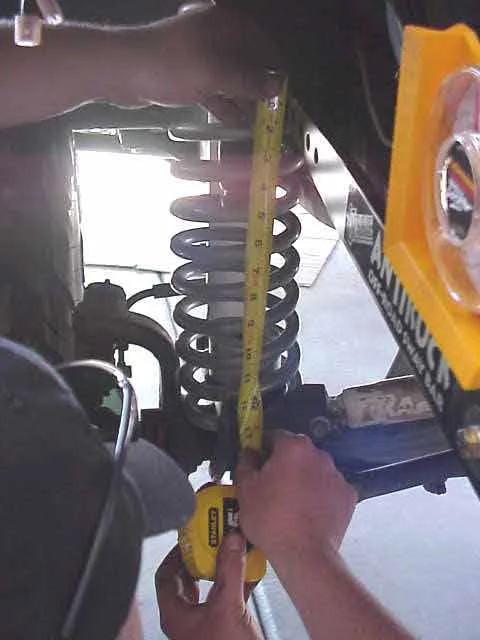
With the arms at their proper position, measure the distance between the two mounting points. You will need to select one of the mounting holes in the arm prior to taking this measurement. If need be, you can always change your mind and use a different mounting arm hole. It will be a compromise between on-road body roll and off-road flex. If you have a friend with an AntiRock, you might want to check with him/her and see what they suggest.
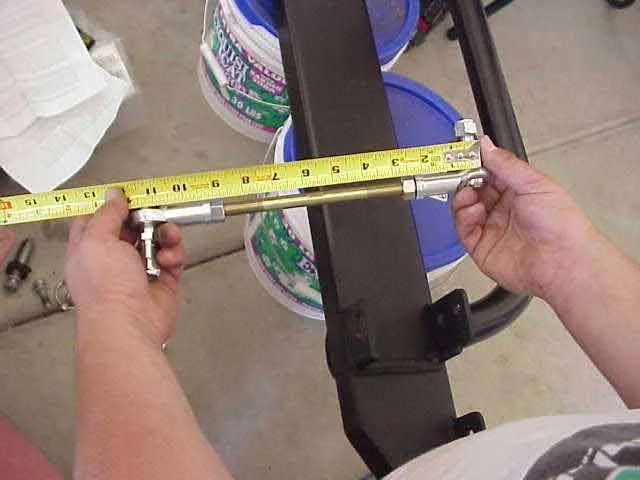
Adjust the link to the same dimensions that you measured on the vehicle. The threads on the links are pretty fine, so you should be able to dial them in so everything matches your measurements.
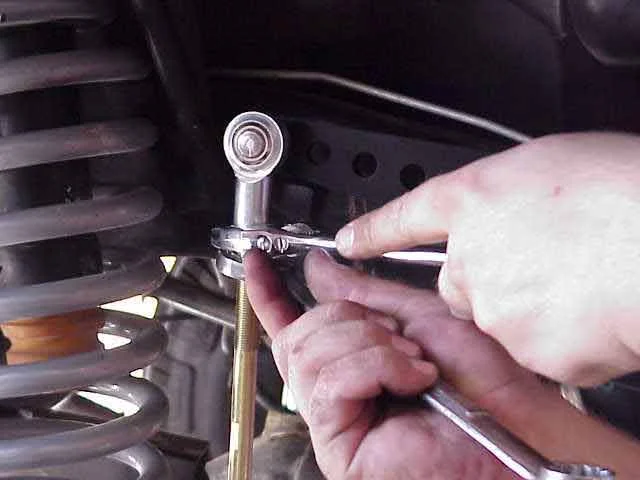
Insert the link into the arm hole and the hole where the disconnect pin was mounted. Tighten the mounting bolts and the snug down the jam nuts on the links. You should check all of your bolts after your first run to make sure none of them have backed off. It doesn't take long too long for a loose bolt or jam nut to cause a problem.
That is it. The install is finished and now all you have to do is go out and enjoy your brand new Currie AntiRock bar.
NOTE: I finally got around to installing an Anti-Rock on my TJ too. As expected, I have fully enjoyed having it. I run mine at the 2nd softest setting. I notice that I will lift a tire more on the trail than I previously did. I also notice that I don't have nearly the body sway when working my way over medium sized rocks and such. Much better overall control of the vehicle....perhaps even more noticeable for me since I usually run a hard top. On road....yes, it is softer than the factory sway bar and yes, it does lean more in the corners. But I drive a Jeep and not a little foreign import like my wife does. If I want to go fast around the corners, I'll use her car.
Every now and then I'll do a write-up on an install that went on someone else's Jeep. I helped Les do his Super 44 axle swap a couple of months ago. He recently picked up a Currie Anti-Rock for his TJ. ScottK offered to host a wrenching party at his place so Les and I took him up on the opportunity. I did my radiator replacement and then we did Les' Anti-Rock.
Les runs a Bullet Proof bumper on his TJ. The mounting brackets for the bumper cover part of the tubular cross member that the AntiRock mounts in. We all took a session with either the sawsall or the grinder. Here is Scott putting the finishing touches on with the angle grinder while Les and I read through the directions (yeah, OK, we admit that we did actually read them!)
We used a piece of 2x4 and a good sized hammer to fully seat the nylon inserts into the cross member. Before you do this, be sure to check the inside of the tube to ensure there are no burrs that will interfere with the insert. On Les' TJ, one was nice and smooth and the other required a couple of passes with the die grinder before we placed the insert.
After both inserts are in place, apply a bit of grease to the end of the AntiRock bar before you tap it into place. The above photo shows the bar emerging from the opposite insert. Ensure that you have equal amounts of the shaft protruding from both inserts. We used the 2x4 on the end of the bar while tapping it into place with the hammer.
With the bar in place, slip the arms onto the end of the shaft. To make it easy to align both arms, install them vertically, rather than trying to hold them horizontal and hoping to get them parallel.
With the arms in place, very lightly tighten the bolt that holds it to the bar. You should be just able to barely move the arm back and forth on the bar. At this point, slide the the arm out to the end of the bar and just a bit further. When looking at the end of the bar, it should be recessed just a bit in the arm.
With the large washer and lock washer in place on the bolt, tighten the bolt in the end of the bar. This will push the arm back onto the bar and put it exactly flush with the end of the bar. Now tighten the bolt that clamps the arm onto the bar and you'll be good to go. Repeat this same process on the other end of the bar.
Oops....Les remembers he needs to remove his old sway bar disconnect pins. They sure did the job for him while he was using them. I am still thinking about putting an AntiRock on Lady one of these days. There are still a couple of other things I need to do first. (yeah, the never ending list of mods!)
With the arms at their proper position, measure the distance between the two mounting points. You will need to select one of the mounting holes in the arm prior to taking this measurement. If need be, you can always change your mind and use a different mounting arm hole. It will be a compromise between on-road body roll and off-road flex. If you have a friend with an AntiRock, you might want to check with him/her and see what they suggest.
Adjust the link to the same dimensions that you measured on the vehicle. The threads on the links are pretty fine, so you should be able to dial them in so everything matches your measurements.
Insert the link into the arm hole and the hole where the disconnect pin was mounted. Tighten the mounting bolts and the snug down the jam nuts on the links. You should check all of your bolts after your first run to make sure none of them have backed off. It doesn't take long too long for a loose bolt or jam nut to cause a problem.
That is it. The install is finished and now all you have to do is go out and enjoy your brand new Currie AntiRock bar.
NOTE: I finally got around to installing an Anti-Rock on my TJ too. As expected, I have fully enjoyed having it. I run mine at the 2nd softest setting. I notice that I will lift a tire more on the trail than I previously did. I also notice that I don't have nearly the body sway when working my way over medium sized rocks and such. Much better overall control of the vehicle....perhaps even more noticeable for me since I usually run a hard top. On road....yes, it is softer than the factory sway bar and yes, it does lean more in the corners. But I drive a Jeep and not a little foreign import like my wife does. If I want to go fast around the corners, I'll use her car.


