Starrs
TJ Guru
I think that's why I would like the vinyl. I'm more into the matte finishes these days. A nice gunmetal grey in matte would be nice. Jeep has a nice blue I think it's called true blue. In a gold all day long tho. Go for it! Lol


Chief blue is a couple shades away from what I was looking atI think that's why I would like the vinyl. I'm more into the matte finishes these days. A nice gunmetal grey in matte would be nice. Jeep has a nice blue I think it's called true blue. In a gold all day long tho. Go for it! Lol
 . Matte would be really nice but after seeing a gloss vinyl I really don't see anything changing my mind. You should get it done as well, start the revolution?
.
. Matte would be really nice but after seeing a gloss vinyl I really don't see anything changing my mind. You should get it done as well, start the revolution?
.
After fighting the pinion nut, this was high on my list. I'm super stoked to run it through its paces! Especially with the upcoming modsNice! Gotta have a nice cordless impact gun. I have one as well, and it comes in handy so often!

 .[/QUOTE]
[QUOTE="
View attachment 27181
Really? I saw one on FB nearly 1 month ago that was being sold for 5k up north, it was a 4 cylinder with some rust
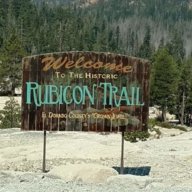
.
I can't bring myself to do that, I can barely use a spray can on a bumper and not have it run. Painting is something I'm still working on lol.
I see you added a bit below the post so I wanted to respond, the wrap is something I'm considering but after I run several trails in January like I'm planning too I really think its going to be nixed. The money could just be better spent elsewhere or towards a mom & pop paint shop. I'm not going to worry about it going forward but repainting is definitely in the back of my mind.View attachment 27296
I can't see how wrap would hold up against branches, brush, rocks, etc. Unless you don't encounter that kind of stuff. And 6K for a paint job is nuts.
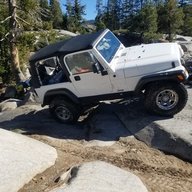

You could save some by renting a spring compressor at an AutoZone or the like. Looks awesome. AntiRock only in my dreams at this time. Maybe when the kids are grown, at least a few of them. They eat money, but worth every penny!Its time! It didn't take very long at all and since it was cold I was off to the MWR self service center!
Stripping the TJ:
View attachment 27512
Old sway bar mounts/bushings with RC Disconnects (going to JMT):
View attachment 27513 View attachment 27514 View attachment 27515
Removed the winch/power cables/headlight:
View attachment 27516
Front Bumper Removed:
View attachment 27517 View attachment 27518
Currie Antirock hardware:
View attachment 27519
I actually used copper slip on nearly everything, I've seen what road salt will do to this stuff first hand:
View attachment 27520
Even put copper slip on the frame hole to assist in setting the bushing:
View attachment 27521 View attachment 27522
Bushings set:
View attachment 27523 View attachment 27524 View attachment 27525 View attachment 27526
Setting the sway bar:
View attachment 27527 View attachment 27528 View attachment 27529
Arms installed:
View attachment 27530
Links installed:
View attachment 27531 View attachment 27532
Tires back on, AR position at ground level:
View attachment 27533
Bumper & winch reinstalled:
View attachment 27534
Outside finished product view:
View attachment 27535 View attachment 27536
All in all the install was very straight forward considering the last couple things I did were quite complex. I am not 100% on if I will need to cut the links or not (Currie designed the links to work with the 4" lift and I am at 4.25" currently so I assumed no cutting would be required). I will be buying a spring compressor and checking all of my measurements/bump stops pretty soon as I have an off road trip planned.
I wanted to add inspecting my vehicle, my battery cables are trash & will need to be replaced very very soon. My brother managed to kill my passenger full door handle, it no longer opens from the outside. I have really not been looking forward to replacing both handles but knew it was coming as they are really hard to open.
I've pulled the coils on my TJ 4 times, it about time I buy a $30.00 spring compressor from OEMYou could save some by renting a spring compressor at an AutoZone or the like. Looks awesome. AntiRock only in my dreams at this time. Maybe when the kids are grown, at least a few of them. They eat money, but worth every penny!
. Starting to try to build a tool collection so I have to stop walking 1 mile to Autozone.
They are suppose to be roughly 15° above the horizontal and just like my least favorite saying I am running into: I don't have an angle measurer *YET* but from research that angle does not really matter. What I found from an old post on WF from Blaine is:AR looks sweet! What angle are the arms supposed to sit at ride height? They look a little high to me, but I don't know much about the AR. Will they hit your bumper when you flex?