Working on a few things while my Jeep is down I figured I'd post what I wound up doing to raise up my transmission / t-case / front diff breathers, along with my locker compressor air input line.
We've had a metric shit ton of rain through the new year in the PNW. I put several thousand miles on my TJR during that time, and I would say nearly 90% of it was in the rain.
When I discovered that I had a bunch of mud and rain debris getting in behind my gas cap area, I took the cap cover off and saw that my t-case and rear diff breather tubes were terminating in a bad spot. Although I'm not planning to do any deep water crossings anytime soon (or ever), I still decided to relocate the rest of the lines somewhere higher and out of direct moisture.
My jaw kinda hit the floor when I realized that there was a tiny nipple with a small nylon vent cap on top of my transmission. I had to dig it out of an inch or two of mud that burried it under my shift lever. I had just succeeded in fighting off early stages of surface rust that were starting to form on my front diff component, so taking care of this was the next logical step.
I could not get any hoses to stay on the transmissiom breather nipple, given the taper and very short height. I did some research and found a webpage where a guy put a copper elbow over his to attach tubing. Went to my local hardware store and snagged ~4-5 different size elbows to test out, and i found that a 3/8" fit perfectly snug over it.
Here are the parts that I used to prototype the tubing connector:
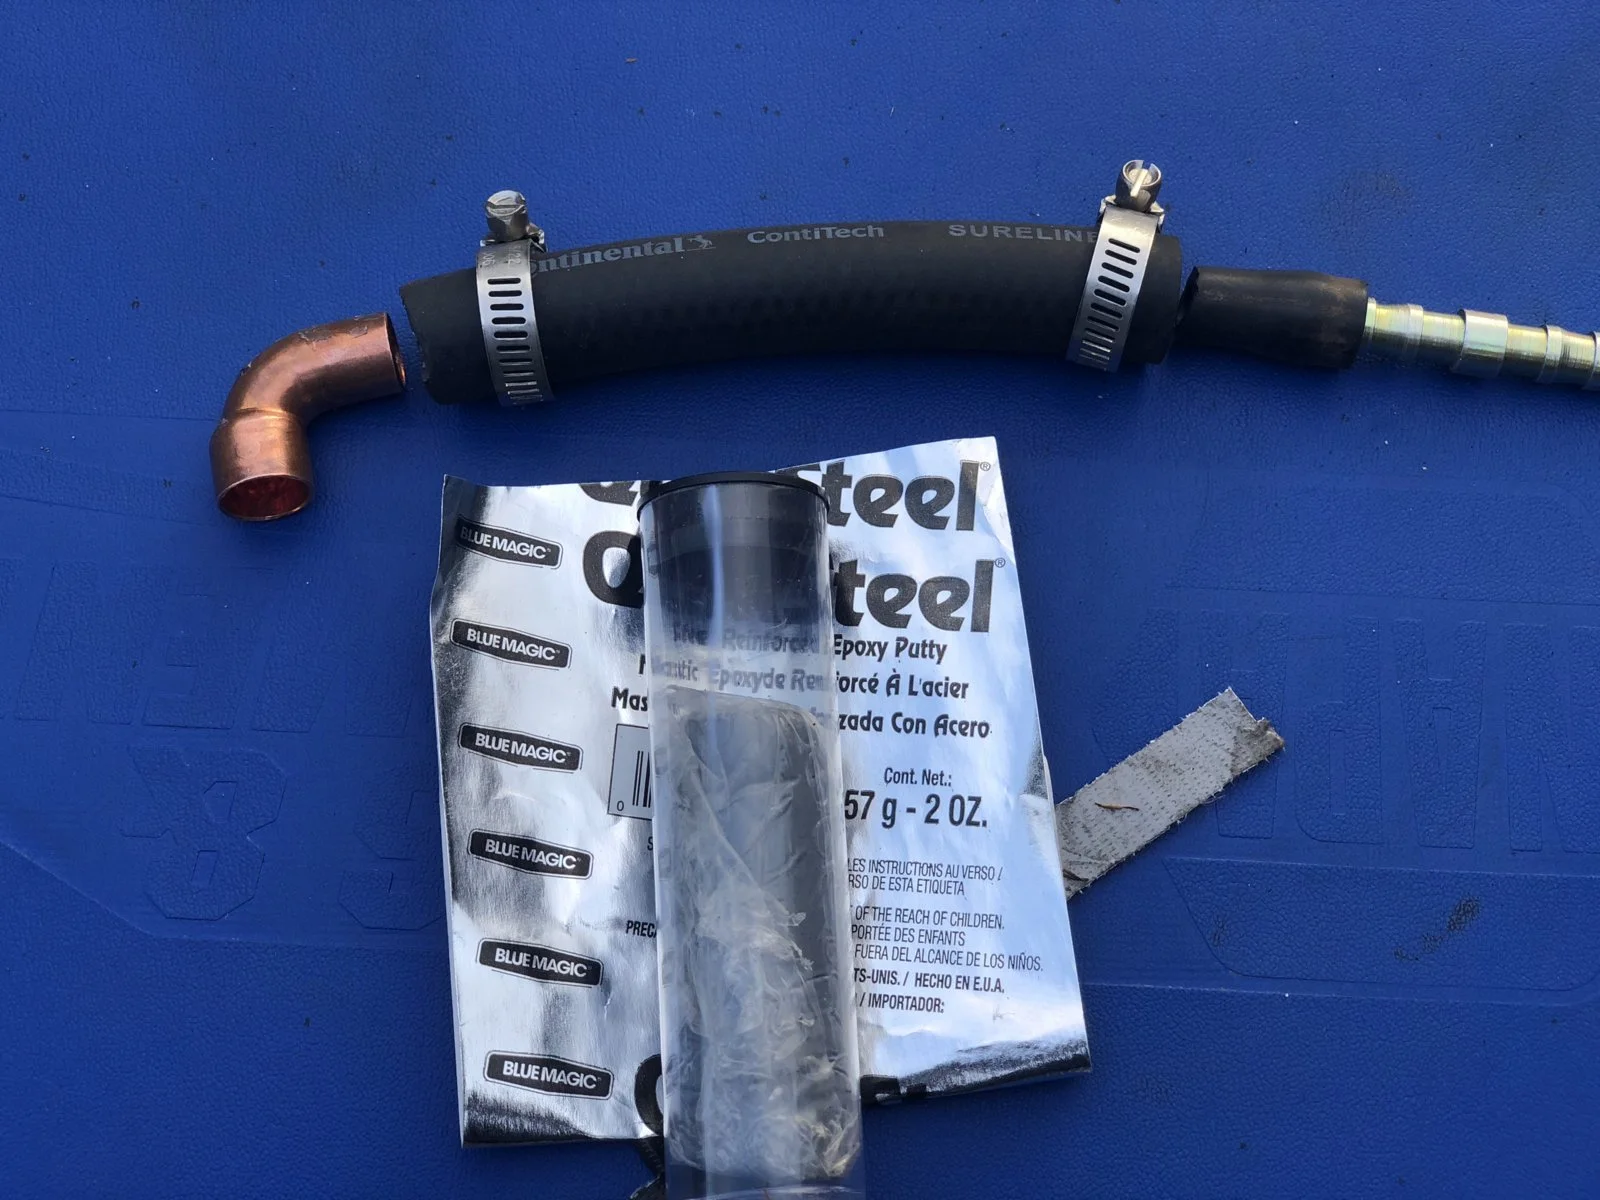
I wound up shortening the fatter 3/8" hose to a size just large enough to connect thr elbow with the barbed brass splice piece on he other end. I also put a small piece of 5/32 tubing on the end of it, which made it fit air tight inside of the larger 3/8" hose.
For added security, I used some Quicksteel around the base of the elbow connecting to the trans breather. I have had food luck with that stuff in the past, it goes on pretty clean and it will only come back off if you want it to (where it also comes off clean).
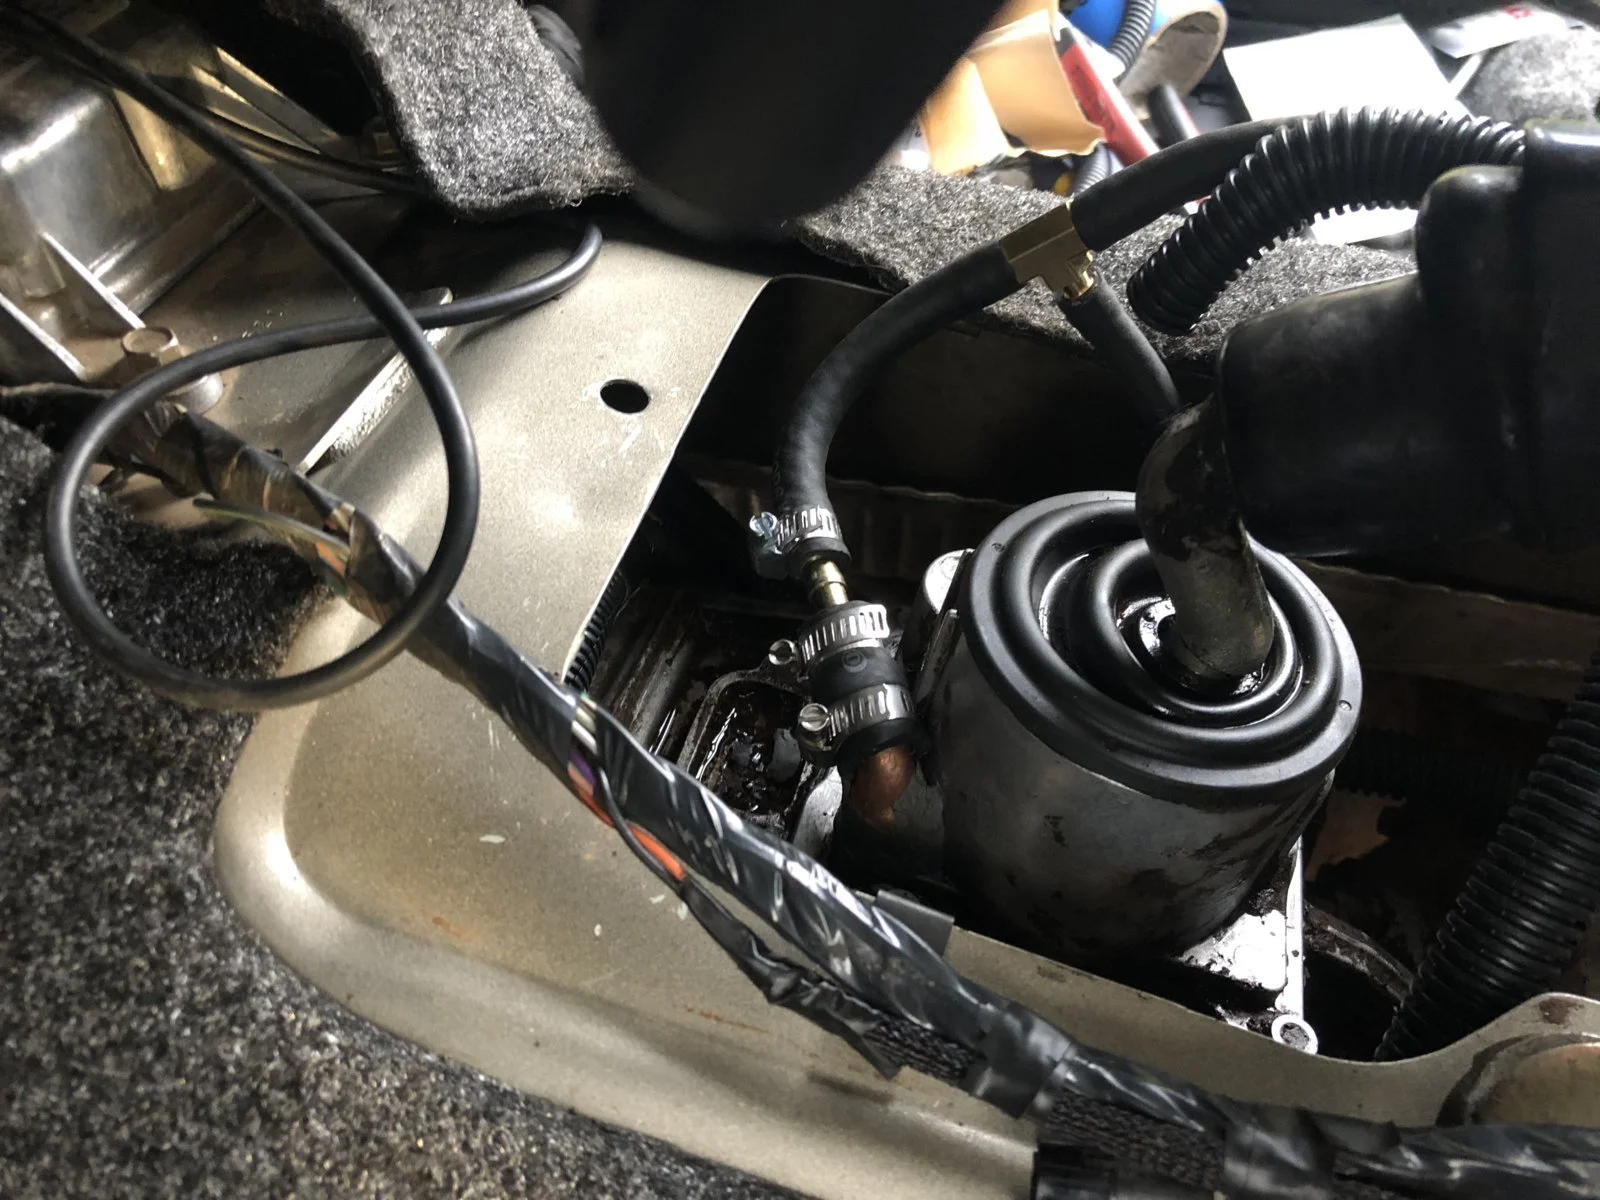
Here is a photo of it installed. I wound up consolidating my t-case breather tubing with this line, where I replaced the hose and connected it with a brass T-connector (and went a little crazy with conduit):
At this point, I probably should have just slapped the nylon breather cap in and ran it under the hood, but having some new and unused parts from other projects laying around, I figured that I'd engage full stupid mode just to see my idea materialize. I also didn't like the idea of running it in parallel with my new rear diff breather line inside my Jeep's roll bar padding, so what the hell?
I started recon'ing areas under the hood. My first idea was to run it in my air intake area, but I did not like the idea of my intake drawing in lots of air and particles, which may or may not make there way into the lines (probably not, but again this is full stupid mode being engaged here). I decided that i wanted it at the rear of my valve cover, up high where I had recently deleted the plastic bridge.
With that, i found a spot on the rear bracket that is pretty solid, that I figured out how to make work with a custom bracket. I took some measurements and went to work hunting down the right sized L-brackets and other parts that i woud need for my mount. The first design i came up with would support 3 or more hoses, but I still had the front diff breather tube and my locker compressor hoses to consider, and one of my objectives was to eliminate as much tubing on my Jeep as i could. I came to terms with the idea of wplicing my diff breather into the trans / t-case breather tubing vent, so all that i would need to build for were two separate runs.
I also wound up using some mini air filters that i got a while back. Here was my initial bracket:
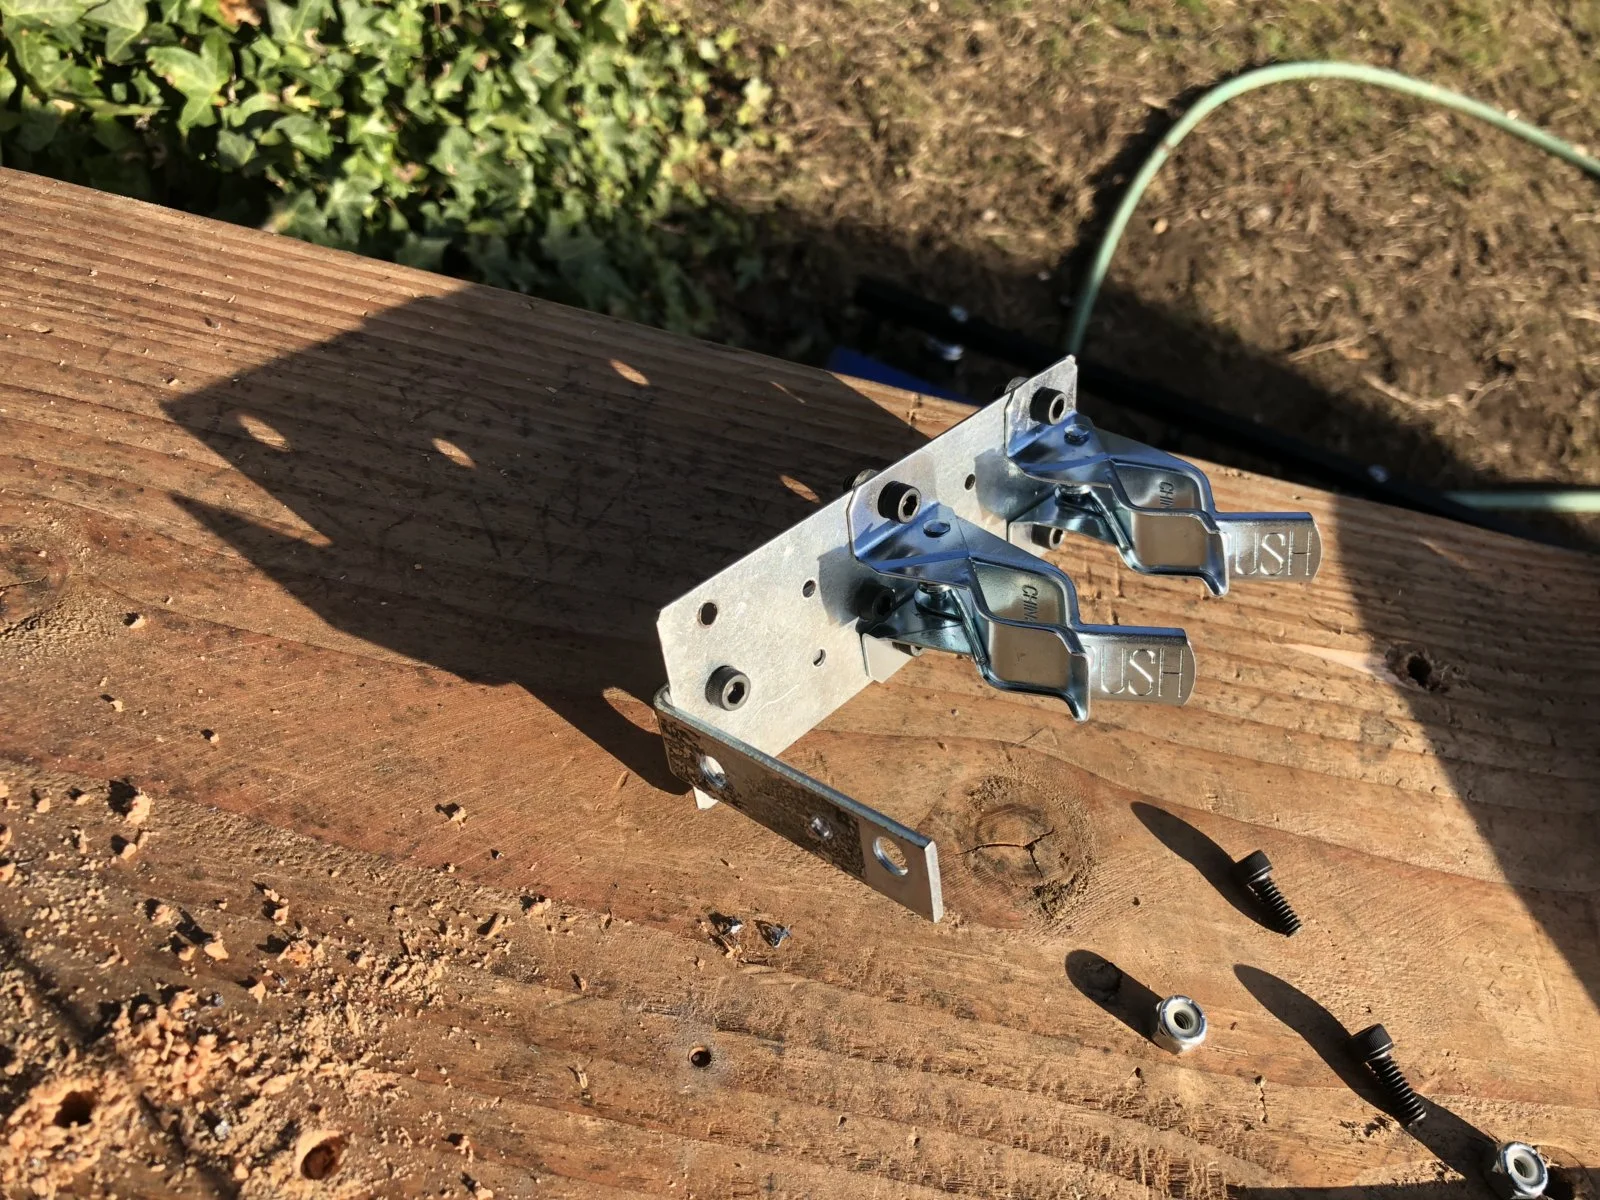
I got it mounted shortly after, but I hated the look, so i modified it like so:
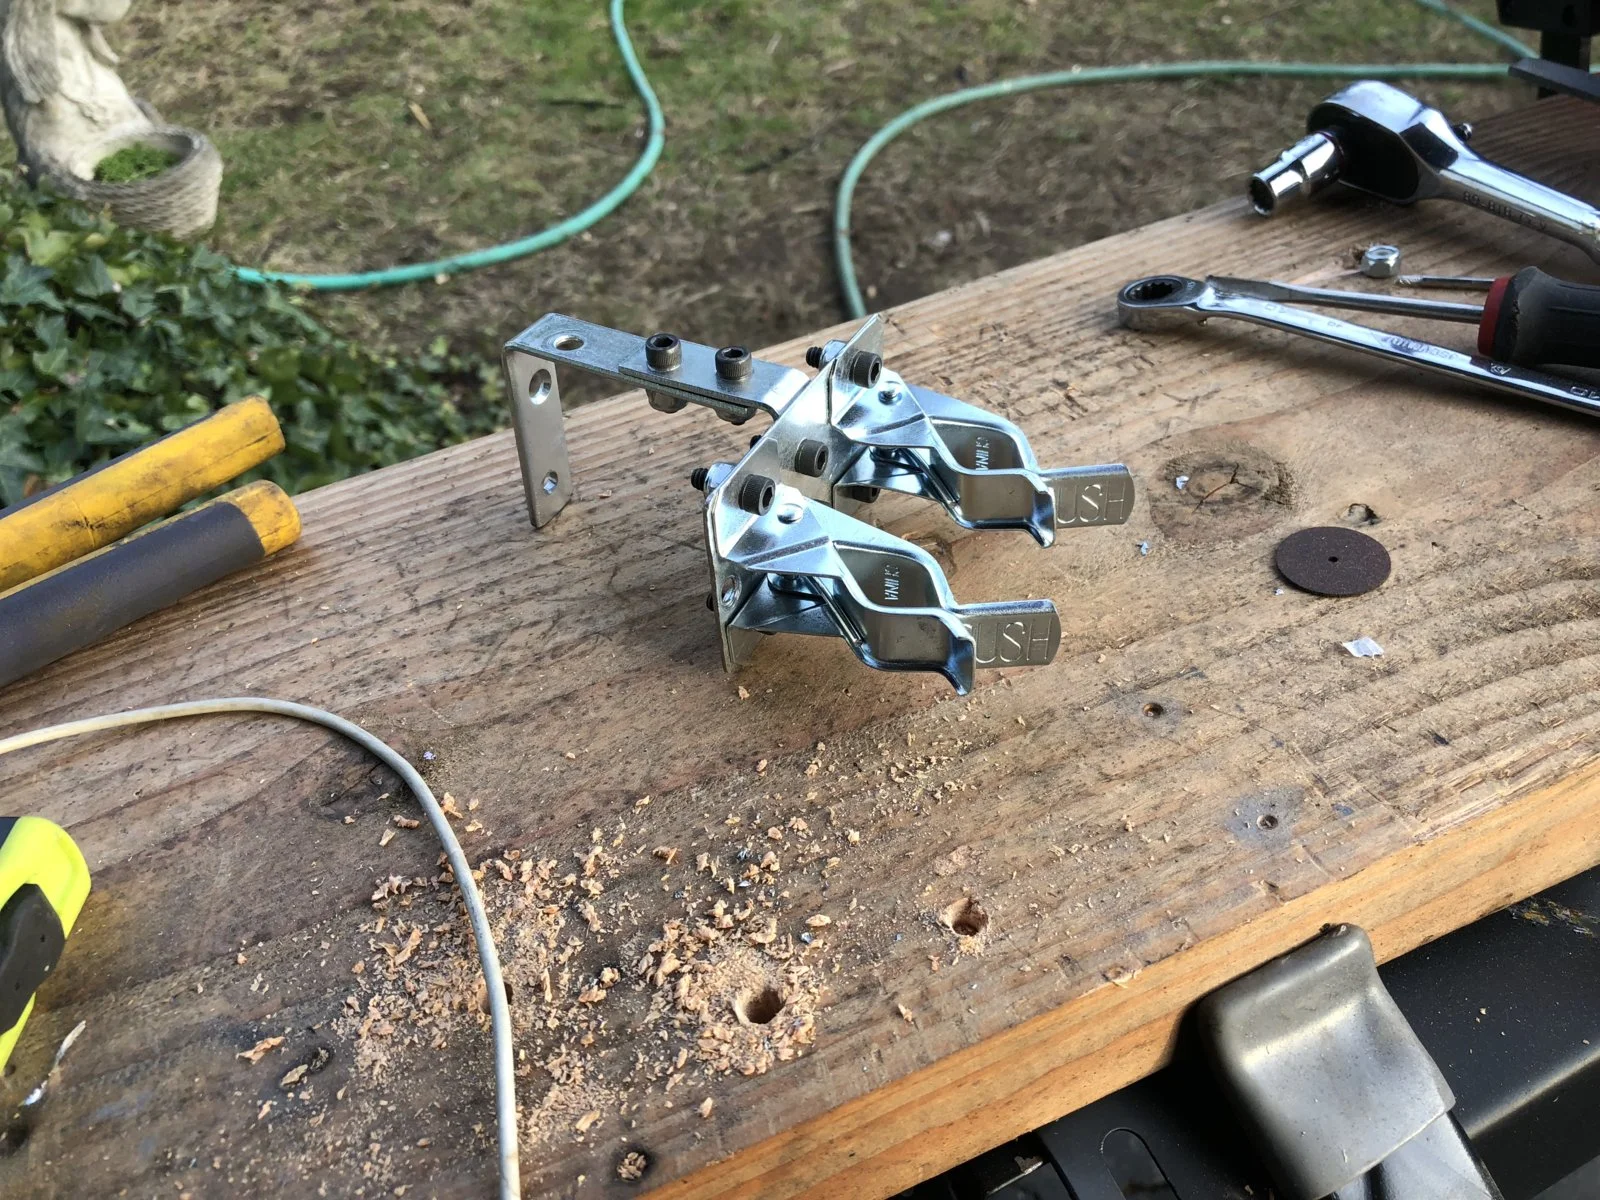
The symmetry came out much better when i configured it like this, so I then just had to get to work on my air compressor intake lines. For these, i went a little overboard again with the filtration aspect. I ported over the ORM nylon breather caps, which i then covered in some new AMSOIL prefilter material I had, which I then shoved into the little air filter, fitting very snug.
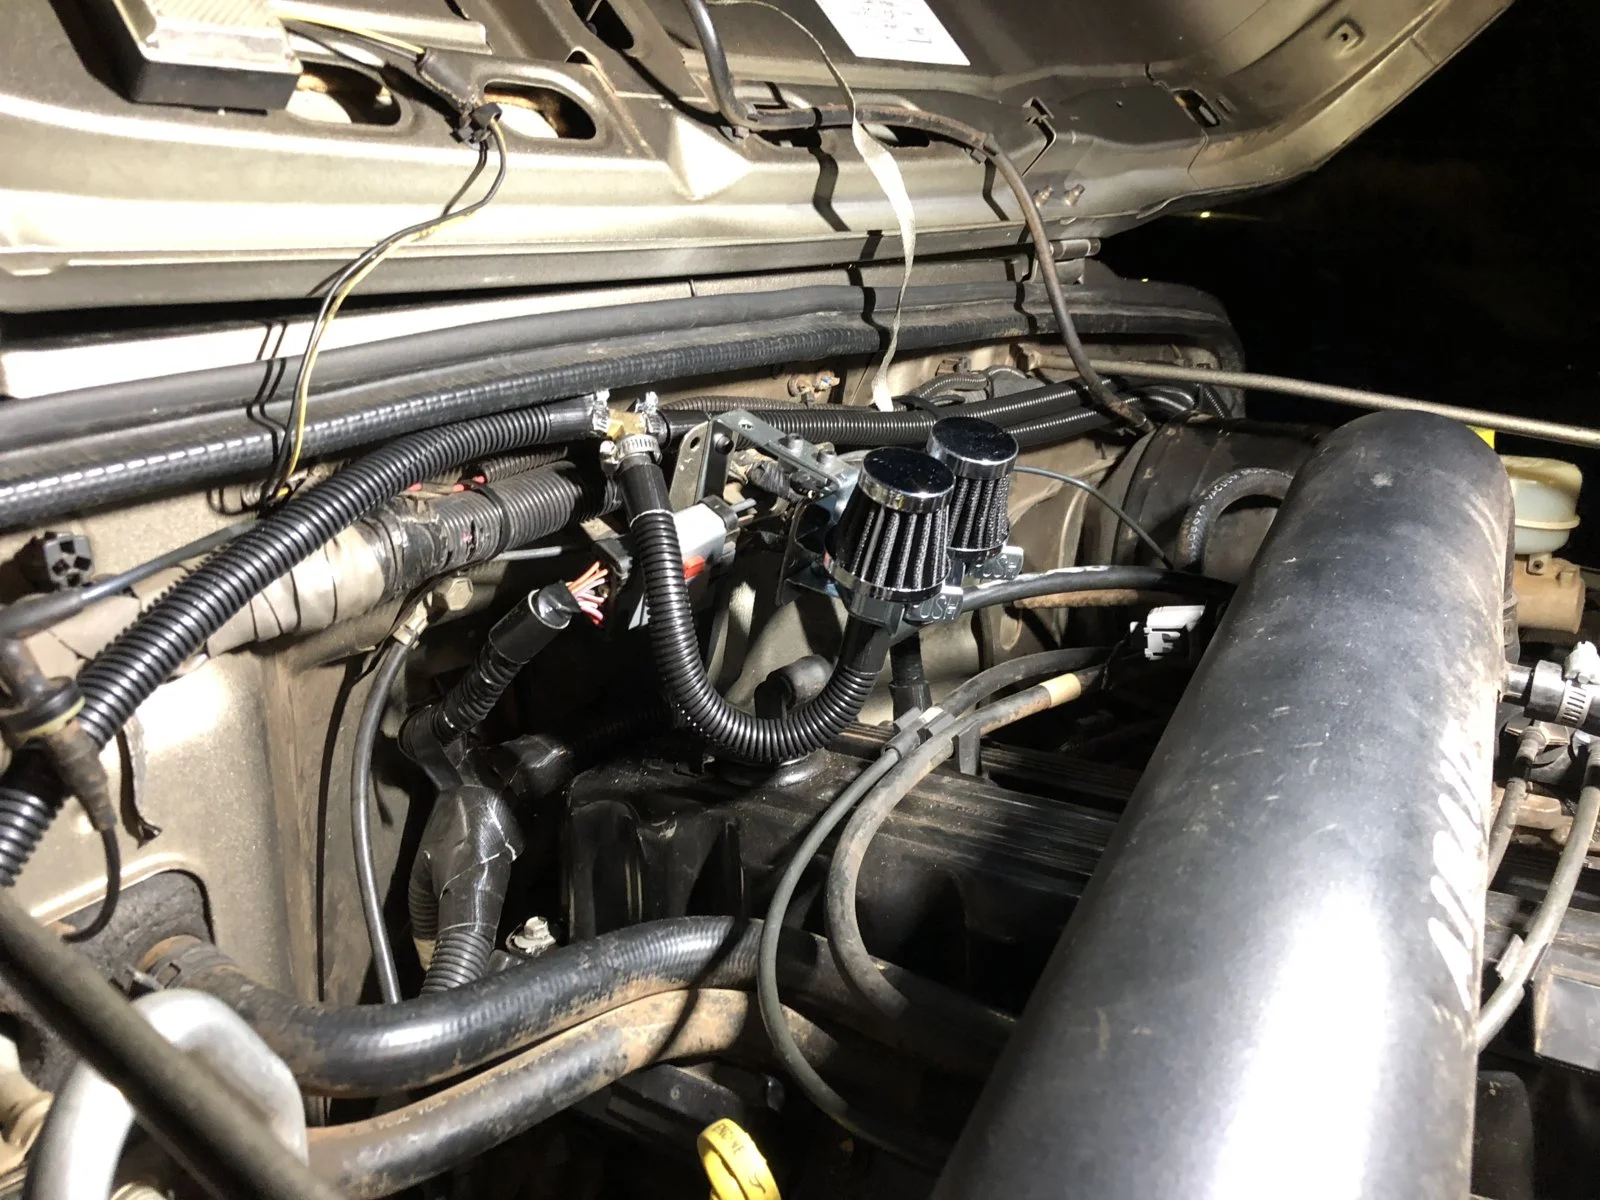
The spring loaded clips that I'm using are strong, and they hold the filters in place very solid. The great aspect about this design, is that I can reconfigure it to support 3 or more lines easy with a dofferent plate, and removing the lines (or the entire bracket) is very simple.
Here was the final prototype mounted (and yes - i am also currently working on redoing the conduit on my electrical)
We've had a metric shit ton of rain through the new year in the PNW. I put several thousand miles on my TJR during that time, and I would say nearly 90% of it was in the rain.
When I discovered that I had a bunch of mud and rain debris getting in behind my gas cap area, I took the cap cover off and saw that my t-case and rear diff breather tubes were terminating in a bad spot. Although I'm not planning to do any deep water crossings anytime soon (or ever), I still decided to relocate the rest of the lines somewhere higher and out of direct moisture.
My jaw kinda hit the floor when I realized that there was a tiny nipple with a small nylon vent cap on top of my transmission. I had to dig it out of an inch or two of mud that burried it under my shift lever. I had just succeeded in fighting off early stages of surface rust that were starting to form on my front diff component, so taking care of this was the next logical step.
I could not get any hoses to stay on the transmissiom breather nipple, given the taper and very short height. I did some research and found a webpage where a guy put a copper elbow over his to attach tubing. Went to my local hardware store and snagged ~4-5 different size elbows to test out, and i found that a 3/8" fit perfectly snug over it.
Here are the parts that I used to prototype the tubing connector:
I wound up shortening the fatter 3/8" hose to a size just large enough to connect thr elbow with the barbed brass splice piece on he other end. I also put a small piece of 5/32 tubing on the end of it, which made it fit air tight inside of the larger 3/8" hose.
For added security, I used some Quicksteel around the base of the elbow connecting to the trans breather. I have had food luck with that stuff in the past, it goes on pretty clean and it will only come back off if you want it to (where it also comes off clean).
Here is a photo of it installed. I wound up consolidating my t-case breather tubing with this line, where I replaced the hose and connected it with a brass T-connector (and went a little crazy with conduit):
At this point, I probably should have just slapped the nylon breather cap in and ran it under the hood, but having some new and unused parts from other projects laying around, I figured that I'd engage full stupid mode just to see my idea materialize. I also didn't like the idea of running it in parallel with my new rear diff breather line inside my Jeep's roll bar padding, so what the hell?
I started recon'ing areas under the hood. My first idea was to run it in my air intake area, but I did not like the idea of my intake drawing in lots of air and particles, which may or may not make there way into the lines (probably not, but again this is full stupid mode being engaged here). I decided that i wanted it at the rear of my valve cover, up high where I had recently deleted the plastic bridge.
With that, i found a spot on the rear bracket that is pretty solid, that I figured out how to make work with a custom bracket. I took some measurements and went to work hunting down the right sized L-brackets and other parts that i woud need for my mount. The first design i came up with would support 3 or more hoses, but I still had the front diff breather tube and my locker compressor hoses to consider, and one of my objectives was to eliminate as much tubing on my Jeep as i could. I came to terms with the idea of wplicing my diff breather into the trans / t-case breather tubing vent, so all that i would need to build for were two separate runs.
I also wound up using some mini air filters that i got a while back. Here was my initial bracket:
I got it mounted shortly after, but I hated the look, so i modified it like so:
The symmetry came out much better when i configured it like this, so I then just had to get to work on my air compressor intake lines. For these, i went a little overboard again with the filtration aspect. I ported over the ORM nylon breather caps, which i then covered in some new AMSOIL prefilter material I had, which I then shoved into the little air filter, fitting very snug.
The spring loaded clips that I'm using are strong, and they hold the filters in place very solid. The great aspect about this design, is that I can reconfigure it to support 3 or more lines easy with a dofferent plate, and removing the lines (or the entire bracket) is very simple.
Here was the final prototype mounted (and yes - i am also currently working on redoing the conduit on my electrical)

 . Next I’m guessing is applying diaelectric grease to all connections and then applying for your submarine permit?