Repainting Rubicon flares

jwilson2899

TJ Enthusiast
Original poster
Supporting Member
Joined
Jul 23, 2019
Messages
160
Location
Front Royal, VA
I managed to pick up a decent set of Rubicon flares today for my LJ. I'm going to give them a good bath this weekend, but ti looks like they might need some refinishing/repainting. I did some searching and came up with the SEM Landau Black paint and low luster clear, but was curious what you all have used for sanding/prep prior to doing them? Thanks for any advice/tips you may have.
 
I managed to pick up a decent set of Rubicon flares today for my LJ. I'm going to give them a good bath this weekend, but ti looks like they might need some refinishing/repainting. I did some searching and came up with the SEM Landau Black paint and low luster clear, but was curious what you all have used for sanding/prep prior to doing them? Thanks for any advice/tips you may have.
You should probably use some aggressive sand paper to knock off and smooth out any imperfections. Follow that up with multiple fine finishes to get it smooth, all the while giving the surface some bite in order to promote paint adhesion. I believe SEM sells adhesion promotor as well.
 
SEM is fantastic quality stuff. I have some landau black on my shelf but I was intending it for painting the interior of my Comanche. I've been using SEM Trimblack for the exterior parts, has held up well so far. Ultimately I'd recommend that.

I've also done Rubicon fenders in the past with a good sand down and Krylon Fusion for Plastic paint
and it held up for years.

It's all about prep. Sand. Clean with something like denatured alcohol. wipe with a tack cloth. Let dry thoroughly. Paint away!
 
Thanks everyone. I did a good sanding of them today to remove the old paint and junk on there. Once my SEM paint gets here, I’m going to do a good wipe down and tack cloth and start painting.
 
R&E Paint supply is a great store for getting the supplies you need (Ahesion promoter, Flex primer and SEM ultra black trim paint) if you decide to go that route.

Edit: saw that you already ordered some!
 
Let us know how it goes, as I know SEM is highly recommended but I couldn't get a good result.

I used SEM products on my interior and it is coming off pretty easily - not durable.

I did a wash with industrial degreaser and a scotch brite pad to get off all the previous owner's black spray paint
Then I used more degreaser and more scotch brite
At this point it was almost gray and all the paint was gone
I cleaned it with dish soap and water, then alcohol, then used the SEM Plastic & Leather Prep
Then I used SEM Plastic Adhesion Promoter
Then Color Coat (multiple thin coats)

It does fine until you scuff it with something. I'm not talking about jabbing it with keys, but it's like it didn't stick to the interior plastic and it's just waiting to fall off.
 
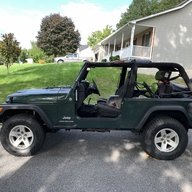
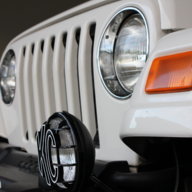
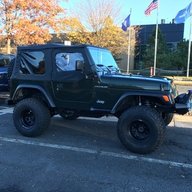
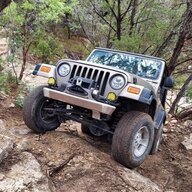
I know someone asked for before and after, but I’m bad at documenting process, I just get busy and start working until it’s done, lol. I ended up using 320 grit sandpaper to knock down the peeling paint and imperfections, then came back behind it with 600 to smooth it out. I picked up a couple Sahara extensions because I don’t have rockers, so I went straight to the 600 on them since they were brand new. 3 coats of SEM black and 3 more coats of Low Luster clear on top. Really happy with how they turned out, now we’ll see how they hold up. Luckily this is mostly a street queen, so it won’t see a lot of heavy off-roading.

4D19D6D1-7370-48B9-A0CF-951E8CAC70C3.webp
5D0F6F49-D186-443C-99F5-E3EF91413C6A.webp
5FAF5BAD-BB3B-4046-A73D-4CDCBEDC7309.webp
8CE24ACA-6BFD-40C5-B38A-ADCE496BBDD7.webp
E57E7A30-FFBD-4015-99E2-0B27C483D7BC.webp
 
I know someone asked for before and after, but I’m bad at documenting process, I just get busy and start working until it’s done, lol. I ended up using 320 grit sandpaper to knock down the peeling paint and imperfections, then came back behind it with 600 to smooth it out. I picked up a couple Sahara extensions because I don’t have rockers, so I went straight to the 600 on them since they were brand new. 3 coats of SEM black and 3 more coats of Low Luster clear on top. Really happy with how they turned out, now we’ll see how they hold up. Luckily this is mostly a street queen, so it won’t see a lot of heavy off-roading.

View attachment 159800View attachment 159801View attachment 159802View attachment 159803View attachment 159804
That is mint!
 
I know someone asked for before and after, but I’m bad at documenting process, I just get busy and start working until it’s done, lol. I ended up using 320 grit sandpaper to knock down the peeling paint and imperfections, then came back behind it with 600 to smooth it out. I picked up a couple Sahara extensions because I don’t have rockers, so I went straight to the 600 on them since they were brand new. 3 coats of SEM black and 3 more coats of Low Luster clear on top. Really happy with how they turned out, now we’ll see how they hold up. Luckily this is mostly a street queen, so it won’t see a lot of heavy off-roading.

View attachment 159800View attachment 159801View attachment 159802View attachment 159803View attachment 159804
Extra points for taking them off the Jeep to sand and paint. Nice job, they look great.
 
Extra points for taking them off the Jeep to sand and paint. Nice job, they look great.
For future reference, you don't need the adhesion promoter to paint Rubi flares or any of the various trim level flares that are smooth like the RME, Tomb Raider, or Sahara. They are already painted and just need the basic scuff, clean, and shoot that you would normally do on a previously painted surface.
 
Dredging this up since it's the most recent I could find on the topic.

Got painted Rubicon flares today, looks like silver but no matter, they'll get painted, probably SEM Trim Black.
The front is smooth paint so I can probably clean, scuff & shoot as recommended here.

But the rear look to have a hammer tone, textured, orange peel paint on them so I'll probably have to strip them down to bare plastic, unless there's a way to sand them smooth. Then again, the textured paint is chipped so I can see smooth plastic underneath, so I'm thinking I'll just get that junk off and start with a clean palate.

Gonna go on a search for paint stripper for plastic, then dig up the recommendations for adhesion promoter, primer, etc.
Thought I'd ask here first.

Has anyone replaced the mounting points on the steel fenders with 1/4-20 nutserts and stainless hardware? I'm thinking that'll be better than lightweight OEM or Rugged Ridge - even more lightweight IMO - that I got via Amazon.

 
For future reference, you don't need the adhesion promoter to paint Rubi flares or any of the various trim level flares that are smooth like the RME, Tomb Raider, or Sahara. They are already painted and just need the basic scuff, clean, and shoot that you would normally do on a previously painted surface.

I found this older thread using a search.

Thank you for saving me money by pointing out that adhesion promoter is not needed. I have a set of Rubicon flares that I would like to clean up and paint.

When you say they need a "basic scuff," what would you suggest?

Is a clear a coat needed?
 
Last edited:
I found this older thread using a search. I have a set of Rubicon flares that I would like to clean up and paint. Thank you for saving me money by pointing out that adhesion promoter is not needed to repaint the flares.

When you say they need a "basic scuff," what would you suggest?

Is a clear-coat needed?
Lacking any surface imperfections, gray Scotchbrite hand pads work very well. Clear coat is a function of your paint selection.
 
I was thinking of using SEM Landau Black.
SEM makes a few clears in the Color Coat line that are compatible. I tend to like the low luster UV clear over the Landau. It sprays oddly. Goes on fairly crappy looking and then after a few minutes just lays down flat like you knew what you were doing.
 
  • Like
Reactions: TJRick
SEM makes a few clears in the Color Coat line that are compatible. I tend to like the low luster UV clear over the Landau. It sprays oddly. Goes on fairly crappy looking and then after a few minutes just lays down flat like you knew what you were doing.

Thanks!

Is there a better option that doesn't need a clear? I am going for a stock look.