only if it "spits flames and pops"Dana 80. Super swampers. Flames coming out the tail pipe.

You are using an out of date browser. It may not display this or other websites correctly.
You should upgrade or use an alternative browser.
You should upgrade or use an alternative browser.

"But the Guys On the Forum Said I Need This Stuff" Build
- Thread starter qslim
- Start date

It’s all good bro!Yeah, she really adds value to the process. Almost knocked the axle off the jackstands a dozen times, then managed to fling gear oil all over me more than once. Also every bolt somehow ended up in the bucket. It's all good though.
I'm putting your ammo in the mail tomorrow, I swear.
BTW, love your thread title!

Got back on it a little today, cleaned up the Dana 44 prior to install, got under there & removed the swaybar & control arms... Laid out the SYE kit that I got from Tom Wood's & started on that.
Went to drop the skid plate & the first bolt is just spinning & spinning! I even started off with a breaker bar for fear of spinning a nutsert! Looks like 3/6 are broken, so I called it for today & started making dinner for the kids. Just ordered a nutsert kit from @mrblaine, might as well just replace them all while I'm at it.
I'm going to try prying down on the skidplate while I loosen the bolts, if that doesn't work I'll just cut the heads off & knock the old nutserts into the frame. I might just leave em there so my wife can be reminded of all the work I did while she listens to them rattle around all summer.
Went to drop the skid plate & the first bolt is just spinning & spinning! I even started off with a breaker bar for fear of spinning a nutsert! Looks like 3/6 are broken, so I called it for today & started making dinner for the kids. Just ordered a nutsert kit from @mrblaine, might as well just replace them all while I'm at it.
I'm going to try prying down on the skidplate while I loosen the bolts, if that doesn't work I'll just cut the heads off & knock the old nutserts into the frame. I might just leave em there so my wife can be reminded of all the work I did while she listens to them rattle around all summer.

In the latest episode of "why the fuck am I doing this", I spent the whole morning getting the skidplate off.
I was able to zip out the right front bolt no problem. The other bolts on the right side were being tough, but they were coming. The left front bolt was just spinning, so I'm guessing the nutsert broke. Ground the head off of that one.

The other two left bolts were really being bastards about it, I mean really difficult. When I took a step back to think about what the hell was going on I realized my skidplate was bowing down over the little jack stand that I had set in the middle for support. Looks like the TC drop spacers installed by the PO were so thoroughly rusted to the bolts that they were forcing the skid plate down with them instead of letting the bolt drop through.

Likewise, the bolt that I cut the head off of had the same problem. Even though the bolt head wasn't there the rest of the bolt was stuck in the broken nutsert and the shank was stuck in the spacer. I was getting really annoyed. I moved the jackstand out of the way & got the skid plate loose just dangling from the one headless bolt by rust from the spacer. Took about a half hour of persuasion with a torch, prybar, & impact hammer to break up the rust & let it fall to earth.
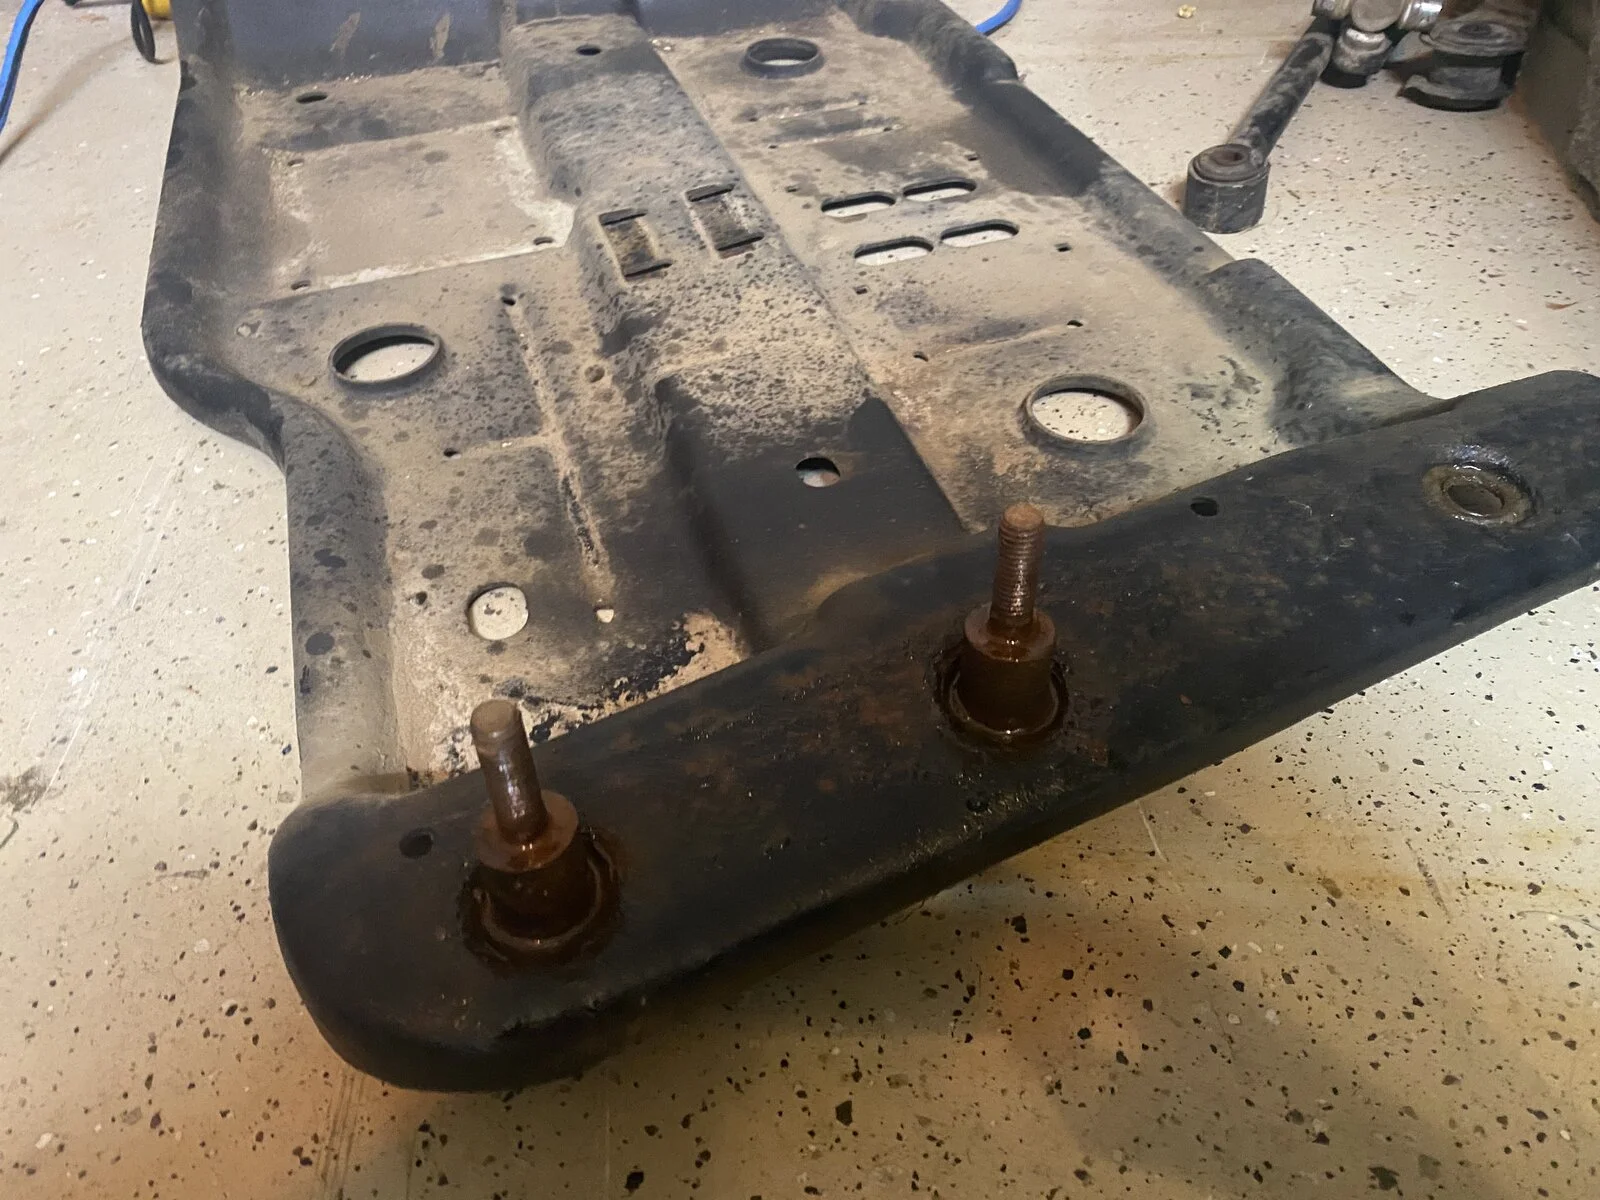
Now I have a skidplate on my garage floor with four spacers rusted to the bolts and one still hanging in the frame. I'm either going to melt them off or just buy a new skidplate.
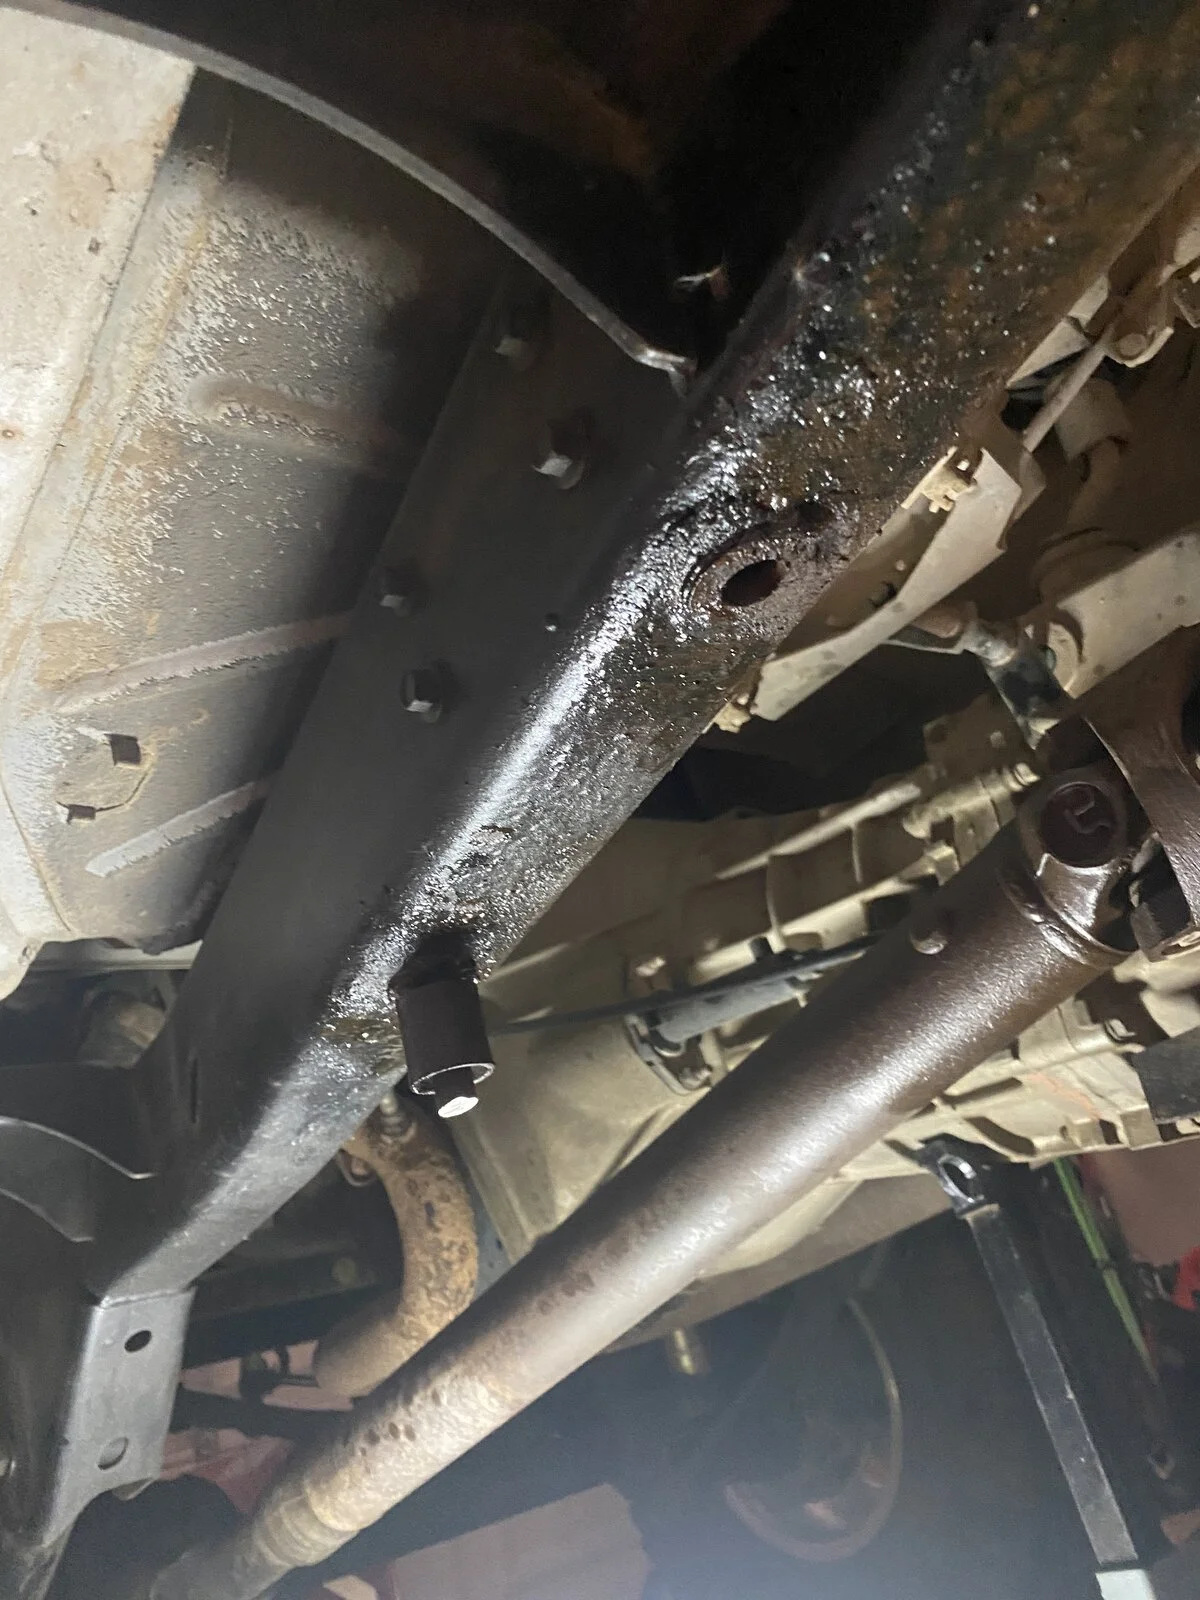
From there I went ahead & started on the SYE. I elected to leave the TC in the truck because it's up high enough for me to sit there & fiddle with it. The instructions that came with the Advance Adapter kit are great, and it's a very straightforward job.
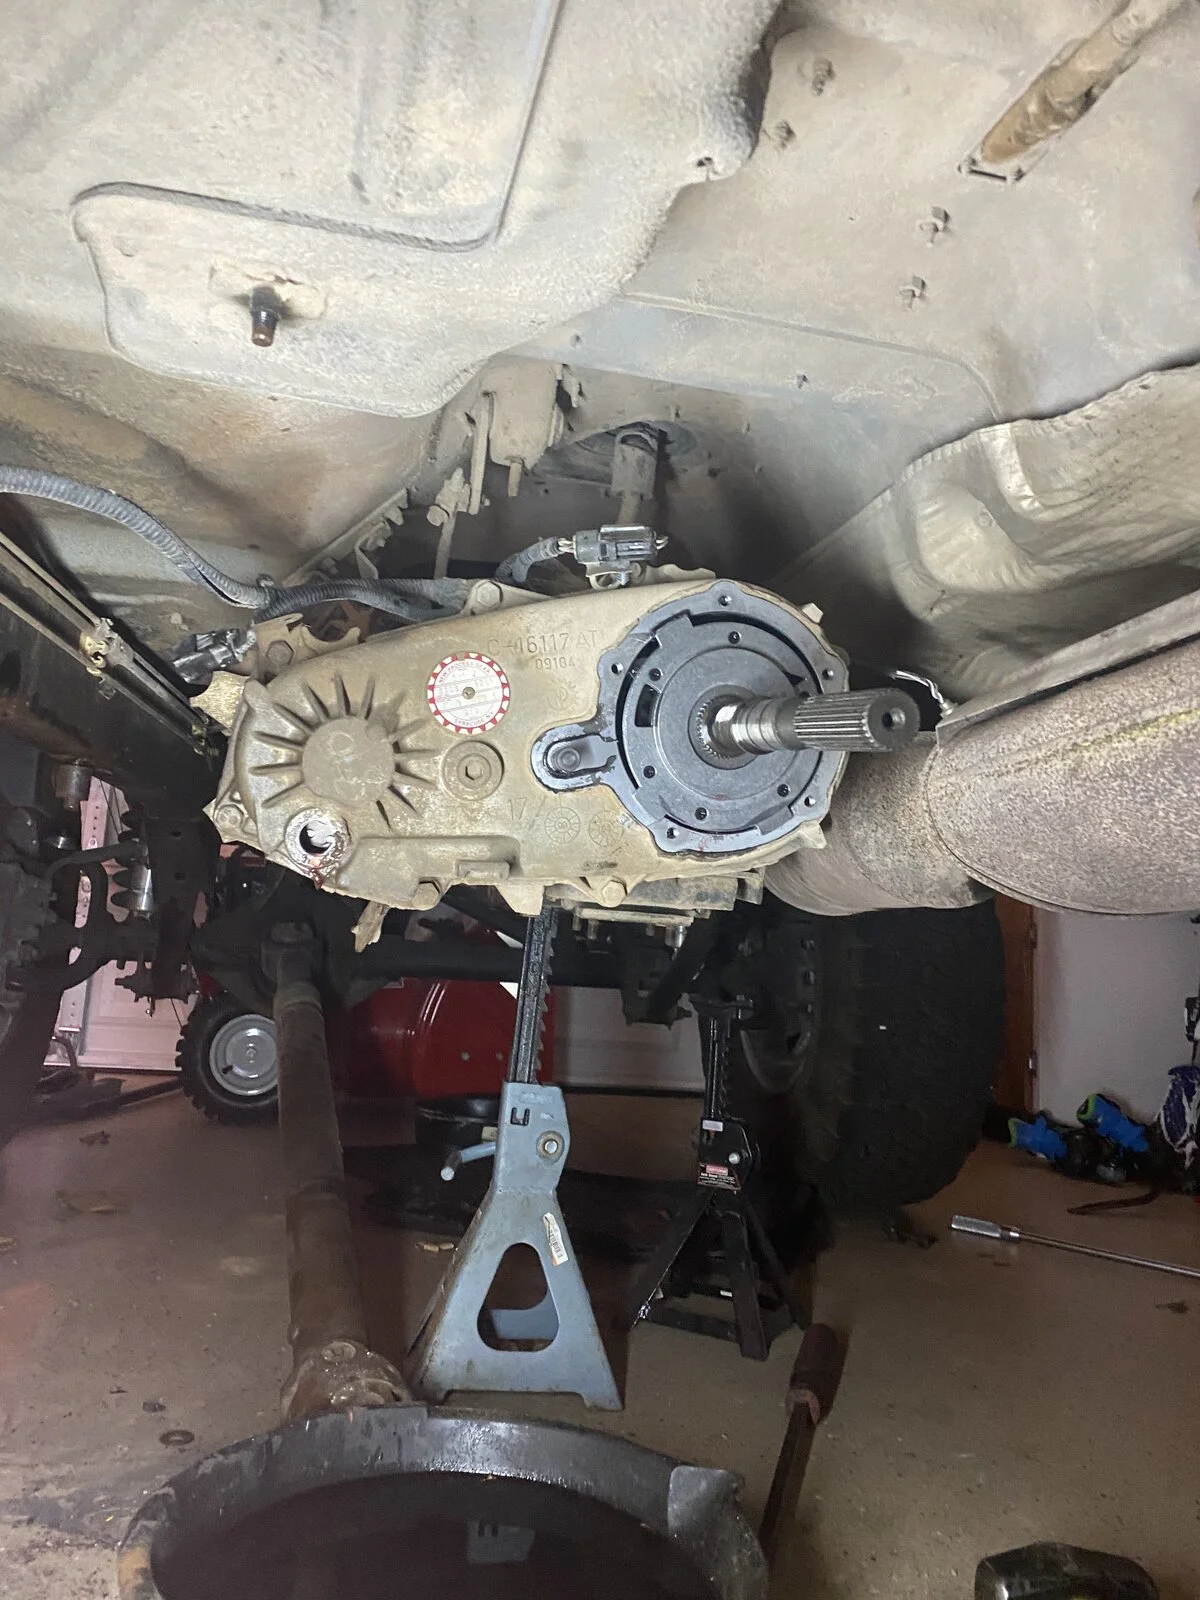
Everything went fine up until the point of installing the new snap ring behind the mode hub. Couldn't find it. Searched & searched, who knows where the hell it went. I unpacked the box like 3 weeks ago. I tried the old one but it got mangled to hell being removed by my shitty snapring pliers & a screwdriver, so that wasn't happening. I called Tom Wood's, spoke to John, he said he'd grab one for me and it would be sitting on top of my original invoice on the file cabinet to the left of the office door. Free of charge, just come grab it. That place is awesome.
I was able to zip out the right front bolt no problem. The other bolts on the right side were being tough, but they were coming. The left front bolt was just spinning, so I'm guessing the nutsert broke. Ground the head off of that one.
The other two left bolts were really being bastards about it, I mean really difficult. When I took a step back to think about what the hell was going on I realized my skidplate was bowing down over the little jack stand that I had set in the middle for support. Looks like the TC drop spacers installed by the PO were so thoroughly rusted to the bolts that they were forcing the skid plate down with them instead of letting the bolt drop through.
Likewise, the bolt that I cut the head off of had the same problem. Even though the bolt head wasn't there the rest of the bolt was stuck in the broken nutsert and the shank was stuck in the spacer. I was getting really annoyed. I moved the jackstand out of the way & got the skid plate loose just dangling from the one headless bolt by rust from the spacer. Took about a half hour of persuasion with a torch, prybar, & impact hammer to break up the rust & let it fall to earth.
Now I have a skidplate on my garage floor with four spacers rusted to the bolts and one still hanging in the frame. I'm either going to melt them off or just buy a new skidplate.
From there I went ahead & started on the SYE. I elected to leave the TC in the truck because it's up high enough for me to sit there & fiddle with it. The instructions that came with the Advance Adapter kit are great, and it's a very straightforward job.
Everything went fine up until the point of installing the new snap ring behind the mode hub. Couldn't find it. Searched & searched, who knows where the hell it went. I unpacked the box like 3 weeks ago. I tried the old one but it got mangled to hell being removed by my shitty snapring pliers & a screwdriver, so that wasn't happening. I called Tom Wood's, spoke to John, he said he'd grab one for me and it would be sitting on top of my original invoice on the file cabinet to the left of the office door. Free of charge, just come grab it. That place is awesome.

Another note - I was REALLY surprised at the amount of rust at the skid plate union. The rest of the frame has a little surface rust here & there, and everything is is almost perfect. Haven't had a single issue up unit this point, and this particular part of my frame really looks like shit.
I'm going to change out all the nutserts when I get the get the kit from Blaine, put a wire wheel over all of it, & put in some drain holes.
I'm going to change out all the nutserts when I get the get the kit from Blaine, put a wire wheel over all of it, & put in some drain holes.

Give the skid plate a washer or two to create a nice air gap. Doesn’t have to be big, just enough to keep water from being trapped in between the two surfaces.Another note - I was REALLY surprised at the amount of rust at the skid plate union. The rest of the frame has a little surface rust here & there, and everything is is almost perfect. Haven't had a single issue up unit this point, and this particular part of my frame really looks like shit.
I'm going to change out all the nutserts when I get the get the kit from Blaine, put a wire wheel over all of it, & put in some drain holes.
Another question - do the factory skidplate nutserts typically have tack welds? I already ordered a new set from @mrblaine , but I noticed today after wresting the skidplate off that all the existing nutserts have two tack welds each spaced 180 degrees apart. Is that normal or did the PO do something hinky?

97-02 have two tacks, 03-06 do not.Another question - do the factory skidplate nutserts typically have tack welds? I already ordered a new set from @mrblaine , but I noticed today after wresting the skidplate off that all the existing nutserts have two tack welds each spaced 180 degrees apart. Is that normal or did the PO do something hinky?

For future reference, though it probably wouldn't have helped you, I've had a fair bit of luck getting bolts loose by starting to tighten them first. Especially one in a nutsert. A little extra torque can help reseat the nutsert and help it hold just a little bit longer.In the latest episode of "why the fuck am I doing this", I spent the whole morning getting the skidplate off.
I was able to zip out the right front bolt no problem. The other bolts on the right side were being tough, but they were coming. The left front bolt was just spinning, so I'm guessing the nutsert broke. Ground the head off of that one.
View attachment 226634
The other two left bolts were really being bastards about it, I mean really difficult. When I took a step back to think about what the hell was going on I realized my skidplate was bowing down over the little jack stand that I had set in the middle for support. Looks like the TC drop spacers installed by the PO were so thoroughly rusted to the bolts that they were forcing the skid plate down with them instead of letting the bolt drop through.
View attachment 226635
Likewise, the bolt that I cut the head off of had the same problem. Even though the bolt head wasn't there the rest of the bolt was stuck in the broken nutsert and the shank was stuck in the spacer. I was getting really annoyed. I moved the jackstand out of the way & got the skid plate loose just dangling from the one headless bolt by rust from the spacer. Took about a half hour of persuasion with a torch, prybar, & impact hammer to break up the rust & let it fall to earth.
Now I have a skidplate on my garage floor with four spacers rusted to the bolts and one still hanging in the frame. I'm either going to melt them off or just buy a new skidplate.
View attachment 226636
View attachment 226637
From there I went ahead & started on the SYE. I elected to leave the TC in the truck because it's up high enough for me to sit there & fiddle with it. The instructions that came with the Advance Adapter kit are great, and it's a very straightforward job.
View attachment 226638
Everything went fine up until the point of installing the new snap ring behind the mode hub. Couldn't find it. Searched & searched, who knows where the hell it went. I unpacked the box like 3 weeks ago. I tried the old one but it got mangled to hell being removed by my shitty snapring pliers & a screwdriver, so that wasn't happening. I called Tom Wood's, spoke to John, he said he'd grab one for me and it would be sitting on top of my original invoice on the file cabinet to the left of the office door. Free of charge, just come grab it. That place is awesome.
That works for quite a few. The problem versions are the ones that rust the nutsert barrel to the bolt and then that twists off from the tack welded flange. It won't tighten or loosen, just spins and they suck.For future reference, though it probably wouldn't have helped you, I've had a fair bit of luck getting bolts loose by starting to tighten them first. Especially one in a nutsert. A little extra torque can help reseat the nutsert and help it hold just a little bit longer.
Yup...if it's spinning, you're gonna hate life for a while.That works for quite a few. The problem versions are the ones that rust the nutsert barrel to the bolt and then that twists off from the tack welded flange. It won't tighten or loosen, just spins and they suck.
Finished up my rusty skidplate/nustsert dilemma this morning. I had to cut & grind the bolts still stuck in my skid & beat the shit out of them until the spacer separated from the bolt. I figured out a pretty good technique on the last bolt. the skid is still a little tweaked, but it's not off by much. I'm just going to reuse it/, it'll probably work out.

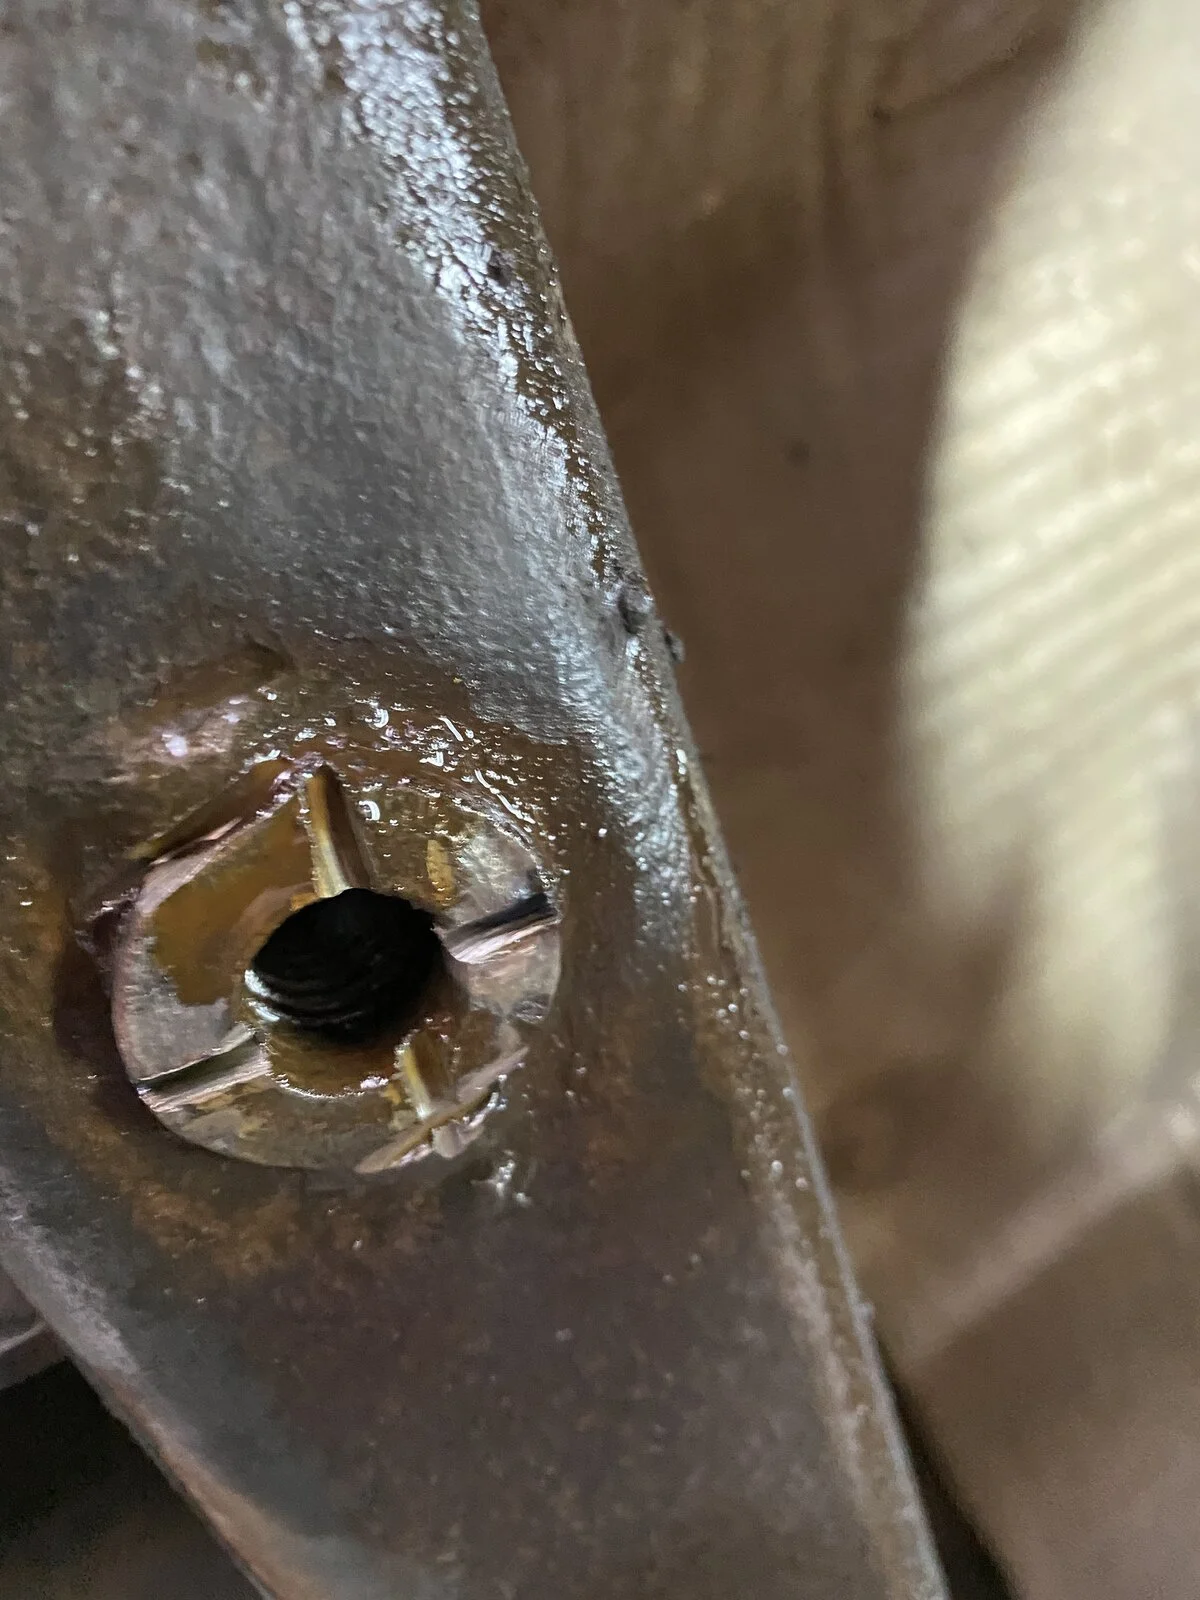
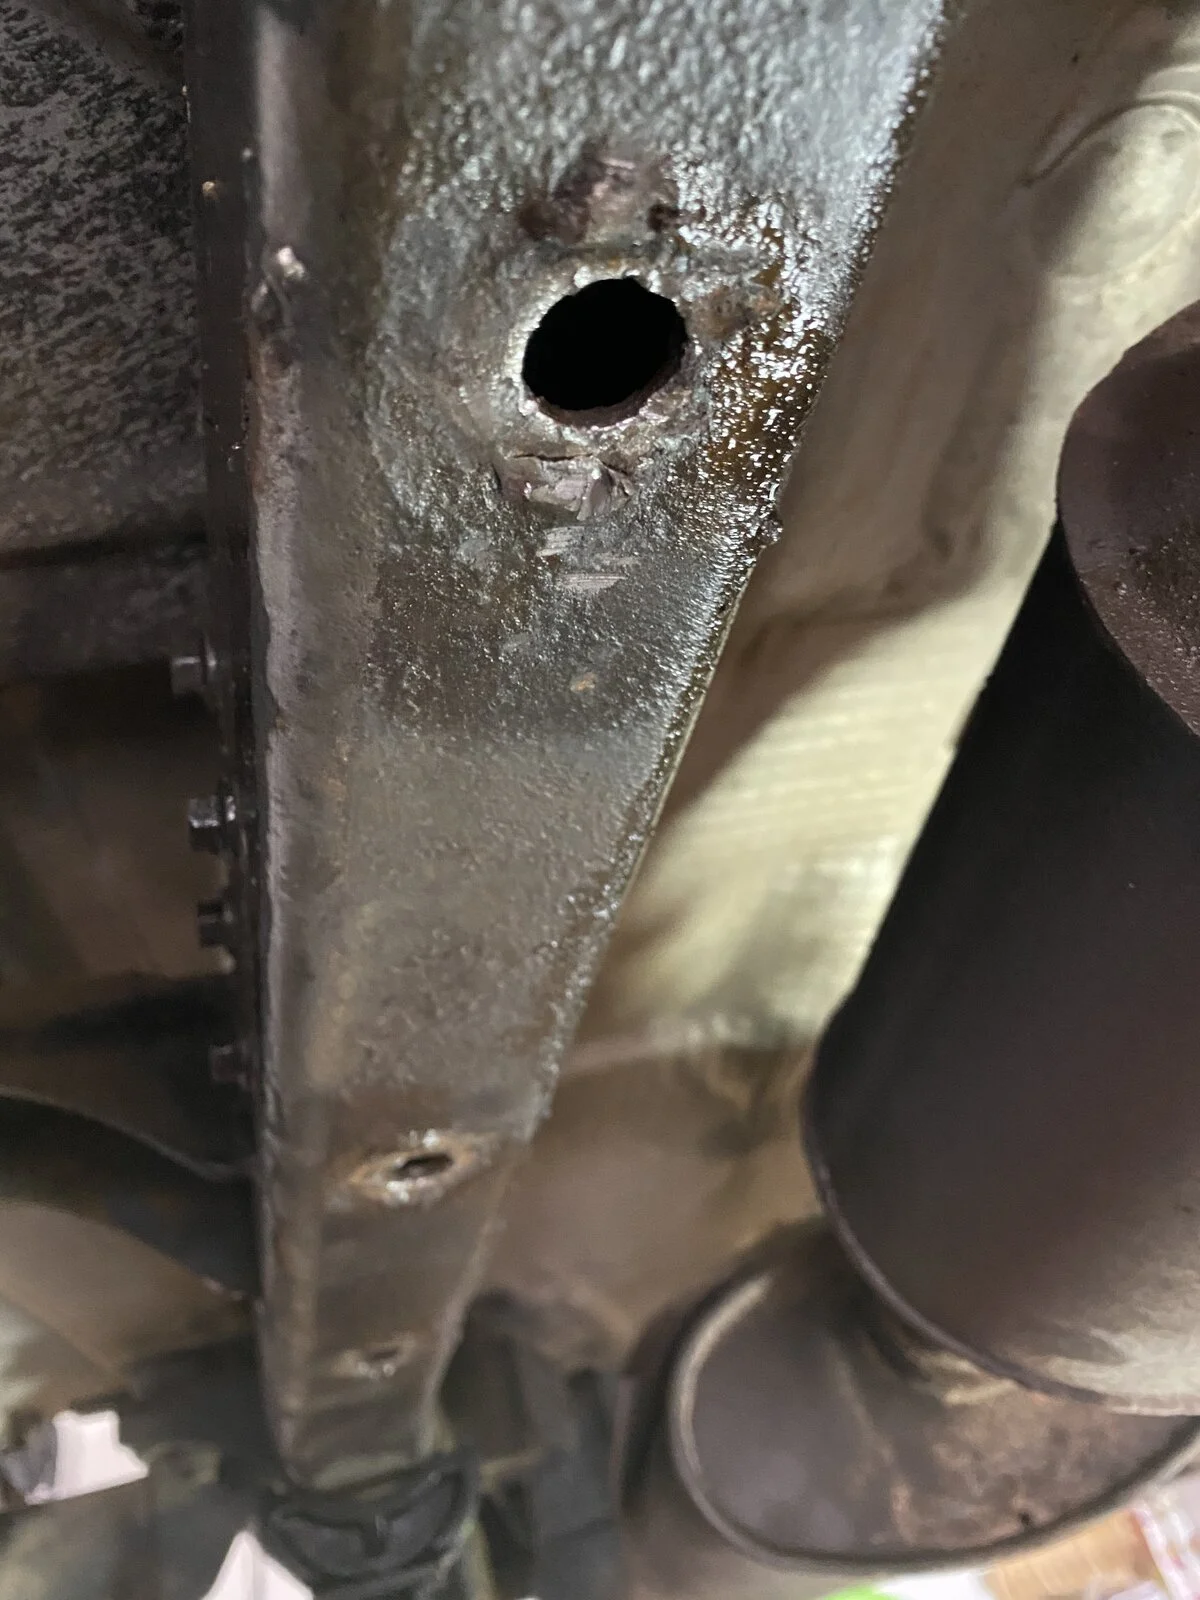
For the nutserts, I was really surprised how easy it was to change them all. I ground down the first one to the frame, figured out there was probably a better way, so I went to @mrblaine ‘s site & found a video from BFH garage. You basically just make four cuts into the nusterts, then cave them into the hole with a chisel. Super easy, only took a few minutes to cut it, hammer it, & knock it into the frame. I was glad I had an air chisel, doing this swinging a hammer upside down really would have sucked.


Installing was just as easy, the tool I got from Blaine in the kit worked perfectly. I wasn't exactly sure when to stop, just quit turning it when I felt some decent resistance. I was using a 15" box wrench, felt like I could have gone tighter if I really leaned on it but didn't want to go too tight. I called it good when I got a little over 1/4" of the installation bolt pulled out.

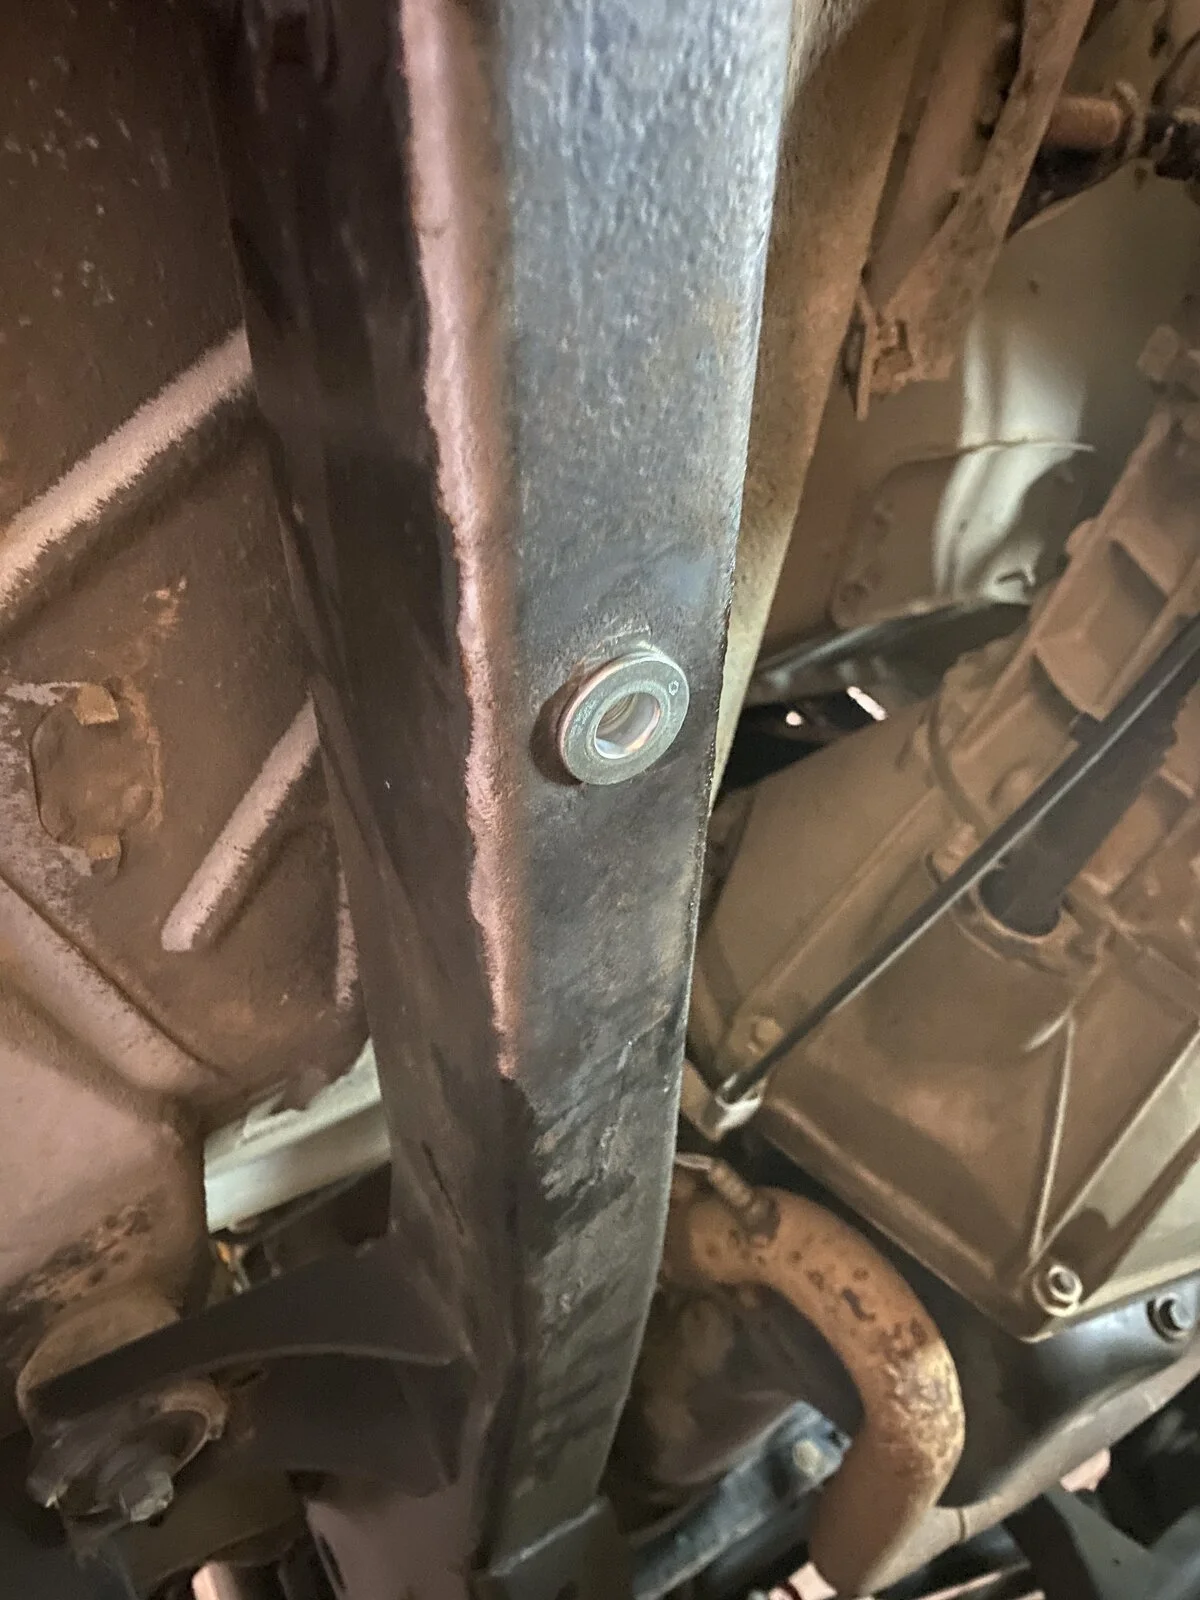
Anyway it only took me about 3 hours & a few cutting wheels. Now I can get back to finishing the SYE & putting everything back together. If this is the only bump in the road I'll consider myself fortunate.
For the nutserts, I was really surprised how easy it was to change them all. I ground down the first one to the frame, figured out there was probably a better way, so I went to @mrblaine ‘s site & found a video from BFH garage. You basically just make four cuts into the nusterts, then cave them into the hole with a chisel. Super easy, only took a few minutes to cut it, hammer it, & knock it into the frame. I was glad I had an air chisel, doing this swinging a hammer upside down really would have sucked.
Installing was just as easy, the tool I got from Blaine in the kit worked perfectly. I wasn't exactly sure when to stop, just quit turning it when I felt some decent resistance. I was using a 15" box wrench, felt like I could have gone tighter if I really leaned on it but didn't want to go too tight. I called it good when I got a little over 1/4" of the installation bolt pulled out.
Anyway it only took me about 3 hours & a few cutting wheels. Now I can get back to finishing the SYE & putting everything back together. If this is the only bump in the road I'll consider myself fortunate.
Last edited:
So is there a need to put a couple of tacks on there with the new ones from your kit? Curious as to why they stopped tacking them.97-02 have two tacks, 03-06 do not.
The tacking was so they could set the nutsert. They must have changed the tooling to set them that did away with the need to tack them.So is there a need to put a couple of tacks on there with the new ones from your kit? Curious as to why they stopped tacking them.
I can see that. If I was working overhead instead of on the ground it would have been hard to keep the nutsert flush to the frame while turning the nut. I used my knee to keep the stackup against the frame while turning the nut for the first rotation or so. If it were up in the air that would have been tough to do.The tacking was so they could set the nutsert. They must have changed the tooling to set them that did away with the need to tack them.
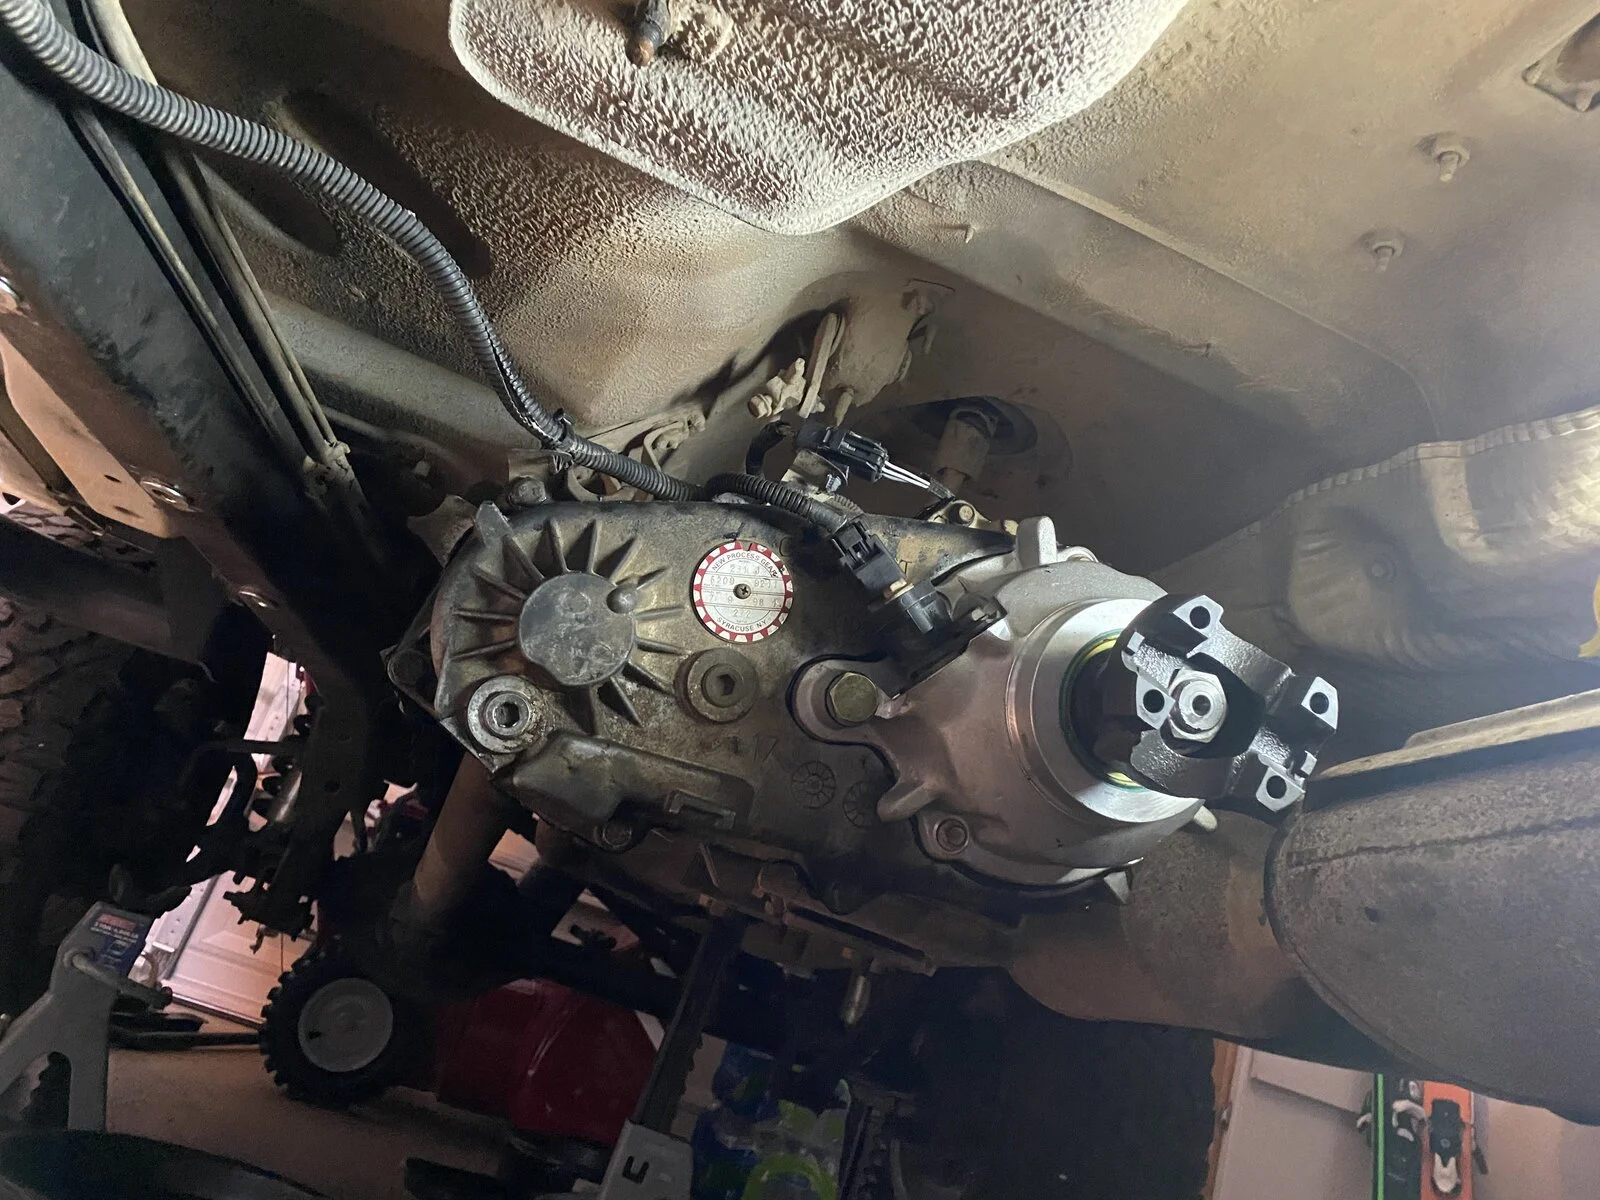
Eked out a couple more hours on the TJ today & finally got the SYE done!
Shouldn't have taken that long, but my dumbass struggled with the rear transfer case housing for way too long because I had the oil pump tabs on the inside instead of the outside. By the time I figured it out the RTV was already tacky so I had to clean it all off & start over. Chalk it up to one of the drawbacks from only getting an hour or two a week to fiddle with it. I should probably be taking more pictures of stuff as it comes apart so I won't forget how it goes back together three weeks later.
I'm "working from home" this next week to satisfy ridiculous DoD protocols despite the fact that more than 50% of my job requires that I be physically present to be effective, so I'll actually be "working from the garage" as I keep my Skype bubble green & try to remember to turn the air compressor off for conference calls.
Next step is to paint the frame around the new nutserts, install the skid, & then start on the rear axle install. Should go perfectly.
Shouldn't have taken that long, but my dumbass struggled with the rear transfer case housing for way too long because I had the oil pump tabs on the inside instead of the outside. By the time I figured it out the RTV was already tacky so I had to clean it all off & start over. Chalk it up to one of the drawbacks from only getting an hour or two a week to fiddle with it. I should probably be taking more pictures of stuff as it comes apart so I won't forget how it goes back together three weeks later.
I'm "working from home" this next week to satisfy ridiculous DoD protocols despite the fact that more than 50% of my job requires that I be physically present to be effective, so I'll actually be "working from the garage" as I keep my Skype bubble green & try to remember to turn the air compressor off for conference calls.
Next step is to paint the frame around the new nutserts, install the skid, & then start on the rear axle install. Should go perfectly.
Speaking of, what's the best rattle can paint to spray over the bottom of everything I ground down?Next step is to paint the frame around the new nutserts, install the skid, & then start on the rear axle install. Should go perfectly.
Krylon rust tough preventative enamel is really good and strong.Speaking of, what's the best rattle can paint to spray over the bottom of everything I ground down?
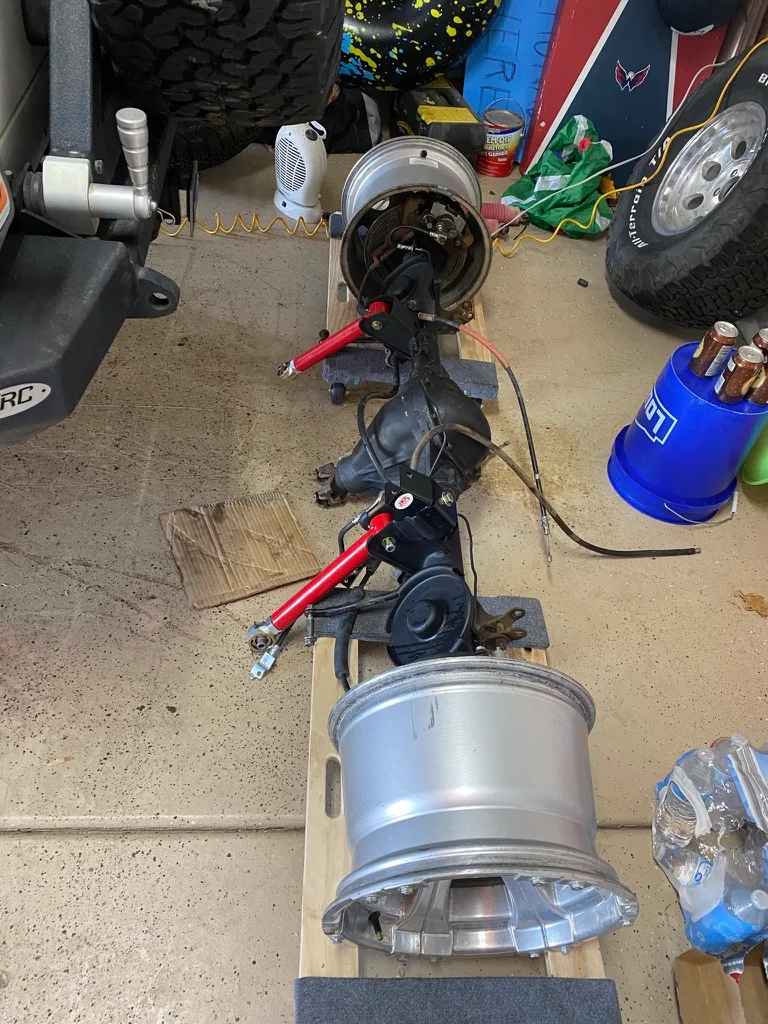
Got a little more time over the weekend, the brakes turned into a little more than I wanted. The left rear brake hose looked suspect, so I wanted to replace them both. The hard line is crimped into the brake hoses from the factory, and there was no option that I could find for getting a full set of pre-bent hardlines with hoses. So I just got some hoses and a length of brake line & made my own. I wasn't planning on spending a day & a half on getting the lines just right, but I did. Should work fine, we'll see if my homemade flares leak when I go to bleed the brakes. I realized after I took this picture that the left brake line is farther away from the axle than I like, and given the fact that the pinion is going to be raised I think I'm going to redo that one. At this point I just want to get it centered so I can get my driveshaft.
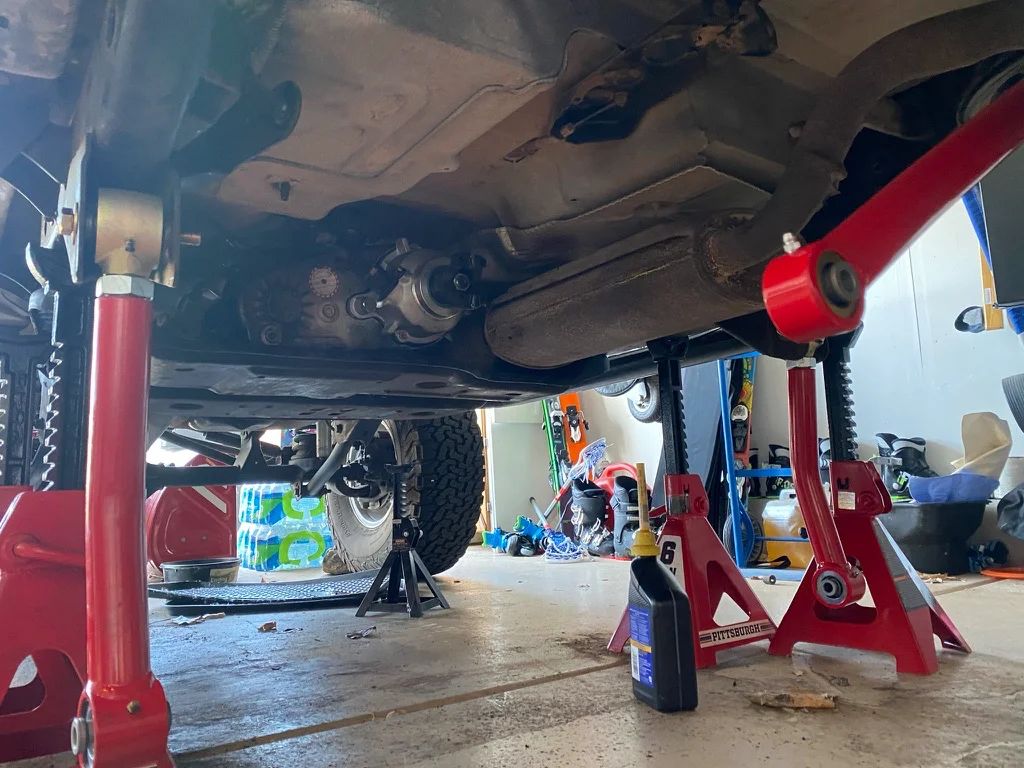
Changed the pinion seal, cleaned up the axle, gave it a fresh coat of paint, & hung the control arms. Here she is in all her glory ready to be hanged.
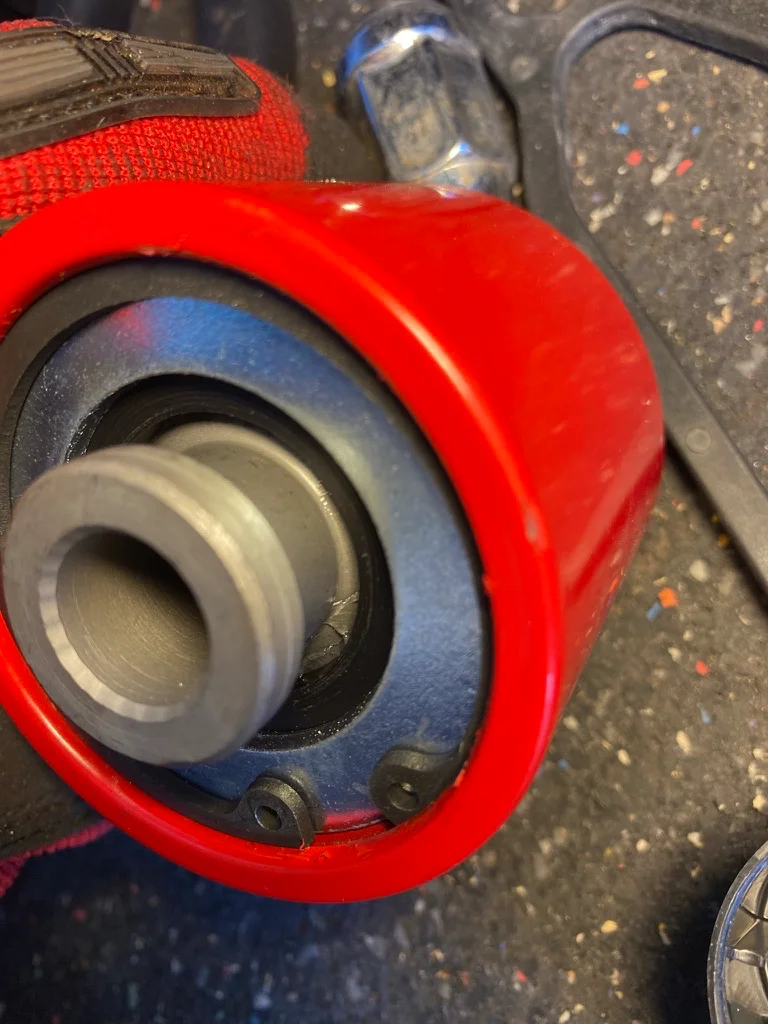
What's not cool is that when I was going through my control arms from Core 4x4 two of the arms had forged ends with the snap ring not completely seated in the groove. I messed with them a little bit & can't get them to pop in. I called the place & their first response was to see if I can press the joint further into the housing, but I told them A: I don't have a press, and B: Even if I did, I have about an hour a week of free time to work on this thing & I'm not interested in losing my time because of their quality escapes. Still waiting to hear back.
Installing the zerks was also a pain in the ass because they got their powder coat all up in the threads. I couldn't chase it because my taps are tapered & wouldn't thread before they bottomed out on the joint, so I had to get a cutting wheel & nick a zerk fitting to turn it into a tap & chase the threads out. Minor annoyance.
Changed the pinion seal, cleaned up the axle, gave it a fresh coat of paint, & hung the control arms. Here she is in all her glory ready to be hanged.
What's not cool is that when I was going through my control arms from Core 4x4 two of the arms had forged ends with the snap ring not completely seated in the groove. I messed with them a little bit & can't get them to pop in. I called the place & their first response was to see if I can press the joint further into the housing, but I told them A: I don't have a press, and B: Even if I did, I have about an hour a week of free time to work on this thing & I'm not interested in losing my time because of their quality escapes. Still waiting to hear back.
Installing the zerks was also a pain in the ass because they got their powder coat all up in the threads. I couldn't chase it because my taps are tapered & wouldn't thread before they bottomed out on the joint, so I had to get a cutting wheel & nick a zerk fitting to turn it into a tap & chase the threads out. Minor annoyance.

Similar threads

- Replies
- 54
- Views
- 4,704


- Replies
- 5
- Views
- 1,032

- Replies
- 26
- Views
- 2,647


- Replies
- 9
- Views
- 1,633

- Replies
- 22
- Views
- 3,196

