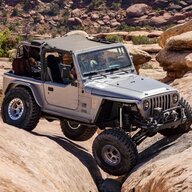
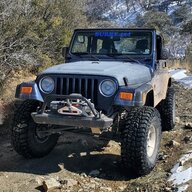
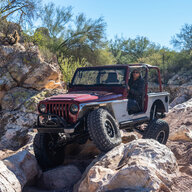
PC1P's 1998 Jeep TJ Build - "Ophelia"

Okay now you have me wondering if it would be better to simply notch the Savvy bracket around the GenRight body mount or the other way around... It wouldn't be too particularly hard to cut 1/4" off (or whatever the thickness of the Savvy brackets are) off the portion that touches the top of the frame. This would sit on top of the Savvy brackets

View attachment 234912
I notched the GR body mount. It's easy enough to do after the midarm.
 
  • Like
Reactions: pc1p and Wildman
You're moving along really good. I spent extra time on mine when I had to apart because I was building the custom mounts for the rear air bags and that took a few days. Then I pulled the rear section of frame back out and welded everything together sitting on jack stands.

20200612_042615.webp


20200616_163130.webp
 
  • Like
Reactions: pc1p
I called Totten Tubes (https://www.tottentubes.com/) today and they said that the tube has been cut and bundled (I had the 12' stick I had to buy cut into 3 pieces for easy transport in the Grand Cherokee!) and is ready for pick-up! (y) With any luck, the new cobalt 1/2" drill bits will also arrive today and I can start prepping the stretch pieces...

View attachment 235127

After a little bit of angle grinder and sawzall action, I got the middle crossmember cut out. I kept the blade super tight to the frame the entire time so there wasn't much to grind away from the rail, but there is still a somewhat measureable gap to be closed up. Rather than goop a bunch of weld in there, I'm thinking of making a small bridge plate out of some 1/4" flat stock. Something like this...

View attachment 235134

I'm going to cut off the "wings" from the crossmember that the shocks mount to this afternoon and make those bridge pieces... the goal is to get the frame stretch and welded in place on Saturday!
I feel like cutting frames in half is becoming common practice on this forum now.

When you add (roughly) 5" to the frame I assume you'll need to add 5" to the body as well so the mounts line up correctly? Or, is that why you cut the upper support out?
 
  • USA Proud
Reactions: pc1p
I feel like cutting frames in half is becoming common practice on this forum now.

When you add (roughly) 5" to the frame I assume you'll need to add 5" to the body as well so the mounts line up correctly? Or, is that why you cut the upper support out?

It's why you cut the crossmember out and then weld it back in. He's going to push the rear axle back 5" where I only went back 4.5" because I was keeping the tire under the flares. If you aren't worried about having flares like when Blaine does his builds then you can go back more.


Also by moving where the crossmember sits you are able to remove those body lift pucks if you had one. So between that and doing the rear BCE the only puck you have to use is the one on the front.
 
Last edited:
  • Like
Reactions: pc1p and Alex01
I feel like cutting frames in half is becoming common practice on this forum now.

When you add (roughly) 5" to the frame I assume you'll need to add 5" to the body as well so the mounts line up correctly? Or, is that why you cut the upper support out?
Some people cut the frame and then also extend the body; this is most commonly done to make a TJ-6. With a TJ-6, you cut and extend the frame 15" to bring the frame to LJ-length, but extend the tub only in front of the axle (where the LJ has additional length in front or in back of the axle). This results in a LJ-long tub but with the TJ overhang and departure angle, on a ~109" wheelbase.

I was originally leaning toward a TJ-6 conversion, but my tub is far, far from straight and have heard that it is a nightmare to do it nicely on anything but razor straight tubs. I'm also going to try to keep my rig on Jeep-width axles, which basically limits it to 35" tires. With a 35"s, the TJ-6 wheelbase is a tad too long for this area (at least without going to a ridiculously tucked tummy).

There are a few ways you can stretch the rear of a TJ (or any rig). You can do what something like the Clayton or GenRight "stretch kits" do and run physically longer links. This moves the axle back but does require you to relocate the top spring bucket. Due to where the spring must now sit on the frame, you are required to run a much shorter spring - usually factory height in the rear (which is then matched with a 4" spring in front). This also reduces the amount of available uptravel, as the frame typically becomes the hard-stop. The alternative is to run coilovers, which is really challenging due to the frame width and axle width (and the resulting clearance issues!).

Since I'm not planning on coilovers, what I'm doing (and what @Wildman and others have already did) was to cut just the frame and extend it back (in my case, 5"). This keeps the axle-to-frame relationship the same, just moving it back some. This allows me to use the same springs I'm using (or any other commonly available aftermarket spring) and even the factory short-arm geometry. Another benefit is that the rear gap between the bumper/rear crossmember and the tub can be eliminated (or greatly reduced).

Coupled with a small front stretch (shooting for 100-101" WB), a tucked tummy, and 12" shocks, it should be a solid performer in AZ and the southwestern trails. One of the reasons the XJ does so well here in AZ is that it has just enough WB over the SWB Jeeps to get the front tire over obstacles/ledges. Personally, I've seen too many $hitbox XJ's walk up ledges where nicely built TJ/YJ's struggle on just due to the difference in being able to get a tire on the flat part of a ledge vs the face of it...

 
  • Like
Reactions: Alex01 and Wildman
Some people cut the frame and then also extend the body; this is most commonly done to make a TJ-6. With a TJ-6, you cut and extend the frame 15" to bring the frame to LJ-length, but extend the tub only in front of the axle (where the LJ has additional length in front or in back of the axle). This results in a LJ-long tub but with the TJ overhang and departure angle, on a ~109" wheelbase.

I was originally leaning toward a TJ-6 conversion, but my tub is far, far from straight and have heard that it is a nightmare to do it nicely on anything but razor straight tubs. I'm also going to try to keep my rig on Jeep-width axles, which basically limits it to 35" tires. With a 35"s, the TJ-6 wheelbase is a tad too long for this area (at least without going to a ridiculously tucked tummy).

There are a few ways you can stretch the rear of a TJ (or any rig). You can do what something like the Clayton or GenRight "stretch kits" do and run physically longer links. This moves the axle back but does require you to relocate the top spring bucket. Due to where the spring must now sit on the frame, you are required to run a much shorter spring - usually factory height in the rear (which is then matched with a 4" spring in front). This also reduces the amount of available uptravel, as the frame typically becomes the hard-stop. The alternative is to run coilovers, which is really challenging due to the frame width and axle width (and the resulting clearance issues!).

Since I'm not planning on coilovers, what I'm doing (and what @Wildman and others have already did) was to cut just the frame and extend it back (in my case, 5"). This keeps the axle-to-frame relationship the same, just moving it back some. This allows me to use the same springs I'm using (or any other commonly available aftermarket spring) and even the factory short-arm geometry. Another benefit is that the rear gap between the bumper/rear crossmember and the tub can be eliminated (or greatly reduced).

Coupled with a small front stretch (shooting for 100-101" WB), a tucked tummy, and 12" shocks, it should be a solid performer in AZ and the southwestern trails. One of the reasons the XJ does so well here in AZ is that it has just enough WB over the SWB Jeeps to get the front tire over obstacles/ledges. Personally, I've seen too many $hitbox XJ's walk up ledges where nicely built TJ/YJ's struggle on just due to the difference in being able to get a tire on the flat part of a ledge vs the face of it...
Thanks for the thorough reponse.

The stretch the way you guys are doing it intrigues me quite a bit because it wouldn't screw up the mounts for the outboard. I guess I'd need to get a different tank and also different corners though or I'd have huge wheel openings.

Definitely on the save for later list.
 
  • Like
Reactions: pc1p and Wildman
Thanks for the thorough reponse.

The stretch the way you guys are doing it intrigues me quite a bit because it wouldn't screw up the mounts for the outboard. I guess I'd need to get a different tank and also different corners though or I'd have huge wheel openings.

Definitely on the save for later list.
For the wheel opening, you could run "blank" corners and then open them up as needed. However, I have seen a handful of nicely opened up TJ-sized corners so I'm going to try that first and see if I can live with it. My 35" MT/Rs are damn near close to 35"s so they should fill it out decently enough (I hope!). If not, I'll eventually get some different corners.

For the tank, I went with the new Motobilt Stretch Tank - I'll report how it fits and works as I get through some testing (supposed to ship today!).

According to many, including Blaine, the outboard isn't affected by the stretch.
 
  • Like
Reactions: Wildman and Alex01
Well, I wired up my CB today. I'll be able to hear y'all next time we wheel. Was able to talk to someone about 3 miles away, that should be good as I try and keep up with this monster of a rig you building.
Nice work! Looking forward to wheeling with you again soon...
 
  • Like
Reactions: RINC
Well, the stretch is almost complete!

I started by trimming the "ears" off of the center crossmember. I gave it a good hit with a flap disc as well as the wire wheel, then followed up with some Super Clean and a hose.
IMG_2215.webp


Totten Tube here in Phoenix was the only place I could find the 2.5" x 4" x 0.188" wall tube. They would only sell me a 12' stick but chopped it up into three sections. I double checked that the ends were squarely cut (they were!) and marked my 5" sections off both ends.
IMG_2224.webp


I prepped the cut section of the frame, first my getting the body mounts chopped off. These were easy - a quick hit with an angle grinder on the welds, then I cut the "U" into sections and whacked the pieces off with a hammer.
IMG_2225.webp


I bolted the crossmember back to the tub before putting the frame back up.
IMG_2230.webp


According to what @Wildman shared, I made the stretch pieces per Blaine's suggestion and success in the past.
IMG_2232.webp


I prepped the frame rails a bit. They were cut as square as possible, but I still took ~1/16" off of length with a flap disc (per the guidance from many folks who have done the TJ-6 stretch) to accommodate some out-of-squareness and flexibility in ensuring the length is perfectly matched from side to side.
IMG_2233.webp


Thanks to an extra set of hands from @starkey480, using some clamps and angle iron, we doubled-checked and then tripled-checked the distances and put some tack welds in place.
IMG_2242.webp


We double-checked square once again and then once again once more, then tacked in the seams, then turned and burned in the plug welds...
IMG_2234.webp


You can see the frame stickout clearly here...
IMG_2240.webp
IMG_2241.webp


The Motobilt crossmember and gas tank should be here Tuesday, so we will be able to get the crossmembers fully burned in place later this week...
 
Looking good. You jumped right into this where it took me a little poking and prodding to finally cut my frame.

Glad you're moving along and I'm looking forward to hearing about the Hemi.
 
  • Like
Reactions: pc1p
Hahah! Damn it, I totally forgot to say that.

For those not there, what Starkey is referring to is the final measurement came out to 4-15/16" of stretch as measured on the reference marks.
Now you can’t update your profile to say 5” stretch, cause, ya know, we‘ll know...
 
After discussing welders with my good buddy, I decided it was time to buy a big-boy welder...

IMG_2277.webp


Found a smoking deal on a Lincoln Power MIG 255; came with three monster 44# spools of wire, a full size 200 cylinder of 75/25 welding gas and a bunch of spare tips.

IMG_2278.webp


Brown Santa also dropped off a huge box from Motobilt...

IMG_2279.webp
 
After discussing welders with my good buddy, I decided it was time to buy a big-boy welder...

View attachment 237059

Found a smoking deal on a Lincoln Power MIG 255; came with three monster 44# spools of wire, a full size 200 cylinder of 75/25 welding gas and a bunch of spare tips.

View attachment 237060

Brown Santa also dropped off a huge box from Motobilt...

View attachment 237061
My dad has that same welder... It's a beast. Something like an 80 percent duty cycle... Really nice.
 
  • Like
Reactions: pc1p
How does the MotoBilt tank compare to the GenRight tank?
Physically, the Motobilt is a different shape. The GR tank (for stretches) had a notched center. The MB is similar to a fuel cell and is more rectangular.

From a build and quality perspective, they appear identical. The neck/fuel pump module section is nicely machined and looks very clean. The finish work is top notch and the welds make me want to cry. I can’t speak to much else yet but will report as I go along. I will post some more pics soon...
 
Physically, the Motobilt is a different shape. The GR tank (for stretches) had a notched center. The MB is similar to a fuel cell and is more rectangular.

From a build and quality perspective, they appear identical. The neck/fuel pump module section is nicely machined and looks very clean. The finish work is top notch and the welds make me want to cry. I can’t speak to much else yet but will report as I go along. I will post some more pics soon...
Is the MotoBilt a lot cheaper?