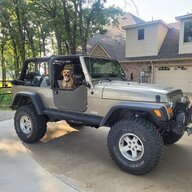
With a recent series of serious overheating incidents while offroading and towing my little pop-up trailer, I decided to hasten my plans to install an auxiliary transmission cooler for my 42RLE automatic transmission. I had added one to my previous TJ that had the more robust 32RH, but Jeep’s newer automatic transmission like my 2004 Rubicon has is far fussier about such things.
High temperatures are the #1 killer of automatic transmissions. So, it makes a lot of sense to make sure it doesn’t overheat while towing trailers, rock crawling, offroading, or just plain crawling in heavy traffic on a hot day. How to do that? Add an auxiliary transmission cooler.
After much research, I decided on a stacked plate transmission cooler from Derale Performance, a well known manufacturer of cooling products for everything from engine oil to automatic transmissions. With over fifty years of making nothing but such products, it was clear to me that Derale knows what they are doing.
After viewing their catalog, it turns out that Derale Performance makes an automatic transmission cooler kit specifically made for the Jeep Wrangler, “
Part # 20561 Direct Fit Remote Cooler, 87-06 Jeep Wrangler TJ, YJ.” Very cool, that is exactly what I need!
View attachment 4891
You can purchase the Derale 20561 transmission cooler here.
Mounted to the frame, this type of fan-based stacked plate transmission cooler uses a thermostatically controlled switch to turn its 500 CFM fan on when the ATF reaches 180 degrees and off after it has cooled it back down to 170 degrees. No frame drilling or frame modification is required to mount it to the frame; it comes with a very cool two-piece clamp-style mount that makes the mounting process very simple. Derale says this kit can lower the transmission fluid temps by 30 to 40 degrees.
This is the box that arrived… you can see it is nicely packaged specifically for the Wrangler.
View attachment 4867
It comes well packaged and it contains every thing needed to install it, down to zip ties for the electrical wiring. The only tools you need are minimal and very basic. If you have SAE size wrenches, a pair of pliers, wire cutters, and a solderless connection crimp tool, you’re good to go. A nice additional tool would be a heat gun and heat shrink tubing for the fan’s electrical connections.
It was engineered to be easily installed by anyone with basic hand tools and that’s what it turned out to be… a very easy non-technical job. The mount and fan frame are unique to the Wrangler kit so no mods are needed to get it to fit perfectly.
View attachment 4866
View attachment 4870
Even the two supplied coolant hoses are already cut precisely to length and are complete with fancy red and blue anodized AN fittings. AN fittings are the standard for high-quality builds, you won’t have leaks from these.
View attachment 4868
One of the first things I noticed about Derale’s kit was its set of instructions. It’s clear Derale put some serious time and effort into them. They are complete, extremely well illustrated, and leave nothing for you to have to figure out. Check them out below.
Derale Instructions:
https://derale.com/images/stories/virtuemart/product/pdfs/20561.pdf
First things first, position the cooler on your workbench so you can attach its two fittings, install its thermostat switch, and do the very basic wiring so the thermostat switch can turn the fan on and off.
View attachment 4869
View attachment 4871
Thread the aluminum fittings, the two on the left above, onto the fan assembly’s inlet and outlet connectors. Note that the o-ring shown above on the left-most fitting actually goes on the OTHER side of that fitting. The o-ring needs to be on the side of the fitting that threads into the cooler, not on the hose side as shown in the picture.
View attachment 4874
Please don't beat me up too much for using the Crescent wrench on that 1 1/16" fitting, my SAE open-end/box-end set set only goes up to 1".
Attach the thermostat switch and its aluminum fitting as shown below using a 7/8” and 1 1/16” wrench. The thermostat switch’s sensor protrudes into its fitting far enough so it can actually touch the ATF as it is pumped through. Use a bit of Locktite on the middle of the thermostat switch’s threads to insure it doesn’t unscrew from the engine’s vibrations. Do not use a wrench to tighten the thermostat switch, it should only be firmly hand-tightened.
View attachment 4872
View attachment 4873
The thermostat switch and fitting assembly is then screwed into the cooler’s input port.
View attachment 4875
Wiring the thermostat switch in is easy, it is a simple on-off switch that turns the fan on and off based on the temperature of the transmission’s ATF fluid. The switch turns the fan on when the ATF reaches 180 degrees, well below the temperature where damage could occur to the ATF or transmission. The switch shuts the fan off after the ATF has been cooled back down to 170 degrees.
ATF can operate at 200 degrees without damage but much above that and it can become damaged. Synthetic ATF+4 can withstand a bit more heat but not much. The use of a transmission cooler can prevent your transmission from ever getting up into the danger zone of over 200 degrees. At 220, ATF begins to break down. As said above, heat is the enemy of an automatic transmission.
Note the following very carefully. MOST of the time, the black wire is negative and the colored wire is positive. In this kit, to get the fan to turn the right direction so it pulls cool air through the stacked plate cooler, the black wire is POSITIVE and the blue wire is NEGATIVE and it is the BLUE wire that gets grounded. Per the Derale instructions, simply read the label on the fan to verify which color is positive and negative so the fan doesn’t turn the wrong direction.
I used a bit of plastic wire loom to protect the wiring and then zip-tied it to an adhesive zip-tie holder to keep the wires where they belong.
View attachment 4878
Next, connect the supplied red wire to the other side of the thermostat fan switch. This wire connects the fan to a +12v source. Derale recommends the +12v be switched, which means the power should only be on when the ignition switch is on. Derale provides an inline fuse holder and blade style fuse to protect everything. Slip the red wire into the provided protective plastic wire loom before mounting the fan.
View attachment 4876
I cover every splice and every crimped connection with protective insulated heat-shrink tubing. Heat shrink tubing is inexpensive, better, and quicker than wrapping connections and splices with electrical tape. This pic shows a heat gun being used to shrink the heat shrink tubing that can be found in any hardware store, Home Depot, Radio Shack, etc.
View attachment 4877
With the fan pre-wired and its hose connectors installed, it is time to install its mount to the Jeep’s frame. The top part goes inside, the smaller part slips over the frame from the outside.
View attachment 4879
The mount leaves plenty of room for the fuel lines and wiring that run along the frame.
View attachment 4880
View attachment 4881
The cooler is attached to the clamp with three bolts. Its angle can be positioned from flat to angled. Once it is at the angle you like, tighten the bolts. For me, it worked best by sliding the mount a bit further rearward and using the forward-most mounting bolt holes. It gives you a choice between two positions, the most forward position worked best for me.
The mount itself is well designed and purposely made from two gauges of steel. The heavier side securely holds the cooler to the frame and away from the fuel and electrical lines underneath. The other half of the mount is still a heavy-gauge steel but it is designed to provide a clamping effect when it bends slightly to conform to the frame and inside mount as the mounting nuts and bolts are given those final turns. The mount holds the fan very securely.
View attachment 4886
For some, that position may seem to be exposed. However, it’s not as exposed as it may seem to be since it has the frame, skidplate, and control arm bracket on three sides of it. I will likely fabricate an additional guard to provide a little added insurance against a rock being in the wrong place at the wrong time. If this makes you feel better, I had my previous TJ’s on-board air tank in the same position and after nearly ten years on the rocks, the rocks never touched the air tank.
View attachment 4887
The electrical line plus coolant lines are attached and tightened before the fan is clamped into its final position and passed forward. They are routed next to the frame and above the transfer case skidplate.
Coolant hose routing and connections
The two coolant hoses are routed along the driver’s side of the frame towards the radiator. The two hoses are connected to the radiator's transmission cooler output side, so the Derale system cools the ATF flowing back towards the transmission. Which side of the radiator's transmission cooler the Derale gets connected into, passenger-side or driver's side, depends on your TJ's model year and thus its transmission type.
For 2002 and older models which use the 3-speed 32RH or 30RH transmission, the Derale cooler lines connect to the passenger-side transmission output port of the radiator and the hard line the OE passenger-side hose used to connect to. Entirely remove the OE short hose that connected the passenger-side transmission cooler port to the hard line, connect the new Derale hoses to those fittings.
The current Derale instructions do not address the change in which way the ATF flows through the radiator transmission cooler for 2003 and newer TJs so the following modification to where its hoses connect should be followed:
For 2003 and newer models which use the 4-speed 42RLE transmission, the Derale cooler lines connect to the driver's-side transmission output port and the hard line the OE driver's-side hose used to connect to. Entirely remove the OE short hose that connected the driver's-side transmission cooler port to the hard line, connect the new Derale hoses to those fittings.
The Derale kit does not otherwise need any additional parts or modifications other than the supply hose leading to the Derale (the plain hose) now has perhaps 6" of extra available length. I left the additional length in place and located the small amount of extra length above the t-case skidplate. Those extra inches of available hose for 2003 and newer TJs may come in handy years down the road.
I expect Derale to add a section to their instructions to cover the 2003 and newer TJ whose transmission cooler flows the ATF through the OE transmission cooler in the opposite direction of the 2002 and older TJ.
The below photo shows the 2003 and newer hose layout connected into the driver's side. For 2002 and older, connect the Derale into passenger side instead.
View attachment 4890
The first hose from the Derale cooler connects to the radiator’s return line. Derale includes two stainless steel hose clamps to be used here and on the other line but I reused the factory constant-tension spring clamps.
View attachment 4882
The other new hose, which is the return line, connects here after the old hose is removed.
View attachment 4883
Derale provides a cool way of attaching the coolant lines to the frame rail which serves to keep them parallel and out of the way of damage. Also provided are zip-ties to secure the hoses and wiring the rest of the way to their destination. Take pain now to insure everything is well secured and out of the way of potential harm.
The two (+ and -) electrical connections are made now.
The negative ground wire, remember, is the blue wire coming from the fan. NOT the black wire which for us electrical types keeps you on your feet. Connect the fan’s blue ground wire to a suitable ground connection. I simply drilled a 9/64” hole in the floor pan above the cooler for the supplied hex-head self-tapping ground screw.
To assure a good solid ground connection, be sure to grind any paint away from what you choose to ground the fan to as shown below. A Dremel tool makes quick work of this.
View attachment 4884
Sorry about the fuzzy photo, it’s just to show to take care in how the wiring is routed.
View attachment 4885
I connected the cooler’s +12v lead to an auxiliary fuse panel I installed last year.
View attachment 4888
The last thing to be done is to add a quart of Valvoline ATF+4. This is needed due to the added capacity of the new Derale transmission cooler.
Don’t do what I did and pour the ATF in faster than the transmission fill tube can accommodate it! Within a minute or two, I had ATF dripping all over the floor and it scared the crap out of me. I had been careful about all the hose connections so it was a scary few minutes until I discovered the ATF had simply overflowed the fill tube. Add the quart of ATF+4 slowly and this won’t happen to you.
Voila, it’s ready for the test! I simply temporary bridged the connection at the thermostat switch and the fan came to life with a definitely audible satisfying roar. You’ll be able to hear it come on if you’re doing low-speed trail work, maybe not on the highway towing your trailer.
Start the engine, let it warm up and check for leaks. I put my hand on the new cooler once it was good and warmed up and it was definitely hot… but not up to 180 degrees because the fan was still off. It took some driving to warm it up enough that the fan came on. Good to go!
This is the final product. Even though I know from past experience that particular location is quite safe, I’m a bit anal about over-protecting everything underneath so I added a protective barrier since this Jeep wheels on a lot of big rocks.
View attachment 63134
So in summary, the benefits of installing this transmission kit are...
- Longer transmission life
- Reduces the transmission’s ATF temperature by a very significant 30 to 40 degrees
- Easily installed, completely bolt-in with no special skills needed
- Thermostatically controlled 500 CFM fan
- Peace of mind when towing, rock crawling, or just heavy traffic.
The quality of the stacked plate cooler itself is outstanding. This is not the cheap type of cooler that NAPA pushes for everything that is easily damaged by even flying insects. Its design is truly heavy-duty without the cheap aluminum fins that get squished together which reduces cooler efficiency. It’s a first-class stacked plate cooler that you have to see to appreciate.
The fan is big and also obviously built to last in the elements of water, mud, and dirt that will inevitably be flipped up onto it. When the fan turns on, it really pulls the air through the plates with authority. 500 CFM (cubic feet/minute).
Last step in the installation... drive it for a week and then get back underneath and check for any leaks where the hoses connect to the cooler. I found one that was weeping a tiny bit, probably from when I had to temporarily disconnect it to reinstall the fittings after learning that I had the two o-rings installed incorrectly. Give the AN fittings a quick test for tightness and re-tighten as needed.
What would I change if this was my product? Basically not a thing, it’s truly a great kit as is. If I had to come up with one enhancement, it’d be slightly longer hoses to give a bit more leeway on hose routing. The hose lengths are technically “perfect” as they were designed but just a tad more length would allow more flexibility in hose routing.
View attachment 4889