
You are using an out of date browser. It may not display this or other websites correctly.
You should upgrade or use an alternative browser.
You should upgrade or use an alternative browser.

James & The Sahara Build Thread
- Thread starter JamesAndTheSahara
- Start date
Oh hit the frame part? Totally didn't think that was ok lol.
Oh hit the frame part? Totally didn't think that was ok lol.
That mount is pretty stout. Just don't wail on it with all you have. Just some good persuasive hits should do it. If it doesn't then kill it with fire.

It will take some good whacks. I would try some hits all around the bolt to help loosen it up.Oh hit the frame part? Totally didn't think that was ok lol.

Yes, big hammer blows right to where those arrows are pointing in the diagram. Took about 50 blows for me. I was worried I'd break something. In the end just pounded that cast portion and it finally fell down
You can do this Jimbo! Keep us posted tomorrow on your progress. Everything is looking good so far. FYI, my name is Jim as well. Bob is my Jeep's name. My girls named it. I don't name inanimate objects for the most part, lol!
BendLarry
TJ Addict
An air hammer makes this a simple job, if you have access to one.
Sent from my iPhone using Tapatalk
Sent from my iPhone using Tapatalk
Thank you Jim! Thanks for clarifying by the way!You can do this Jimbo! Keep us posted tomorrow on your progress. Everything is looking good so far. FYI, my name is Jim as well. Bob is my Jeep's name. My girls named it. I don't name inanimate objects for the most part, lol!
I hope I don't break anything lol. Starting with the front tomorrow and going to get that done before focusing on the rear track bar.Yes, big hammer blows right to where those arrows are pointing in the diagram. Took about 50 blows for me. I was worried I'd break something. In the end just pounded that cast portion and it finally fell down
Will do, really going to hit the crap out of it with my 2lb hammer, won't have access to a 3lb hammer.It will take some good whacks. I would try some hits all around the bolt to help loosen it up.
The shop I am using may have one. In the event they do is there a specific bit I would want to use with the air hammer other than the hammer one?An air hammer makes this a simple job, if you have access to one.
Sent from my iPhone using Tapatalk
BendLarry
TJ Addict
Most air hammers come with an assortment of bits. If you can fit it in there. I would first try a pointed bit, I don't know about your bolt but many have a dimple in the end that will capture the air hammer point. A pickle fork bit can sometimes work with these joints.
Sent from my iPhone using Tapatalk
Sent from my iPhone using Tapatalk
L
LTTJ
Guest
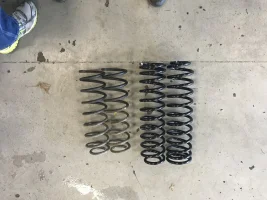
Wow! Sorry today was frustrating, but look at those old springs and shocks!! Your Jeep is going to thank you for the upgrade! Keep up the good work- I'm so excited to see the final pictures tomorrow.
Sent from my iPhone using Tapatalk
Sent from my iPhone using Tapatalk
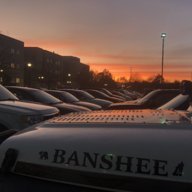
Today was as some would call it: "One of those days". It started off quite well.
Dang I hate when that happens. solid advice from everyone though I have had to beat out bolts too. Excited to see it all finished. You are doing great work!
When you do the front trackbar (Currie I think), I think you have to drill them out for beefier mounting hardware, (I'm sure you know the diameters). To do this it is helpful to have an electric drill rather than battery powered. Your bit needs to be long enough on the axle side to avoid hitting the tie rod and still get all the way through without wallowing out the closest hole. Every TJ is different as your MML showed, fortunately, in your favor, so maybe you won't have this issue. When you get to the frame side, it's a long hole to drill out so just be prepared once you get to that side and make sure your bit is sharp and you have plenty of oil to keep it cool...Good work, keep it up, it's coming together, you're more patient than I am!
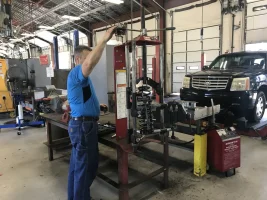
Haha yes I have cooled down since then and am ready for tomorrow. I am very excited to see it tomorrow. I will share photos tomorrow but the Jeep will be left with my mechanic to properly align the new suspension. I will hopefully get a chance to take some mad photos the following day. Enjoying working at the ASC on Fort Benning though, the group of guys in front of me are installing a turbo. Love seeing all the projects that go on.Wow! Sorry today was frustrating, but look at those old springs and shocks!! Your Jeep is going to thank you for the upgrade! Keep up the good work- I'm so excited to see the final pictures tomorrow.
Sent from my iPhone using Tapatalk
Yep I've got plenty of tap magic and have an electric drill with quality bits. Ready to get this show on the road!When you do the front trackbar (Currie I think), I think you have to drill them out for beefier mounting hardware, (I'm sure you know the diameters). To do this it is helpful to have an electric drill rather than battery powered. Your bit needs to be long enough on the axle side to avoid hitting the tie rod and still get all the way through without wallowing out the closest hole. Every TJ is different as your MML showed, fortunately, in your favor, so maybe you won't have this issue. When you get to the frame side, it's a long hole to drill out so just be prepared once you get to that side and make sure your bit is sharp and you have plenty of oil to keep it cool...Good work, keep it up, it's coming together, you're more patient than I am!
Also, and you may know all this stuff, if so just disregard it, but once you get some bumpstops you can slip them in between the coils. I like to put a white lithium spray on them so they slip through easier and then into the cup. Wallaaa....
Regardless of if the information has been passed onto me beforehand or not I truly appreciate all of the help everyone provides. The rear with the axle at full droop was pretty easy to get the pucks in, I know the front has the coils significantly closer to each other. Hopefully there isn't an issue!Also, and you may know all this stuff, if so just disregard it, but once you get some bumpstops you can slip them in between the coils. I like to put a white lithium spray on them so they slip through easier and then into the cup. Wallaaa....
L
LTTJ
Guest
Haha yes I have cooled down since then and am ready for tomorrow. I am very excited to see it tomorrow. I will share photos tomorrow but the Jeep will be left with my mechanic to properly align the new suspension. I will hopefully get a chance to take some mad photos the following day. Enjoying working at the ASC on Fort Benning though, the group of guys in front of me are installing a turbo. Love seeing all the projects that go on.
Yep I've got plenty of tap magic and have an electric drill with quality bits. Ready to get this show on the road!
Oh man, military guys and their car mods! When my husband was at Hood I couldn't believe how much road noise we had from modified cars.
I was also chatted up at the gate multiple times about what I was driving. Okay guy on the gate- I could mod my diesel Jetta, yes, but should I? I'm really just trying to take my husband lunch or get to the PX... seriously. It's like when you're in the Army you have to be into cars, trucks, Jeeps, or football. And golf, geez, don't forget the golf!
I hope that cooling down involved some beers. Or tequila. Either will work!
Sent from my iPhone using Tapatalk
I hear you on that. Just to clarify my father is the one who is currently actively servicing. I'm a university student finishes up my undergraduate.Oh man, military guys and their car mods! When my husband was at Hood I couldn't believe how much road noise we had from modified cars.
I was also chatted up at the gate multiple times about what I was driving. Okay guy on the gate- I could mod my diesel Jetta, yes, but should I? I'm really just trying to take my husband lunch or get to the PX... seriously. It's like when you're in the Army you have to be into cars, trucks, Jeeps, or football. And golf, geez, don't forget the golf!
I hope that cooling down involved some beers. Or tequila. Either will work!
Sent from my iPhone using Tapatalk
L
LTTJ
Guest
I hear you on that. Just to clarify my father is the one who is currently actively servicing. I'm a university student finishes up my undergraduate.
Ha, I figured something like this because your Jeep doesn't have like 25 airborne or ranger decals on it!
My husband did college first, did about 7 years active duty and is a reservist now. Honestly, there is just no way we could both have meaningful careers if he had stayed in and that is a big deal to us. But there are times when I miss the military life. Certainly life is very different for us now.
Sent from my iPhone using Tapatalk
I appreciate his service. I'm glad you both found your careers!Ha, I figured something like this because your Jeep doesn't have like 25 airborne or ranger decals on it!
My husband did college first, did about 7 years active duty and is a reservist now. Honestly, there is just no way we could both have meaningful careers if he had stayed in and that is a big deal to us. But there are times when I miss the military life. Certainly life is very different for us now.
Sent from my iPhone using Tapatalk
We barely completed it today!
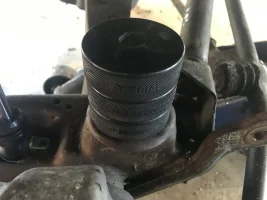
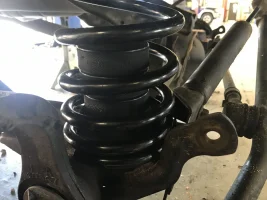
We barely made the closing time of the shop today, but the Jeep was finished today. By far the hardest part was getting the rear trackbar back into the mount (It literally took me backing/turning out of the garage slowly and my dad on a creeper under the vehicle to get the bolt holes to line up properly). Today we properly bumpstopped the front (3 hockey pucks for the front, 2 hockey pucks in the rear, shocks limiting on both sides), we got the springs and shocks in (The springs REQUIRED a spring compressor, there was no other way than to disconnect the control arms the axle was a max droop with the control arms attached, unlike the rear), we drilled & installed the front trackbar (Which required a $35.00 Fastenal 5/8ths drill bit, ugh didn't have time to go looking around for a better price), got all the tires on, & got the rear stock trackbar attached. In the process putting everything together there was one mishap, when attaching the driver's side front stock sway links, one imploded as soon as we reached the torque spec (lucky for me a peer offered to give me a free set of his TJ quick disconnects, so picking those up tomorrow). The Jeep is currently parked at Firestone waiting a proper alignment, barely made it there (5:57PM EST 3 minutes before they closed, also driving "disconnected" on the main road is a terribly awkward feeling) so I will find out tomorrow if she gets aligned all properly. Here are the tons of pictures I took of the work we did today.
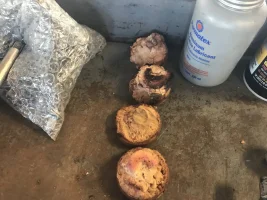
Old jounce bumpers that were completely shot:
Bumpstopping the front of the TJ & Coils/Shocks installation:
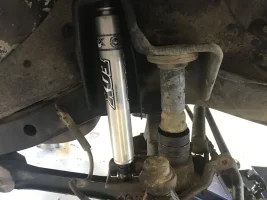
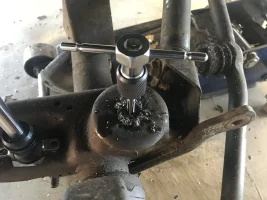
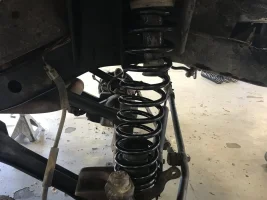
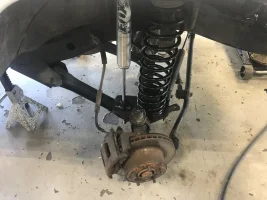
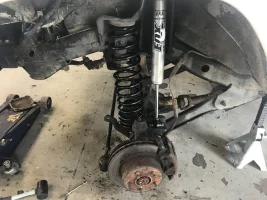
Front Currie Trackbar Installation:
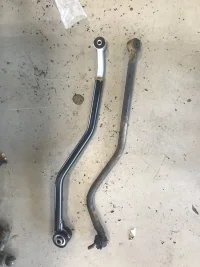
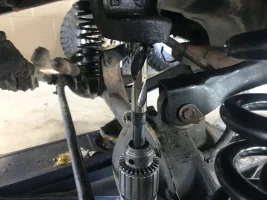
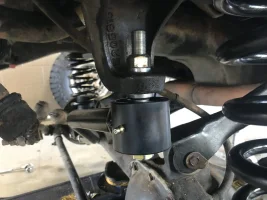
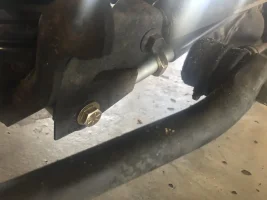
Front sway bar link mishap:
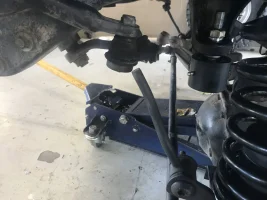
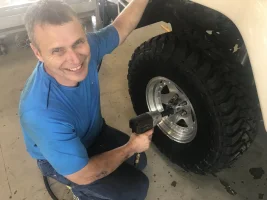
Obligatory photo of my dad installing the last tire:
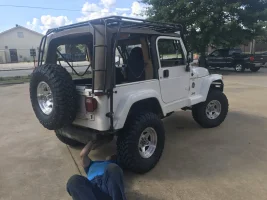
Fighting the rear trackbar in the parking lot:
Final installation photos before rushing to Firestone:
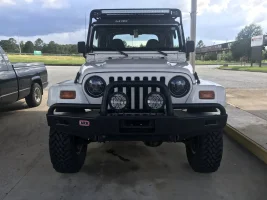
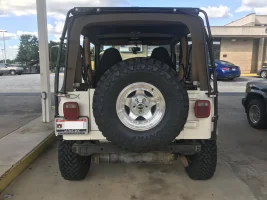
And just because its a build thread, here's my progressive from before & after the suspension work:
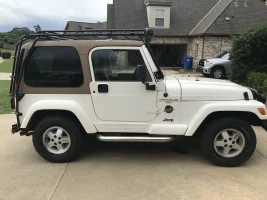
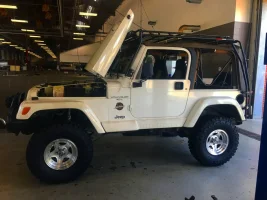
Today was an incredible success and another day my dad was able to help out, I couldn't have done it without him. I will update everyone once I find out how she turns out after the alignment & new disconnects installed. Finally she's starting to feel like a real Jeep!
We barely made the closing time of the shop today, but the Jeep was finished today. By far the hardest part was getting the rear trackbar back into the mount (It literally took me backing/turning out of the garage slowly and my dad on a creeper under the vehicle to get the bolt holes to line up properly). Today we properly bumpstopped the front (3 hockey pucks for the front, 2 hockey pucks in the rear, shocks limiting on both sides), we got the springs and shocks in (The springs REQUIRED a spring compressor, there was no other way than to disconnect the control arms the axle was a max droop with the control arms attached, unlike the rear), we drilled & installed the front trackbar (Which required a $35.00 Fastenal 5/8ths drill bit, ugh didn't have time to go looking around for a better price), got all the tires on, & got the rear stock trackbar attached. In the process putting everything together there was one mishap, when attaching the driver's side front stock sway links, one imploded as soon as we reached the torque spec (lucky for me a peer offered to give me a free set of his TJ quick disconnects, so picking those up tomorrow). The Jeep is currently parked at Firestone waiting a proper alignment, barely made it there (5:57PM EST 3 minutes before they closed, also driving "disconnected" on the main road is a terribly awkward feeling) so I will find out tomorrow if she gets aligned all properly. Here are the tons of pictures I took of the work we did today.
Old jounce bumpers that were completely shot:
Bumpstopping the front of the TJ & Coils/Shocks installation:
Front Currie Trackbar Installation:
Front sway bar link mishap:
Obligatory photo of my dad installing the last tire:
Fighting the rear trackbar in the parking lot:
Final installation photos before rushing to Firestone:
And just because its a build thread, here's my progressive from before & after the suspension work:
Today was an incredible success and another day my dad was able to help out, I couldn't have done it without him. I will update everyone once I find out how she turns out after the alignment & new disconnects installed. Finally she's starting to feel like a real Jeep!
Similar threads
- Replies
- 4
- Views
- 1,222


- Replies
- 30
- Views
- 5,539

- Replies
- 1
- Views
- 290

- Replies
- 7
- Views
- 1,316

- Replies
- 26
- Views
- 5,869
