I sent my measurements to the guys at tom woods after the tuck and they mentioned any pinion angle changes would be so minimal it shouldn't be worried about.Wasn't so concerned about hitting as how long the drive shaft needed to be, considering it's already been ordered.

You are using an out of date browser. It may not display this or other websites correctly.
You should upgrade or use an alternative browser.
You should upgrade or use an alternative browser.

Savvy tummy tuck / under armor install
- Thread starter mattcogdell
- Start date

As far as
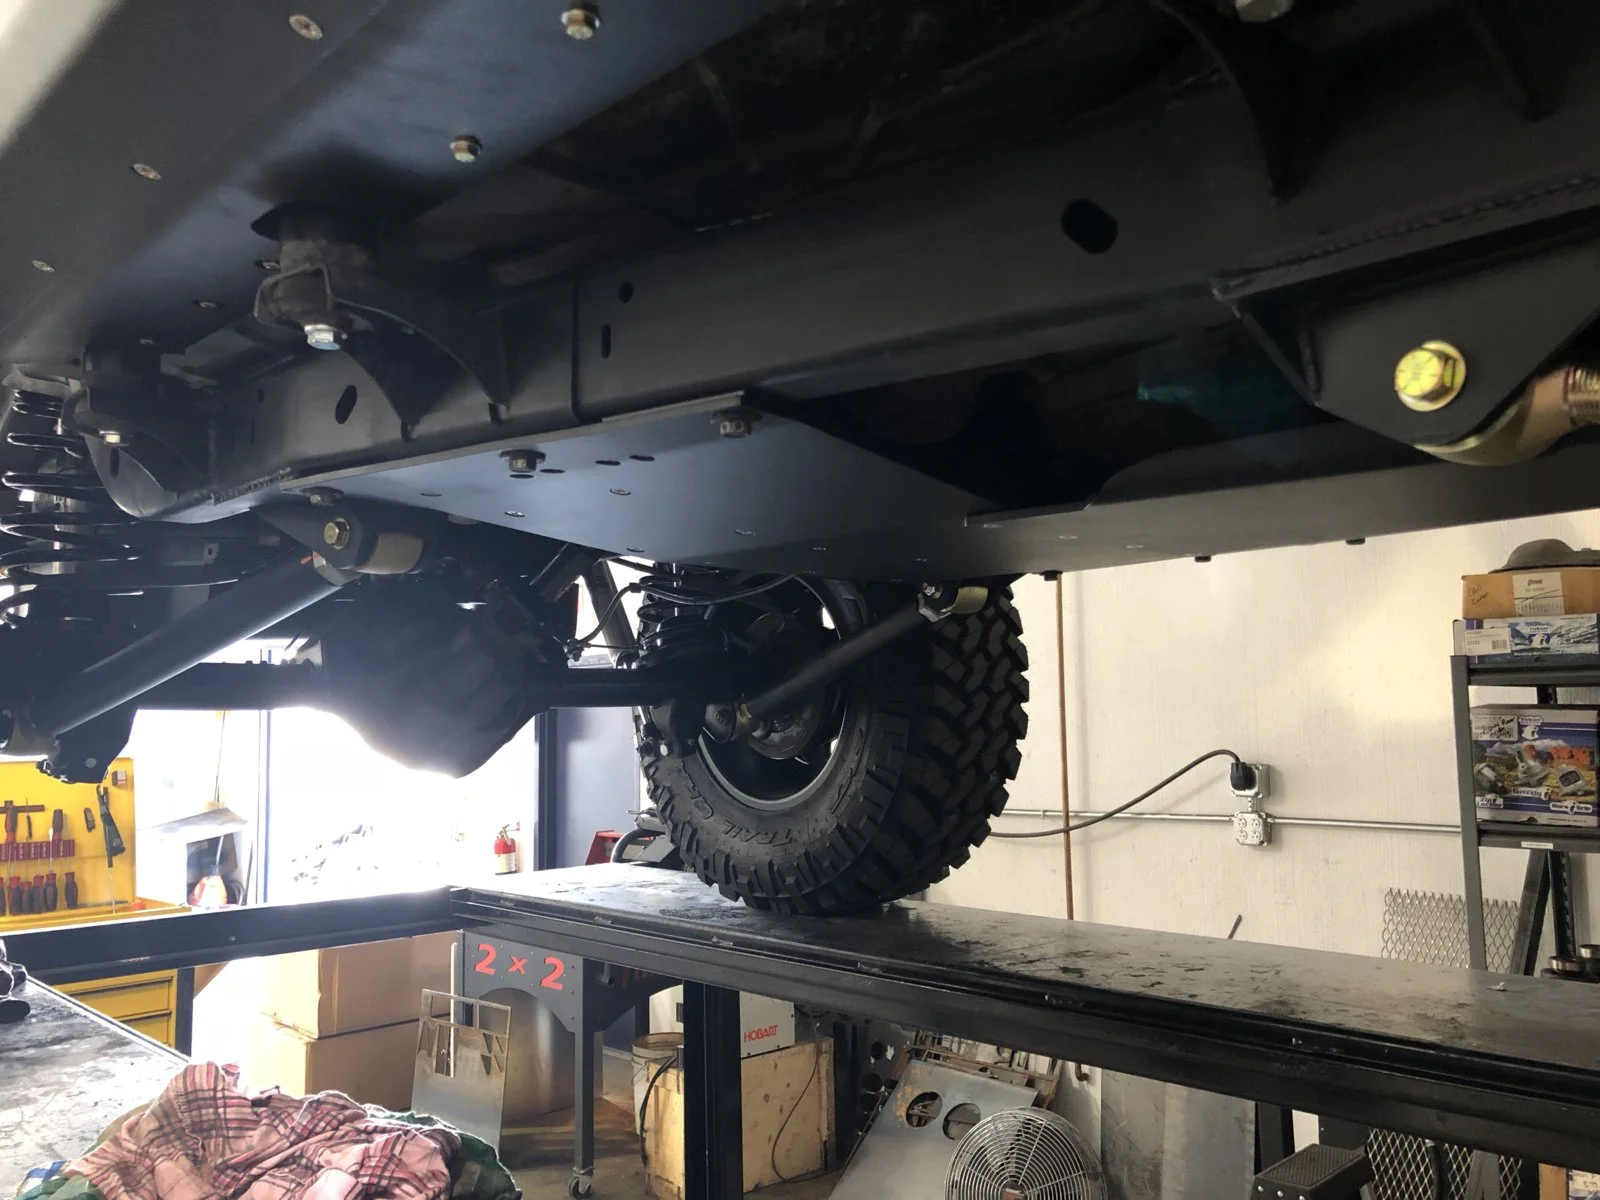
This is my attempt to do what is needed while keeping it minimal. The Jeep has 2 inch OME springs. The Jeep is extremely capable as is but my biggest holdups where the factory steering and skid getting hung up. I have full intensions of the mid arm but rather than throwing money at the Jeep I am enjoying learn how each upgrade benifits me from the past. If you hopped in a Jeep that was built prior or just threw money at it without wheeling, what would you gain aside from a sweet Jeep? Probably wouldn't learn anything ......
That's a good way to go about it. Solve the problems as they present themselves.

Interesting to see differences between jeeps. When I installed my savvy skid I had to have my driveshaft lengthened to 19"

Well done. Watching with interest. I'm running 2" lift springs as well and have found the same as you...Skid plate gets hung up the most. I can run with guys on 35's, right up until I catch the skid. I also need to put some armor on my axle side control arm mounts.

Once the Jeep gets more lift I will probably need to order a longer one. It has 2" springs currentlyInteresting to see differences between jeeps. When I installed my savvy skid I had to have my driveshaft lengthened to 19"
I understand that. I was in the same boat. I'm curious to see what the next issue is now. I do not believe I can run front lower control arm mount skids with factory arms? Maybe I'm wrong. If so I'll order some. The groups that I've wheeled with are always surprised just how well that Jeep goes.Well done. Watching with interest. I'm running 2" lift springs as well and have found the same as you...Skid plate gets hung up the most. I can run with guys on 35's, right up until I catch the skid. I also need to put some armor on my axle side control arm mounts.
You already have a taste of your Jeep without somewhat of a belly but you will fall in love all over after sticking this one on! I'll try to get pics of the one and only spot I have to make clearance for.Savvy finally shipped mine! It shows it will be delivered on Monday.
Took about 3 weeks, but it's worth it.
You already have a taste of your Jeep without somewhat of a belly but you will fall in love all over after sticking this one on! I'll try to get pics of the one and only spot I have to make clearance for.
Yep. My Rokmen is the same height as the Savvy in the middle I believe, but the sides don't go up to be flat like the Savvy does.
Yeah, I do believe a big limitation with a factory tj (Rubicon espessically) is the belly. I spent about 4 months reading reviews and planning everything. Savvy was the most well thought out and put together kit. I saw two UCF kits within that time of research so you could say that they were selling to upgrade to savvy. I'm a very firm believer in spending money once and being done. (Then moving to the next project lol)Watching this build, planning a TT next spring, was looking at the UCF original skid due to price but damn that looks good. Also running OME springs and get the same comments from the big boys on 35s /37s.
This is strictly my opinion and I think if you spend your time reading and talking to those with savvy or another company it's possible you'll form the same opinion. I can say how ever without any instructions the kit went together extremely easy. There's two spots that I had to make clearance for. Maybe a quarter inch and realistically it's one spot as they are within inches of another.
This will only apply to those with the rubi transfer case (driver side) :
- The orange circle indicates the two tabs (?) that contact the bottom of the tub. I was told from another savvy owner that without clearance or enough that it creates a vibration.
- The blue circle was a solid cast vertical tab that touched the tub as well. I cut about half an inch off of it. Attempted to make it the same height as the tabs in the orange circle.
- I intially tried several methods that I will not mention to make clearance as they weren't successful. The best thing I found was to take a solid piece of metal probably 4" x .5" and place it on top of the tabs in the orange circle and lifted the transfer case up into the body causing the solid metal piece to press a uniform area up into the tub.
Awe god damnit. I’m on 2 inches with a BB. That skid looks clean ! <take a breath> How to justify it
Awe god damnit. I’m on 2 inches with a BB. That skid looks clean ! <take a breath> How to justify it
I'm with ya, it's on the top of my list to get done but at around $1900 in parts (including a savvy gas skid) it will be a little while before it happens. That total does not include new black magic transfer case skid frame nutserts, I know all my bolts aren't coming out easy with it's Midwest history.
Is the tub relief noticeable inside the cab? Looks like its in a place that would be covered by the front seat or something.This will only apply to those with the rubi transfer case (driver side) :
- The orange circle indicates the two tabs (?) that contact the bottom of the tub. I was told from another savvy owner that without clearance or enough that it creates a vibration.
- The blue circle was a solid cast vertical tab that touched the tub as well. I cut about half an inch off of it. Attempted to make it the same height as the tabs in the orange circle.
- I intially tried several methods that I will not mention to make clearance as they weren't successful. The best thing I found was to take a solid piece of metal probably 4" x .5" and place it on top of the tabs in the orange circle and lifted the transfer case up into the body causing the solid metal piece to press a uniform area up into the tub. View attachment 66898
Once the Jeep gets more lift I will probably need to order a longer one. It has 2" springs currently
2" springs and the fact you have the bigger 241 transfercase. I didnt catch those in your initial posts. Good work though--you'll love it when its all said and done!
The tub is a double wall in that area. The denting isn't visible from the inside.Is the tub relief noticeable inside the cab? Looks like its in a place that would be covered by the front seat or something.
Is the tub relief noticeable inside the cab? Looks like its in a place that would be covered by the front seat or something.
Truthfully I haven't found the area in the tub on the inside. Im pretty sure it is where the console and seat meet and you'll never see that. I looked for it and couldn't see anything.

You will be very pleased once you get it all together! My exhaust fit extra tight and took some extra work to route but I can’t say enough about the quality and function of this system.



Similar threads

- Replies
- 9
- Views
- 2,488
- Replies
- 6
- Views
- 1,375


- Replies
- 63
- Views
- 17,398

- Replies
- 71
- Views
- 14,872

