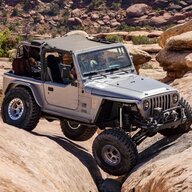
But the wife's commentary is so fun when he's getting filmed on the edge.

Oldie but a goodie! I wish I could find that video on my channel! I’m not too tech inclined.
 
@Mike_H and @Jamison C

The 4 bolts from the flex plate to the T/C would fit in any orientation. They weren’t off 1/8” as Jamison’s. 🤷‍♂️

It’s the 6 bolts through the stiffener and flex plate that only orient one way.

 
@Mike_H and @Jamison C

The 4 bolts from the flex plate to the T/C would fit in any orientation. They weren’t off 1/8” as Jamison’s. 🤷‍♂️

It’s the 6 bolts through the stiffener and flex plate that only orient one way.

Interesting. I know the 32RH orientation doesn't matter, but thought the 42RLE did. Maybe it's one of those weird series things because I know for a fact that my flywheel and TC only went on one way.

Makes things a lot easier for you! You just line up a bolt hole and go.
 
  • Like
Reactions: JMT and Wildman
@Mike_H and @Jamison C

The 4 bolts from the flex plate to the T/C would fit in any orientation. They weren’t off 1/8” as Jamison’s. 🤷‍♂️

It’s the 6 bolts through the stiffener and flex plate that only orient one way.

Might be a year thing? Honestly, I couldn’t remember if mine were off or not, but I know it’s always a possibility, so I wanted to have you check before you get it installed
 
  • Like
Reactions: JMT
Wildman or me? 🤣

I’m not even warmed up yet, but I know one thing, my reverse sucks, and it’s worse in the freezing cold.

Hey be nice.... I'm in a holding pattern at this point...


You'll be done with yours before I'm done with mine with the way things are going.
 
  • Sad
Reactions: FarFire70
Hey be nice.... I'm in a holding pattern at this point...


You'll be done with yours before I'm done with mine with the way things are going.

For your sake I hope you’re wrong. I was able to catch up a bit on your build. Ridiculous they can’t get your parts to you faster. Like you, I’m not liking this post Covid world.
 
  • Like
Reactions: Wildman
For your sake I hope you’re wrong. I was able to catch up a bit on your build. Ridiculous they can’t get your parts to you faster. Like you, I’m not liking this post Covid world.

Well hopefully this will be the year we finally get to go wheeling together. You'll learn how I got the Wildman nickname too...

Show you around some of the Naches trails. You & Kaleb.. And do some camping too.
 
  • Like
Reactions: JMT
Well hopefully this will be the year we finally get to go wheeling together. You'll learn how I got the Wildman nickname too...

Show you around some of the Naches trails. You & Kaleb.. And do some camping too.

That would be awesome. I really hope you get yours done soon! I’ve been waiting and watching and hoping and praying.
 
  • Like
Reactions: Wildman
I've broken my upcoming project into three stages. I'm looking for feedback. I have more to do than just the transmission swap, so I figured I could get some procedures out of the way before the swap and keep driving until I'm ready for the actual swap. I may not be understanding how everything works or how it is best to do everything, so I'm open to advice. My goal is for the Jeep to be down as little as possible. I realize that Stage 3 could take awhile and I'm okay with that.

Order of Swap


Stage 1 (RMS)

1. Disconnect battery
2. Drain oil
3. Remove oil filter
4. Install new oil filter
5. Remove O2 sensor, exhaust bracket and upper exhaust
6. Remove oil pan
7. Fix RMS
8. Install new oil pan
9. Add 6 quarts oil
10. Reconnect battery

Stage 2 (AC EVAP and DASH HARNESS)

1. Get AC evacuated
2. Disconnect battery
3. Remove steering wheel
4. Remove dash
5. Remove dash harness
6. Remove old AC Evap
7. Install new AC Evap
8. Install new dash harness
9. Install O/D switch
10. Install new Eaton elocker switch
11. Reinstall dash
12. Reinstall amp
13. Reinstall steering wheel
14. Reconnect battery
15. Get AC recharged

Stage 3 (TRANSMISSION)

1. Remove battery
2. Remove radiator
3. Install auto radiator
4. Remove brake pedal
5. Remove clutch
6. Install clutch block plate
7. Install auto brake pedal (and plug into dash connector)
8. Remove front console
9. Install transmission temperature gauge
10. Remove front driveshaft
11. Remove TCase
12. Drain and remove NSG370 transmission
13. Remove manual shifter plate
14. Install auto shifter plate
15. Install auto shifter light in bezel
16. Install shift cable
17. Install shift interlock cable
18. ReInstall front console
19. Remove manual engine and transmission harness
20. Remove manual computer
21. Install auto computer
22. Install auto engine and transmission harness with PDC
23. Plug engine harness into dash harness
24. Install auto transmission
25. Install dipstick
26. Install new transmission filter
27. Install transmission temp sender unit in new oil pan
28. Plug in auto transmission connectors
29. Install transmission cooler lines
30. Install TCase and connectors
31. Install front and rear driveshafts
32. Splice fuel pump wires
33. Add ATF+4 to transmission
34. New PCM learn function
35. Go for a drive
 
I've broken my upcoming project into three stages. I'm looking for feedback. I have more to do than just the transmission swap, so I figured I could get some procedures out of the way before the swap and keep driving until I'm ready for the actual swap. I may not be understanding how everything works or how it is best to do everything, so I'm open to advice. My goal is for the Jeep to be down as little as possible. I realize that Stage 3 could take awhile and I'm okay with that.

Order of Swap


Stage 1 (RMS)

1. Disconnect battery
2. Drain oil
3. Remove oil filter
4. Install new oil filter
5. Remove O2 sensor, exhaust bracket and upper exhaust
6. Remove oil pan
7. Fix RMS
8. Install new oil pan
9. Add 6 quarts oil
10. Reconnect battery

Stage 2 (AC EVAP and DASH HARNESS)

1. Get AC evacuated
2. Disconnect battery
3. Remove steering wheel
4. Remove dash
5. Remove dash harness
6. Remove old AC Evap
7. Install new AC Evap
8. Install new dash harness
9. Install O/D switch
10. Install new Eaton elocker switch
11. Reinstall dash
12. Reinstall amp
13. Reinstall steering wheel
14. Reconnect battery
15. Get AC recharged

Stage 3 (TRANSMISSION)

1. Remove battery
2. Remove radiator
3. Install auto radiator
4. Remove brake pedal
5. Remove clutch
6. Install clutch block plate
7. Install auto brake pedal (and plug into dash connector)
8. Remove front console
9. Install transmission temperature gauge
10. Remove front driveshaft
11. Remove TCase
12. Drain and remove NSG370 transmission
13. Remove manual shifter plate
14. Install auto shifter plate
15. Install auto shifter light in bezel
16. Install shift cable
17. Install shift interlock cable
18. ReInstall front console
19. Remove manual engine and transmission harness
20. Remove manual computer
21. Install auto computer
22. Install auto engine and transmission harness with PDC
23. Plug engine harness into dash harness
24. Install auto transmission
25. Install dipstick
26. Install new transmission filter
27. Install transmission temp sender unit in new oil pan
28. Plug in auto transmission connectors
29. Install transmission cooler lines
30. Install TCase and connectors
31. Install front and rear driveshafts
32. Splice fuel pump wires
33. Add ATF+4 to transmission
34. New PCM learn function
35. Go for a drive

While doing the RMS with the transmission off isn’t not necessary, having the bell housing out of the way makes it easier to maneuver.

The RMS is more disassembly than anything. Since you’ll have most of that stuff out of the way when the transmission is out, you’d be surprised at how quick you could get it done. The exhaust alone is half the battle if you’re still using the skid as the trans mount.

Otherwise, I like how you’ve laid out the phases.
 
  • Like
Reactions: PNW_LJ
For your sake I hope you’re wrong. I was able to catch up a bit on your build. Ridiculous they can’t get your parts to you faster. Like you, I’m not liking this post Covid world.

This new normal shit needs to die a quick but painful death. I can remember a time when my job was enjoyable but hard to say that anymore.
 
While doing the RMS with the transmission off isn’t not necessary, having the bell housing out of the way makes it easier to maneuver.

The RMS is more disassembly than anything. Since you’ll have most of that stuff out of the way when the transmission is out, you’d be surprised at how quick you could get it done. The exhaust alone is half the battle if you’re still using the skid as the trans mount.

Otherwise, I like how you’ve laid out the phases.

Ok, thanks for the RMS suggestion. A few months back I cut my exhaust off in front of the skid and put it back together with a Walker clamp so when I got ready to do the RMS I could drop it much easier. I’ll still figure in doing it in tandem with the transmission.🙂
 
One of my daughters is turning 16 this year. She starts defensive driving in March. My Jeep is in desperate need of the transmission swap, so we decided to start car hunting. I found a 2010 Nissan Murano 4D LE AWD with a few minor fixes I can do for sub $300. I pick it up tomorrow. Now I’ll have plenty of time for the swap!
 
  • Like
Reactions: zebra12