
You are using an out of date browser. It may not display this or other websites correctly.
You should upgrade or use an alternative browser.
You should upgrade or use an alternative browser.


I gave up trying to fit the MM 6.5" speakers to the rear pods without altering them. The problems I found with the adapter rings on Thingiverse are:
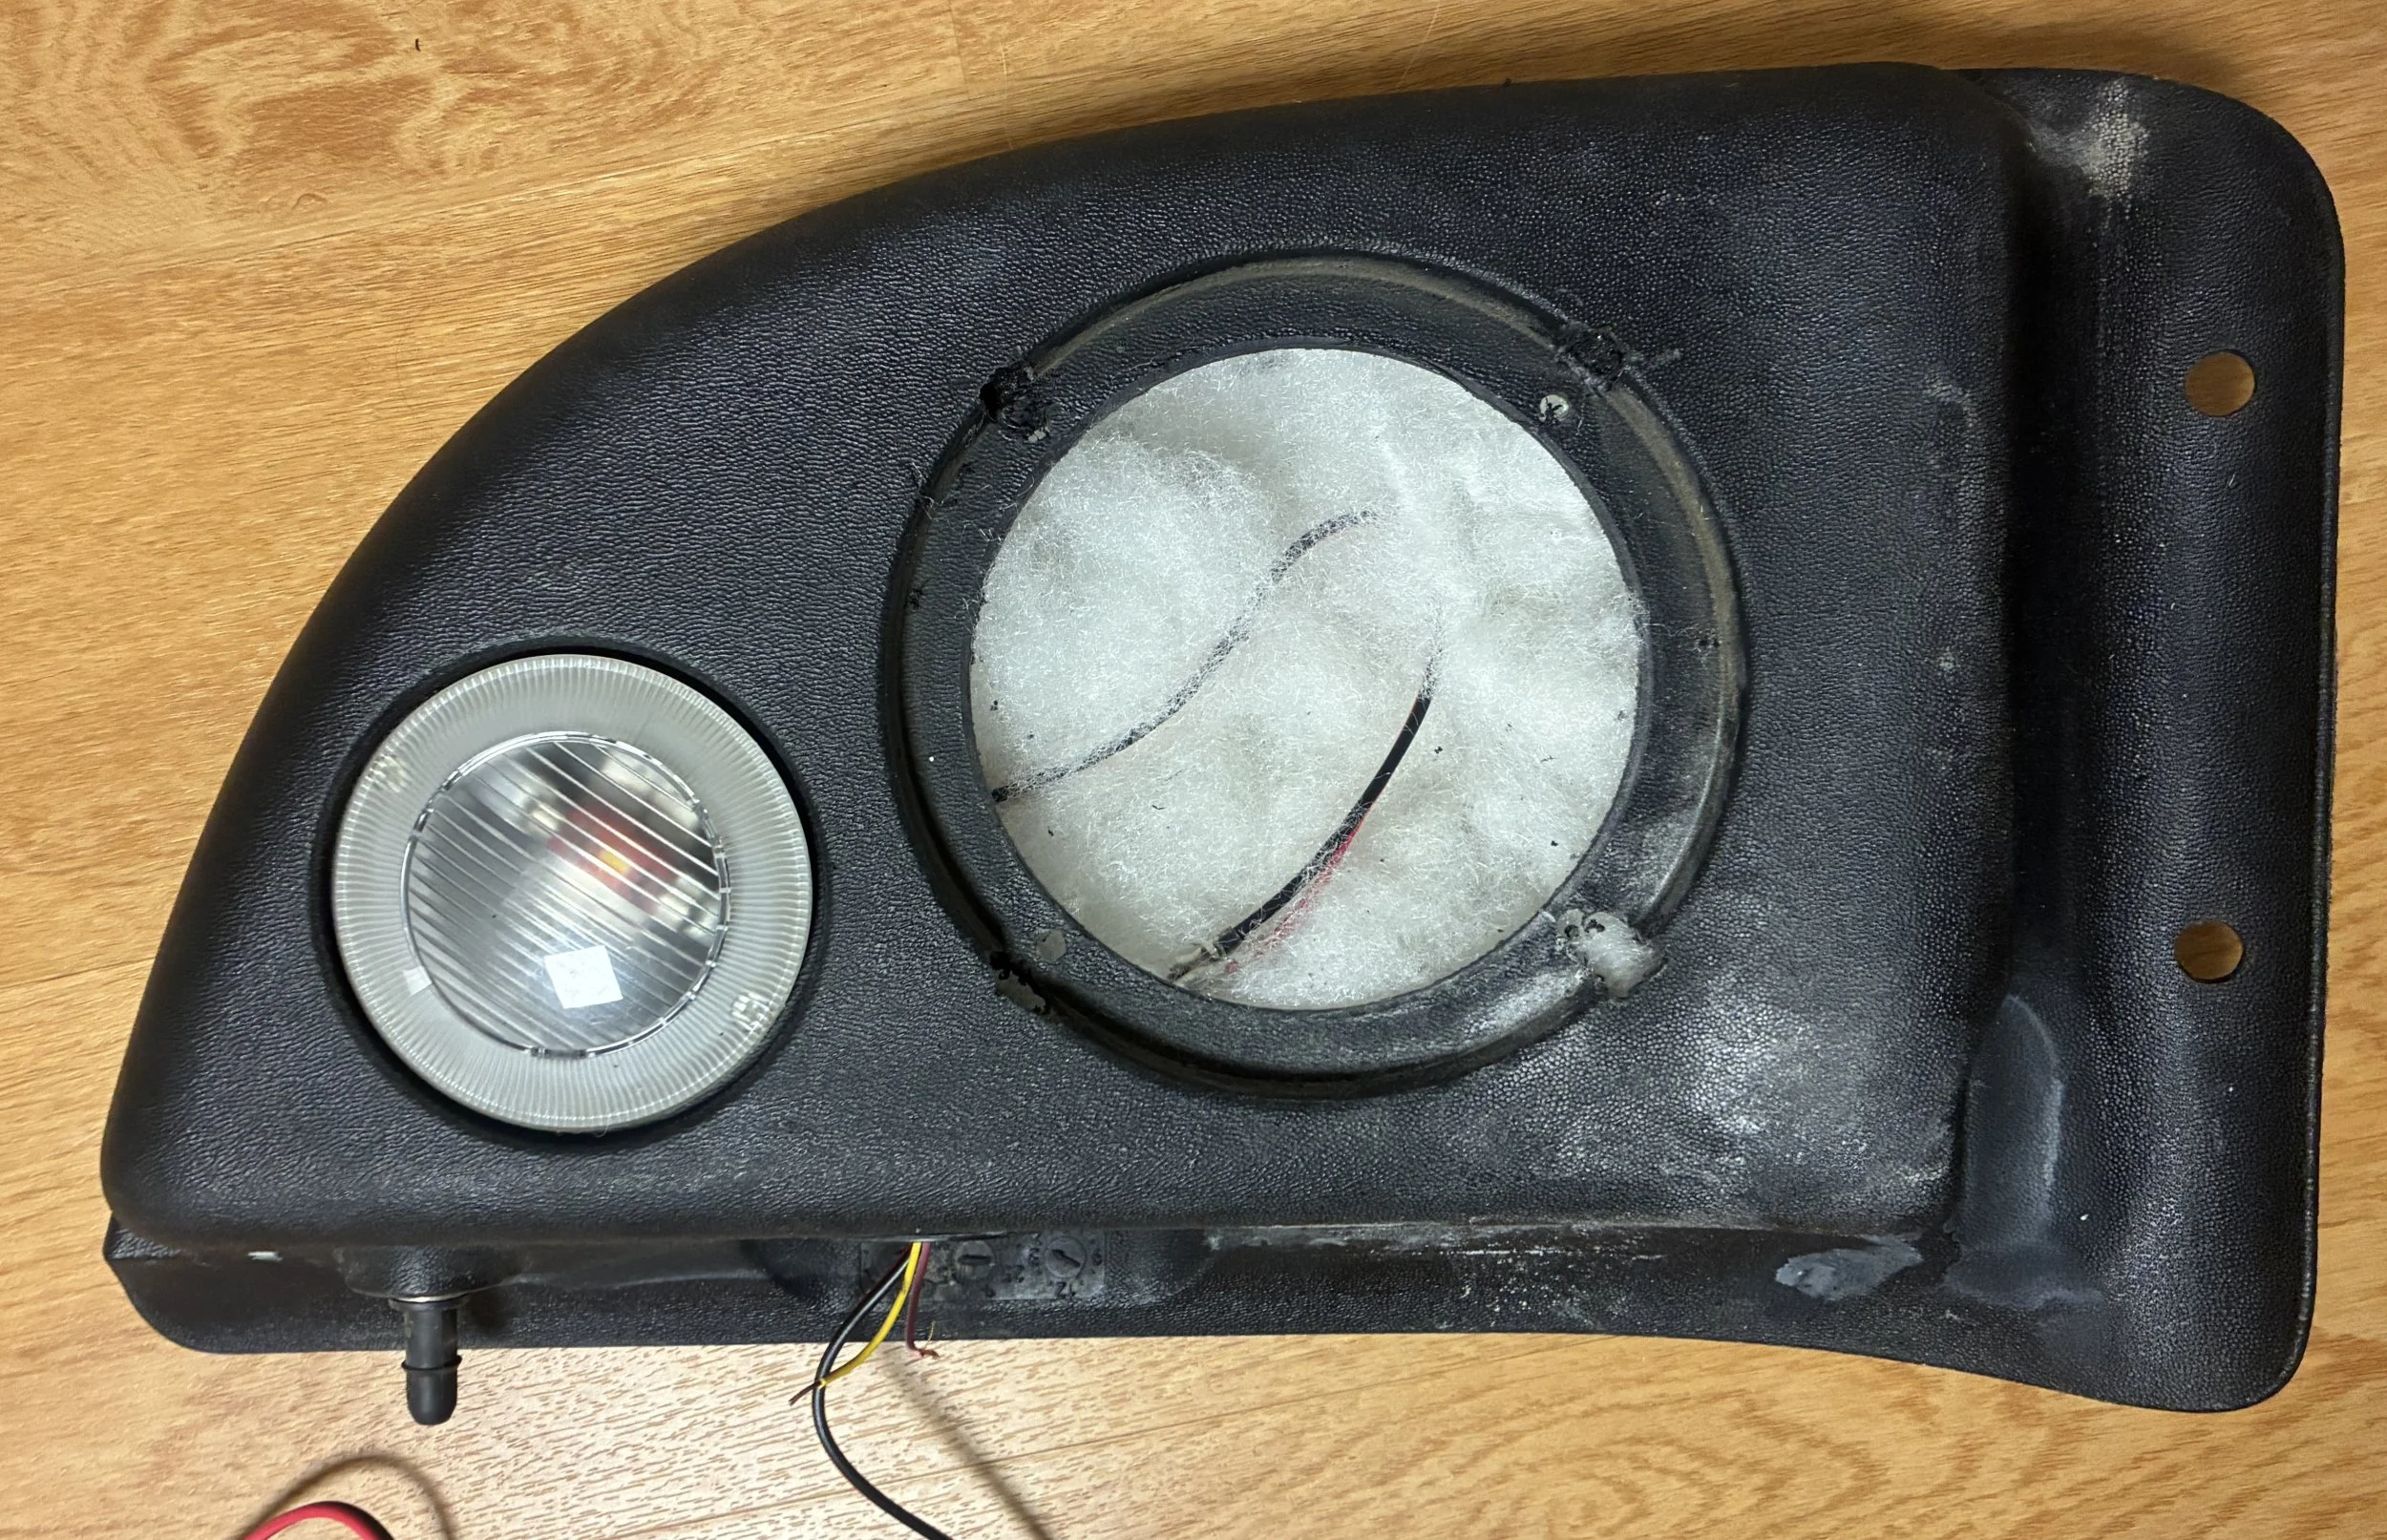
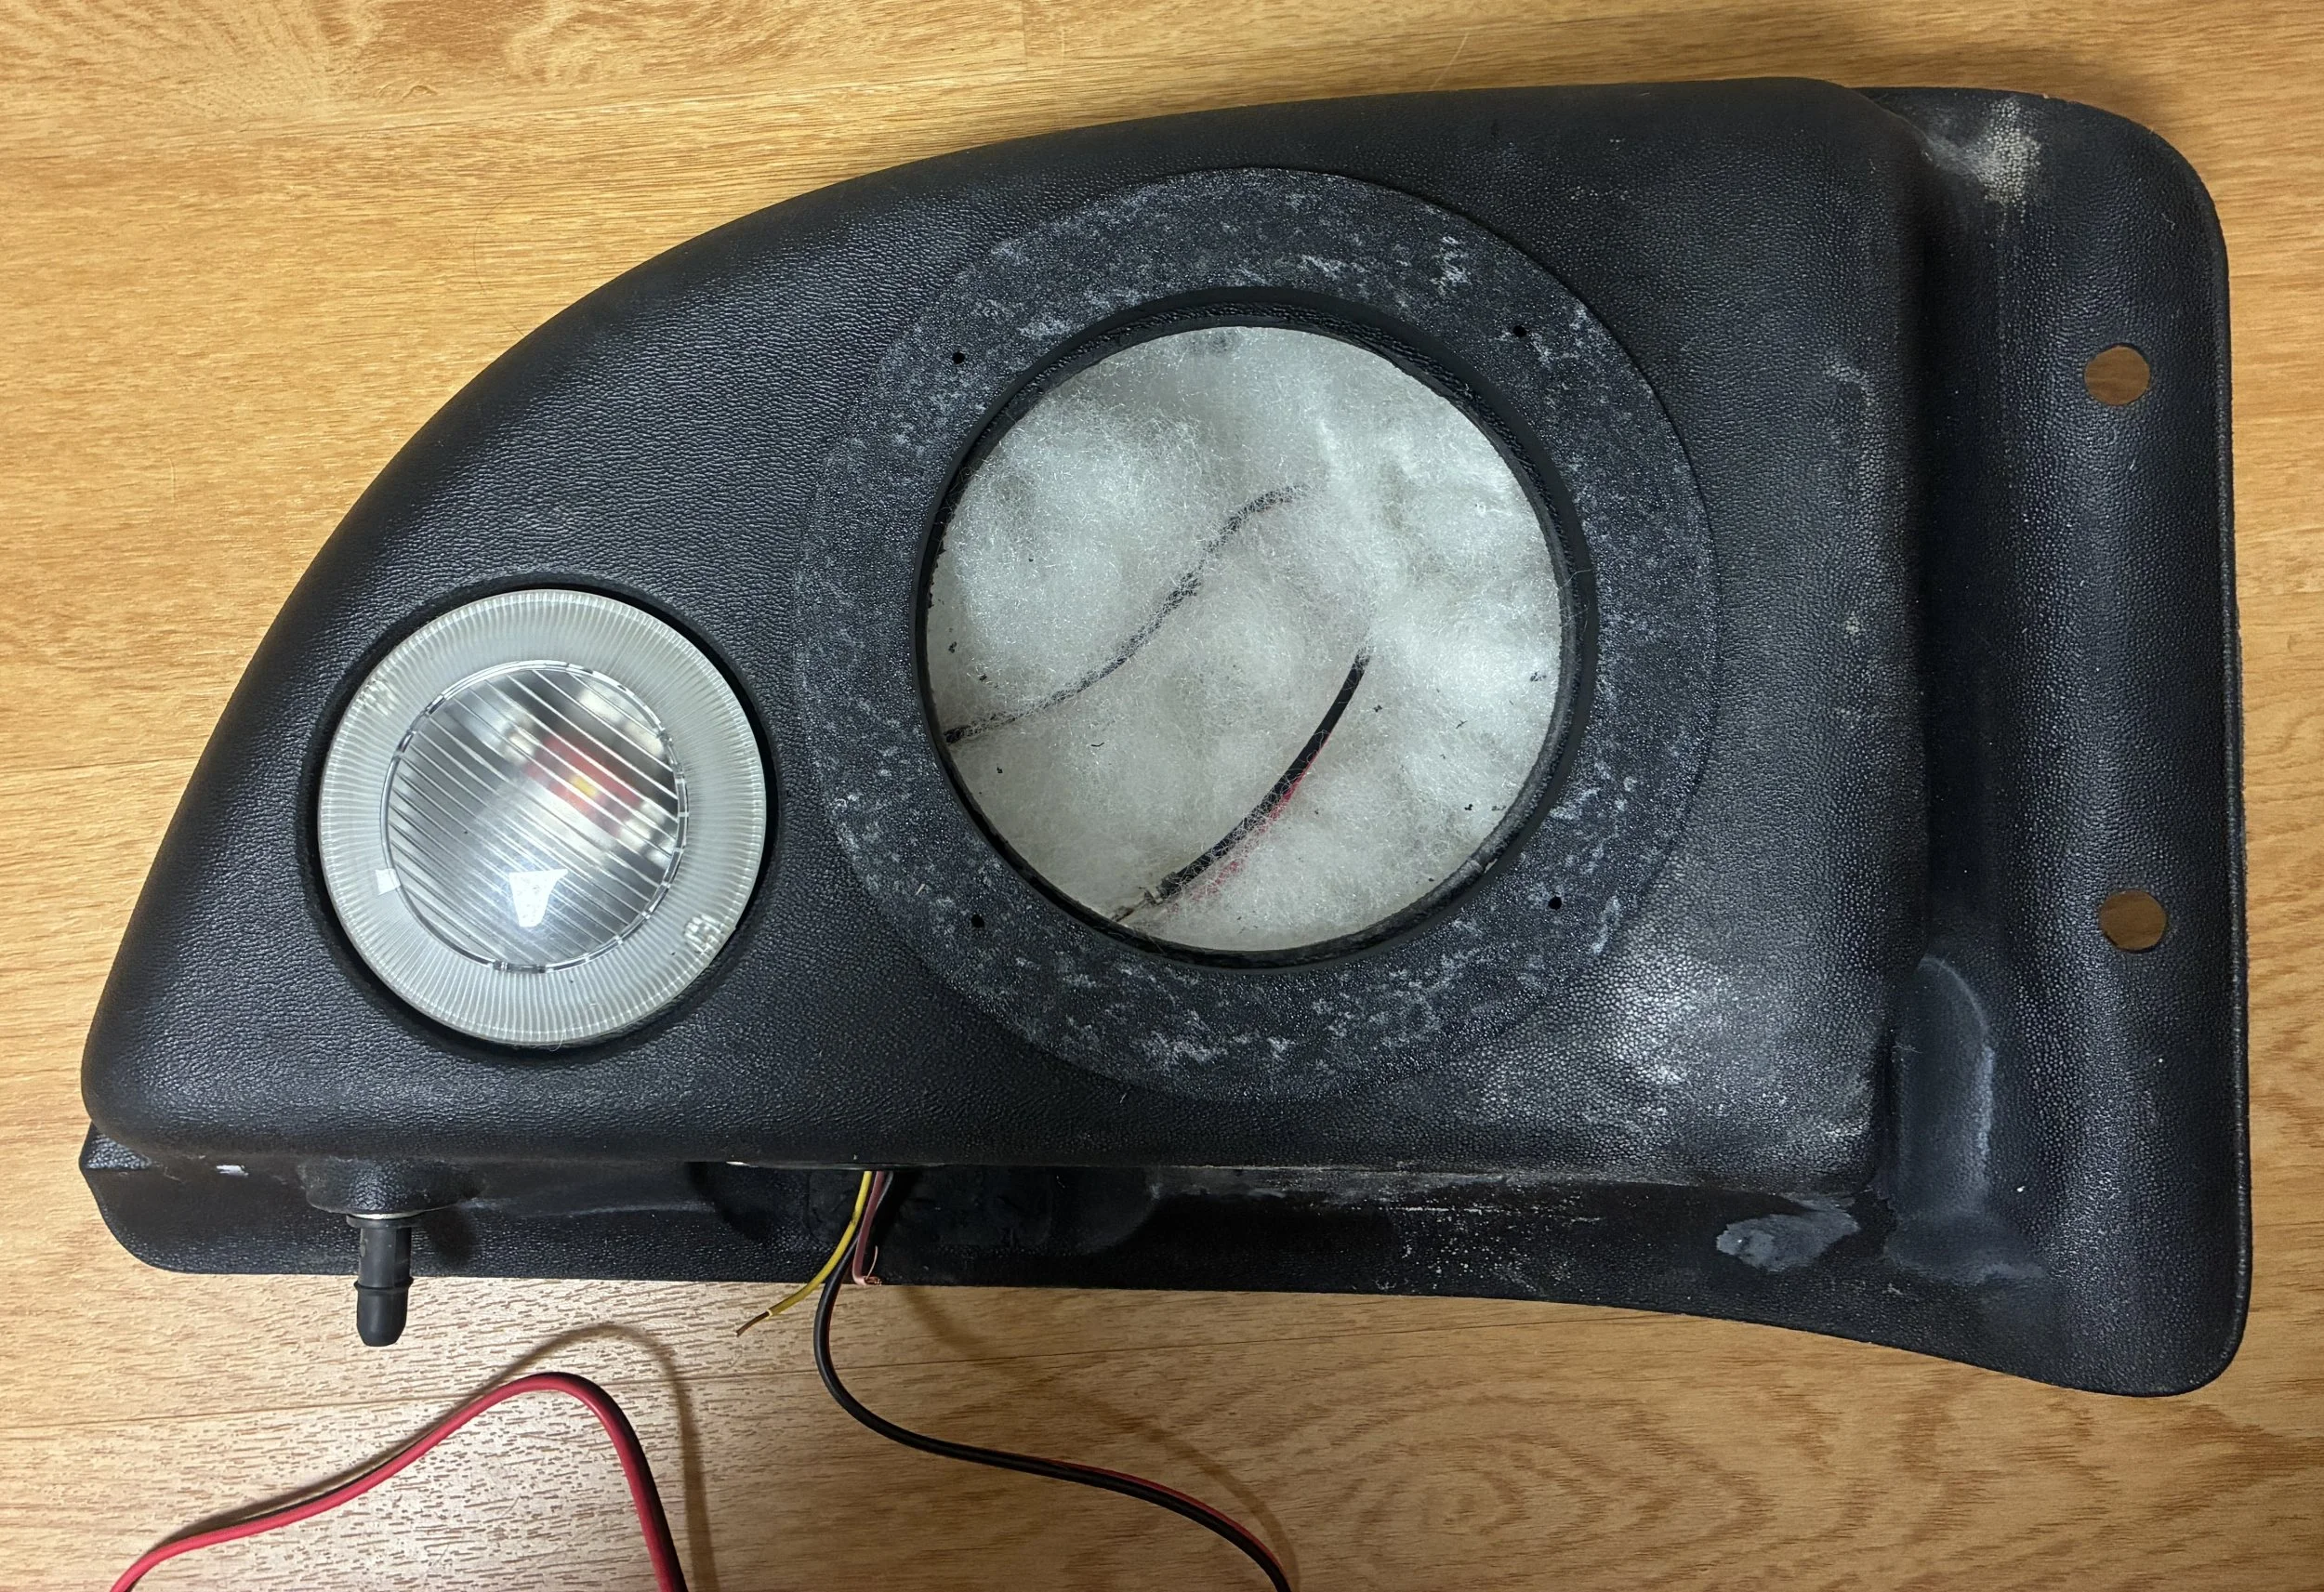
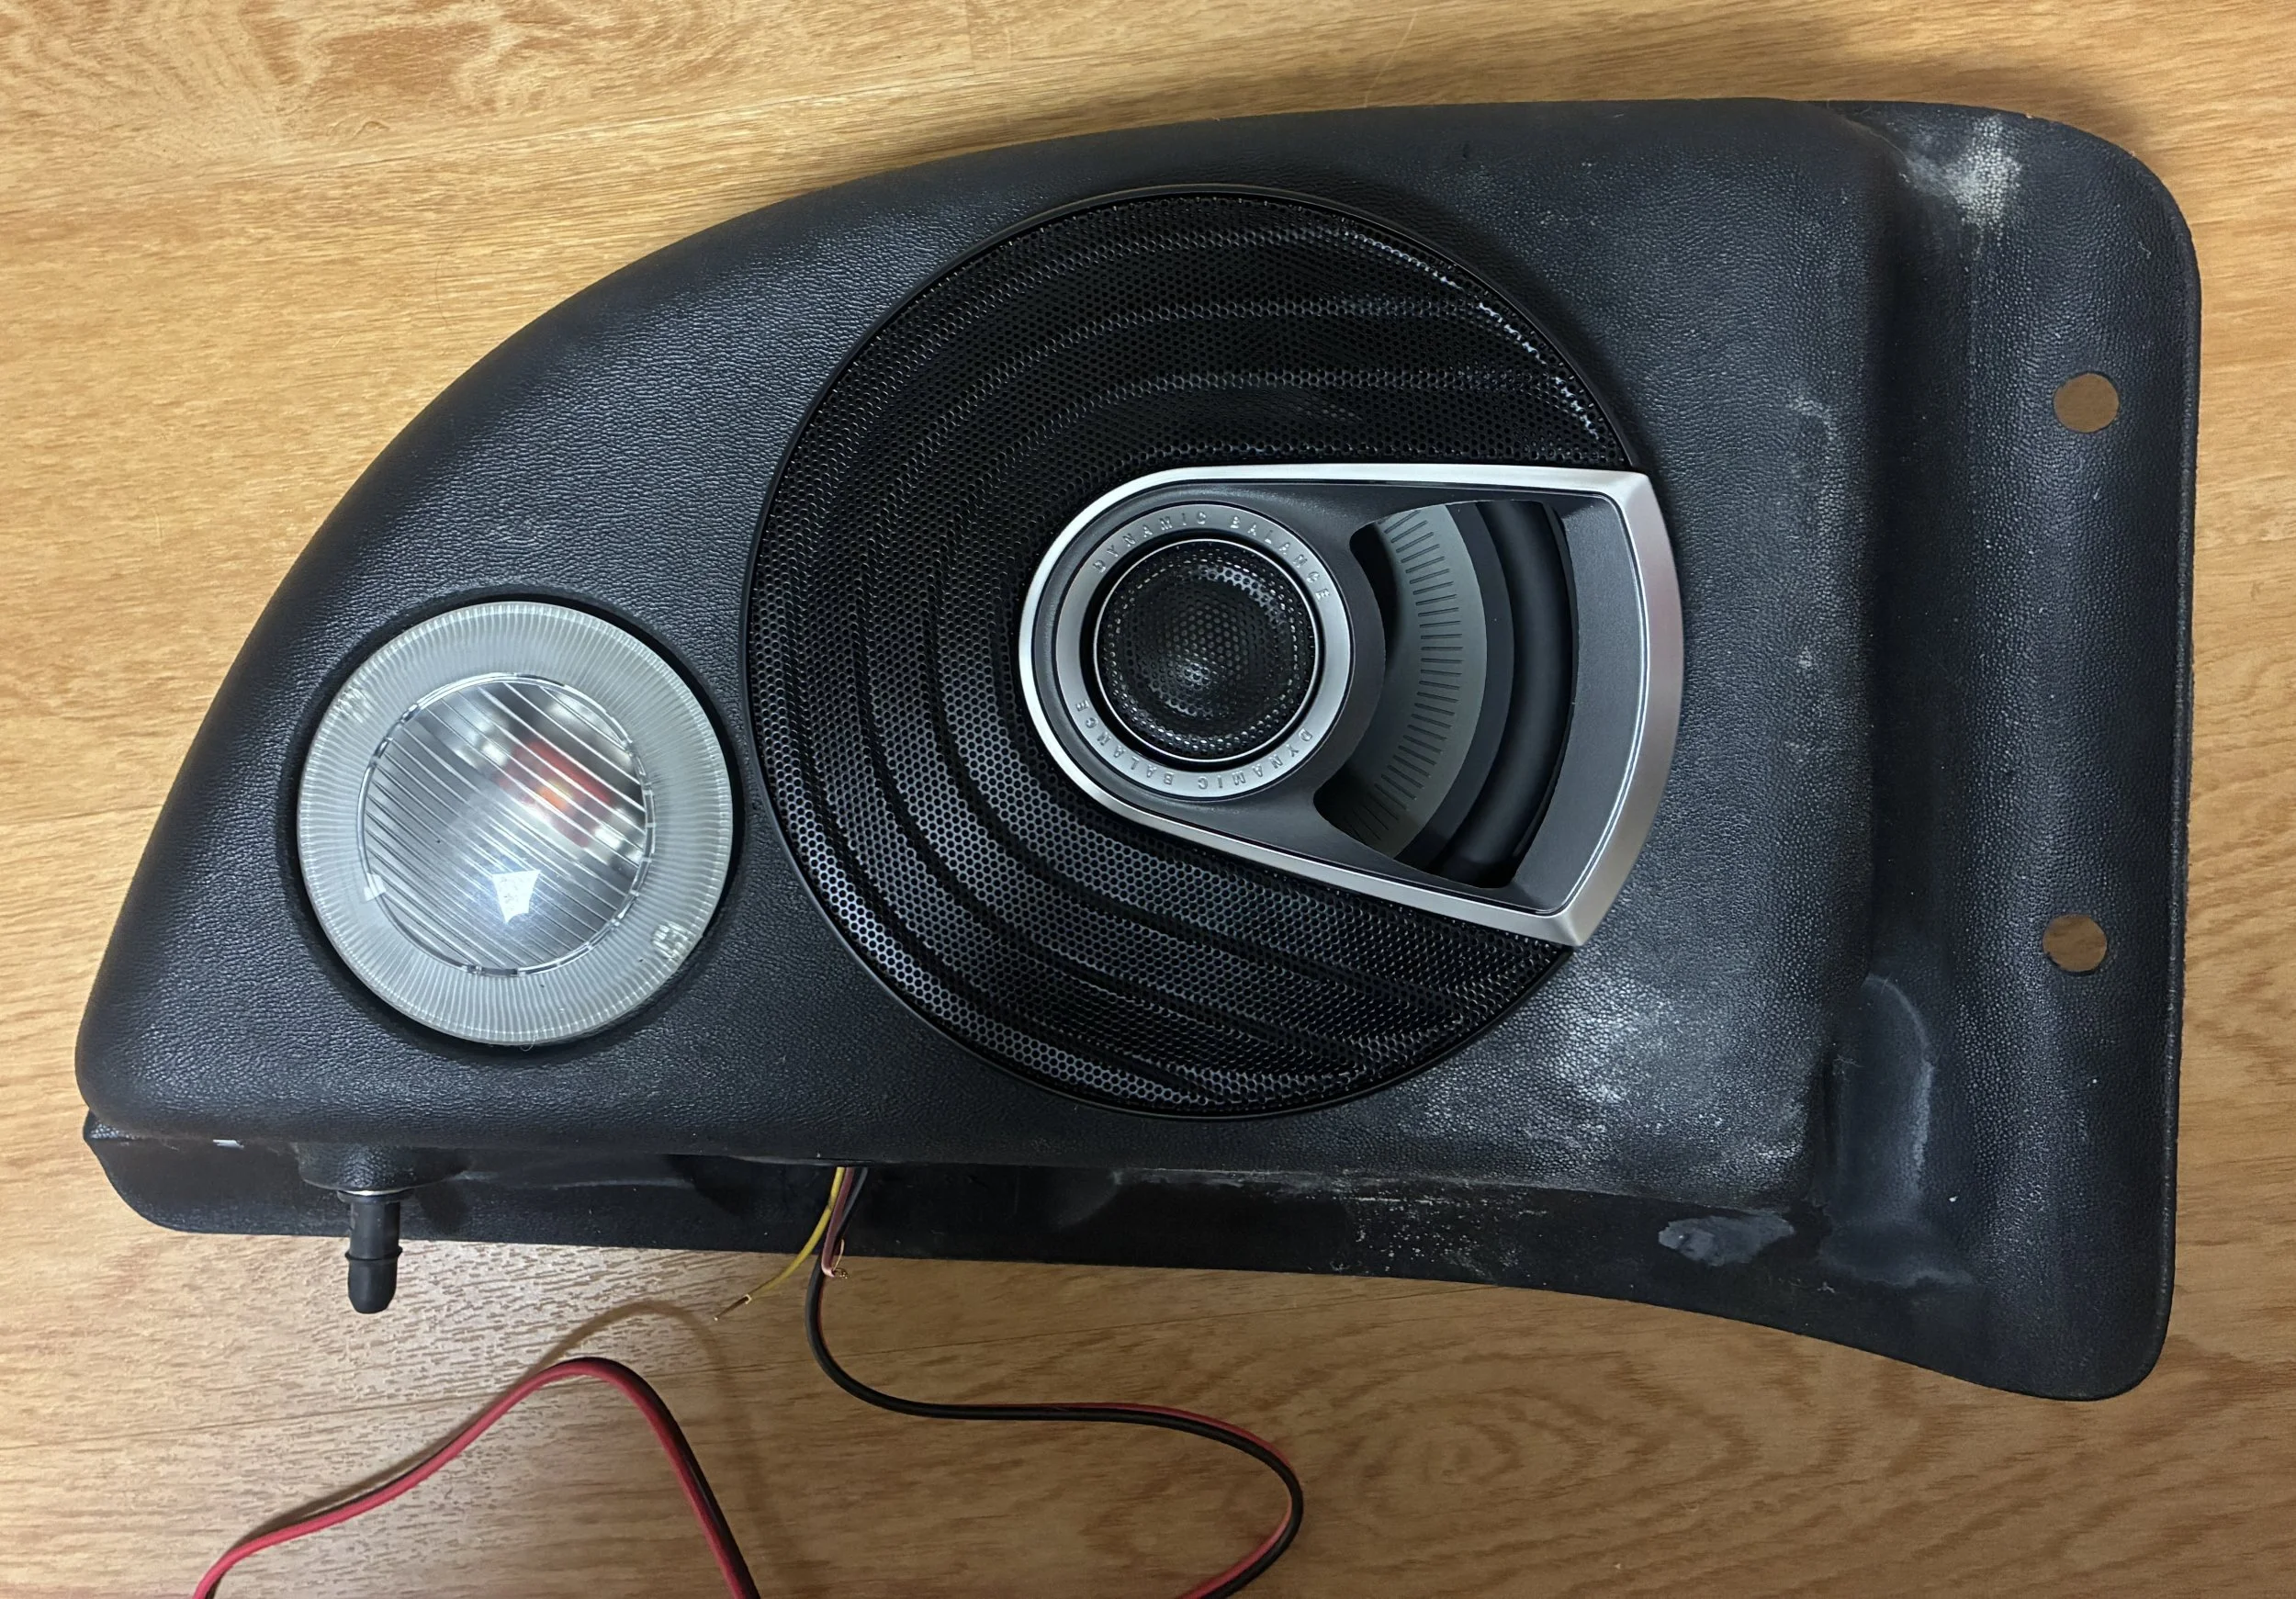
- they fit the pods fine, but aren't big enough for the speakers;
- They add 5mm of "height" for the speakers (the speakers hang down 5mm more than they would without the adapter)
3/8/2026
152,242 miles
I brought the Jeep home from storage and started pulling speakers out. My custom dash pods don't fit past the heating ducts, so I went back to the drawing board and I've designed some new ones to print.
I also ordered the remainder of the audio equipment:
152,242 miles
I brought the Jeep home from storage and started pulling speakers out. My custom dash pods don't fit past the heating ducts, so I went back to the drawing board and I've designed some new ones to print.
I also ordered the remainder of the audio equipment:
- Sony XAV-AX6000 head unit
- NVX 4-channel amp
- Kicker HS10
- misc cables, fuse holder, dist block
3/13/2025
As with every other project, it's getting more complicated...
I picked up a Kicker 51HS10 with the understanding that it fits under the rear seat easily. Apparently, the structure under the rear seats of the later-model TJs is sufficiently different so as to make that impossible. I need a new rear seat anyway, so I'm going to gut the one I have and try to figure out how to make this fit. If it works well, I'll move it to a better seat.
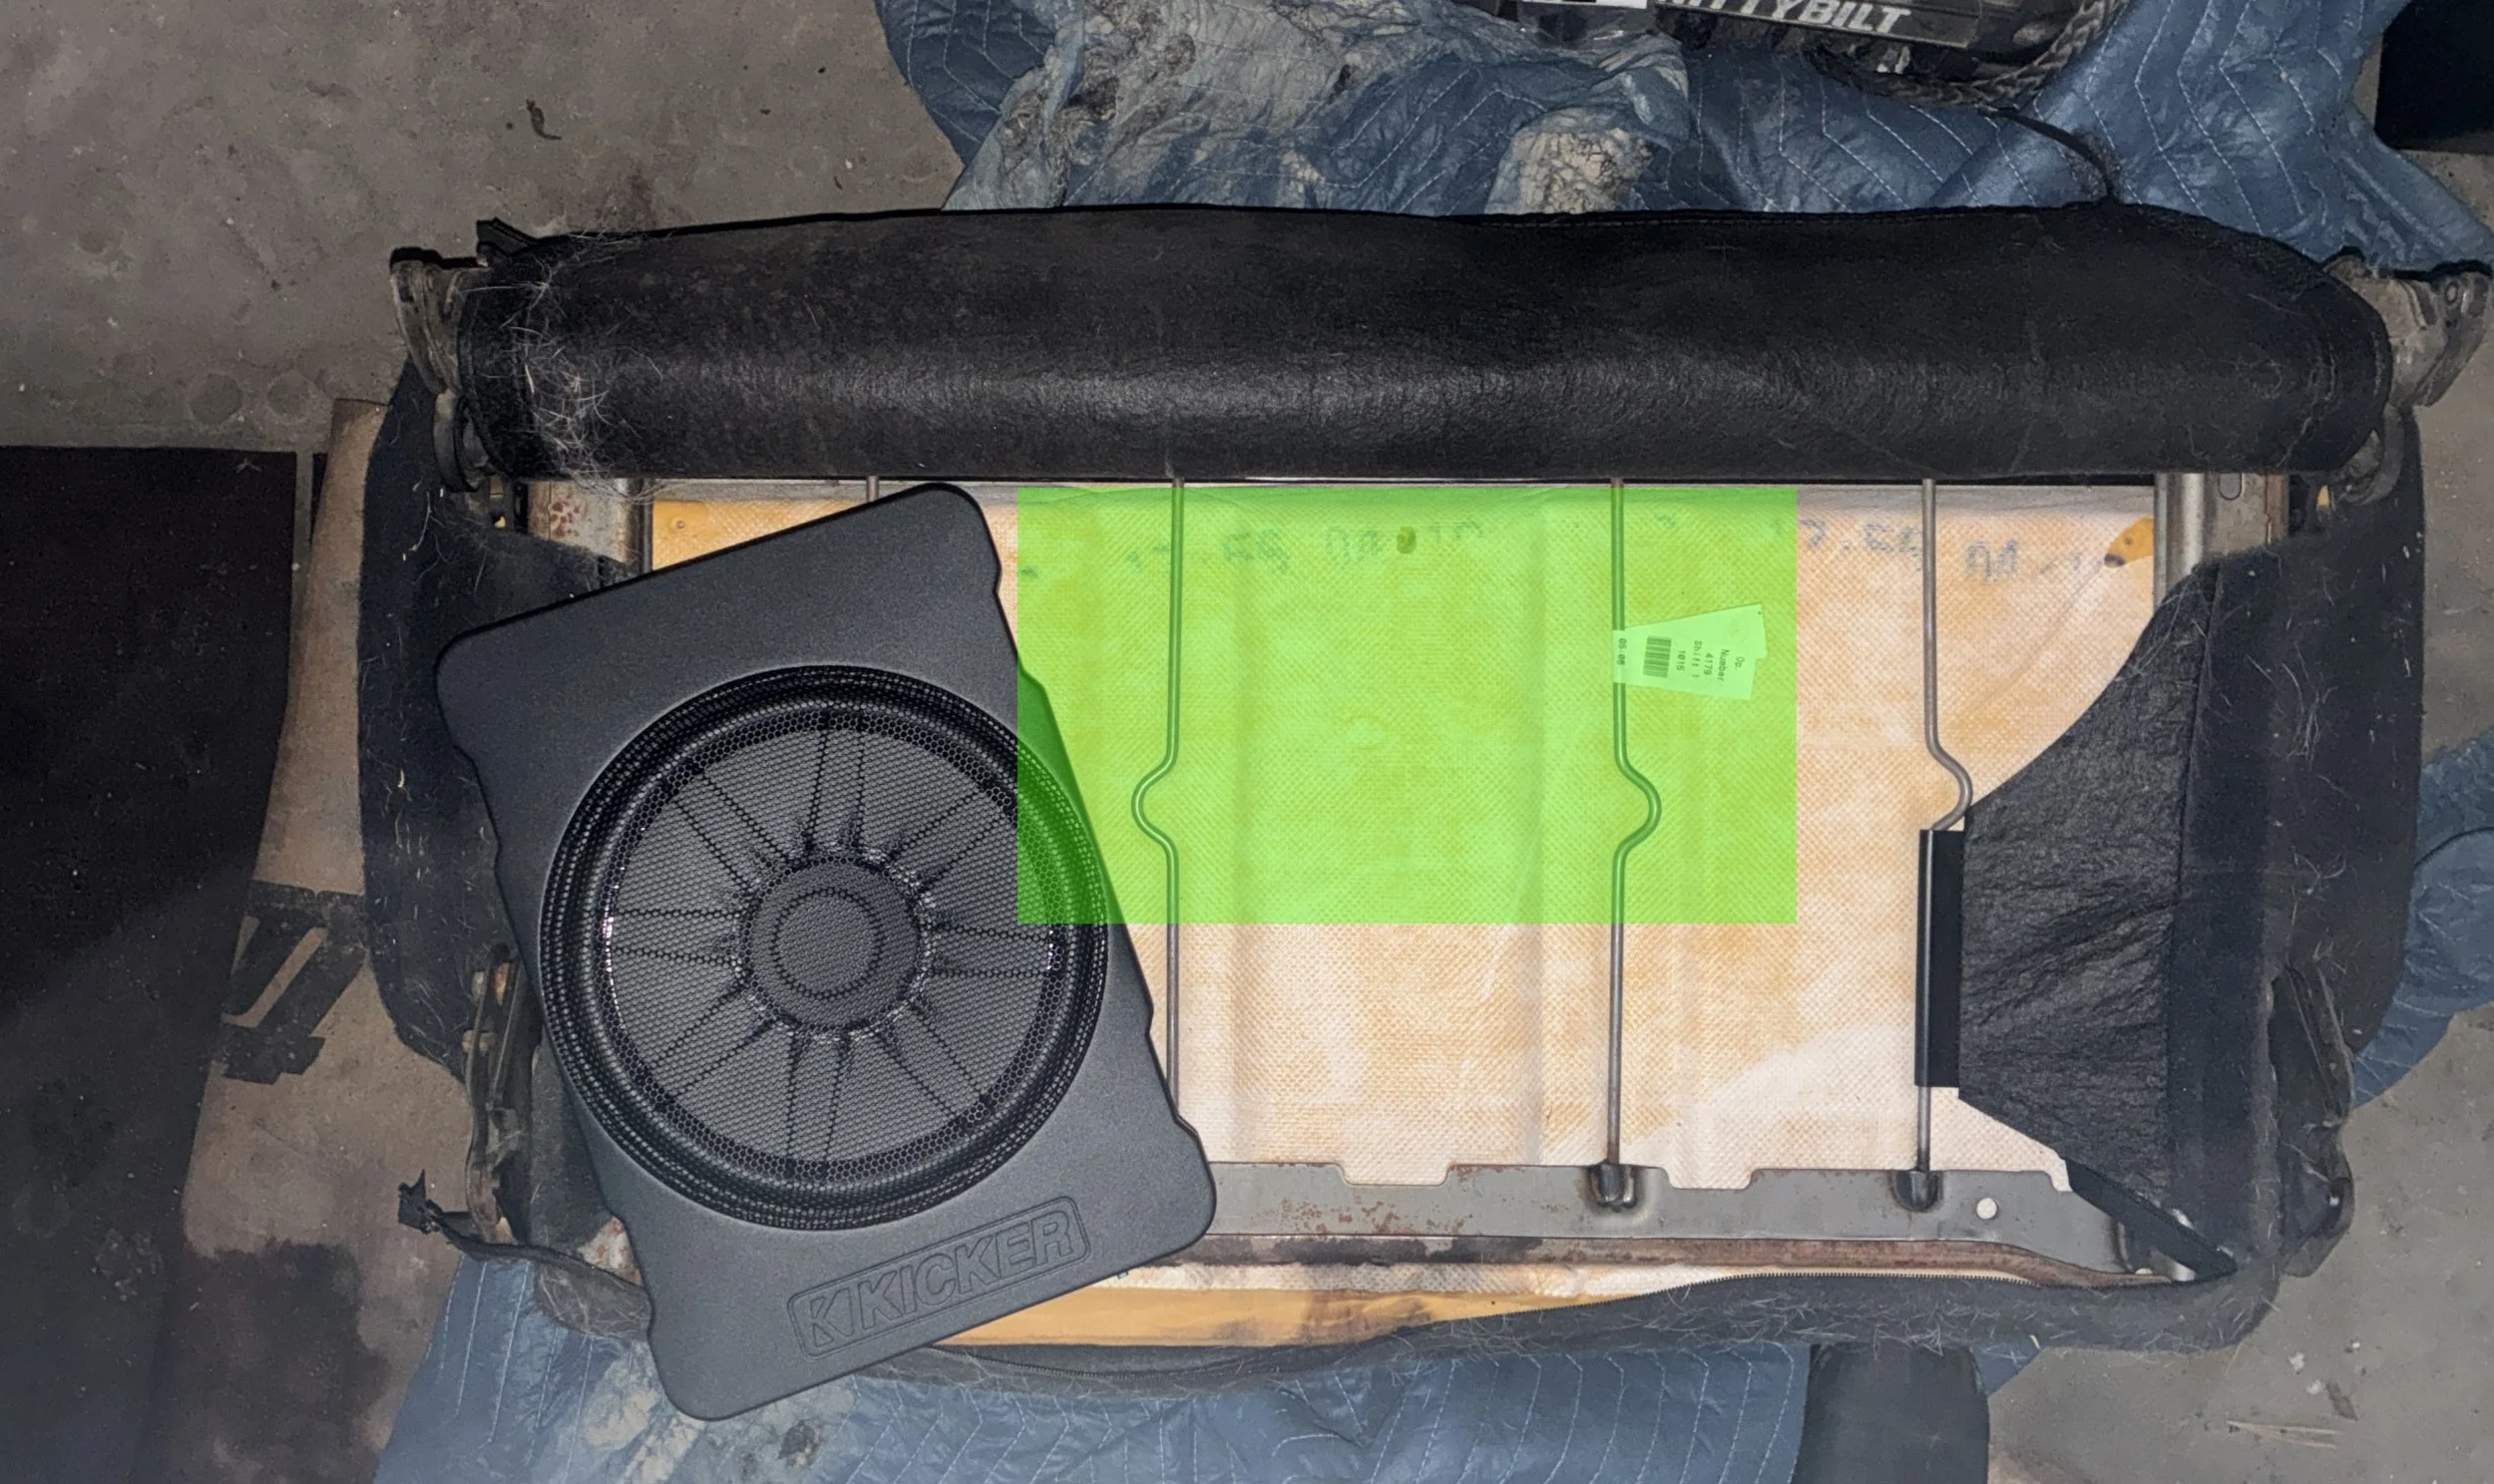
I'm thinking under the front center of the seat bottom behind the seat locking bars is where it should go, sort of where the green box is. That'll have the least impact on cutting the foam and the comfort of the seat. It'll require cutting out those two center supports. I'll replace them with some sort of MDF span with 3D-printed brackets, and a hole cut out for the woofer/grille. My goal is to have the sub connected to the seat frame so it'll flip with the seat without having to disconnect the harness. And that'll just unplug if I want to pull the seat out.
At this point, could I just go get a slim subwoofer and amp and build a sealed enclosure and get better results? Yes, for sure. But, I got a deal on this, it's low-impact (I think), and I'm really not trying for Earth-shattering bass. This should rumble the rear seat and give me enough oomph to fill out the system.
EDIT: OK, from measuring this up and modeling it, the sub will have to be closer to the seat's rear frame rail:
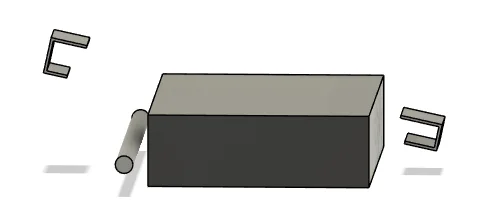
The simpler thing to do would be to raise the seat an inch or so, but if I sit the back seat, my head already pushes up the mesh top.
As with every other project, it's getting more complicated...
I picked up a Kicker 51HS10 with the understanding that it fits under the rear seat easily. Apparently, the structure under the rear seats of the later-model TJs is sufficiently different so as to make that impossible. I need a new rear seat anyway, so I'm going to gut the one I have and try to figure out how to make this fit. If it works well, I'll move it to a better seat.
I'm thinking under the front center of the seat bottom behind the seat locking bars is where it should go, sort of where the green box is. That'll have the least impact on cutting the foam and the comfort of the seat. It'll require cutting out those two center supports. I'll replace them with some sort of MDF span with 3D-printed brackets, and a hole cut out for the woofer/grille. My goal is to have the sub connected to the seat frame so it'll flip with the seat without having to disconnect the harness. And that'll just unplug if I want to pull the seat out.
At this point, could I just go get a slim subwoofer and amp and build a sealed enclosure and get better results? Yes, for sure. But, I got a deal on this, it's low-impact (I think), and I'm really not trying for Earth-shattering bass. This should rumble the rear seat and give me enough oomph to fill out the system.
EDIT: OK, from measuring this up and modeling it, the sub will have to be closer to the seat's rear frame rail:
The simpler thing to do would be to raise the seat an inch or so, but if I sit the back seat, my head already pushes up the mesh top.
Last edited:
3/15/2026
152,247 miles
Drained the NSG370 and then added Redline MTL until it didn't want any more.
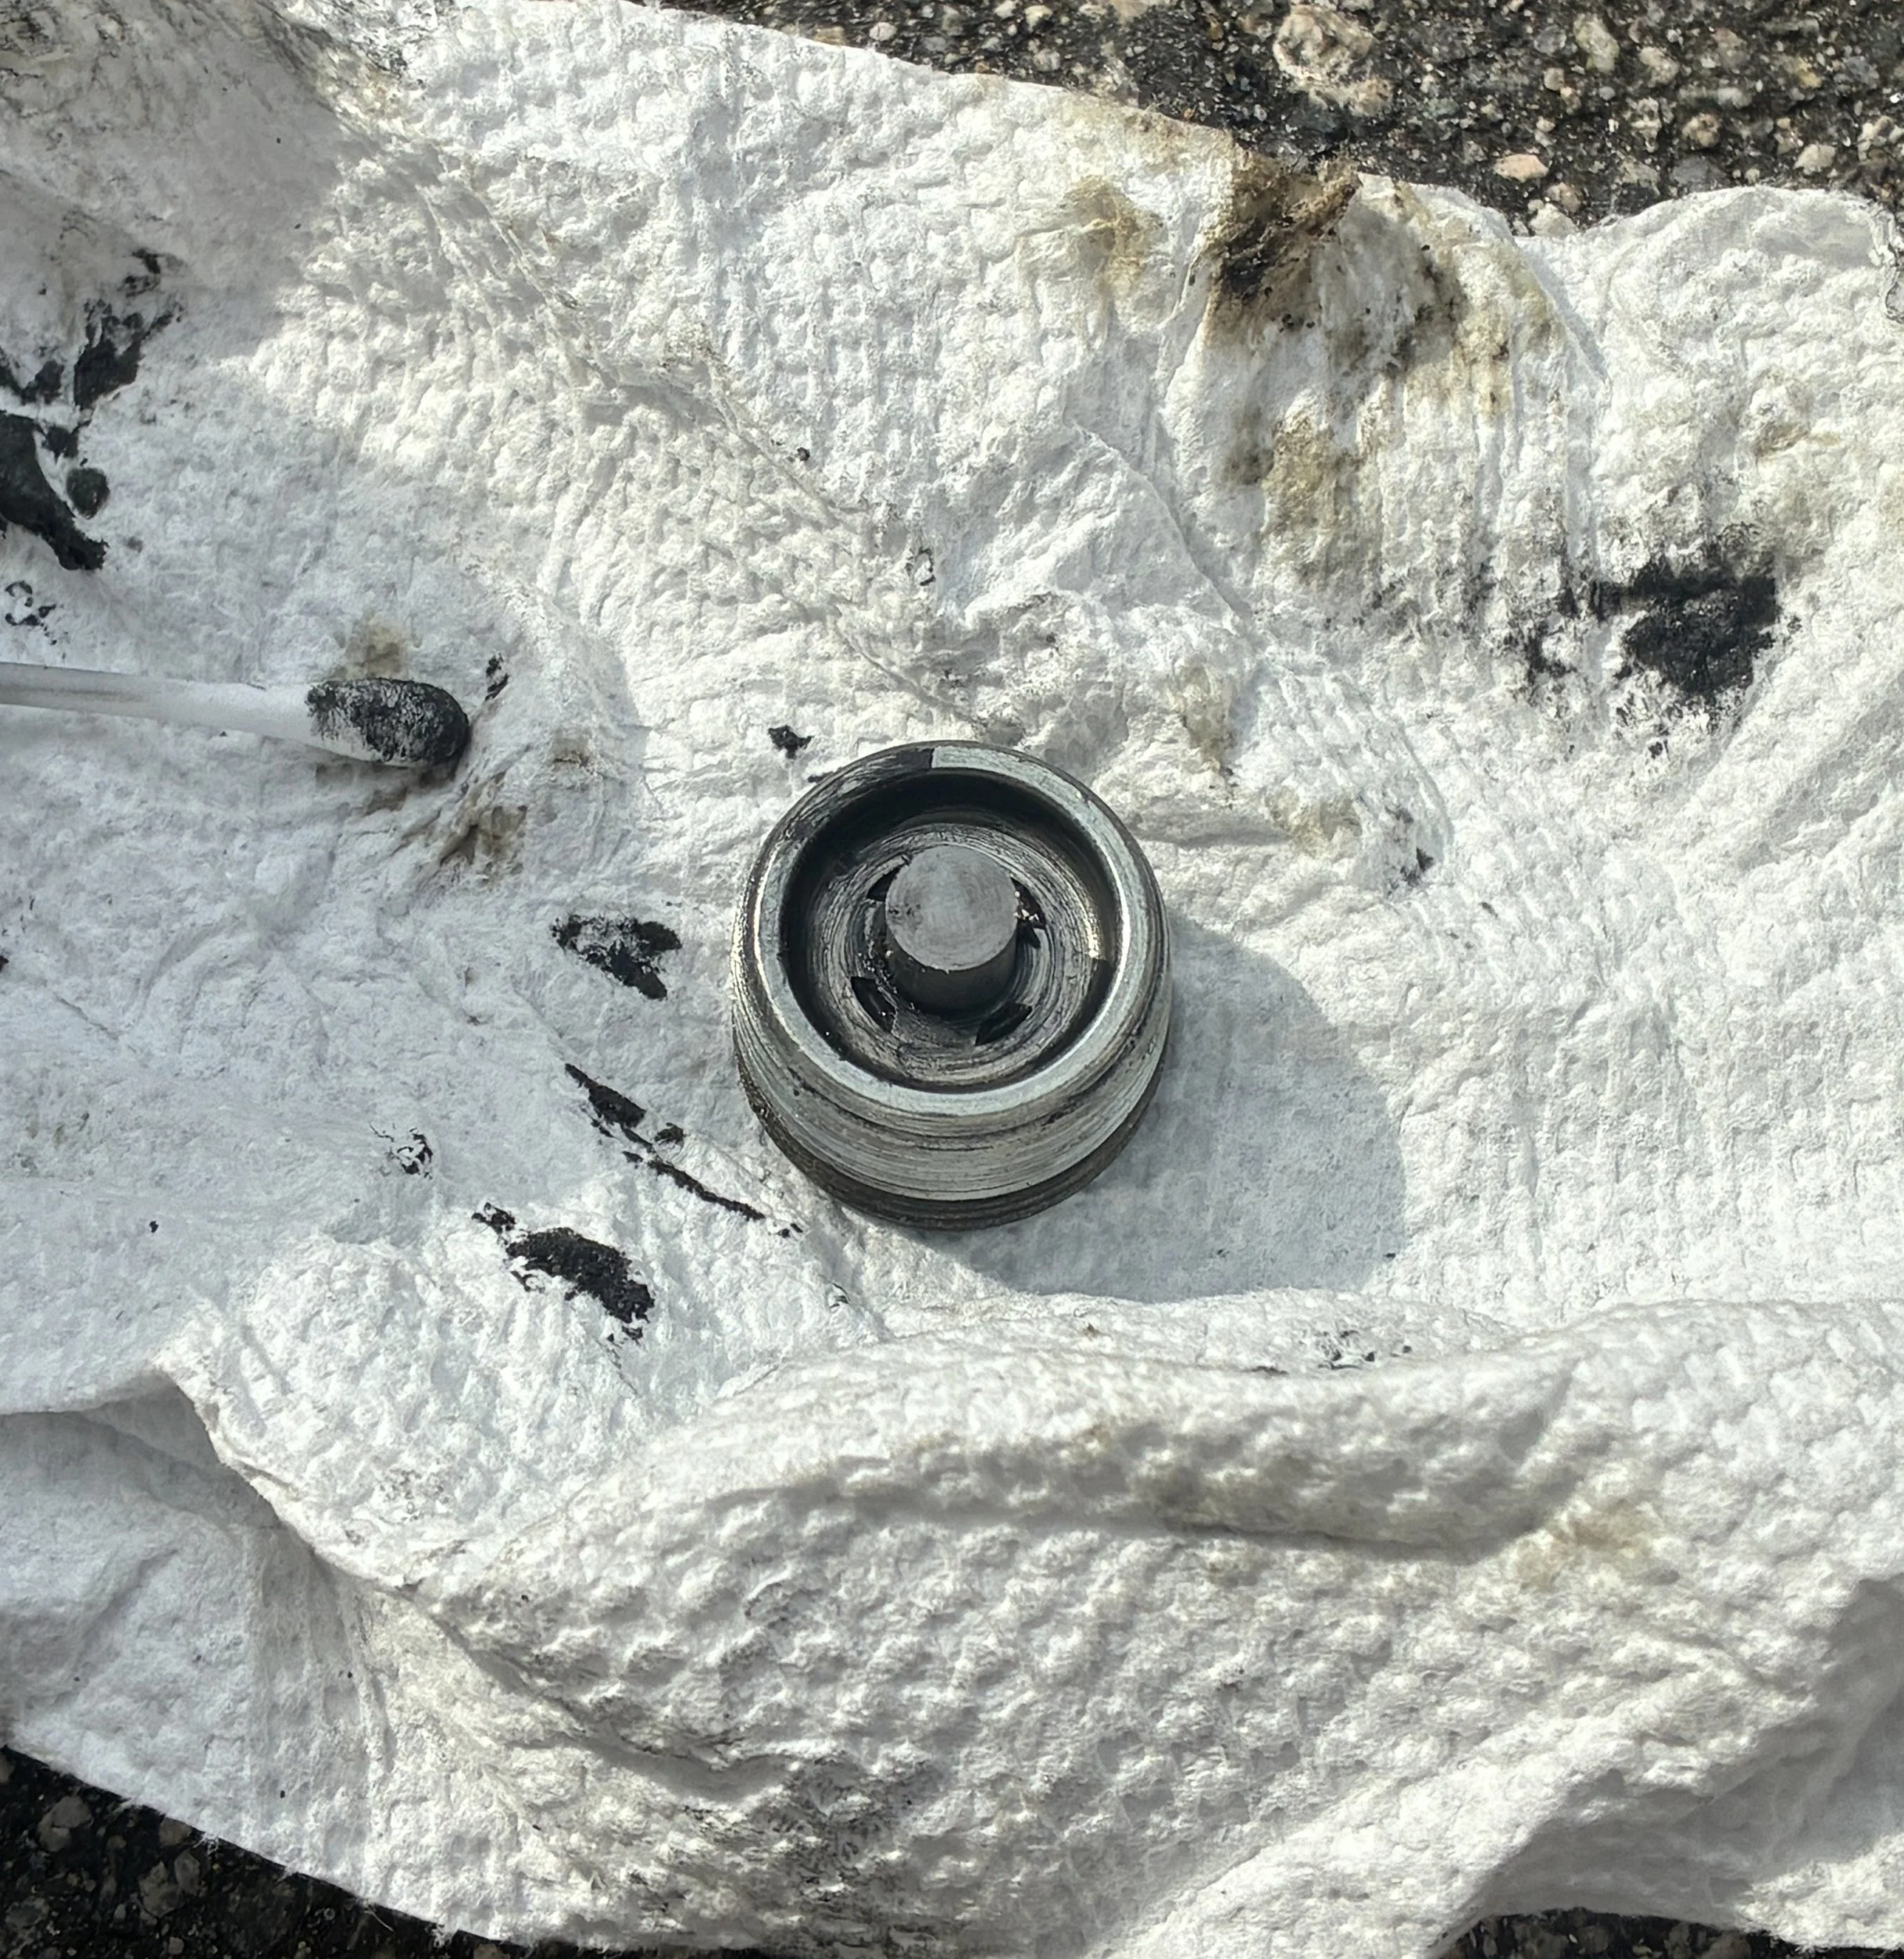
Drain plug coming out:
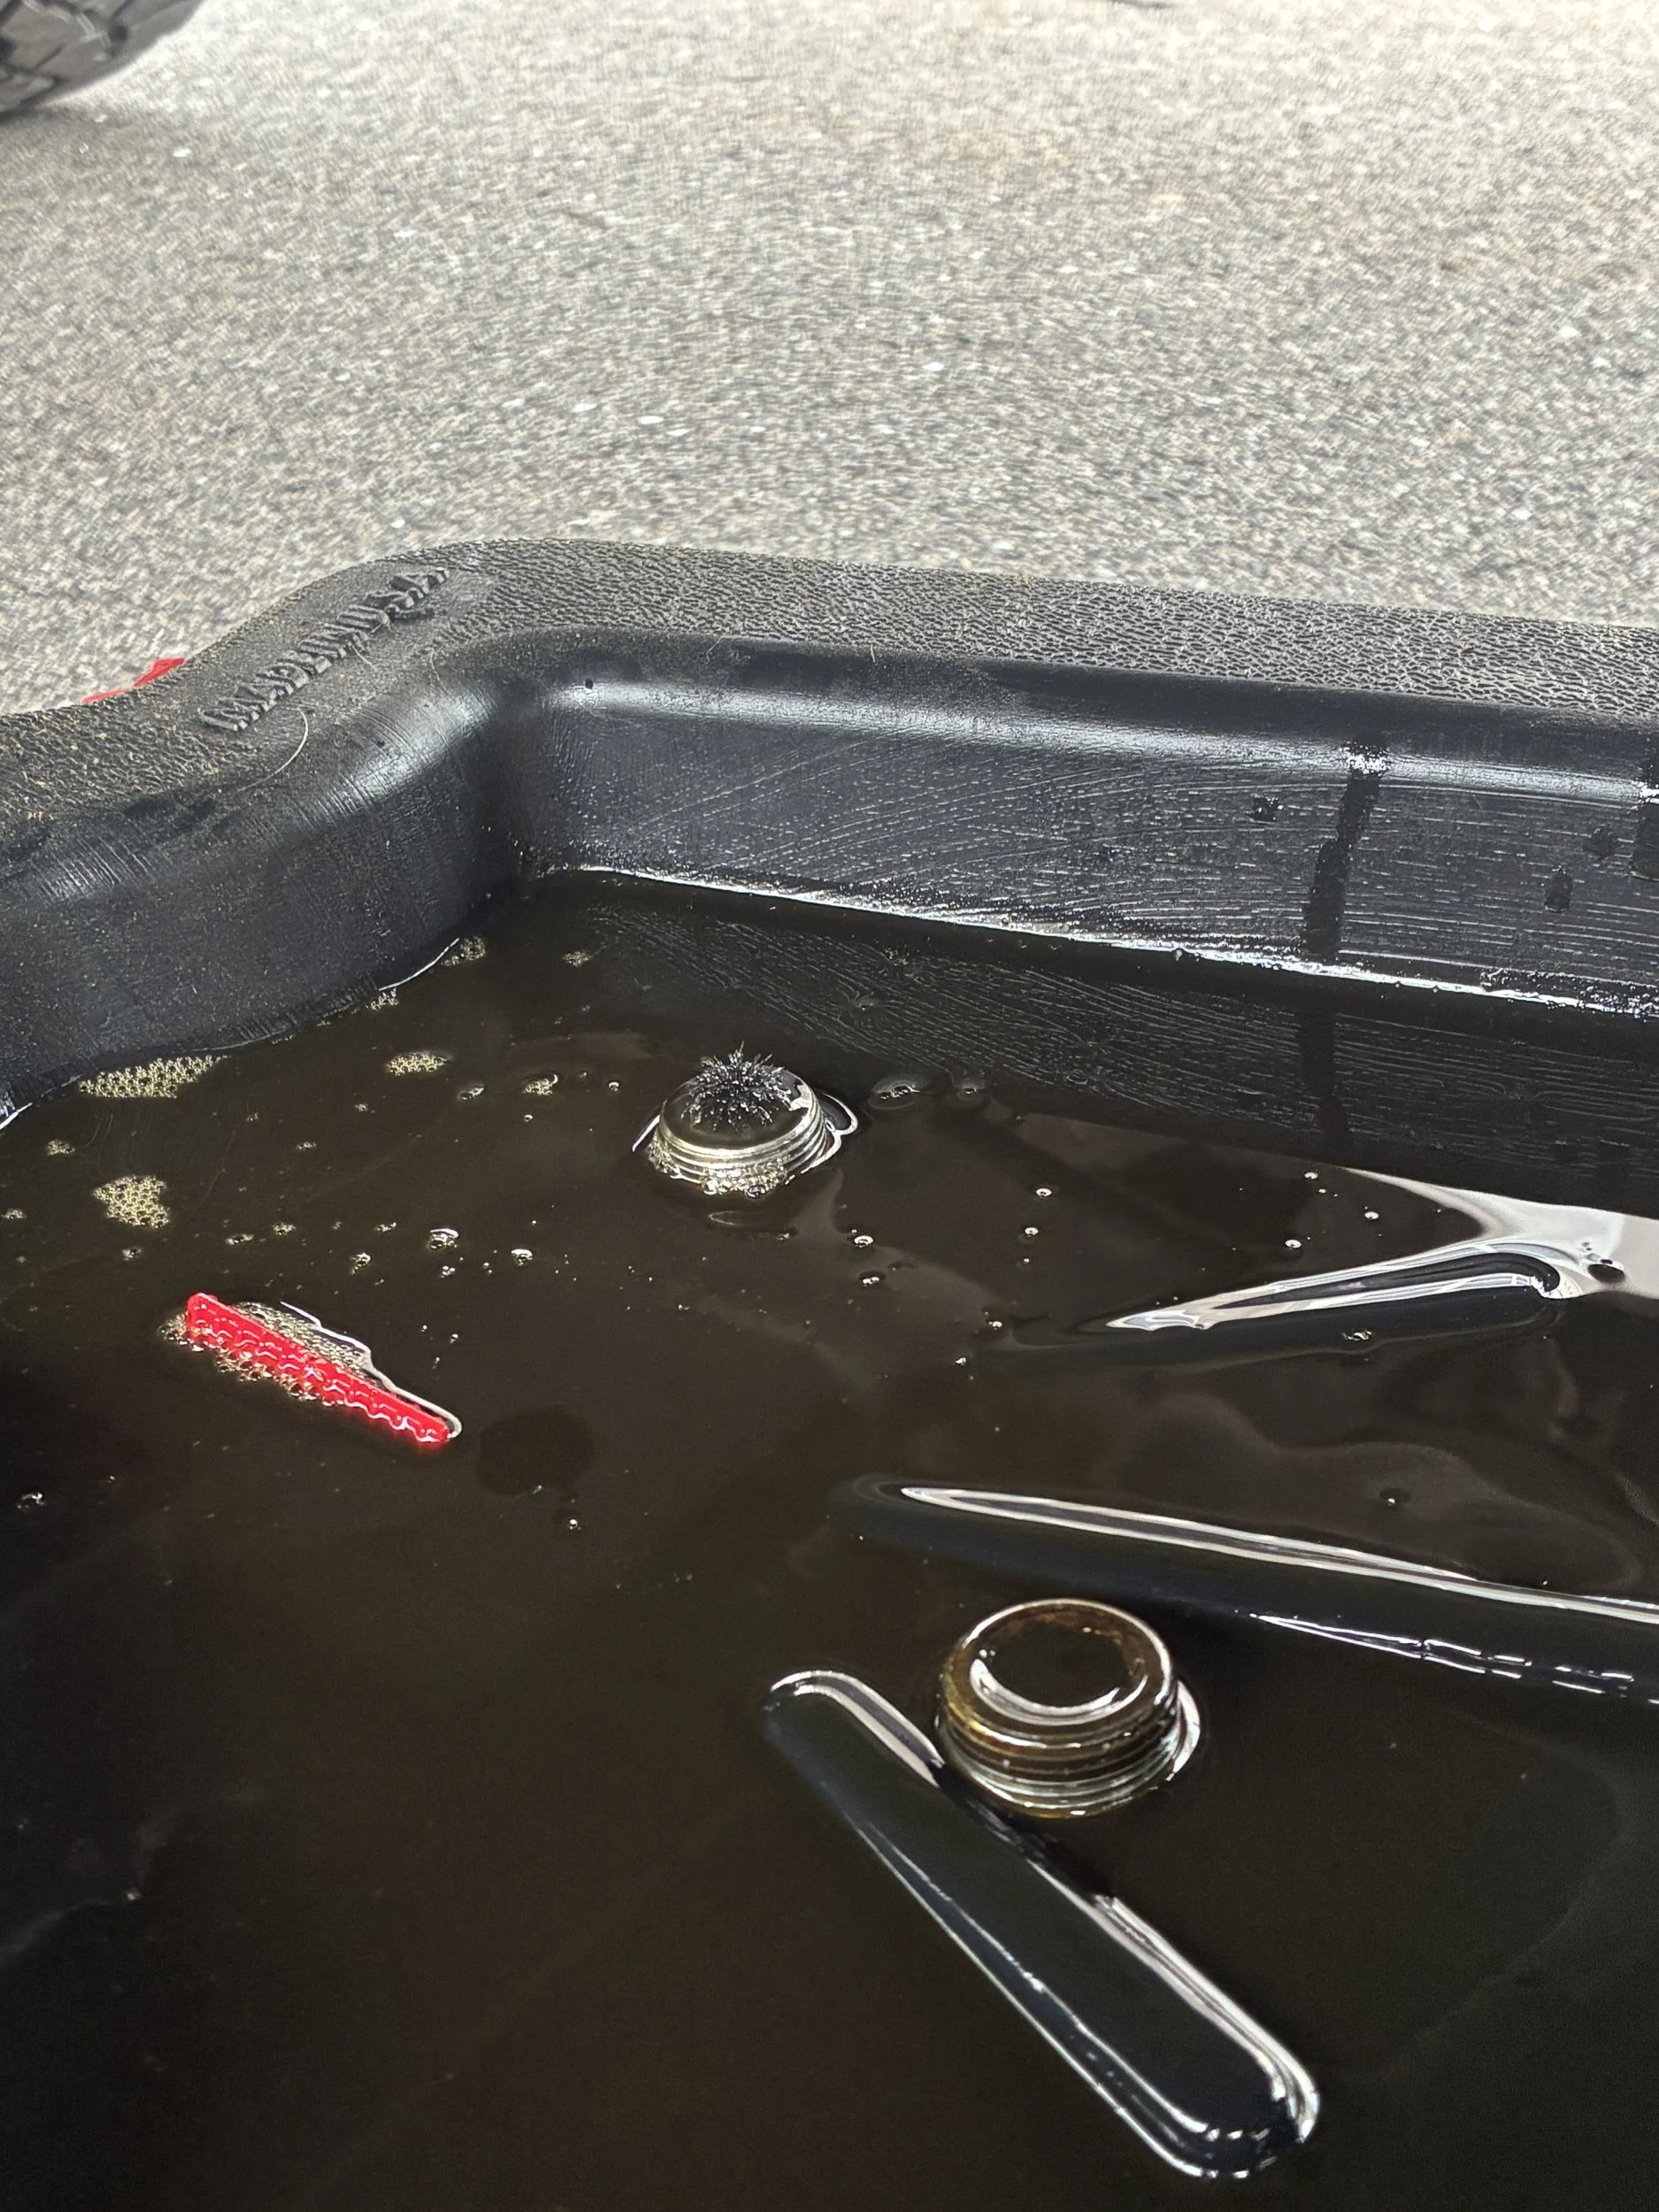
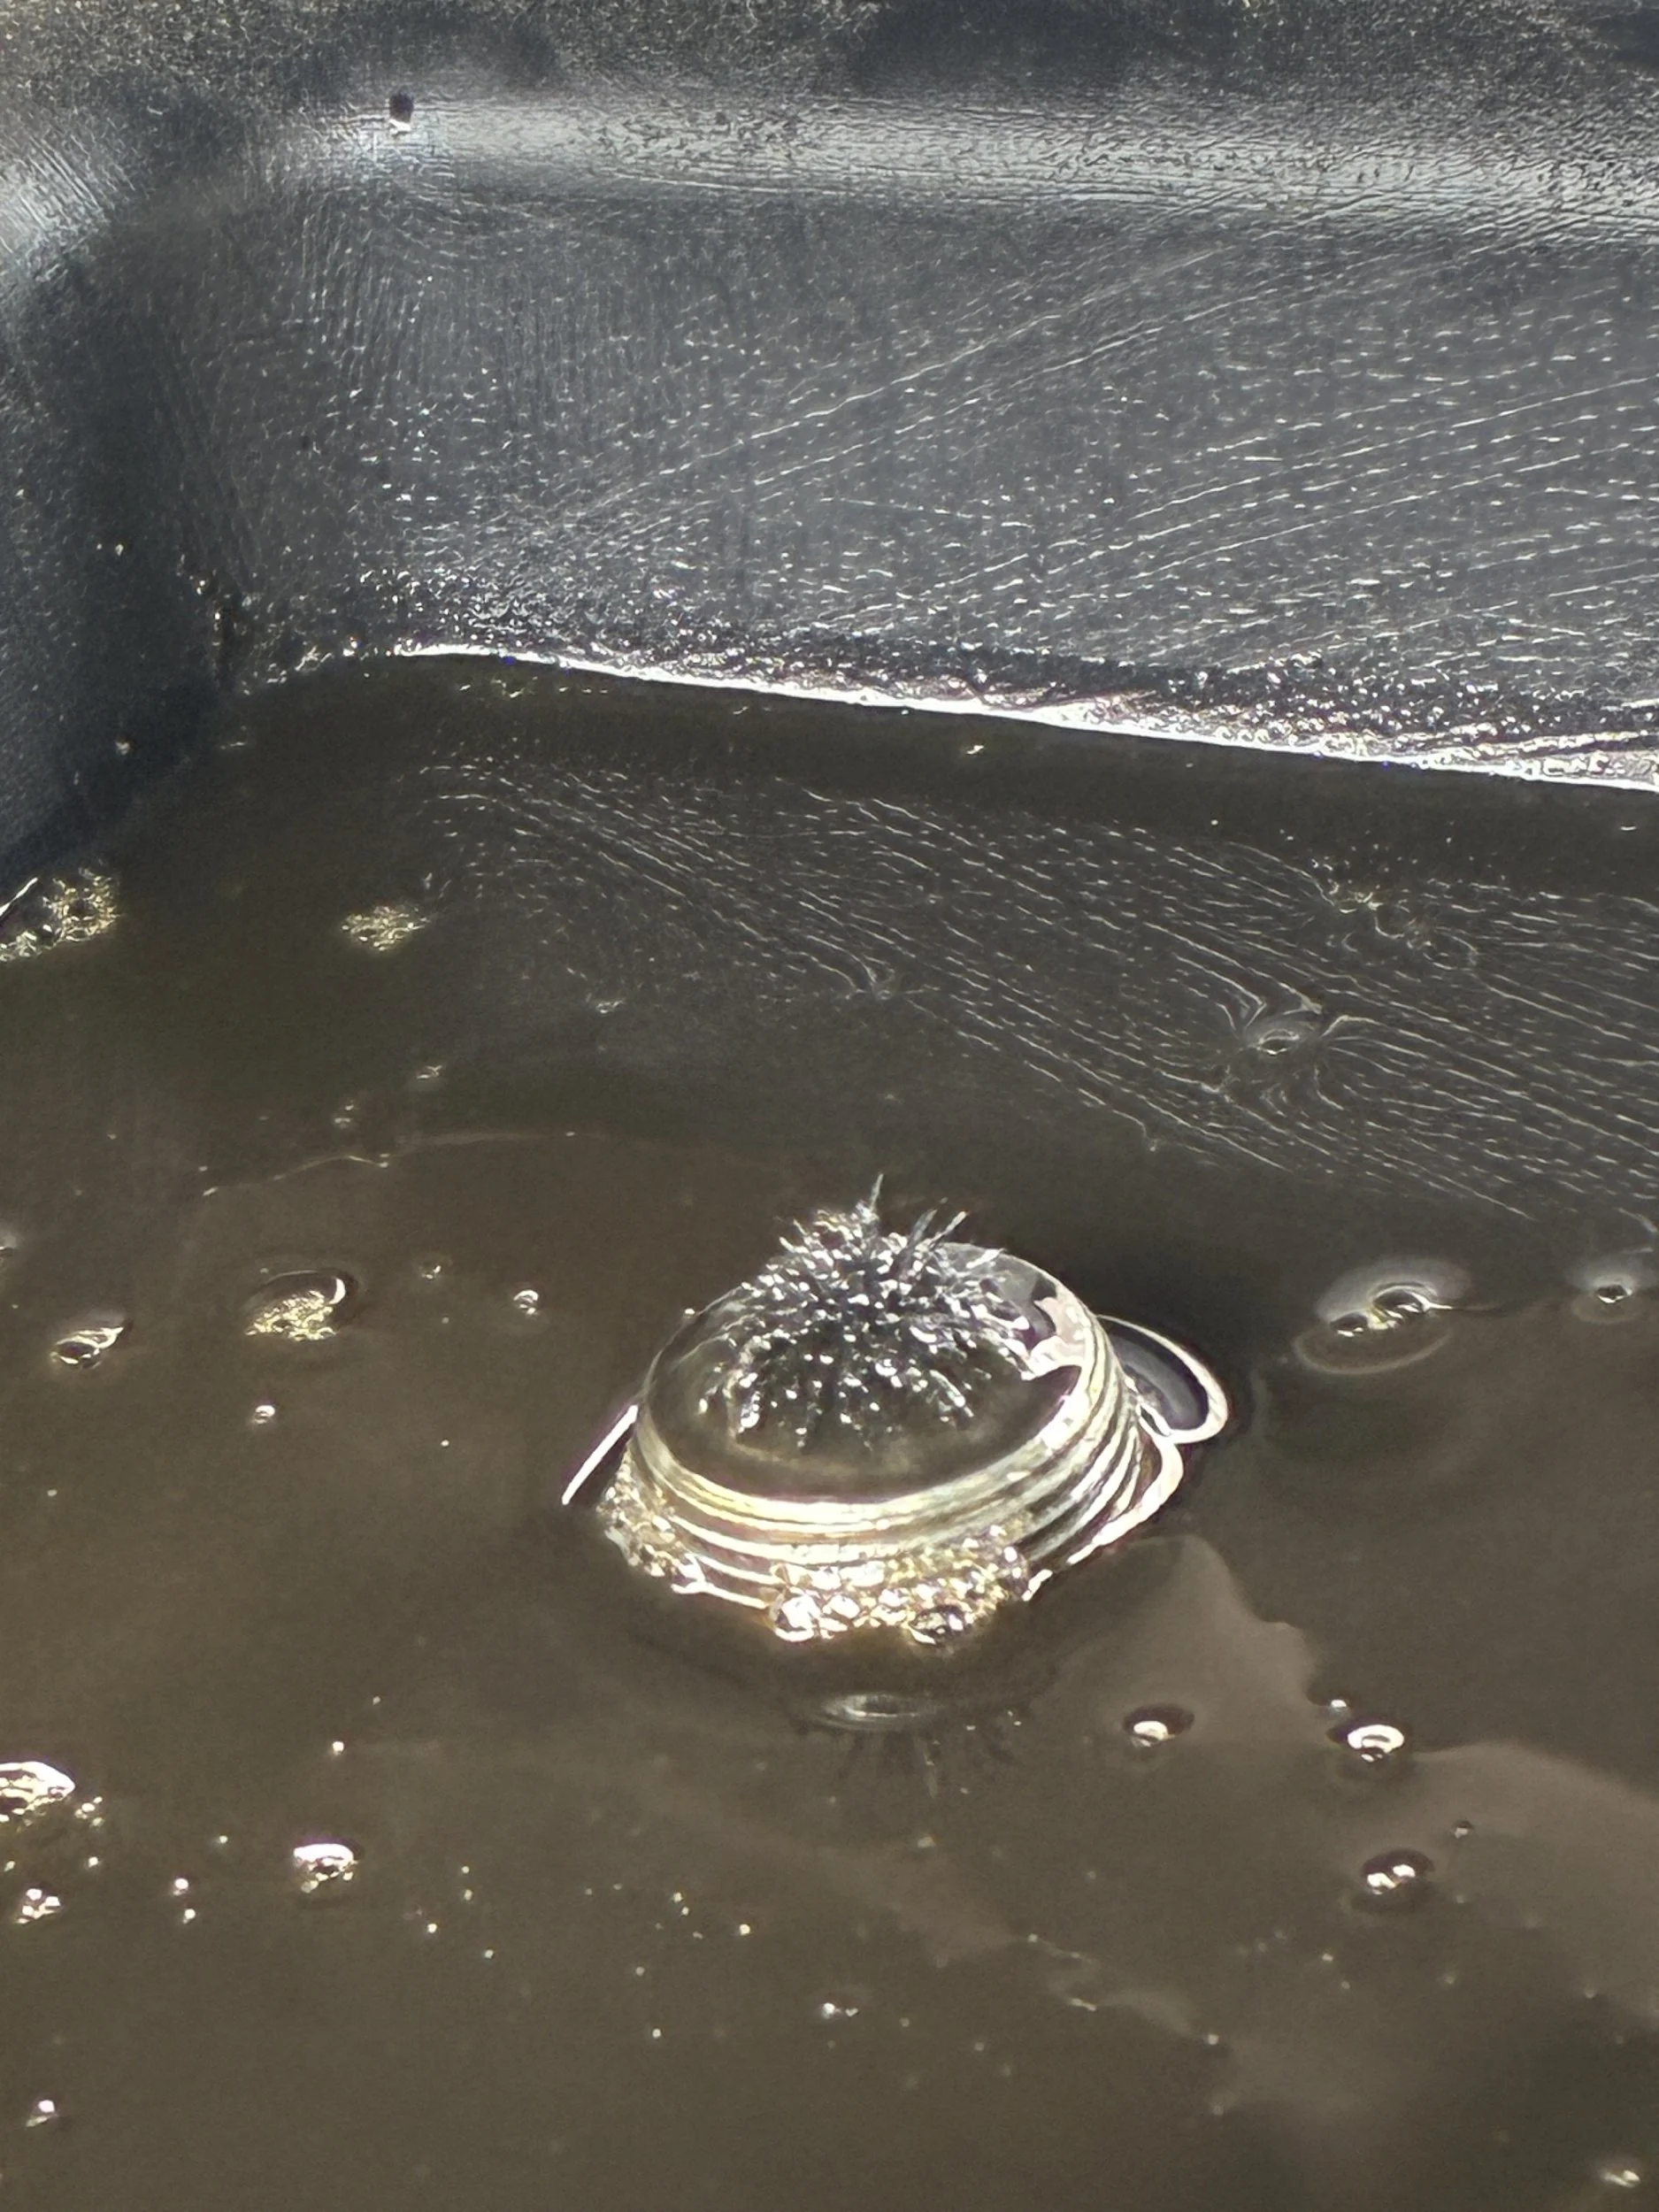
Pretty typical from what I've seen. No idea when or if it was changed last. Going back in:
I never had any issues with the 6MT... no popping out of gear, no grinding, none of that. But I'm expecting a B&M 45195 in the next few days to upgrade and maybe to ward off future issues.
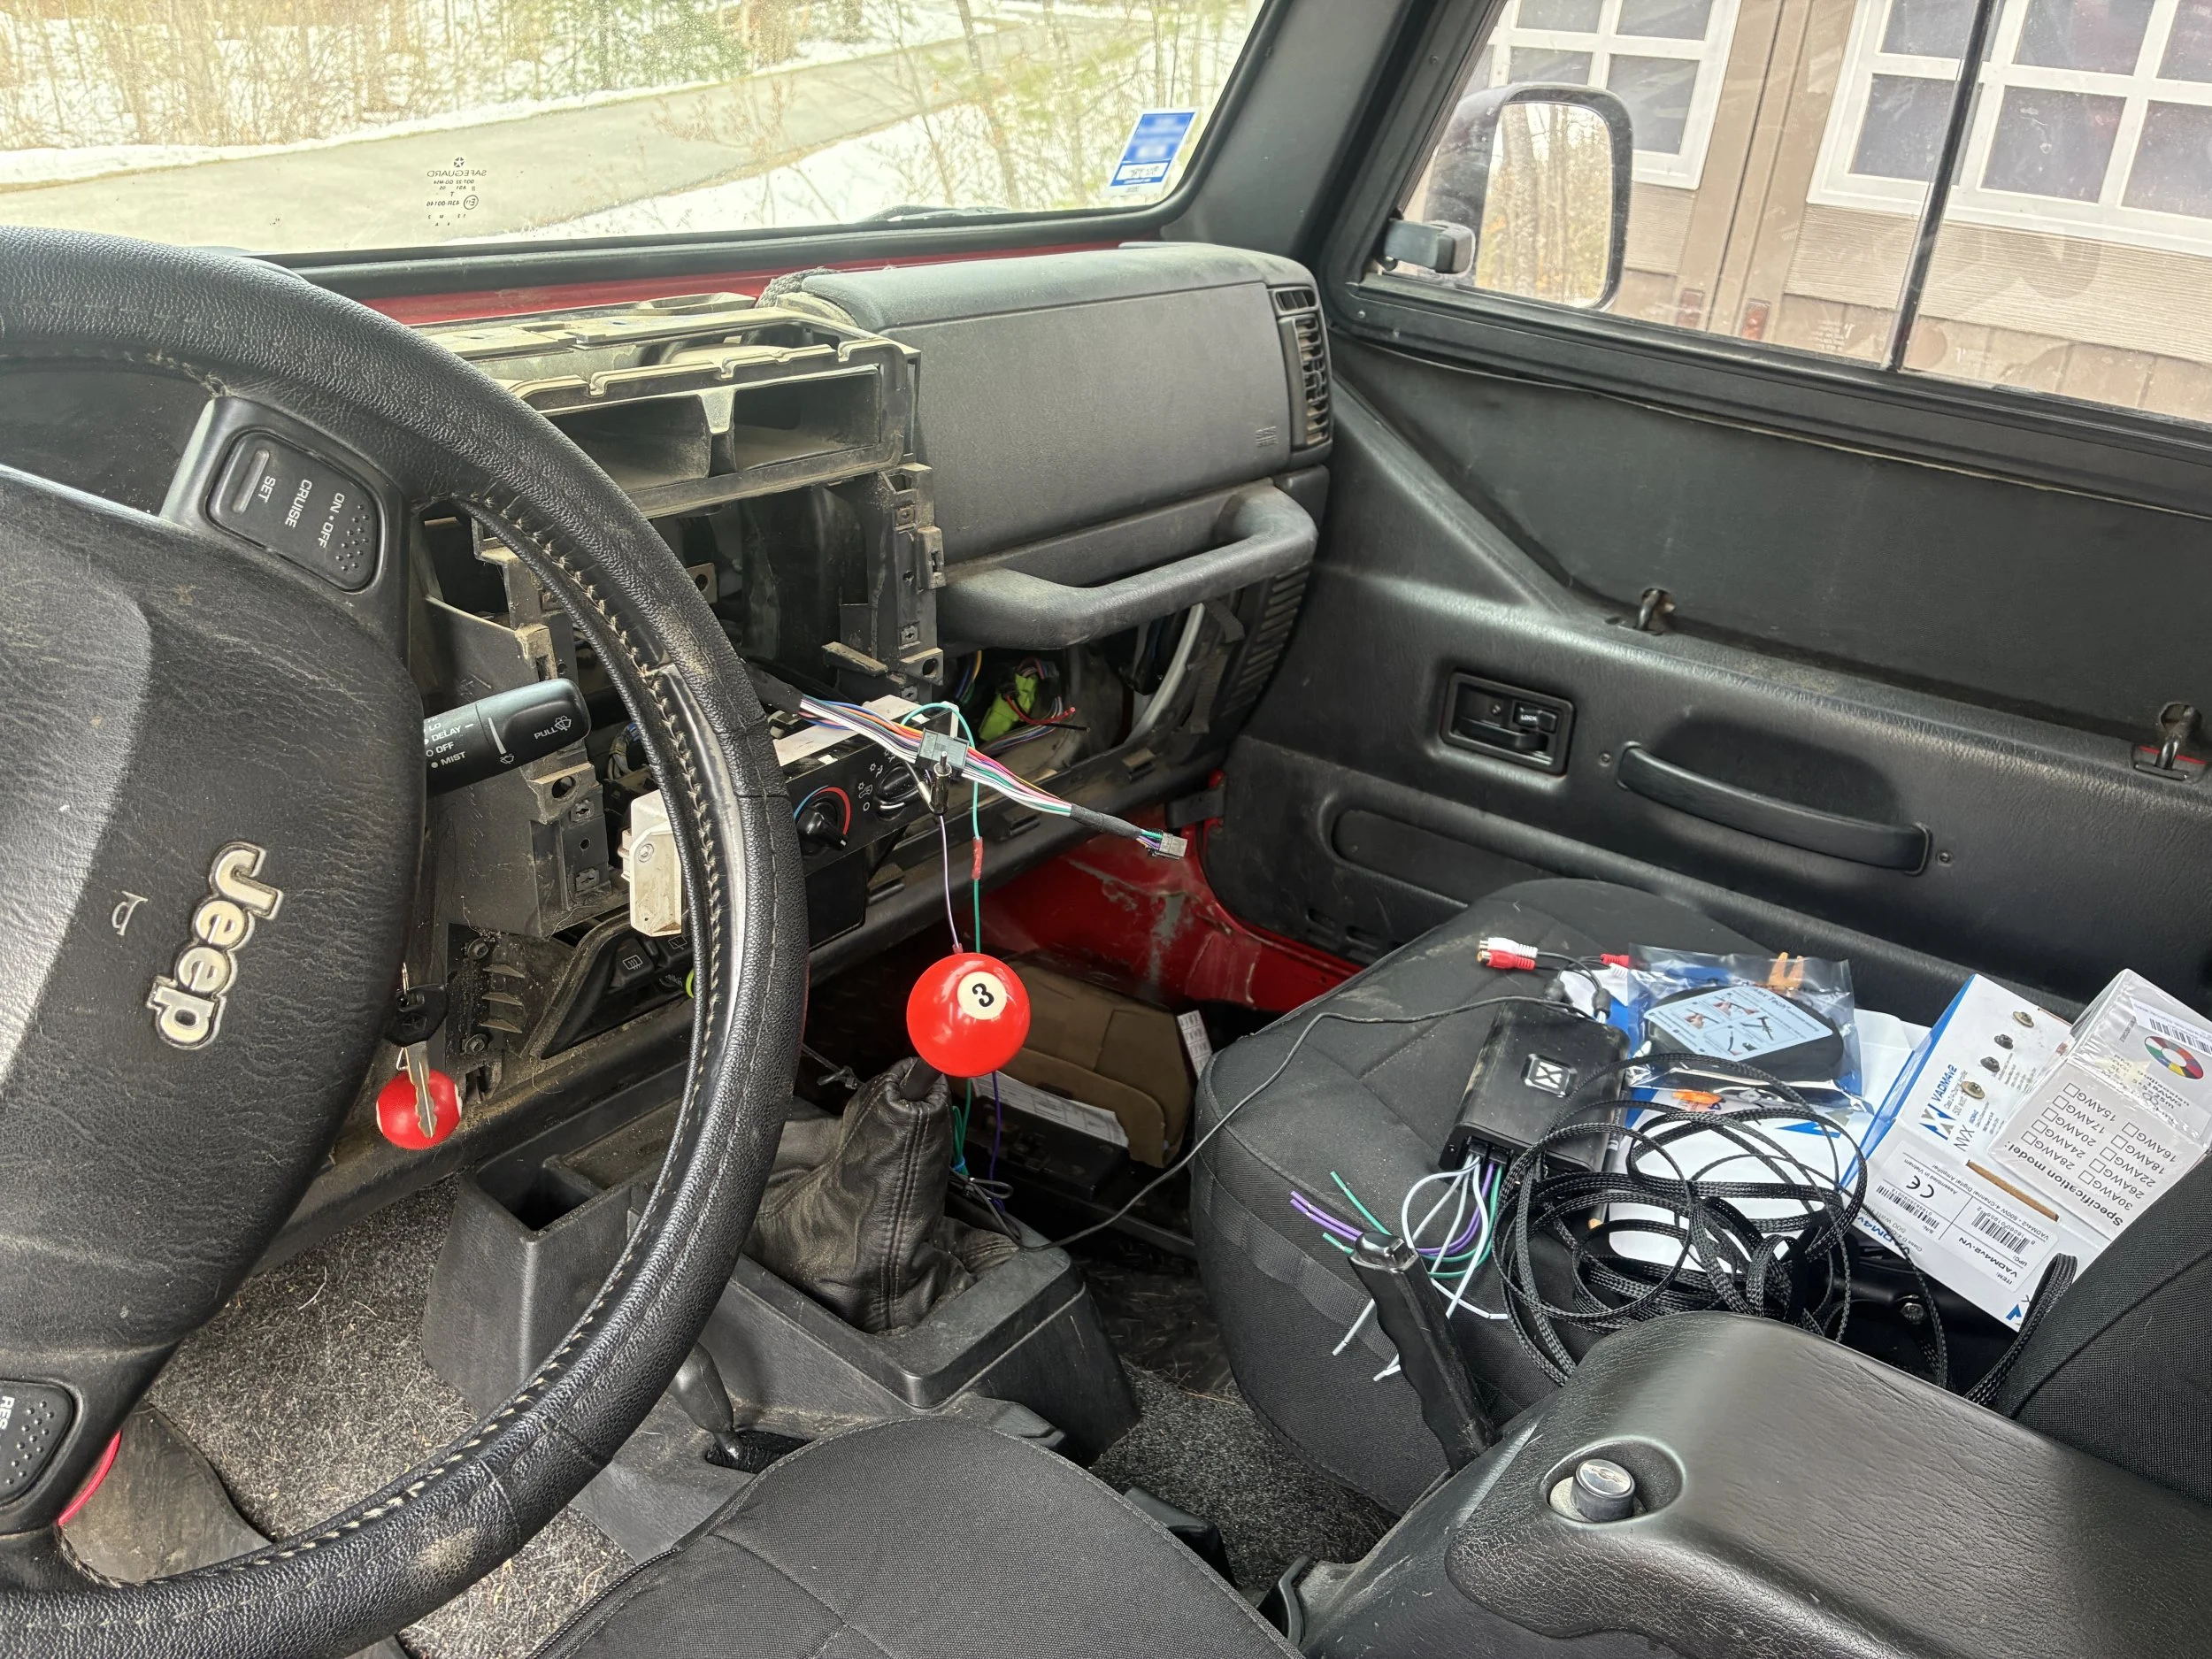
I'm still in the middle of a stereo install. Speakers are in, but head unit, amp, and sub are pending a few things. I figure everyone who's had a Jeep has driven it at least once looking like this:
EDIT: I forgot to mention that I replaced the ground-side battery cables with 4 AWG and a new “military-style” terminal on 3/14. One to the firewall and one to the block. The positive-side cables to the alternator, starter, and fuse block are next once I decide whether to re-use or replace the fusible link.
152,247 miles
Drained the NSG370 and then added Redline MTL until it didn't want any more.
Drain plug coming out:
Pretty typical from what I've seen. No idea when or if it was changed last. Going back in:
I never had any issues with the 6MT... no popping out of gear, no grinding, none of that. But I'm expecting a B&M 45195 in the next few days to upgrade and maybe to ward off future issues.
I'm still in the middle of a stereo install. Speakers are in, but head unit, amp, and sub are pending a few things. I figure everyone who's had a Jeep has driven it at least once looking like this:
EDIT: I forgot to mention that I replaced the ground-side battery cables with 4 AWG and a new “military-style” terminal on 3/14. One to the firewall and one to the block. The positive-side cables to the alternator, starter, and fuse block are next once I decide whether to re-use or replace the fusible link.
Last edited:
My kid is learning to drive on my ‘05 TJR 6spd. I’ll need to do this soon! 

Easiest fluid change I remember doing. A hand pump is 100% necessary. My kid did most of the filling.My kid is learning to drive on my ‘05 TJR 6spd. I’ll need to do this soon!
3/21/2026
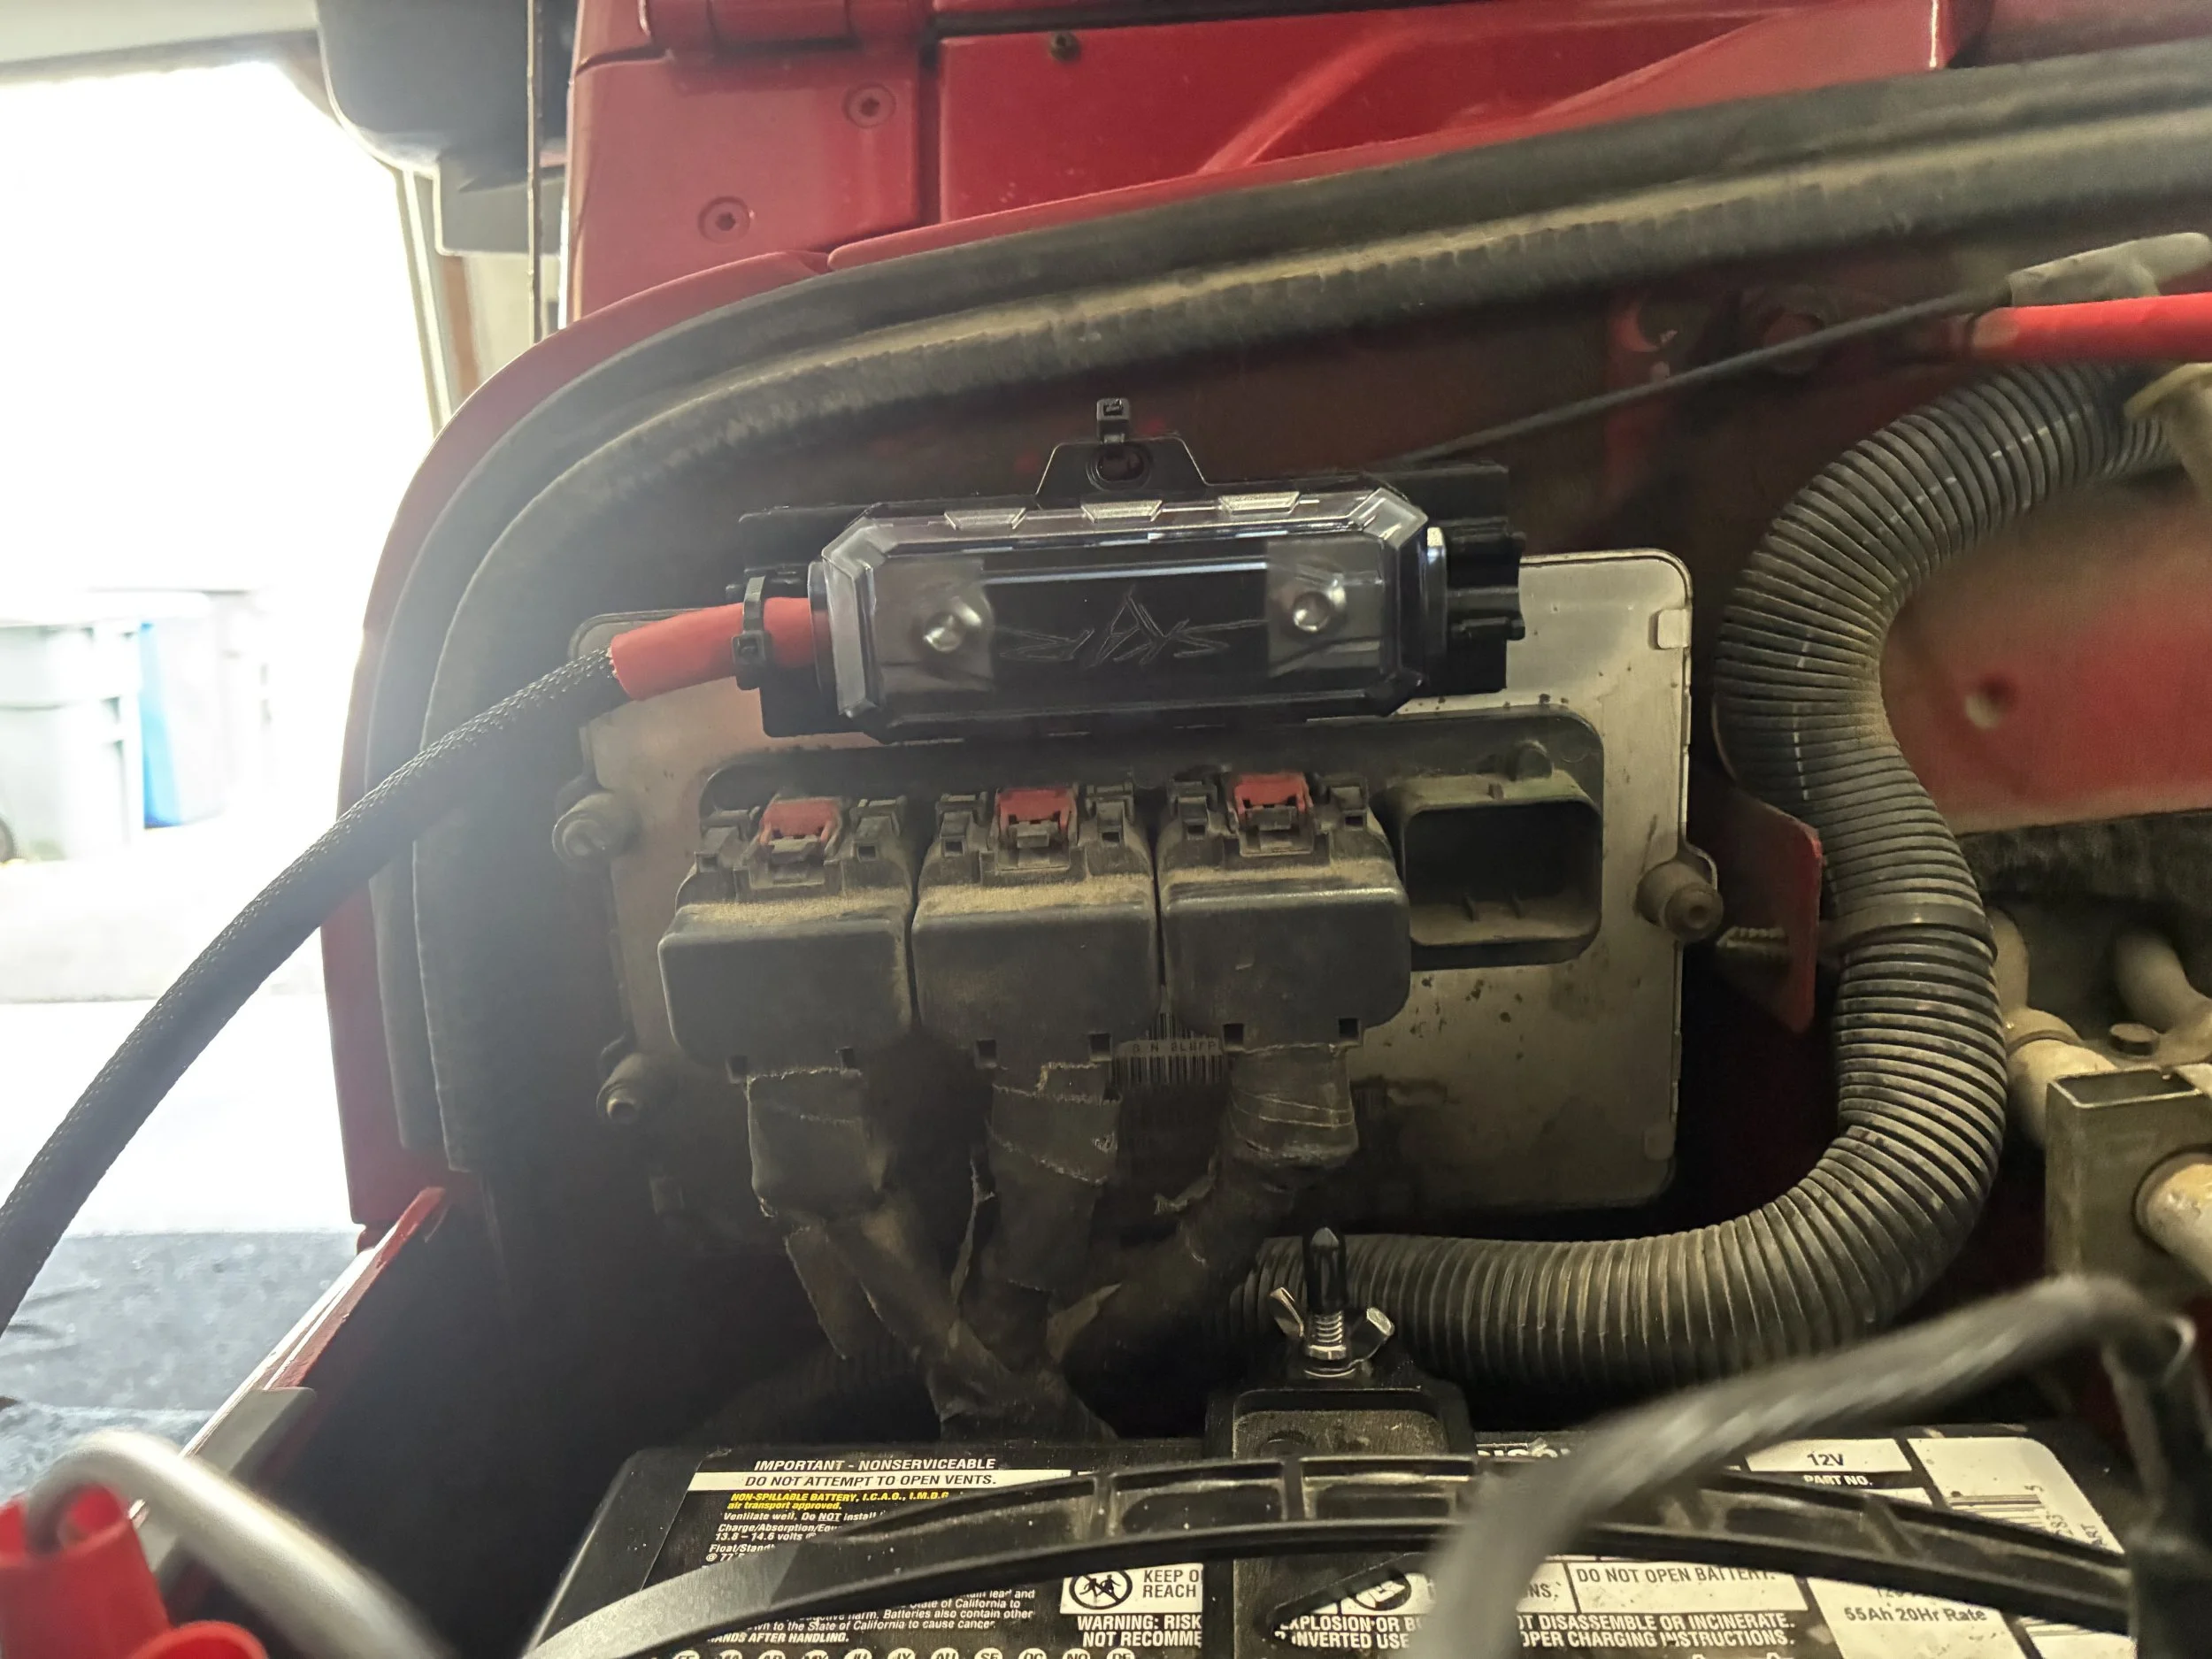
Busy day. Designed and printed a fuse holder mount that hangs on the PCM. I mounted that, and then installed the fuse holder and started running battery and amp wiring. No place in town has fusible link wire bigger than 16 AWG, so I had to order some 10 AWG to put in line with the new battery cables. While I was at it, I updated my battery cable thread with complete dimensions.
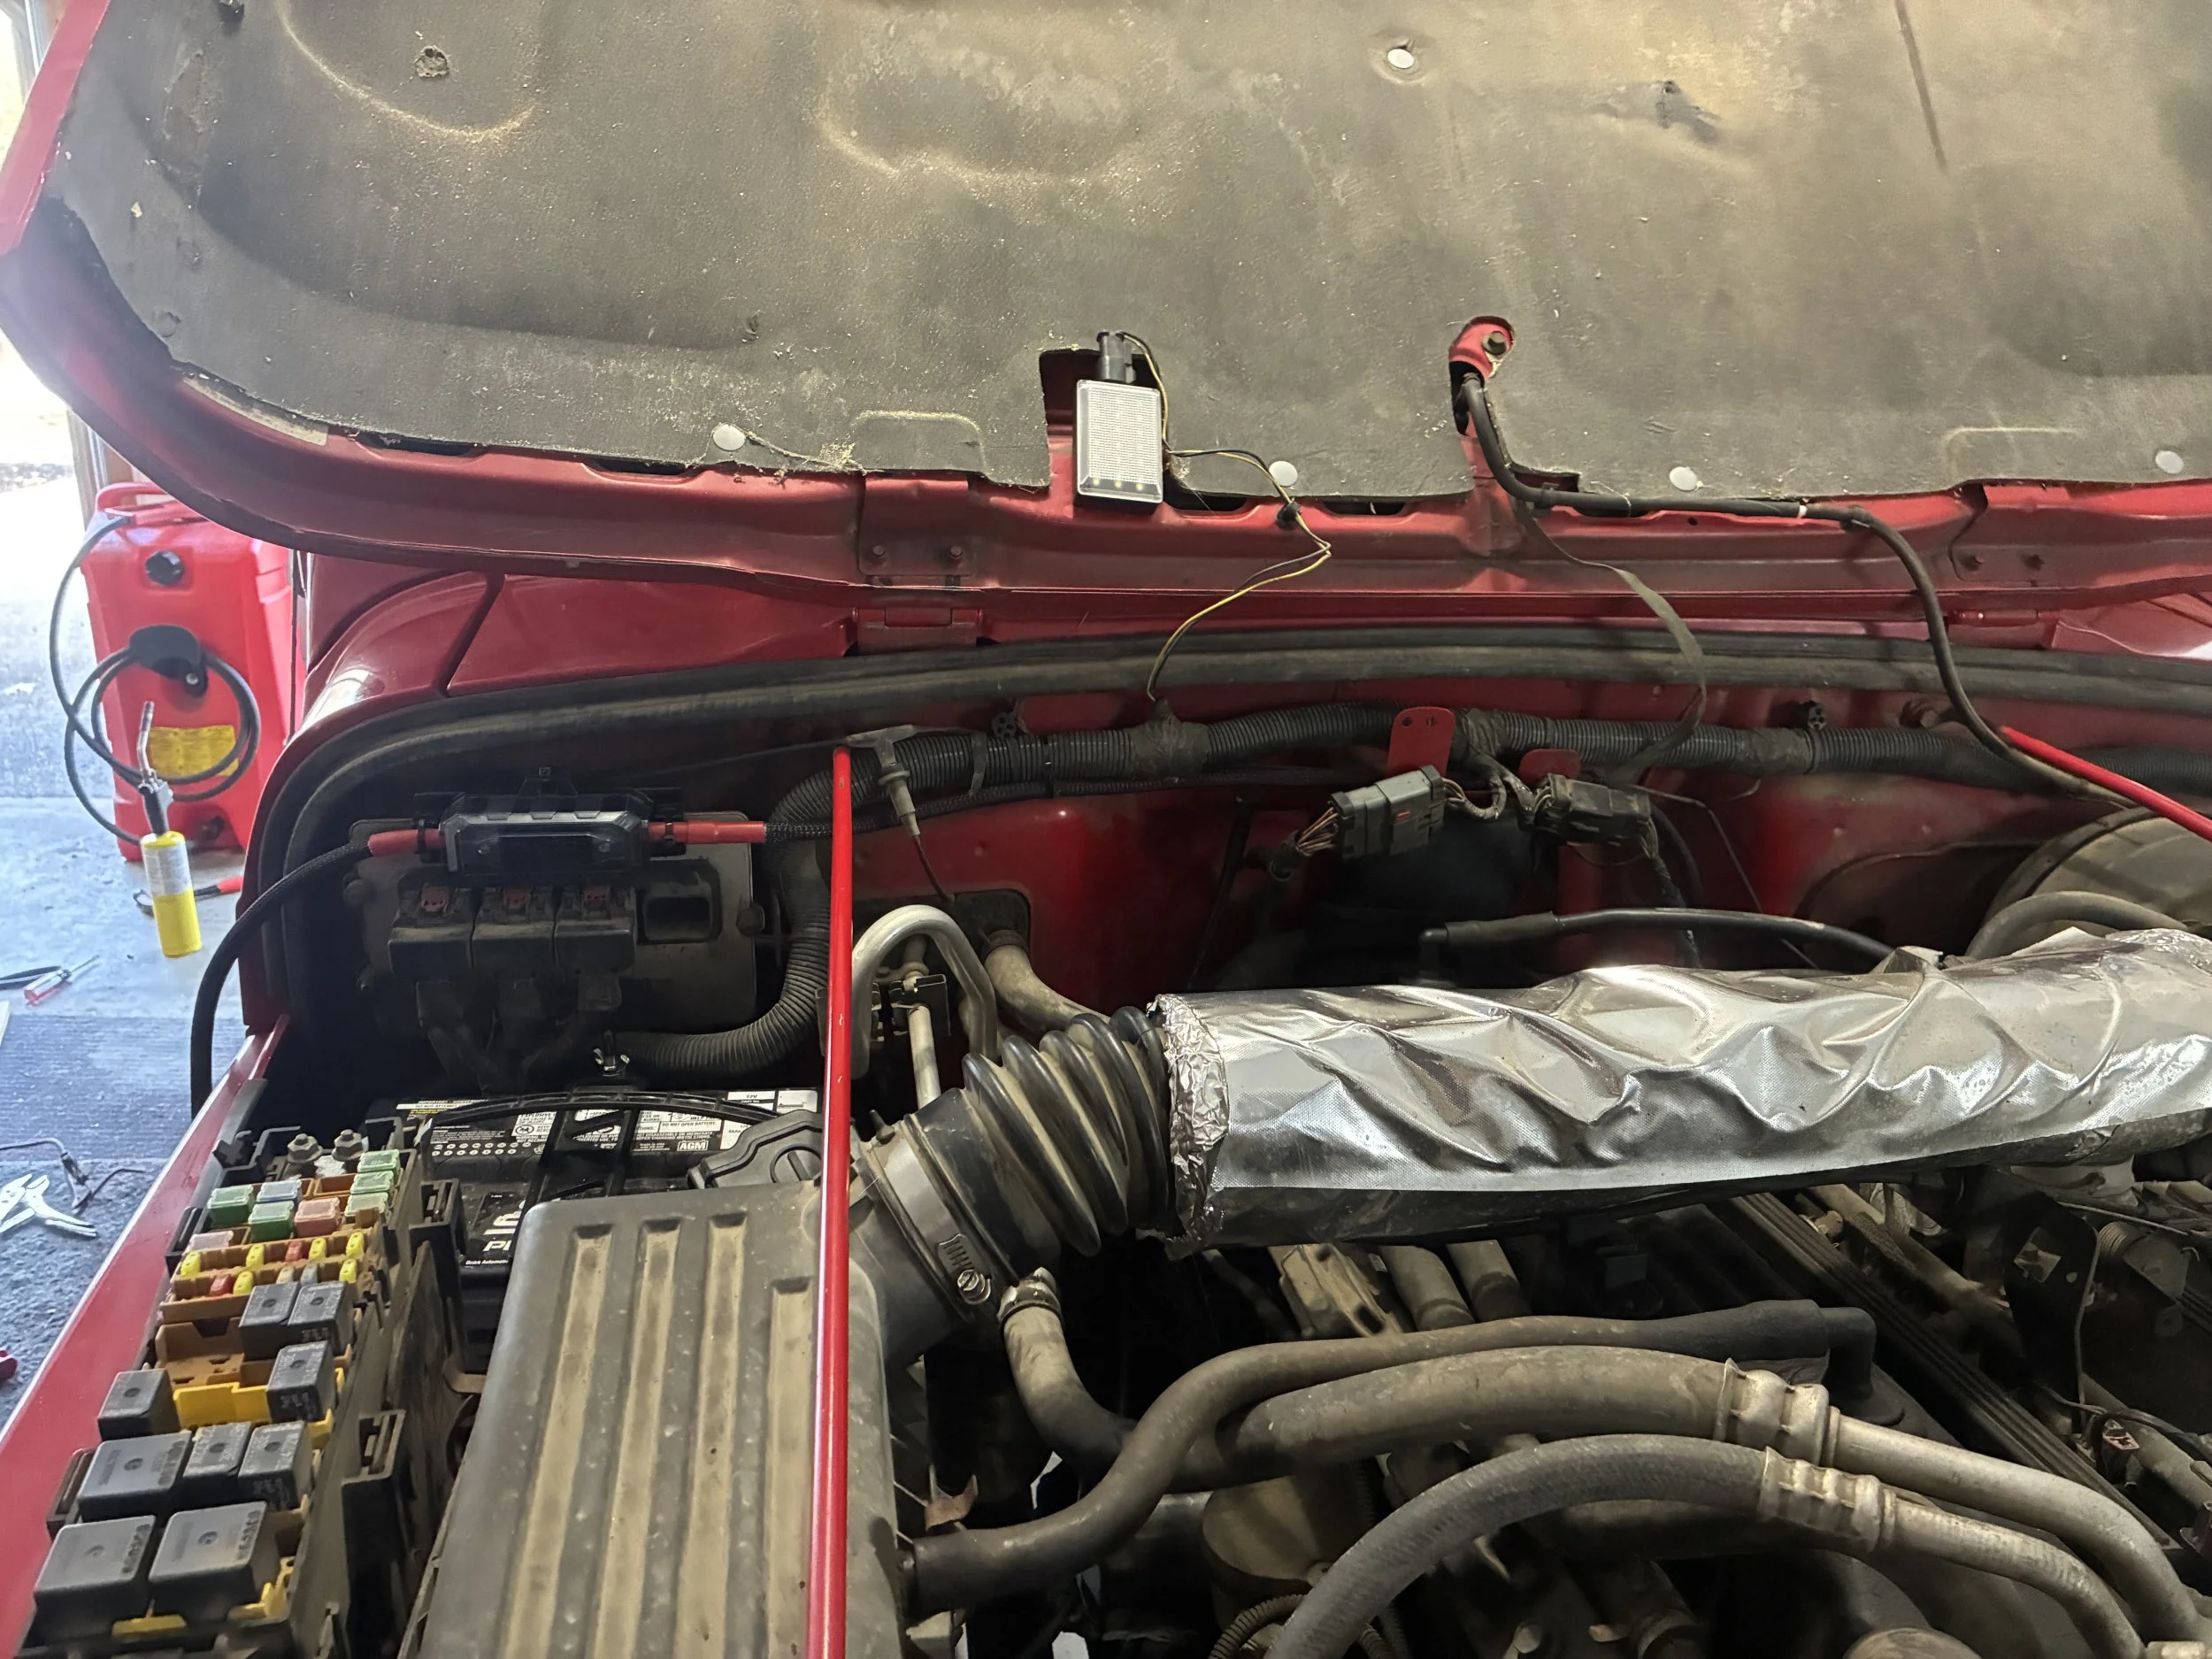
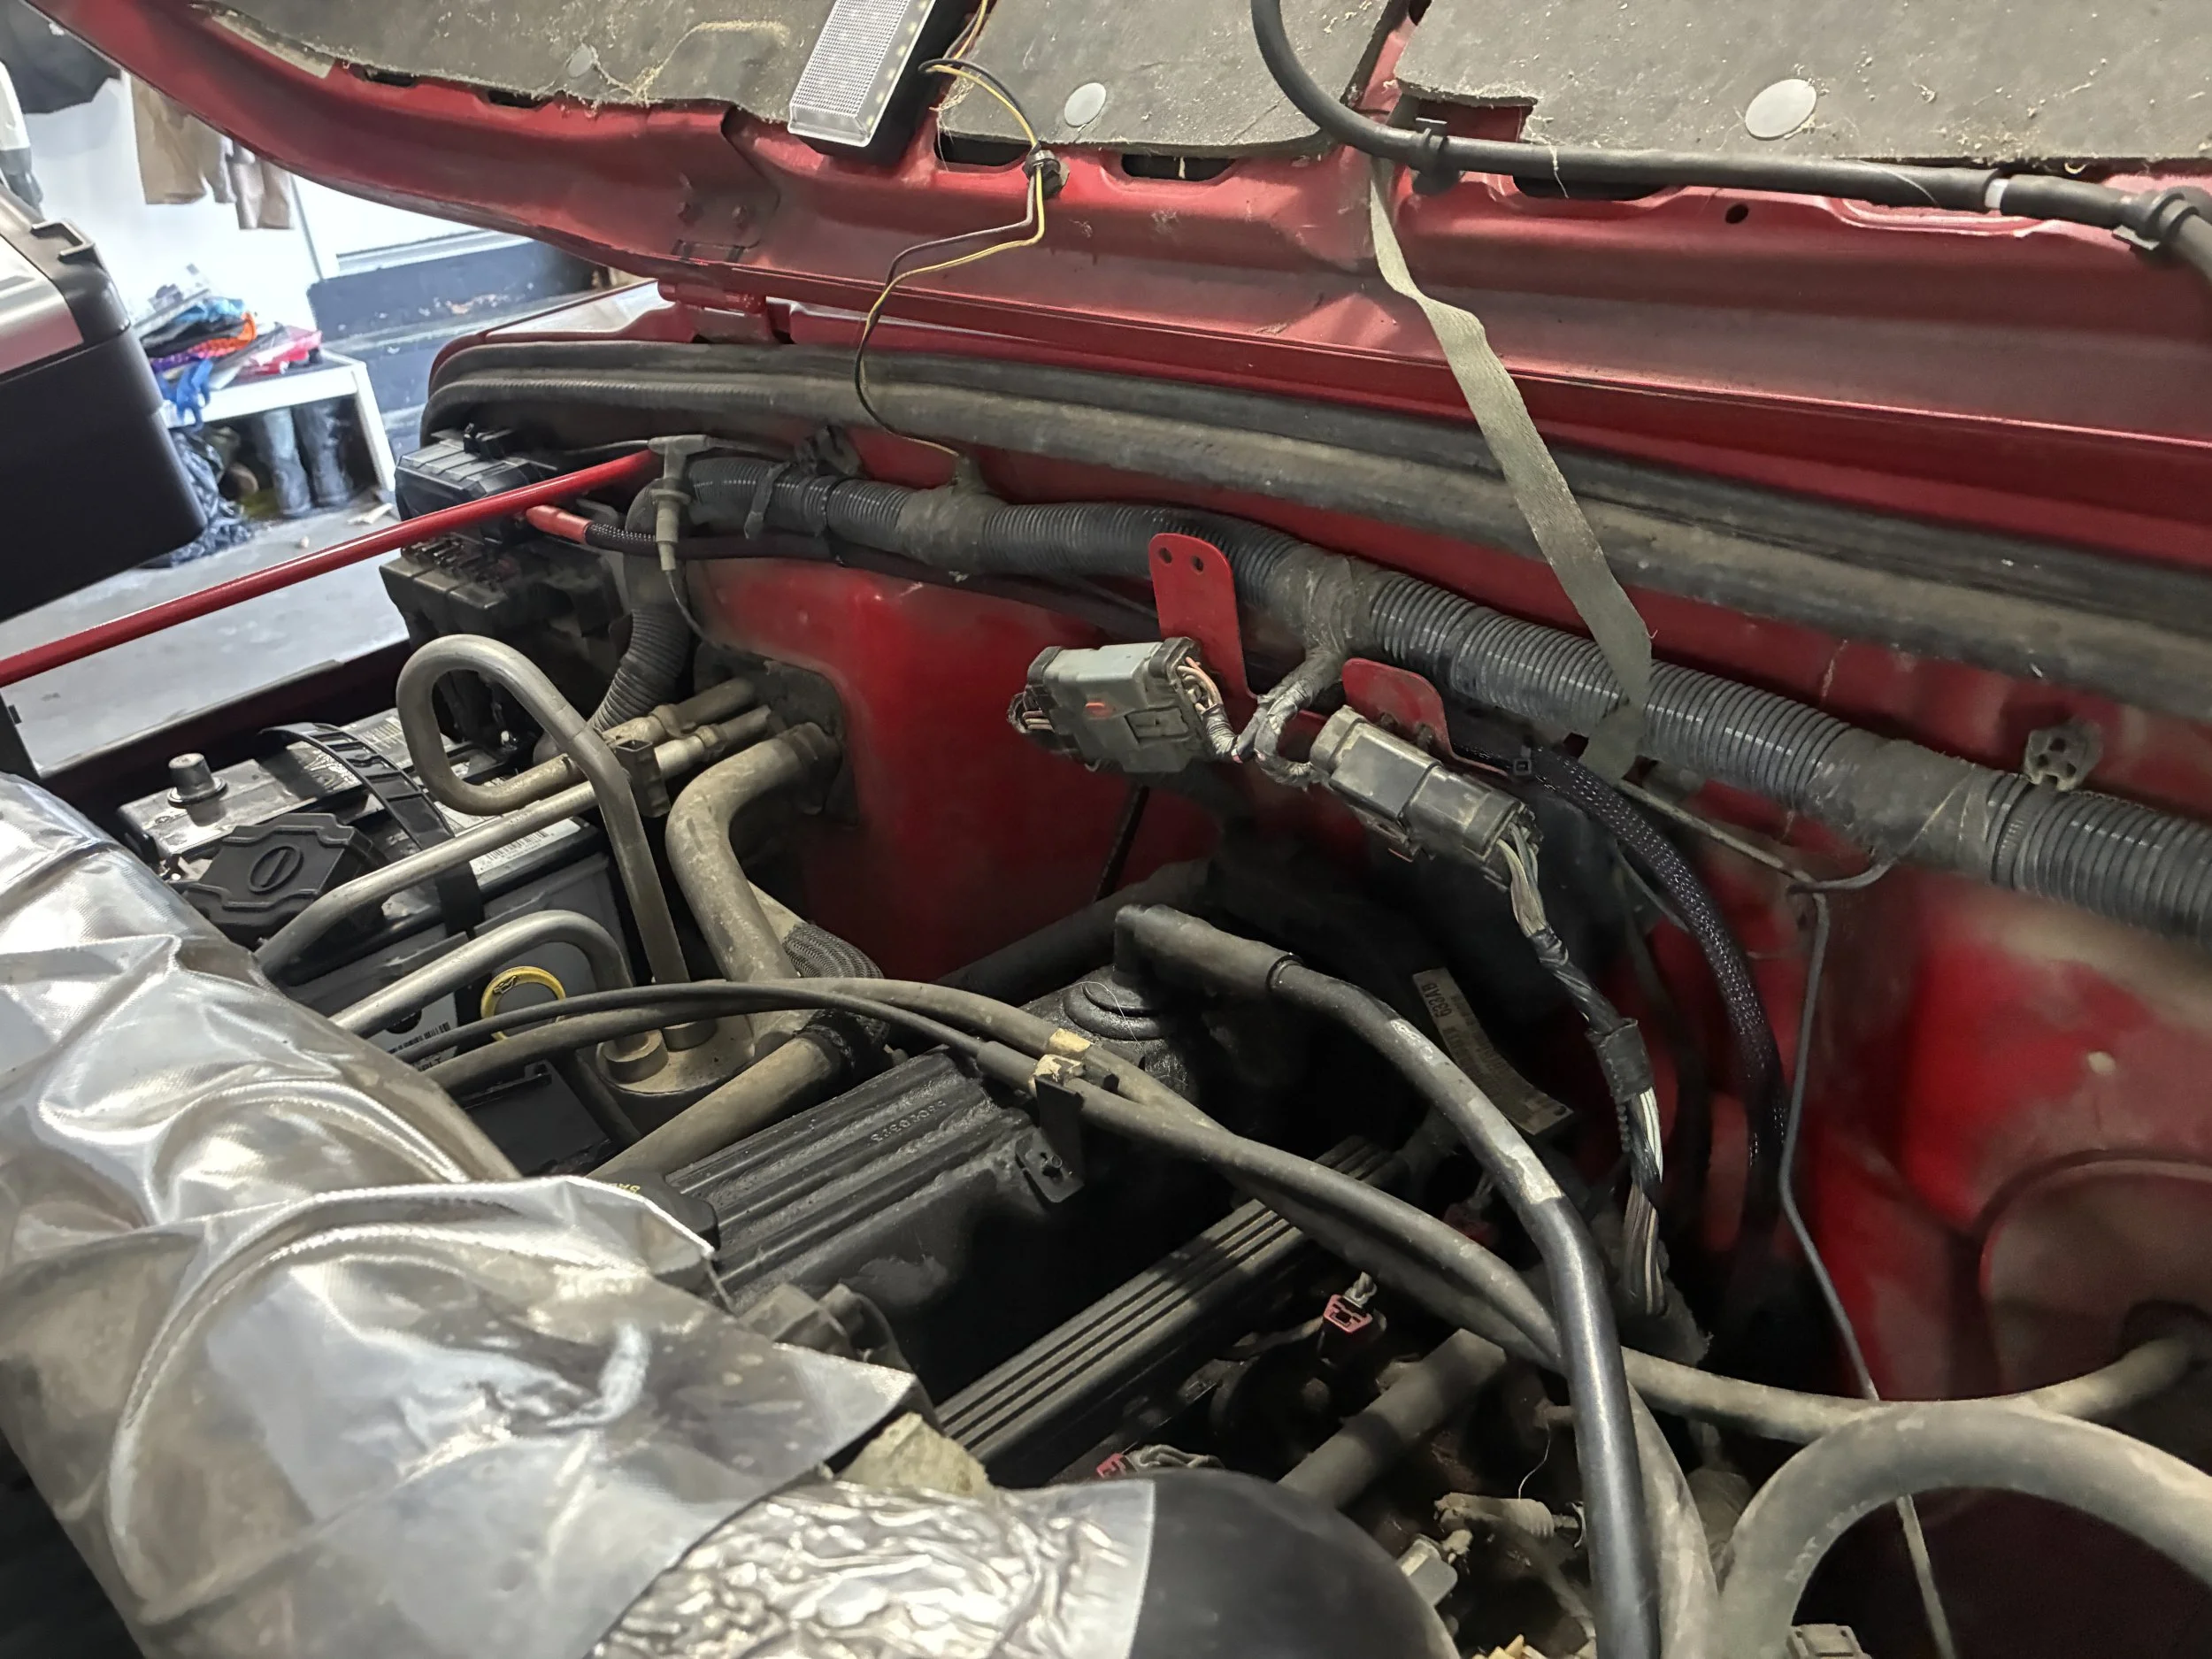
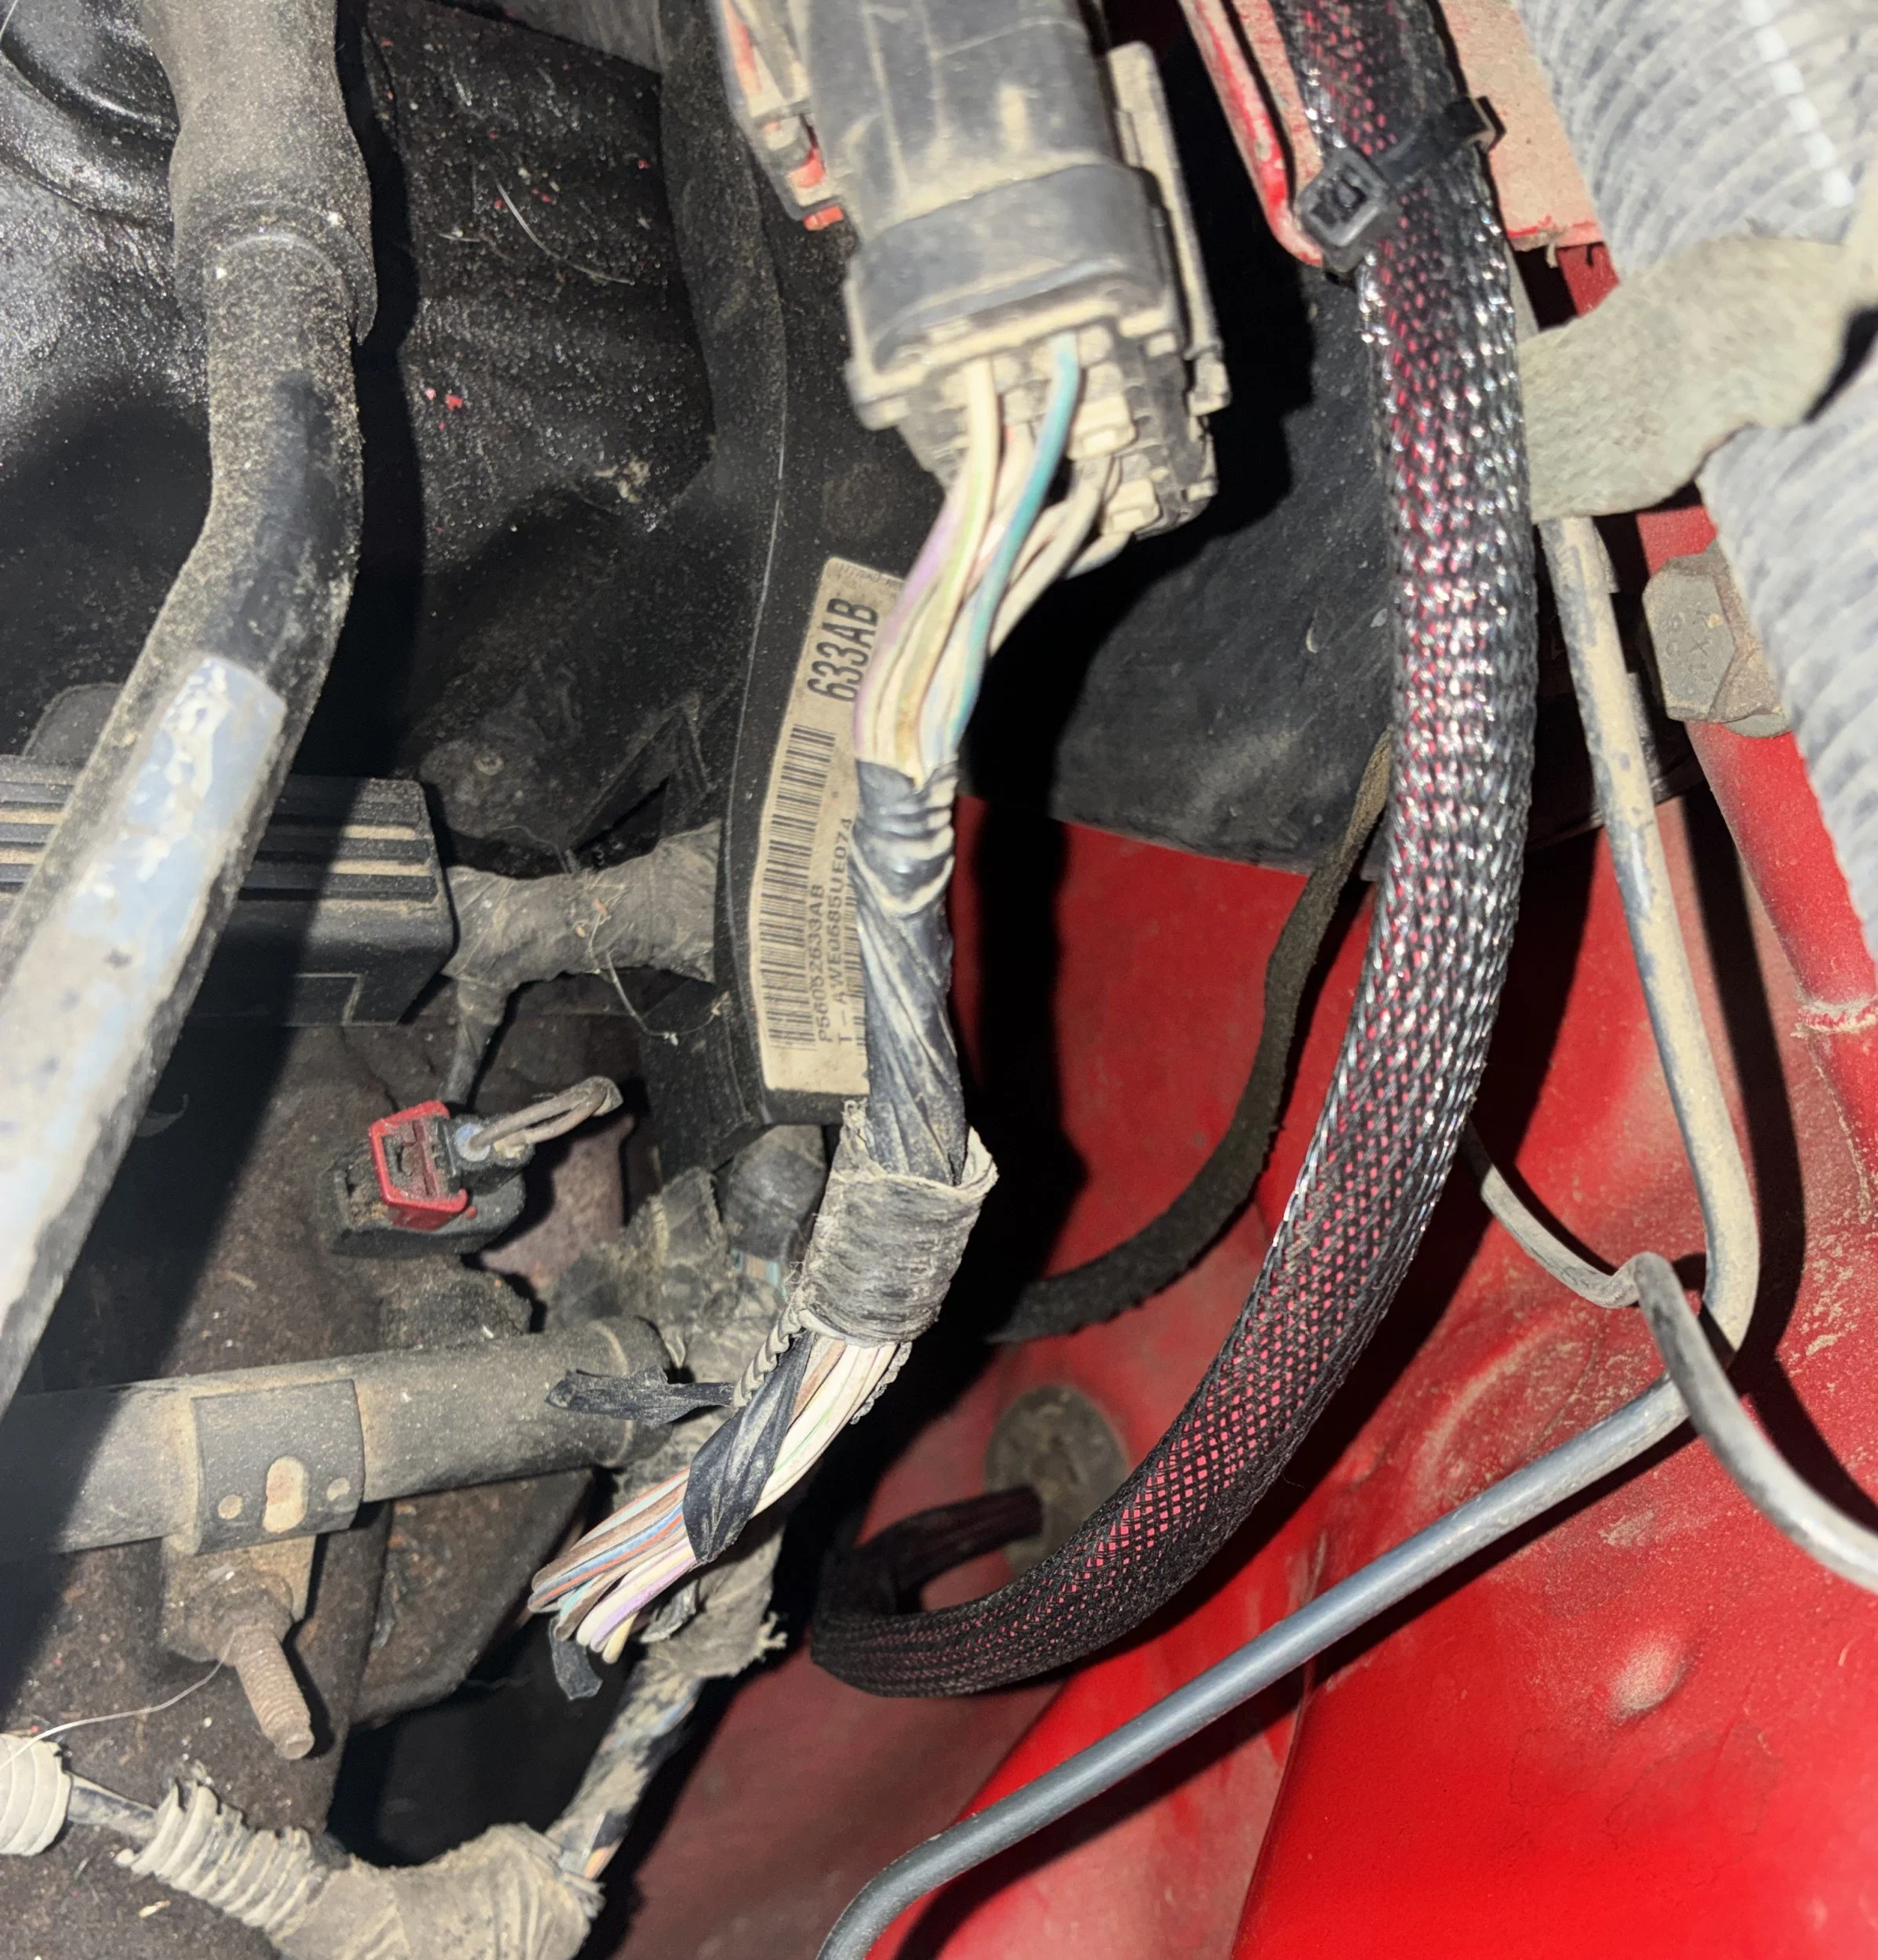
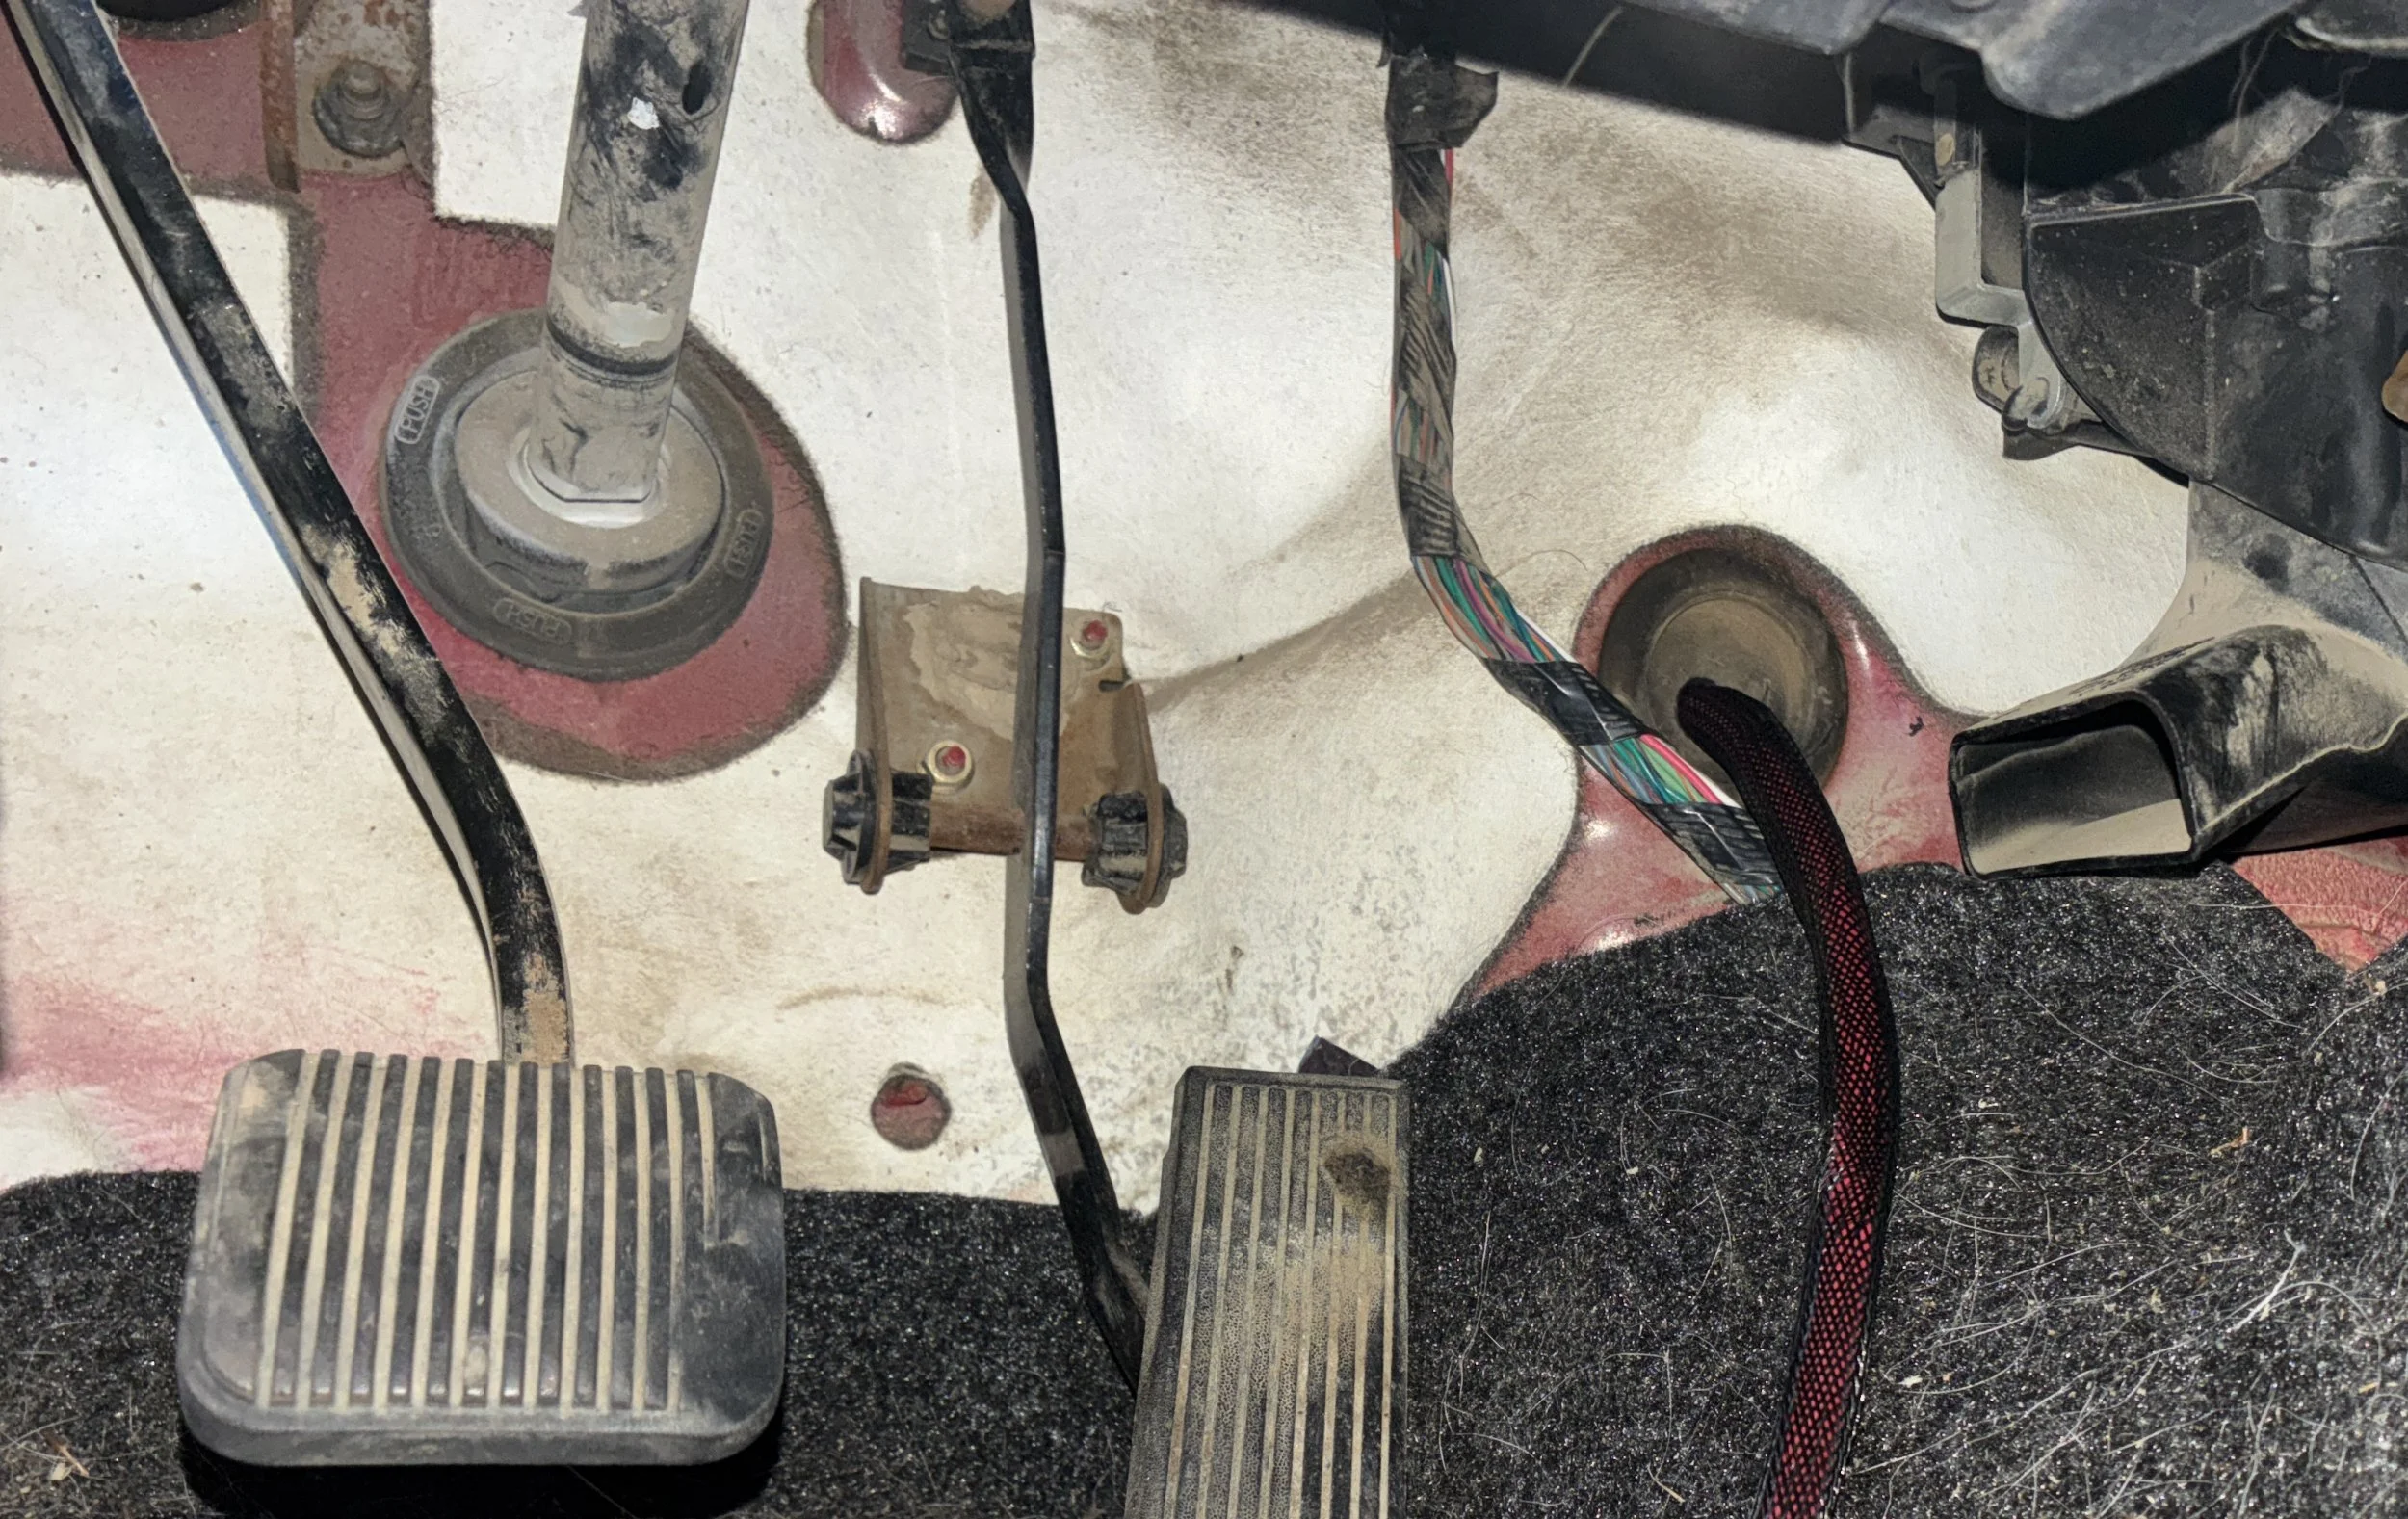
Also decided to force myself to come up with a solution for the under-seat sub by cutting out two bottom supports from the rear seat.
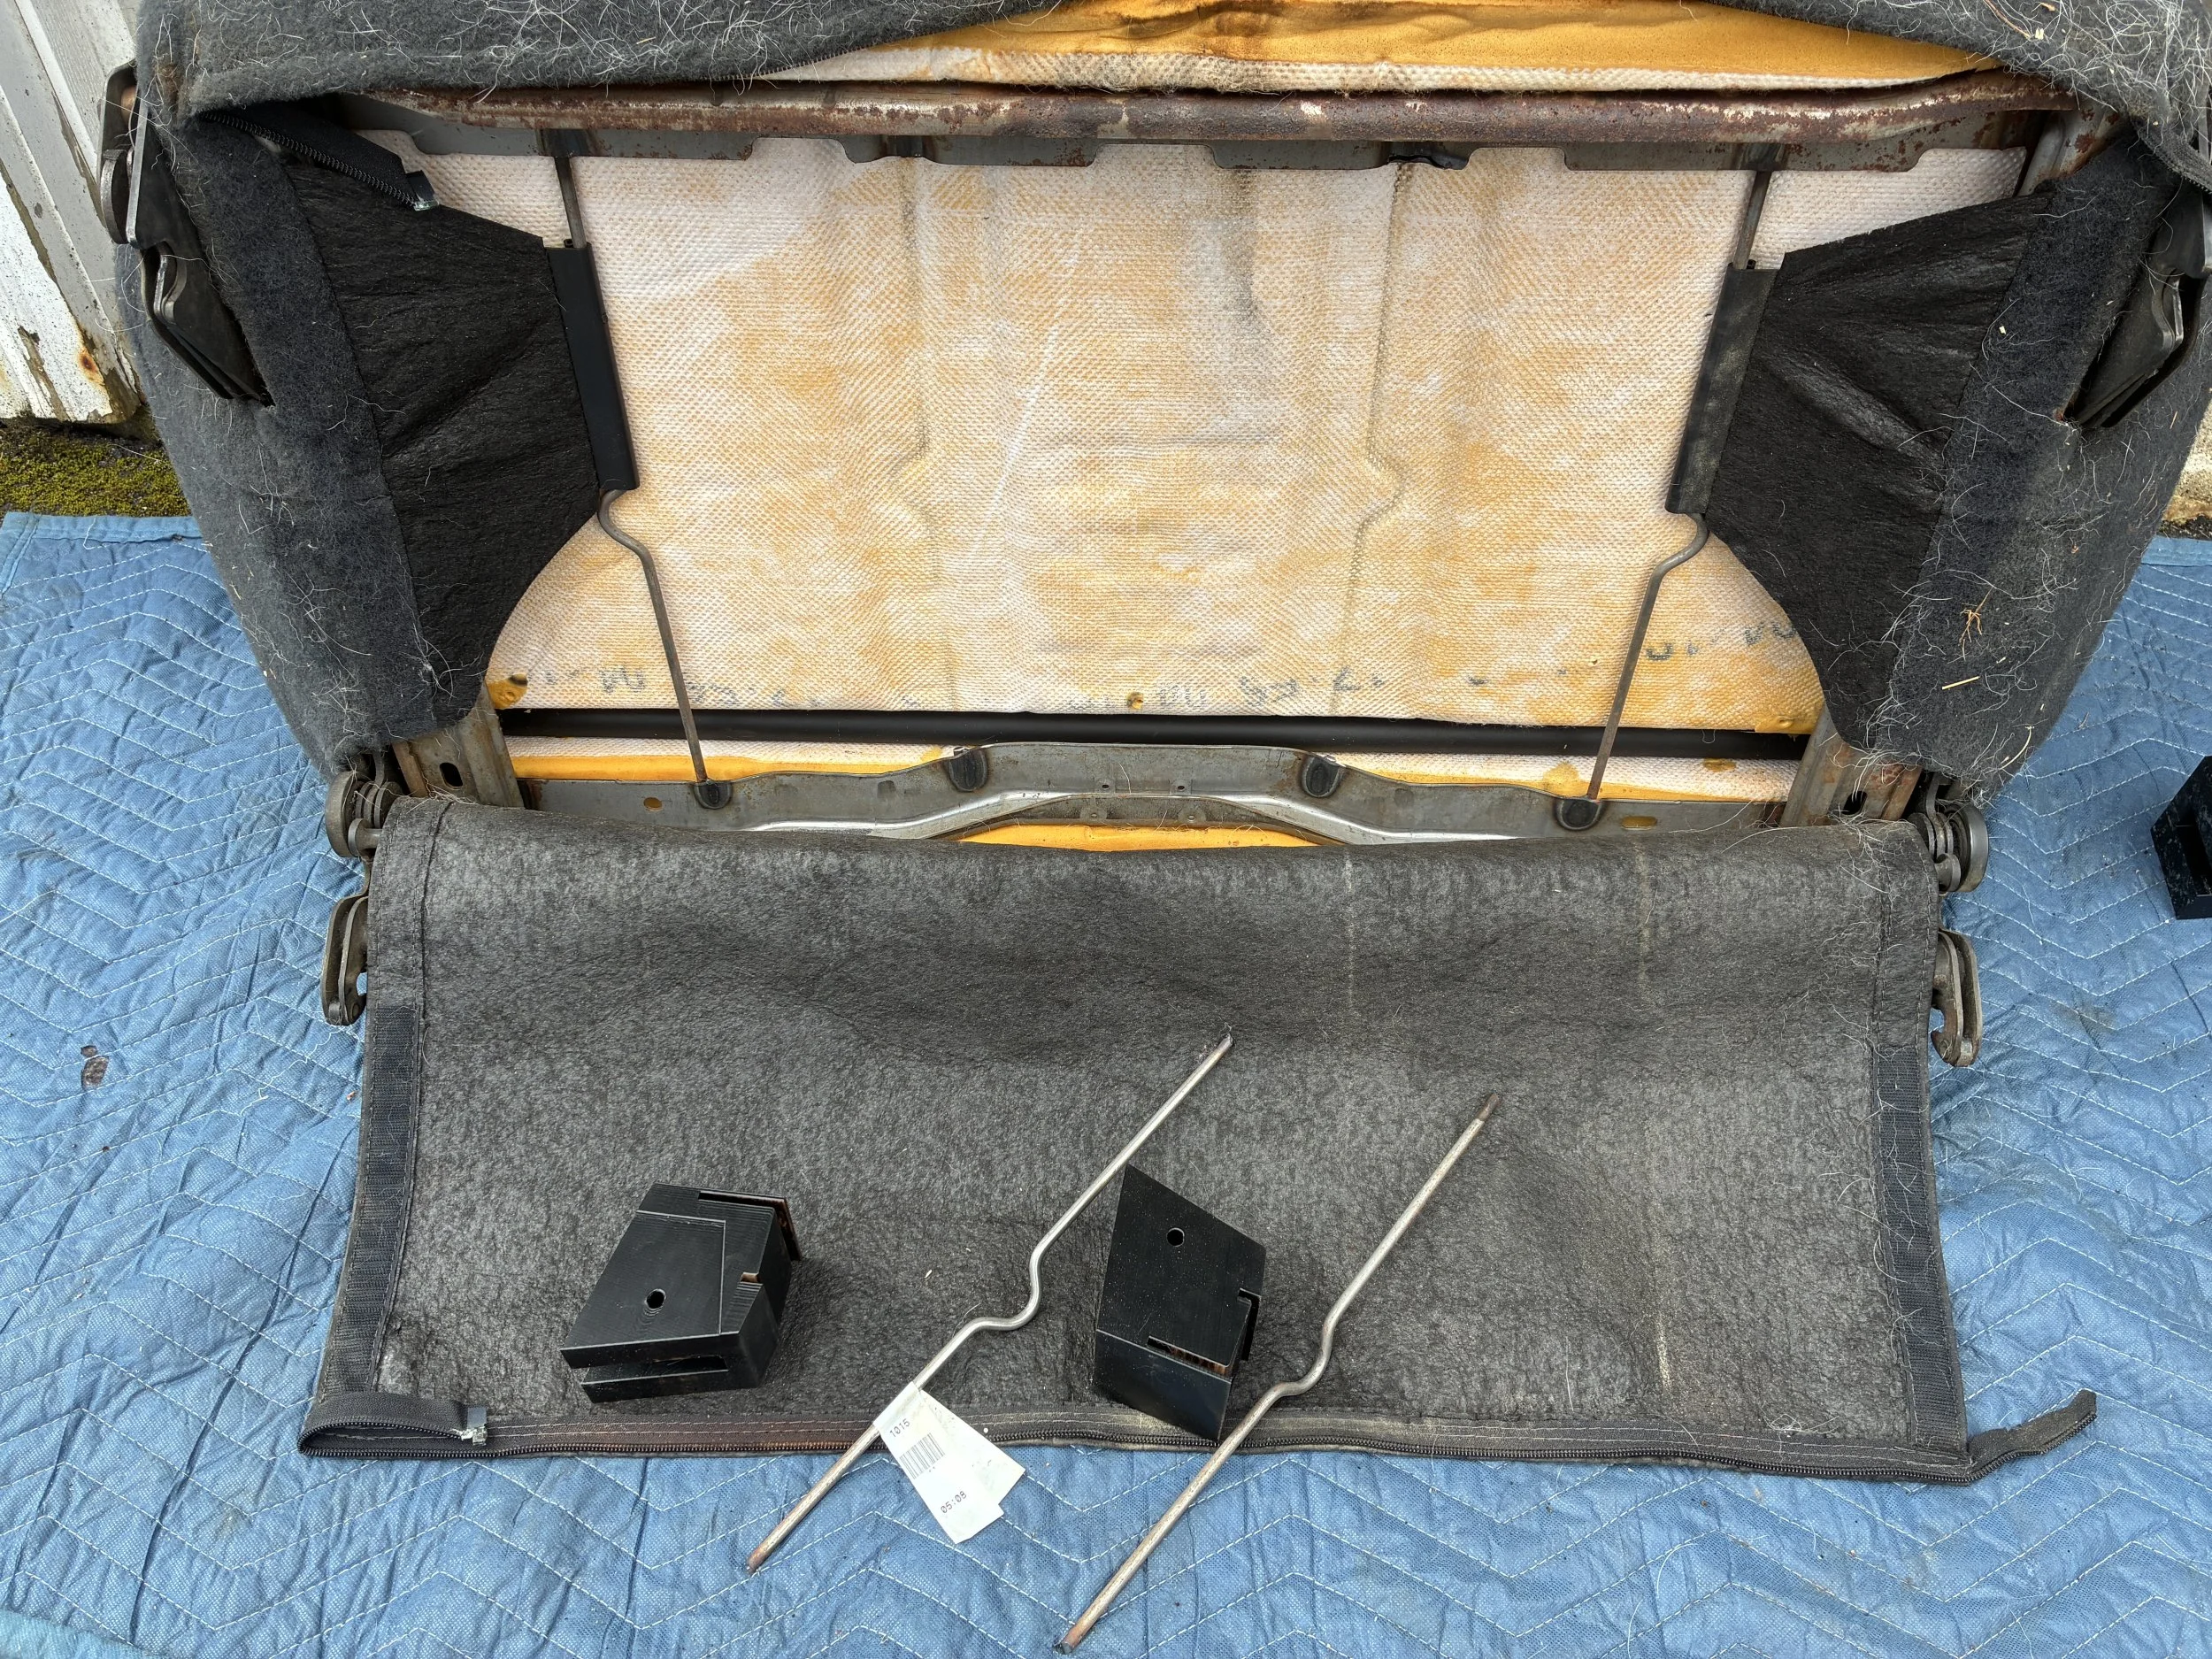
The sub fits great with these two struts removed. But, I worry the grille will get squished if someone steps in the back center of the seat bottom. I'd like to come up with a way to protect it, but I'm going to wait until after everything's connected to see how it sounds. I might look into some tensioned straps between the remaining struts to provide some support for the weight of passengers in the back.
EDIT: I found 8 AWG fusible link wire here and got one on the way.
Busy day. Designed and printed a fuse holder mount that hangs on the PCM. I mounted that, and then installed the fuse holder and started running battery and amp wiring. No place in town has fusible link wire bigger than 16 AWG, so I had to order some 10 AWG to put in line with the new battery cables. While I was at it, I updated my battery cable thread with complete dimensions.
Also decided to force myself to come up with a solution for the under-seat sub by cutting out two bottom supports from the rear seat.
The sub fits great with these two struts removed. But, I worry the grille will get squished if someone steps in the back center of the seat bottom. I'd like to come up with a way to protect it, but I'm going to wait until after everything's connected to see how it sounds. I might look into some tensioned straps between the remaining struts to provide some support for the weight of passengers in the back.
EDIT: I found 8 AWG fusible link wire here and got one on the way.
Last edited:
3/22/2026
Test-fitted the 3D-printed steering column amp mount and it goes in easily enough, so I screwed down the distribution block and amp. I left some room for future expansion... might add a fuse & relay box in the upper right section.
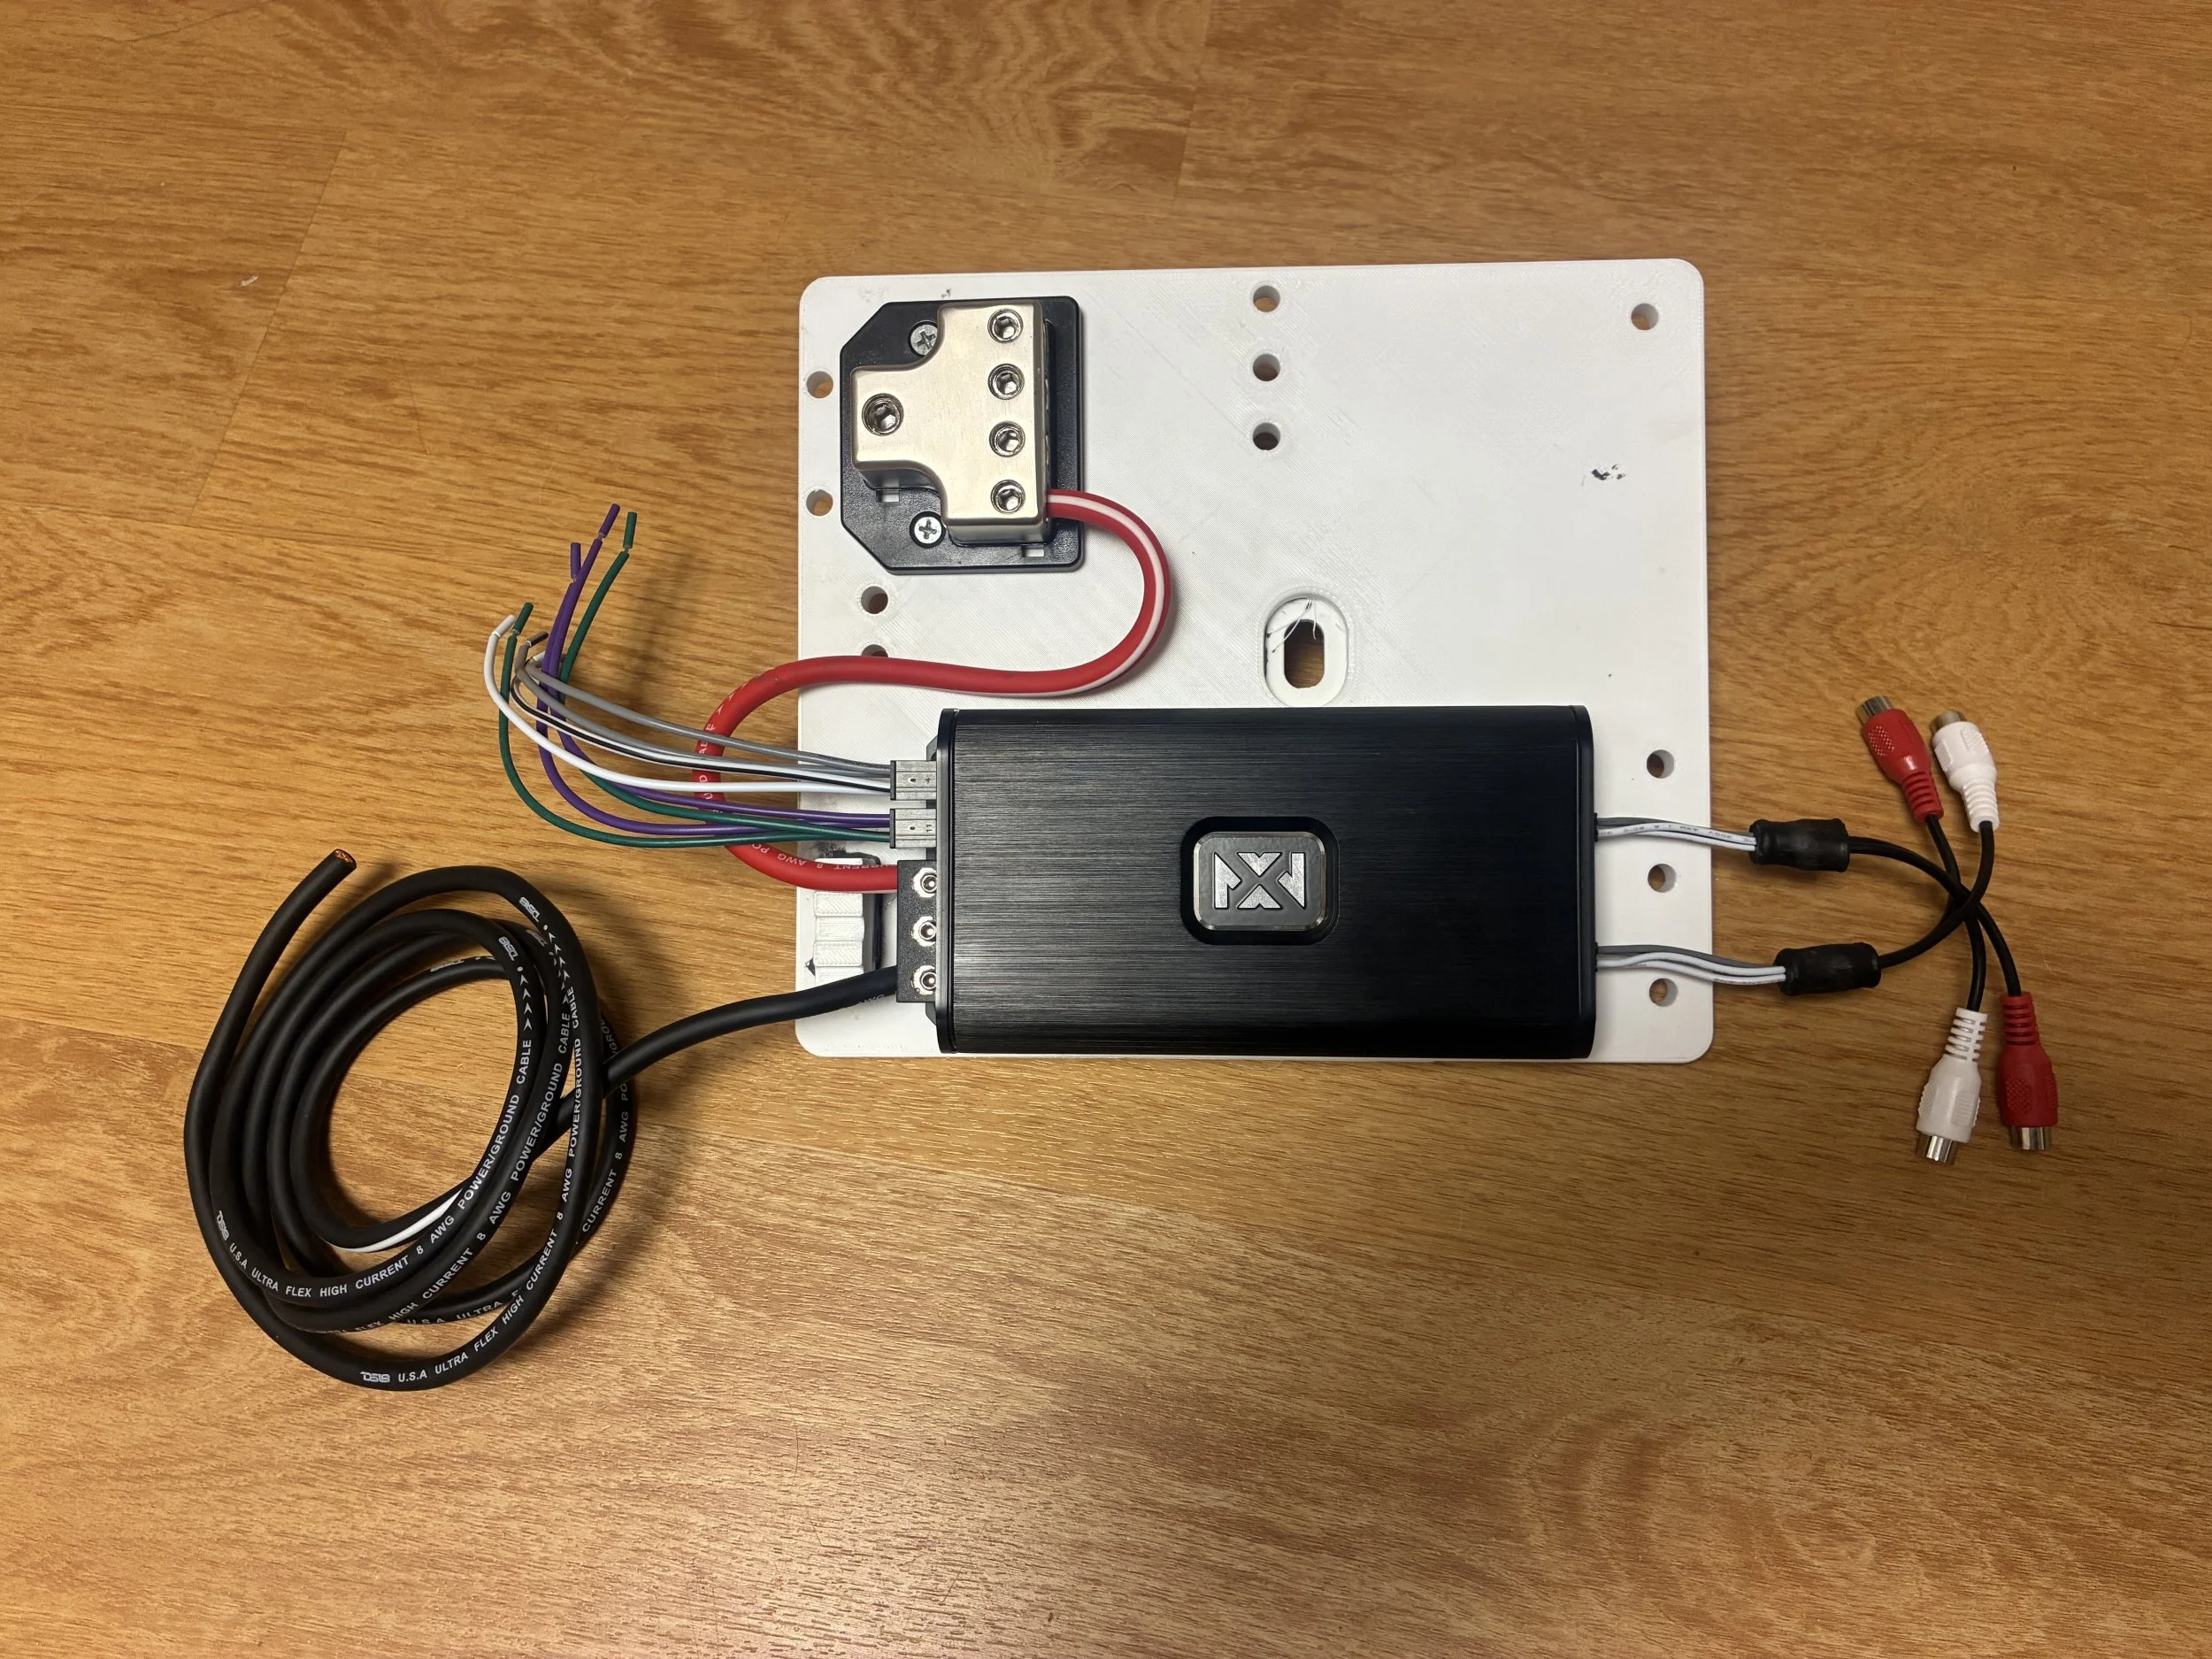
It's cruddy out here. I'll probably run power and signal wires from the dash to the sub location sometime this morning. Maybe solder some speaker wiring. I'm waiting for battery cable parts so it's hard to get motivated knowing no matter how much I get done, I'm not switching anything on today.
Test-fitted the 3D-printed steering column amp mount and it goes in easily enough, so I screwed down the distribution block and amp. I left some room for future expansion... might add a fuse & relay box in the upper right section.
It's cruddy out here. I'll probably run power and signal wires from the dash to the sub location sometime this morning. Maybe solder some speaker wiring. I'm waiting for battery cable parts so it's hard to get motivated knowing no matter how much I get done, I'm not switching anything on today.
3/25/2026
Continuing to do piecemeal work on the audio system while waiting for my fusible link cable to arrive. I added a maxi fuse between the distribution block and the 4-channel amp, and prepped a 8 AWG wire with a maxi fuse it in to run from the distribution block to the sub in the back.
For the sub, I ordered this guard to 1) protect the grille on the sub, and 2) give the sub a little space to move air under the seat cushion. It should hold up to some weight, in case someone hops up and down in the middle of the rear seat. It's not attached yet... I'm just going to stick it on with VHB tape.
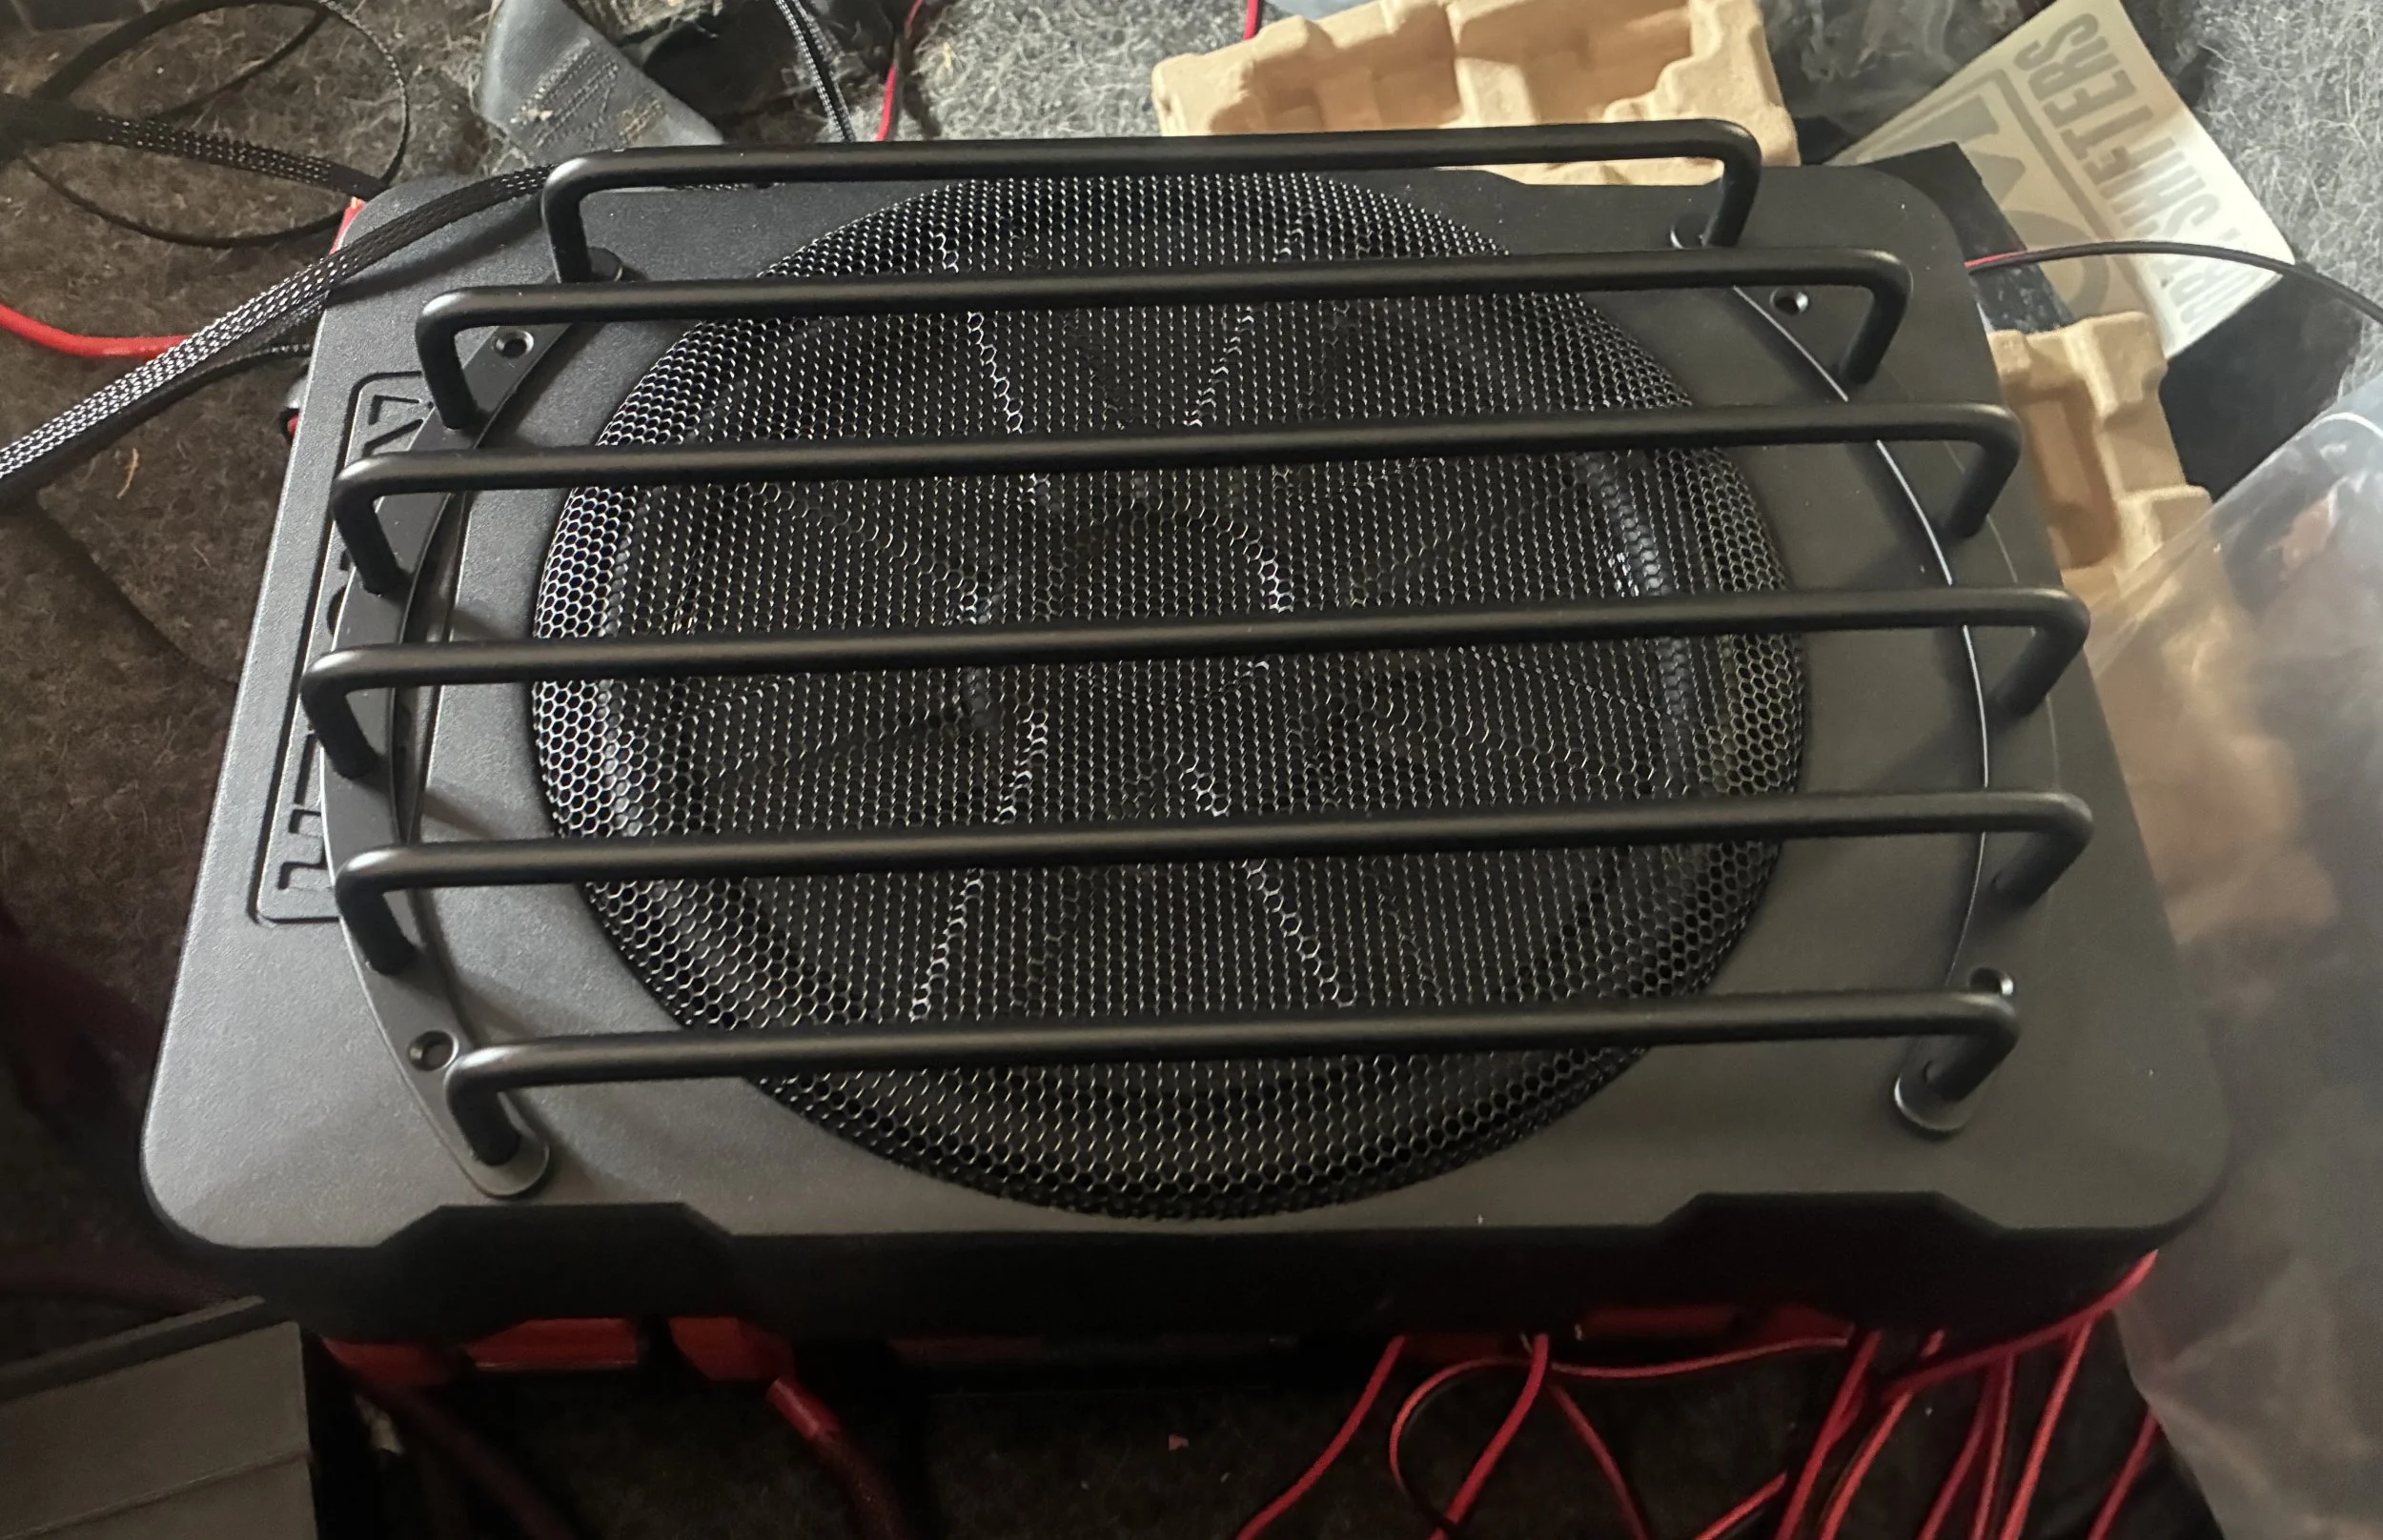
Continuing to do piecemeal work on the audio system while waiting for my fusible link cable to arrive. I added a maxi fuse between the distribution block and the 4-channel amp, and prepped a 8 AWG wire with a maxi fuse it in to run from the distribution block to the sub in the back.
For the sub, I ordered this guard to 1) protect the grille on the sub, and 2) give the sub a little space to move air under the seat cushion. It should hold up to some weight, in case someone hops up and down in the middle of the rear seat. It's not attached yet... I'm just going to stick it on with VHB tape.
3/27/2026
All of the battery cables have been replaced: ground to block & firewall; positive to fuse block, starter, audio system, and alternator through a new 8 AWG fusible link. I added an SAE connector for easier battery tending. And I plugged in the head unit to see if it makes any noise... and it does! For the first few minutes, though, I couldn't figure out why the sound was clipping so bad. Then I remembered that the blown OE sub is still hooked up. I'll tackle that this weekend.
All of the battery cables have been replaced: ground to block & firewall; positive to fuse block, starter, audio system, and alternator through a new 8 AWG fusible link. I added an SAE connector for easier battery tending. And I plugged in the head unit to see if it makes any noise... and it does! For the first few minutes, though, I couldn't figure out why the sound was clipping so bad. Then I remembered that the blown OE sub is still hooked up. I'll tackle that this weekend.

3/27/2026
All of the battery cables have been replaced: ground to block & firewall; positive to fuse block, starter, audio system, and alternator through a new 8 AWG fusible link. I added an SAE connector for easier battery tending. And I plugged in the head unit to see if it makes any noise... and it does! For the first few minutes, though, I couldn't figure out why the sound was clipping so bad. Then I remembered that the blown OE sub is still hooked up. I'll tackle that this weekend.
Build your own cables or go with something like Jeep Cables?

3/27/2026
All of the battery cables have been replaced: ground to block & firewall; positive to fuse block, starter, audio system, and alternator through a new 8 AWG fusible link. I added an SAE connector for easier battery tending. And I plugged in the head unit to see if it makes any noise... and it does! For the first few minutes, though, I couldn't figure out why the sound was clipping so bad. Then I remembered that the blown OE sub is still hooked up. I'll tackle that this weekend.
Pics or it didn’t happen!

With the exception of the battery-to-alternator cable, I made my own. For the record, 25’ of cable is more than enough to run into the cab for amps and do all of the positive-side battery cables…! I put more detail about cable sourcing in this thread.Build your own cables or go with something like Jeep Cables?
The interior is still in pieces… but here’s some of the battery cabling:Pics or it didn’t happen!
When I wire up the winch, I might bite the bullet and have some custom cables made so I’m not overloading the terminals. EC Auto Electric Supply (linked in that other thread) makes that easy.
Last edited:
With the exception of the battery-to-alternator cable, I made my own. For the record, 25’ of cable is more than enough to run into the cab for amps and do all of the positive-side battery cables…! I put more detail about cable sourcing in this thread.
The interior is still in peeves… but here’s some of the battery cabling:
View attachment 679641
View attachment 679642
View attachment 679643
When I wire up the winch, I might bite the bullet and have some custom cables made so I’m not overloading the terminals. EC Auto Electric Supply (linked in that other thread) makes that easy.
It’s not easy getting it all packed in there nicely. Good job.
3/29/2026
I hooked up the Kicker 51HS10 sub under the rear seat today. It is way more bass than I need, which is about the right amount. I'm still printing some brackets to position the head unit correctly. I'm going to add a small relay board to the back of the driver side kick panel for the phone charger and probably seat warmers in the future. I'll add some photos when it's all put back together.
Removing the OE subwoofer left a cavernous spot to fill in the console. I need to figure out how to set up some concealed storage in there, because there's a lot of it.
I hooked up the Kicker 51HS10 sub under the rear seat today. It is way more bass than I need, which is about the right amount. I'm still printing some brackets to position the head unit correctly. I'm going to add a small relay board to the back of the driver side kick panel for the phone charger and probably seat warmers in the future. I'll add some photos when it's all put back together.
Removing the OE subwoofer left a cavernous spot to fill in the console. I need to figure out how to set up some concealed storage in there, because there's a lot of it.
3/30/2026
152,247 miles (same as 2 weeks ago)
If I had a time machine, I'd go back to May 2024 when I put in the Savvy transfer case cable shift kit and smack myself on the back of the head for not fixing the crappy nutserts. It bit me today.
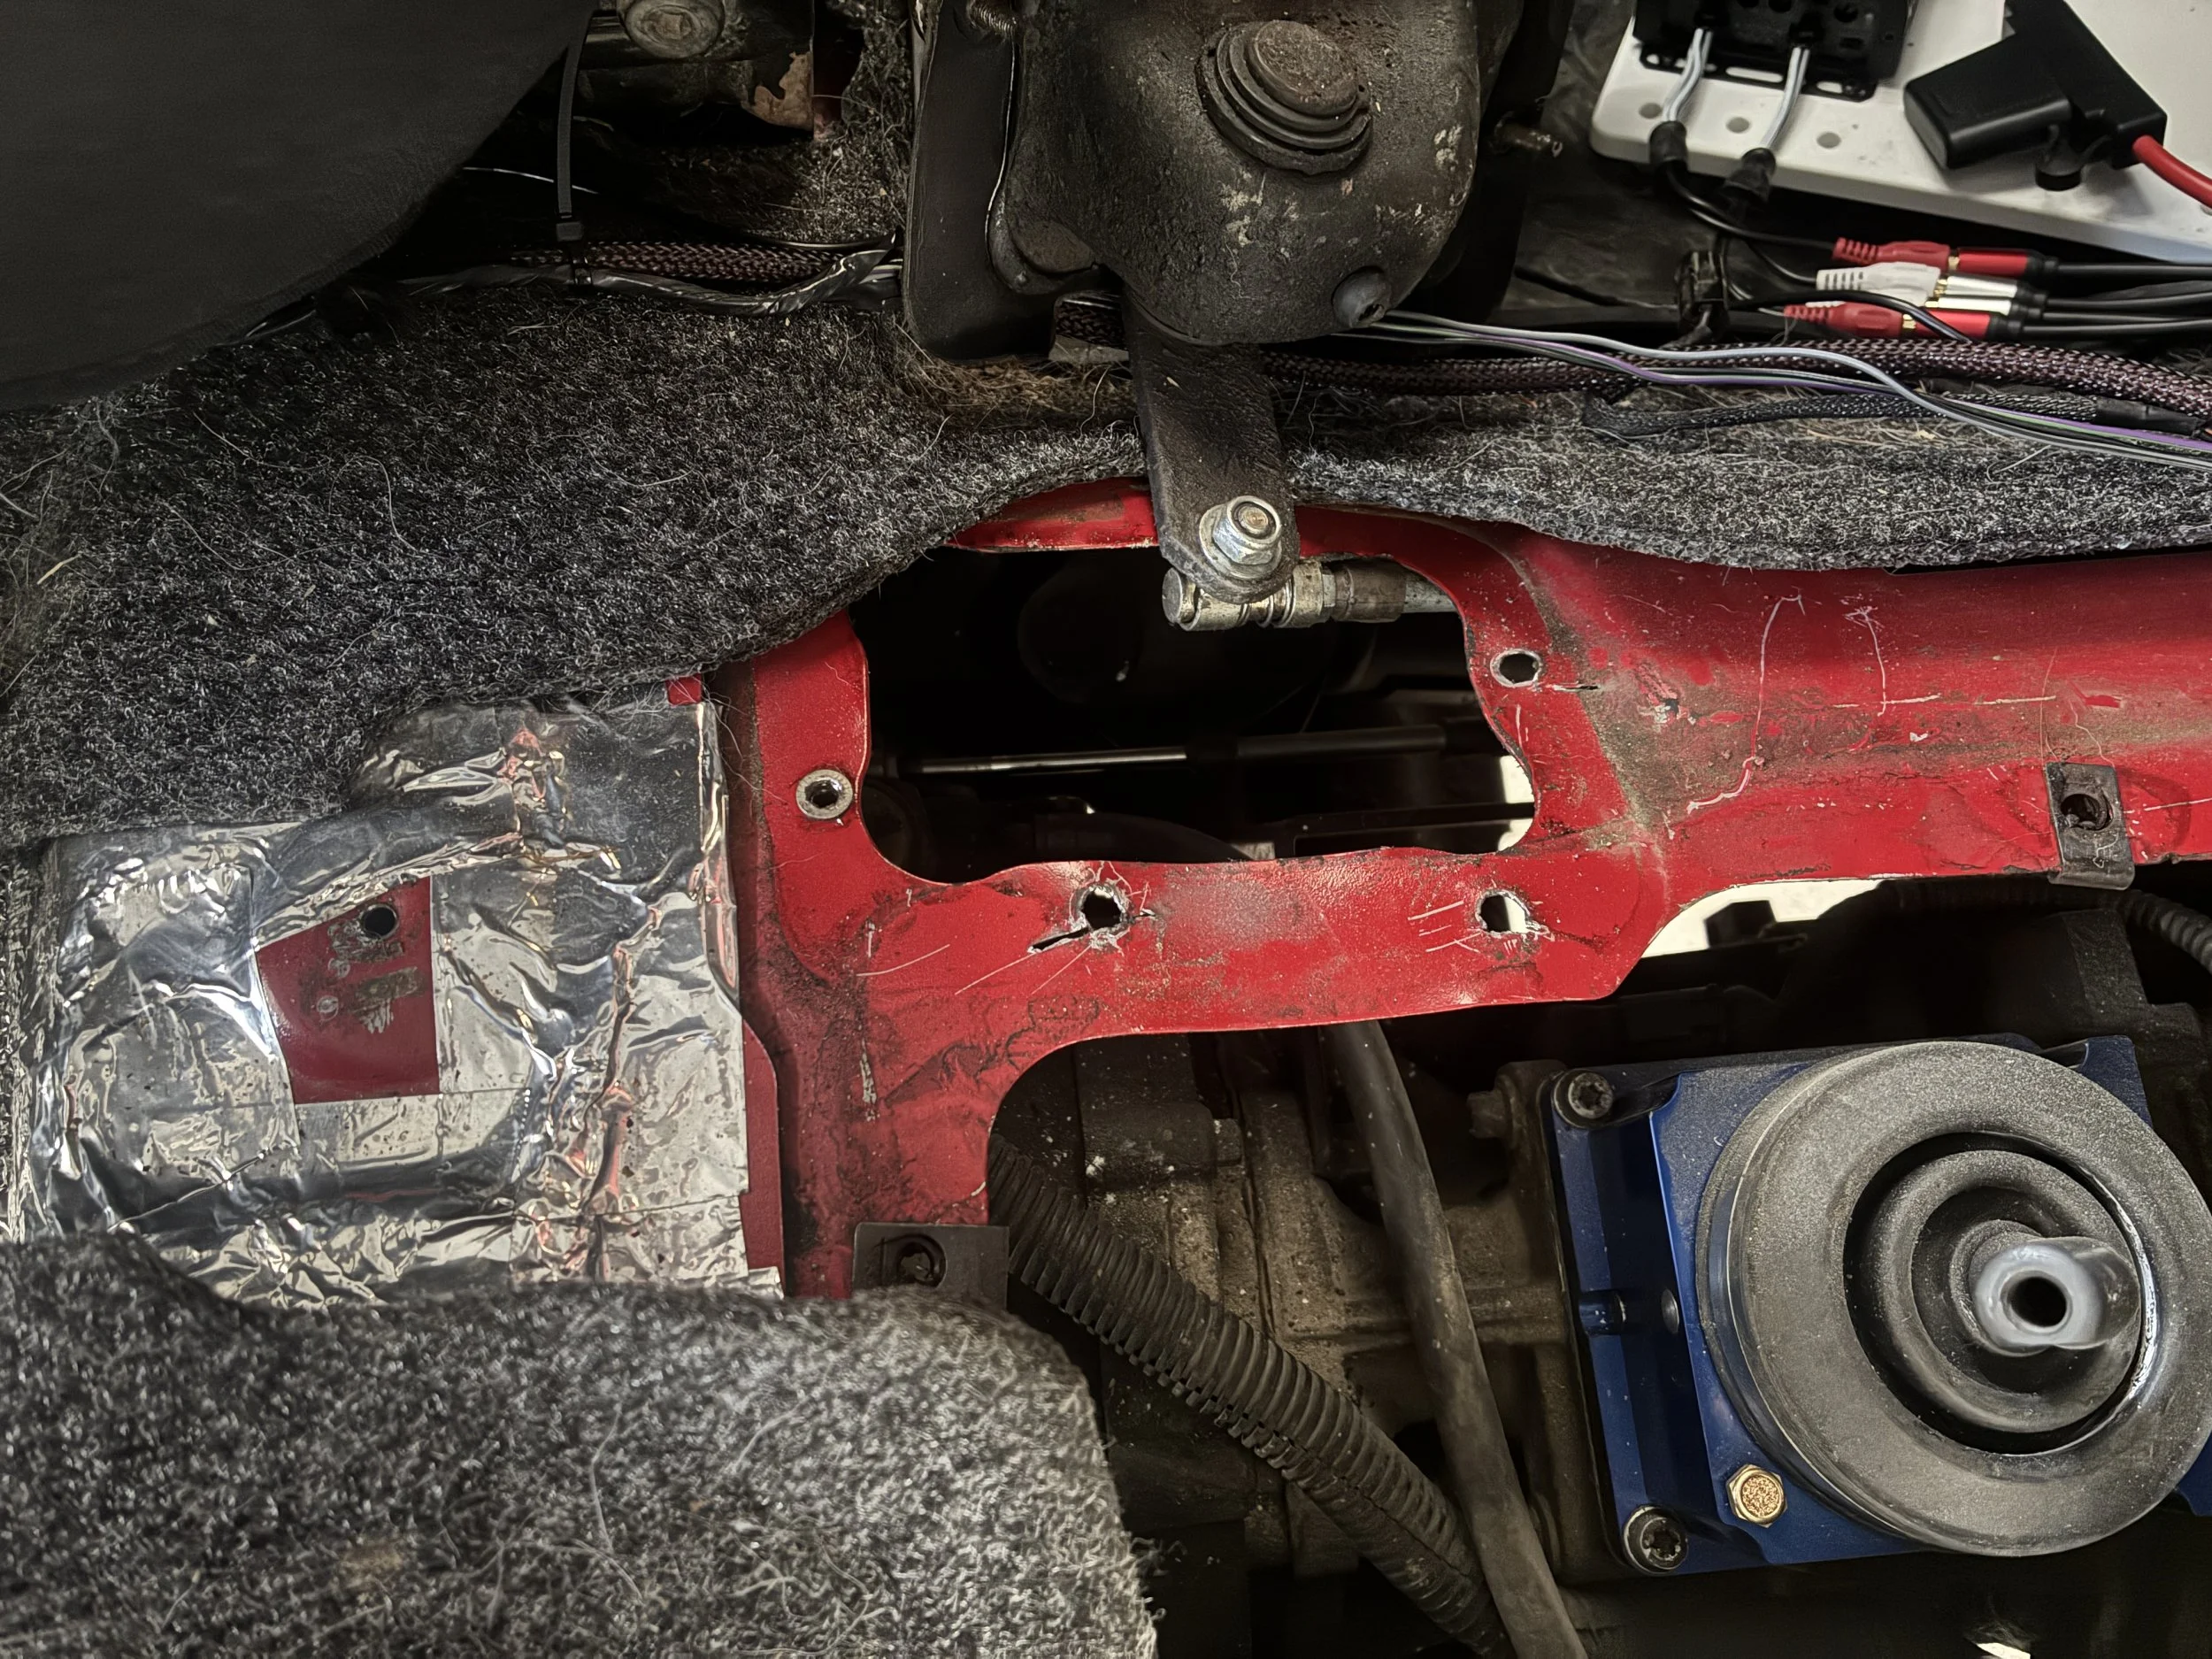
I installed the B&M Precision Sport Shift tower, p/n 45195. It would have gone in pretty easy, except the lower shift boot didn't want to come off due to the transfer case nutserts spinning. So, I ended up just pulling the boot away and tearing one of the holes (knowing full well how hard to get these things are intact):
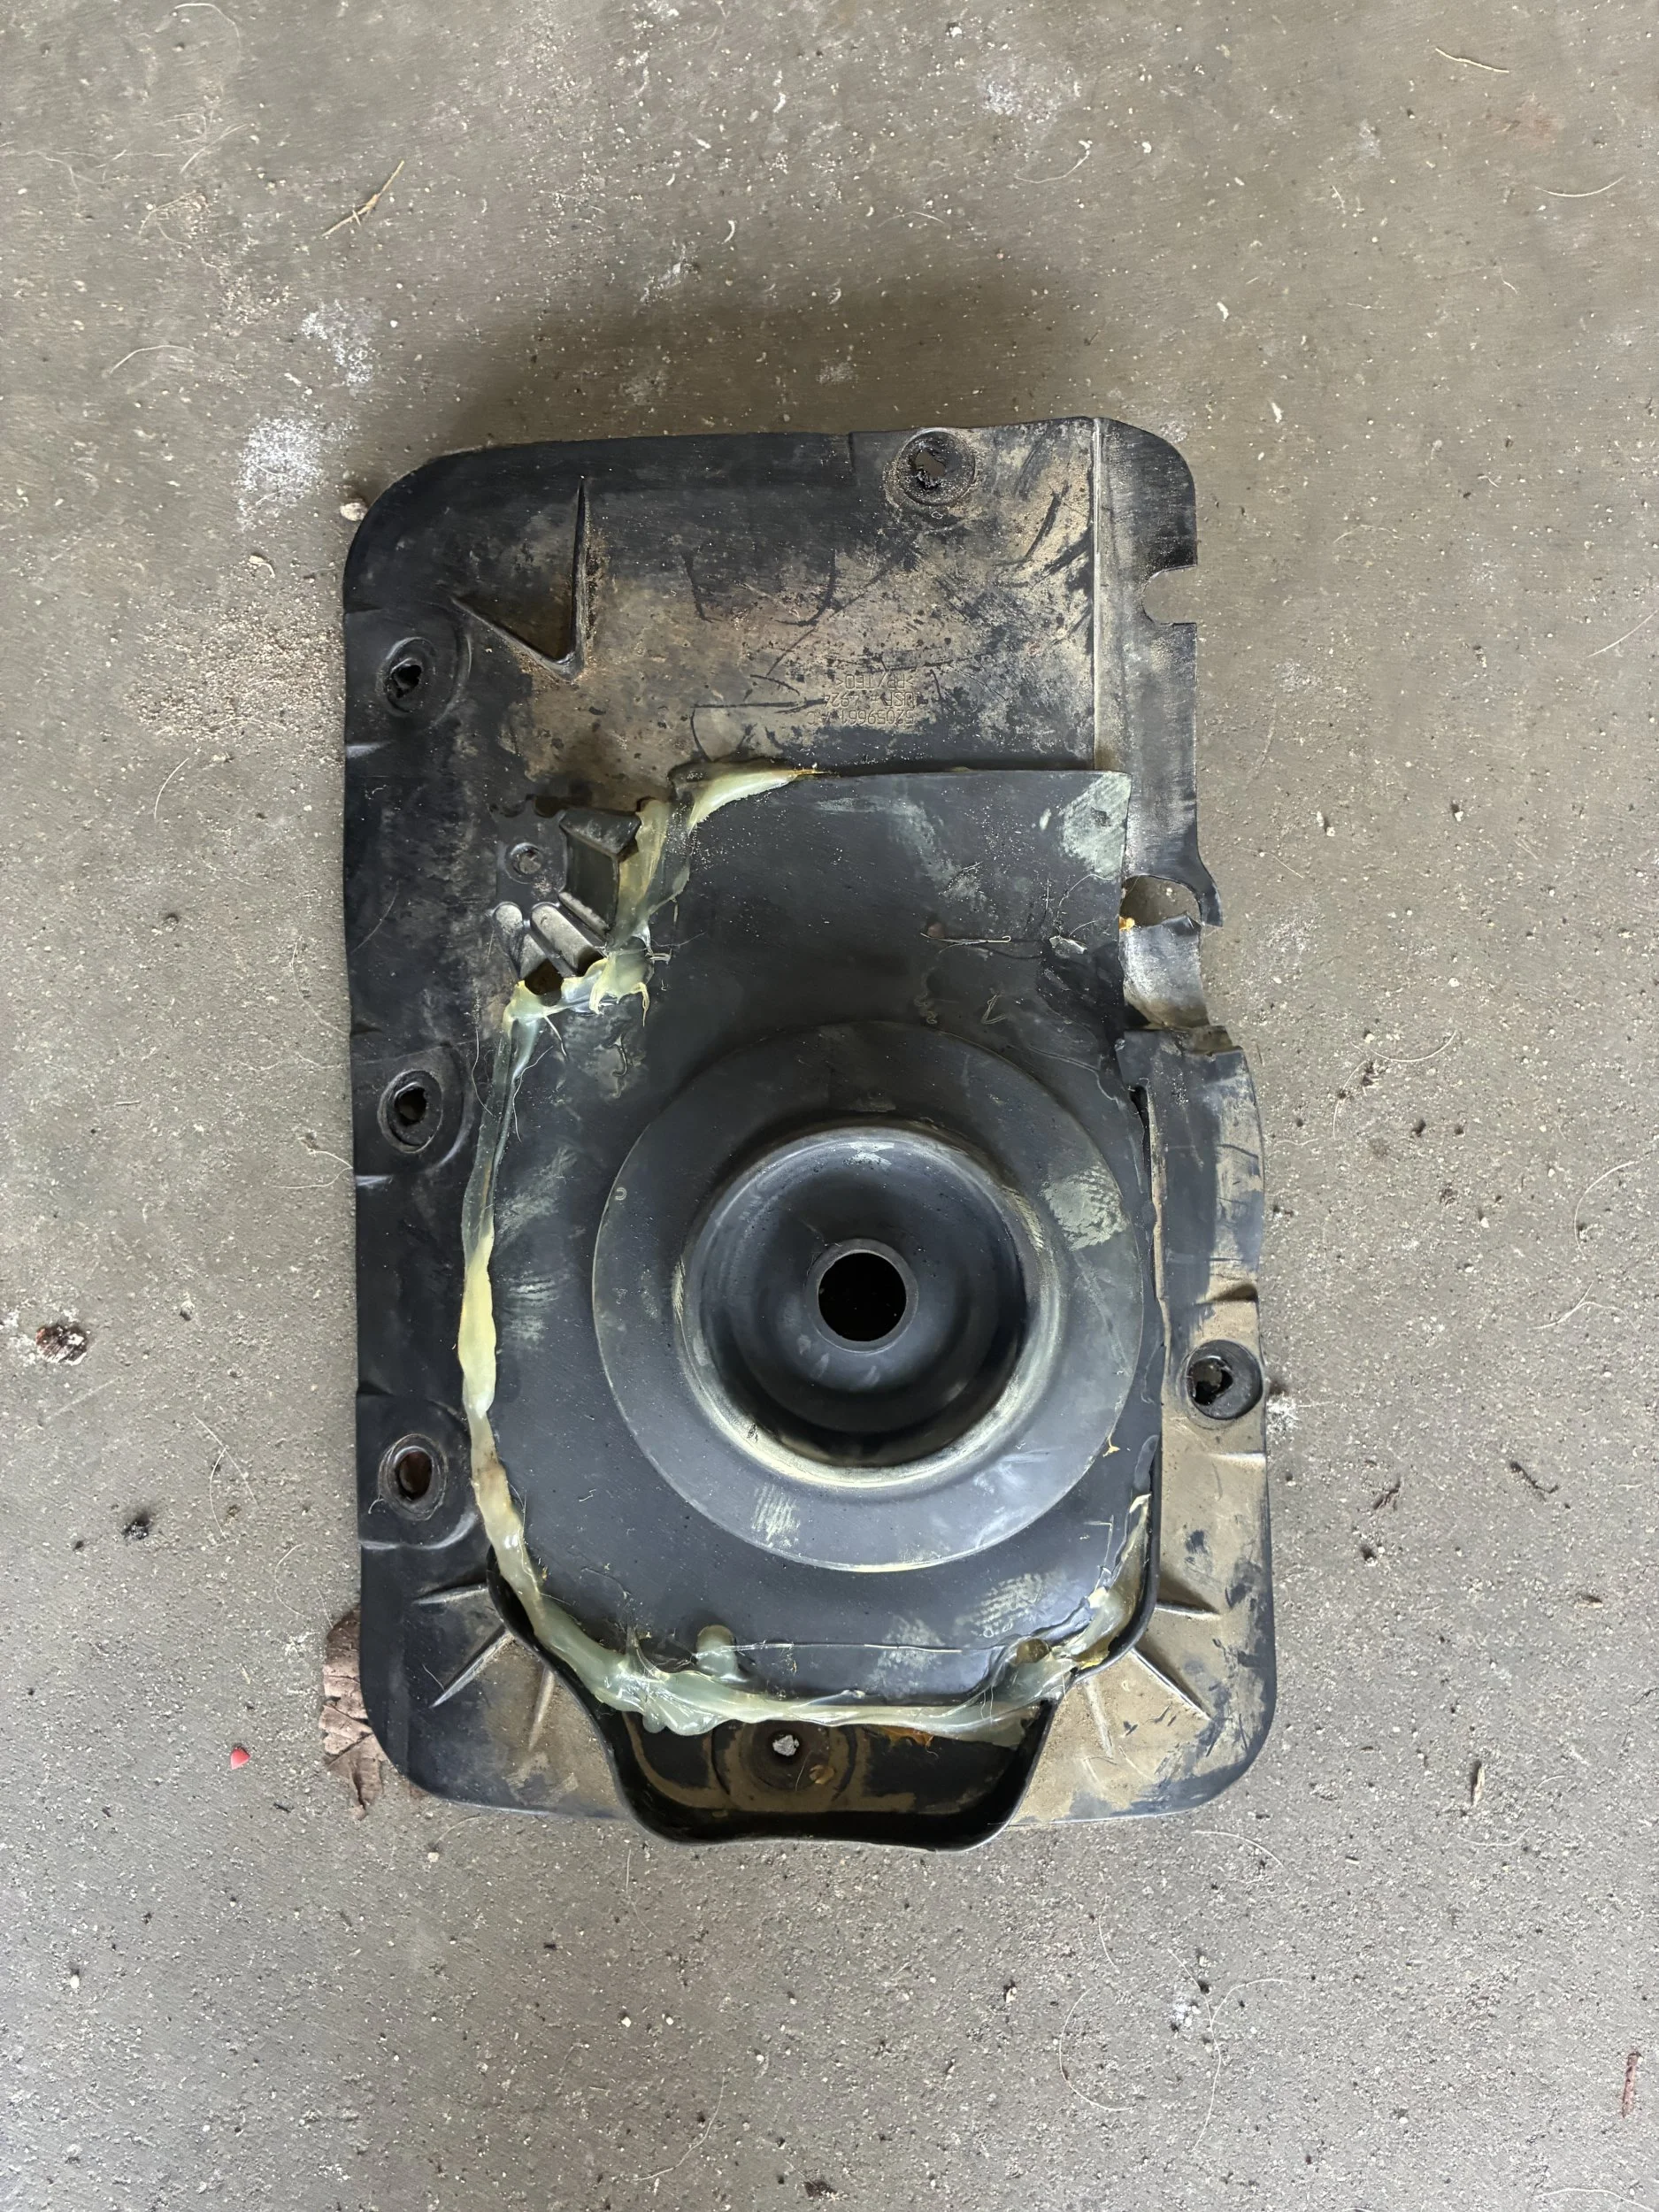
From there, I was able to cut away at the nutserts (and a bit of my tub) with a Dremel and get the bolts out. I'll do some patch work and paint to make sure it doesn't rust, and then put new nutserts in.
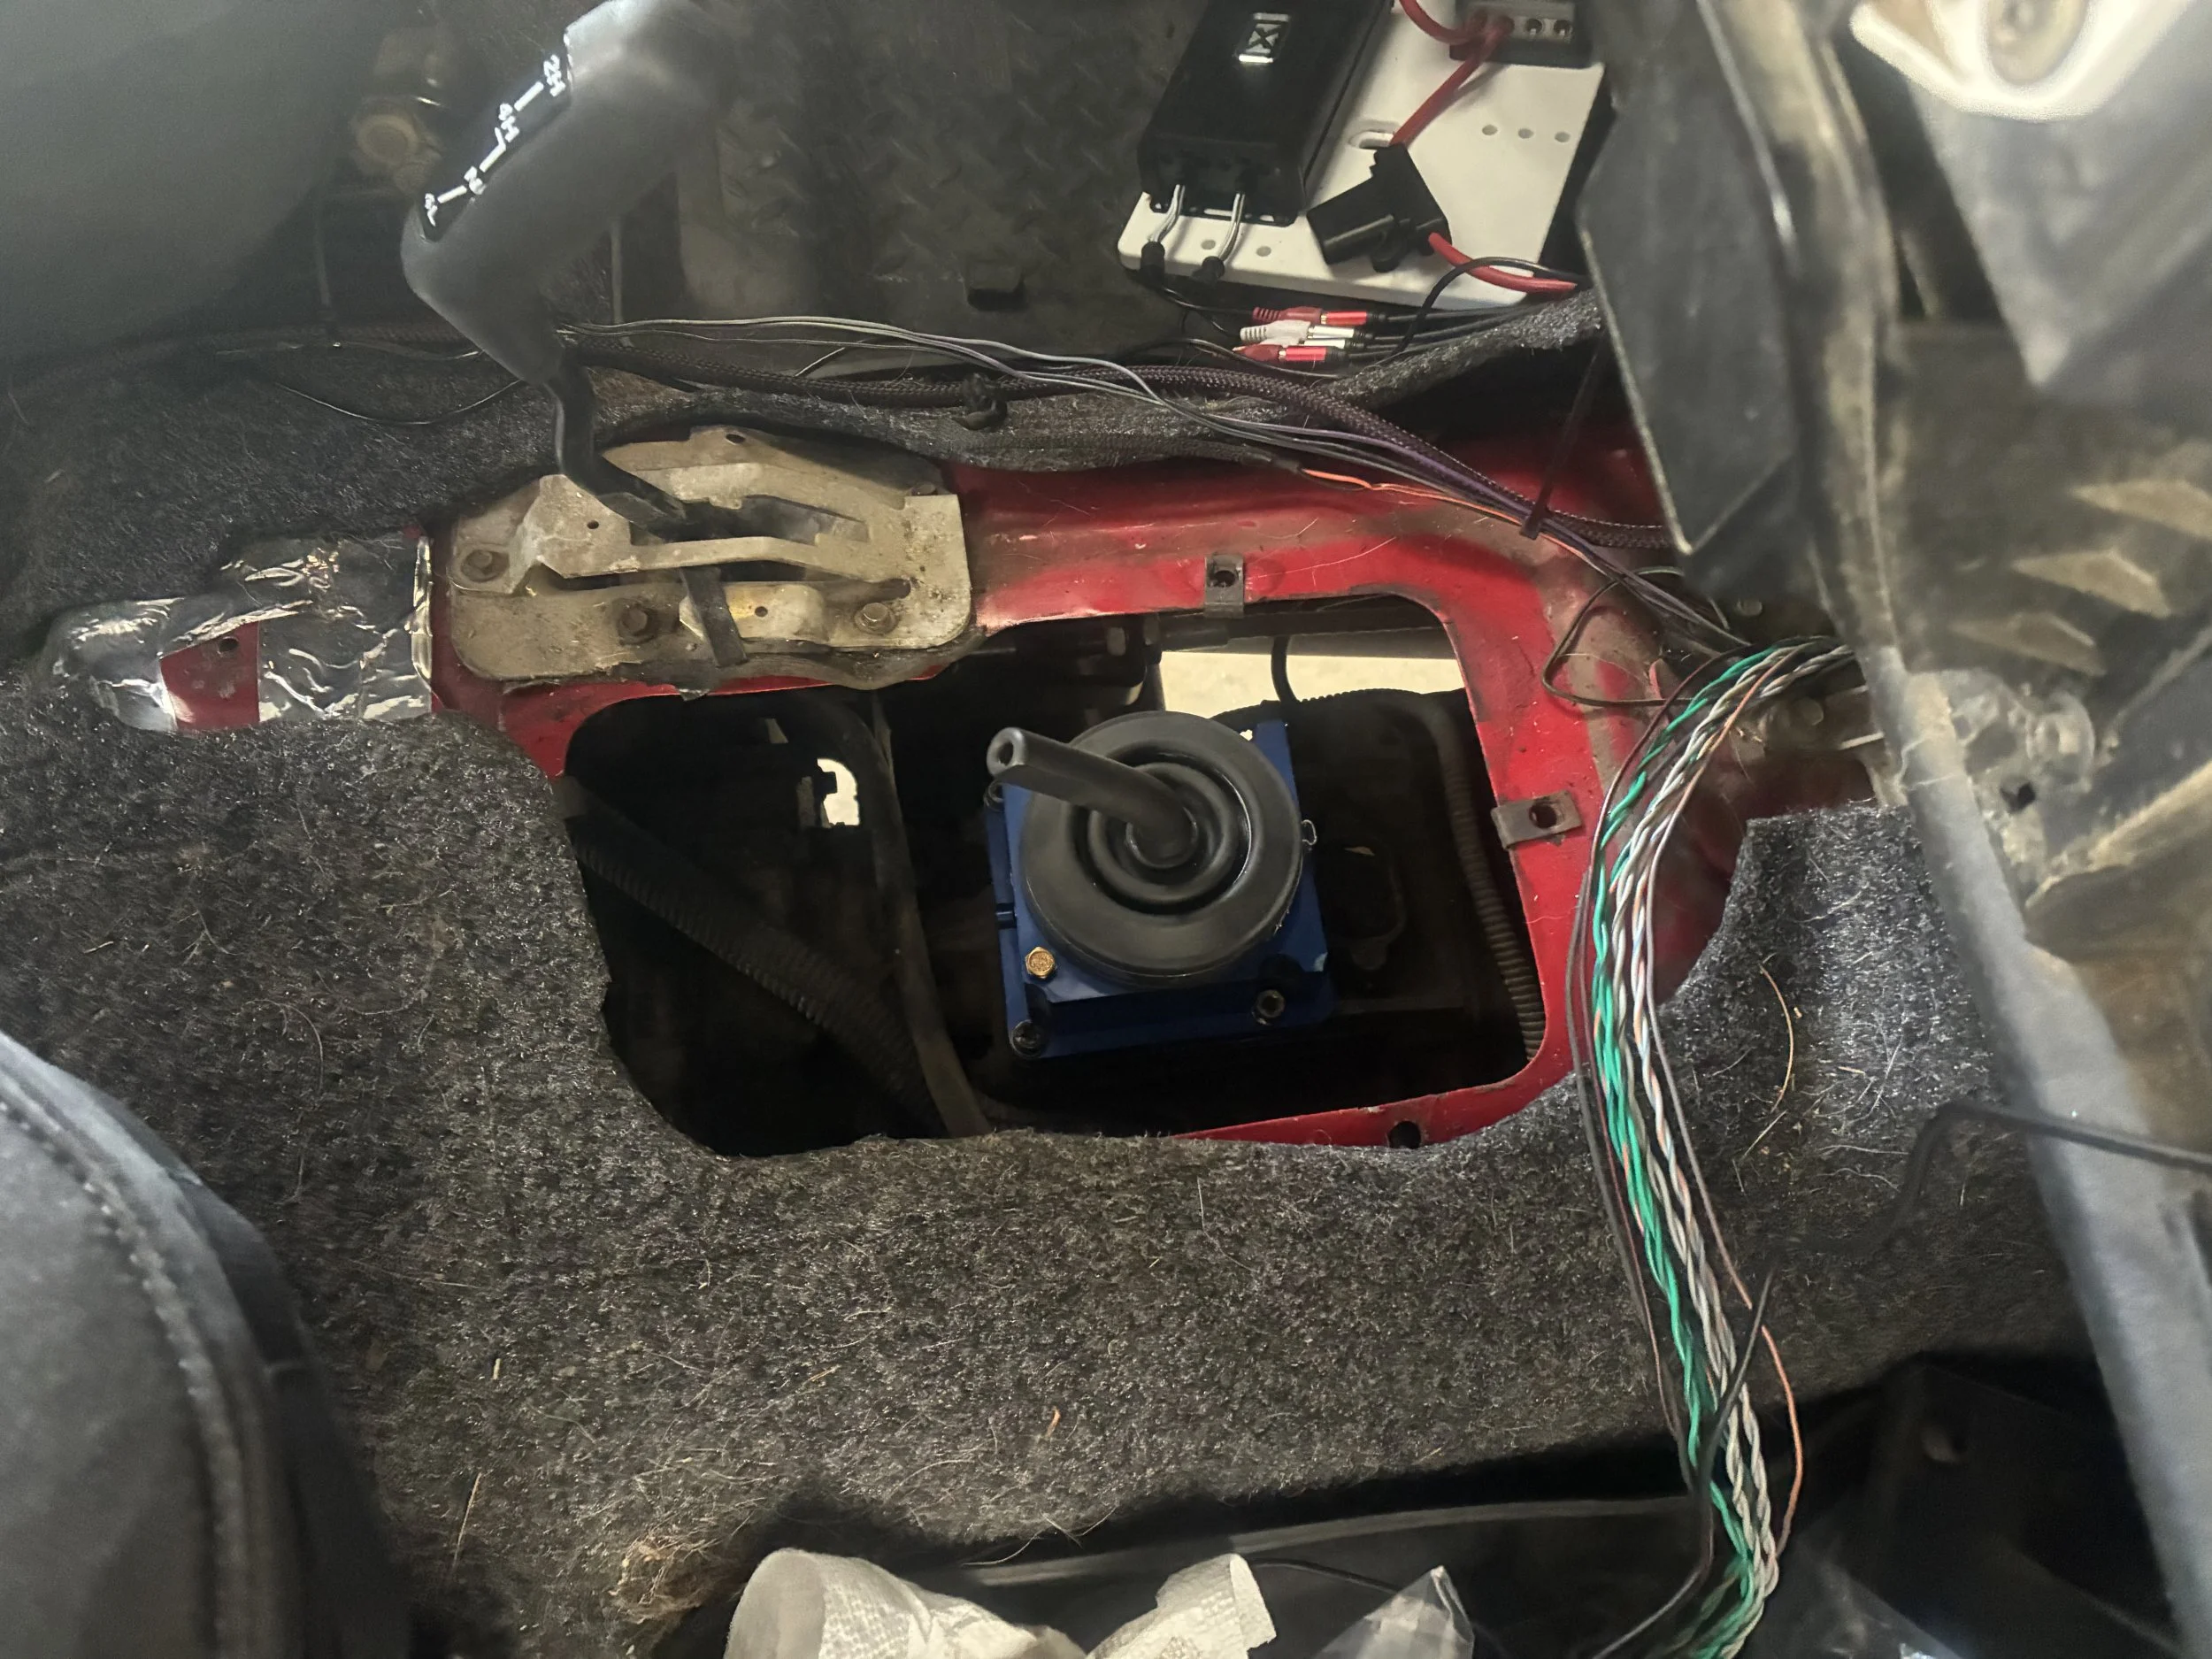
With all of that out, though... the tower went in easy. If everything had gone smoothly, an hour, tops. But I'll have three into it by the time I'm done with it now.
152,247 miles (same as 2 weeks ago)
If I had a time machine, I'd go back to May 2024 when I put in the Savvy transfer case cable shift kit and smack myself on the back of the head for not fixing the crappy nutserts. It bit me today.
I installed the B&M Precision Sport Shift tower, p/n 45195. It would have gone in pretty easy, except the lower shift boot didn't want to come off due to the transfer case nutserts spinning. So, I ended up just pulling the boot away and tearing one of the holes (knowing full well how hard to get these things are intact):
From there, I was able to cut away at the nutserts (and a bit of my tub) with a Dremel and get the bolts out. I'll do some patch work and paint to make sure it doesn't rust, and then put new nutserts in.
With all of that out, though... the tower went in easy. If everything had gone smoothly, an hour, tops. But I'll have three into it by the time I'm done with it now.
3/31/2026
Upgraded my WTF account today. Probably one of the more responsible upgrades I've done so far.
Upgraded my WTF account today. Probably one of the more responsible upgrades I've done so far.

3/30/2026
152,247 miles (same as 2 weeks ago)
If I had a time machine, I'd go back to May 2024 when I put in the Savvy transfer case cable shift kit and smack myself on the back of the head for not fixing the crappy nutserts. It bit me today.
I installed the B&M Precision Sport Shift tower, p/n 45195. It would have gone in pretty easy, except the lower shift boot didn't want to come off due to the transfer case nutserts spinning. So, I ended up just pulling the boot away and tearing one of the holes (knowing full well how hard to get these things are intact):
View attachment 679998
From there, I was able to cut away at the nutserts (and a bit of my tub) with a Dremel and get the bolts out. I'll do some patch work and paint to make sure it doesn't rust, and then put new nutserts in.
View attachment 679999
With all of that out, though... the tower went in easy. If everything had gone smoothly, an hour, tops. But I'll have three into it by the time I'm done with it now.
View attachment 680000
It really sucks when removing simple nuts and bolts goes wrong. It turns a 30-minute project into a 3 hour one.


3/31/2026
Upgraded my WTF account today. Probably one of the more responsible upgrades I've done so far.
Do you miss the ads?

Similar threads

- Replies
- 1
- Views
- 1,047


- Replies
- 234
- Views
- 48,179


- Replies
- 8
- Views
- 5,153


- Replies
- 21
- Views
- 2,949
