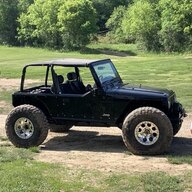
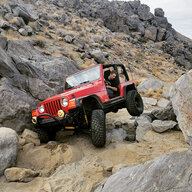
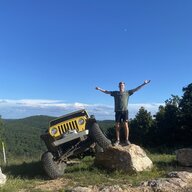
Bessy the Rock Rod - A Crawler Built in Stages

UPDATE: This Jeep likes to party!!

We wheeled Dresser WI on Saturday but didn't take any pictures. We wheeled Frontenac Farms in Lake City MN on Sunday and took a lot of pictures.

The leaf sliders are really stable on side hills. Having nothing hanging past the frame rails is awesome for ground clearance. The bald sticky tires do indeed stick to rocks. The new seats hold you in and make for a super comfortable ride.

I had a super fun weekend. I had the most fun wheeling since back when I lived out west.

View attachment 428607

View attachment 428608

View attachment 428609

View attachment 428610

View attachment 428611

View attachment 428612

View attachment 428613

View attachment 428614

View attachment 428615

View attachment 428616

View attachment 428617

View attachment 428618

View attachment 428619

View attachment 428620

View attachment 428621

View attachment 428622

View attachment 428623

View attachment 428624
This last picture was the obstacle that instigated the last 6 months of Jeep projects. What you don't see is the 4' tall undercut rock under my driver front tire. Last fall I tried bumping it hard several times in an attempt to make it up, slamming my driver side leaf hanger into the undercut left tire rock which cracked/bent the frame and tipped the jeep into the rock on the right which caved in my rear tub side. Yesterday I CRAWLED the same obstacle!!

The next small projects will likely be a quick release steering wheel (it's very tight getting in and out with the tall side bolsters of the new seats) and probably a hydraulic cutting brake setup (the mechanical parking brake dig brake just don't work that well.

The next large project will definitely be building a legit roll cage (with door bar(s) and harness bars and frame tie ins at A, B, and C pillars. The frame tie ins I have already set in place in .188 wall 1.75" DOM with my combination boat side/body mount design and my shock mounts.

When I build a cage, I am also considering eliminating the factory dash and putting the windshield on quick release pins for visibility when crawling. The cage project might be a little ways out though...I need to balance family time/Jeep projects.

Attached below are some inspiration pictures for reference of the high visibility dash/cage concept I'd like to emulate.

View attachment 428632

View attachment 428633

The rig looks like it is working well. Nice work.


Screen Shot 2023-06-08 at 9.48.09 PM.png


Screen Shot 2023-06-08 at 10.50.23 PM.png


Screen Shot 2023-06-08 at 10.53.42 PM.png


IMG_3152.webp


IMG_3156.webp


IMG_3157777.webp


IMG_3158.webp
 
Last edited:
I love the way that 2.5l sounds.just chugging along pushing those 39's!

I agree! The new muffler is a little louder when you're in the Jeep but it isn't ridiculous.

The gearing is still plenty low enough (despite the larger tires) that the Jeep crawls slowly without much use of clutch. When the tires get really bound (on an undercut rock for example) the little engine stalls out and I'm hoping that lack of power keeps these axles alive.
 
  • Like
Reactions: Rickyd and Wildman
It's time for a picture heavy update.

It was fun having the Jeep around over the summer. I drove it back and forth to work a bit and did some more wheeling. It is little fun on the street but such a hoot on the trail! The atlas and the dry rotted red labels have really been a game changer in the rocks. The Jeep will walk lines that it previously struggled on. The leaf springs continue to boggle minds and fuel conversation and debate. The front leaf eye slider boxes flex great but ride like shit at speed. The ground clearance is unreal compared to my previous setup. The factory power steering pump clearly struggles to keep up with the hydraulic assist ram. I also had an issue with the tie rod/drag link pinching my hydro lines so I rerouted them.

The wittle Dana 44s held up to a surprising amount of abuse (and tire).


I spent some time up north at Gilbert OHV park. The wheeling is good and so is the scenery. The trails are rocky, jagged, and unforgiving.

I snapped a front outer chromoly axle shaft in two but I had it coming. I was attempting a hard left front-dig, pointing uphill, with the right rear tire bound. The snapped shaft blew out the locking hub and wrecked the hub spindle too. The inner shafts and the Yukon "Super" joints held up. Note to self: avoid bound, uphill, 4,500rpm front digs! It wasn't too bad of a fix and it was good to find the limit of my parts with these tires. If this breakage becomes a trend I might consider RCVs and drive slugs.

We had an end of season wheeling trip planned late October but got several inches of rain so I took a rain check. Now the Jeep is tucked away in the barn for the winter.

I'm looking forward to wheeling more in 2024! Future plans include some fresh tires and I definitely still want to build a proper roll cage! I also got a 36" Corbeau bench that matches my front seats so I can eventually bring my son along.

206.webp


207.webp


208.webp


209.webp


210.webp


211.webp


213.webp


214.webp


215.webp


216.webp


218.webp


217.webp


219.webp


220.webp


221.webp


224.webp


225.webp


226.webp
 
i love this build. im very curious about the leaf sliders. how are they attached to the frame? in the pic, they dont look frenched and i cant see a cross member above
 
i love this build. im very curious about the leaf sliders. how are they attached to the frame? in the pic, they dont look frenched and i cant see a cross member above

I guess I never took pictures of how I accomplished this (just the initial rough mock up). They're attached alongside the frame rails cantilevering off the frame using some 1/4 plate and gussets and a lot of weld. There is a tube crossmember running across the front of the boxes from frame rail to frame rail that the traction bar attaches to. So far so good on that deal.
 
Very cool. Always nice to see a non-standard build getting after it.
 
I guess I never took pictures of how I accomplished this (just the initial rough mock up). They're attached alongside the frame rails cantilevering off the frame using some 1/4 plate and gussets and a lot of weld. There is a tube crossmember running across the front of the boxes from frame rail to frame rail that the traction bar attaches to. So far so good on that deal.

Thanks! Im in the lcog camp as well and have been thinking how i want to go about moving up from 35’s. Your build may inspire some of my choices
 
Nothing better than fresh tires!

IMG_5356.jpeg

IMG_5362.jpeg


I treated Bessy to some fresh red label stickies!

I also added some bump stops to the rear so the new tires won’t get too chewed up in the fender wells.

IMG_5619.jpeg


IMG_5627.jpeg


Then I removed a leaf from the rear to lower the rear end 1.5” and eliminate the rake it had before. While I was at it, I modified my seat brackets to lower the seats a couple inches. Boy did that make it easier getting in and out. The picture below shows the driver seat lowered and the passenger seat in the previous position.

IMG_5670.jpeg


Then I gassed her up.

IMG_5701.jpeg


And loaded up to go wheeling!
IMG_5706.jpeg


I also picked up some soft doors real cheap on marketplace! I really like them!
 
Last edited:
We wheeled Dresser WI and Lake City MN over Memorial weekend and had a great time. The little Jeep worked great!

IMG_5710.jpeg


IMG_5720.jpeg


IMG_5723.jpeg


IMG_5713.jpeg
IMG_5731.jpeg
IMG_5732.jpeg
IMG_5734.jpeg
IMG_5737.jpeg
IMG_5742.jpeg
IMG_5733.jpeg
IMG_5743.jpeg


We had an awesome time wheeling and nothing broke which is always nice. I did bend my passenger rear leaf spring a little so I’ll swap that out for a spare and we’ll be ready for another beat down! The new tires hooked up really well and I’m very pleased with them.
 
Last edited:
Awesome action shots! Just out of curiosity, what’s the name of the places you wheeled in dresser and lake city? The most I could find searching was Trollhaugen ski area but that doesn’t seem right…
 
Awesome action shots! Just out of curiosity, what’s the name of the places you wheeled in dresser and lake city? The most I could find searching was Trollhaugen ski area but that doesn’t seem right…

Trollhaugen is in Dresser, WI and is where the Minnesota Go4Wheelers have been building trails and holding events for about the last 50 years.
 
  • Like
Reactions: E-Ticket and Tob
Awesome action shots! Just out of curiosity, what’s the name of the places you wheeled in dresser and lake city? The most I could find searching was Trollhaugen ski area but that doesn’t seem right…

Trollhaugen is in Dresser, WI and is where the Minnesota Go4Wheelers have been building trails and holding events for about the last 50 years.

This. Specifically, the pictures were on yellow rock trail at dresser/trollhaugen. We also wheeled Frontenac farms in lake city.
 
Trailers, roll cage tube, PRP goodies, oh my! Time to bring you guys up to speed.

All this time I have been borrowing car trailers to get the Jeep to the trail. This past season we did a lot more wheeling so I finally bought a trailer.

It's a 14 foot 10k PJ trailer with brakes on all 4 wheels. I have been so happy with it and it has been a pleasure to tow, park, and store a little 14' trailer when I have been used to using 20' and 22' borrowed trailers.

IMG_6258.webp


My buddy Vinny tig welded on some d rings and swing away pipe jacks for me. Then I stained the boards with black oil based deck stain and it was ready to party.

IMG_6177.webp


We did some wheeling at Frontenac, Dresser, and Gilbert (the iron range).

IMG_6315.webp


In the fall, I picked up some $100 rollers to have on the Jeep in the cold Minnesota winter months and put the stickies inside where it's warm to prolong the inevitable BFG red label cracking.

Last month, I ordered a whole bunch of DOM tubing and drew some blueprints for the roll cage build.

FullSizeRss.webp


FullSizeRsss.webp


FullSizeRs.webp


FullSizeRssss.webp
 
Next, I brought the Jeep out to my buddy Tommy's shop. We weighed the Jeep and then began the tear down. Prior to tear down, the Jeep weighed 3421 lbs (on the little roller tires. it is 3700 lbs on the 39" tires w/ beadlocks).

FullSizeR.jpg


For weight savings and visibility, we removed the windshield, dash, heater, gauge cluster, windshield wiper components, factory seat mounts, and the factory roll bar. I didn't weigh everything we took out, but the dash plastic and speakers alone weighed 41 pounds!

IMG_7606.jpg


With everything tore out, we started by building frame tie ins. The A and B pillars are anchored to the frame off of the boat side tubes and the C pillar have frame tie ins that double as the rear shock mounts.

We started with the a pillars and dash bar. I added a PRP steering wheel with an NRG quick disconnect.

IMG_7386.jpg


We then added B pillar lowers, and bent cross tubes over the tunnel and Tommy designed some tabs to hang the seats off of.

IMG_7546.jpg


Then bending the door bar tube that runs from A to B to C.

IMG_7545.jpg


The cage is a "Belt-line" design that is common in the buggy world. The belt line tube at the dash and along the tub rail interrupts the upper and lower sections of the A, B, and C pillars. If we do take a substantial tumble that results in roof damage, the upper half of the cage can be cut off at the belt line and rebuilt without having to rebuild the entire assembly.

We worked to get the upper B pillars tipped in at an attractive degree and tipped back ever so slightly to follow the door line.

IMG_7573.jpg


The trickiest tubes so far have been these A to C roof line tubes.

IMG_7574.jpg


IMG_7575.jpg


IMG_7577.jpg


IMG_7583.jpg


IMG_7590.jpg


Dirty details: Removing the dash/winshield/gauge cluster gained 4.5" of visibilty.
At the B pillar, we took 2.5" out of the total roof height. The cage has a little bit of hot-rod rake downward and is lower in the front. The seats are lowered enough to still have about 4+" of headroom between my the top of my helmet and the tubing that will be above.

More updates to come! There will be a halo added above the rear seat area along with harness bars, a windshield spreader, and an X behind the seats and at the roof. The tubing is 1.75" .120 wall DOM on all external tubes and 1.5" 1.20 wall DOM for internal bracing. I have 5 point PRP harnesses for the front seats and a little corbeau bench seat with PRP 4 point harnesses for the back.
 
Cage work looks bitchin!! Awesome build! Super sanitary and well planned out. What are the plans for gages and engine monitoring?
 
Cage work looks bitchin!! Awesome build! Super sanitary and well planned out. What are the plans for gages and engine monitoring?

Thanks a bunch! My preferences tend toward clean and minimal and I am happy that the build reflects that. For gauges, I am still deciding but I am currently leaning toward running a ScanGauge II off of the OBDII and adding a separate oil pressure gauge because it seems like the scangauge products display everything but that. I am mostly concerned with monitoring oil pressure and water temperature.

On a related note, we will probably put together a super simple angled flat dash (sheet metal or aluminum) with the couple gauges and a few switches and that's it.
 
Last edited: