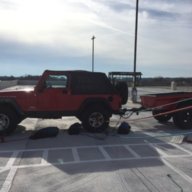
@Midnight LJR I'll check what nutsert sizes I have once I get home. Either way, I'll bring the tool Saturday and you can have it till you're done.
Last edited:


 this after being told to use “anything to help seal the wood“ as a primer from the company..... Needless t say, I will not be recommending this product for use over wood. It has, however, held up well inside my LJ..... We use line-X on our ground pads (5/8” plywood) for trench rescue work and it has held up extremely well (15 years of hard use and abuse).
I used Monstaliner on my trailer over plywood and it has not held up well, in fact there are several spots that have started to rot
Easy big fella, I wasn't suggesting he do it on the trailer, I was pointing out this other method that you can do with a hand drill.That's what I thought but then I got confused over the need to disassemble the whole fucking trailer and carry it over to the drill press with 5000 dollars worth of melty hole shit chucked up in it and the complete and utter lack of a thread rolling tap set up. Put a fucking nutsert in it and be done.

Have you seen anyone do that with a hand drill?Easy big fella, I wasn't suggesting he do it on the trailer, I was pointing out this other method that you can do with a hand drill.
That's a fair bit of horsepower to do that. Are you using the roll thread taps or cutting taps?yes, me.
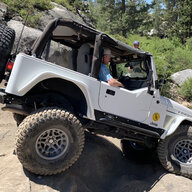
All right goddamn-it can you stop posting pictures, all you are doing is giving me ideas on how to spend more money on my jeep. And now a trailer, please stopMore Trailer progress:
I got the tailgate reinforcements and cables in.
View attachment 184873
Also test fit the tonneau cover, I have the fiberglass pieces to make a hard cover as well but think I might like the simplicity of this snap on one. It also allows me to get into any corner I want.
View attachment 184867View attachment 184868
Tacked the shocks in place I didn’t finish weld them yet, wanted to think on the location a bit and make sure I like it.
View attachment 184869
I got the safety cables and max coupler ready to go. I still need to drill the hole for the pin for max coupler but am trying to decide the best way to mark and drill the hole.
View attachment 184870
These are some progressive trailer bump stops I got from Timbren. Trying to think how best to make them work.
View attachment 184871View attachment 184872
OCD required that I change the wheel bolts out to stainless to match the jeeps.
View attachment 184876
Next step: work on re drilling my spare Rubicon flares to try and fit in place of the sport flares and see which I like better. The trailer uses all new holes vs using the flares on a Jeep.

I use thread cutting taps for my work when wall thicknesses are sufficient and inserts when they are not.That's a fair bit of horsepower to do that. Are you using the roll thread taps or cutting taps?
he should of done 4 of them at the same time, I know three other guys that could have used one.All right goddamn-it can you stop posting pictures, all you are doing is giving me ideas on how to spend more money on my jeep. And now a trailer, please stop
Fun day. I'll be feeling that fiberglass for awhile even though I tried to avoid it.Whew I am always amazed at how much work making brackets is. It always take so much longer than I expect. A huge thank you to @Alex01 for his help today.
We got four mounting locations made for the the tent rack. We also made mounts for two of the linear actuators and figured out where the other two are going to go. They should be able to use the existing angle on the tongue.
It was quite challenging making sure we had room for everything, working around the future tongue box, brake lights, tailgate, and trying to keep in mind the future awning etc.
Two mounts in the back will be for the rack. Side ones will be for the linear actuators.
View attachment 185511
I have not finished welding them it yet. I want to make sure everything works as planned first.View attachment 185513
Front rack mounts. The plan is to mount the actuators on the angle. I plan to put them between the tongue box and the frame so the tongue box can protect them from getting blasted with rocks.
View attachment 185512
The rack will bolt on here. I wanted it to be removable in case I ever need to change the design.
View attachment 185514
These are our mock up linear actuators showing how they will mount on the side. They helped a lot when trying to figure out available space for everything.
View attachment 185515
We made the mounts up slightly higher than the bottom so I can put the rock sliders around the bottom of the tub. I didn’t want them connected, that way if the sliders take a hard hit it won’t mess up the function of the rack.
Blaine helped me and gave me an idea of how I could do the rack and I think it’s going to work out amazing. I am very excited to get it finished up.
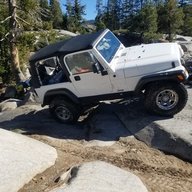
Will the actuators raise the platform high enough to use an annex?

Without digging through your thread, can I see photos of how Blaine setup your Exogate with the Savvy tub and tailgate armor?
I’m going to have him do the same thing for me.
Are you doing tub rails?Without digging through your thread, can I see photos of how Blaine setup your Exogate with the Savvy tub and tailgate armor?
I’m going to have him do the same thing for me.
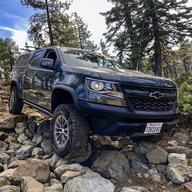
Makes no difference. A bear can peel open a hard tonneau just as easy as they can pry open a car door.My only concern about a soft tonneau like that vs a hard cover is would you feel comfortable leaving a cooler or fridge in with the soft tonneau in bear country?
Looks great, looking forward to seeing it with a tent on!
My only concern about a soft tonneau like that vs a hard cover is would you feel comfortable leaving a cooler or fridge in with the soft tonneau in bear country?
Looks great, looking forward to seeing it with a tent on!