The Pickle LJ

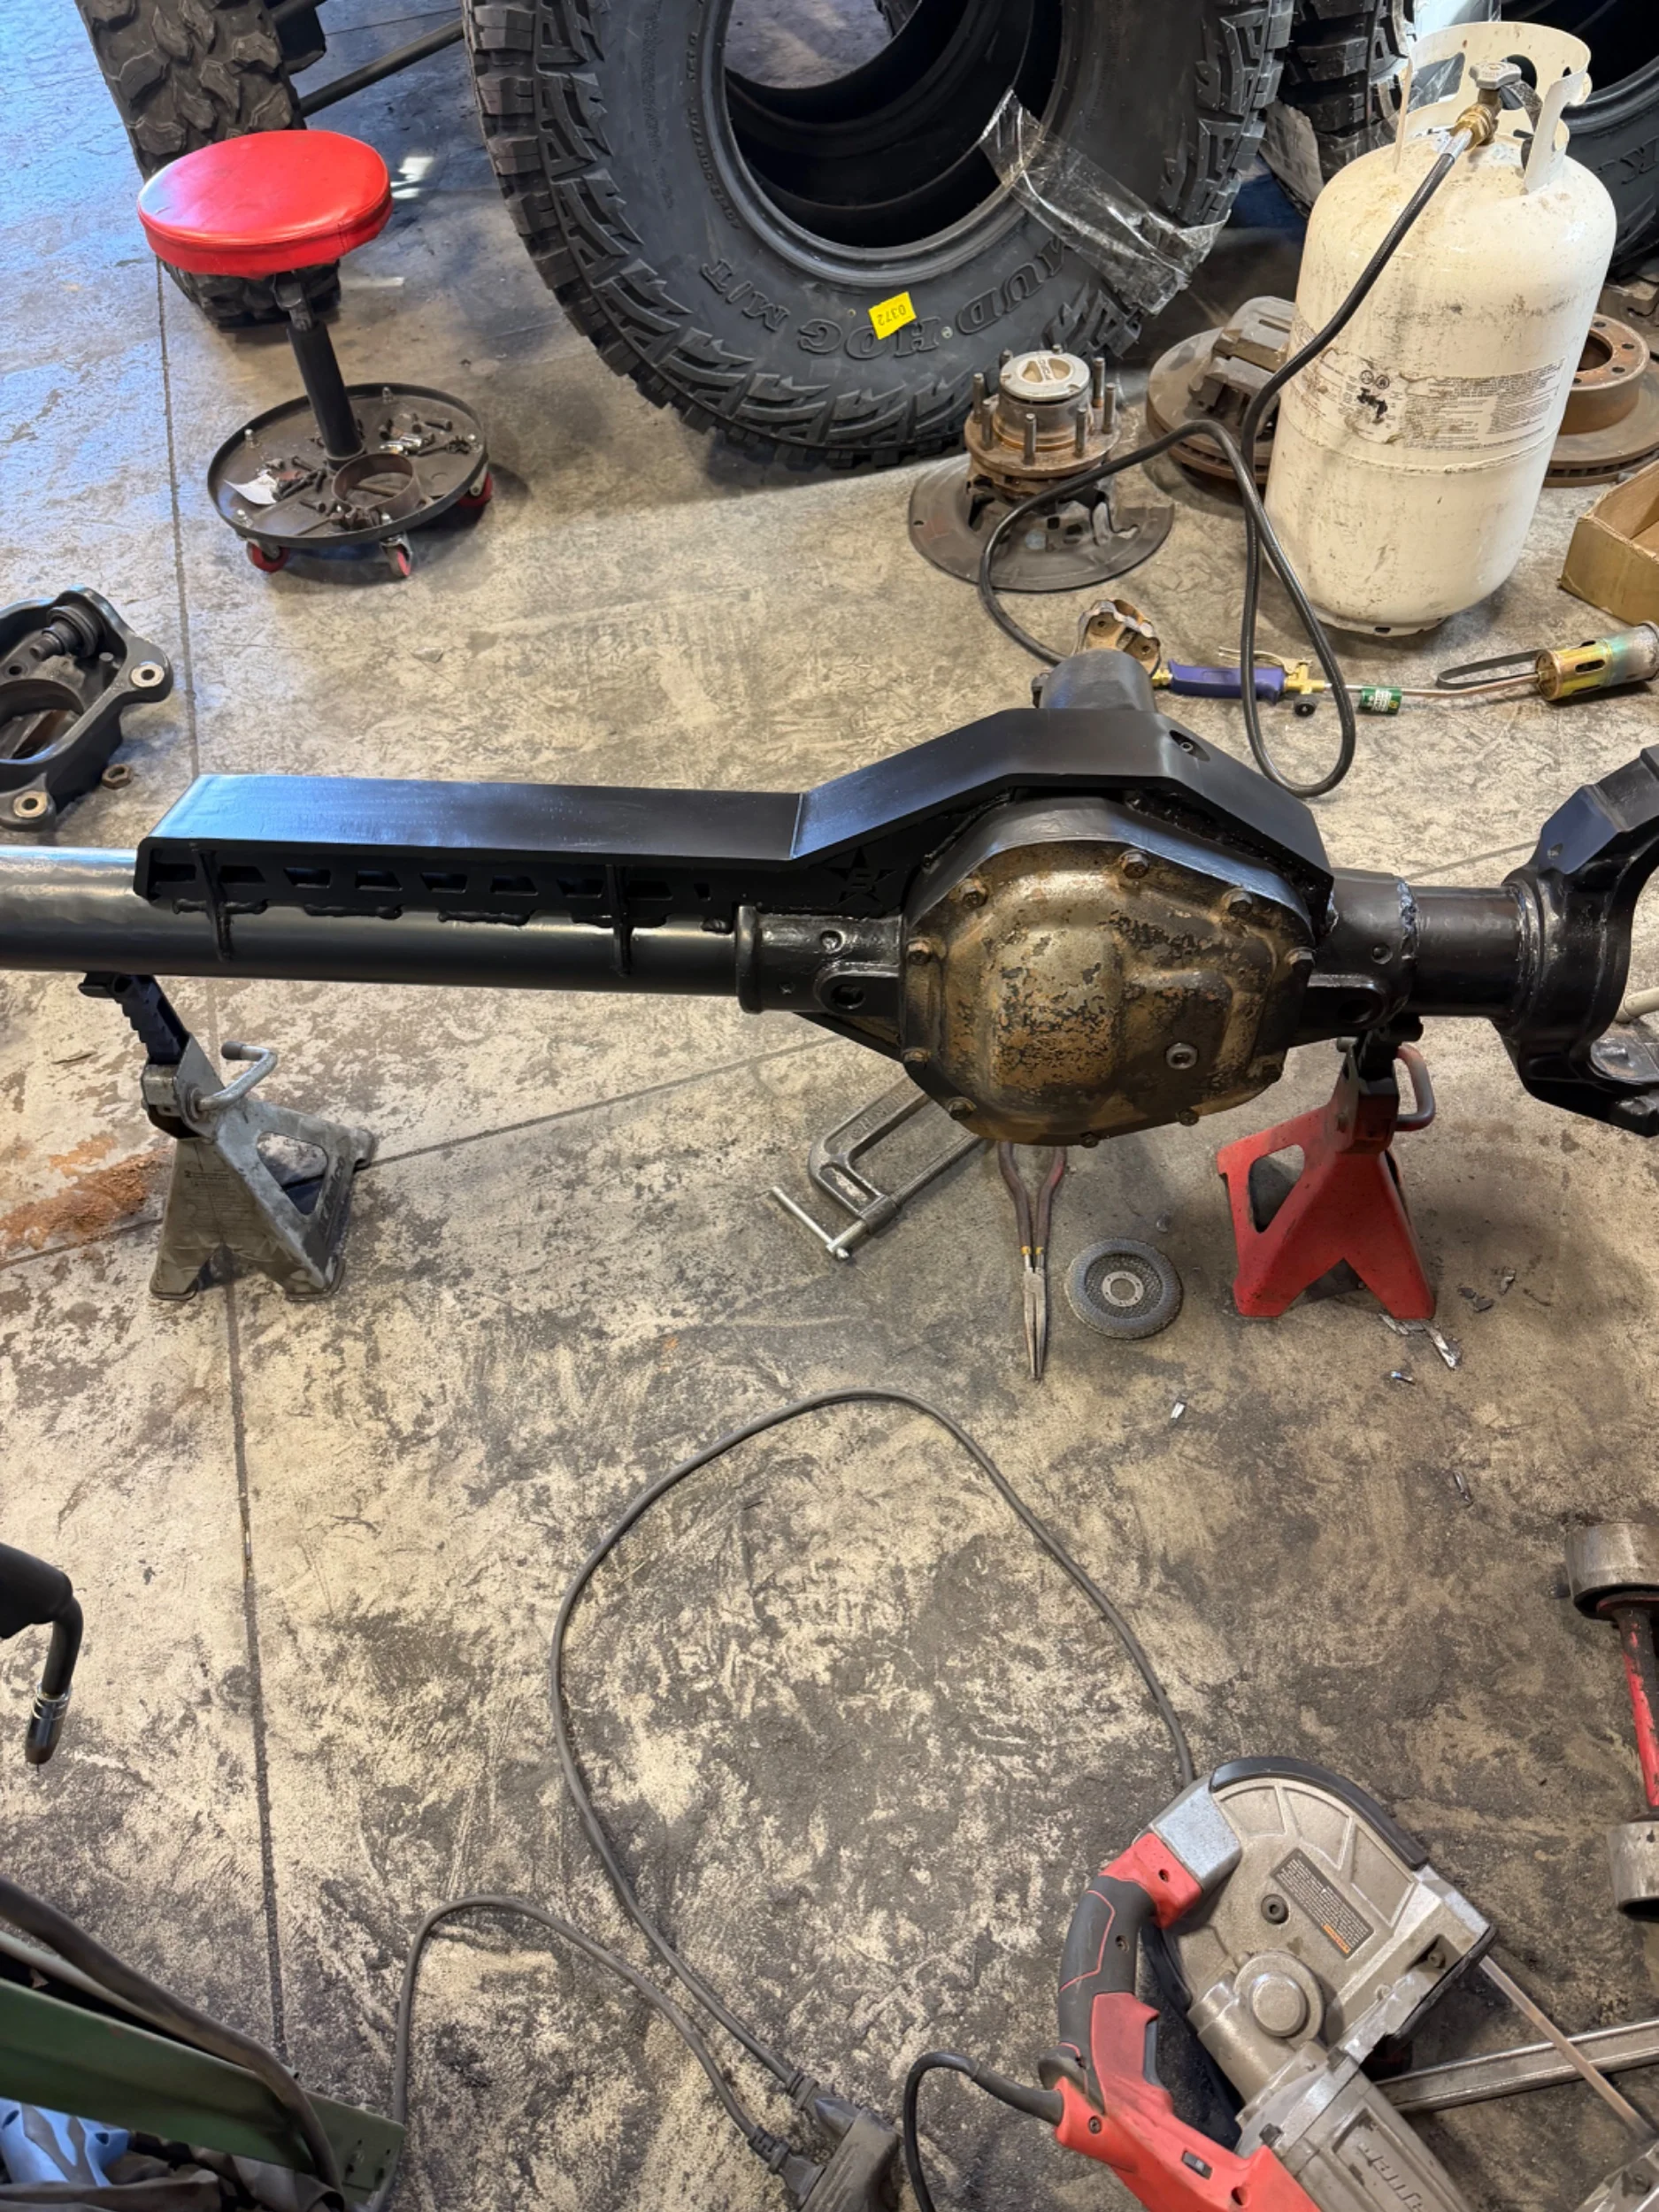
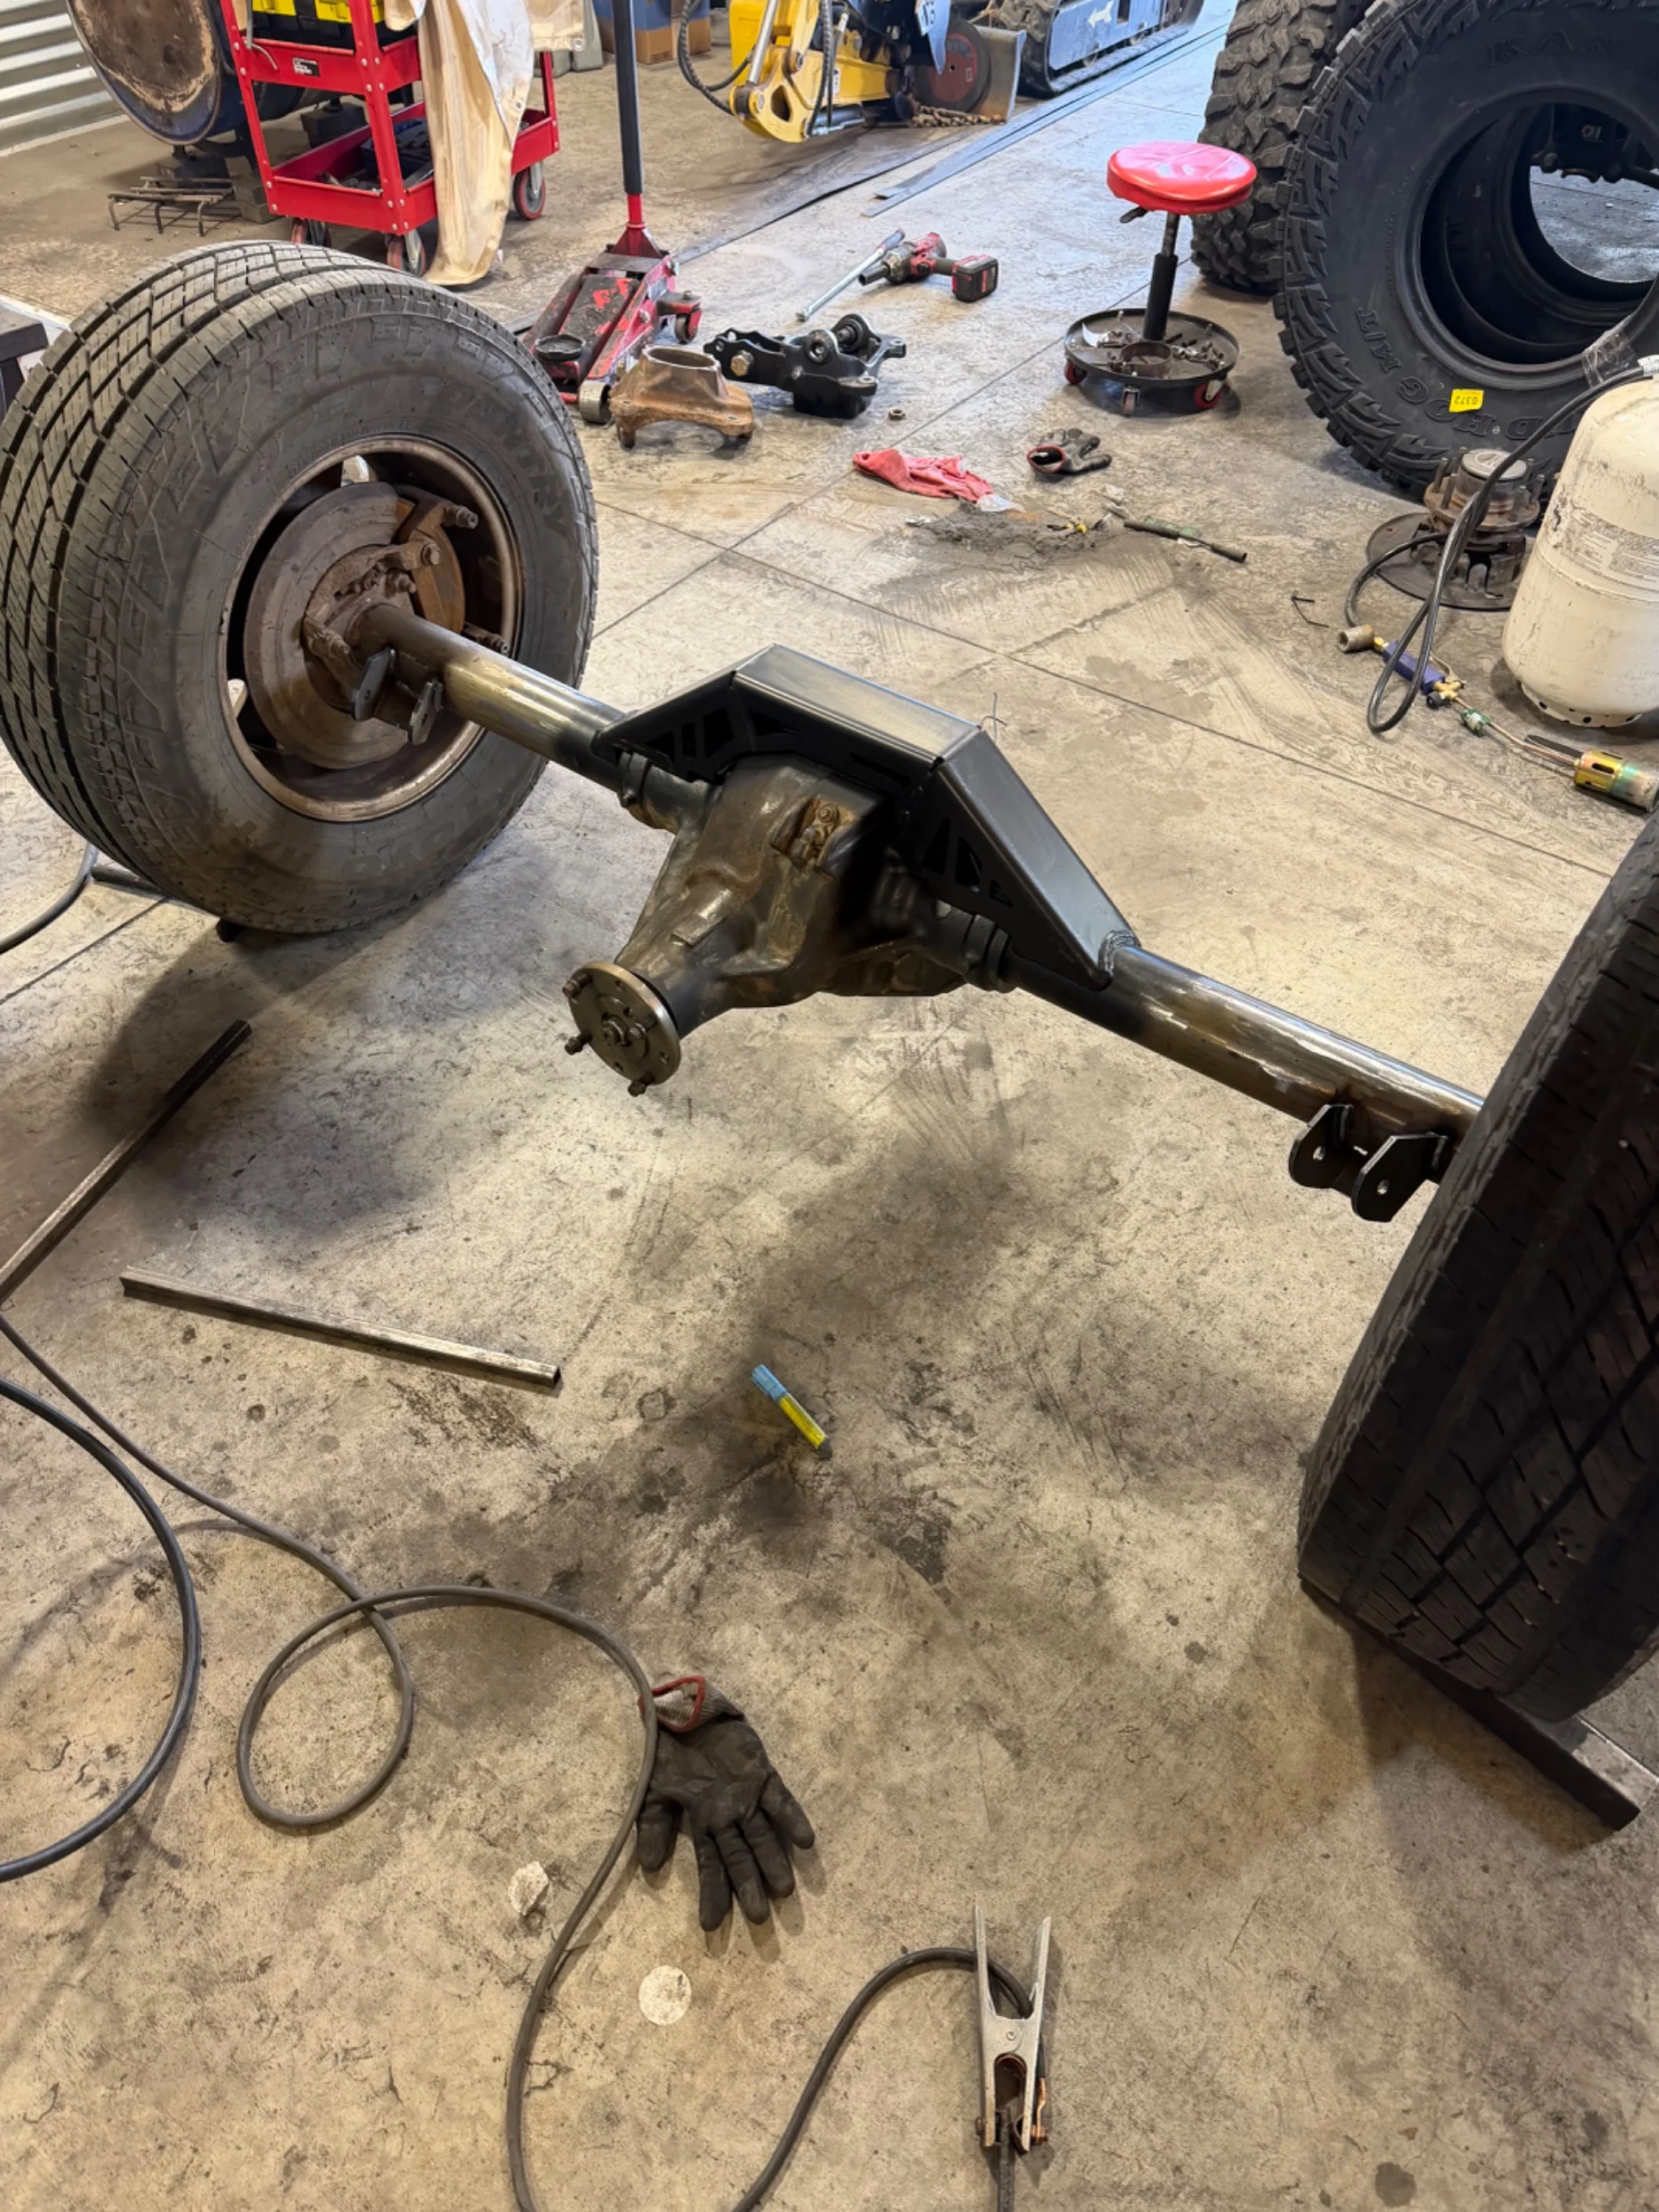
Today was relatively successful, finished welds on the front truss and rear cradle, and got a coat of steelit over the welds. also got the rear lower control arm mounts welded up.

IMG_0007.jpeg

IMG_0009.jpeg

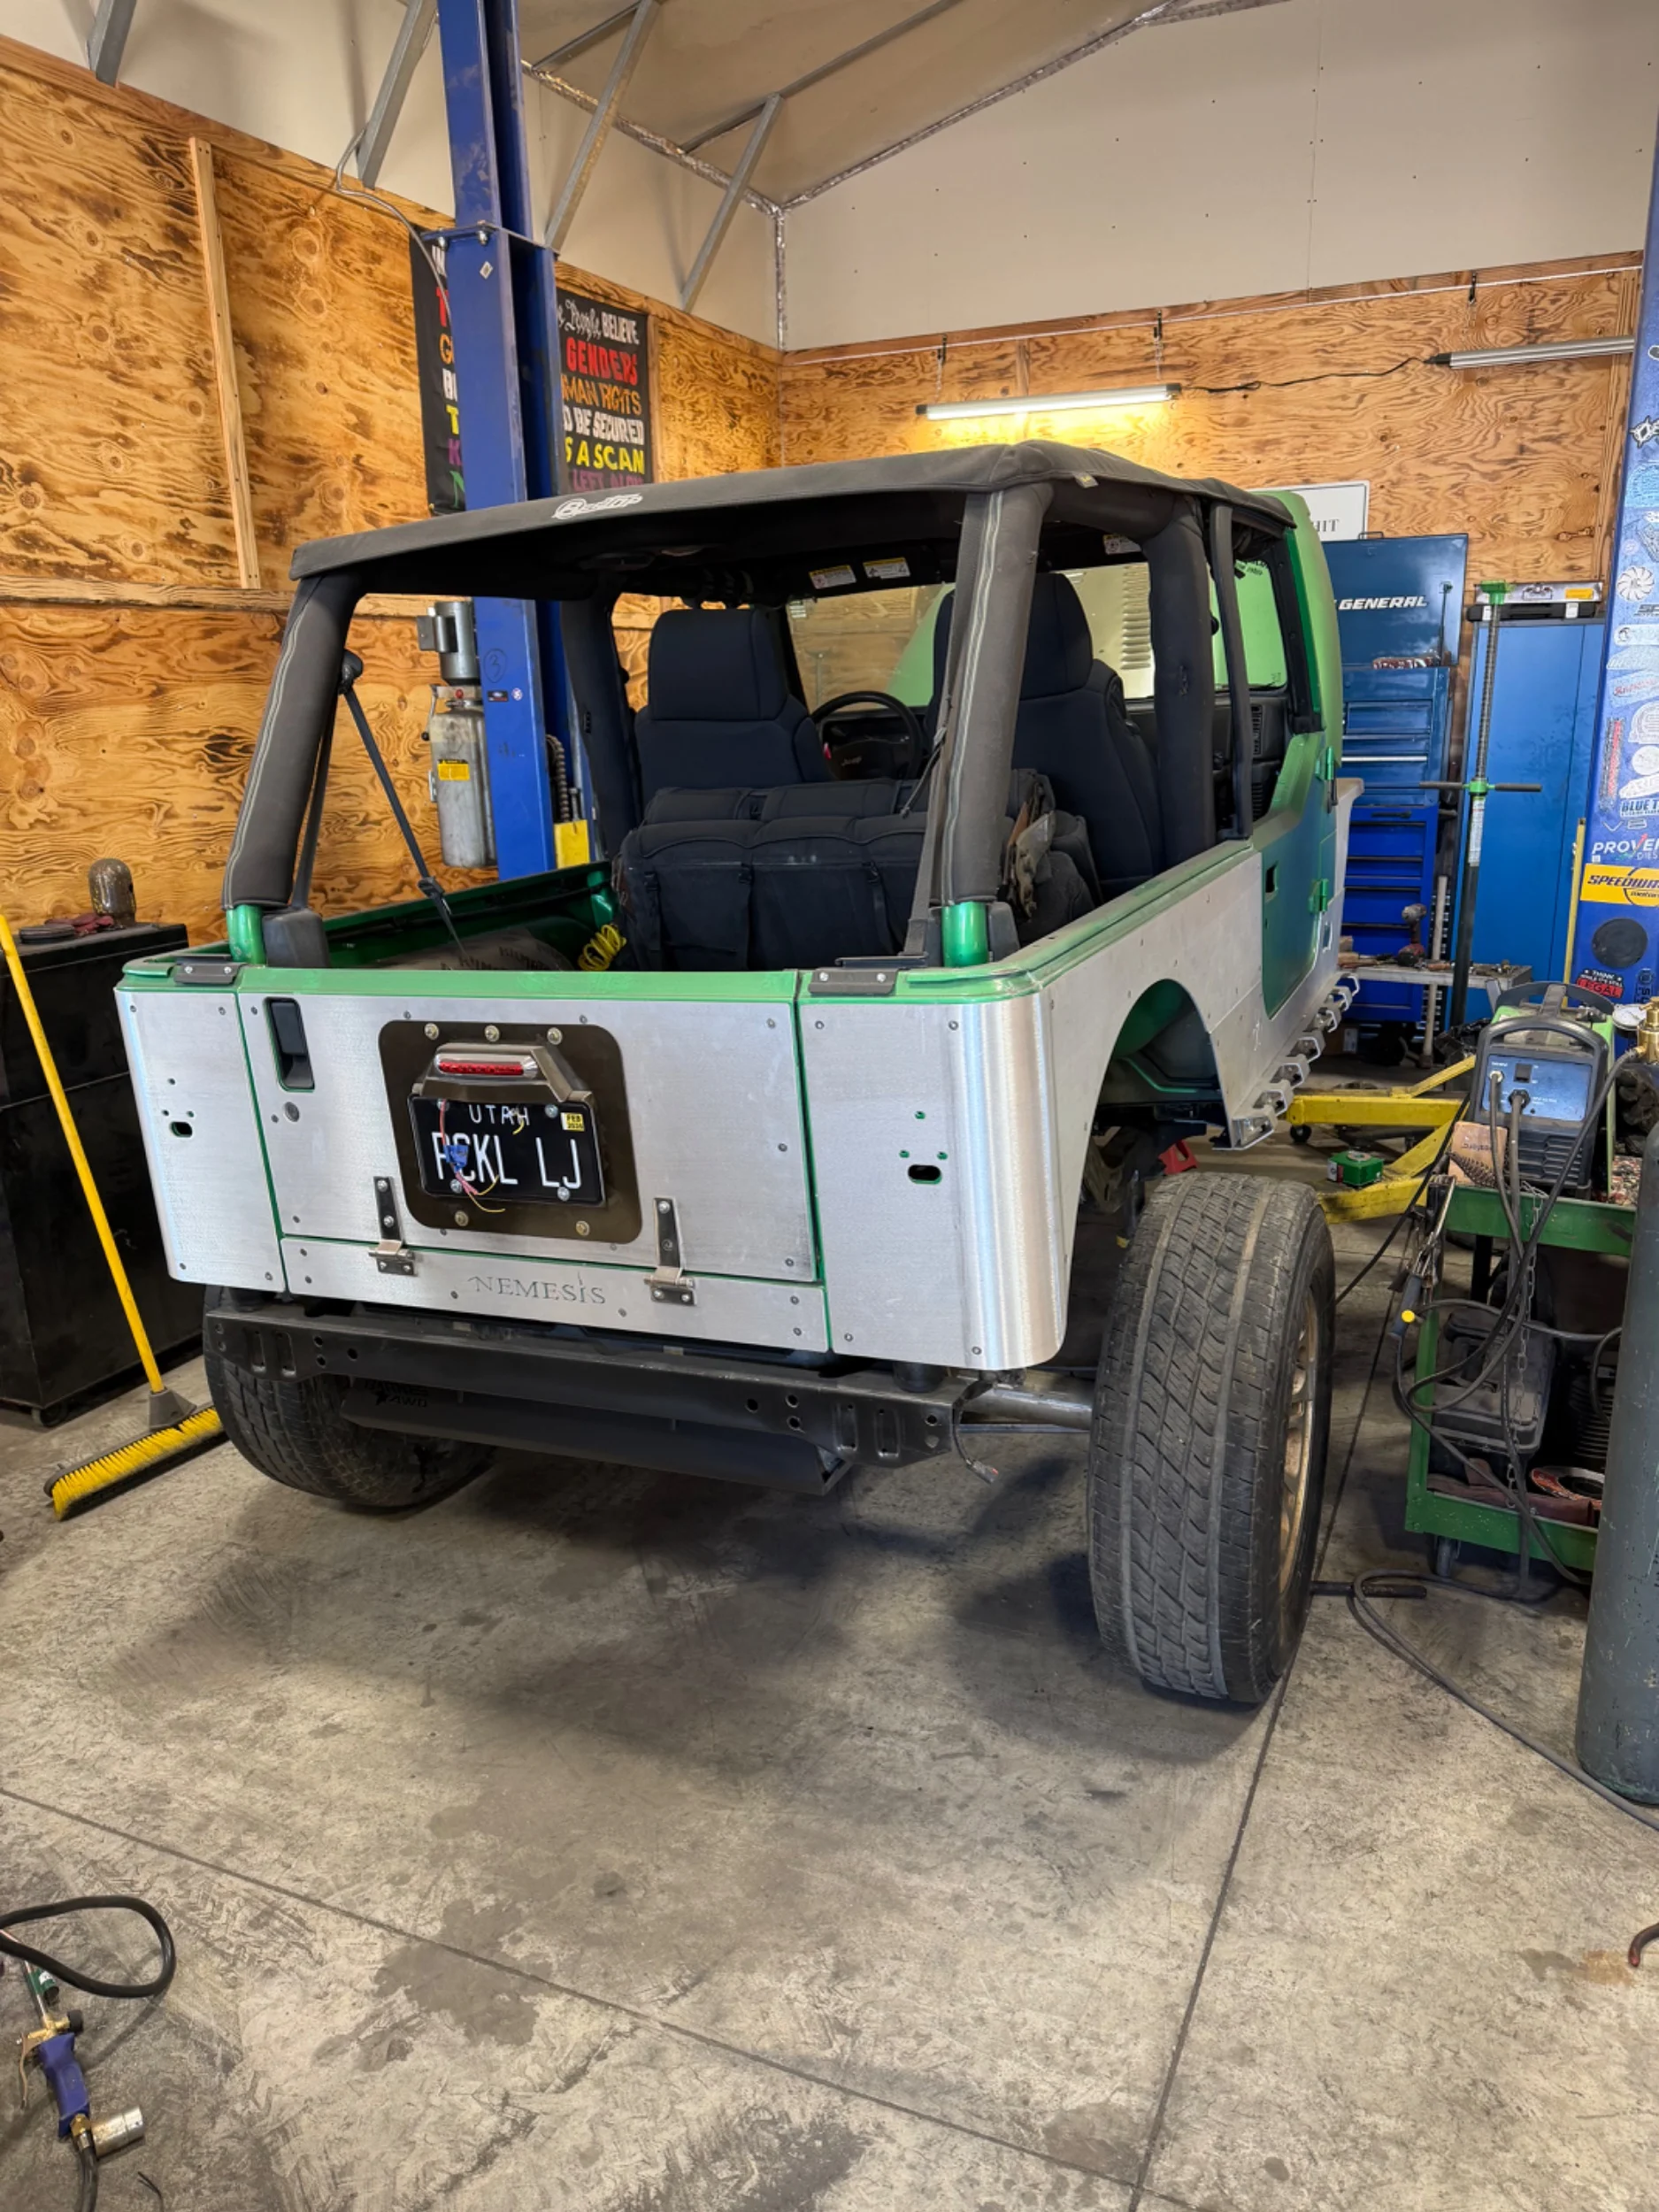
After that I messed with trying to get my lower balljoints in and gave up on that pretty quick, and moved the axles to their rough position under the jeep.
IMG_0013.jpeg


Was really just killing time till my rear main seal showed up, cleaning up the shop a bit and getting an idea of axle position.
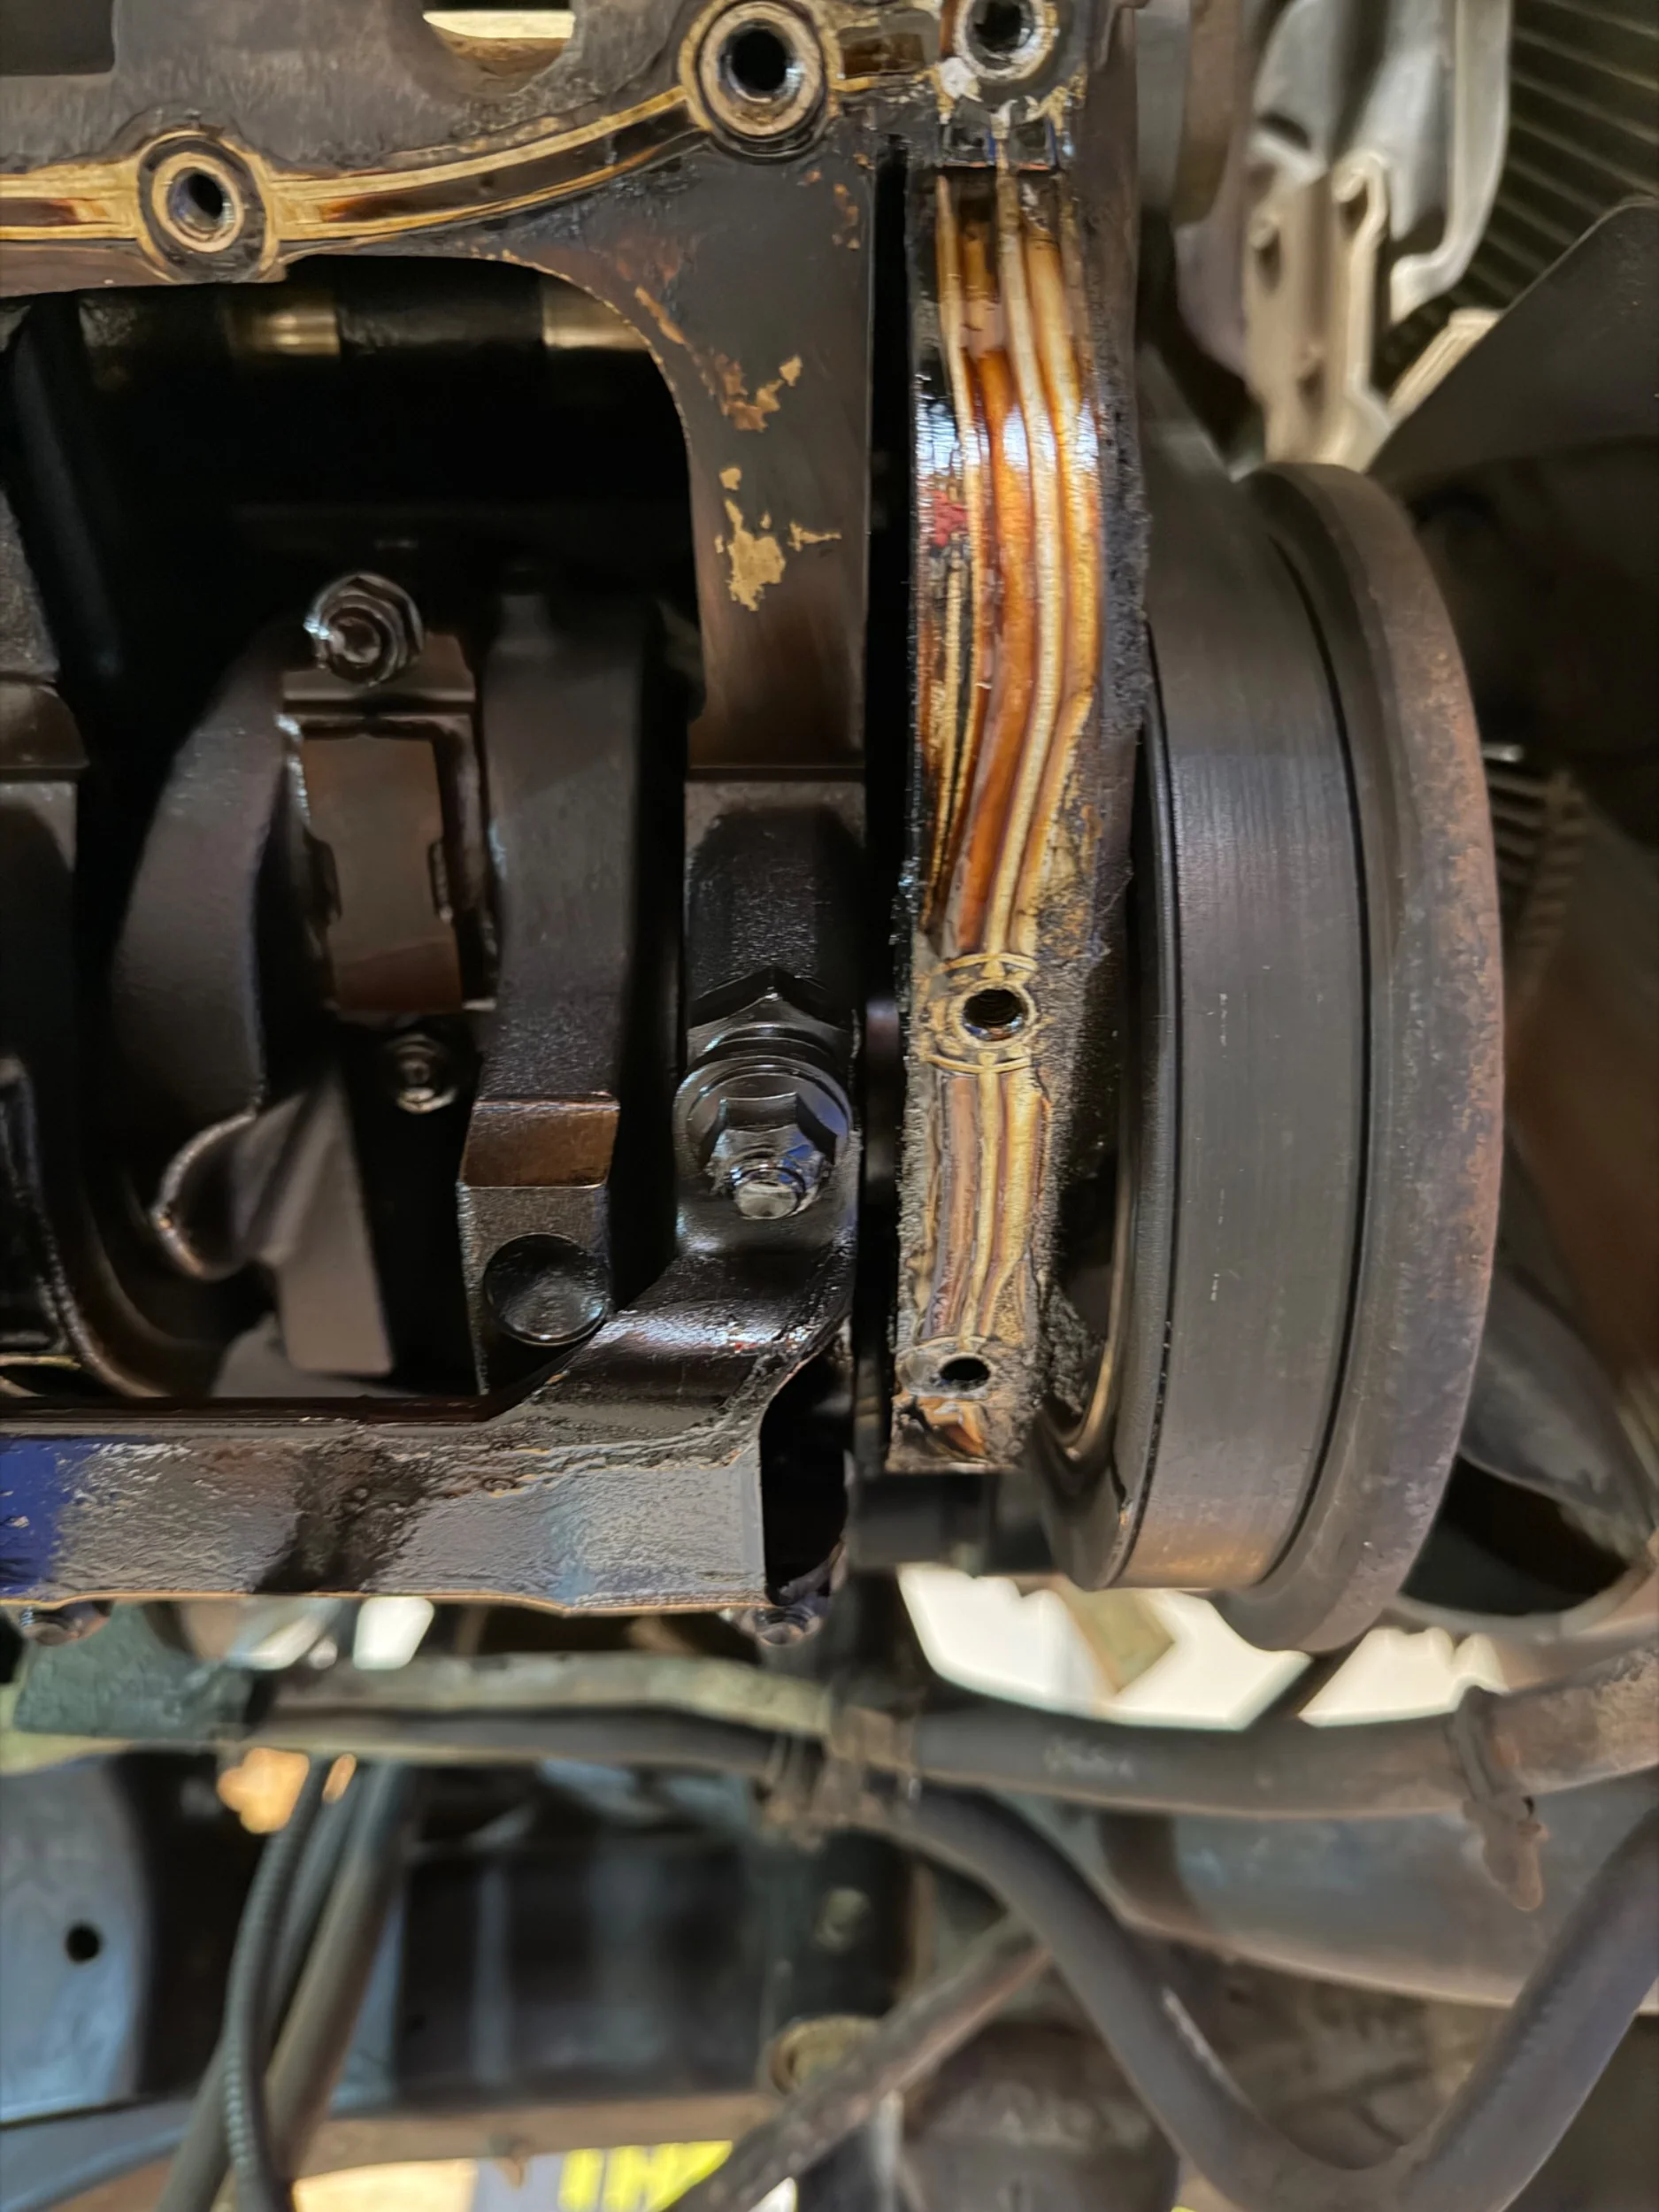
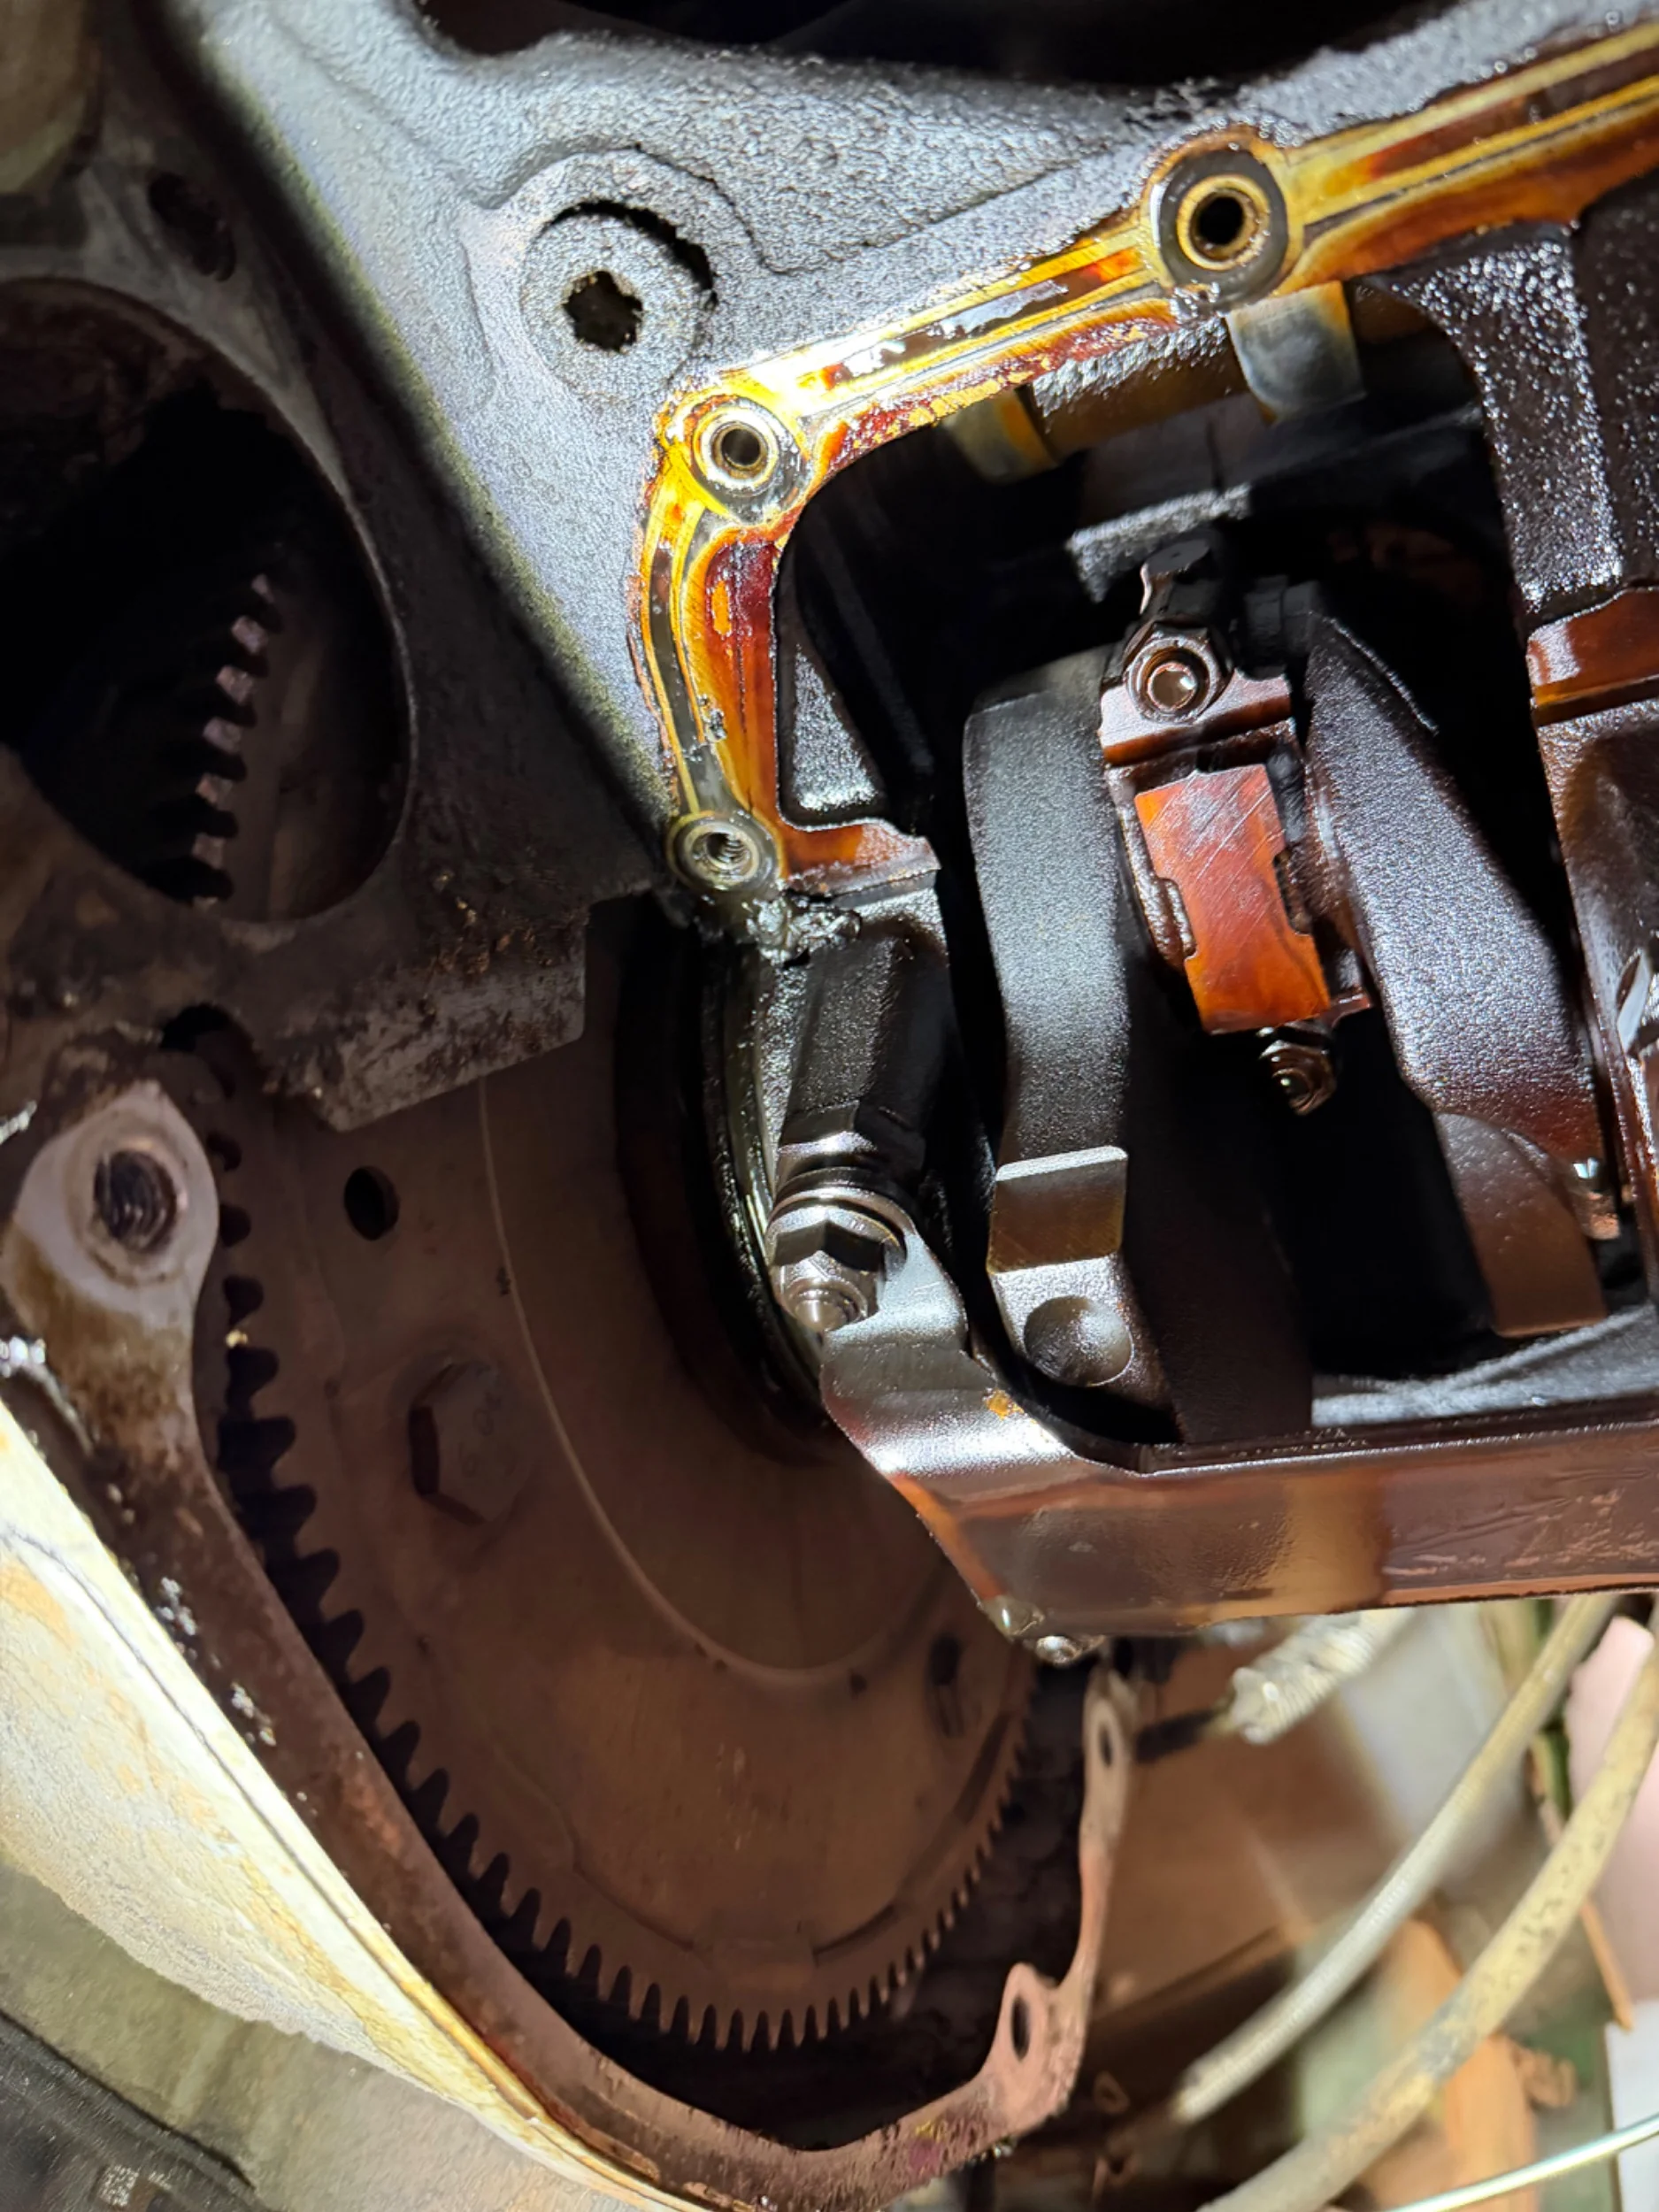
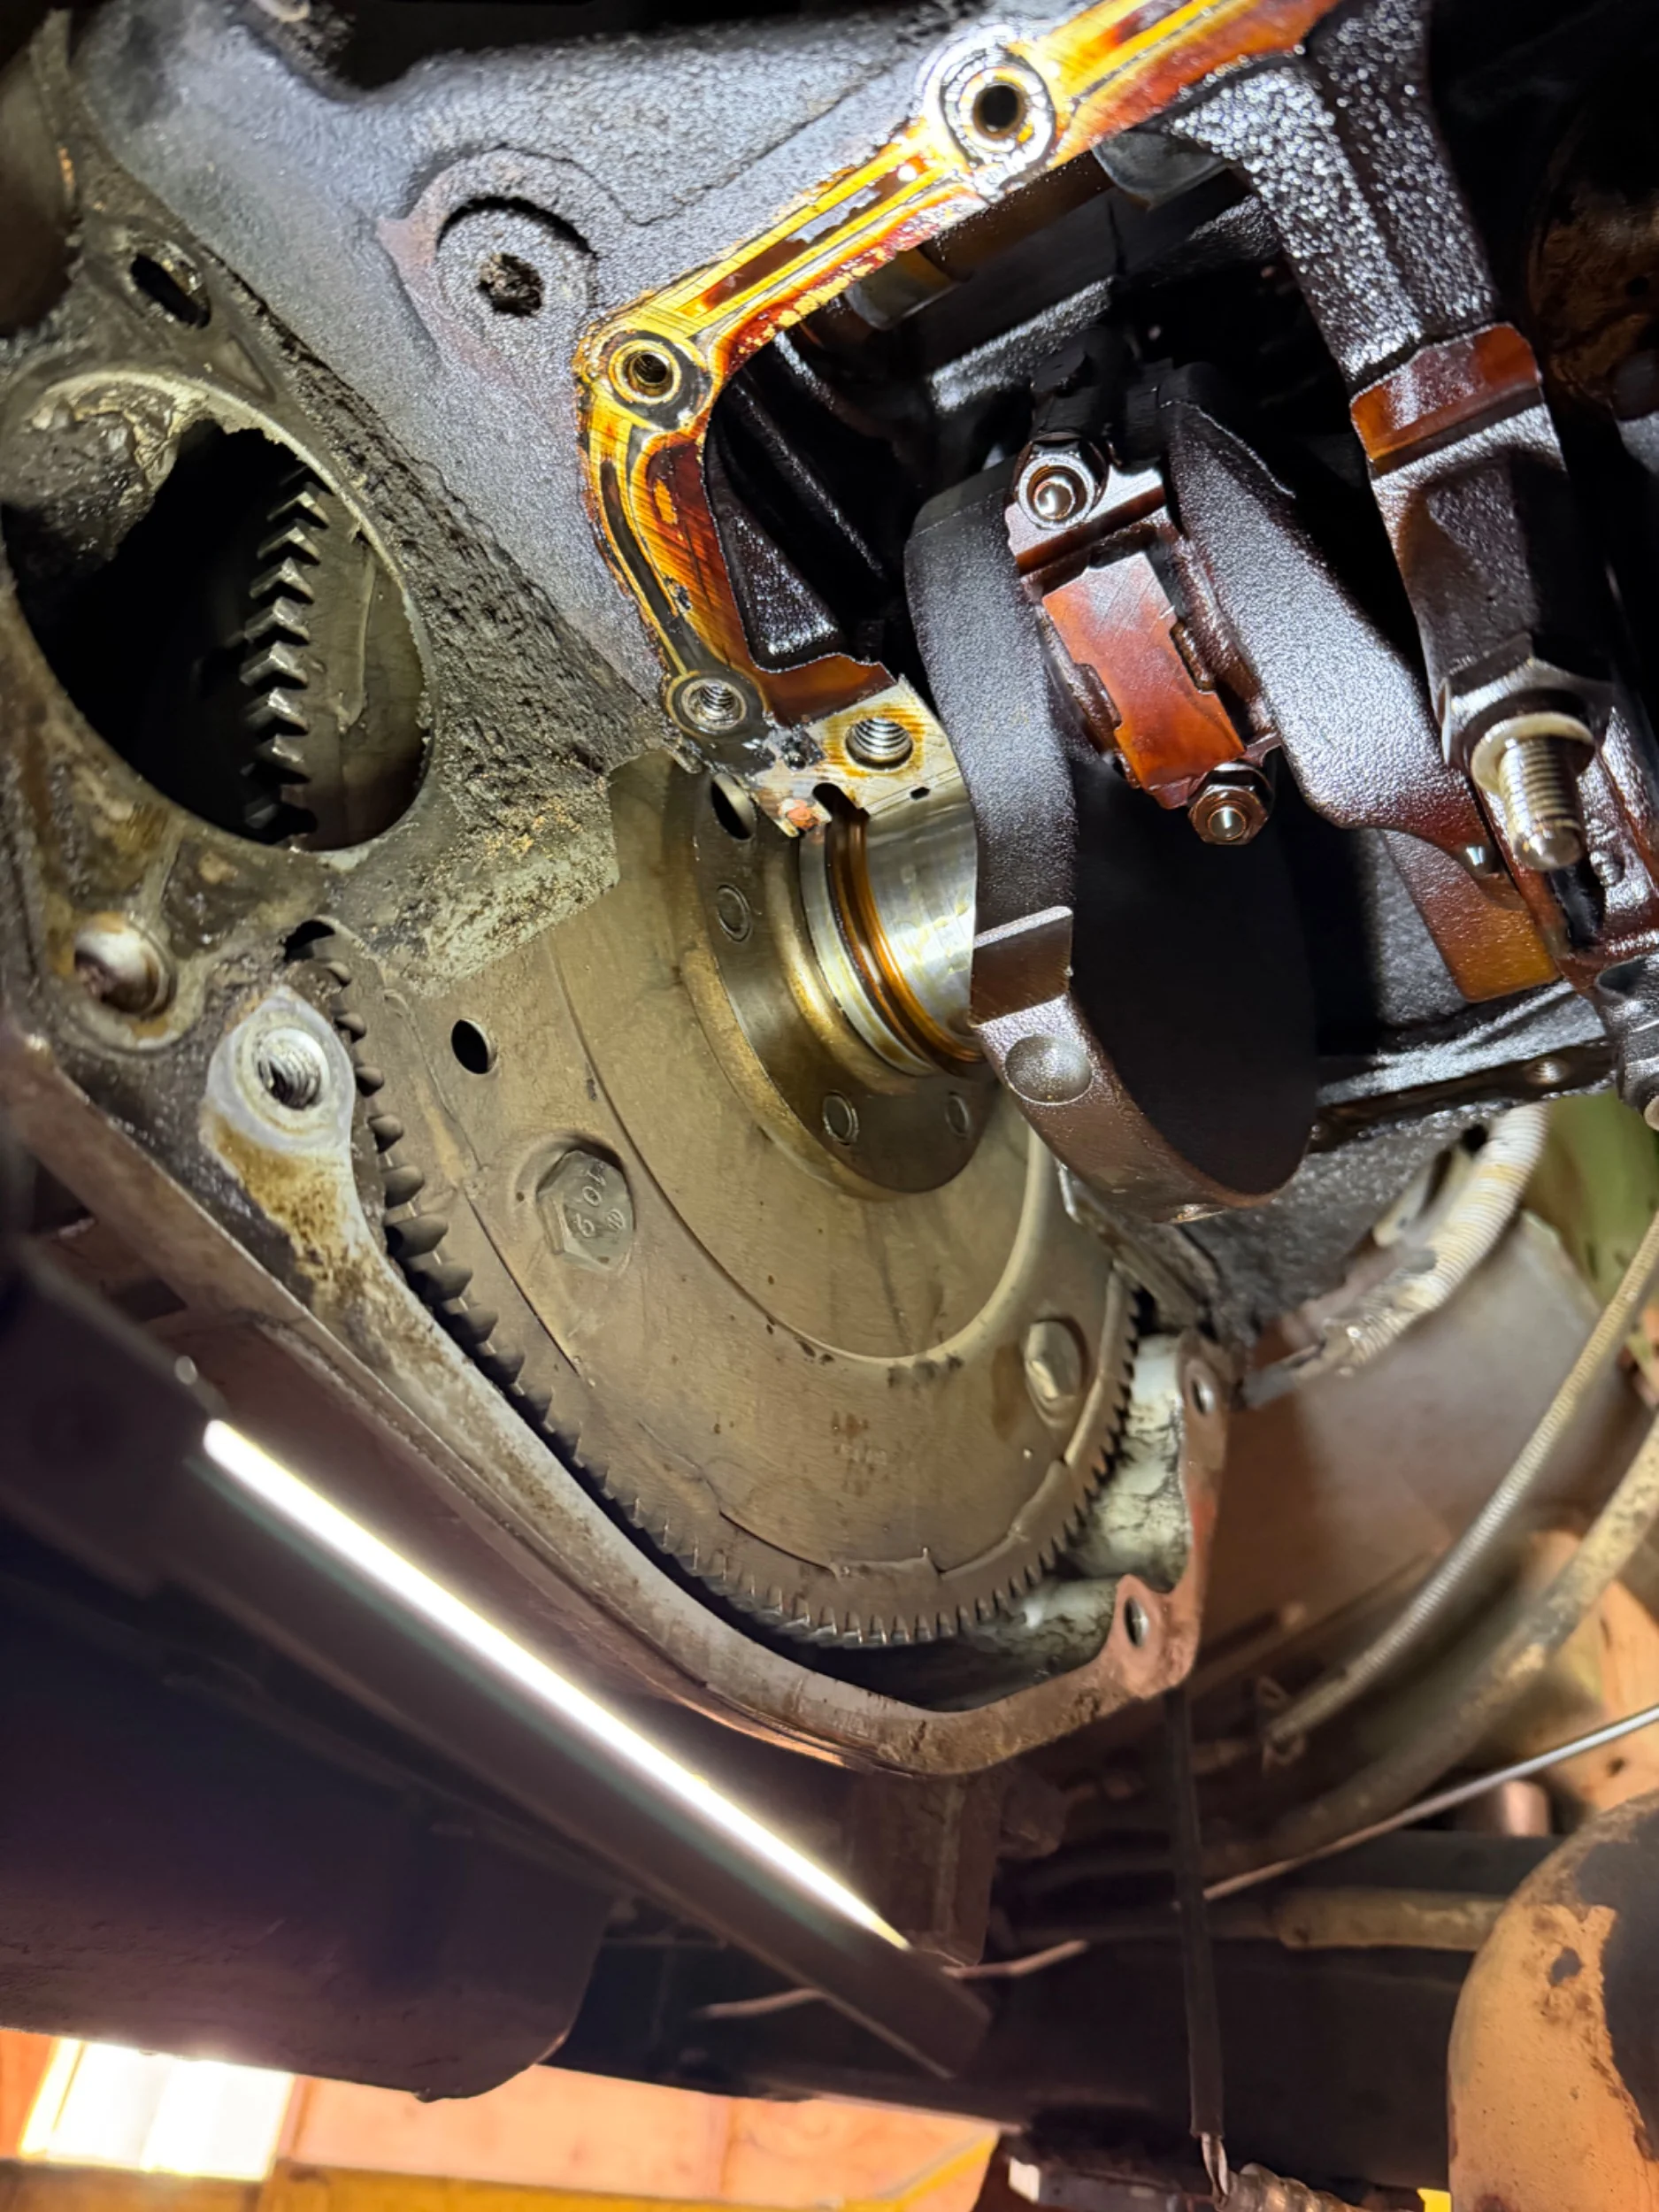
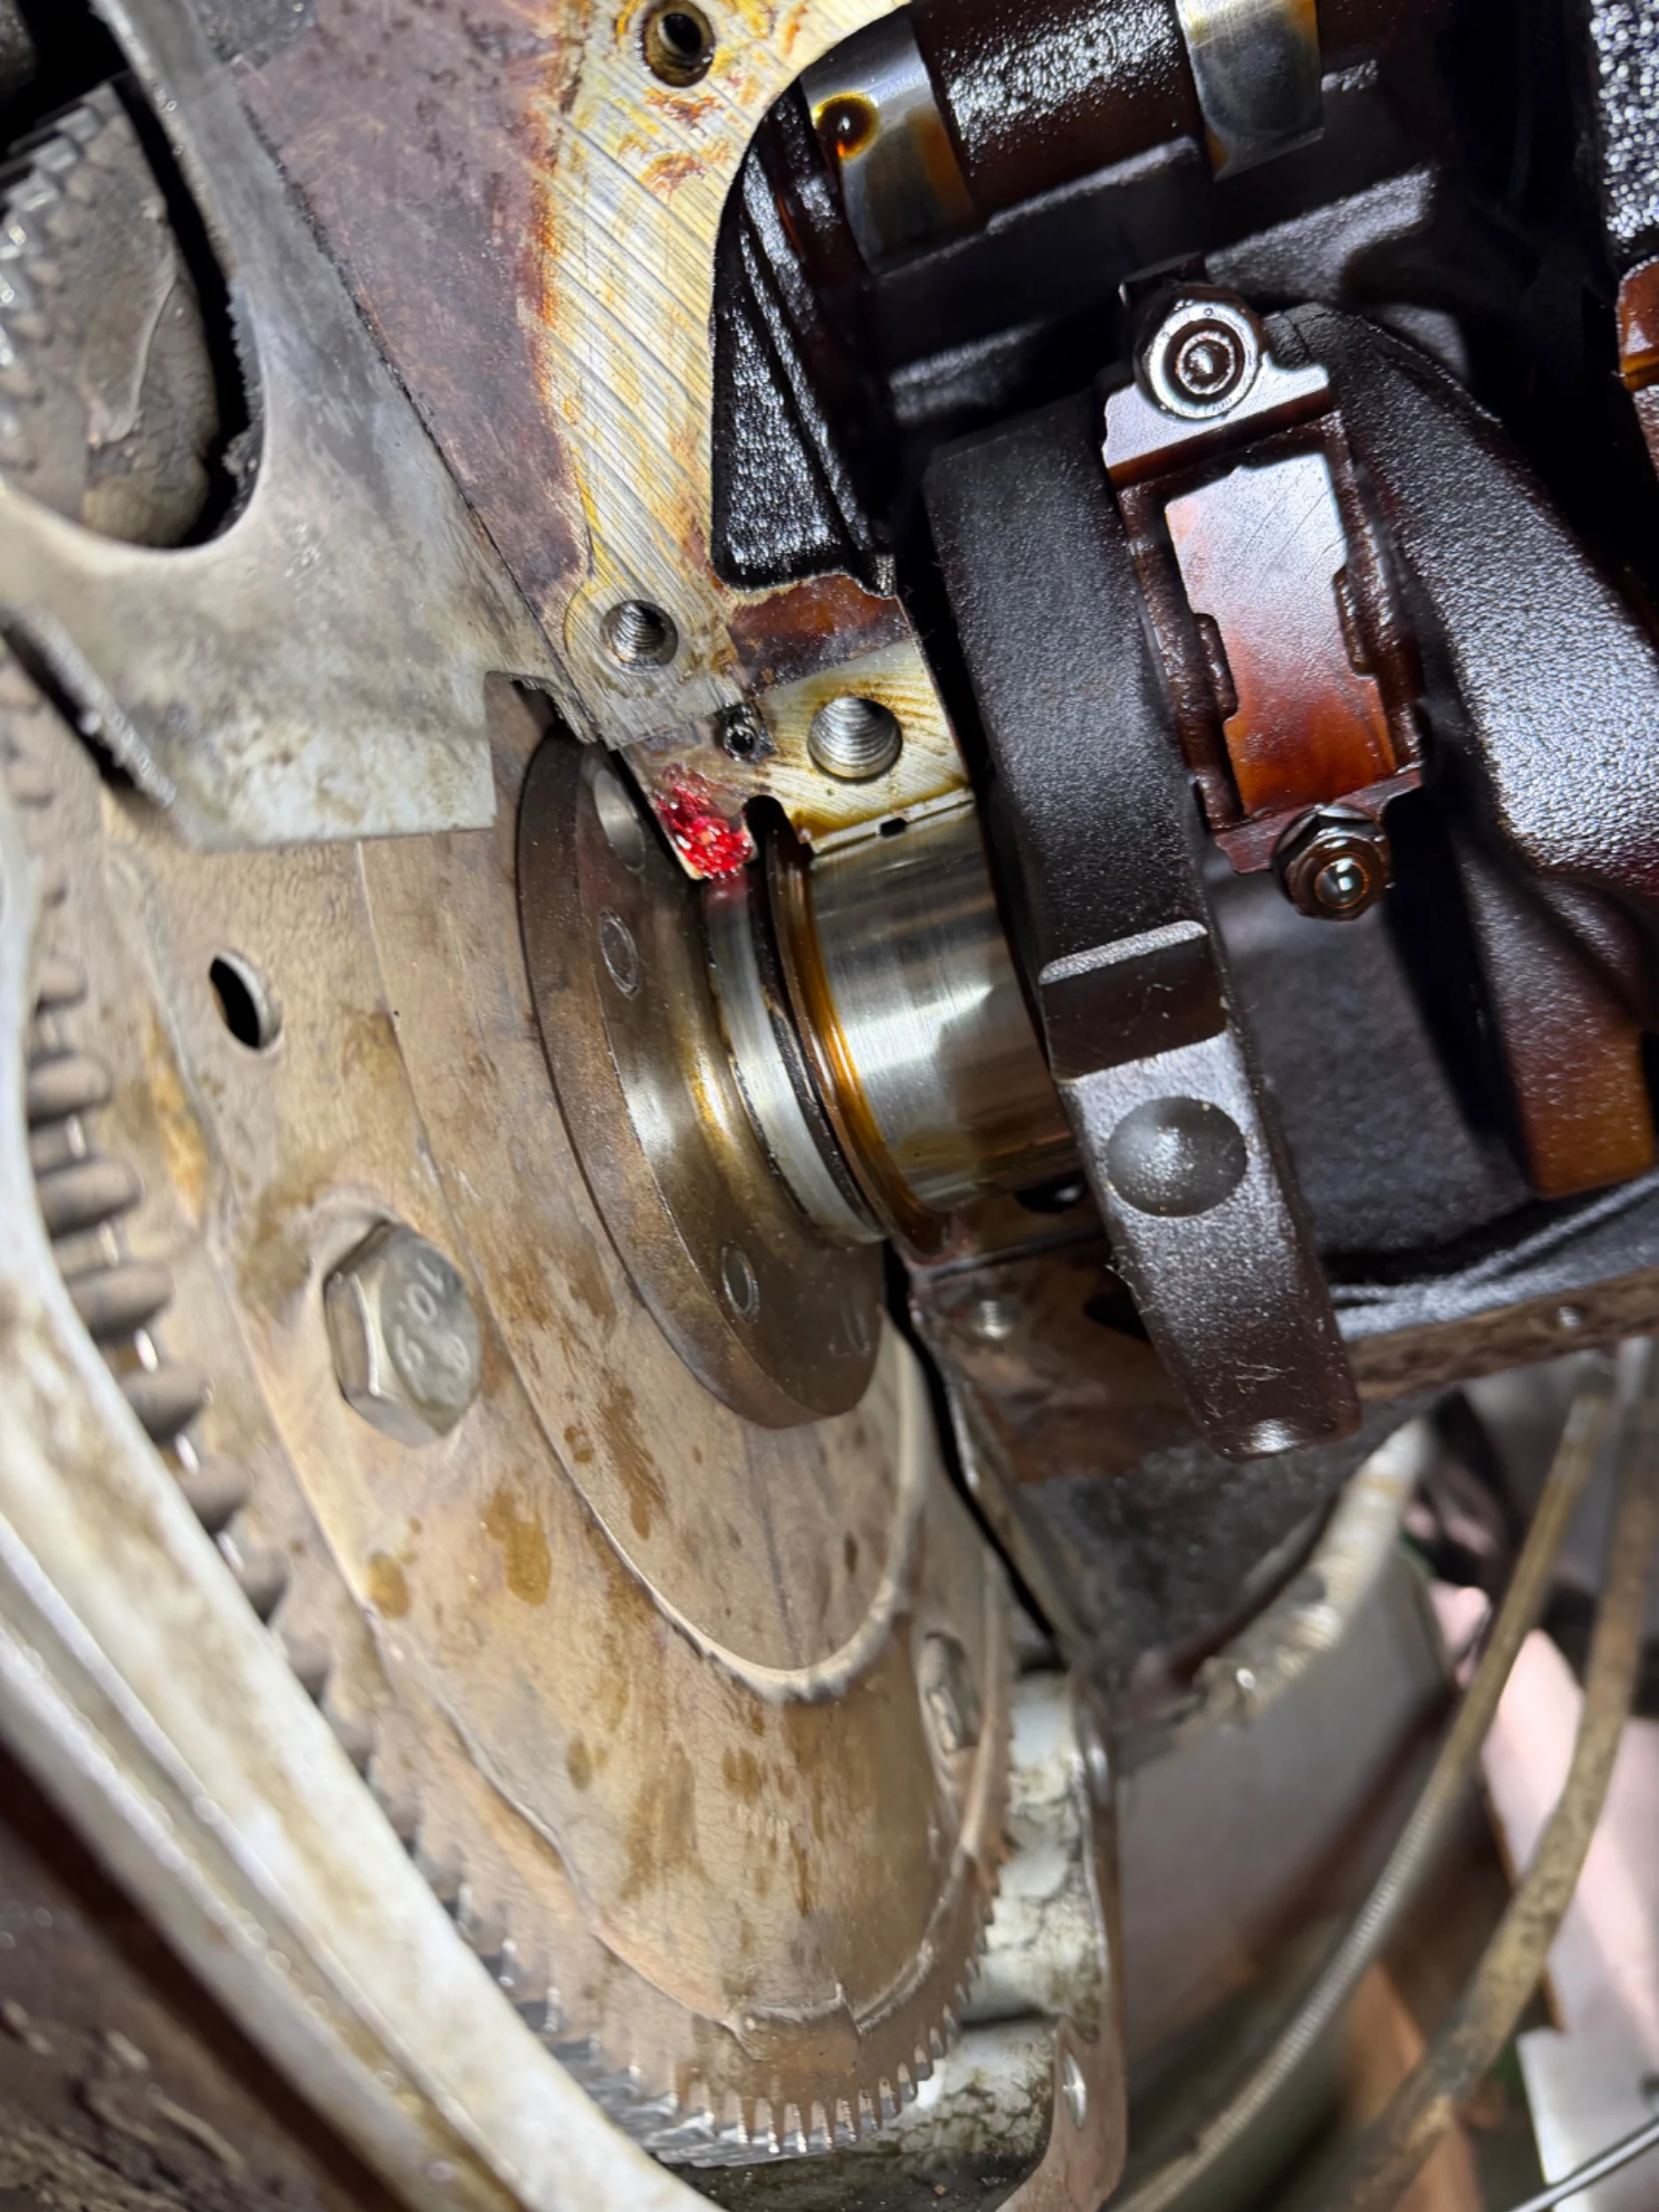
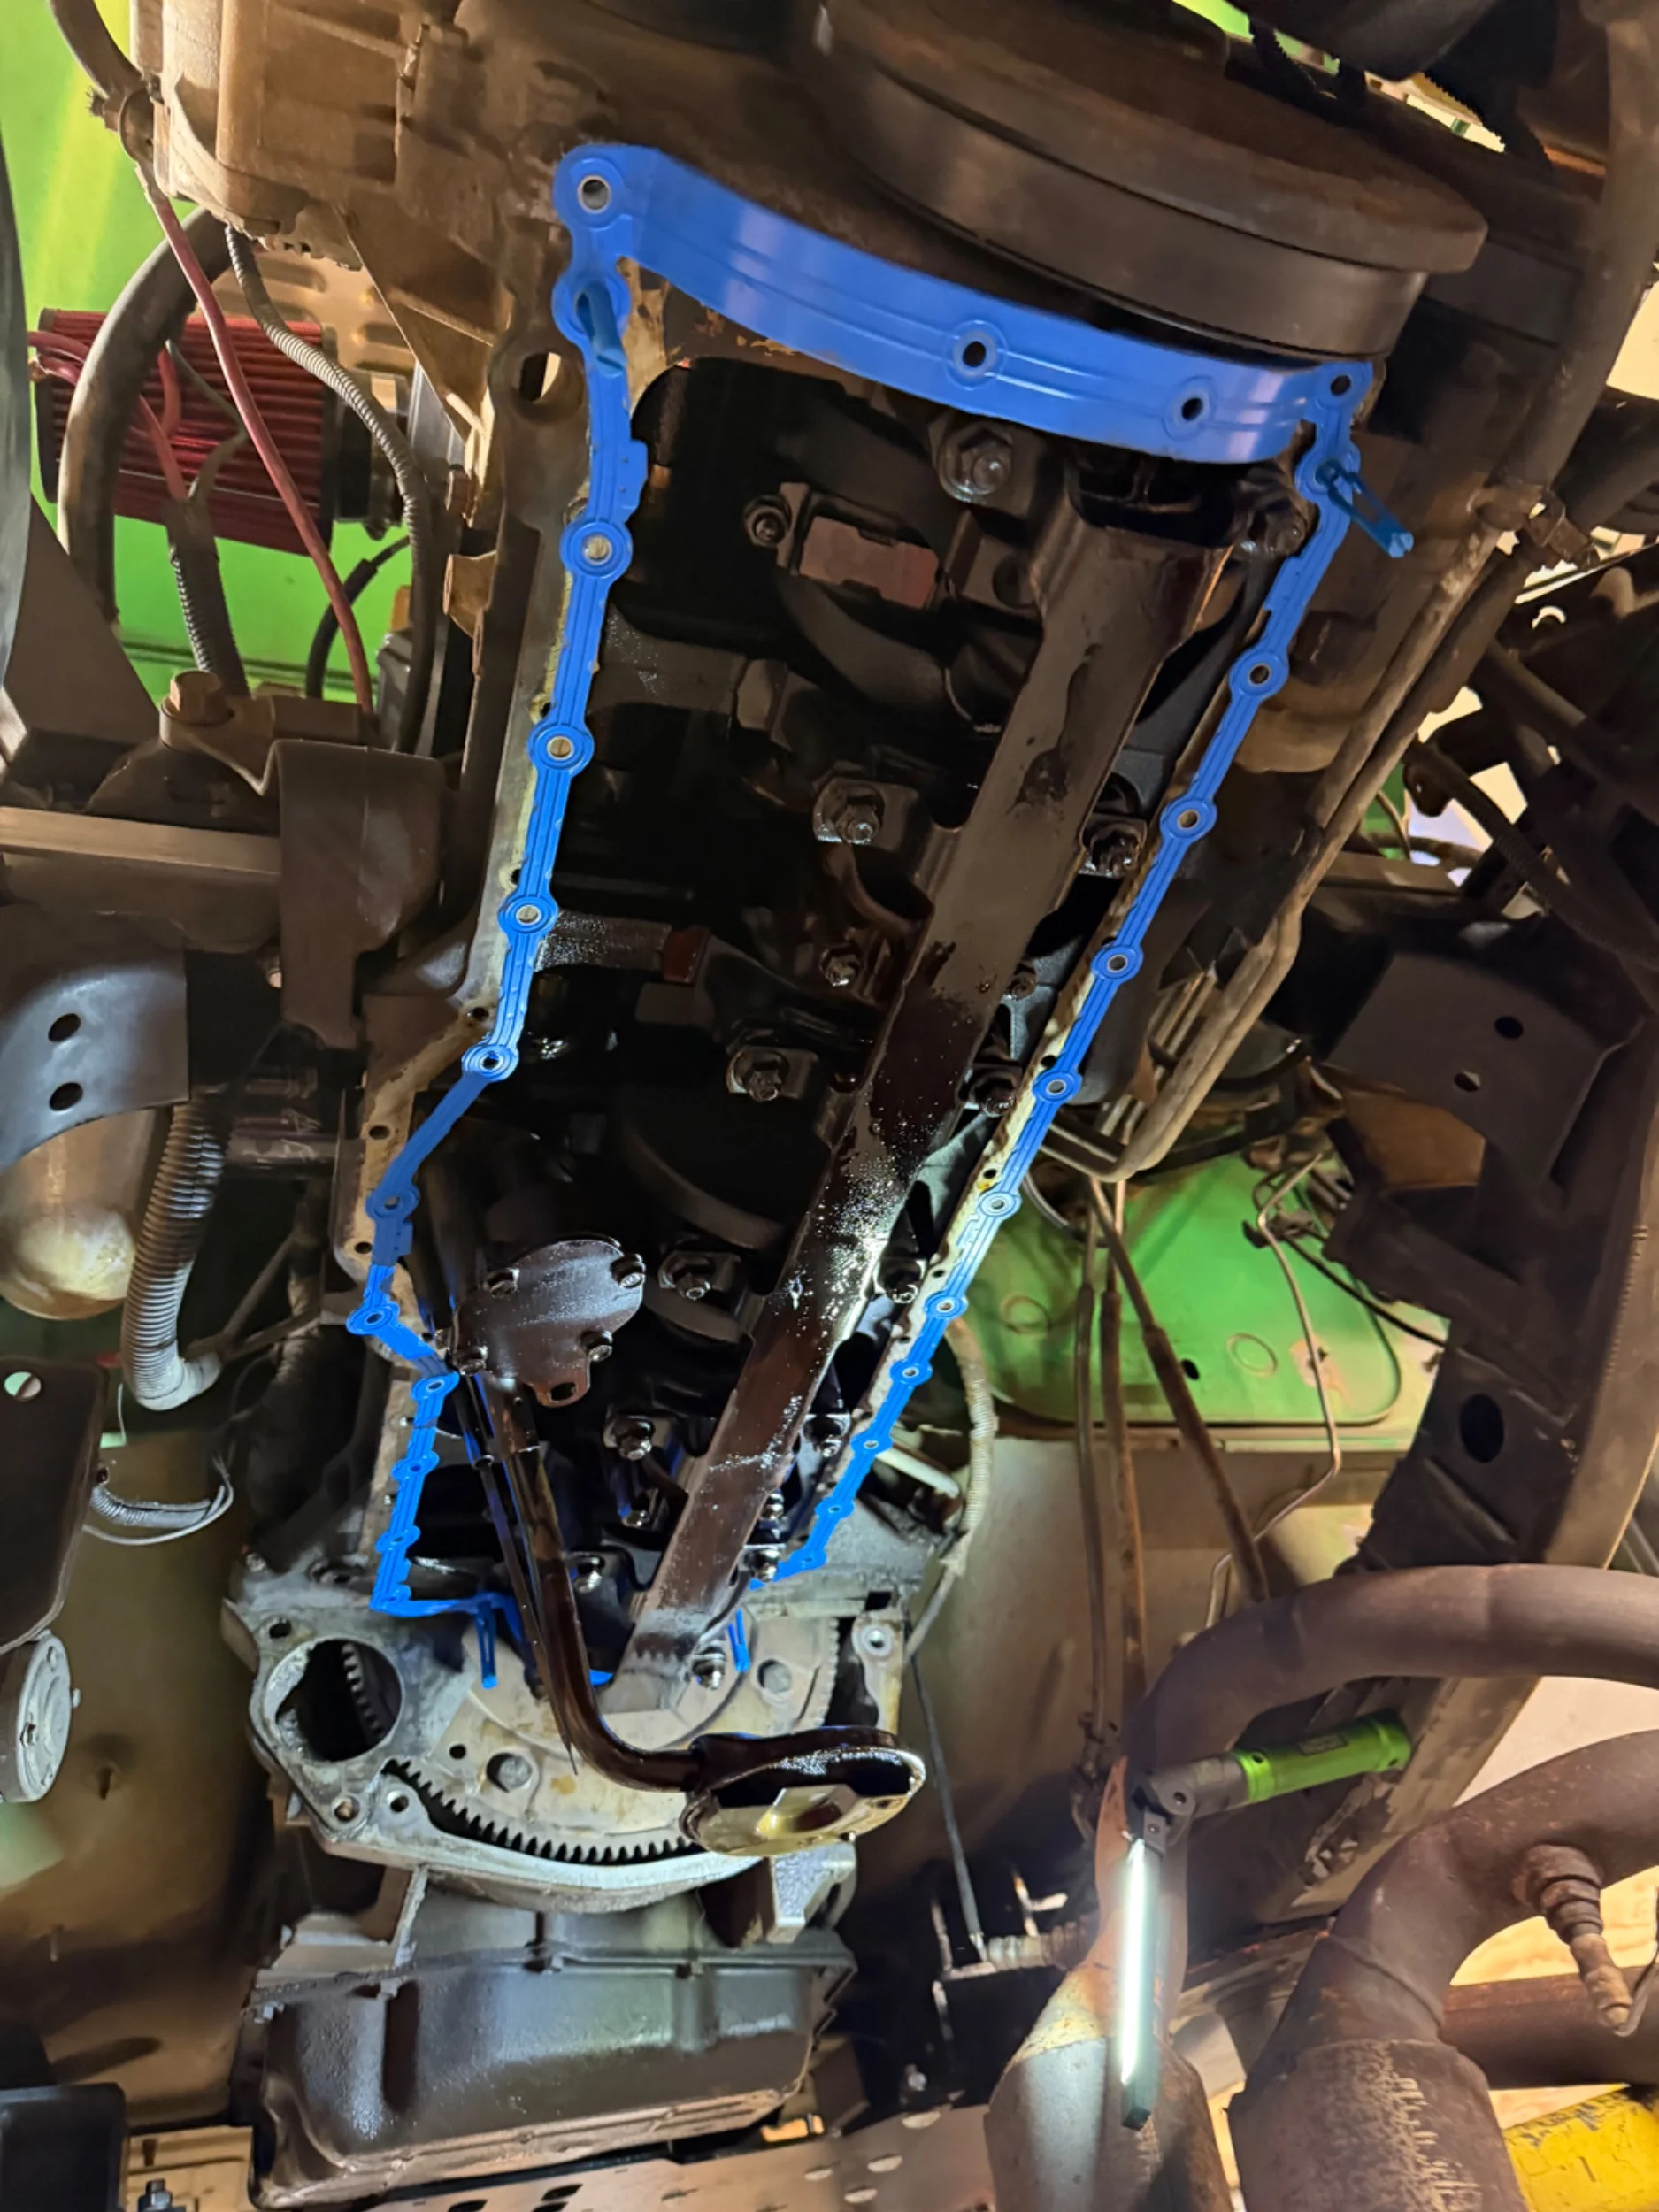
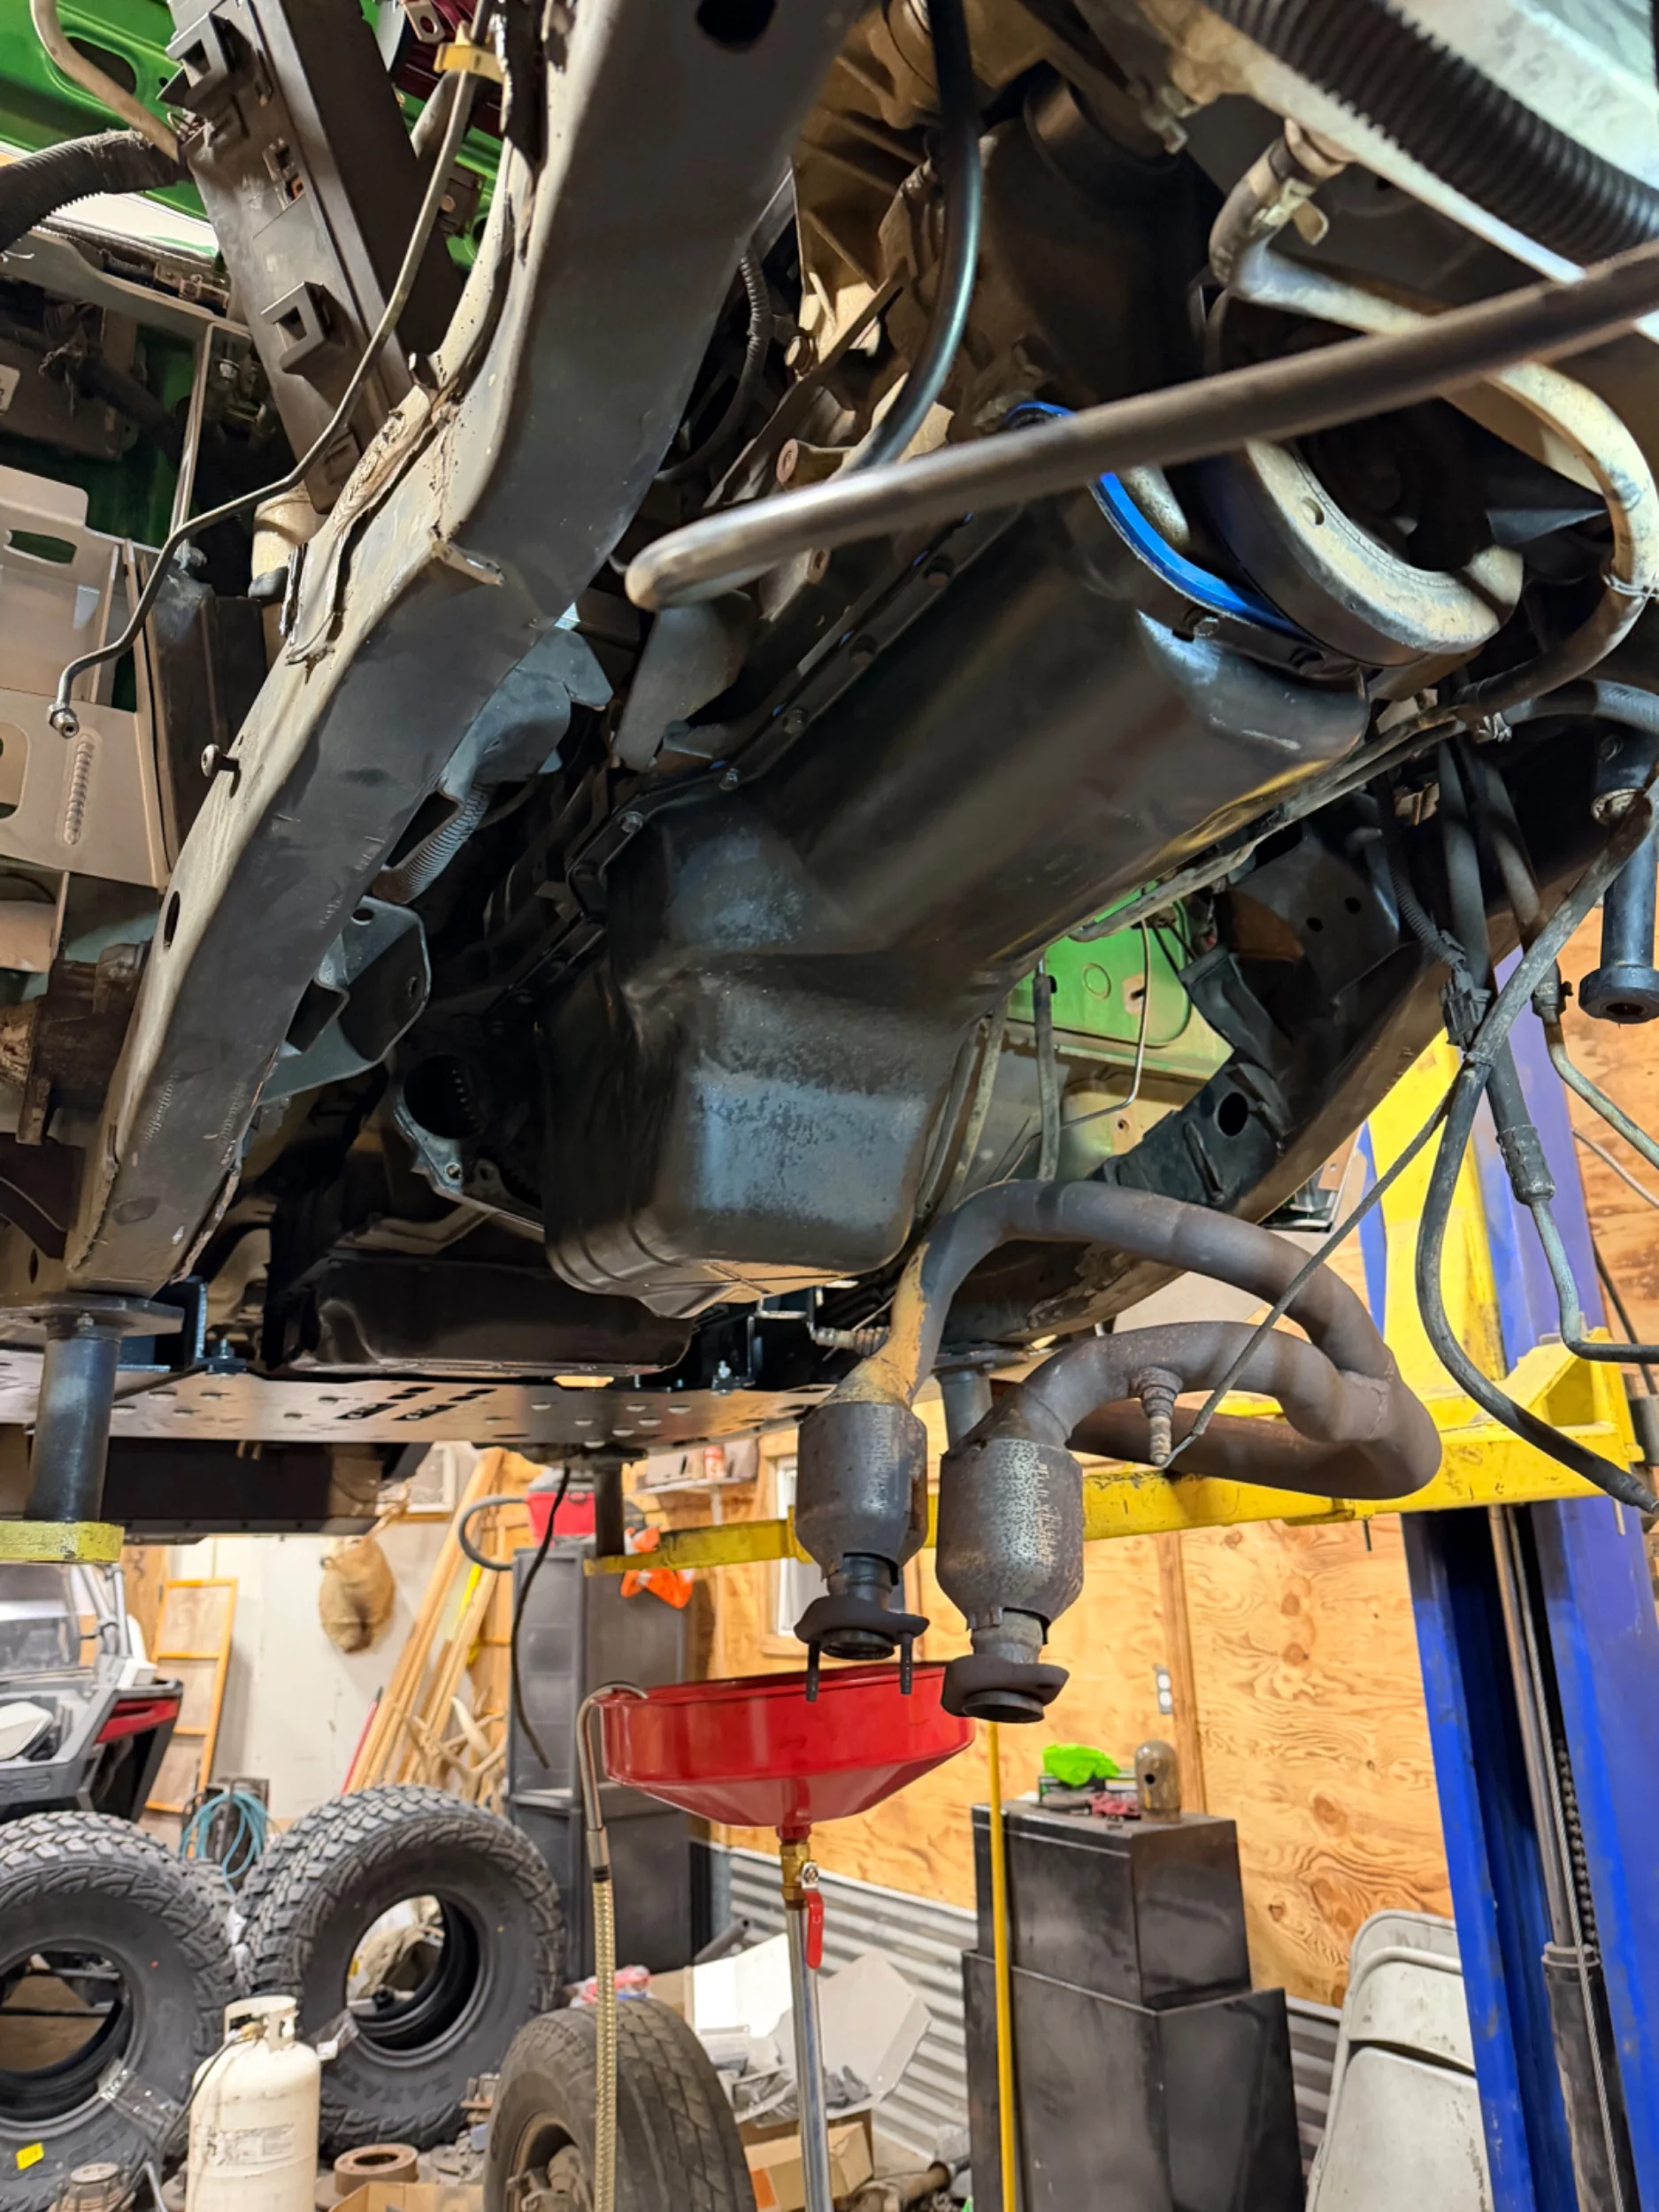
Got the rear main seal and oil pan gasket replaced, honestly it woulda only taken an hour or so if it wasn’t for all the crusty bits on the edge that had to be scraped off, but turned out alright, should seal up good.
IMG_0015.webp
IMG_0016.webp
IMG_0017.webp
IMG_0018.webp
IMG_0021.webp
IMG_0022.webp


IMG_0011.webp
 
Havent had a ton of time to work on the LJ the past week or so, but the time I've had has been fairly productive.

We will start with the bad. After I did my rear main I decided to start disassembly on the Front 60 for the regear, it went pretty smooth besides the inner pinion cup fought me a little bit, and got the housing cleaned up. Pulled off the bearings and I will make setup bearings here in a week or two.
1770699564378.webp

Now the bad, I went home to get my ring gear put on my Eaton Locker, and although I checked it to make sure i got the right one, I didnt inspect it super close.
1770699653185.webp

I guess UPS didn't like shipping the locker because it had the hell beaten out of the end flange, to the point where i was pretty sure there was deformation, as well as some surface rust you can see. Not a big deal if I was in a hurry to regear, but Im not. I made a phone call to ECGS, and they got me taken care of quick and painlessly and are sending me a new locker as soon as this one gets back to them. 10/10 on the customer service! So with gears on the back burner I turned towards some other tasks for the time being.

Front Axle: Upper and lower control arm mounts are welded in, lower balljoints are pressed into knuckles (no i didn't finally do it I had a buddy press them in for me I gave up). Balljoint eliminators are ready to go, getting ready to mock up steering soon. Lowered the jeep down and centered the front axle to get an Idea of what angle to mount my upper mount, decided with perpendicular to the axle since it will need to have a bend for clearance on the frame.
1770699908731.webp
1770700227004.webp


Rear Axle: not sure if I already posted about it, but I dont want my reply to clear out, but got the lower control arm mounts on, and mocked up the upper mount (ill go into a bit more detail later in this reply.

Transmission: I took some time and got the skidplate and trans pan dropped so I could put a lube locker in and a new filter, pretty easy job, but I'm still waiting on my new motor mounts to arrive so still fighting clearance issues at the moment. Got it put back on as well as the skidplate.
1770700072728.webp
1770700088707.webp


Body Lift: I already have a 1.25" body lift, however RK recommends a 1.5" for their tummy tuck, and I couldn't find any mfg that makes a 1.5" body lift, so I used some thick body panel washers to space it up another 1/4" and it did make a bit of a difference, not much but every little bit helps! (no word yet on if my MML has shipped yet).

Steering: I started doing the 3rd bolt relocation on my steering box tonight, i was hoping to be a little bit closer off the bat but i got the sleeve cut out and will have to work on it more tomorrow since i forgot my 1" drum sander attatchment thatll make this a breeze, and I dont like working that hard with a dremel. LOL
1770700471657.webp


Now the bigger task that I completed of the week, after lowering the Jeep a couple times and taking a look at clearances, I was not satisfied with the amount of up travel I would have with the rear, and after looking over a buddies LJ that was stretched, I took some inspiration from him and made some clearance.
1770700608015.webp

Cut out the shape of my upper link mounts and boxed in the open space on the crossmember with some 1/4" flat strap I had, and fully welded the Barnes gas tank relocation bracket in place to help give it some structure (im not worried at all now). I dont think I even needed to box it but it was for my own satisfaction. In addition to this I am planning to modify my rear truss a little bit unless anyone yells at me to do otherwise.
1770700783468.webp

I figure if i leave the back part of the truss intact, and cut the top at those angles, and cut down the truss to the top of those holes in it, then weld 100% around the outside I will gain approx an inch to an inch and a half of clearance between the top of the link mounts and the tub, while still keeping around 9" of separation (its around 4" at the tub). All while still having adequate space underneath the mount to bolt down my links. I think i am going to be fighting a game of clearance on this one with how low profile I'm wanting to keep it on 40's.

Lastly but certainly not least we have wheels! Picked up a new set of Raceline's tonight from a good friend of mine and im super excited to be able to finally build a tie rod lol, I've been waiting to get them so I have an easy spot to measure for square so I can build the link correctly.
1770701147512.webp

He suggested I take a look at the Apex Valve Stems, and I really like them but I was planning on running balance beads. Does anyone have experience with their quick deflate stems and beads? Can i use a filtered valve stem core with them?

 
Havent had a ton of time to work on the LJ the past week or so, but the time I've had has been fairly productive.

We will start with the bad. After I did my rear main I decided to start disassembly on the Front 60 for the regear, it went pretty smooth besides the inner pinion cup fought me a little bit, and got the housing cleaned up. Pulled off the bearings and I will make setup bearings here in a week or two.
View attachment 671283
Now the bad, I went home to get my ring gear put on my Eaton Locker, and although I checked it to make sure i got the right one, I didnt inspect it super close.
View attachment 671284
I guess UPS didn't like shipping the locker because it had the hell beaten out of the end flange, to the point where i was pretty sure there was deformation, as well as some surface rust you can see. Not a big deal if I was in a hurry to regear, but Im not. I made a phone call to ECGS, and they got me taken care of quick and painlessly and are sending me a new locker as soon as this one gets back to them. 10/10 on the customer service! So with gears on the back burner I turned towards some other tasks for the time being.

Front Axle: Upper and lower control arm mounts are welded in, lower balljoints are pressed into knuckles (no i didn't finally do it I had a buddy press them in for me I gave up). Balljoint eliminators are ready to go, getting ready to mock up steering soon. Lowered the jeep down and centered the front axle to get an Idea of what angle to mount my upper mount, decided with perpendicular to the axle since it will need to have a bend for clearance on the frame.
View attachment 671285View attachment 671288

Rear Axle: not sure if I already posted about it, but I dont want my reply to clear out, but got the lower control arm mounts on, and mocked up the upper mount (ill go into a bit more detail later in this reply.

Transmission: I took some time and got the skidplate and trans pan dropped so I could put a lube locker in and a new filter, pretty easy job, but I'm still waiting on my new motor mounts to arrive so still fighting clearance issues at the moment. Got it put back on as well as the skidplate.
View attachment 671286View attachment 671287

Body Lift: I already have a 1.25" body lift, however RK recommends a 1.5" for their tummy tuck, and I couldn't find any mfg that makes a 1.5" body lift, so I used some thick body panel washers to space it up another 1/4" and it did make a bit of a difference, not much but every little bit helps! (no word yet on if my MML has shipped yet).

Steering: I started doing the 3rd bolt relocation on my steering box tonight, i was hoping to be a little bit closer off the bat but i got the sleeve cut out and will have to work on it more tomorrow since i forgot my 1" drum sander attatchment thatll make this a breeze, and I dont like working that hard with a dremel. LOL
View attachment 671289

Now the bigger task that I completed of the week, after lowering the Jeep a couple times and taking a look at clearances, I was not satisfied with the amount of up travel I would have with the rear, and after looking over a buddies LJ that was stretched, I took some inspiration from him and made some clearance.
View attachment 671290
Cut out the shape of my upper link mounts and boxed in the open space on the crossmember with some 1/4" flat strap I had, and fully welded the Barnes gas tank relocation bracket in place to help give it some structure (im not worried at all now). I dont think I even needed to box it but it was for my own satisfaction. In addition to this I am planning to modify my rear truss a little bit unless anyone yells at me to do otherwise.
View attachment 671291
I figure if i leave the back part of the truss intact, and cut the top at those angles, and cut down the truss to the top of those holes in it, then weld 100% around the outside I will gain approx an inch to an inch and a half of clearance between the top of the link mounts and the tub, while still keeping around 9" of separation (its around 4" at the tub). All while still having adequate space underneath the mount to bolt down my links. I think i am going to be fighting a game of clearance on this one with how low profile I'm wanting to keep it on 40's.

Lastly but certainly not least we have wheels! Picked up a new set of Raceline's tonight from a good friend of mine and im super excited to be able to finally build a tie rod lol, I've been waiting to get them so I have an easy spot to measure for square so I can build the link correctly.
View attachment 671292
He suggested I take a look at the Apex Valve Stems, and I really like them but I was planning on running balance beads. Does anyone have experience with their quick deflate stems and beads? Can i use a filtered valve stem core with them?


That is pretty neat. I fought tooth and nail to make sure I had as much up travel in the rear as possible. I ended up moving my rear crossmember and floor up 6" to make room for my truss and links. I also thought about notching the truss for the rear upper links how you plan too, but sadly I got lazy and now I wish I had because it nicks the floor at full bump. Not a lot, but enough to wish i could have at least 1/2" more space
 
  • Like
Reactions: PickleLJ
Another task checked off the list tonight, I got the power steering box 3rd bolt welded back in, and mounted
IMG_0278.jpeg


I decided while I was there, I would finish getting the steering shaft, reinstalled and set to center which turned out to be about 3 hours worth of cussing until I finally figured it out for the small price of a busted clock spring. I was having problems with my steering wheel being upside down when centered with the steering box. I checked everything 3 or 4 times positive I had screwed something up when rebuilding the steering rack. Right as I was about to leave and of course as soon as I messaged all the auto savvy guys I know about it I figured out what must have happened. When you swap the Saginaw box in the LJ’s you have to drill out the little plastic pin in the steering shaft to extend it. I did this and it was difficult to move so I took it all the way off to clean it up so it was manageable. The genius move of the day was I put it back on 180 degrees from the way it was supposed to be. Problem solved and now my wheel is straight. Now I need to order a clock spring, waiting on my Genright twisted pitman arm to arrive, and will be trying to tackle the rear upper mounts and tie rod this week. Will have to see how it goes with the storm moving in. Hoping to measure for links by this weekend.
 
  • Like
Reactions: Irun and Wildman
Today I was able to knock out a couple more tasks. Got both knuckles on, hubs, and rotors, and used some scrap tube to rough out my tie rod length. Stopped by the hardware store for some new grade 8 bolts , cut my tubing and got my tie rod welded up and set to around 1/8” toed in for now. I also welded one end of my draglink for esthetic sake while waiting for my remaining steering components to arrive.

IMG_0316.jpeg


After that I tackled getting my rear upper link mounts inset in the rear truss. I cut into the truss and was able to drop the mount in an additional inch which should help with clearance at full stuff. I think it turned out good! Now just need to build some spacers for my control arm joint size and weld the lower plate into the mount, then I can measure for links! Depending on how I feel about it after welding in the lower plate, I may add in some more gusseting.

IMG_0319.jpeg

IMG_0322.jpeg
 
After setting my spacing for my links, I think I will add one brace below the middle to give it a pinch more structure but other than that I’m pretty happy with the results of the rest truss/cradle after adding the lower bracket (I guess I forgot to take a picture today). Tonight I got my twisted pitman arm painted and installed on the box, and started figuring out how far forward and low I can go, and it’s looking pretty promising. Genright claims with an outside the frame trackbar and their twisted pitman you can stretch the front up to 5”, and based off what I eyeballed tonight I believe them. Anybody got experience that can chime in? Anybody with full size 1 tons got some pictures of your steering setups/axle positions?
IMG_0344.webp

IMG_0338.webp


IMG_0341.webp
 
Been a few weeks since my last update, work got pretty busy with that storm that rolled through, but was still able to get some stuff done including, but definitely not in order
Rebuilding the rear wheel bearings and seals, new e brakes, pads, rotors, calipers and hi temp paint around these components (side note I put the lever in backwards in this pic)
IMG_0547.jpeg
IMG_0639.jpeg


Additionally I drained and removed the aluminum radiator that was in it, it had substantial rust streaking in the inside and needed to be replaced, so got a new radiator, cap, coolant overflow etc coming, I’ll hold off on reinstalling till after the grill gets painted.
IMG_0604.webp

Oil and filter replaced on the engine, rear differential filled, tcase filled, trans will get refilled after the radiator is reinstalled.
Started the rough wiring of the switch panel to my relay box, can’t do much until I’m ready for inner fenders.

IMG_0602.webp


Ordered parts for the front end and they will be here next week, my new (undamaged) Eaton locker showed up yesterday, so starting on the front axle regear this weekend, got the new ring gear on, and need to prep my setup bearings. While waiting on front end parts got the old ujoints and seals pulled off the axle shafts, and gave the hubs a quick refresh, going to hit the shafts with some sandpaper and a wire wheel to get the surface rust off

IMG_0642.webp

6601513482456729971.webp


I also took advantage of having a buddy in the shop last weekend and mounted the 40’s, I decided against powdercoat the machined look is growing on me, and put the rear tires on the axle to see what it would look like and so I could move it around a little easier.


IMG_0640.webp

And the final thing I got done was I started cleaning up my mess. Shops gunna be clean before I start the regear it’s getting a little claustrophobic with all the parts tools and dirt scattered around.
 
Update time, Seems like I'm at the stage of this project where every step forward is 2 steps back. Started out with cleaning up the shop, it was nice to have a clean workspace while I got started on the front regear.

Front Dana 60 Regear:
The Good: Got an acceptable pattern, a little on the aggressive side and got my hole drilled to run the wiring for my eaton.
The Bad: After putting on all my new bearings, and final install, the old pinion nut threads blew apart. My fault, i shoulda just swapped to the new one and ordered an additional. I picked out the old nut threads out of the pinion threads, and hoped it would be good enough to get it past the first 2-3 threads. I was wrong, now i need to run a die down it, and am waiting for a new yoke (when in rome) and nut, then i will figure out pinion preload again. Hopefully its in the acceptable range.
This kind of discouraged me so i took a break for a couple days

MML
My Brown Dog Offroad 1.5" motor mounts finally came in over the weekend, so I spent monday evening getting them installed. I am happy to report that I now have sufficient clearance between the tcase and tub, and between the transmission and skidplate.
1773200874203.png
1773200902304.png


I also was able to get a set of 97-02 Power steering lines installed to the box, So my steering is one step closer to being completed.
1773201001697.png


Last week, I was recommended to swap my upper control arm mount from the post style i had, to a clevis style mount. Tonight I cut the old one off, welded on the new one and pulled my new measurement for my Front upper CA. Hopefully can get the ball rolling on building my links this week.
1773201039946.png


I decided to just go with OEM mounts for my hood, so I lowered the jeep down and got the new latch holes drilled in the hood, and test fitted.
Since I think it will be a few weeks before I will need my grille for lining anything up, I decided to finish up disassembling the hood, grille and half doors to get them off to paint (you can see how gross looking the grille is from the cover that was on it before i bought it). That way I can get them put back on and start reassembling the grille, radiator, etc and get some of the smaller things taken care of before all i want to do is mount shocks.
1773201084198.png
1773201163098.png

1773201267102.png


I'm debating on if I want to just pull off all of the armor while I'm at it and take it to powdercoat, but with me still needing to do cutting, grinding, and welding, Im not sure if i should or wait till last.

Side Note: I found a fun little easter egg in my grille from an owner at some point. He put a hide a key in the grille.
1773201232501.png


1773201163864.webp


1773201164769.webp
 
Last edited:
Little bit more done tonight, got my axle shafts cleaned up and removed the rust, as well as put in the new u-joints and mounts/seals? Not sure what the proper term is but they snug up in the knuckle.
IMG_0883.jpeg


And for the less fun part, luckily I had a coworker that had the correct die and tap for my pinion that I screwed up the threads on.
IMG_0882.jpeg

Successfully got the threads retapped and chased, and the new yoke and pinion nut showed up today, hoping to rebuild the front axle and have everything rebuilt/sealed by end of the week on the front axle.
 
  • Like
Reactions: FarFire70
Little bit more done tonight, got my axle shafts cleaned up and removed the rust, as well as put in the new u-joints and mounts/seals? Not sure what the proper term is but they snug up in the knuckle.
View attachment 676837

And for the less fun part, luckily I had a coworker that had the correct die and tap for my pinion that I screwed up the threads on.
View attachment 676838
Successfully got the threads retapped and chased, and the new yoke and pinion nut showed up today, hoping to rebuild the front axle and have everything rebuilt/sealed by end of the week on the front axle.

I don't know the term either as I haven't had ABS on mine - but is that a tone ring (my term - maybe right, maybe not) for ABS? aka - is that a part installed for ABS?

I'm hoping to be at the state of:

ralph-ralph-wiggum.gif
 
  • Like
Reactions: PickleLJ
I don't know the term either as I haven't had ABS on mine - but is that a tone ring (my term - maybe right, maybe not) for ABS? aka - is that a part installed for ABS?

I'm hoping to be at the state of:

View attachment 676841

I think they call it the inner knuckle seal , either way, I don’t have abs and won’t be vacuum actuated hub. But I think the point is to keep the dust out of the backside of the hub. Either way it came with my seal and ujoint kit, and my uncle had the tool to punch em on, so on it goes 🤷🏼.
 
I think they call it the inner knuckle seal , either way, I don’t have abs and won’t be vacuum actuated hub. But I think the point is to keep the dust out of the backside of the hub. Either way it came with my seal and ujoint kit, and my uncle had the tool to punch em on, so on it goes 🤷🏼.


Jim Carrey Reaction GIF


I read - then walked away - and came back with my reply and forgot you mentioned this is a Dana 60 Front.... Duh - dumb on me, I was just thinking Dana 30/Dana 44 TJ axles... o_O
 
  • Like
Reactions: PickleLJ
Front axle is getting close, new gears and locker are in, new diff cover, new upper ca mount, got my hole drilled for my elocker wires, new u joints, all new seals, painted various parts, put the abs to grease zert fittings in from Barnes, and put most of the front axle back together. I did forget my dust shields for the brakes so I might pull it back apart for those.
IMG_0919.webp
 
Been getting a few things ticked off the list while waiting on links. I wanted to get the front axle as close to done as I could so i took the hubs back off to put the dust shields back on for the rotors, and picked up my new calipers. New pads and rotors get here by the weekend and i'll be able to put the front tires on for a sec to see how it will look. I also put the tie rod back on for now and mounted the axle side of the draglink.

I pulled my armor this week and I'm going to get them off to powedercoat tomorrow or Friday (waiting on one piece that is allegedly showing up tomorrow). Feels like a bit of regression but its a necessary evil :).
1773898151345.webp


Today that I cleaned up a couple spots where armor bolts wouldn't clear, any sharp edges, braces that will have to be removed for my shock towers, and undercoated a couple more parts of the tub.
I also decided it was time to finish removing the remainder of the shock/spring mounts, and clean up the inside of the frame where the control arm mounts were, I'm getting close to being done with the old mounts, but I ran out of flap disks, and ive got a couple knicks I need to fill and grind down.

1773898187807.webp


PSA. DO NOT ORDER PARTS FROM RUFF STUFF SPECIALTIES IN THE NEAR FUTURE. I am very bummed out by my experience with them, they had exactly what I was looking for. They will take your order, and provide no lead time, as well as not answer a single one of the multitude of phone calls and emails over the course of multiple weeks with no way to check or cancel your order. I had to dispute the charge because i couldn't get an answer from anyone and came across several recent reviews of people waiting 3 months or more with no product. So I shifted gears and went with a little bit different setup, running heims with a Barnes offset trackbar mount and a Genright outside the frame trackbar mount. I was able to get that tacked up tonight and get an idea of where it would sit to clear the pitman arm travel (btw 3 business days from order date to arrival. Good job Tony!). it should be close but not touch. Im waiting to weld it up until i can see where it sits for sure, I might even be able to move it forward more depending on where the axle sits. I was able to find a socket that was exactly 2 5/8" wide and with it in the mount as a spacer for tacking. It put me at 2 &11/16 which is perfect imo giving me a 1/16 wiggle room.
1773898237245.webp


The last thing today was a power steering cooler. I got a relatively universal kit and mocked it up, I wasn't planning on adding one yet but I figured i had the grill all disassembled and at paint anyways, so might as well integrate one... for the price it would be silly not to. I haven't checked on my stuff at paint but I'm guessing here in the next week or two and then I can rebuild the grille assembly.
 
Front axle is getting close, new gears and locker are in, new diff cover, new upper ca mount, got my hole drilled for my elocker wires, new u joints, all new seals, painted various parts, put the abs to grease zert fittings in from Barnes, and put most of the front axle back together. I did forget my dust shields for the brakes so I might pull it back apart for those.
View attachment 677321

That is some beef.
 
  • Like
Reactions: PickleLJ
Been about a month since my last update, hasn’t been a ton of progress, still in purgatory waiting on parts, I’m going to start with an issue in having that maybe you guys can provide some input.
When I put my rear locker in I verified that it would actuate put a notch on the outer part of the case to run the wires (the lazy route 😬) and sealed it up/filled it. I believe I checked it afterwords but can’t remember. Anyways, I tested the locker again today with it filled and the rear won’t lock. I pulled the cover off and it locks fine with power. You guys think it is an interference issue? Or is the cover pushing on the wires too hard? I didn’t have time to dig into it too deep today but curious what input you guys have. It doesn’t even sound like it’s trying to engage with the cover on.
IMG_1517.webp


Since I’ve been waiting I’ve been working on miscellaneous wiring, I’ve got the inside of the dash about 90% with wires ran from the switch panel to my relay box, flasher unit in, new clock spring, power to the switches and grounded, as well as got the cb mounted and lines ran.

IMG_1496.webp

IMG_1497.webp


My hood, grille and half doors came back from paint, so I got the grille reassembled, put the louvre back on and added the power steering cooler I may have mentioned in my last post. The half doors were their own chore as I decided to repaint the inners black (I previously painted them gray) and added locks to the doors. Figment of the uppers in the door frame proved to be its own chore but I got them fitting decently on both sides.
IMG_1361.webp

IMG_1088.webp

IMG_1123.webp

IMG_1499.webp

As of right now I am waiting on my suspension links and the powdercoat to be done, and in the mean time been doing whatever I can to simplify the process when those goods arrive.
It has been quite the project and progress has been unfortunately slow but fulfilling. Much respect to you guys who do this all the time.

IMG_1467.webp
 
Update on the Pickle LJ, We finally have some progress towards getting this rig on its own weight!
My links showed up a week or two ago, and I got them on, the front is looking pretty good, unfortunately I measure my rear lowers completely inaccurately, so the new ones will be here in a couple weeks. No big deal as it gives me time to setup the steering and trackbar up front.
IMG_1808.jpeg

IMG_1816.jpeg

IMG_1819.jpeg

I hadn’t really done anything yet to the LJ that I just wanted to be in there, so I decided to throw in the B&M shifter. It seems pretty solid although I still need to adjust it for proper engagement, the install guide was terrible though. Fitment was decent, I did have to pull it out twice to get it to not hit the dash when in park though.

IMG_1770.webp

IMG_1765.webp

Since my last post I also received some armor back from powdercoat. Unfortunately the majority of the parts that I was planning to powdercoat I just could not find an acceptable green to color match to, so those are going off this weekend to be painted. BUT my bronze goodies did get finished, and look great!
IMG_1764.webp


Now the last and possibly most daunting task I’ve (mostly) completed on the jeep yet, maximizing uptravel. I’ve been a little concerned about where the front axle would sit in relation to my steering since I ordered them, and when I got my links bolted up and dropped it to full compression, I found out it was a justified reason to be worried. I couldn’t get nearly as low as I wanted without the housing or tie rod hitting my pitman arm. Fortunately, I had some help and got recommendations from a friend, and he suggested I relocate my power steering box. With TNT customs no longer making parts, and me not exactly thrilled with the looks of the Barnes relocation kit, DIY was the only way I could go. I also wanted to keep my front bumper I already had built, I will just have to get it powdercoated again after I clearance it.
I started off with removing the factory PSB mounts, and I came across an old forum where a guy cut the front tube in half to slide it forward, I started with that but then I noticed he had a couple differences such as his pitman arm faced forward, etc. and it didn’t work for what I needed
IMG_1927.webp

So I did the next logical thing and removed the whole section of tube where the box would be after taking some measurements. I also welded an internal plate to help brace the frame where the old hole sat.
IMG_1942.webp

Had some new sleeves built , squared the frame back up, did some redneck steel geometry, messed up a ton, drilled some new holes and got it all welded back in place
IMG_2057.webp

I still have some reinforcing to do, and I need to cleanup some welds, but the box is sitting exactly where I need it to. I even kicked it back upward towards the shaft bracket to make it a little easier on myself.

With it in place for the time being, I finally was able to lower it as far as I could go and see what I was working with. I moved my tie rod down a bit, and my drag link forward, and I’m pretty happy with how it’s shaping up

?hash=1f8311bc61d64c1147f94c149db74f02.webp

IMG_2059.webp

The frame of reference I’ve been using with others has been a measurement to the seam just in front of the doors, and at compression I’m sitting at approx 42&1/4” to that seam, with approx 5” front stretch at compression (so probably closer to 4.75” at ride height). Not too bad I don’t think for 40’s and a SD 60. My limiting factor is the radiator hose at this point.


IMG_2061.webp

That’s all for now! Armor goes to paint this weekend, I’ll finish up the frame by the ps box, shocks go on order next week, and rear lower links will be here in a couple weeks 🤘

IMG_1770.webp


IMG_2062.webp
 
Been about a month since my last update, hasn’t been a ton of progress, still in purgatory waiting on parts, I’m going to start with an issue in having that maybe you guys can provide some input.
When I put my rear locker in I verified that it would actuate put a notch on the outer part of the case to run the wires (the lazy route 😬) and sealed it up/filled it. I believe I checked it afterwords but can’t remember. Anyways, I tested the locker again today with it filled and the rear won’t lock. I pulled the cover off and it locks fine with power. You guys think it is an interference issue? Or is the cover pushing on the wires too hard? I didn’t have time to dig into it too deep today but curious what input you guys have. It doesn’t even sound like it’s trying to engage with the cover on.
View attachment 683615

Since I’ve been waiting I’ve been working on miscellaneous wiring, I’ve got the inside of the dash about 90% with wires ran from the switch panel to my relay box, flasher unit in, new clock spring, power to the switches and grounded, as well as got the cb mounted and lines ran.

View attachment 683616
View attachment 683619

My hood, grille and half doors came back from paint, so I got the grille reassembled, put the louvre back on and added the power steering cooler I may have mentioned in my last post. The half doors were their own chore as I decided to repaint the inners black (I previously painted them gray) and added locks to the doors. Figment of the uppers in the door frame proved to be its own chore but I got them fitting decently on both sides.
View attachment 683623
View attachment 683624
View attachment 683621
View attachment 683622
As of right now I am waiting on my suspension links and the powdercoat to be done, and in the mean time been doing whatever I can to simplify the process when those goods arrive.
It has been quite the project and progress has been unfortunately slow but fulfilling. Much respect to you guys who do this all the time.

View attachment 683620

I was looking back at your last post to refresh myself for your latest update and then something relevant hit me....

I'm about to install a Midland MXT275 and I'd seen plenty of pics of it mounted in the driver footwell. I already ran the 12V line to the driver footwell, modified the mounting bracket to accept 1/4" bolts to go into nutserts, and I have the ethernet port ready to go into the dash switches area.

I'm all ready - just need a few minutes to bite the bullet and drill in the nutserts.....

And then I see you mounted yours in the passenger footwell!!

Oh My God Wow GIF by reactionseditor


  • I plan to run the coax up the passenger side - shorter and less complicated (not through the dash) run
  • Aux (Second OEM) Fuse block is already on the passenger side - shorter run (I can just pull back the line I ran through the dash already)
  • I haven't run ethernet yet - zero time wasted and about the same length to either footwell
Oh damn - did you just convince me to go to the passenger footwell??

Only question - how does it appear it will far in the footwell with passengers? Meaning with passenger feet, as passengers have less to pay attention to - no pedal action - verses the driver well. Seems pretty tucked up there in your install.
 
  • Like
  • Haha
Reactions: PickleLJ and Irun