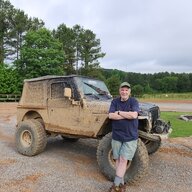
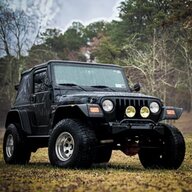
Nashville TJ's Build - Continued

So, do you think I should paint these things Yellow, Jeremy? I'm planning on black, just to make them blend in a bit. You know how I like to maintain my sleeper look... :oops:

No, but Solar Yellow is still a great color. I kept looking at one for my daughter but ended up with another Flame Red. Either are better than Silver!

Your project looks great!
 
I knocked out another detail on the rail reinforcement project today. The rear fenders attached to the armor via grade 8 hex bolts and nuts. The mounting bolt in the front goes through the Jeremy Bar, but the rear bolt is too far back to do so.

You can see what I mean here. The two 7/16" bolts in the center thread directly into the Jeremy Bar right at the stub tubes. I want the fender to attached directly and securely to the rail reinforcement bar via those bolts, and to do so I need to add a flange to the fender.

IMG_1556.webp


I considered a few ways to do this, originally planning to simply weld a 1" flat bar along the inner edge of the fender between the two braces. But that would have required a lot of welding, which would then require repainting the fender - at least the top where the powder coat would certainly burn away.

After some thought, I instead decided to use a piece of 1" angle in that same spot. That way, instead of having to run a bead along the entire edge to secure it in place, I can simply plug weld it in place. It would be a bit stronger, and with less welding it would damage less of the powder coat.

So first up, I pulled out my CAD software to design a template. The fender is flat across the top, but tapers downward toward those supports.

IMG_1560.webp


After marking the angle, then it was over to the band saw to cut the taper:

IMG_1572.webp


Here is the rough cut:

IMG_1561.webp


After the cut, I hammered the top edge down to meet the curve. This was the first fit up, after which it did not take much work at all to get everything to fit the contour.

IMG_1562.webp


Happy with the fit up, I drilled a series of holes in the new bar for the plug welds...

IMG_1573.webp


... marked the locations on the fender, and ground off the powder coat.

IMG_1574.webp


Now to destroy the powder coat... :oops:
 
Last edited:
Having pretty much resigned myself to at least touching up the fender above the plug welds, I had an idea.

After throwing down some weld through primer on the back of the new flange, I clamped everything in place to weld 'er up. I also laid the fender on a wet towel below the plug welds. My thought was that if I could keep the powder coat on the top surface cool, it would lessen the heat damage.

So, I took a shot. I also welded the corners of the flange after completing the plug welds:

IMG_1564.webp


I completed the plug welds as I always have done, throwing plenty of heat at it with the MIG to ensure a good connection.

And what do you know...

IMG_1566.webp


I was completely and pleasantly surprised by how well this worked. Truthfully - I was shocked...
 
Last edited:
Having pretty much resigned myself to at least touching up the fender above the plug welds, I had an idea.

After throwing down some weld through primer on the back of the new flange, I clamped everything in place to weld 'er up. I also laid the fender on a wet towel below the plug welds. My thought was that if I could keep the powder coat on the top surface cool, it would lessen the heat damage.

So, I took a shot. I also welded the corners of the flange after completing the plug welds:

View attachment 697396

I completed the plug welds as I always have done, throwing plenty of heat at it with the MIG to ensure a good connection.

And what do you know...

View attachment 697397

I was completely and pleasantly surprised by how well this worked. Truthfully - I was shocked...

That is impressive all around, plus the "no burn" on top. You may or may not have to touch that area up in the future, but it would be minimal, if any. Damn nice work! You'd think they would have made that fender/flare similar to that in the first place.
 
Then I took a little time and cleaned up the plug welds, after which I mounted the fenders on the rig and used a transfer punch to mark the location of the new mounting holes.

IMG_1569.webp


I knew there would not be enough room to clear a hex nut and still be able to get a wrench, or even a socket, in there to tighten the bolt. So my plan was to use 7/16" allen cap screws to secure the fender to the Jeremy Bar. To clear the head of the cap screw, I had to mill just a bit of the flange. A die grinder made short work of it:

IMG_1578.webp


And after a final fit up to make sure everything worked, all that was left was a little paint on the underside:

IMG_1579.webp


And now, watching paint dry... :)
 
Last edited:
That is impressive all around, plus the "no burn" on top. You may or may not have to touch that area up in the future, but it would be minimal, if any. Damn nice work! You'd think they would have made that fender/flare similar to that in the first place.

Thanks, Zorba!

 
Good thing you opted for the 392 to help move all that steel! 😉

I've been wondering just how much more she's gonna weigh. ...

Well, on my fat-ass rig, it's a rounding error...

🙄

But I did weigh them - about 15 pounds each...

...and don 't forget about the offsetting weight I removed by milling down the seat belt retractor covers.
 
Last edited: