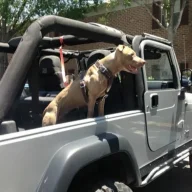
Hey guys! I know it's been a long long while since I have updated this thread, but I got some good updates. I am going to be back filling a couple of projects. This is going to be a long post, so I apologize haha.
I had some clanking coming from under the jeep. It sounded like it was a U-joint from either the axles or front drive shaft. I also thought it could be wheel hubs. I went ahead and ordered the new u-joints and hubs and set to work.
Turn out if I would have just crawled under I would have found out it was the rear drive shaft that was making the noise! Oh well haha. I guess it never hurts to put new parts on anyways.
About a month and a half ago I was finally able to pull the trigger on the Savvy/currie 4 in short arm lift! I opted to do the configure your own lift to save a few pennies. I decided to hold off on the anti-rock option, as I want to try and ORO Swayloc. I also decided to try the Savvy valved shocks. They are on the pricey side, but I hadn't seen very many reviews on them and figured it wouldn't hurt to try.
Opening these boxes made me feel like it was Christmas day, and I was the luckiest kid on the block! Funny story with the delivery, I had mixed up the shipping and billing address somehow and I got the delivery notification, but I didn't see the boxes! Turns out, they just dropped the boxes in a random hallway and didn't bother trying to call me. It was a stressful day until I found them haha.
Anyways, I got to work on the lift. It took me about a month in total to get everything together and dialed in. I would've probably had it down in less than a week, but work decided to change my timeline. For the install of the arms, I mostly just followed the thread "How-to set adjustable control arms" for most of this, and that was very helpful.
(This was before aligning the bump-stops)
I think the longest part of the install was drilling the front spring perches for the new bump-stops. I had to have gone through at least 5 or so drill bits getting that done! The mid 90 degree weather in Kansas also didn't help haha.
Next major hold up on the install was actually self-inflicted. Turns out the new currie track bar joint doesn't require very much grease in it, and I accidentally over filled it. The bushing was starting to come out the top of the joint, so I went ahead and ordered a joint rebuild kit and curries JJ rebuild tool. With the tool, I was able to make quick work replacing the old blown out joint with the rebuild kit.
I must say, those fox's look very nice in there IMO.
(Sorry for the bad lighting on this one)
And the front is finally done! (Probably took a week and a half to get to this part haha) It was nice to see it finally coming together. Too bad there was still the back that needs to be done too. I measured the axle to the body mount brackets to see if the axle was square to the frame, and to my surprise, I was only 1/16" off!
With everything I had learned from the front, I was able to make pretty quick work on the rear. The spring perches were at least a half inch thinner than the ones up front, thankfully. I also went with the Currie trackbar relocation bracket only on this.
The underbody and frame were in good shape, but the axles have a lot of surface rust. I think I'm gonna sand them down and put on a good coat of paint this winter.
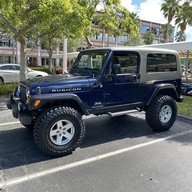
Here is the final product!
I can't tell you how happy I am with the ride! It cruises and tracks straight down the road, and it feels much more under control than before. I'm sure a lot of y'all know what I mean when I say this, but it's also a great feeling knowing I was able to do this. I think the most refreshing part of the process is finally being done haha.
I still need to put the Savvy 241 cable shifter on, but I'll be gone for work for all of September and I've got a lot of prep until then.
Future Plans:
Tailgate Reinforcement Kit
Savvy Tummy-tuck
New drive shafts (Not sure on Adams or Tom Woods yet, I've heard great things about both)
Revolution Chromoly Axle Shafts
Revolution Gears (Either 4.88 or 5.13)
Savvy Rockers w/ Side steps
New Speaker system
Replacements:
Replace clutch and throw-out bearing
Replace Cats
Replace rear main seal
I'm sure I'm forgetting some parts, but thats the gist for now!