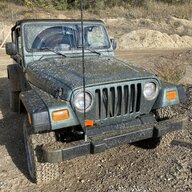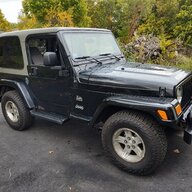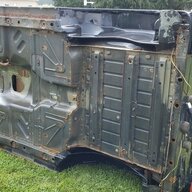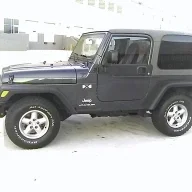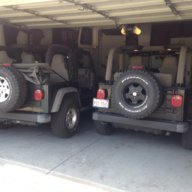
Project: Probably Shouldn't Be Alive AKA Sue

If you've ever worked on a project like this, then you will know the phrase "scope creep" well. One day in September of 2019 while I was looking at the Rear control arms I thought... You know, that rear axle is pretty gross. Heck, while I'm at it, I should really take a look at those shock mounts. And that front axle doesn't exactly look pretty either. Hmmmmm.

So one thing led to another, and I guess I accidentally de-rusted and re-finished the front and rear suspension. New gear oil for the differentials as well as a POR-15 paint job, new control arms upper and lowers - front and rear, and picked up some really cheap, and basically new, JK shocks and springs (temporary cheap lift I swear). You know, just the basics. And we haven't even gotten to the ball joints and u-joints yet!

IMG_1152.webp


IMG_1155.webp


IMG_1756.webp


IMG_2186.webp


IMG_2187.webp


IMG_2189.webp


IMG_2190.webp


IMG_2192.webp


IMG_2194.webp


IMG_2210.webp


IMG_2211.webp


IMG_2214.webp


IMG_2215.webp


IMG_2239.webp


IMG_2241.webp


IMG_2266.webp


IMG_2490.webp


IMG_2494.webp


IMG_2495.webp


IMG_2496.webp


IMG_2498.webp


IMG_2561.webp


IMG_2563.webp


IMG_2609.webp


IMG_3129.webp


IMG_3130.webp


IMG_3133.webp


IMG_3137.webp


IMG_3138.webp


IMG_3164.webp


IMG_3250.webp


IMG_3252.webp


IMG_3256.webp


IMG_3287.webp


IMG_3288.webp


IMG_3293.webp
 
Oh I got those shock bolts out, you'll see in a second.
Sweet! Those of us in the rustbelt always seem to have major issues with these!
I am considering an engine swap, but to be honest I would like to just drive this thing before anything else, even if it means more work down the line!
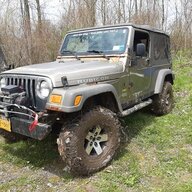
Now that I think about it, this is probably a really good idea. You can shake out the rebuild first without introducing new issues.

Have fun!
 
After finishing up the axles I took a bit of time to clean up the knuckles and the axle ends. Put brand new Spicer balljoints in to be safe as well. And you know... While I'm at it, I might as well throw in new U-joints on the entire vehicle. Needless to say I'll be pretty sad if I get some mean driving vibrations after all of this hah!

I also threw on a cheap ~2.5" lift via JK springs and shocks as well as some bump stop extensions. After all that was done the car was really starting to clean up! But man did that steering look kinda crusty... I know! A ZJ tie-rod conversion and all new balljoints! Man this is starting to get expensive. At least that frame looks pretty good next to the Gladiator.

IMG_3367.webp


IMG_3368.webp


IMG_3374.webp


IMG_3375.webp


IMG_3441.webp


IMG_3443.webp


IMG_3558.webp


IMG_3680.webp


IMG_3962.webp


IMG_3965.webp


IMG_3969.webp


IMG_3979.webp


IMG_3984.webp


IMG_3985.webp
 
After finishing the suspension and driveline work, I thought it might be a good idea to change out the clutch and bearing on the transmission. Well I can tell you it wasn't exactly pretty. I ended up replacing the flywheel, the pressure plate, throwout bearing, and rear main seal. I used Luk parts for all of the transmission components as I have seen about 100 different threads where they are recommended! I'm excited to see how this thing shifts once I get it back to one piece!

IMG_2660.webp


IMG_2661.webp


IMG_2663.webp


IMG_2665.webp


IMG_2671.webp


IMG_2672.webp


IMG_2735.webp


IMG_2738.webp


IMG_2739.webp


IMG_2764.webp


IMG_2767.webp


IMG_2771.webp


IMG_2776.webp


IMG_2781.webp


IMG_2788.webp


IMG_2891.webp


IMG_2949.webp


IMG_2980.webp


IMG_2984.webp


IMG_2990.webp
 
After a compression test on all of the cylinders I cleaned it up (or as much as I could anyway), and prepped the engine for a quick paint job. Honestly I wasn't looking for anything huge out of this, just better than peeling, chipping grayed paint. I think it turned out pretty well. A weird thing I found out while looking at the engine is that this is actually a 2.5L out of a '93 YJ based on the production stamp. So that's strange, I guess the PO had replaced the original for some reason.

IMG_0375.webp


IMG_0385.webp


IMG_2991.webp


IMG_3012.webp


IMG_3014.webp


IMG_3016.webp


IMG_3018.webp


IMG_3020.webp


IMG_3022.webp


IMG_3049.webp


IMG_3051.webp


IMG_3052.webp


IMG_3055.webp


IMG_3058.webp


IMG_3069.webp


IMG_3070.webp


IMG_3841.webp
 
WOW! Damn my wallet hurts just reading this thread. Good job, cant wait to see it all back together!
Honestly it's been pretty cheap in terms of materials. According to my spreadsheet I'm about $4K into it, including the cost of the Jeep. The most expensive part is the hundreds and hundreds of hours of labor haha.
 
  • Like
Reactions: Vasq and Elyse8743
Don't use self-tapping screws when replacing the floors. There was basically nothing supporting these sheets, as the floor supports and the original floors were rusted through. Check out that mouse nest! There will be more of those...

1.JPG


2.jpg


4.jpg


5.jpg


6.jpg


7.jpg


8.jpg


9.jpg


10.jpg


11.jpg


12.jpg


13.jpg


14.jpg


3.jpg
 
Last edited:
  • Like
Reactions: TJ Starting
For those of you who have thought about replacing your floor, let me tell you it is a lot of work. When you do all 4 panels and the torque boxes it can be a real pain. I would say the best thing to do is sand/grind back any rusted metal and FIND THOSE SPOT WELDS. Your job will be SO much easier if you do that rather than grinding away at the body. So here is the passenger side.
1.webp
2.webp
3.webp
4.webp
5.webp
6.webp
7.webp
8.webp
9.webp
10.webp
11.webp
12.webp
13.webp
14.webp
15.webp
16.webp
17.webp
18.webp
19.webp
20.webp
 
Lookin' good. Keep fighting the good fight.

How would you rate the fitment of the KeyParts panels and torque boxes?
 
Lookin' good. Keep fighting the good fight.

How would you rate the fitment of the KeyParts panels and torque boxes?
Thanks! I would say that the panels are well made to fit. The hardest part was the rear floors. You only have the body side flange to align the panel, so there is a lot of check, cut check. The torque boxes are good as well. The bolt holes on it are all SAE and they fit reasonably well to the body. Some bending was needed and they were not perfectly OEM, but with some self-tappers they went in well enough.
 
Good to know. I'm on the cusp of pulling the trigger on the 6pc set for the "Shoulda been a partout" project that my son, BIL, and I are currently working on.
 
  • Like
Reactions: Bennythebull
Here is the driver's side. It took me a solid 2 months to finish the passenger's side just because I had to keep coming back to fix little things. After I learned to attack the spot welds and started to just cut rust rather than trying to repair it went a lot faster.

1.jpg


2.jpg


3.jpg


4.jpg


5.jpg


6.jpg


7.jpg


8.jpg


9.jpg


10.jpg


11.jpg


12.jpg


13.jpg


14.jpg


15.jpg


16.jpg


17.jpg


18.jpg


19.jpg


20.jpg
 
Nice to see someone taking a project on like this and not cutting any corners to get it finished.
Proud of you and it looks really FUN !!!
 
  • Like
Reactions: Bennythebull