Nashville TJ's Build - Continued

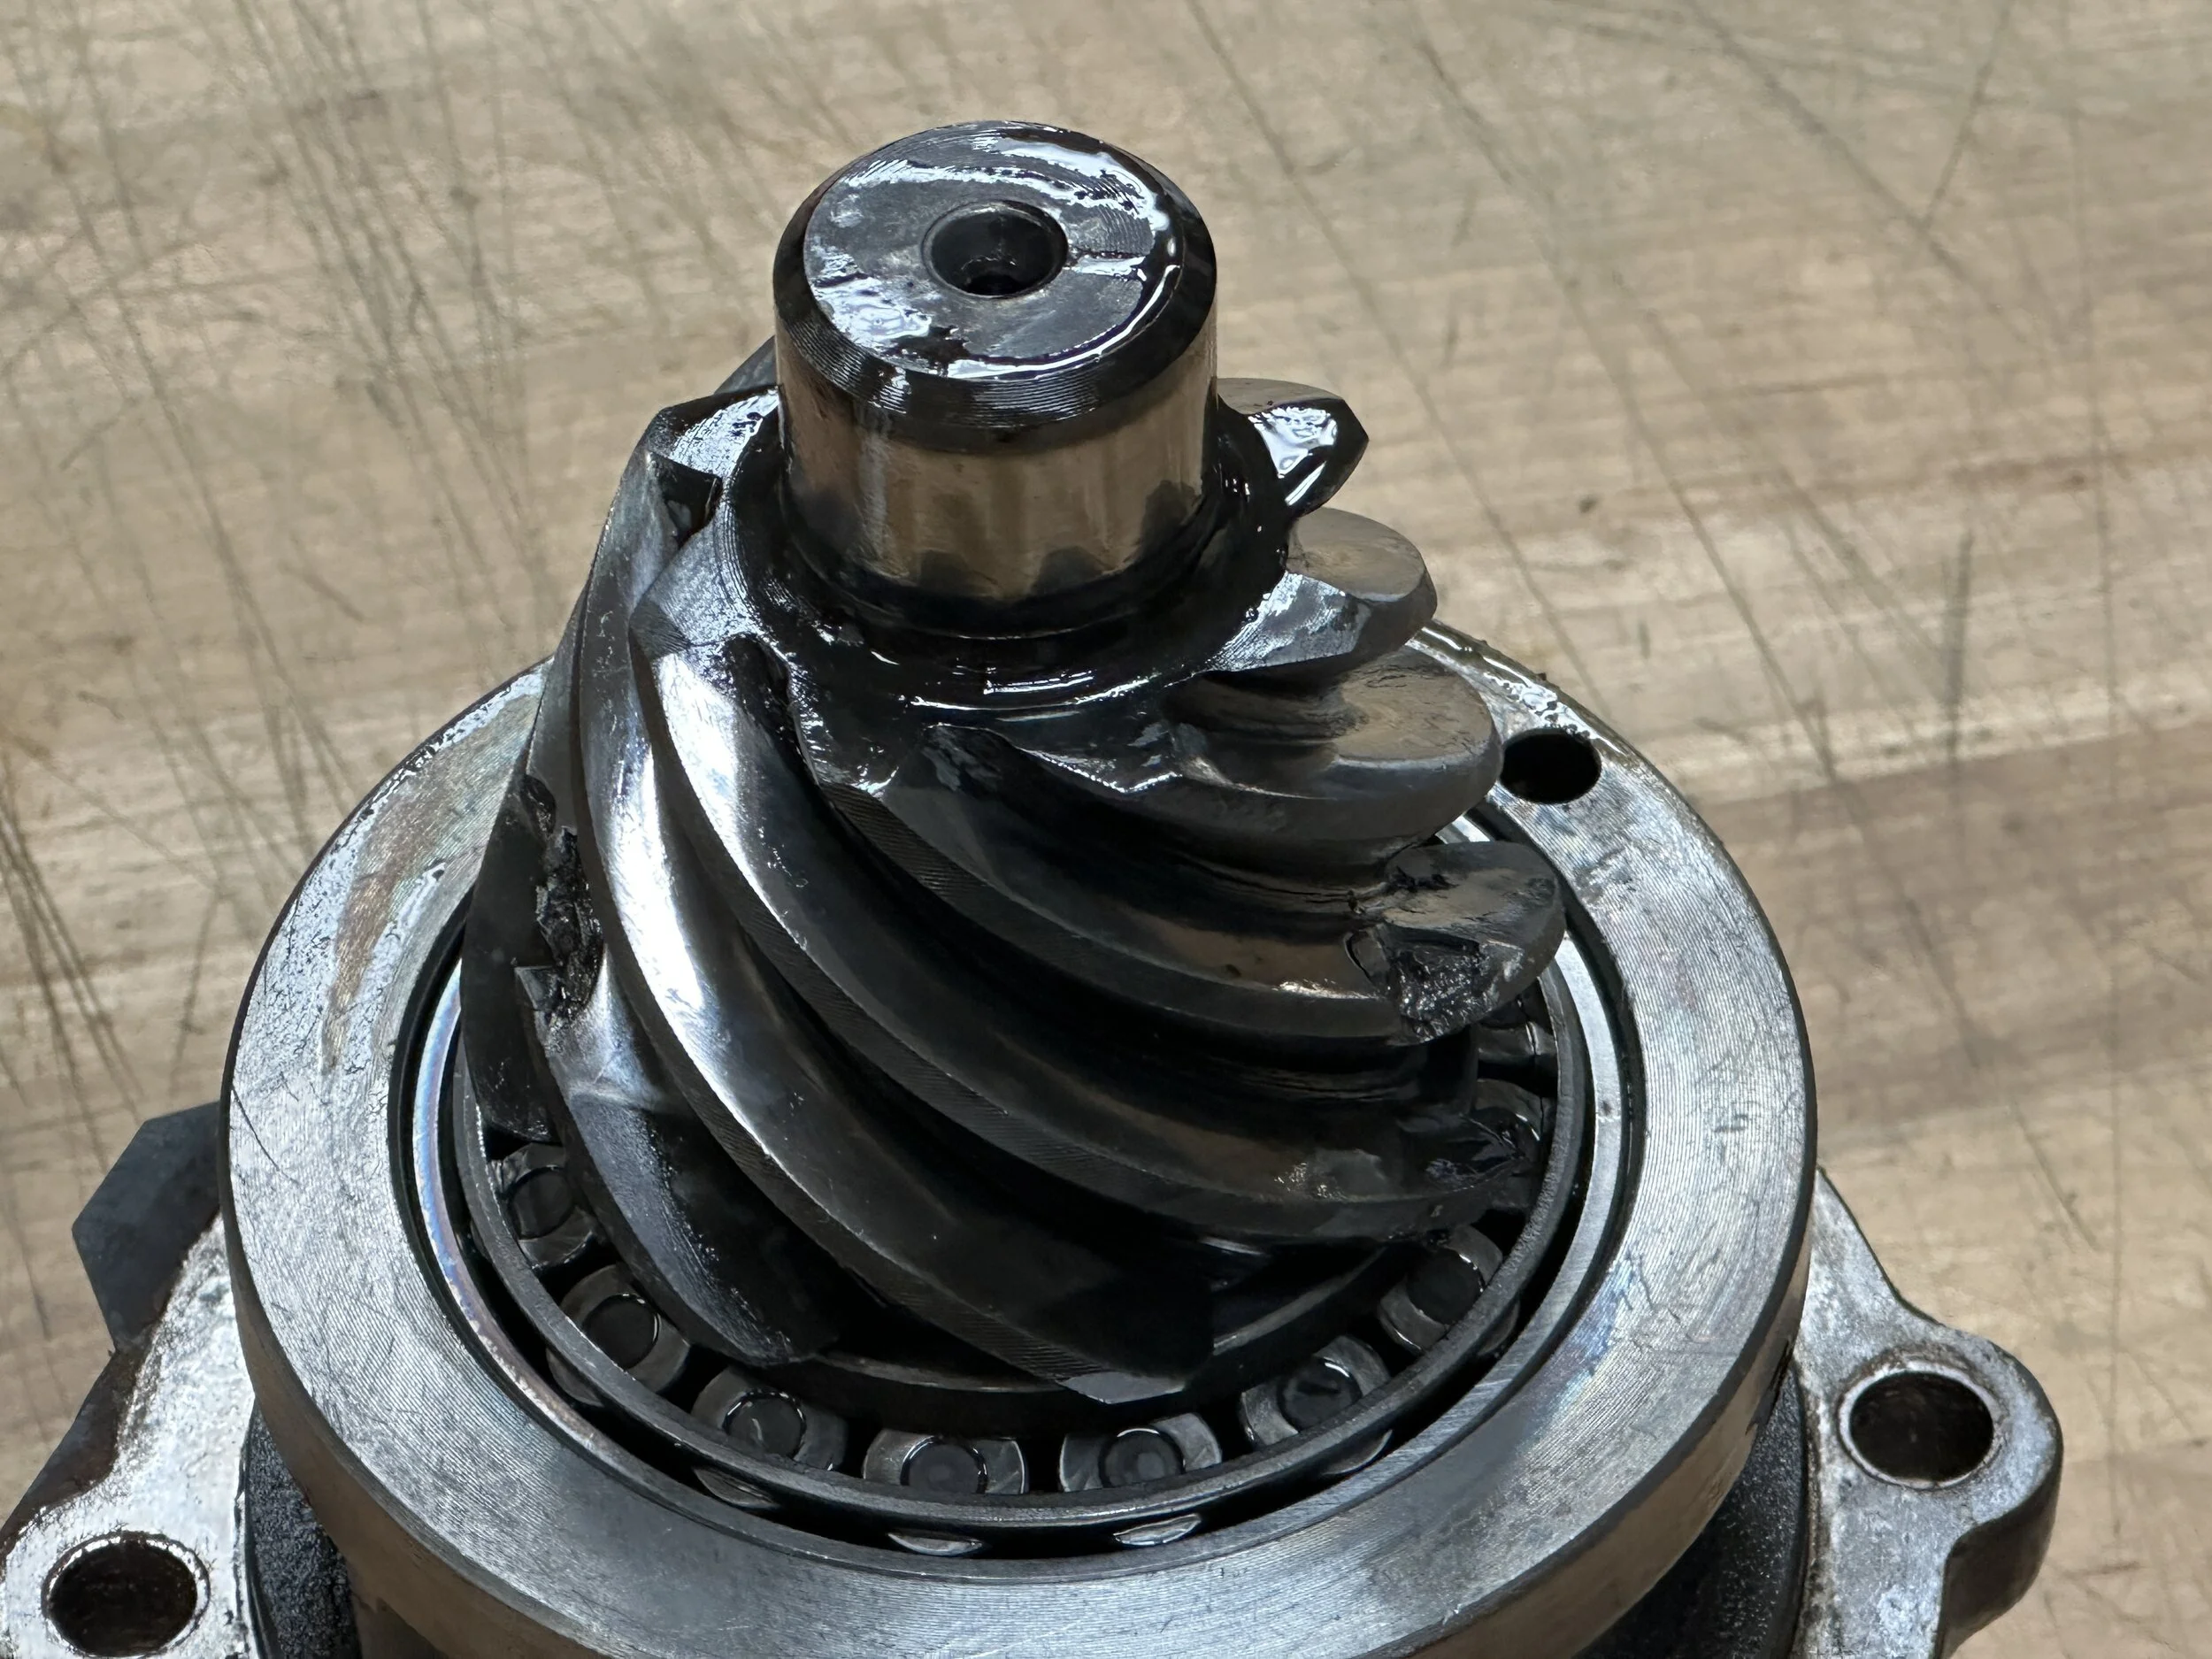
And here it is. Two teeth toast - the big missing chunks - and two more teeth marred with a bit of a divot. It's been making noise for well over a year, maybe even two, so I think it has been running like this for a while.

IMG_5213.webp


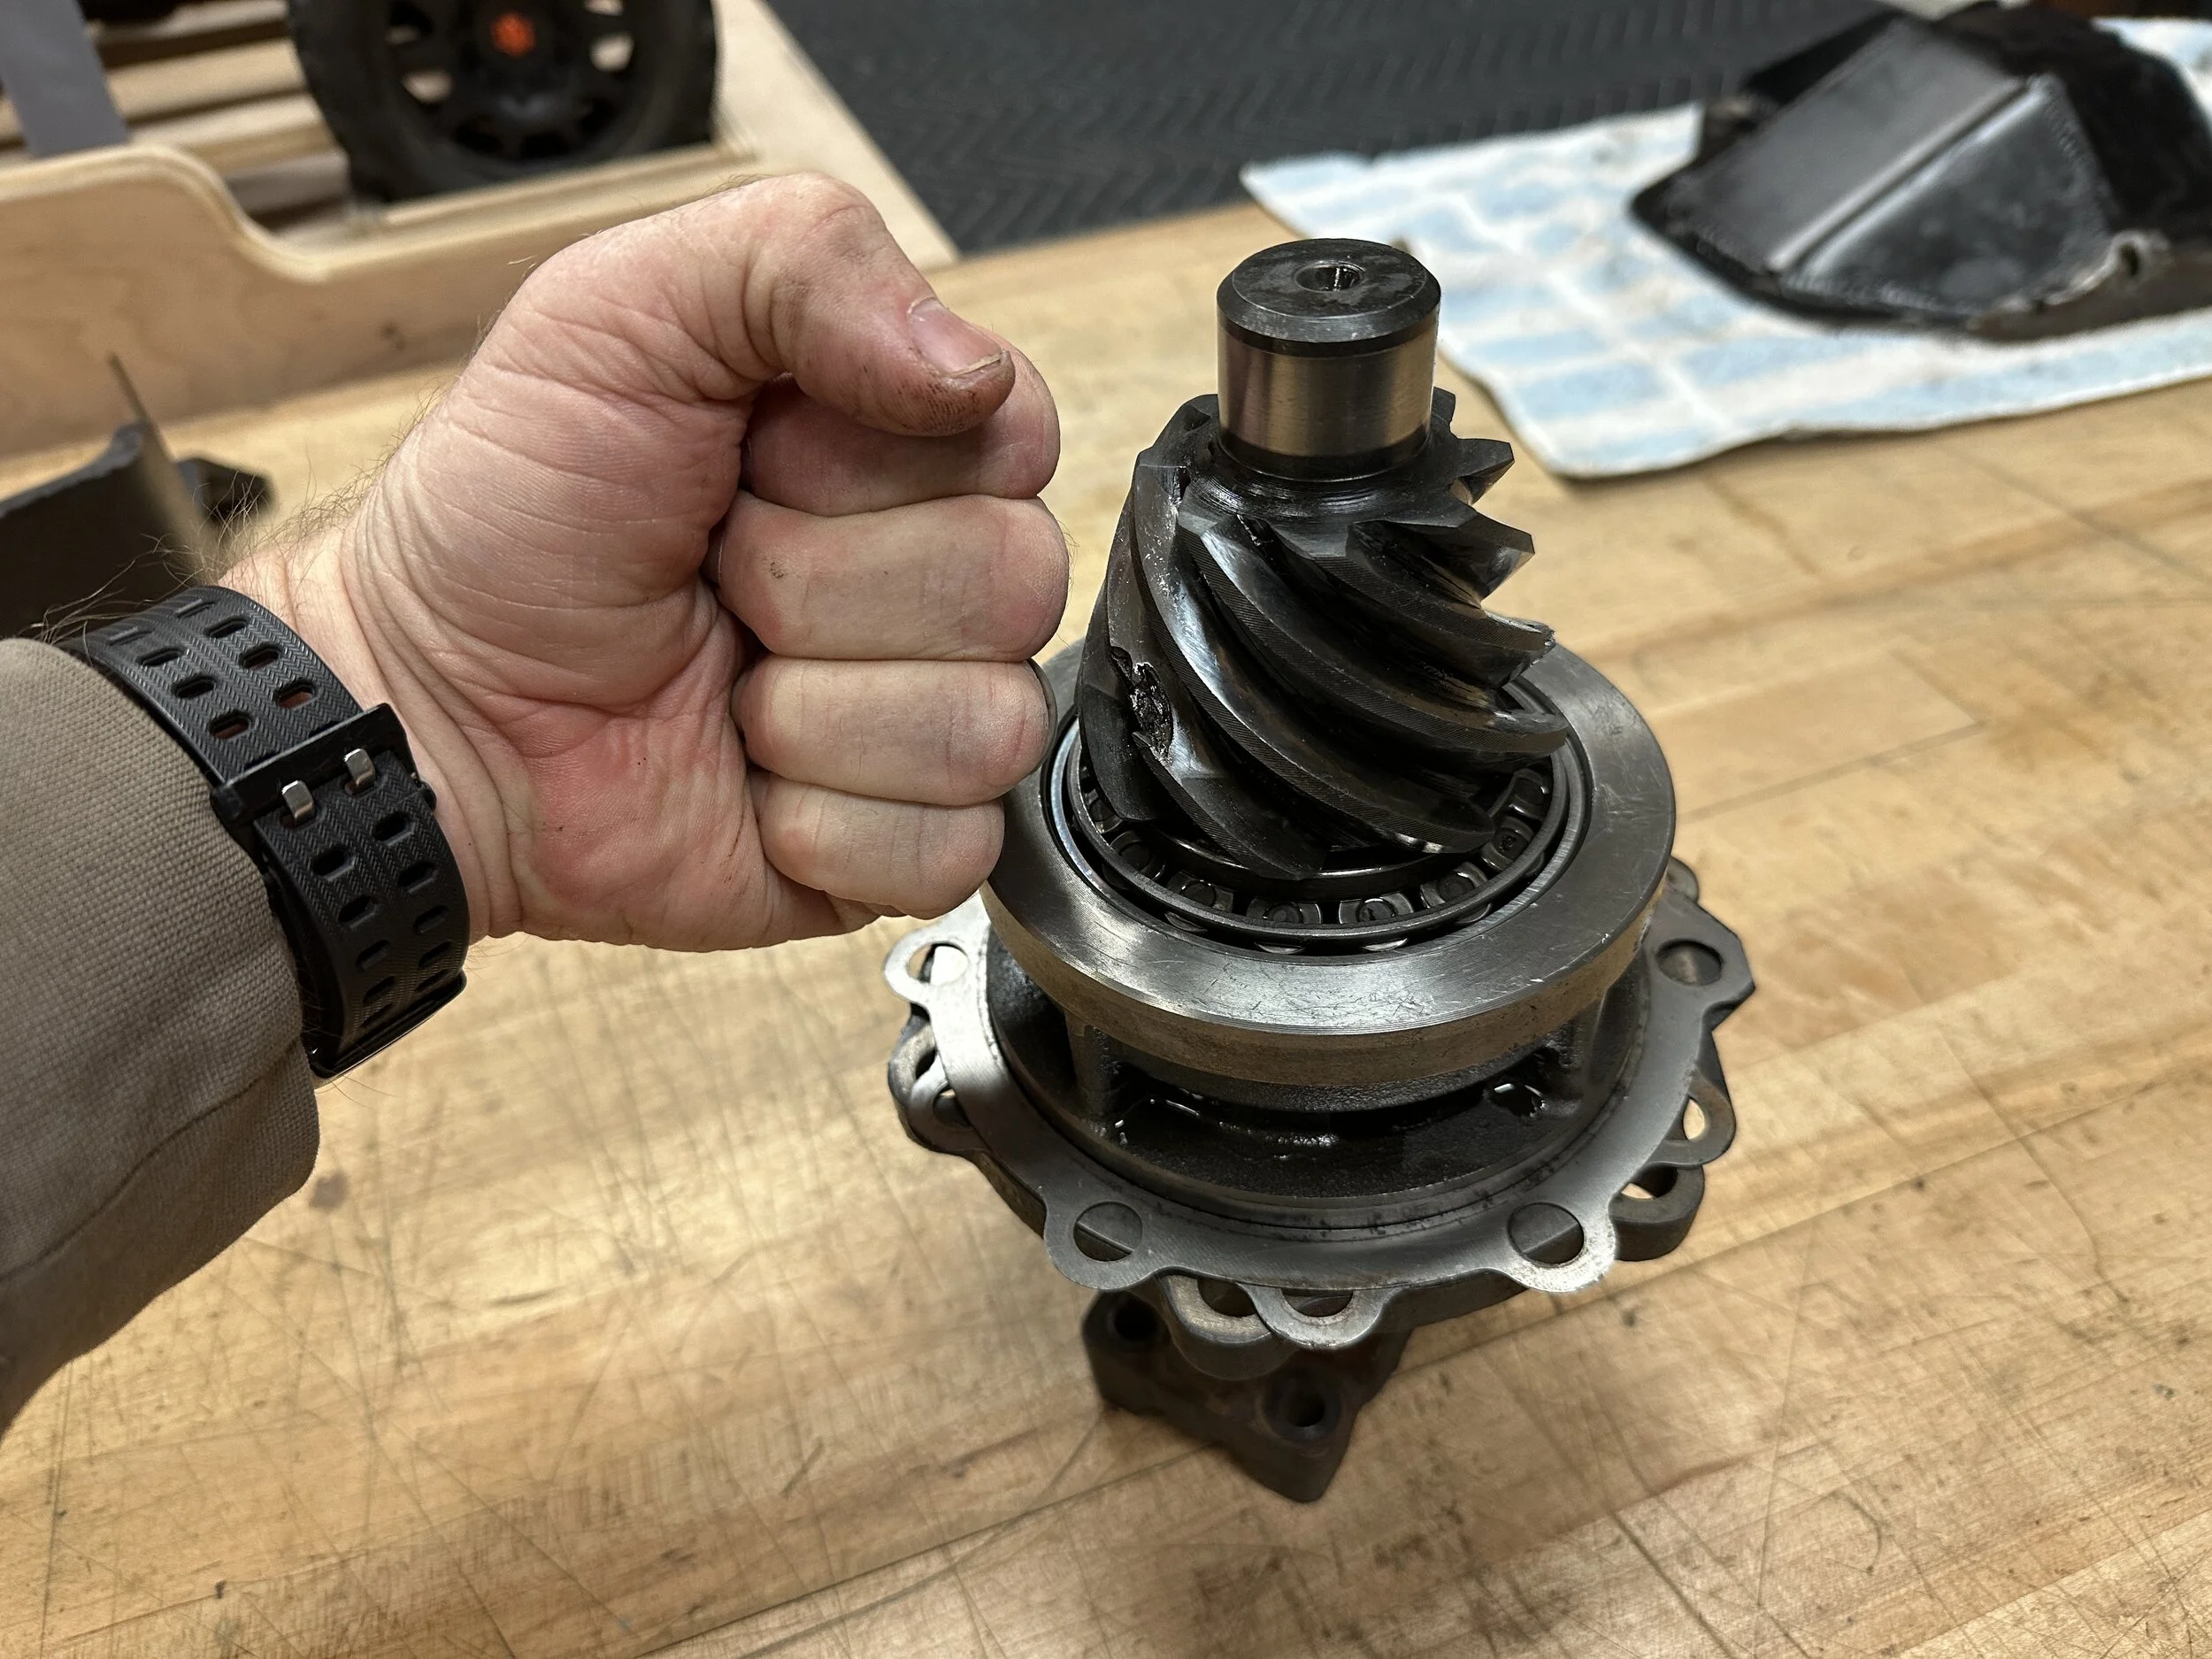
And Rory was right. I can't believe this little, tiny pinion gear lasted this long...

IMG_5220.webp


:)
 
And here it is. Two teeth toast - the big missing chunks - and two more teeth marred with a bit of a divot. It's been making noise for well over a year, maybe even two, so I think it has been running like this for a while.

View attachment 585952

And Rory was right. I can't believe this little, tiny pinion gear lasted this long...

View attachment 585953

:)

Was Rory thinking 14 bolts though?


So he doesn't like ARB's either from the video.


I hadn’t watched that one. He was complaining about the 5’s in the prior video.

I agree with him on too many air connections though. Big reason why I eliminated as many as I could on my last air system revamp.
 
As Scott ( @sab ) recently said, it's the little victories that keep us from going crazy during the big projects - so here's mine. I carry spare left and right Johnny-Joints, so fixing my busted end was just a matter of anti-seizing the right-handed spare...

IMG_5225.webp


...and threading it in:

IMG_5226.webp


Now I'll order a replacement spare joint.

The gearset should be here tomorrow. Then the real fun begins. :oops:
 
As Scott ( @sab ) recently said, it's the little victories that keep us from going crazy during the big projects - so here's mine. I carry spare left and right Johnny-Joints, so fixing my busted end was just a matter of anti-seizing the right-handed spare...

View attachment 586289

...and threading it in:

View attachment 586290

Now I'll order a replacement spare joint.

The gearset should be here tomorrow. Then the real fun begins. :oops:

Is the housing getting trashed too? A center ball is half the price. Nevermind,by the time you get a center ball and a rebuild it isn't much more to just have a whole new joint
 
Is the housing getting trashed too? A center ball is half the price. Nevermind,by the time you get a center ball and a rebuild it isn't much more to just have a whole new joint

The housing is fine, as it has been in previous, similar failures. It's just a whole bunch easier just to replace the entire joint.
 
I spent some time today disassembling the 14-bolt in prep for the re-gear. First order of business, pressing the old pinion gear out of the pinion gear assembly:

IMG_5276.JPG


And then popping out the outer pinion bearing and seal with a brass punch. I don't need to bother pressing the inner bearing off of the old pinion gear since I am not reusing it.

IMG_5280.JPG


There are two sets of shims for the pinion gear. There is an inner set which sets the distance between the two primary pinion bearings, and therefore sets the pinion preload (the small round shims), and then the larger shims which position the pinion assembly housing within the diff, and sets the pinion depth.

These are the pinion bearing shims I pulled.

IMG_5279.JPG


To give me a decent head start on the new setup, I carefully mic'd and recorded both sets, and will replicate this on the first setup which should get me close.

IMG_5274.JPG


Next I pulled the axle shafts. Since the 14-bolt is a full-floater, and nice advantage is that I don't have to disassemble the brakes to pull the shafts:

IMG_5285.JPG


There is a big difference in the lengths of the passenger and driver's side shafts in the 14-bolt. No chance of confusing these beasts on reassembly.

IMG_5287.JPG


And then on to the carrier. There are no carrier shims on a 14-bolt. You set carrier bearing pre-load and backlash using the carrier bearing adjusters which position the carrier. This makes setting up a 14-bolt a lot easier than say a little Dana 60 ;). No case spreader required.

The adjusters are the narrow cylinders with the slots you see outboard of each bearing. They are threaded and adjusted by rotating them in or out. Loosen them just a few notches and the carrier comes in and out easily.

IMG_5288.JPG


And out comes the carrier. No small feat as this thing is massive:

IMG_5290.JPG


With the carrier removed you can see another reason the 14-bolt is so strong. That bearing in the center is a third bearing which supports the end of the pinion gear, meaning the pinion is supported by 3 bearings. This guarantees that the pinion gear will never fail. :rolleyes:

IMG_5289.JPG


And finally, an empty diff. Now the fun part begins...

IMG_5292.JPG
 
Well, I guess I need to get started now…

View attachment 586710

I’ll have to brush up a bit on the 14 bolt procedures…

Hopefully Yukon sent everything without anything missing.

I went back and read your original posts for the 14 bolt install and the "shaving". I remember seeing and thinking "that's a lot of material that's gone" and this time again, I could not help but think the same thing. Is that a common thing to do for folks wanting and installing this axle?
 
  • Like
Reactions: MikeE024
I spent some time today disassembling the 14-bolt in prep for the re-gear. First order of business, pressing the old pinion gear out of the pinion gear assembly:

View attachment 586871

And then popping out the outer pinion bearing and seal with a brass punch. I don't need to bother pressing the inner bearing off of the old pinion gear since I am not reusing it.

View attachment 586872

There are two sets of shims for the pinion gear. There is an inner set which sets the distance between the two primary pinion bearings, and therefore sets the pinion preload (the small round shims), and then the larger shims which position the pinion assembly housing within the diff, and sets the pinion depth.

These are the pinion bearing shims I pulled.

View attachment 586874

To give me a decent head start on the new setup, I carefully mic'd and recorded both sets, and will replicate this on the first setup which should get me close.

View attachment 586875

Next I pulled the axle shafts. Since the 14-bolt is a full-floater, and nice advantage is that I don't have to disassemble the brakes to pull the shafts:

View attachment 586876

There is a big difference in the lengths of the passenger and driver's side shafts in the 14-bolt. No chance of confusing these beasts on reassembly.

View attachment 586877

And then on to the carrier. There are no carrier shims on a 14-bolt. You set carrier bearing pre-load and backlash using the carrier bearing adjusters which position the carrier. This makes setting up a 14-bolt a lot easier than say a little Dana 60 ;). No case spreader required.

The adjusters are the narrow cylinders with the slots you see outboard of each bearing. They are threaded and adjusted by rotating them in or out. Loosen them just a few notches and the carrier comes in and out easily.

View attachment 586878

And out comes the carrier. No small feat as this thing is massive:

View attachment 586879

With the carrier removed you can see another reason the 14-bolt is so strong. That bearing in the center is a third bearing which supports the end of the pinion gear, meaning the pinion is supported by 3 bearings. This guarantees that the pinion gear will never fail. :rolleyes:

View attachment 586880

And finally, an empty diff. Now the fun part begins...

View attachment 586881

Nice write up so far Jeff. I’m looking forward to the rest. I’m in the middle of my HP 30 at present. It also uses pinion preload shims instead of a crush sleeve (which took me a minute to figure out). Because I’m so new to this stuff, it seems like every axle has some new thing to learn about. But the baby Dana 30 carrier and ring gear sure are easy to throw in and out😁The first full gear set up I did on my own was the AAM 11.5 in my tow rig last year. That was a beast like your 14 bolt. The carrier and ring gear are 75#. But, at least, and also like your axle, it has carrier bearing adjustors instead of shims. What gears are you using?

 
Hopefully Yukon sent everything without anything missing.

I went back and read your original posts for the 14 bolt install and the "shaving". I remember seeing and thinking "that's a lot of material that's gone" and this time again, I could not help but think the same thing. Is that a common thing to do for folks wanting and installing this axle?

Very common. The only issue other than weight with the 14 bolt is the clearance. This solves it! Ballistic started dong this yeeeears ago on Pirate. This is still my favorite junk yard axle. This axle shaved with a spool, Aluminum hubs and light weight brake kit is hard to beat for the cost in my opinion.

Ditto great write up!
 
Hopefully Yukon sent everything without anything missing.

I went back and read your original posts for the 14 bolt install and the "shaving". I remember seeing and thinking "that's a lot of material that's gone" and this time again, I could not help but think the same thing. Is that a common thing to do for folks wanting and installing this axle?

Yukon stuff, but through ECGS. They are usually pretty good about making sure everything is there, and that was the case here. I’m not crazy about Yukon stuff, Sri. The gears in there were Yukon and the pinion gear failed, so there’s that. But the reason I went this way is that the ring gear needs to be milled down by about a half inch to fit the setup. ECGS does that, and only with the Yukon gear sets.

I’ve actually always worried about that plate that gets welded to the bottom of the diff. But, it’s AR500, and as much as I beat on it, it is not even scratched - and still dead flat. The bottom trailing edge of the diff cover - not so much. I had to do a bit of work to get the bolts out.

The mod cuts a full 2” off the bottom of the diff, even with adding back that half inch plate. It also makes it flat so it slides much better. It does make a big difference. And for me - who enjoys doing fab work like that - it was up there with the most fun projects I’ve done on the rig. If you reread that project you probably saw why. The challenge of doing the shave was the main reason I went that route as opposed to buying an already built axle.

Edit: Here is a good pic showing the clearance you add with the shave:

Jeep - 14 Bolt 8 (6).JPG
 
Last edited:
Nice write up so far Jeff. I’m looking forward to the rest. I’m in the middle of my HP 30 at present. It also uses pinion preload shims instead of a crush sleeve (which took me a minute to figure out). Because I’m so new to this stuff, it seems like every axle has some new thing to learn about. But the baby Dana 30 carrier and ring gear sure are easy to throw in and out😁The first full gear set up I did on my own was the AAM 11.5 in my tow rig last year. That was a beast like your 14 bolt. The carrier and ring gear are 75#. But, at least, and also like your axle, it has carrier bearing adjustors instead of shims. What gears are you using?

The 14 bolt is usually a crush sleeve setup, I believe, but when I built it I converted over to shims. To me, it is easier to dial it in, and no worries if you ever have to remove and reinstall the yoke.

I’m running 5.38’s.
 
Very common. The only issue other than weight with the 14 bolt is the clearance. This solves it! Ballistic started dong this yeeeears ago on Pirate. This is still my favorite junk yard axle. This axle shaved with a spool, Aluminum hubs and light weight brake kit is hard to beat for the cost in my opinion.

Ditto great write up!

Thanks Flux.
 
The 14 bolt is usually a crush sleeve setup, I believe, but when I built it I converted over to shims. To me, it is easier to dial it in, and no worries if you ever have to remove and reinstall the yoke.

I’m running 5.38’s.

When I did my AAM 11.5 crush sleeve, I thought that was an unnecessarily finicky set up, especially since it took a 3/4” impact capable of 1500ft.lbs. to do it. However, having just done pre-load shims for the first time, I may actually prefer the crush sleeve. I had to take it apart a bunch of times to walk it in to the right rotational torque at the pinion nut toque spec. Also, I was unaware that such conversions were a thing. I wonder what else I’ll learn today…