Nashville TJ's Build - Continued

Well, crisis perhaps averted.

I looked on ECGS's site to check on replacing the locker. "Call For Availability" was the price... :oops:

So I called for availability. None in stock, waiting for delivery with an unknown expected date. Maybe...March. Keeps getting better and better.

But then I told they ECGS guy what happened, and he told me that they have seen this before on ARB's. He said folks correct it by tig-welding the inner bearing race to the journal...or dimpling the journal. And the light went off. I can't count the number of times I've seen Blaine write about dimpling ball joints to correct loosening issues.

So, with nothing to lose except for an indeterminant wait to spend $1,500, I gave it a shot.

First, to ensure I got some consistency with the dimpling, I did some mes'rin and mrk'in:
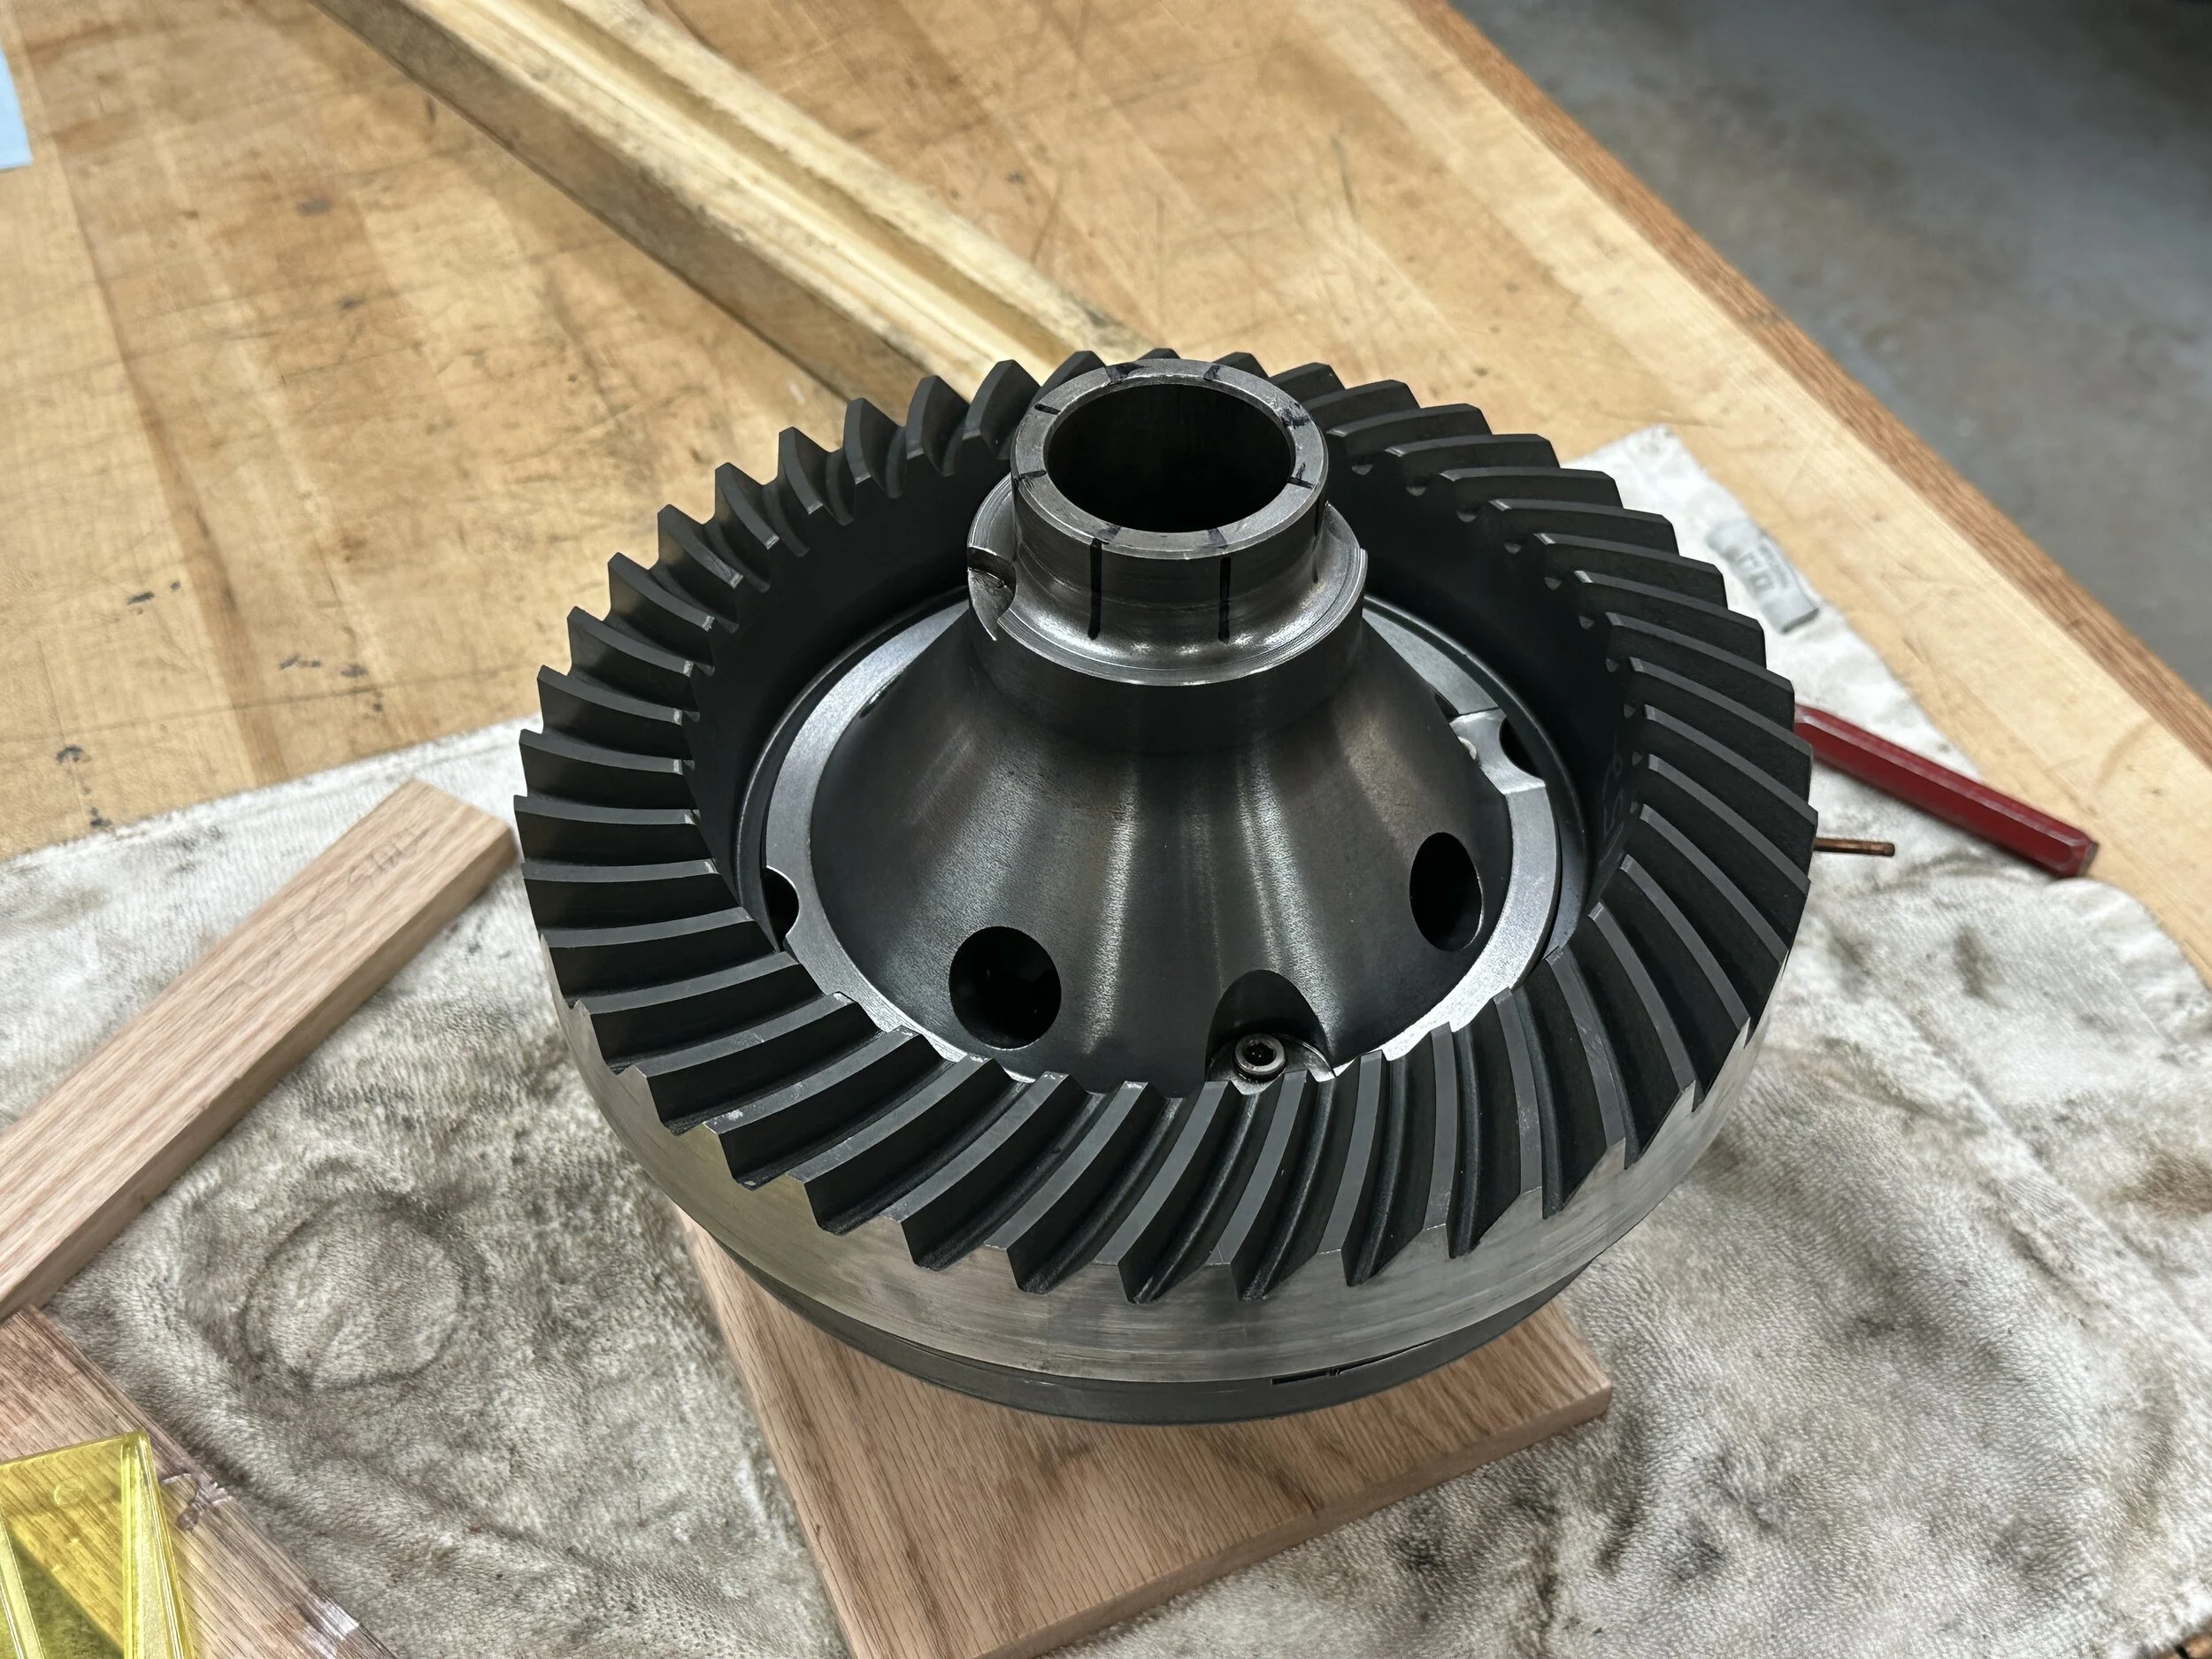
IMG_5310.JPG


Then I went to town with a quality hardened punch and a heavy ball peen. I tried to keep everything even by striking each spot three times, attempting to keep the force consistent. Every so often I tested the fit, and after about ten dimples I could no longer slide the bearing on. This is the final result:
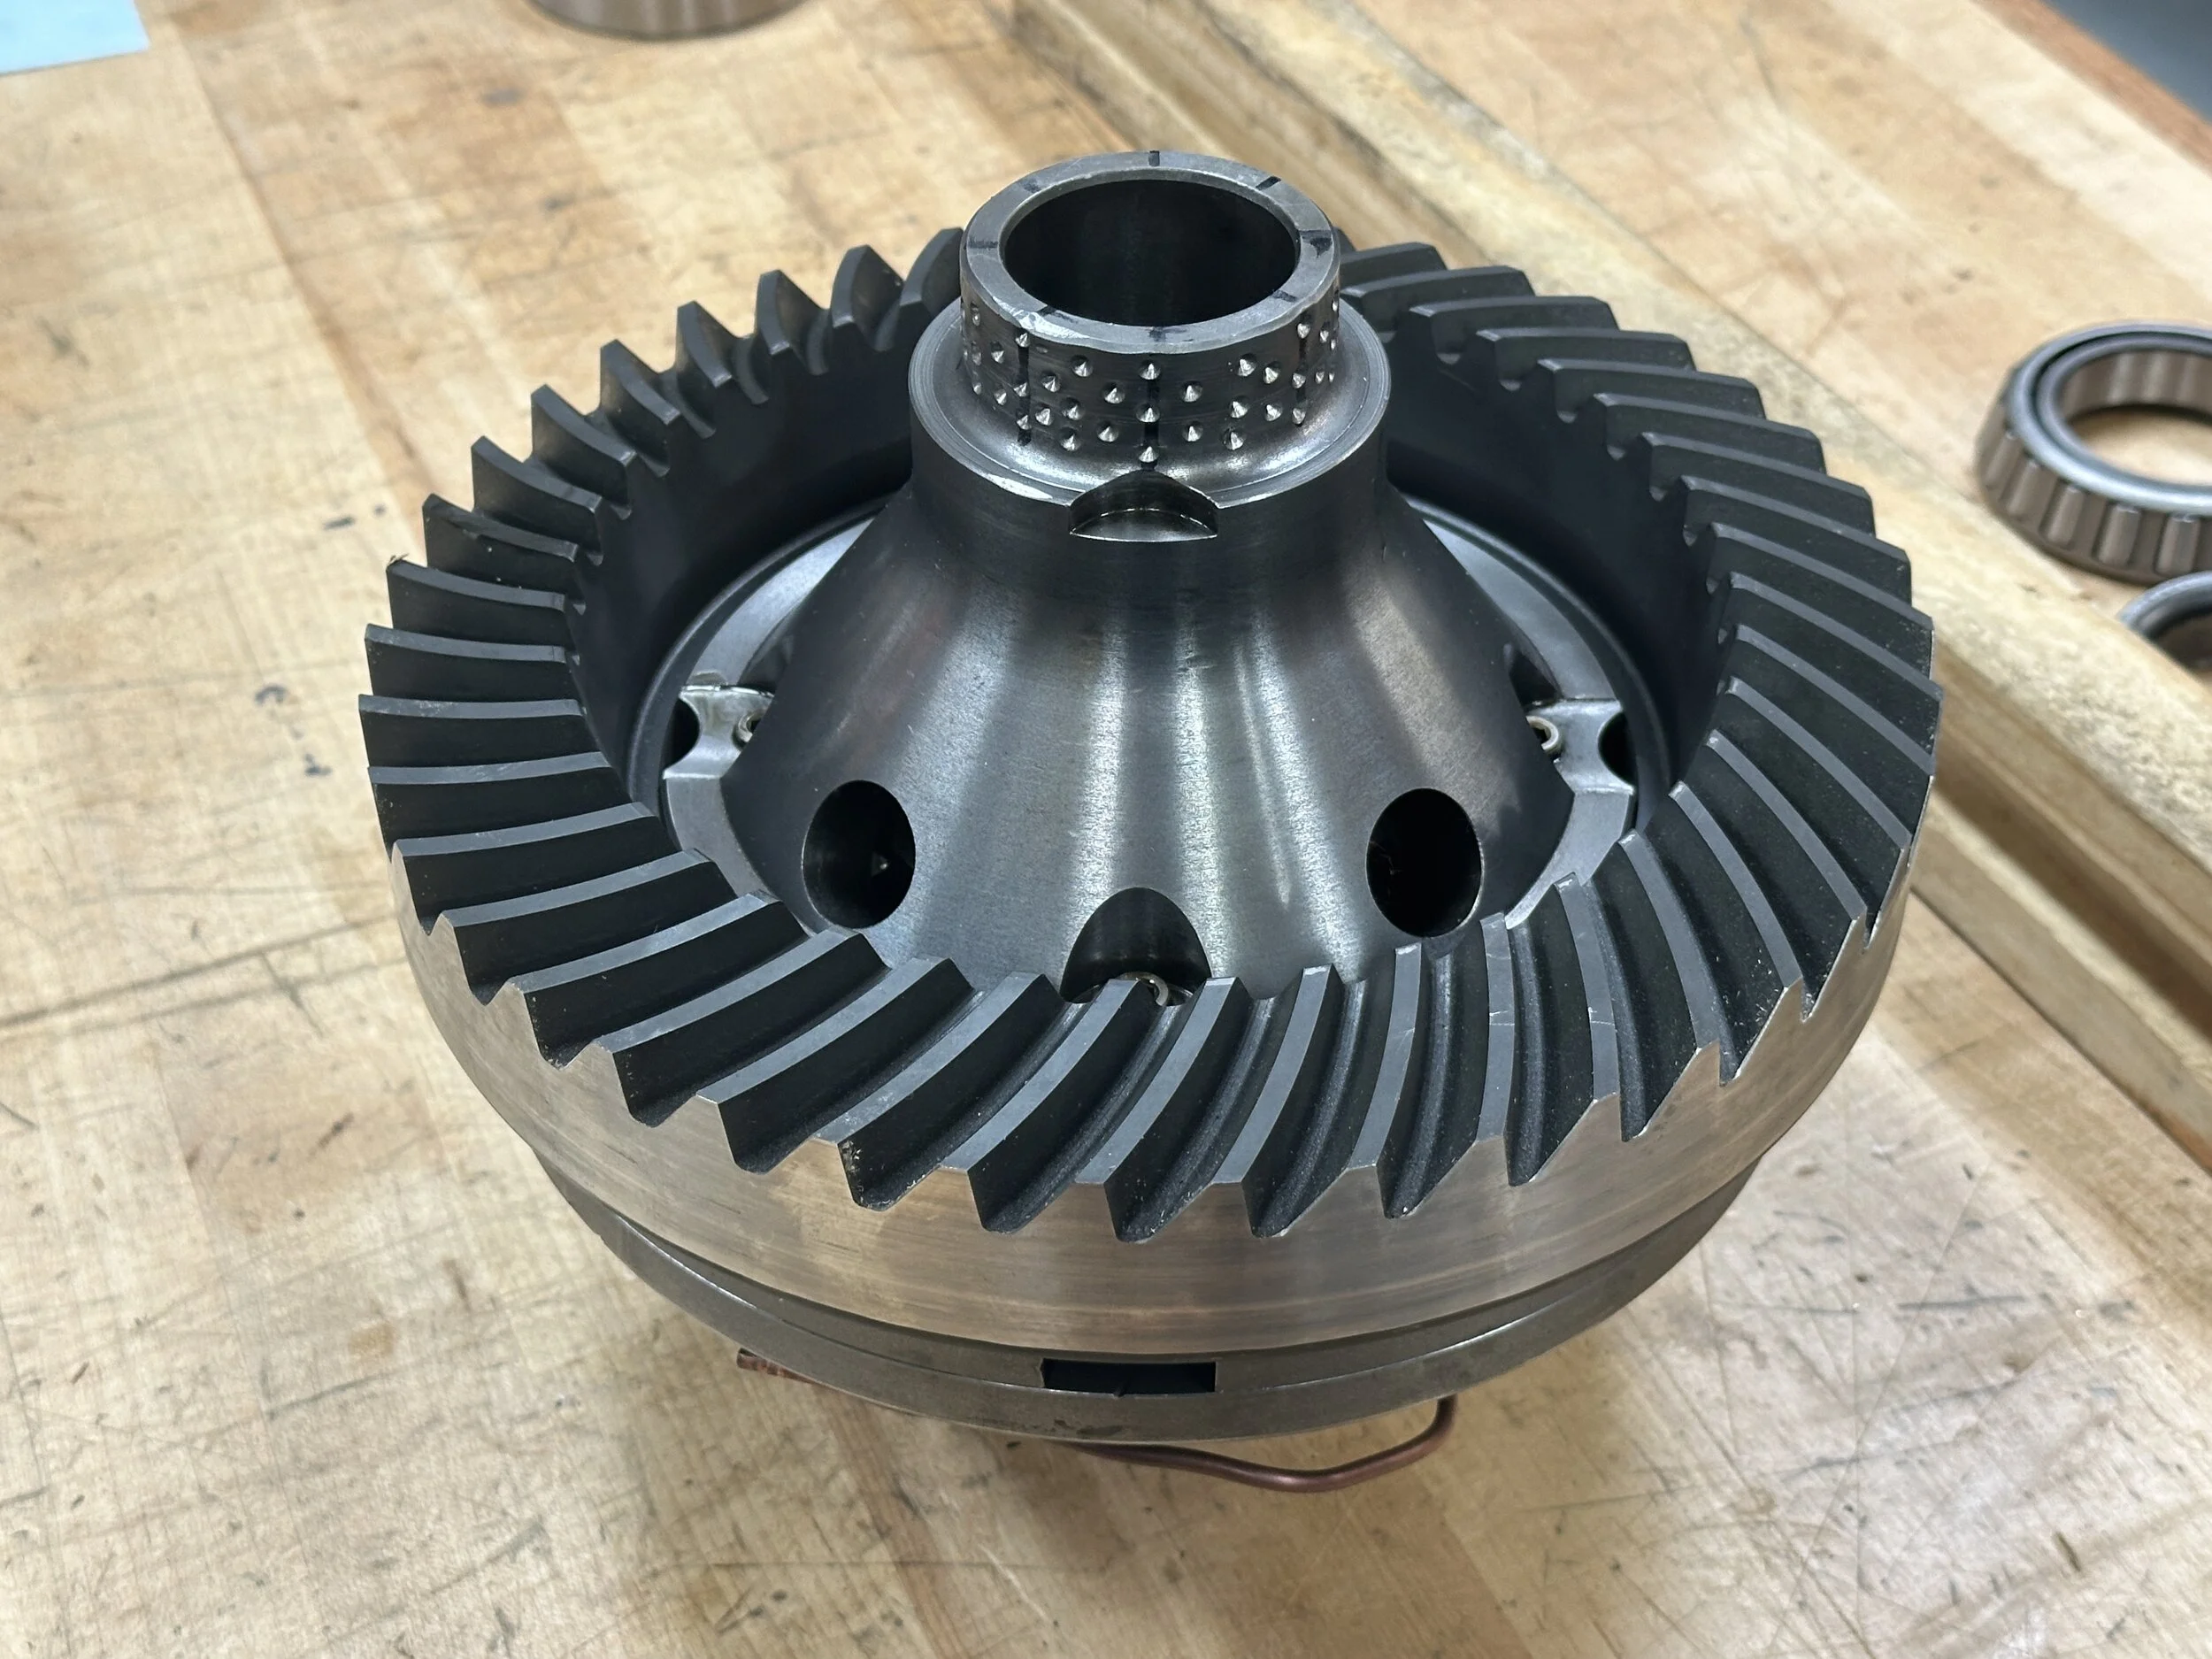
IMG_5311.JPG


Then off to the press. It took some effort to get it on, but my seat of the pants evaluation was that it seemed to take about as much pressure as the other side. Definitely a tight press fit.
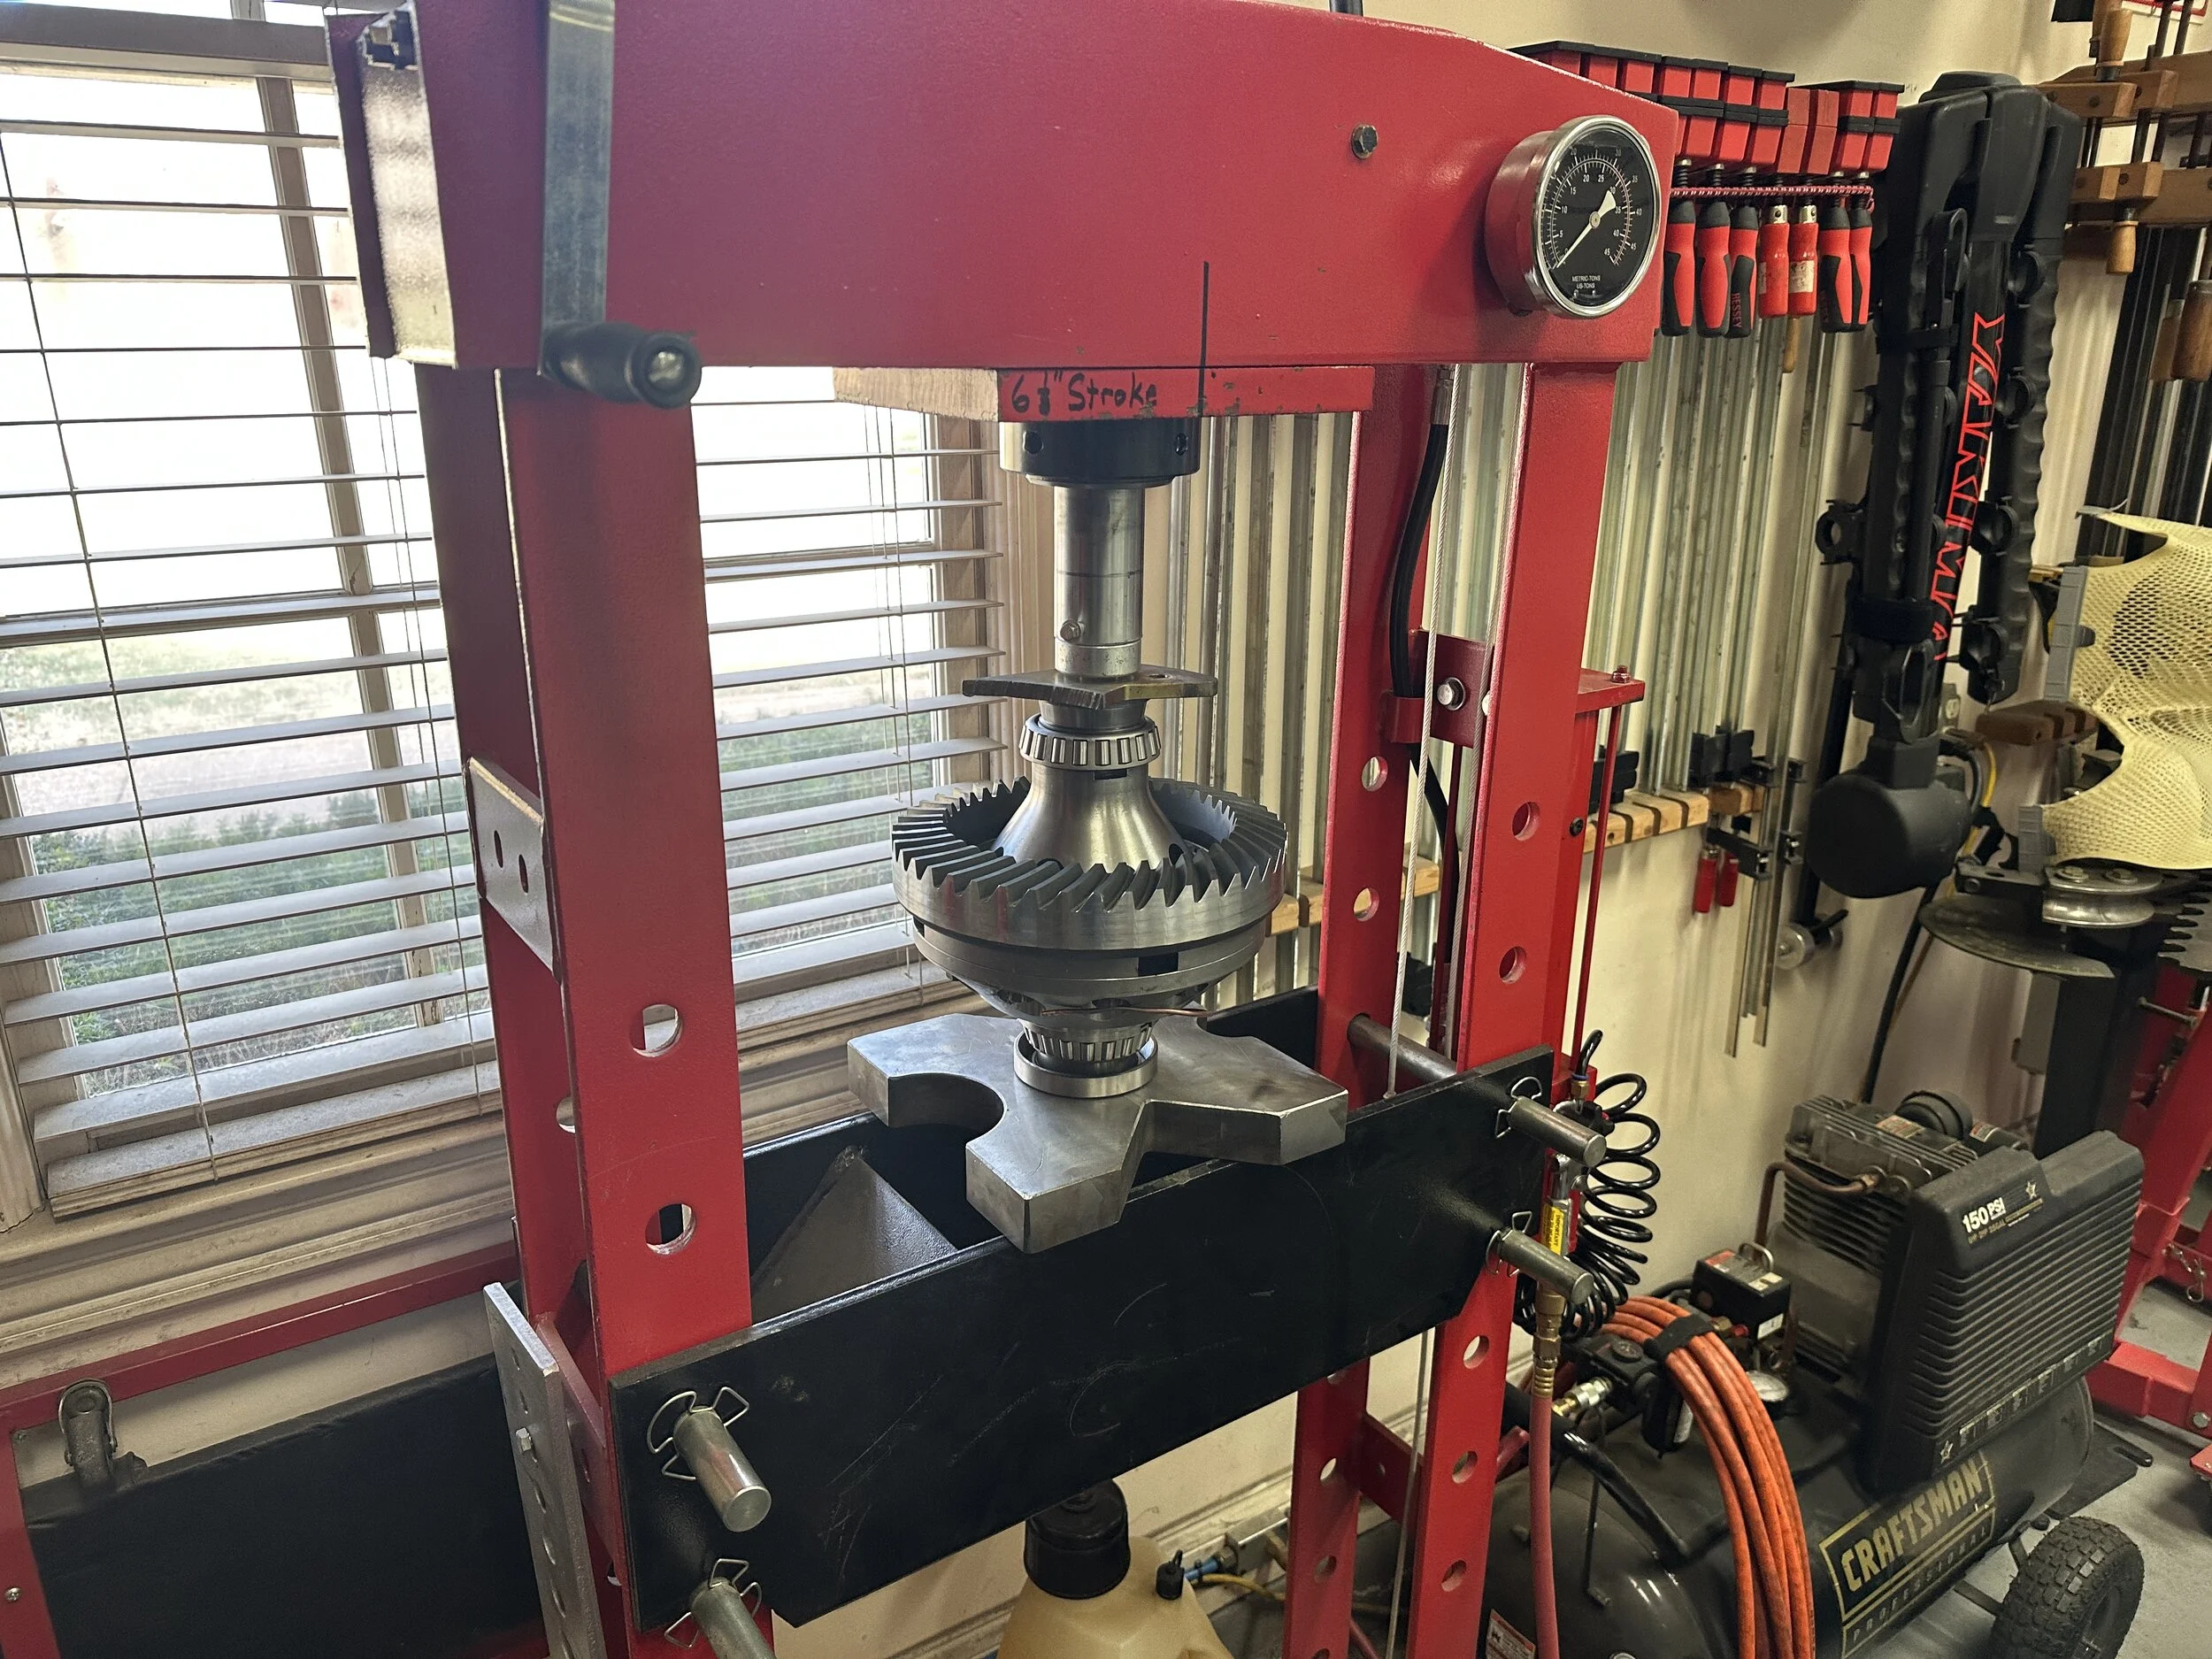
IMG_5312.JPG


And it's back together. I still have no idea why this could have happened, but I think I'm back in the game.
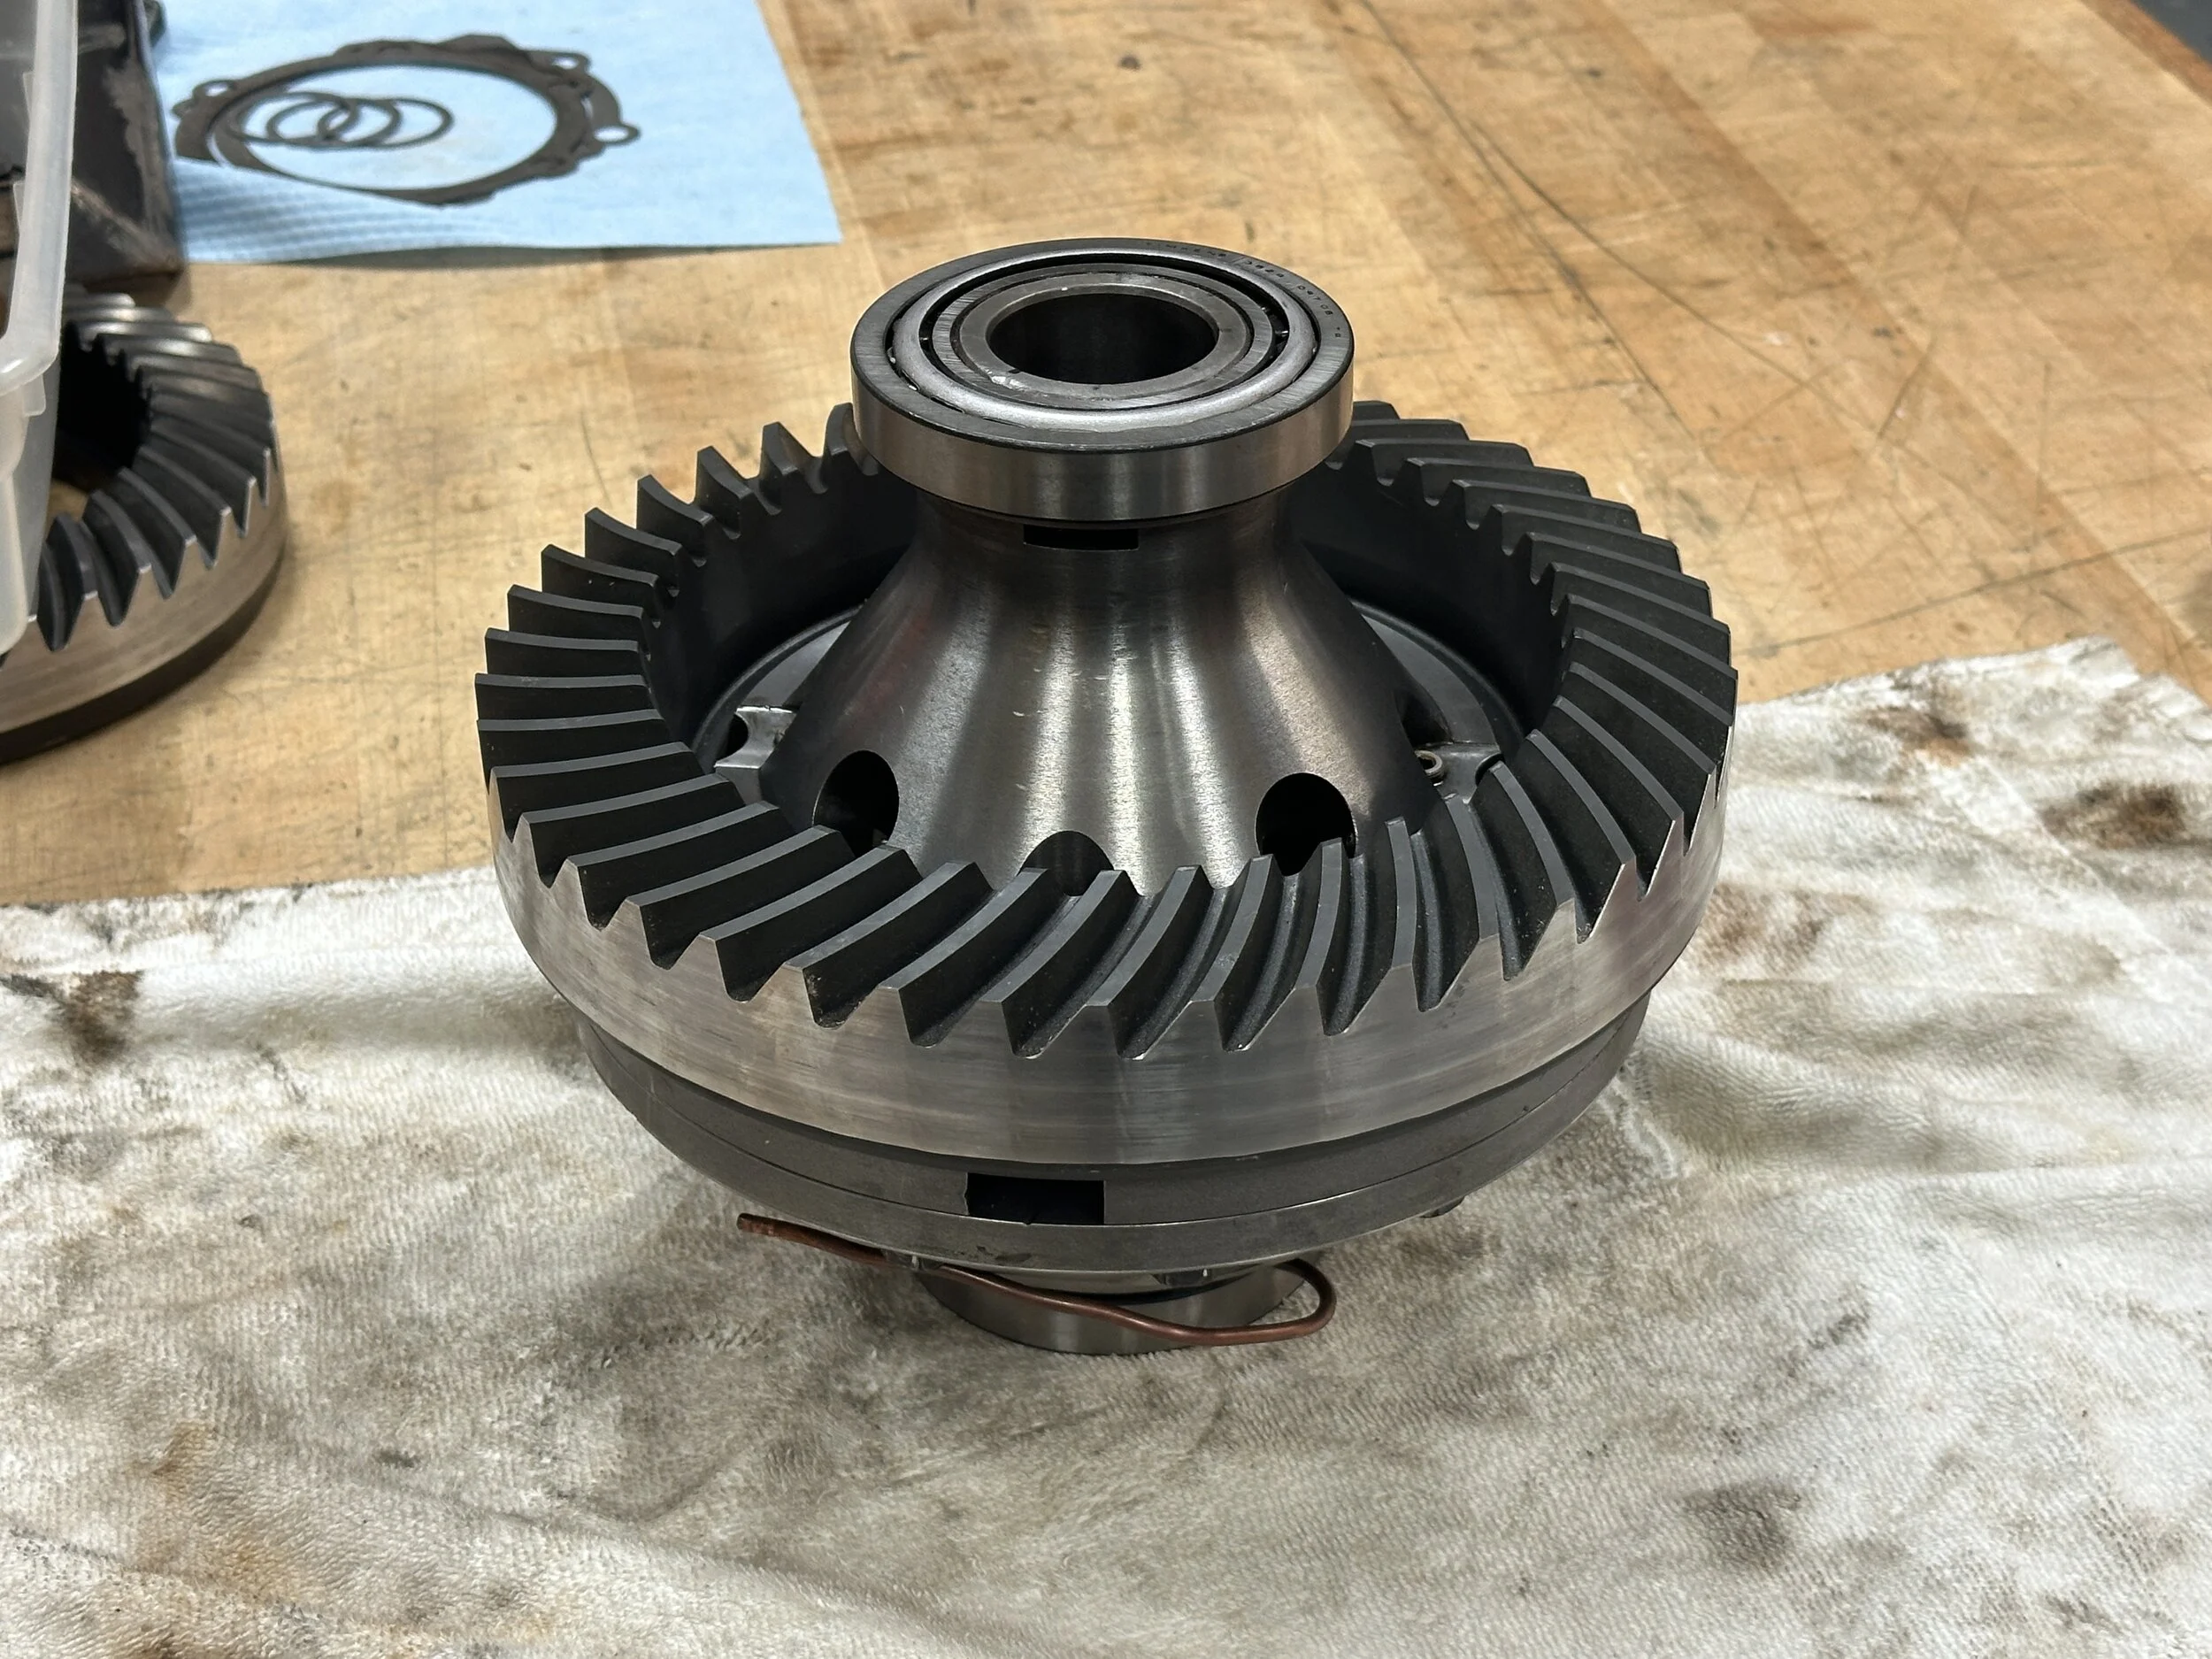
IMG_5314.JPG


If anyone has an idea what could have caused that bearing to spin, I'm all ears.
 
I may have a problem with the ARB. I need to confirm one way or the other. Here it is:

View attachment 587155

View attachment 587156

No, I am not incredibly strong. The new pinion side carrier bearing is not a press fit. It's snug, but easily removed and installed. The old bearing came off this way as well.

I've been searching but have not yet found an answer. My recollection is that this was a press fit when I installed it four years ago. The journal does show just a bit of wear, but I can't imagine what would cause the bearing inner race to slip and rotate.

View attachment 587158

The inner bearing race also shows a bit of rotational scoring, but there is no damage to the bearing which would indicate something got in there and jammed the bearing.

View attachment 587159

Anyone have any insight?

Fuck. I think I'm replacing the ARB.

I see the line that goes all the way around the cone as well as the bearing journal. It looks like it has spun and wore the surface down. I have seen people use the dimple method and red or green loctite to hold a race in place, I don't see why it wouldn't work here. I believe @mrblaine has experience doing this in one fashion or another and will hopefully chime in with his insight.

Edit: I should have read down further and saw that was direction you went.
 
Last edited:
Wouldn't building up the bottom with weld end up being stronger? Thought I had read somewhere that the additional weld would bring in carbon from the original cast?

I think @AirborneTexasRanger would better to answer this. My diff is shaved bad enough that I am going to swap it out and use it as my spare.
 
Wouldn't building up the bottom with weld end up being stronger? Thought I had read somewhere that the additional weld would bring in carbon from the original cast?

I’m pretty sure @starkey480 built up the bottom of his diff by welding and that it was supposed to be stronger.

Jeff, that dimpling pattern looks fantastic even though it will never be seen 🤞.
 
Well, crisis perhaps averted.

I looked on ECGS's site to check on replacing the locker. "Call For Availability" was the price... :oops:

So I called for availability. None in stock, waiting for delivery with an unknown expected date. Maybe...March. Keeps getting better and better.

But then I told they ECGS guy what happened, and he told me that they have seen this before on ARB's. He said folks correct it by tig-welding the inner bearing race to the journal...or dimpling the journal. And the light went off. I can't count the number of times I've seen Blaine write about dimpling ball joints to correct loosening issues.

So, with nothing to lose except for an indeterminant wait to spend $1,500, I gave it a shot.

First, to ensure I got some consistency with the dimpling, I did some mes'rin and mrk'in:

View attachment 587200

Then I went to town with a quality hardened punch and a heavy ball peen. I tried to keep everything even by striking each spot three times, attempting to keep the force consistent. Every so often I tested the fit, and after about ten dimples I could no longer slide the bearing on. This is the final result:

View attachment 587202

Then off to the press. It took some effort to get it on, but my seat of the pants evaluation was that it seemed to take about as much pressure as the other side. Definitely a tight press fit.

View attachment 587203

And it's back together. I still have no idea why this could have happened, but I think I'm back in the game.

View attachment 587204

If anyone has an idea what could have caused that bearing to spin, I'm all ears.

1) nice job!
2) It seems like loose chunks of pinion going through the gears could deflect the carrier and temporarily distort the case/bearing caps enough to over load the bearings and cause something like that?
 
I guess you want to know WHY that happened. But if you figure that out and the ONLY problem is the carrier press fit is worn, I wonder if tacking the bearing on would work for the life of the bearing?

Don’t get me wrong. I’m not advocating that. But in a post apocalyptic world (you know, when Amazon stops delivering stuff to your doorstep step because all the drivers have been drafted to fight Canada:sneaky:…) would it work?

1737485332503.webp
or
1737485364785.webp
 
I think @AirborneTexasRanger would better to answer this. My diff is shaved bad enough that I am going to swap it out and use it as my spare.

You could build it up by padding some welds then capping with hard facing rods. I recommend building up layers of 7018, then no more than two layers with Stoody 35 rods. As far as it being stronger...in theory yes, but heat treatment is key. @starkey480 could give you the best real world testing results
 
But then I told they ECGS guy what happened, and he told me that they have seen this before on ARB's. He said folks correct it by tig-welding the inner bearing race to the journal...or dimpling the journal. And the light went off. I can't count the number of times I've seen Blaine write about dimpling ball joints to correct loosening issues.
The dimple method was learnt due to salvaging a medium duty front drum brake hub when none were available in a hurry. The race spun in the hub, press fit was restored via dimples. In my world, I use a sharper punch, less force, and far more dimples. I want more areas of support, not fewer with lots of support. They are going to get smeared off when you press the race on so I like a lot more small dimples. I do about a 1/8" x 1/8" pattern.
If anyone has an idea what could have caused that bearing to spin, I'm all ears.
They don't spin with lots and lots of preload. Don't know if that is the answer, but it may be a factor. Not being all the way informed as to the failure, if you broke something big like a shaft, the shock load could do it easily. The smaller surface is going to lose that battle which in this case is the locker journal. The housing journal has a lot more surface area so it will withstand more load in total.
 
I’m pretty sure @starkey480 built up the bottom of his diff by welding and that it was supposed to be stronger.

Jeff, that dimpling pattern looks fantastic even though it will never be seen 🤞.

You could build it up by padding some welds then capping with hard facing rods. I recommend building up layers of 7018, then no more than two layers with Stoody 35 rods. As far as it being stronger...in theory yes, but heat treatment is key. @starkey480 could give you the best real world testing results

Thanks for the reminder--Starkey's thread was where I read it at.
 
...

They don't spin with lots and lots of preload. Don't know if that is the answer, but it may be a factor. Not being all the way informed as to the failure, if you broke something big like a shaft, the shock load could do it easily. The smaller surface is going to lose that battle which in this case is the locker journal. The housing journal has a lot more surface area so it will withstand more load in total.

The more I look at this trying to determine the reason for the failure (including speaking with Scott ( @sab ) this morning), the more it seems to point to a carrier bearing preload issue. The failure was not catastrophic - two chipped teeth on the pinion gear which only resulted in a bit of noise when coasting. It did not leave me stranded, and in fact I likely drove it like this way for a year or two. As I understand it, too little carrier preload could certainly have caused the pinion gear failure. And as you indicated, too little carrier preload could also allow that inner bearing race to rotate as it did.

At the time I did the original setup I was confident that I had done it correctly. Among other sources, I followed Billavista's 14 bolt setup procedure, and also ARB's. But, since that was my first attempt at a gear setup for a 14 bolt, I certainly - and likely - could have done something wrong.

I'm also certainly not easy on the rig, and it's heavy, so that may have contributed in some way as well.

This time, I'll be sure to pay a lot of attention as to how I set the carrier preload.
 
The more I look at this trying to determine the reason for the failure (including speaking with Scott ( @sab ) this morning), the more it seems to point to a carrier bearing preload issue. The failure was not catastrophic - two chipped teeth on the pinion gear which only resulted in a bit of noise when coasting. It did not leave me stranded, and in fact I likely drove it like this way for a year or two. As I understand it, too little carrier preload could certainly have caused the pinion gear failure. And as you indicated, too little carrier preload could also allow that inner bearing race to rotate as it did.

At the time I did the original setup I was confident that I had done it correctly. Among other sources, I followed Billavista's 14 bolt setup procedure, and also ARB's. But, since that was my first attempt at a gear setup for a 14 bolt, I certainly - and likely - could have done something wrong.

I'm also certainly not easy on the rig, and it's heavy, so that may have contributed in some way as well.

This time, I'll be sure to pay a lot of attention as to how I set the carrier preload.

Based on my 60 if yours goes in without a yuge amount of swearing and force it's probably not enough preload, and yes I used a spreader.
 
Based on my 60 if yours goes in without a yuge amount of swearing and force it's probably not enough preload, and yes I used a spreader.

Since the 14 bolt uses adjusters, and not shims like the 60, it's actually a piece of cake to get the carrier in and out - you just loosen the adjusters (properly, of course). No swearing or force required. As you know I've done a 60, and they are a pain.

Still not sure what I may have done. I just reread all the procedures and believe I did everything correctly, but I must have done something...
 
too little carrier preload could also allow that inner bearing race to rotate as it did.

The cause of rotation is what I can't seem to understand. What is riding up against that race with enough friction to rotate it? I assume shims are riding in that area, but are they in contact with that race? It just seems to me like there was a significant amount of force needed to rotate it on that shaft, and the rollers shouldn't have provided that force.
 
The cause of rotation is what I can't seem to understand. What is riding up against that race with enough friction to rotate it? I assume shims are riding in that area, but are they in contact with that race? It just seems to me like there was a significant amount of force needed to rotate it on that shaft, and the rollers shouldn't have provided that force.

No shims involved with the carrier, but the adjusters press the outer bearing race in toward the carrier, and therefore also press the bearing cone, and the inner race, into the hard edge / flange on the carrier, creating the carrier preload. Under normal circumstances there should be very little rotational force on that inner race - but clearly there was at some point.

Scott thought perhaps it could be a bent shaft, but after checking the shaft appears to be true.

My initial though was that perhaps a piece of the chipped teeth from the pinion bearing made its way into that bearing (very unlikely, but certainly possible) and jammed it. But, there was absolutely no damage to the roller bearings, or to the bearing cage, which would indicate that happening.

As I'm sitting here thinking, another possibility could be a bent housing. That's easy enough to check with it sitting on the shop floor.
 
The
Since the 14 bolt uses adjusters, and not shims like the 60, it's actually a piece of cake to get the carrier in and out - you just loosen the adjusters (properly, of course). No swearing or force required. As you know I've done a 60, and they are a pain.

Still not sure what I may have done. I just reread all the procedures and believe I did everything correctly, but I must have done something...

The procedure has a snug it up,plus x amount of rotation or torque to achieve preload correct?

All those types of diffs I've worked on have something to that effect
 
  • Like
Reactions: NashvilleTJ
The

The procedure has a snug it up,plus x amount of rotation or torque to achieve preload correct?

All those types of diffs I've worked on have something to that effect

Correct, Rick. And then once the preload is set properly, you turn both adjusters the same amount in or out to adjust backlash, and that maintains the preload.
 
As a bent axle housing is at least a possible cause for the spun bearing, I wanted to check it while I have the axle disassembled. When I build the 14 bolt I made a tool to check if the housing was straight. The tool consisted of two plugs which fit snug around the open spindles, with a hole dead center through which passes a string. The string goes from one spindle plug to the other pulled tight, passing through a marked puck which fits in the carrier bearing journal. If the axle is straight, the string passes through the dead center of the puck.

The original spindle plugs I made mounted around the outside diameter of the spindles, but that would not work with the hubs and brakes installed. Rather than take the time to pull the brakes and hubs, I make new spindle plugs.

It was a quick task on the lathe to make two plugs which fit tightly inside the bore of the spindles, with a shoulder to set the depth. I also drilled the center hole on the lathe to ensure it is dead center in the plugs.

IMG_5317.JPG


Here are the plugs - a bit on the oily side here as this pic was taken after they were used. For this version I used guitar string instead of string - which is much, much easier to pass through the hole in the plugs as it is a tight fit.

IMG_5329.JPG


This is the plug installed in the spindle.

IMG_5328.JPG


And here is the result. The string lines up with each of the marks on the bearing puck, indicating that the string is dead center of the puck, and therefore the housing is straight.

IMG_5323.JPG


I certainly did not think this thing would have moved, especially given the truss, but now I'm sure. So, I can check that off the list of possible causes... :oops:
 
During my discussion with Scott yesterday, he said another possible cause of the spun bearing could be a bent axle shaft. So I checked those as well:

IMG_5331.webp


The long side - passenger - shaft was out of true about 15 thou in the center. The short side - driver - shaft (the side on which the carrier bearing spun) was out 8 thou. I don't know what the specs are on these things, but that seems close enough. Is this a reasonable level of straight?