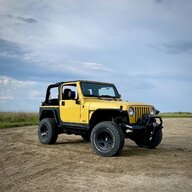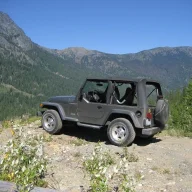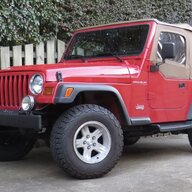
Notes on a '97 SE (2.5)

Seat Tumble Fix

  • Fold-and-tumble feature had not worked for years. Read this and this and this to diagnose.
  • Bought a scrappy 98 seat for $20, posted these pics of the mechanism.
  • Lower cable had snapped, but OEM was expensive. Bought this instead.
    • Has been working since December 2023, but doesn't get daily use.
    • Now appears to be unavailable. Consider this one instead.
 
Last edited:
  • Like
Reactions: Irun and Wildman

Tuning Options for 97 SEs​

@Chris keeps a nice list of tuning options here.
The notes in this post are specific to the 2.5, and in particular a 97 model.

Stock Tunes

With a stock TJ, canned tunes are sometimes offered as a mail-in service. Send in the PCM for someone to tune it and mail it back. But not everyone who offers stock TJ tunes includes the 2.5.
  • FlyinRyan Performance, mentioned in Chris’s list above.
    • They offer a stock performance tune for $450 at the time of writing.
    • Rather than a mail-in, you need an SCT 3200 (X3), which is $379 from SCT.
    • I wonder if they’d offer a mail-in for those without the SCT device.
  • B&G Performance, mentioned in Chris’s list above.
    • They offer a stock performance tune (mail-in) for $399 at the time of writing.
  • Garrett Tuning, found via Google.
    • They offer a stock performance tune (mail-in) for $200 at the time of writing.
    • I don't know of anyone who has used their services.
  • MoPower Calibrations, previously “Syked Tuning”.
    • Kevin offers a stock performance tune (mail-in). Price is not listed, so call for a quote.
  • TexasJeepProducts, mentioned in Chris's list above.
    • They are looking into whether they can give a stock performance tune for a 97. Will report back here.

Custom Tunes

Out of all tuning services in Chris’s list above:
  • FRP offers remote tuning for the 2.5. For a ’97 or ’98, you must purchase the SCT 3200 (X3), which is $379 from SCT.
  • B&G offers custom tuning for the 2.5, but only by mail-in. For a custom tune, that sounds difficult.
  • TJP offers remote tuning for the 2.5. They use HP tuners, so are investigating options for the 97. Will report back here.

DIY Tuning

One approach is simply to buy HP, SCT, or B&G's software. Of those three, HP sounds like it has the best user forum. Syked Tuning (now MoPower, above) no longer sells their software.
  • For HP, note that it cannot datalog on 97s and 98s. Only 99+. That’s why FRP uses SCT for remote tuning 97s.
  • For SCT, you purchase the SCT 3200 (X3) for $379 from SCT. Software part number is 4332-DCX, which is $350.
  • For B&G, pricing is available on their site.
Another approach is DIY software.
  • TunerPro is open-source. Allows you to edit PCM files, but relies on another app to read and write to PCM.
  • Megasquirt is a DIY approach that actually replaces the ECU.

Other 2.5s

- This guy and this guy have done some interesting work with accessing the ECU in early YJ 2.5s.
- This guy has done some interesting work supercharging his 2.5 YJ with a piggy-back tuner.
 
  • Like
Reactions: Chris

Coolant Flush for 2.5​

  • 2.5 capacity is only 9 quarts, unlike the 4.0 at 10.5 quarts.
  • Forum recommends Zerex G05 for coolant. Need 4.5 quarts, so must order two gallons.
  • Forum recommends Thermocure for rust buildup. One quart is enough for the 2.5.

  • Get engine up to operating temperature and check level in overflow reservoir.
  • With engine off, drain from radiator plug. Remove radiator cap to speed up flow.
    • Bucket needs to hold at least 6 quarts. About 3 will remain in system.
    • If engine block plug isn't stuck, draining from there also can speed up process.
    • FSM has no pick of block plug for 2.5, but it is beside the upstream O2 sensor and needs a 8mm hex.
    • First time around, remove reservoir and use hose or pressure to remove gunk. Rinse with distilled water.
  • Replace reservoir, plug back the radiator (and engine block), and fill with distilled water.
    • You may need to burp the radiator hoses (squeeze) to get air bubbles out.
    • You should be putting back in about what you drained a few minutes ago.
    • The empty gallon jugs can store what you caught on your last drain. Pics of each can show the progress.
  • Run 5–10 mins at operating temp. Run your heater on max to circulate water through heater core.
  • Repeat until you're draining something much closer to the color of the distilled water you're putting in.

  • If you detect rust, add one quart of thermocure and top off with distilled water.
  • Follow instructions on bottle: run for a few dozen miles over a few days. Not too long.
  • Then drain and flush with distilled water same as above, until it flushes clean.
  • Note that thermocure goes in clear and comes out black, appearing and smelling a bit like engine oil.

  • On final flush, take note of how many quarts come out. In my case, about 6 each time.
  • Assume the remaining 3 are almost 100% water. So add 4.5 quarts of coolant, and top off with distilled water for a 50–50 mix.
  • Add 50–50 mix to overflow reservoir as needed.

  • For another overview, see here.
  • Other approaches include removing thermostat.
  • Other approaches involve pumping, instead of flushing. But think twice about tap water.

  • Less than 10k miles later, asked here about debris in coolant.
 
Last edited:
  • Like
Reactions: Wildman

Radiator Swap (and Grille Removal)​

Found a low-mileage OEM radiator for the 2.5. See also @Irun's summary of options here.
Having just flushed the coolant (previous post), swapping the radiator was easy and intuitive.
  • Drained radiator and saved coolant to re-use. Removed coolant reservoir tank. No tools required.
  • Removed: upper and lower hoses; four 11mm fan shroud bolts; six 11mm radiator bolts.
  • Once the radiator is out, the fan shroud can come out. (It's deeper on the 2.5L than on the 4.0.)

  • With everything removed, drilled new holes in the fan shroud for a future body lift.
  • Also replaced weatherstripping between radiator and AC condenser. Followed this example.
  • Also cleaned and painted the condenser seals on either side of radiator.

  • Decided to also remove grille, which requires detaching the AC condenser from grille.
    • Detaching condenser may require cutting the rubber ‘well nuts’.
      • Good thread about it here. I bought these.
      • Once cut, they yank out easily. They are not rivnuts, after all.
      • Add a dab of superglue to keep them from spinning.
    • Zip-tied condenser to the grille's support rods and hung support rods by pipe across fenders.
  • Then had access to remove grille itself.
    • Read this on removing grille. Instructions for grille install are here.
    • 6 bolts per side, access from wheel wells. Plus one center through frame.
  • Removing grille also requires pulling the headlight wiring harness.
  • With grille removed, could finally:

  • While installing radiator, replaced radiator's 1/4–20 bolts and speed nuts. Original too rusty to restore.
  • While installing radiator, found shroud holes not threaded. Read this, but used M5 bolts, washers, and nuts.

  • After install, replaced lower condenser seal with part 55036369 from Detroit Muscle.
 
Last edited:

Header Seal​

  • OEM seal works fine with soft top, but causes wind noise with hard top.
  • Asked about it here and posted options here. Similar conversation happening here.
  • Part number is 55395101AC. Decided to try the Fairchild.

  • Removal was easy. Two push-fasteners at corners of windshield, and the adhesive.
  • Adhesive was stubborn, so used a decal "eraser wheel" to remove.
  • Compared OEM to replacement here. OEM is not floppy, nor as deep.

  • Fairchild had poor fit, with 3mm gap across main section. Pics here. More here.
  • Looked into the APDTY 140307 from Amazon, but poor results mentioned here.
  • Looked into the Crown from Quadratec and Amazon, but poor results mentioned here.
  • Blaine had similar experience with non-OEM options, mentioned here.
  • So far, only positive reviews are for OEM, which is $250 on eBay or $200 here.

  • Bought the OEM from World Auto Parts. Fit perfectly.
 
Last edited:
  • Like
Reactions: lBasket
This is a great write up. Great job.
I prefer Fox shocks personally. Much firmer ride.
 
Last edited:
  • Like
Reactions: SSTJ

Valve Cover Gasket​

  • Found a slow oil leak. Posted about it here. Initially considered trying some additive.
  • Turned out to be coming from the valve cover. All driver-side bolts were only finger-tight (!?).

  • Read this. Removed cover, cleaned cover, cleaned all bolts.
  • While removed, scraped the paint off the high lines, following this example.
  • Wiring harness going over back of cover was a pain, but seems easier than on the 4.0.
  • Posted about it here. Used a zip tie to replace original clip.

  • Replaced with Fel-Pro 50502.
  • Replaced PCV elbow with Dorman 47079.
  • Replaced PCV grommet with Dorman 42344.
  • Torqued all bolts to spec.
 
Last edited:
  • Like
Reactions: Irun

Transmission Fluid Flush​

  • First time working with transmission, so posted the plan here.
    • Put Kroil on the fill plug (top) and drain plug (passenger side) for a day or two before even trying.
    • Be sure I can open the fill plug before I open the drain plug.
    • Park with the front slightly inclined, to ensure I drain everything.
    • Buy this or this hand pump to aid with pumping in the new oil.
    • Put in 3.3 quarts (or more if that's what it takes to start overflowing) of Redline MT-90.
  • While off, asked about skid plate nutserts here.
  • While off, did some rust cleaning and asked about Fluid Film application, here.
 
Last edited:
  • Like
Reactions: Wildman

Power Steering Fluid​

  • Got MIL code 65, which is P0551: "Power steering high pressure seen at high speed (2.5L only)."
  • Found that power steering fluid was low. From below, pump appeared to have slow leak.
  • Rather than replace, asked about additives here. Decided to just drain fluid and replace with this.
  • (Read about Power Steering Fluid vs Auto Trans Fluid, but the 97 manual specifies Power Steering Fluid.)

  • While reading, learned about this filter screen and possible need for new pressure switch.
 
  • Like
Reactions: Wildman

Paint​


Exterior: PR4 "Flame Red"

Interior: K5 Seat Style and T6 "Saddle Tan" Interior
  • The SEM "mix code" for T6 is 4976, as shown here. But, see here for discouraging results.
  • SEM 15033 "Saddle Tan" is no match, and 5020 Med Camel is too gray, but SEM 15173 is close. See here, here, here, here.

  • For black, went with SEM Landau Black.

  • When painting a set of mist gray door panels, read this thread and put my notes here.
  • Door panel marking says ">PP<" ... Polypropylene? SEM says use Plastic Adhesion Promoter or XXX Adhesion Promoter.
  • Acetone did not melt or smear, just evaporated. Again, SEM says use Plastic Adhesion Promoter or XXX Adhesion Promoter.
  • XXX Adhesion calls for SEM soap (39362) and SEM surface prep (77774)

  • For clear coat, Blaine uses SEM low luster clear.

Tops: "Spice" Soft Top and "LTB" Hard Top.
 
Last edited:
  • Like
Reactions: Wildman

Differential Flush​

  • Found slow leak in rear diff. Looks easy to drain, flush, and re-seal.
  • Read here about lubricant. Went with Lucas Oil 10043 SAE 80W-90.
  • Read here about RTV vs gaskets. Chose FEL-PRO 55019 for rear (35) and RDS 13089 for front (30).

  • Watched this to get a sense of what's involved.
  • Both came off easy: front fluid was much clearer than rear, of course.
  • Cleaned bolts and mating surfaces with a wire wheel. Applied blue Loctite to bolt threads.

  • Found that rear (Dana 35) has rubber plug instead of threaded (see here and here). Replaced with this.
 
  • Like
Reactions: Irun and Wildman

Seat Restoration​

  • Driver-side lower cushion needed replacement. Vinyl siding needed repair. Fabric needed cleaning.

  • Bought Summit replacement foam mentioned here, and listed here.
  • Bought hog ring pliers for seat foam reinstall. Had snips for hog ring removal.
  • Bought Dorman seat heaters: 628-040.
  • Bought Tear-Aid for the cracked vinyl.

  • Removing seat from TJ, and separating back from bottom was worth the effort. Followed FSM diagrams.
  • Seat foam removal was slow but smooth. Snips helped remove hog rings without tearing fabric.
  • Angle of attack on Dewalt hog ring pliers was not ideal. Would have preferred this style.
  • With OEM fabric removed, had to re-sew the hog ring bar sleeve to the back of the seat fabric.
  • New foam made for a very snug fit when reinstalling the OEM fabric.

  • Seat warmer install write-ups here and here.
  • Had to trim seat warmers to fit between seams of seat fabric without buckling.
  • Over-trimmed one seat warmer and cut into the wires, had to replace.
  • Positioned warmers so that wires for both bottom and back come out the inside corner.
  • Have not yet wired to switches.

  • Cleaned seat frame with OSPHO, then painted SEM Landau Black 15013.
  • Cleaned OEM fabric. Patched vinyl crack with Tear-Aid.
  • Touched up vinyl siding and patch with SEM Camel 15173.

  • After reinstall, noted some misalignment here. Easy fix next time I loosen bolts.
 
Last edited:
  • Like
Reactions: Irun and Wildman
Wow! So much great information packed into your build thread! My plans are similar to yours, just sticking with the 2.5, 30RH, and not going too big with the tires.
 
  • Like
Reactions: SSTJ and Irun

Full Door Restoration​

Found a set of '97 full doors in flame red, but with grey interior panels.

1) Alignment
  • Replaced my hinge sleeves and noted some 97 specifics here. See also here.
  • Snapped a hinge plate torx bolt here. Finally managed to remove them here.
  • Finally found replacement screws and posted them here and here.
2) Panels
  • Great videos here and here about removing panels and latches.
  • This thread has good info about restoring interior parts like panels.
  • This thread has info on painting panels, and some specifics on tan. My notes here.
  • For panel clips, bought these. Work fine, but break 50% of the time when removing.
  • I used SEM XXX Adhesion Promotor, SEM 15173 Camel, and SEM 13023 Low Luster Clear.
    • This came out a bit darker than the rest of the interior.
3) Door Seals
  • This post shows the difference between OEM and aftermarket door seals.
  • This thread covers many options and suggests using weatherstripping to fill gaps.
  • This thread describes early-style "channels" vs later-style "clips". This post describes converting.
  • My seals turned out to be alright after removing, cleaning, and re-installing on "channels".
3) Latches / Handles:
  • For interior went with: AM-22291975. For exterior: T1A from Amazon. For rod clips: Rexka on Amazon.
  • After install, had some play in the driver side interior latch. Solved it here.
  • At one point, passenger door locked and would not disengage. Solved it here and here.
 

Oil Heater​

  • This thread describes the process.

  • OEM part is 4792912AE. I bought a Dorman 918621.
  • OEM hose is 11/16". Dorman heater outlets are 5/8". Bought 5' of Gates 28404 5/8".
  • To route the hose, bought two Dorman 47062 90° elbows.
  • For clamps, constant tension or adjustable. (Not my links; just examples.)

  • Cooler installs directly in between oil filter and engine. No hoses involved. Lubricate o-rings with oil.
  • Hose from water pump to heater inlet is now routed through the cooler. Can cut, or replace.
  • No markings to suggest inlet vs outlet for coolant hoses. Asked Dorman, and received this.

  • For heater install, tightened center tube/shaft by hand. Filter's additional tension secures it.
  • The 2.5 has less room for the heater, so the inlet and outlet are angled about 45° toward rear.
  • Use a new filter, even if no oil change. Finding new approach with heater installed ensures spilling.

  • 5/8" hoses installed easily on heater, but OEM fittings (water pump and heater inlet) are 11/16".
  • Heat gun, dielectric grease, and firm twisting got hose onto water pump. But not on heater core.
  • Used 11/16" hose on heater core, clamping down firmly at the 90° connector coming off oil heater.
  • Draining the radiator prevents coolant spill when removing hose from water pump to heater core.